Transcripts
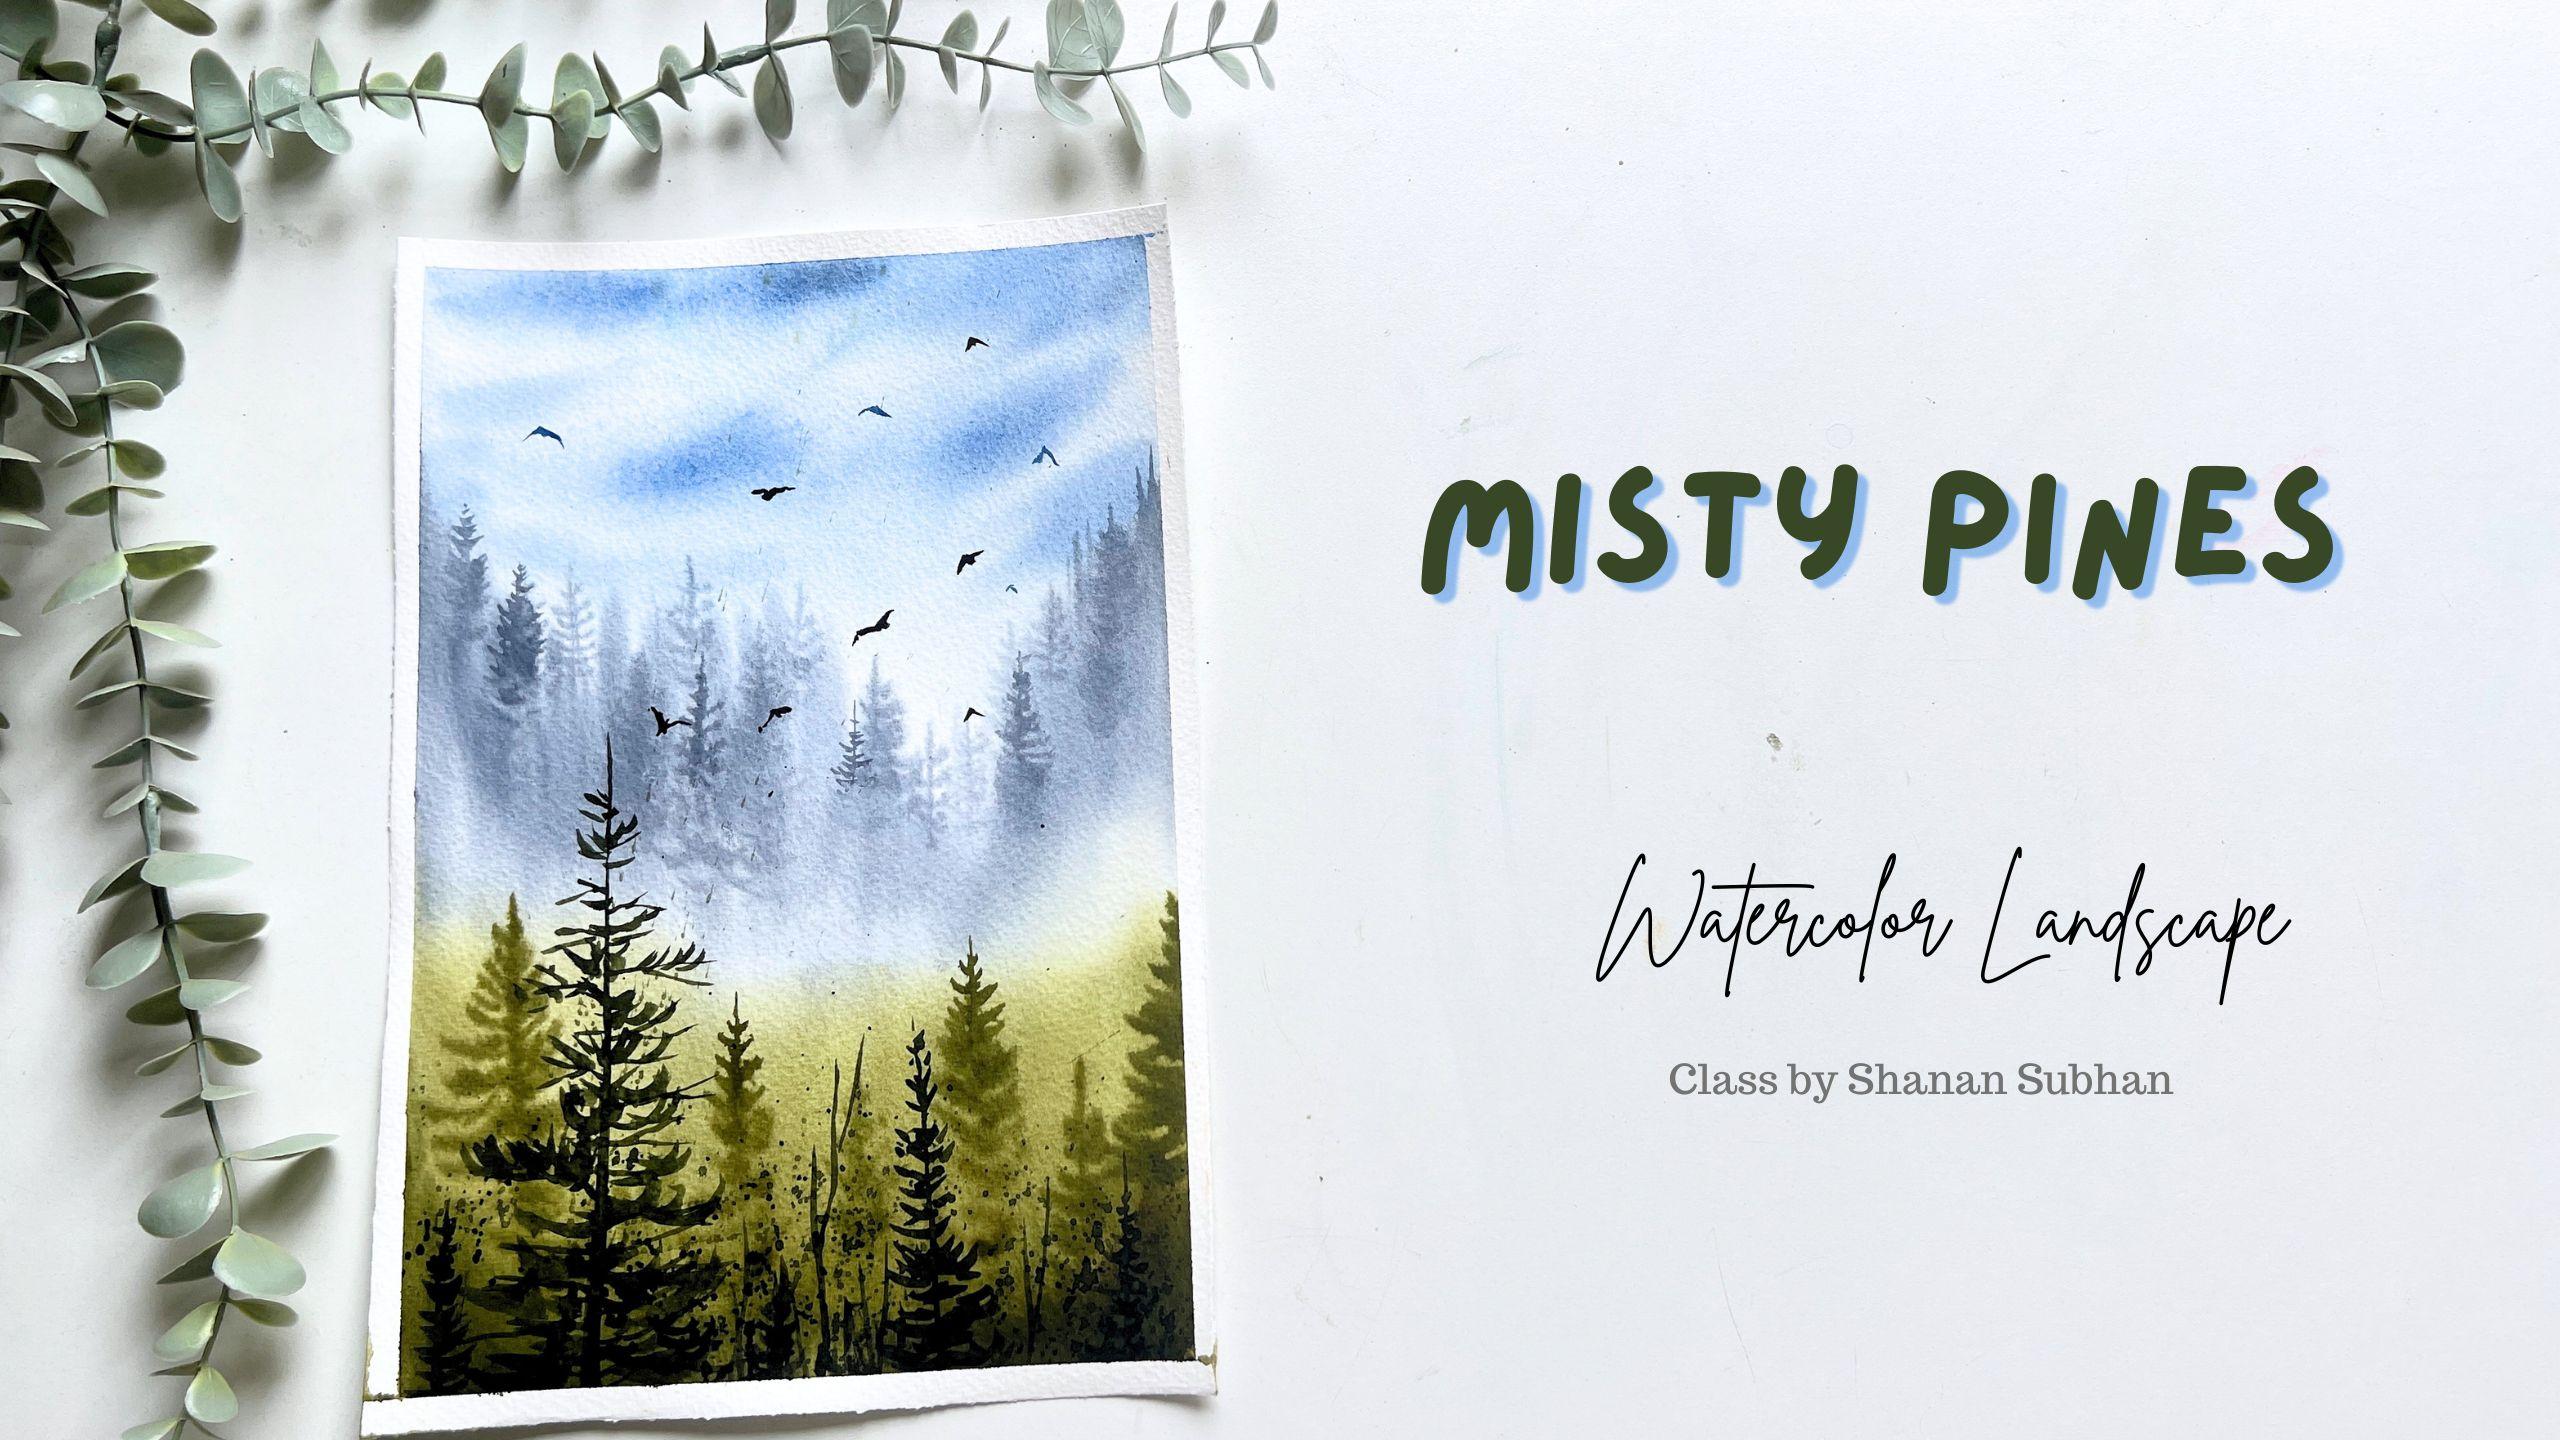
1. Misty Pines Landscape: Welcome to our artistic
journey of painting a mesmerizing Misty
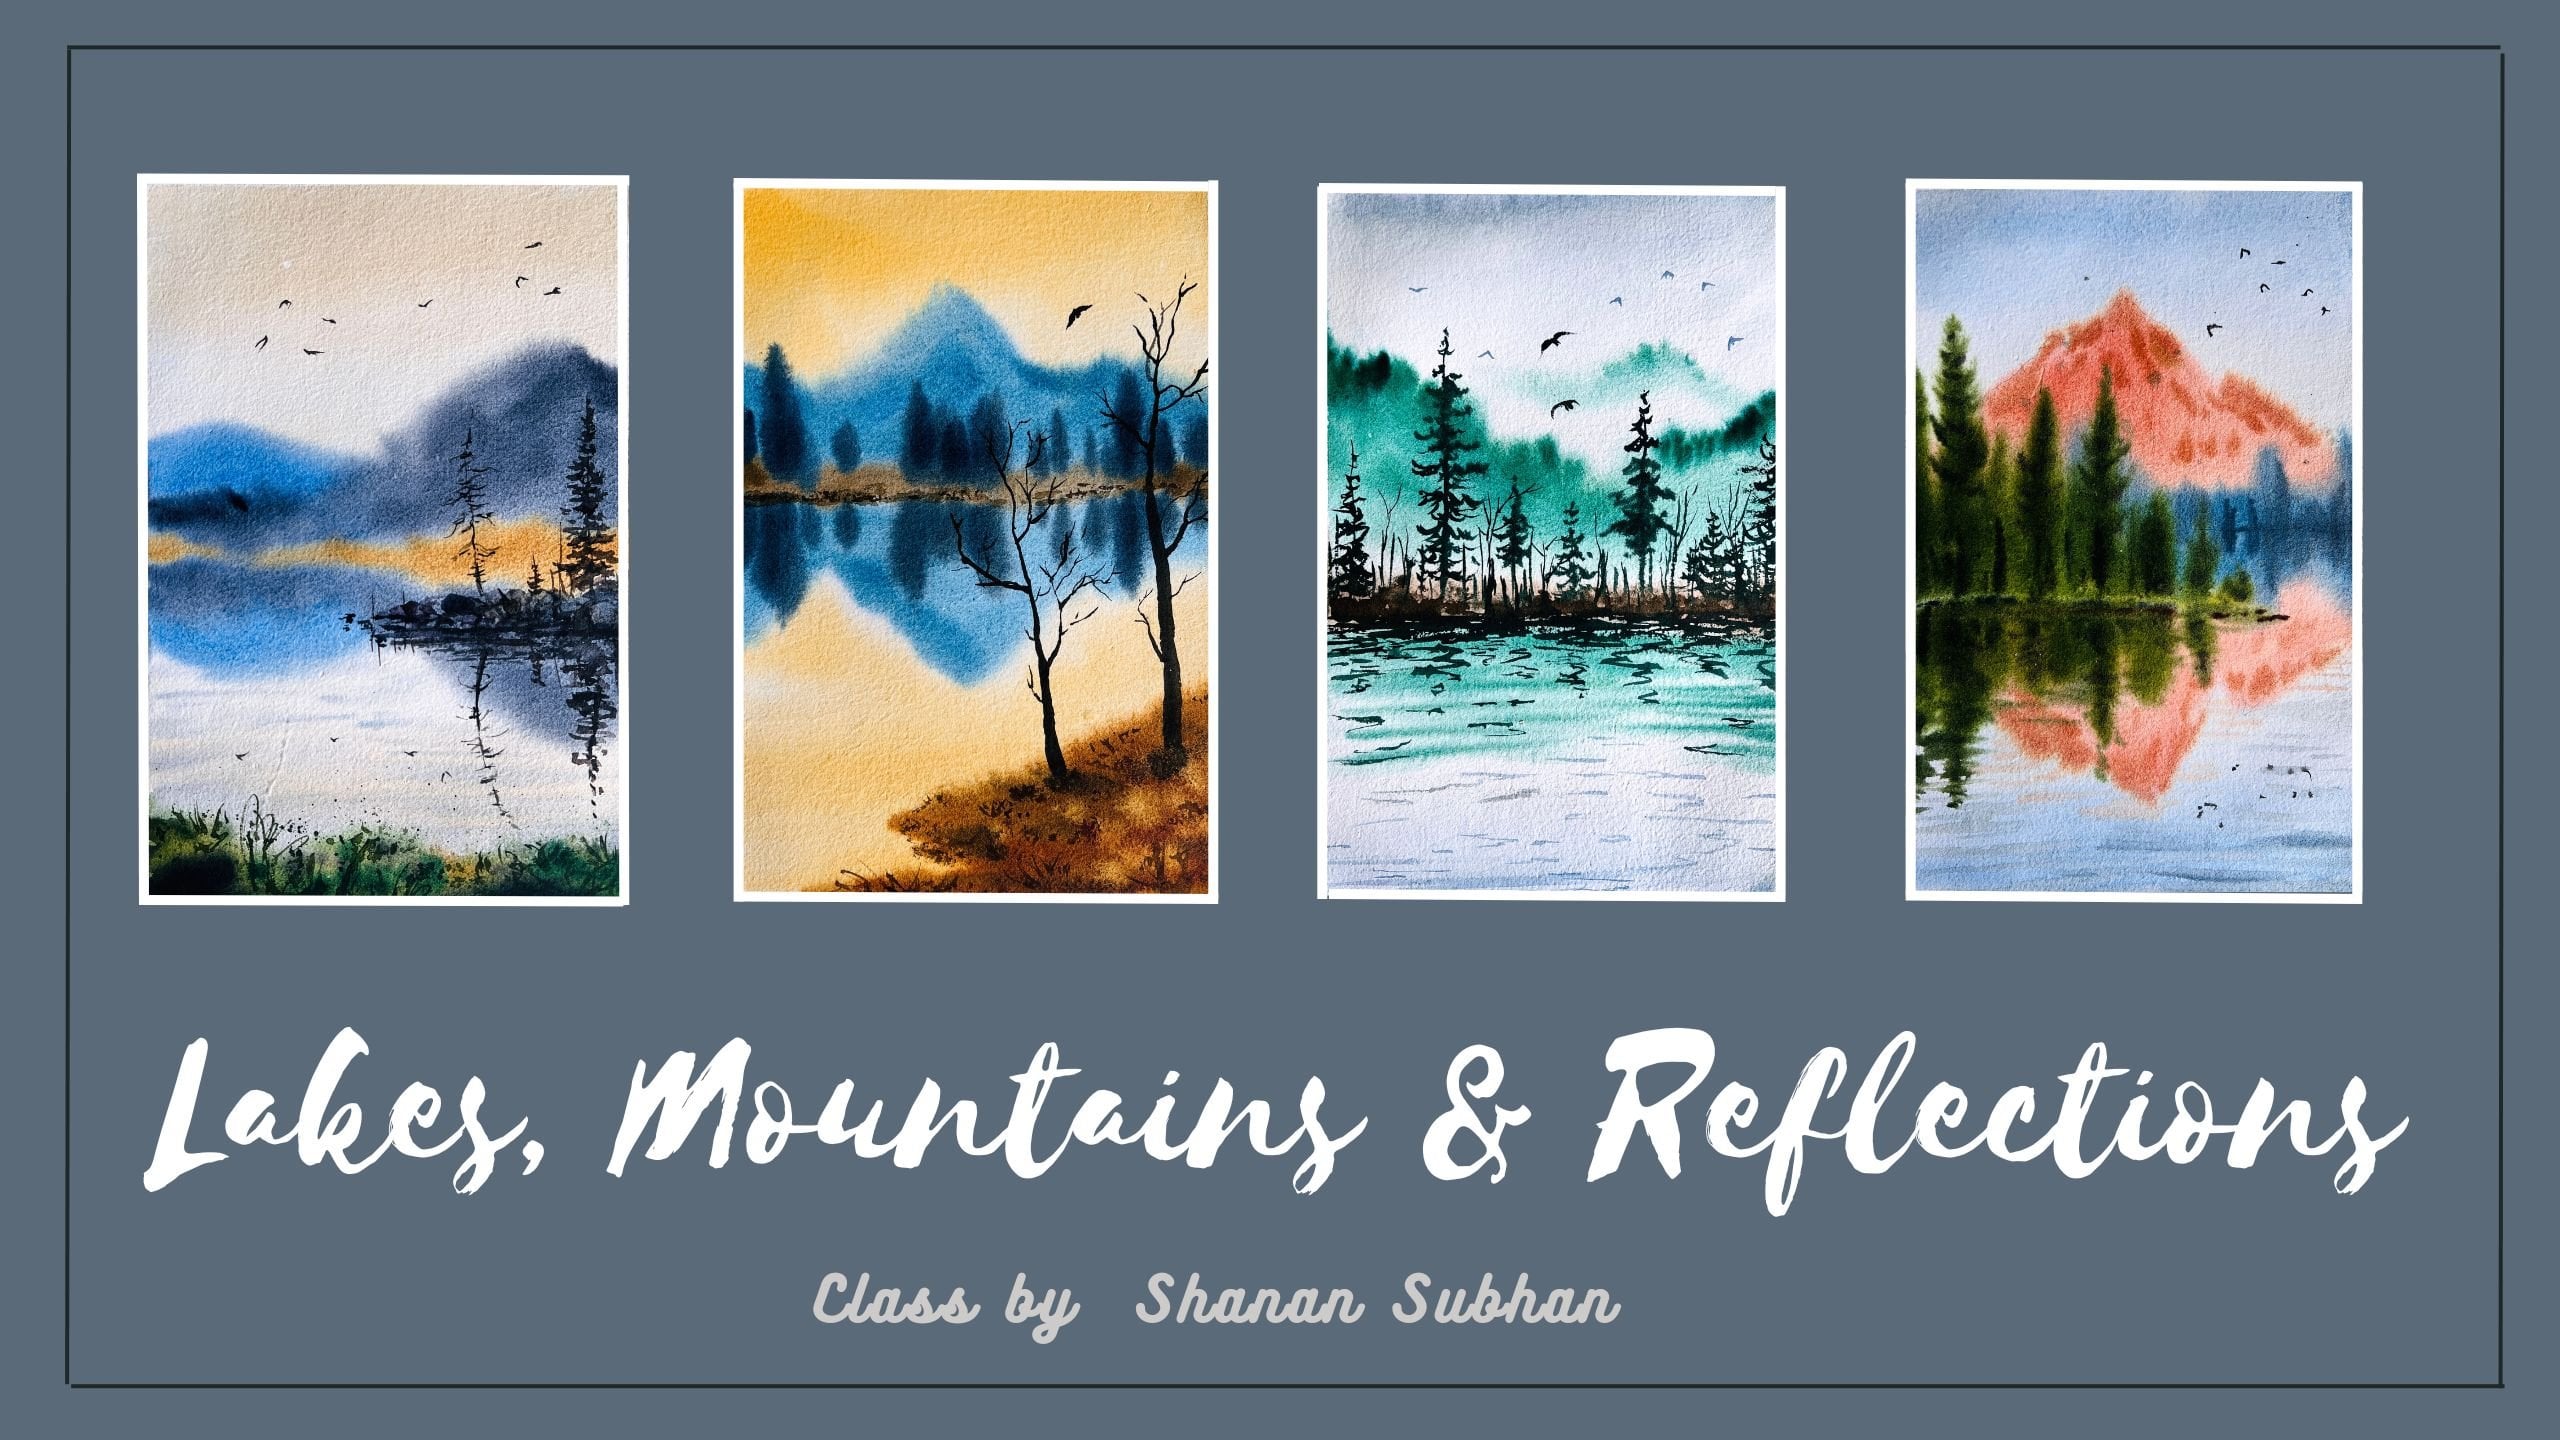
Pine Forest landscape using watercolors. Hello, I'm Shannon
Subhan watercolorist from Bangalor India. You can check out my
works on Instagram. I go by the handle Watercolors. You'll see a variety of
landscape paintings on my feed, and I'm sure you'll love it. In this class, I'll guide
you through step by step techniques to create your
own stunning masterpiece. First, we'll explore the
essential art supplies. You will need to get started. Next, I'll walk you through beginner friendly techniques for painting pine trees and crafting a misty atmosphere
that draws viewers in will cover how to paint
seamless backgrounds, layering for depth, and creating a sense of distance to add
realism to your painting. Throughout the class,
I'll be guide, providing clear instructions
and demonstrations to help you achieve the desired
effects in your painting. By the end of our session, we'll have created a
captivating misty pine forest. Let's gather our supplies
and get ready to capture the essence of
nature's beauty on our canvas.
2. Art supplies: Welcome to the class.
In this chapter. I'll walk you through
all the art supplies that I have used in this class. First off, let's talk
about the papers. I'm using Saunders 300 GSM, 100% cotton coal press paper. This has a mild texture in it, and then we would
need clipboard or a backing board to place
the paper and paint on it. This will help us to work with gravity and resistance
with watercolors. Next, let us talk about colors. I'm using artist
grad watercolors. It is poured on plastic palette. It has these wells, which helps me to mix
the colors on the go. You can have a palette or
a plate to mix the colors. The colors that I
would mainly be using for this class is green, orange, paints gray,
and ultramarine blue. And we would need
two jars of water. One is to clean dirty
pins of the brushes. Another one is to take
clean water for the washes. Now, let us talk
about the brushes. I have these mini brushes. First is three quarter
inch mop brush and size six and four mob
brush by Princeton Neptune, silver velvet, size
eight and size two. These are the brushes that I
will be using in this class. You can go with the sizes
that you already have. Next, we would need a
napkin or tissue papers to wipe off the paint and a hair dryer to speed up the drying process and a masking tape to tape down
the paper on all the sides. That's about the supplies. You can use any alternative supplies that you already have
3. Pine trees: Okay. Let us practice painting
some pine trees. You can use indigo or
black or any darker color. This is just for
practice purpose. Okay. So one easy way
is first, add the line. Just have that imaginary
shape and then you can apply some zigzaggy brush
strokes within this area. You'll have a pine, nice pine tree shape. Then have defined boundary
triangular shape in mind. Then within this area, you're going to apply the page. You could either start with
the first half like this. And then move onto
the other side. The problem with this is the
middle area looks empty. You're going to apply some
criss cross brush strokes again so that it looks fuller. Again, have a triangular
shape in mind. That will be much easier. Here we're not drawing any line, simple shape, and
then at the end, we'll be adding the main trunk. Okay. Okay. And then the main skeleton to just define the overall
shape of the tree. This is the shape. Again, it comes within this
triangular shape. Then I'll add some
smaller lines. Now I can go back and add the
foliage part of the trees. Okay. I have to just fill in each and every branch that you have added
in the painting. This can be done for a
smaller tree as well. My go to style for painting
pine tree is just draw a line and then Zia a rat
strokes and we're done. When you have to paint
group of pine trees, you just place the lines
next to each other, overlap some brush
ropes and then apply water to
blend it together. This makes it appear
very organic. You could also use
some splattering to fill in the empty spaces.
4. Background techniques: In this chapter, let us talk
about the tonal values, and we'll also discuss
the techniques used to paint the background
and the foreground elements. Okay. Okay. So let us
talk about tonal values. We are using different tonal
values of a color to achieve a sense of variation and to set a mood or a
vibe in a painting. Let me show you an example. I'm taking this indigo color
in a thicker consistency. Now, this is the darkest
tone of a color. If I add some water to it, it will appear slightly
less pigmented. So we will keep adding
water to the paints until it reaches its
diluted watery state. Here, we have reached the lightest tone with different
tonal values of a color, we can easily manipulate
the mood of the painting. I'll show you with an example. Let's say I want to
paint some pine trees. If I want to create
the lighter version, I'll use a very diluted tone. This will in turn create a
misty vibe in the painting. Now here, I'm using
darkest tonal value. This is how you can vary the color and manipulate
the mood in the painting. Some trees appear lighter
and covered with mist, whereas some trees appear. That's how you can control the tonal values using
water or more colors. In our class project, we are going to use the
diluted tonal values to create a sense of atmospheric perspective
in the distant area. So with the help of diluted
and mid tone colors, I'll be painting the distant
background misty forest. First, you can wet the area. Let's say this is the background
area of the painting. Now, we'll add the
background trees. I'm using Mon color here
and diluting it with water. Using the tip of the brush, I'll paint some vertical
lines suggesting the trees. Then we will blend it into
the background white color, trying to create a smooer
transition using a clean brush. Once you're done
with this, you'll be adding some trees
with some details. Adding a few trees here
and there will make the painting appear realistic. Now, you can use some color in order to add some variation. It will also manipulate the mood appearing as though some areas are
not covered with mist. Again, you have to blend
this with the background. That is it. This is how we paint the distant background
area. Okay.
5. Foreground techniques - 1: In this chapter,
I'm going to show you how to paint the
foreground elements. The foreground is
divided into two parts. First is the soft base wash, and then we will add the
detailed part of the foreground. For the base wash,
I'm going to wet the area using clean water. Now, on this wet layer, I'm going to apply some paints. This will create a very
diffused in the midground area. Between the background
and the foreground, we will leave some wide gap
to suggest the misty part. Now, once we have
this base wash, we'll be painting
some trees using a mid tone or slightly
darker tone consistency. Slightly darker color, and we'll paint some
trees with that. After drying, this is going
to create a diffused look. Okay. Adding some filler elements by applying some vertical
lines and also some splatters. Now we will allow it to dry and then come back and
add all the details.
6. Foreground techniques - 2: All right, the paints
have completely dried. Now let us move on to
the second segment of the foreground
part where we will be painting the detailed trees. I'm going to use wet on
dry technique for this. Let's take a darker color. I'll start by drawing a
straight line and then applying some zigzag brarokes
creating pine tree shape. Around that I'll be adding
some smaller trees. Okay. Okay. So the first method
was the zigzag method. Now for the second big tree, I'll be painting the
skeleton of the tree and then adding the foliage part. I would recommend
you to practice these exercises on
a small piece of paper so that you get familiar with the techniques that is going into the main landscape. Okay.
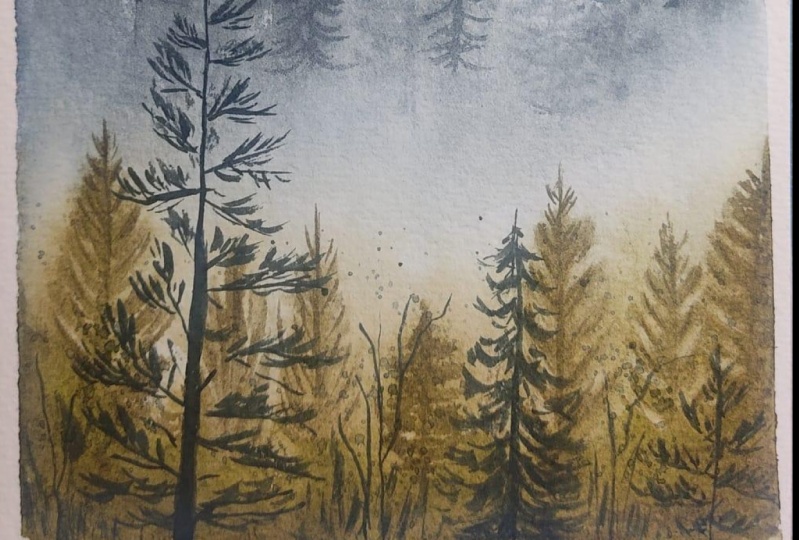
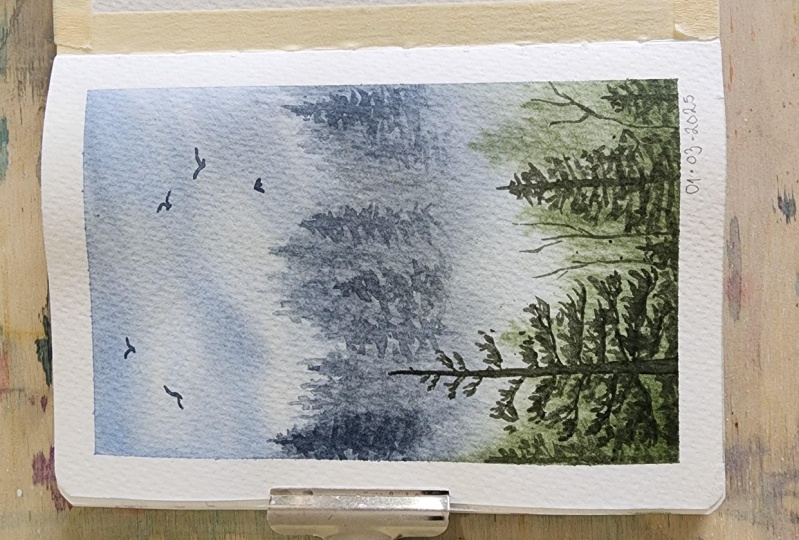
7. Thumbnail: Okay. In this chapter, we are going to paint a
small thumbnail artwork to understand the
composition of the painting. We will mark the distant
rail line first. This is the forest in
the background area. We'll be painting this
with a lighter color. In the bottom part, we will be painting
the foreground area. This is the composition
of the painting. First, let us wet the paper. I'm going to use paints gray for the distant tree line
and background trees. Next, you can add some darker tone to create a sense of variation
in the background. I'm adding these vertical lines. Add few trees here and there just to suggest
some details. For the foreground area, we will be using some
brownish green color. In the middle. This will act as the misty area in the landscape. I'll also be
painting some trees. Use slightly
concentrated colors. Let us allow this layer
to completely dry and then we'll come back
and add all the details. All right. The paper has dried. Next, we we'll add the
details on the dry paper. We'll use some darker
and thicker paint. This will be wet
on dry technique. I'm applying wet
paint on a dry layer. You can add as many
trees you want. Feel free to paint the pine
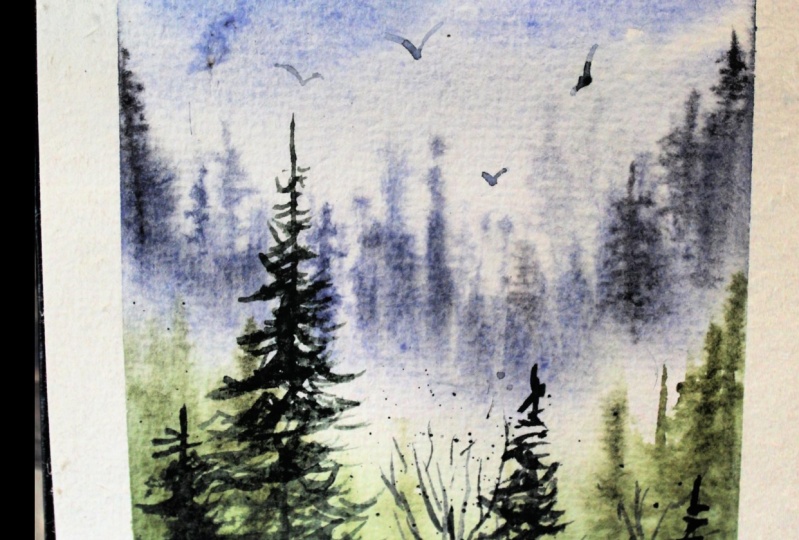
trees in your own style. Also, I'm adding some bar trees. You can splatter
some paints as well. At the end, you can
add some birds. There you go. We just completed
the thumbnail painting. This is to give you an
idea about the steps that we are going to follow
in the main painting. Okay.
8. Class project - part 1: Before we start the landscape, let us seal the paper
down using masking tape. We are applying masking tape, so that the paper remains secure throughout the
painting process. We'll be dealing with lots of watering layer wet
on wet techniques. That's why it is important in watercolor paintings to
have the paper secured. If you're using watercolor
block or, you know, the paper that is glued
on all the sites, you don't have to
use masking tape. However, if you want a nice
border to your painting, you can still go ahead and add the masking tape. All right. So I'm using this clip board
and taping the paper down. The reason behind using
a clip board like this is to move my paper
around for tilting process. I apply water and then
move my board around so that I get a nice flowy effect in my watercolor paintings. Now, I'll be using this two inch masking
tape under this board, something like this, and
I'll be applying the water. Whatever extra water is there, it will flow down because of the gravity gravitational force. Let's wet the water. You could either use a larger
brush or a spray bottle. So I have this mob brush. Okay. And apply generous
amount of water on the paper. This brush is by Dyer row three quarter
inch mop round brush. This is the quality of
this brush is just fine. It leaves a lot of bristles. The hair keeps coming off
just like you saw here. But it's fine as long as you
are just using it to wet the paper because it holds
a lot of water in it. I'm making sure my paper
absorbs really good amount of water in it so that I can
work on multiple layers. Now, I'll use Princeton Neptune. This is size four mob brush. It is very bigger brush, so it has the capacity to hold
lots of paints and water. I'm going to use ultramarine
glue in diluted consistency. This will be the sky
in our painting. You could leave
some white gaps in between to suggest the
white clouds in the sky. Okay and some angular brushes. Next, I'll take paints
gray and ultramarine blue. We'll add some darker clouds. Okay. Since I'm keeping this paper in a tateed position, the pains are flowing downwards due to the
gravitational force. If I want to resist the flow, I can turn the board around
in different direction. Whichever direction you
want the pains to flow. You can change in
that direction. This way, we will achieve very seamless cloudy
effect in the sky. Also, I'll remove
the masking tape that I had placed earlier. I don't want the sky colors
to flow any further. That's why, remove the tilt. Next, let us paint the
distant misty trees. I'll use paints gray in a
slightly medium consistency. Load the paints in
a bigger brush. I'll apply this yard like this. This is down down motion. I'm creating a sort of wavy effect here.
It's not straight. You have to constantly
move your brush. Then we will add
some vertical lines depicting the tip of the tree. Now, clean your brush and also have a napkin handy
wipe off the extra water. Here I am trying to blend all the colors into
the white background. I'll create this graded effect here so that it appears like a misty forest in
the background. Let's place the
masking tape again. Now you can tilt your board and allow the paints
to flow down. I'm applying some
more water here so that it creates a
nice flowy effect. You can take a fine
liner brush or a smaller sized brush and makes a mid tone consistency
of paints gray dab off the extra paints and we'll paint some pine
tree shapes here. When we add these
partial details here and there in the painting, it gives a sort realistic
vibe to the whole painting. The paper here is
damp at this stage. So that's why we
are able to create a very soft effect in
the background trees. If the paper tends
to become more dry, then we will get
some sharp lines. At that point, we will
stop adding these trees. And also creating some
trees inside this area. Use a slightly
darker paints gray. Okay. Here, I notice that the
paper has started to dry, so I have to be very careful. You can either stop here and if your paper is still
damp in some areas, you can use a slightly
mid consistency and add some trees. This will create a nice
variation in the distant trees. Okay. And if your trees appear something like this, you can lift off the paints. You can use slightly
diluted paints to blend it with the background. Otherwise, it is going to appear very sharp and
hard edged, right. So we have to soften it
out using a diluted paint. This is the background layer. We have painted the sky and you've added the
background trees. Next, we will be painting
the foreground elements. So before we paint
the foreground, we need to dry the
background here. I'm using a head dryer. Okay. All right, my paper has dried. At this point, there
are chances that the masking tape might, you know, lift off
from the sites. So you can secure it by
pressing it over the tape. Okay. Okay. Now, for
the next layers, we are going to apply
water with the spray. I would recommend using
a spray bottle because the water will be applied on the top and it won't
pick any pains. In case you don't
have spray bottle, you could use a larger brush and gently apply water over it. I'll show you how you can do it load your brush with lots of water,
something like this. And with least
amount of pressure, you're going to apply water. I'll wet rest of the area
using the spray bottle. Moving on, we will paint the foreground area to
paint the foreground area, we'll mix the colors. I'm using S green
and burn Sienna. I'll mix the two colors
in equal proportion. We will get a
brownish green color. Now, load your brush
with this paint and apply it on the lower part. This is a base for
the ground area. Leave some white part. Clean your brush,
take new water, clean water and blend the colors into the
background area. You could also use a water spray bottle to blend
it with the background. Towards the bottom
in the lower part, we can have darker colors. But towards the center, we'll try to keep it
as light as possible, creating a nice so transition. Again, we'll try this layer. Okay. Whenever you're
using a head dryer, move it around in all
directions so that the pains are equally uniformly
distributed.
9. Class project - part 2: Okay. So this layer has dried and this is how the
painting looks like. No, we'll apply another
layer of water. So I'm taking my
larger brush and applying water to out
the paper very gently. There are chances you
might pick up the paint. This has picked up some paint. I would recommend you
to use spray bottle, but I'm showing just in
case if you don't have, then you should not
be discouraged. That's why I've used this. Now I'll switch to my
eighth round brush. Take the same color
in a consistency. Burnana and San green. Okay. Some concentrated pigments and apply it on the bottom area. With this thicker pins, we are going to paint
some mid ground trees. Apply like this on one
side and another on the other side or you could
apply Zigzagbra strokes. Okay. This is the partial tree that's only visible half. Now I'll draw
slightly bigger tree. You could also paint
a tree like this, starting from one side and
then going to the other side. Whichever is
comfortable for you. You can follow that step. Here, I'm simply adding some filler elements by
adding some vertical lines. Okay. You can paint as
many trees you want. There's no restriction in that. The paper has started drying. So now if I paint, it will look
something like this. I'll still add the tip
of the tree so that it appears and the bottom part
appears slightly foggy or, you know, covered with mist. Okay, so we'll try
this area again. Okay. All right. Now let's take green
and burn timber, slightly darker brown color, and some paints gray. You could also take black. Here, all we want is to
have a darker green color, which is closer to b. I'm
mixing this darker green color, which is for the brown trees. First, let's start by painting
the trunk of the tree. So I'm going to add the
basic skeleton first. This will be a guideline
to paint the tree. Again, I'll be adding
some smaller branches. And focus it in the next step. Okay. Once you have added
all the branches, you can start
adding the foliage, by randomly applying
some brush strokes. Paint the foliage in a
very irregular manner. Let's try not to paint
symmetrical shapes. Just apply some random brushes, trying to fill in the
empty spaces in between. You could also
flatter some paints. The paints are accidentally splattered on the
sky part as well. We can cover the upper part. Otherwise, that is
what happens when you don't cover and
splatter the pains. Let's paint another
tree somewhere here. So for this cell just
apply some zag brass. And then try to fill in the empty spaces
between the branches. And then I'll add
some bad trees. Some smaller trees. There is no fixed number as such on the number of trees
that you can add. It's up to you. You can add
as many trees you want. I'll cover this upper
area this time so that it doesn't splatter the
paints on the upper parts. Now, let's add some birds. I'll use black for this. You could also take
brown and paints gray. You can paint the birds using very simple shapes like
shape or inverted V shape. That is my trick
most of the times. Also, I have an old
class on Skillshare, which is specialized on painting birds. You can check that out. I'll also add some birds with bluish color to suggest that
they are at a distant area. All right, so we are
done with this painting. Now, let us remove
the masking tape. We have to gently peel it off on the other opposite direction
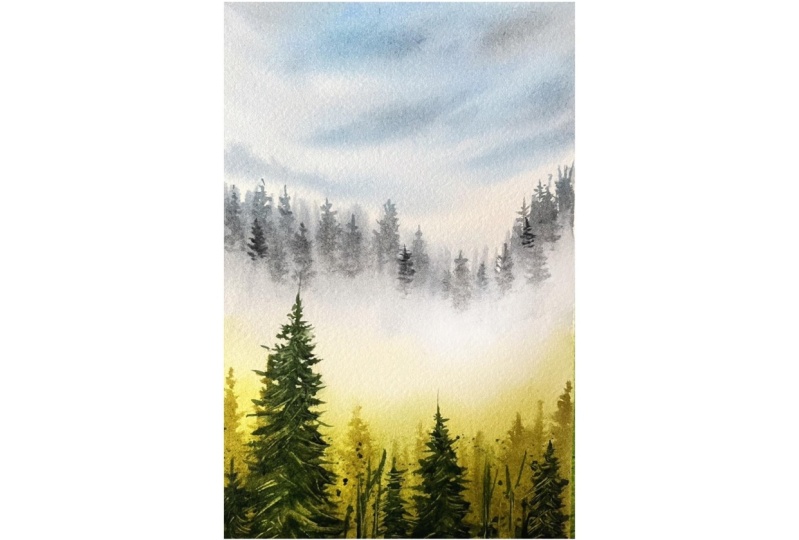
in about 45 to 60 degrees. This is how the painting
looks like once it is done. I hope you enjoyed
painting this with me. Do share your projects and reviews under
the project scaly. I'm really looking forward
to see yours. Thank you.
 Shanan Subhan, Watercolor/Gouache | Art Educator