Transcripts
1. Introduction: Miniature RNAs. And then working on tiny
creations for years. Today, I'm thrilled
to share with you some techniques and
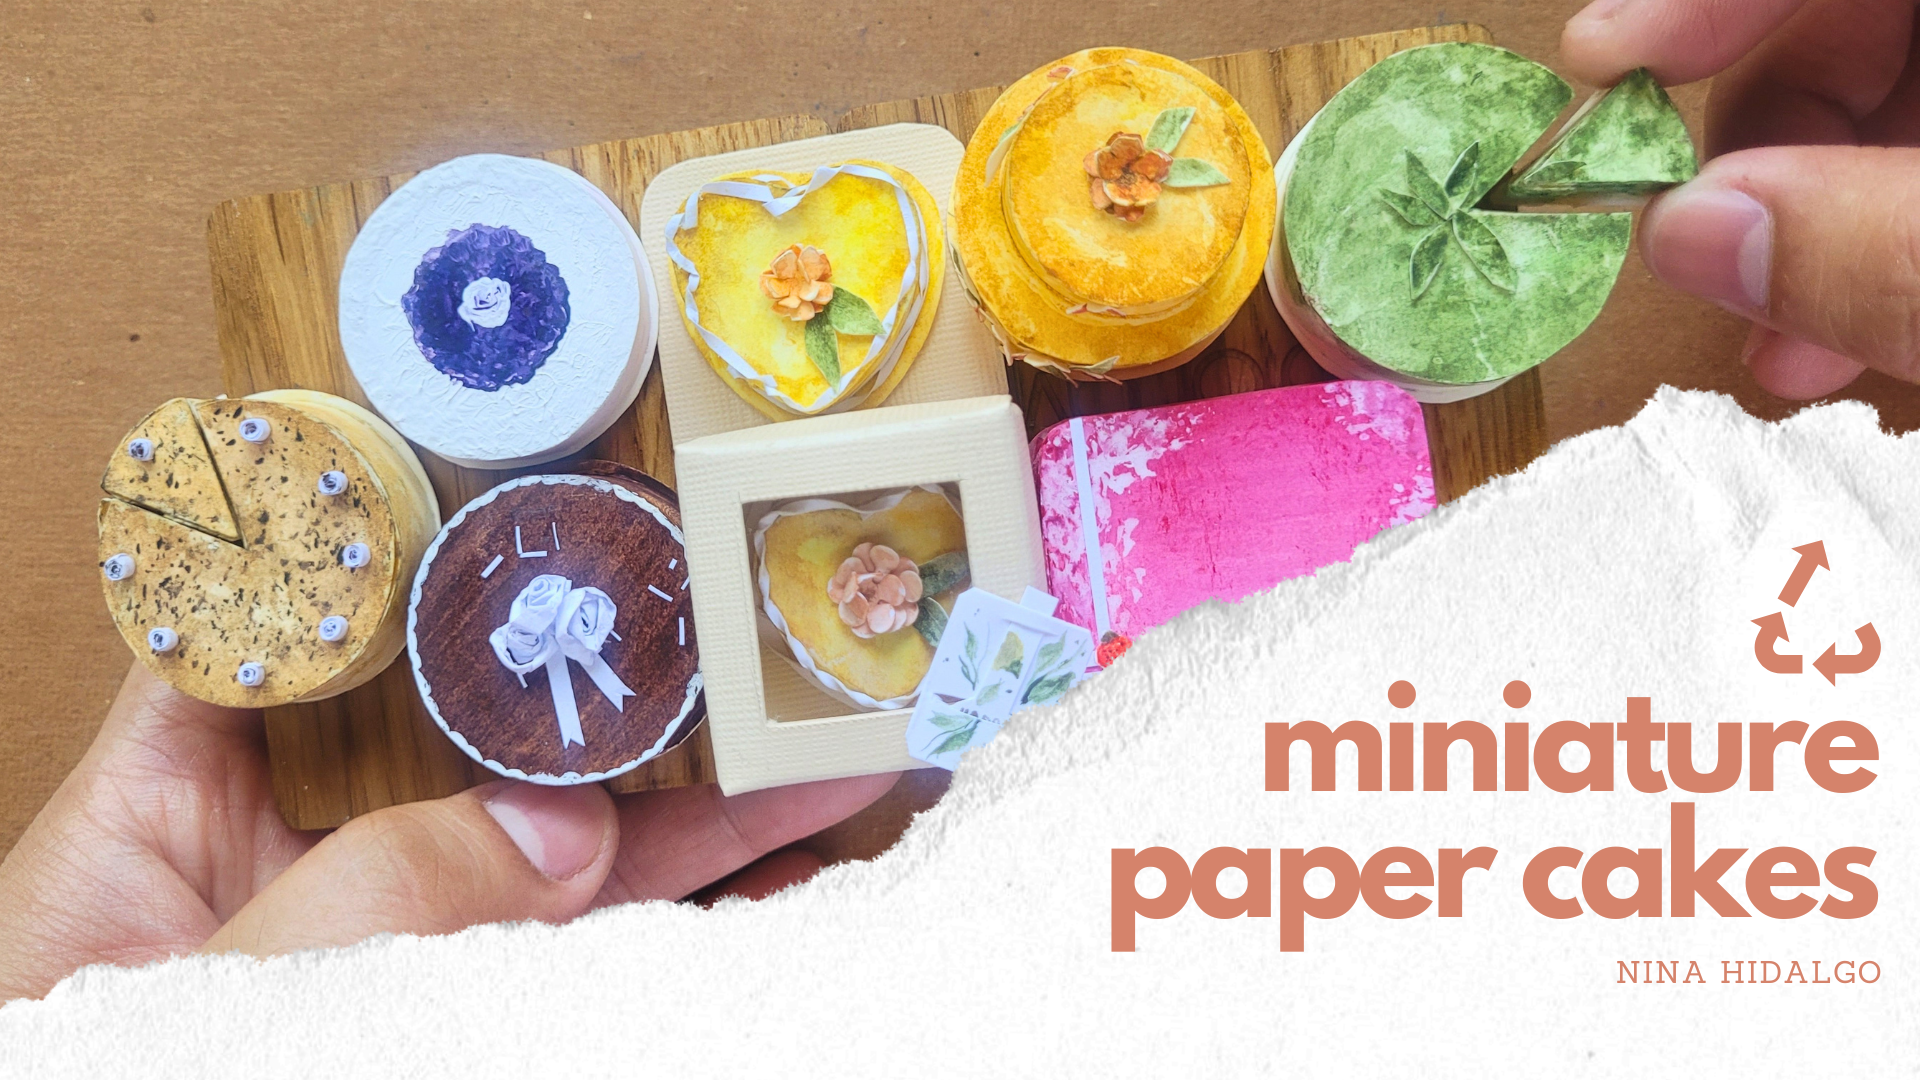
making mini paper cakes. Before we begin, let's talk
a bit about Miniature Art. As some of you may already know, this Art Form requires
great precision. Patients and creativity. With miniatures, we aim to capture the essence of life's most beautiful
and intricate details while failing them
into tiny dimensions. And believe me, the results
are always magical. So come and join us for the sweet and fund Miniature Paper Cakes
Skillshare class. I can't wait to see
your mini paper cakes.
2. Materials: Here's what you need. Scrap papers like board paper, bond paper, and specialty
paper, a pencil, scissors, cutter, score, ruler, glue, paint, and a cutting mat. Don't worry, we will be using
regular sized materials. It is important to
use items on hand. Specialty scrap papers
3. Ratio 1:12: Now let's move on to our class for today,
the paper cakes. You might be wondering why paper cakes, well,
they're adorable. Scrap papers can be
upcycled and they can be the perfect Decker for any
miniatures seen or dollhouse. First, carefully measure out the paper and cut it
into the correct ratio. For this class, we'll
do one-twelfth. It is important that the cake be proportional to a real cake. Even though it's just paper. At then inch gate
divided into 12, sensor ratio is
one-twelfth is 0.83 ", which is 2.11 cm
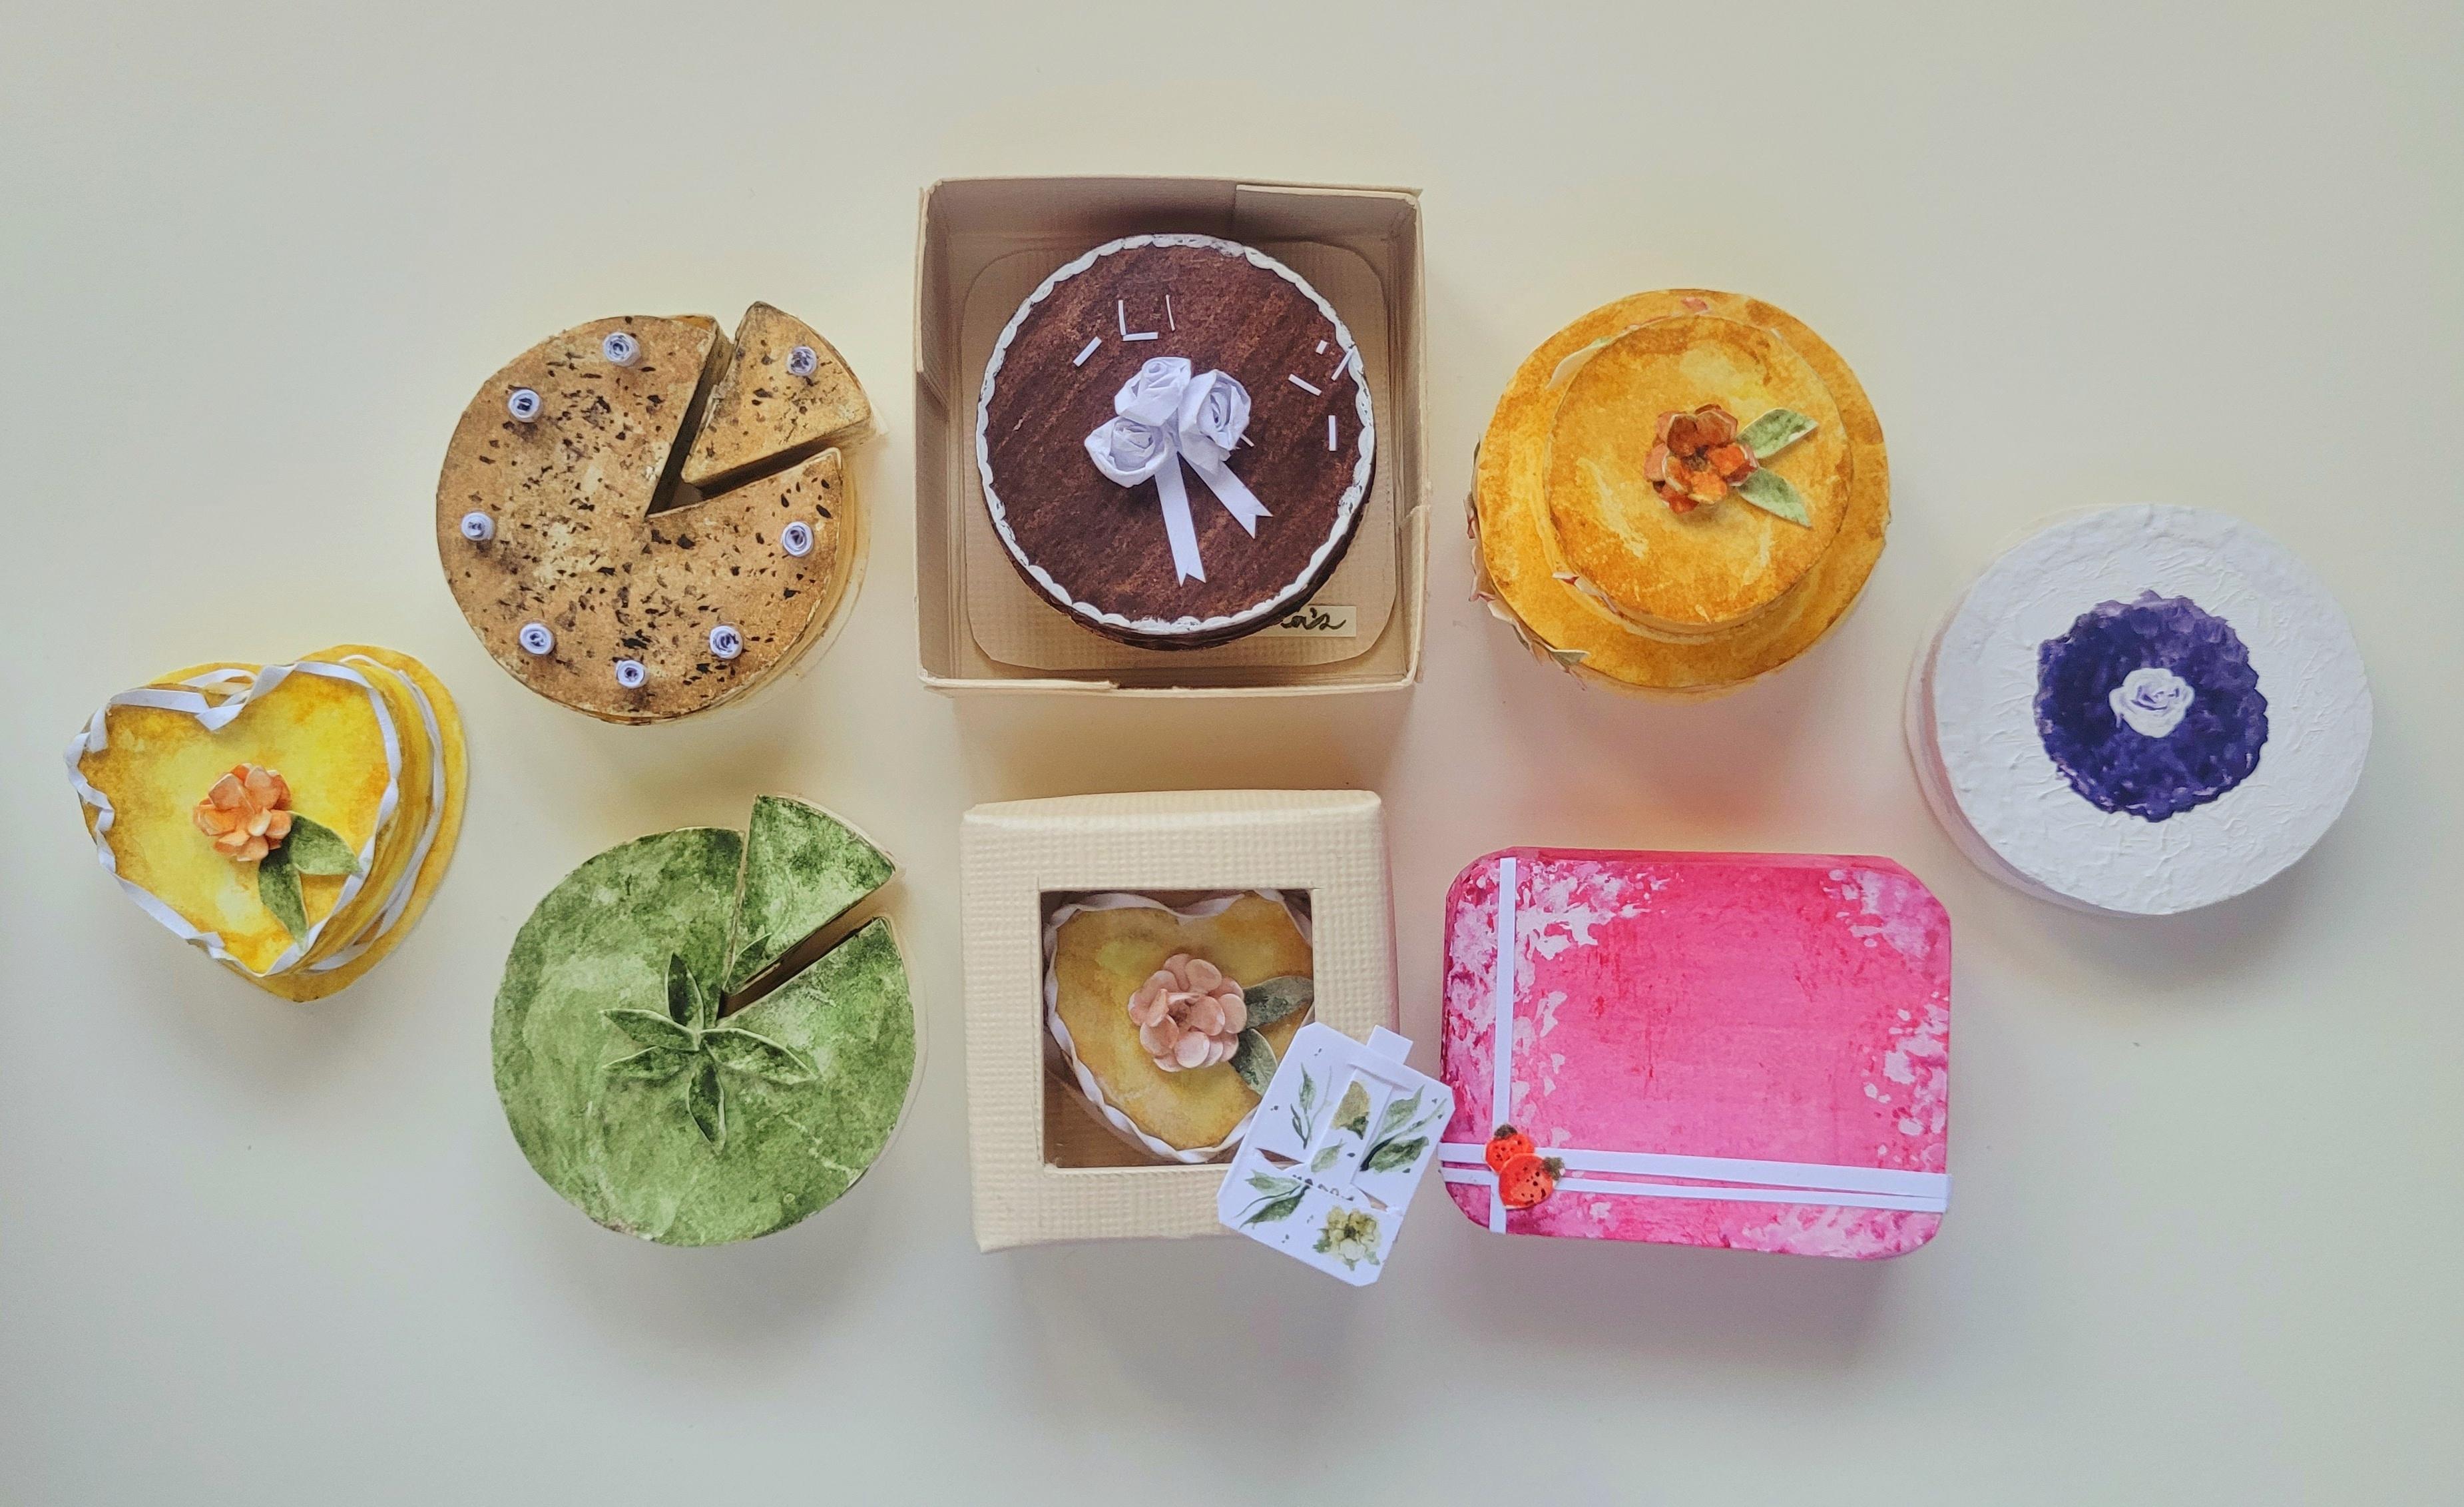
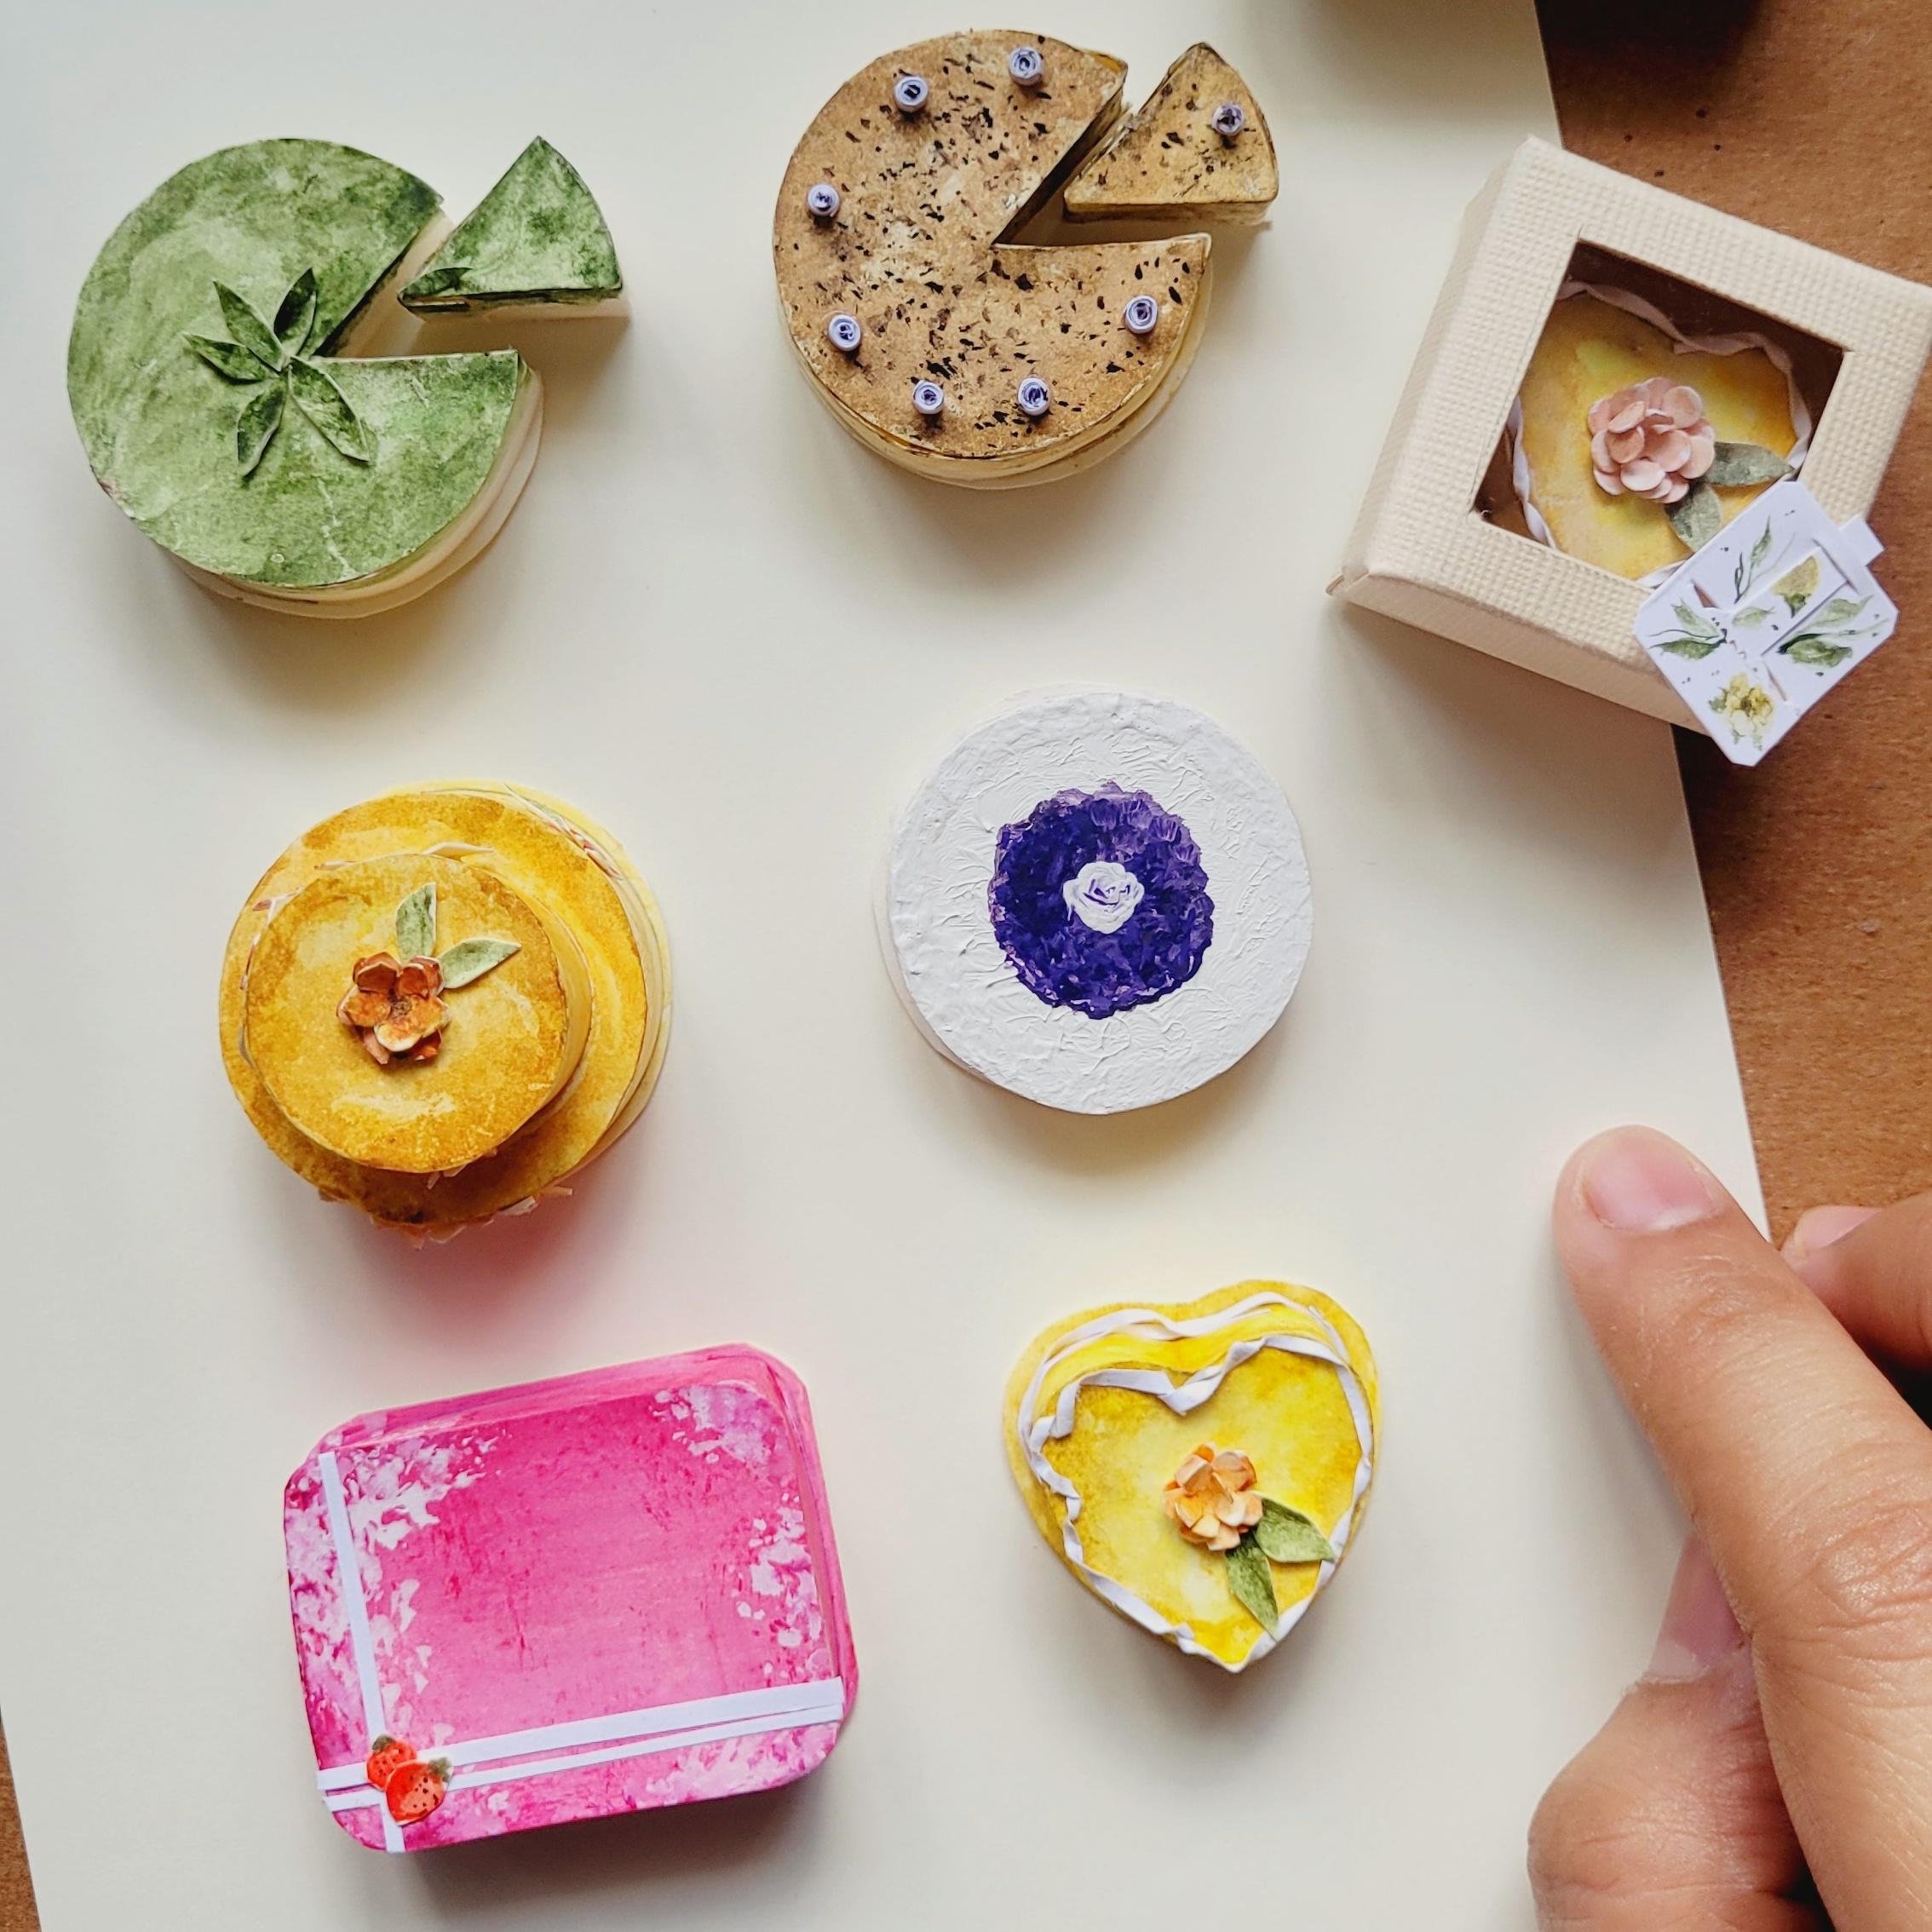
4. Project: Miniature Paper Cakes: Now let's dive into
the fund Part, designing and creating your very own
miniature paper cakes. You can let your imagination run wild with various
shapes and sizes, creating multiple tiers or adding intricate
details your design. You might even want to add some realistic frosting using texture and paper or by utilizing a
bit of Glenn for folding. By the end of the class, you will have developed a
strong foundation for creating miniature paper cakes and the skills to create
your own unique designs. You will also have at least three completed
cakes to display or gift. Make sure to create and
submit your projects because Skillshare has made it easier
for us to communicate here, especially when it comes
to sharing feedback
5. Project 1: Heart Cake: Project number one, Heart Cake. First, cut out two
pieces of a to 0.11 cm around it hard
for your Caitlin. Then keep one service your template for when
you want to do some more. Cut out a strip, a 0.6 centimeter
wide and 1 cm high. Draw another heart and cut
it out with an allowance of 2 mm for the cake base. Next, fold and mold the paper
strip into the shape of our heart cake carefully making sure each crease is just right. I couldn't help but smile essay saw my cakes start
to take shape. You may secure the
ends by using glue, but I use masking tape so I can easily adjusted when I have to squeeze the glue bottle
gently and apply a thin layer to the heart strip before placing
the cake lead. Allow it to dry. Then repeat with the cake base. Apply some pressure to it, then set it aside
to dry once more. Simply control the color I'm
using watercolor paints. Please keep in mind that
the use of water color is dependent on the
thickness of the paper, because this is 120 GSM board. I am certain that a few
layers of watercolors will not harm this surface as long
as they are not too wet. The first layer is lemon yellow. Then I put in some orange and brown to give the cake
a wonderful texture. For the frosting. Cut, two
pieces of two millimeter high strips of 16
centimeter length from scrap bond or thin paper. The next step requires a
massive amount of patients. Twist this trips, apply glue to the Cakes edges and then
apply the icing gently. If it's too lengthy. Do the same for the base. I'd want to keep it white, but you can make
colorful patterns, textures on your paper strips with paint or other
coloring materials. I then mentioned it in the
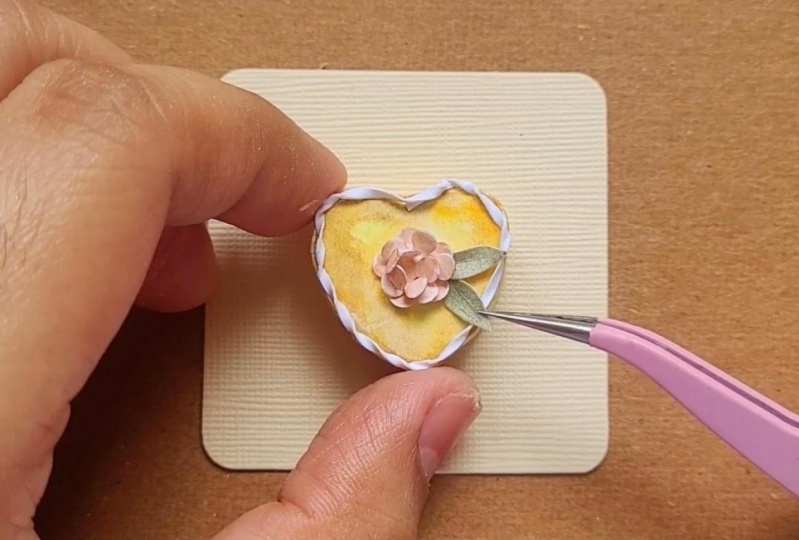
list of supplies needed. But if tweezers are available, then they'd be a friend. You never thought you'd need. Make a flower shape onto
board using the pencil. After drawing three flowers. Cutter along the lines. Push the center with the
bottom of your paintbrush, then paint them with a
mix of orange and red. Take another piece of board
paper and painted green. Save it for the leaves. Dab some glue in the center of the cake and add the layers of flowers on top of each allowed the adhesive
to dry completely. Cut out leaf forms from the
green painted board paper, folded in half to show
the midrib of the leaves. Big the leaves one at a time. Dab some glue on them, and stick them at the
bottom of the flower. Here's your first project, the heart shape Cake
6. Project 2: Rectangular Cake: Project number two,
Rectangular Cake. The procedure and
proportions are similar. But for this unique cake will do additional DIY
embellishments. Get your three CM by
3.75 CM lid base with two M M more allowance and
15.5 CM by one cM strip ready, mole, fold and glue
or tape this trips. And while ensuring
that the lid is the exact size when
placed over it, allow it to dry. Stick this trip to
the cake base with a thin stroke of glue
on the other side. Apply some pressure
too wet to secure it, then let it dry again. Who am I do say no. And my daughter asked
me to paint the pink. She also suggested sprinkling some strawberries on
top, which we will do, cover the entire
cake and pink or any other color of
your choice are paper cake will have a
wonderful texture thanks to two or three layers of
slightly moistened paint. I'm spattering the paint that
make small dots that will represent the combined
strawberries and icing. Finally, paint small dots, crimson and damp green
paint on there dumps. After it has dried. You may paint
teeny-tiny dots on it. To make the little dots. Use a detailing brush or
the tip of a toothpick, then cut out those
little strawberries. As you can see, I put white splashes on the
sides and thin strips of paper before stacking the
two miniature strawberries on top of each other. The daughter is overjoyed. I hope you are as well.
7. Project 3 Part 1: Round Cake: Project number three,
Part one, Round Cake. You might have mastered
the naked cake by now. Prepare the three CAM circle
in the three-point to see Embase and the 11
CM by one CMBS trip. When making the bear cake, we always use board paper
since it's more sturdy, mold, fold and glue
or teeth districts. And while ensuring
that the lid is the exact size when
placed over it, allow it to dry. Stick this trip to
the cake base with a thin stroke of
blue on either side. Apply some pressure
to it to secure it, then let it dry again. The Round Cake is
my favorite because you won't have the
crease this trip, which is much easier. Paint the first layer with
an orange brown mixture, then brown for the second layer, and another brown with a much darker tone
for the third layer. Cut two strips are three M, M broad by five CM
height. Thin paper. Roll this trip on at least three times width
tweezers or a toothpick. Twist the remaining
strip, then roll it. If your patient is running fin, take a deep breath in and out. Don't throw it away. Finding a small
piece of paper is more stressful than twisting it. Tuck the final end of this
trip in, then pinch it, make three or more of them
and glue them together and dissenter get some white paint. I'm using gouache, by the way, and a small amount of water just enough to make the paint
the same consistency as the icing Decker and glides Gallup strokes around it to
make the process easier, rotate the cake to make it look like a gate for
a special location. I placed short streamers at
the bottom of the blues. I then use glue to cover
the top of the cake and dusted it with the thinnest
papers I could ever cut. That Cake Box is also
quite lovely, isn't it? This class includes
a bonus video that will walk you through
the steps of making it
8. Project 3 Part 2: Tiered Cake: Project number three,
Part two, Tiered Cake. You're getting used
to the process. I prepared two links, one base into strips. The larger led
measures of ECM in diameter with a three-point
to see and base. While the smaller led measures
to see them in diameter. The larger strip measures
11 CM by one cM, and the smaller one is
nine CM by one thick. This trip did a good basis with a thin stroke of glue
on the other side. Apply some pressure
to secure it, then allow it the dry, glue, the smaller naked Cake to the larger one and
let it dry again. Will design it after the
heart cake we repaired. So we'll use yellow paint first, followed by an
orange brown mixture as the second and third layers. Draw little flowers
on another piece of board paper and glue them to the cake and
different places. I decided to cover the
masking tape with it. It can also use glue
instead of tape, so you won't have this
challenge later on. The beauty in using
masking tape is you can adjust it
on a later time. Leave three flowers to paint while you wait
for the flowers, you just placed it dry. After it has set. Paint those flowers with the orange red mixture and
add a little.in each center, glue the three flour pieces
you place, decide on top, then add the leaves and
extra tears as desired. But the top tiers diameter
should be two CM. Is in it simple and
enjoyable to me? I'm so curious how many you
intend to grade right now. Let me know soon
9. Special Project: Sliced Cake: Special Project
Sliced barrier lid, which should have a
diameter of three SCM. Your base which should
have a diameter of three, going to see them. And your strips that have a length of 11 CM by
a height of one SCM. Then a short their strip, five CM by one cM. By lightly sketching
the center of the lid divided
into eight slices. Cut one slice and set it aside. Use the LED to outline this Sliced Part cotton
and set it aside as well. Molded strip onto the limb. Make creases, remove exits, then glue or tape it. Make sure that the molded strip has the exact size as the lead, so it will be smooth when
you stick it together. Oh, this Sliced Cake
looks like Pac-Man. Glue the base, then let it dry. Because this is a coffee Eyck painted light the medium
brown with an ombre effect, similar to a gradient. To obtain the desired effect, use water to disperse
or tone down the color. Remember the paint, the
insights have the cake, as well as the cut One. Dab some darker brown. So until the detailer brush
or the tip of the brush you are using to make it look like
a speck of coffee founder. This factoring technique
can also be used to make thin strips
that are 4 cm long and 2 mm to correlate
with tweezers or a bank, then glue the end of the strip. These are EPB, the
white chocolates, make eight pieces of this squeezed dots
of glue on each of these slides and gently place our teeny-weeny white chocolates
and that looks yummy. Yummy, yummy, yummy, yummy
10. Bonus Lesson: Cake Box: Bonus Lesson Cake Box
for the Gateway, cut, a 3.6, um, by 3.16 square, and then Round each corner. Cut two more squares from
this specialty paper. One is seven by 7 cm in
size and the other is 6.2 by six point to see MB
in size for the box cover, 7TM square should
have an inner square. That's for CM by force yen. And the covers inner square
should be 4.2 by 4.2 cm. Score 1.5 CM on each side
of the seven Vm square. Each of the little squares on the edges should be
caught in one part. Bring these squares inside
after folding this gourd, then glue everything
together and that it cure. Score 1 cm on each side of the sixth
point to see em square. Again, each little square on the edges should be
caused in one part. And glue that after
folding discord parts. If you have that plastic wears some paper
sheets are backed, then you might as well
use it on this project. Cotton up plastic
and 4.7 by 4.7 cm, but strips of double-sided
tape on the back, Art off the cover, then stick the plastic onto it. Use your finger or anything else that can assist you in keeping the plastic and
place tape or glue the cake on the cake
late and set it inside, or a garbled small box. Except for the Rectangular
and Tiered cakes. All of the Cakes
in this class can fit inside of late and Box
11. A BIG THANKS: As I step back to
admire my work, I feel proud of my creation and can't wait to show it after you. Creating something with our
hands allows us to tap into our creativity and bring our imagination to live in
a new and exciting way. I hope you enjoyed this
Skillshare class and that you find joy in creating your
very own paper cakes. Remember, the beauty of miniature aren't lies
in the little details. So take your time, enjoy the process, and
let your creativity shine
 Nina Hidalgo, Miniature Artist