Mini Class: Simple Winter Landscape in Watercolor | Trang Chibi ❤️ | Skillshare
Search

Playback Speed


1.0x


  • 0.5x
  • 0.75x
  • 1x (Normal)
  • 1.25x
  • 1.5x
  • 1.75x
  • 2x

Mini Class: Simple Winter Landscape in Watercolor

teacher avatar Trang Chibi ❤️, Watercolor and Gouache Artist

Watch this class and thousands more

Get unlimited access to every class
Taught by industry leaders & working professionals
Topics include illustration, design, photography, and more

Watch this class and thousands more

Get unlimited access to every class
Taught by industry leaders & working professionals
Topics include illustration, design, photography, and more

Lessons in This Class

    • 1.

      Class Introduction

      0:35

    • 2.

      Tools and Materials

      2:05

    • 3.

      Painting Process

      7:58

    • 4.

      Final Details and Goodbye

      3:15

  • --
  • Beginner level
  • Intermediate level
  • Advanced level
  • All levels

Community Generated

The level is determined by a majority opinion of students who have reviewed this class. The teacher's recommendation is shown until at least 5 student responses are collected.

171

Students

10

Projects

About This Class

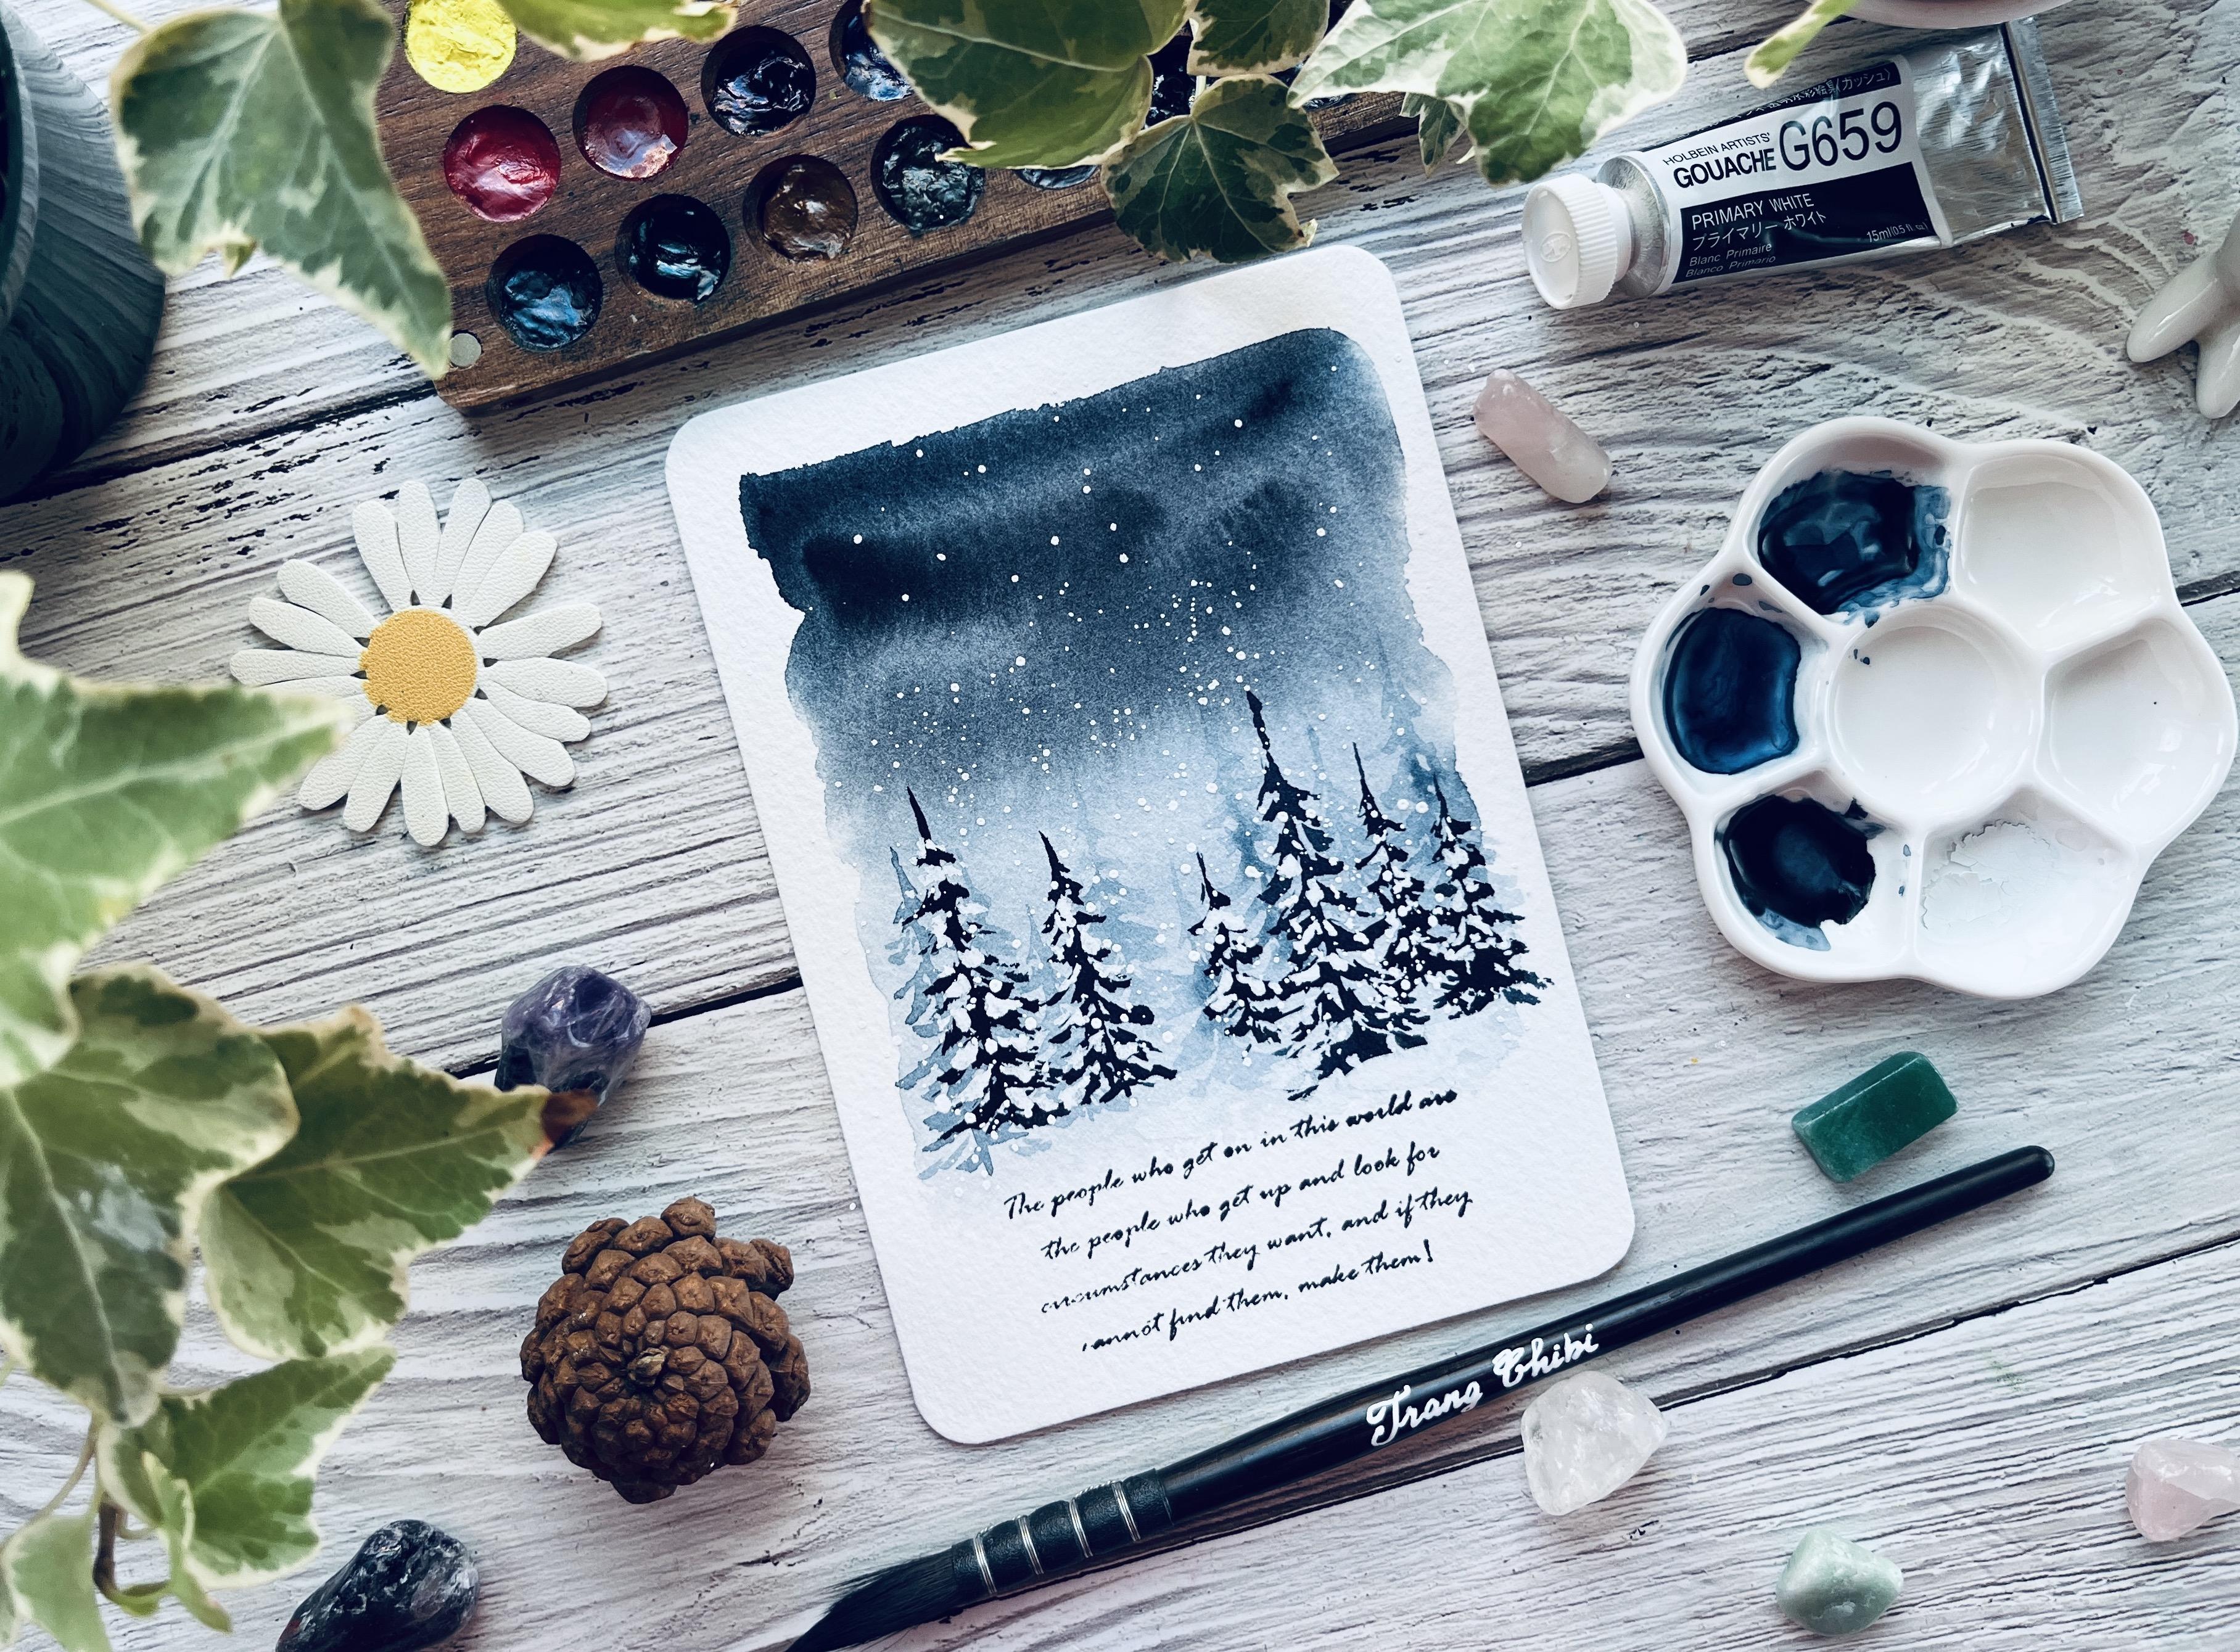
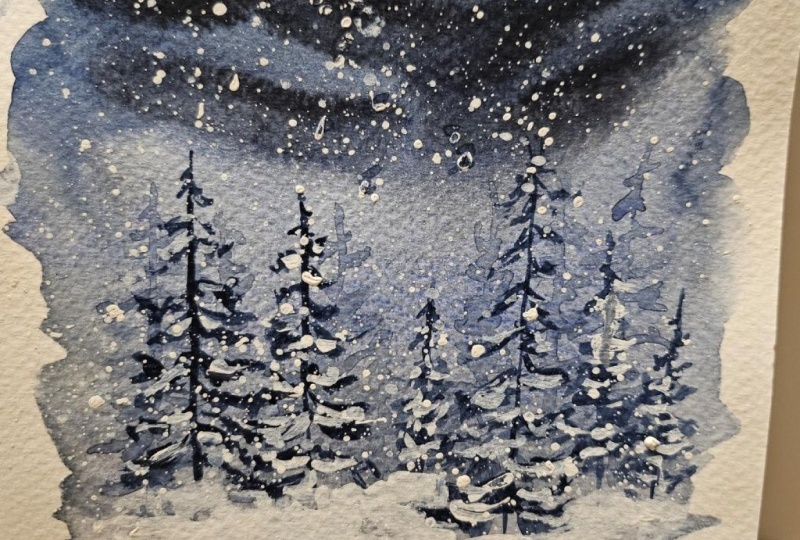
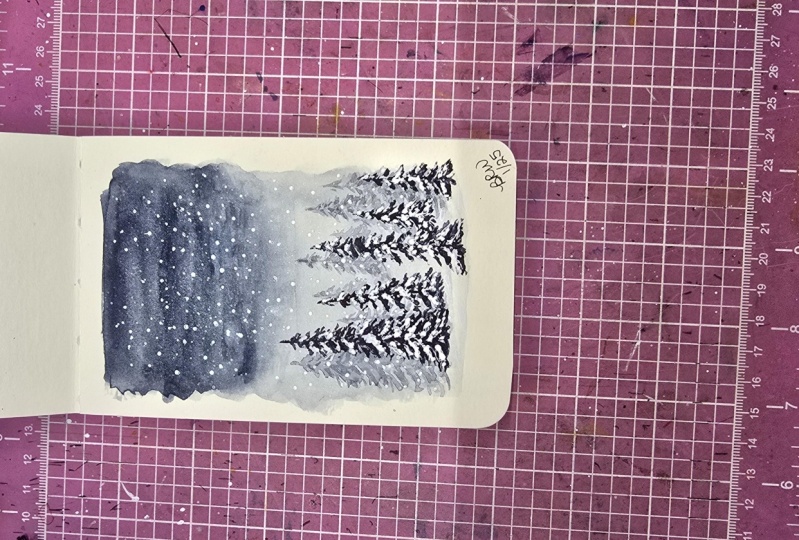
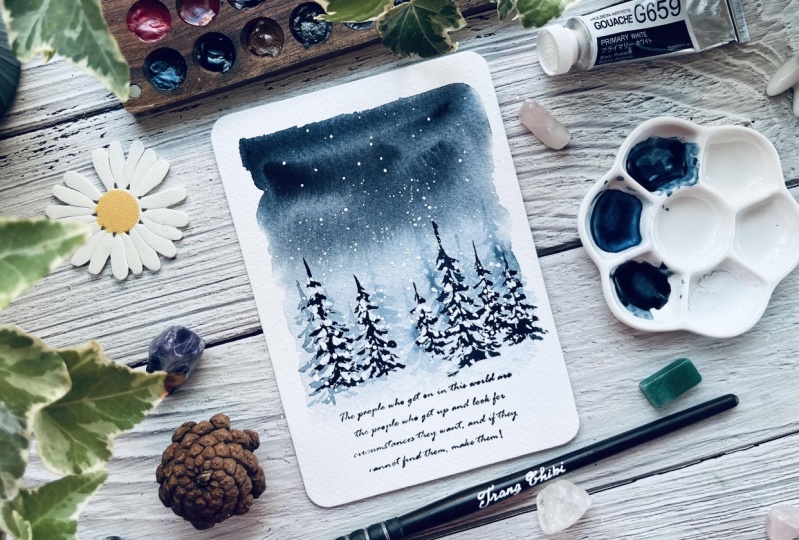
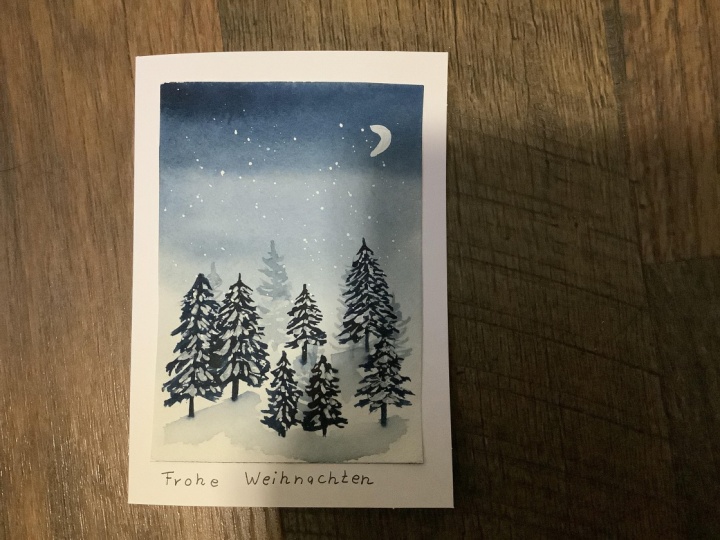
Embrace the beauty of winter by painting a serene and simple winter landscape with watercolor. This mini-class is perfect for anyone who wants to capture the quiet magic of snowy scenes in just 30 minutes. Whether you’re a beginner or a hobbyist, you’ll find this project both relaxing and rewarding.

What You Will Learn:

  • Techniques for creating soft, dreamy winter skies
  • How to paint snow-covered trees and landscapes with minimal colors
  • Simple methods for adding depth and texture to your artwork
  • Tips for using white gouache to create realistic snow effects

Why You Should Take This Class:

  • Create a peaceful winter-themed painting perfect for seasonal decor or gifting
  • Master beginner-friendly watercolor techniques that can be applied to other projects
  • No prior experience needed—just your love for cozy winter vibes!
  • As your instructor, I’ll provide step-by-step guidance and helpful tips to ensure you feel confident with your watercolor skills

Who This Class is For:
This class is ideal for beginners and anyone looking to explore winter-themed art. It’s also great if you’re seeking a quick creative escape during the colder months.

Materials/Resources:
You’ll need:

  • Watercolor paints (Indigo and Payne’s Gray)
  • White gouache for snow details
  • Watercolor paper (A6 size or similar)
  • Brushes: one mop brush and one round brush
  • Mixing palette and water jar
  • Optional: a stamp or pen for adding personalized details

Join me as we paint this tranquil winter scene together. Let’s bring the magic of snow to life on paper!

Meet Your Teacher

Teacher Profile Image

Trang Chibi ❤️

Watercolor and Gouache Artist

Teacher
Level: Beginner

Class Ratings

Expectations Met?
    Exceeded!
  • 0%
  • Yes
  • 0%
  • Somewhat
  • 0%
  • Not really
  • 0%

Why Join Skillshare?

Take award-winning Skillshare Original Classes

Each class has short lessons, hands-on projects

Your membership supports Skillshare teachers

Learn From Anywhere

Take classes on the go with the Skillshare app. Stream or download to watch on the plane, the subway, or wherever you learn best.

Transcripts

1. Class Introduction: Hello, everyone. I am Then Tibi an artist from Vietnam, and I'm so happy to have you here. In this glass, we will paint this charming winter landscape together. It is a quick and enjoyable project that you can finish everything in under 30 minutes. So now let's jump right in and go over on the tones and materials that we may need. 2. Tools and Materials: Let's talk about the tons and materials. We need to in this glass. Keep in mind, you don't have to use the exactly similar art supplies as I do, feel free to use alternatives which is more available to you. For the color in this class and you water color from Winnie brand, I put it on this wooden set myself and you only need two colors in particular, which is indigo and paints gray. If you don't have both two colors in your set, you can use one color. It is good enough, but it is in two colors we make the painting more interesting and dynamic and you also need some white wash for slow effect. If you don't have white wash at home, you can use white watercolor paint or white alcolic paint. I will use a six is ten and 15 centimeters. This cold bras Watercolor paper. Today I use I color paper from soder Waterft brand because the texture is not too rough. I will use this step to create the handwriting here, the note here. But if you don't have it, feel free to use your handwriting, but make sure the surface is not too rough. Otherwise, it will be difficult to write anything on it, and we only need two brushes for today class, one more brush for the background, and one rail brush for the pie sheet that's on the tones and materials, we need in this class in the next lesson, let's start to pin. 3. Painting Process: In this lesson, we will start to paint the background. I want to create a vintage pe, that's why I don't try to create a perfect rectangular bottle. First we just need to the background and leave the gap in the bottle. Then you will put indigo on it. Make it darker in the top and fit lighter in the bottom. I will leave a gap in the bottom for the node. Then we need to put pain away to make it darker. I believe less is more. That is all we need for the wow. Let's wait for this to go right here. Let's wait for this to dry before continuing with our glass. Now the background is already dry, so let's start to paint the pie cheese. Actually, you don't need to wait for the background to dry completely. It is okay to paint it while it is a little bit wet. I use indigo to paint the pie cheese in the background. So we very watery mature. So the way we paint the pie che is I will paint the central, the he hung first. I think I need it to be even more watery. Then we will use short shops to paint the leaves to the branches, I think, and try to make it have the title angle shape. You may consider painting the bottom first. The top and the bottom and then collect the two. That's why we create the triangle set. So to create the natural five, we need to create a small one and big one near each other. I think I will make the pain even more. Water? I think we can make the pasi more natural by painting with very, very light shade. Then after finished painting the pah with very light shade, we put a little bit darker colour onto it so that we will have a frien in the shade colours in the pachi it's quite. Okay. I think that's enough patches in the background, let's wait it to dry completely before painting the patches on the foreground. The patches in the background is already dry, so now let's pin the patchy on the for ground. I will start with indigo first, and then I will add pin graze on top of it to the dynamic, the different color hue in the cheese. But this time even little bit dark shaped indigo. I try to try to not pin the patch on the for round at the same position as the pachi on the background. After that, when the pain is already is still wet, we put pain away on top of it, so that even it is in shape, it has we cannot notice using our eyes, but it will create more depth for the painting If your Phi is not natural, you can peep practice and after if you practice pending the pai chi every day after one week, I'm sure you will have a very natural Pache um, Don't worry, everything is not really natural now, later when we put the slow on top of it, the whole painting will make more sense. So now wait for the painting to dry before booking the slow and other final details. 4. Final Details and Goodbye: No, the pain is already dry and let's put some slow on it. I will I wash from Hb in. Actually, I forgot to mention in the material lesson, but I will change to the round brush to being the slow because from my experience, I feel that this brush is the size of slow, which is what I want. We need some experience to know what brush you will use for brush, some slow because different size, different type of brush we create different size of the particle here. So look at my hand. I will start. I think I need to put it and add to that, I then come back with it through us to ask some more slow on the she. So I mean, with some slow on the on the ground. Just a little bit here and there to go with the dynamic on the on the pending. And I do think it need just another round of splicter if I that's enough for the snow. Then for the final touch, I will put my stem on this. If you don't have this stem, it is okay just in your handwriting. I want to make sure there's no snow on the ground. And that's week we finish our today class, Bojet. Thanks for painting with me today. I hope you are happy with your winter escape postcard. Please upload your painting onto the BojeGallery section, and I hope to see you in another class.