Transcripts
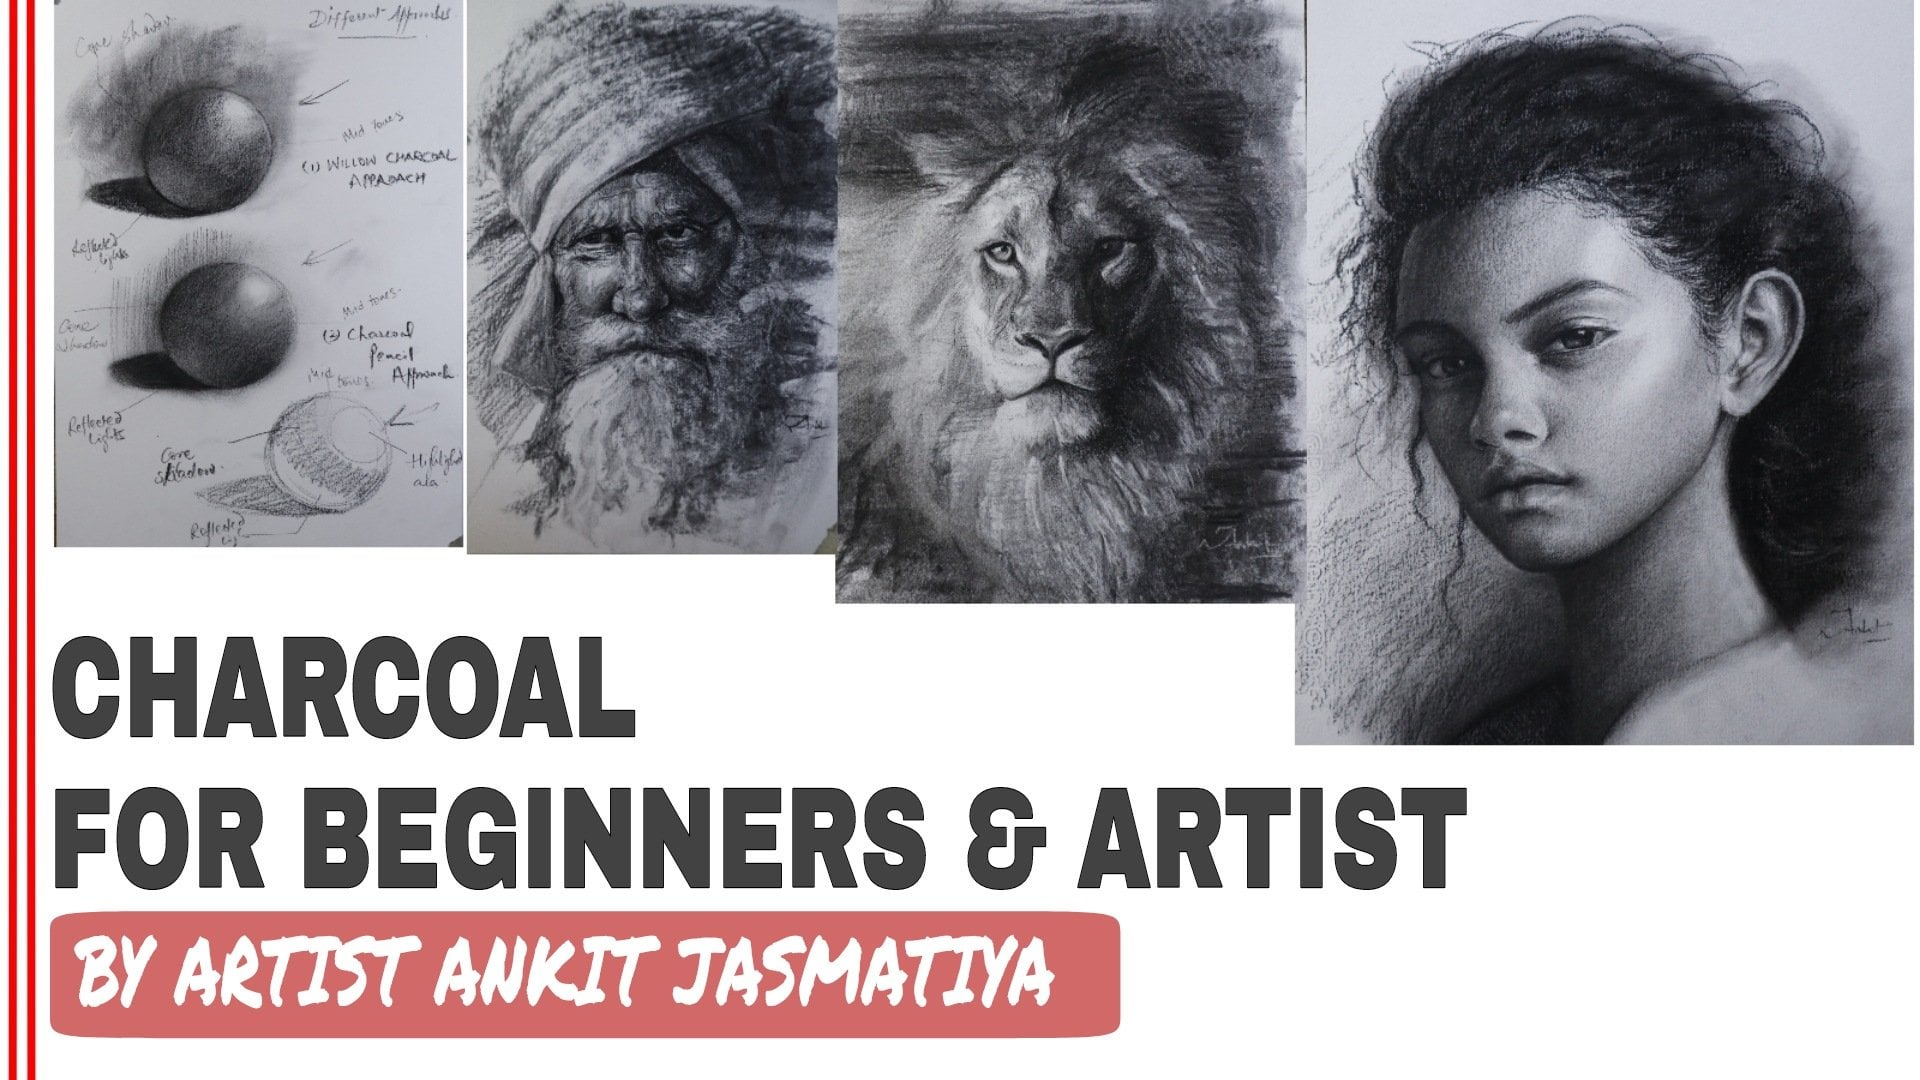
1. Introduction to the Class: Welcome fellow
Shading enthusiast to our new Skillshare class, where we promise to shade your word with joy and laughter. Are you tired of your drawing
looking flatter? Fear not. I am here to rescue your artwork from the depth of two dimensional to the
three dimensional. Welcome to my new drawing class on Mastering shading technique. First of all, let me tell
you something about myself. I'm an artist based in
India and following my art passion for
almost last 14 years. I have a YouTube channel with the name of artist
Danke Jasmata, where I have more than
400 K subscribers. I love to work on portrait
drawings in the Academic Mt. I also used to upload art
classes on Skillshare as well, and this is my ninth
class on Skillshare. After drawing so many portraits, I can say one thing that
shading is something which is the utmost part of creating a portrait and generating
the realism into that. And for that, one
must understand the basic principle of sheding
and how to implement them. Today, we are going to deep dive into the principle of shedding. And I promise you, it's going to be the
incredible journey. From pencil to charcoal, brushes to blending stumps, erasers, sharpeners, and various kind of tools
that we are going to use. That is all we are going
to explore in this class. But remember, this class is not only about the
technicalities. It's about to explore or unleashing your inner
artist, your creativity, finding your unique style, and expressing
yourself through art, which is very, very
important in drawing. In this class, we have
covered almost all kind of shedding like cross etchings,
contouring, circulism, and various other kind
of sheddings, as well, which will help to create
realistic portrait, and also the artistic
portraits as well. We're also going to discuss
about the human portraits, about the animal portraits and the most complex shading
parts like fur of an animal. So we're going to cover each and every aspect of shading,
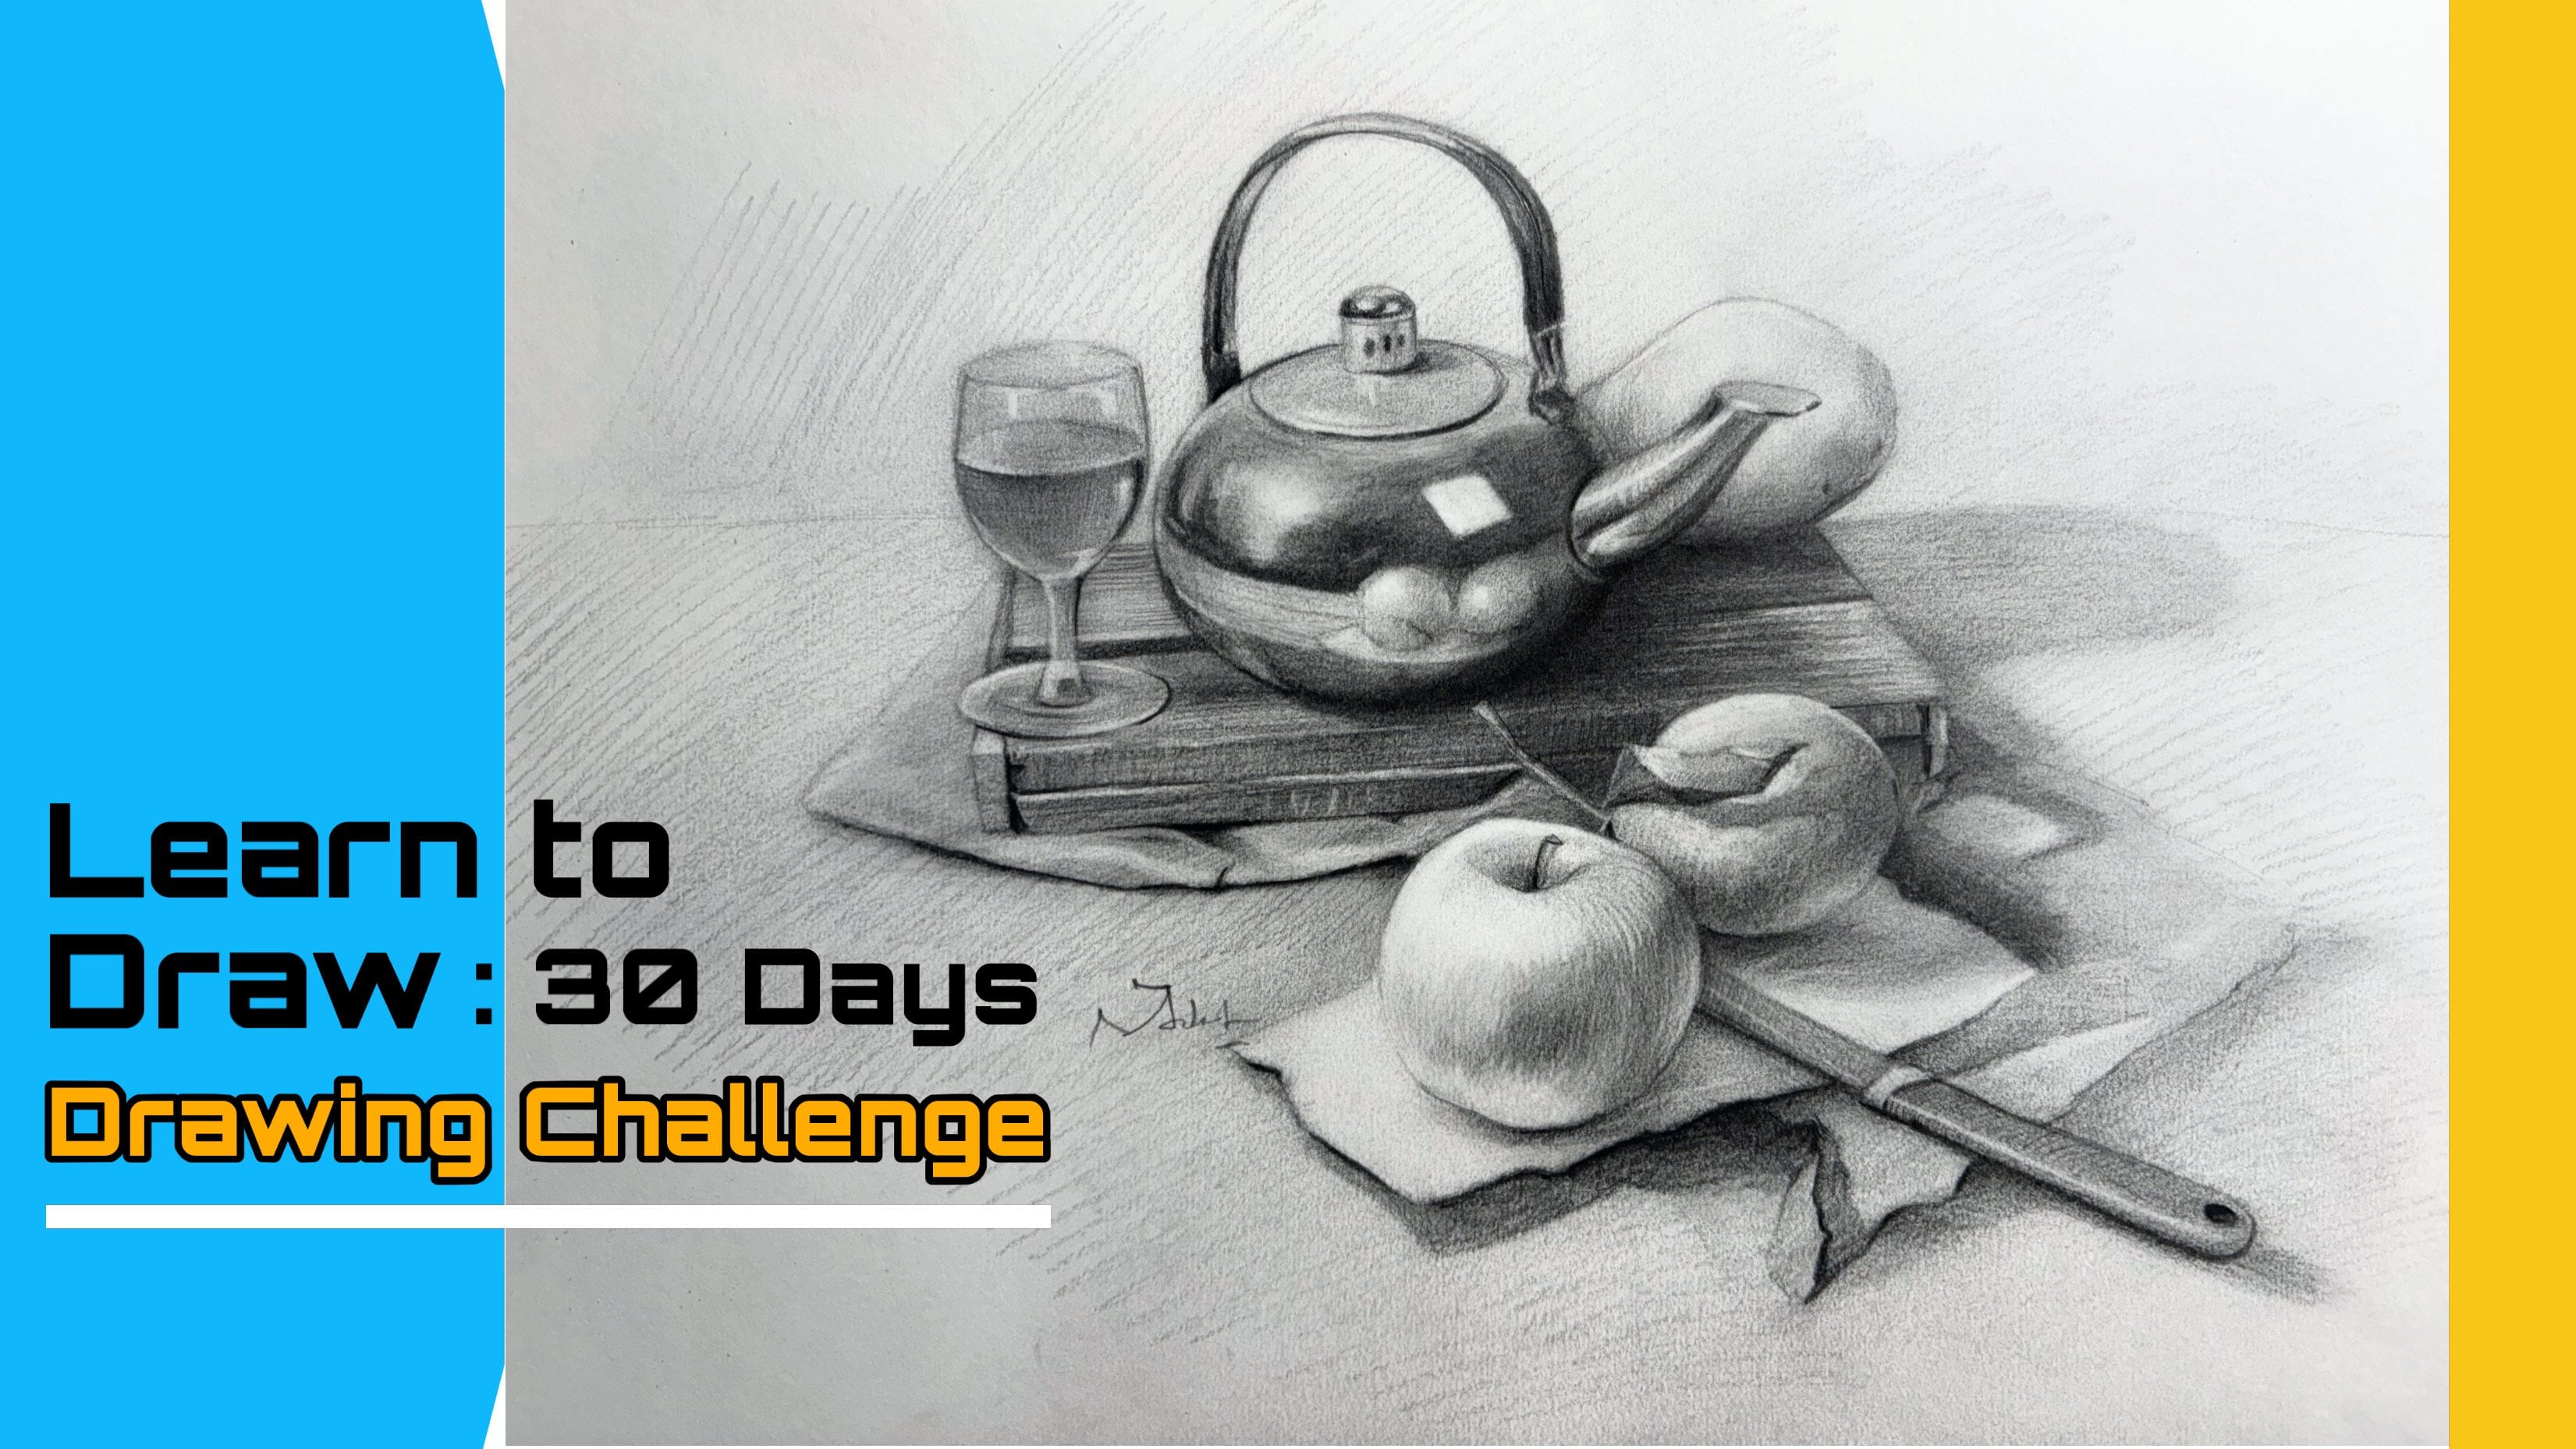
not only portraits, we have also focus on still life drawing in which
we have to put a few objects, and then we have to draw it. We're also going to
talk about how to hold your pencil because it is very important
aspect of drawing. This will drastically
change the amount of shading as well and the energy that you transform.
Into your drawing. So whether you are
just a beginner artist or a seasoned artist, seeking to refine
your shedding style, this class has something
valuable for everyone. So grab your pencil and paper. Let's embark on this
exciting journey together, exploring the captivating
word of shedding. So join me. And together, we will unlock the
secrets of shedding. See you in the
class, and remember, keep shedding and shining.
2. Class Project and Material used: First of all, thank
you so much for showing your interest
in this class and took a step ahead to learn this super amazing hidden
technique of shedding. Now let's talk about our
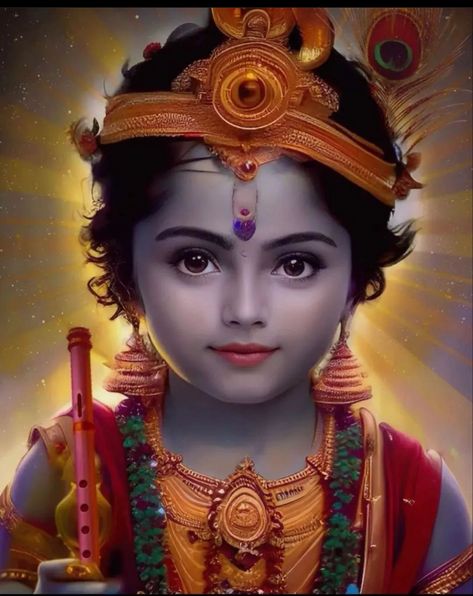
project in this class. So we are going to convert a two dimensional outline of any portrait into the three
dimensional realistic phase. So this is the project, and whatever be the phase you
want to use as a reference, you can use my
reference as well where I have drawn a little kid, and then converting
into it realistic one. So you can use that
reference as well, or you can use any reference
and find it anywhere. You may have your own
portraits as well, or you can use
animal portrait as well as a reference and then convert that two
dimensional outlines into the three dimensional
realistic phase. You can also help yourself by drawing the still life
as well and then shading it and then see how much
you can actually understand the shading and what about the light and shades of
a particular subject. Now, let's first
understand what are the material that you require
to complete this project. So here we need first of all, the pencils and pencils of
four different rates like HB, two B, four B, and six B. These four kind of pencils,
we are going to use. The application of
usage of these pencil, we will discuss in
the coming section. And secondly, we are going
to use the needed eraser. Needed eraser, we
already know this. This is a very flexible
kind of kind of eraser, and it can change its shape. To the any level and we can achieve the erasing
capability of it. We may also use this
normal plasto eraser. And then the last we are going to use this pencil
eraser, which is very, very useful for getting the details and the highlights
in the shedding process. This is a very important tool. We must have this tool. Now the next tool
is the sharpener. So this is the normal sharpener. We may use it and get the sharpening of the
pencil being done by this, or you may have another
kind of a sharpener like a steel sharpener or this one is the
mechanical sharpener. This is very, very useful for
quick sharpening of pencil. So you can see here. I just put a single pencil over there. And then using the
spindle of it, I just give a revolution
of 23 revolution, and then you can see the
pencil has been sharpened up. Then the last but not least, this one is the
the shading tools. These are the shading tools
that we are going to use. These are the brushes,
the two brushes. One is the thick, and
another one is the thin one. So these brushes
are very helpful in getting the shading
the equal grades. The last tool that we may
use is the paper stump. This one is very useful
in the charcoal drawing. And the hyperlism
drawing as well. Let's talk about the paper. So paper, you may have a
paper with a rough texture, cartridge paper
or a rough paper, or any kind of a texture has to be there for
the shading thing. You can see the
texture over here. So this is all
about the tools and the art materials.
Hope you understand.
3. Basics of Shading: Now we are going to talk
about the types of shedding. Here, there are two ways in which we can
achieve the shedding. One is without the tools, and other is with the tool. For without the tools, you actually need a pencil. That's it. You always
have a pencil with us, and we are going to draw
anything using the pencil. And just by using the pencil, we're going to achieve the
shedding in two forms. First one is the cross tching. Another one is the
contour or circulism, and the third one is the raw. Now let's understand
what is cross etching. Cross etching is
basically the two lines, they are crossing each
other on any angle, that is the cross etching
in the larger perspective. And the contour is basically, we are going to create
different contours of different sizes and the The bunch of it actually create a various
kind of shedding, a different kind of a
shedding altogether. Also, circulism is
what we're going to create a small size circle
or a big size circle, and just the bunch of it is going to create very
very realistic shedding. So this is something
which will help us to achieve a very realistic
shedding also. So these are two
important shedding. First one is the cross hatching. Second one is the
contour hatching or the circulism hatching.
Not the hatching. It is only contour shedding
or the circulism shedding. Without the tool, we can
do the shedding as well, and just by using these
simple techniques. The third one, which one is the raw shedding or
the random shedding. Here, we are going to use many different form of
shedding or the lines, and somehow we are going to
manage the shedding part. Third one is not that important. Now, let's come towards
the width tool. That is very important
for the student who really want to
achieve more realism. Like hyperism or ultrasm. So here, there are three way
we are going to achieve it. First one is the brush. Second one is the
blending stump, and third one is a cotton bird
or a tissue paper as well. So for brush, you can
see this is the brush, what we can use And these brushes are make up
brushes which are firm. Their brussels are firm, and they are very
smooth as well. So they are not going to affect the surface of the
paper as well. But eventually, they actually help us to achieve
the smooth layers. So let us see how we are going to achieve by
using this brush. So you can see here, I'm not putting the
pressure onto the paper. It is something which
is very gradually, and It should be done in
a very simplistic manner. So how to use the brush, we're going to discuss in the upcoming lessons
of this class. And there is one more kind
of shedding that we can use. We are going to use
our finger as well. Those who don't have any problem of sweating on their hands, they can use the finger as well. So this is also very helpful for those artists who really want to achieve something very quick, and they don't actually rely
onto the tools as well. So this is what you can use. Another way is blending stumps. Here you can see this is
blending stump or Tuten, whatever the name you
actually gave to them. But the results are very
smooth, first of all, and in hyperism, many
artists used to use it. It is very, very
realistic, very effective, and it may change the paper
may damage the paper as well. The patterns or the textures
may rhetoriate, also. So this is something which is not recommended
to the beginners. And also, if someone who don't want to actually do
things very dramatically, so they shouldn't use this. And the other way like
cotton bird tissue paper. Cotton bird, it
should not be used, and it is not something which
I should recommend to you. So I actually don't
prefer to use it. And tissue paper
you can also do, and there are many artists
who are using tissue paper, and it is very
effective for sure. The fingers is also again, it is is just like a pencil thing because you are not going
to use any tools. So this is all about
type of shedding. I'm going to see you
in the next lesson.
4. Shading Process: So now here we're going
to talk about how to use the tools to basically
get the shedding. So here, I'm going to draw a circle and then we're
going to use the brush to actually understand
the utilization of that particular brush for
the shedding perspective. So here I'm going to
apply the first layer, which is very light and try to get the layer as
smooth as possible. Even if we are going to
use any brush or tool, we have to be very smooth and very gradual
onto the paper. We should not do it
rigorously or roughly. Otherwise, it will be
difficult for us to maintain the smoothness
and the evenness. Or the gradient of that shading. Here, I just want to add layers
in a very gradual manner, in a very graded manner. And you can see here I'm
just confirming the outlines of the circle so that we can convert them
into the sphere. And here you can see I'm converting them into
the sphere thing and just adding layers
in a proper manner. I am just doing some contouring as well, you can see here. Whatever the technique
you are going to use, you have to be very specific, very clear in your mind that what you are
going to achieve, that has to be in
your mind for sure. So I just assume the light
is coming from the top. I have shown it from
the arrow thing, and how the shed can play a
role in it that you can see. So now I'm going
to use the brush. We should start from
the lighter portion. Always, you should
remember this thing. Whenever you are going
to use the brush, and you should follow
the flow also. Whatever the flow that you have created, you have to follow. And then gradually, you should do the contouring
the circulism using the brush and just
trying to smudge it out from the lighter
portion to the darker portion. We should not do it from
the darker to the lighter. Otherwise, All the darker
thing has come out onto the brush and the
lighter portion also get affected
with the darker one. So you should start from
the lighter one and then gradually move towards
the darker portion. This is the way. This is the easiest
and the coolest way actually to do the shedding. And you can see here, the lines have um, have been omitted
into the paper, and you can see it is a very gradual thing,
a very smooth thing. I'm not putting pressure
onto the paper. And then you can use if you are comfortable
with the finger, you can use the fingers as well. And you can see here when
you're going to use the finger, the things become more and
more subtle and more smooth. So this is the way you should apply the first layer
of the shedding. This is just the first layer. As you're going with the flow as you are
adding the layers, like what I'm doing here. I'm just adding
the second layer. So This should be the way of doing the
shedding for a beginner. If you are advanced artist or if you're doing it
for the longer time. So you can add all the layers in one go and then finally
do the shedding thing. That is something which will help you to save
some time as well. But for beginner, you
should go layer by layer, and you should have a step by step process so that you
should not do any mistake. You can see here I'm using a high red pencil
like four B or six B, and then trying to
smudge the things, trying to utilize
the darker area. And you can see I'm just
focusing on the belt portion, which is the darkest
portion of the sphere, and then slowly and easily move towards the
latter one as well. Again, I'm using the brush, you can see here and just trying to smooth the graphite thing. So this is the way we should
do the shedding thing, and we should take
time for that. This is very important
for any shedding. You should give time to
that particular shedding. Otherwise, things will not come out in the way that
you actually want it. Now I'm using the
brush, the eraser, and just I just highlighted that where the
light is actually focusing on. This is actually depending upon the texture of that
particular surface, what you are trying to achieve. So this is approach
light to dark area. What I have discussed,
the lightest area, I actually started started from the lightest one and then move toward the darker
one. This is the way. And then finally finally utilizing that
particular light area. So This is the thing that
you should keep in mind, and there are few steps, a few tips that
you can see here, what I've written here, that you should keep that
in mind as well.
5. Shading Basic Objects: In this lesson, we
are going to take an object as a reference and going to draw,
going to shed it out. So I have already
drawn a few outlines, which is very basic one. I've just drawn and jar, which is made up of steel. The cap is made up of the steel, and the lower portion is
made up of the glass. So this portion is of class where I am actually
doing the shedding. So these are the composite one. The cap is of steel and
the the lower portion. The main portion is
made up of the glass. So you can see here. I'm just going to fill
these areas with the lines, the contour lines, the horizontal lines and the
vertical lines as well. Just this is the
preliminary lines. You don't need to
worry about that. And then I'm using the fingers, so to get the even surface in
even gray surface as well. Here, I'm adding fewre lines, few more dark areas, using the two p pencil
or the four p pencil for that particular area
because this is made up of steel like material, steel, or zinc, whatever
you can say made up of, and sometimes it's made
up of brass as well. So respective of the
material that has been used, our process has to be
very uniform and generic. And for the glass portion,
the lower portion, we have to find the
darker values and then reduce those darker values to actually achieve
the highlights. So our process is like this
only. You can see here. I'm just trying to get the lines And I'm leaving few of the
belts. You can see here. If you observe it very closely, I just leaving few few belts, you can say or blocks, you can see where I I don't want to get
the darker values. Now, I'm using the brush
and just trying to blend to smudge the values
in a very very easy manner, in a very lighter manner. I'm not putting the pressure. I'm just trying to get a few
even surfaces to work on. Now I'm adding the third
layer, so you can see here. Again, I'm doing the work like I've already told you
in a layer by layer manner. You can see here, now I'm going to use the high lighter thing, the needed eraser, and trying
to get the highlights. As I have already mentioned, it is made up of glass,
the lower portion. Here we are going to get some random highlights
onto the tip as well. Now I'm using the pencil eraser and just trying
to get the edges, the sharp edges
where you can see the shine as well and
the grip of the cap. That I am going to also
try to get the details. Even on the glass surface, you can see it is a thick glass. So we have to show the
inner layers as well, inner linings as well and
the outer lining as well. You can see here how
easily we have actually maintained and create
a glass surface and the steel surface. This is basically a
very easy example in the coming lesson
of this class, we're going to discuss
these things in details as well so that you can
get more idea of it.
6. Types of Shading: Now, let's talk about the
various forms of shedding, and the preliminary form is
cross tching, which is very, very popular, and it's very
important for any artist to understand about the cross
ching or tching techniques. So, what is hedging? Let's understand about
the hedging thing. So Hatching is
some random lines, which has to be drawn in
such a manner that it has to have a very quick
a very quick stroke. So the set of line
to represent depth. So this is something which we
can define in this manner. And there are various
types of hatching. First one is the
horizontal hatches, where you have to put parallel lines in a
horizontal direction. So this one is the first one. Then another one is
the vertical hatching. So here, as its name suggests, it has to have a vertical lines which are parallel
to each other. So These are parallel lines, and it has to have a firm
stope. That is very important. That's why I am keep on
stating this statement. It has to be firm.
So the third one is the diagonal hatching. It has to have a certain angle from the horizontal
or the vertical. So here you can see it. It has to have a certain angle
from the horizontal line. So it has to it has to
be in any direction. The angle is not confirmed. So You can draw it in any angle. It has to have any angle. It may vary as well. So let's talk about
the most popular one. Which one is the cross hatching. So The cross tching
is the mixture of the all different hatching, what we have earlier discussed. Like first one is the
horizontal and the vertigal. When we mix them,
it create a cross or a diagonal one or the
horizontal one or vertial one. Whenever you mix the two
different form of hatching, it will eventually convert
into the cross etching. Like you can see here, I'm going to create a mesh of
horizontal and vertical lines. These are also cross etchings. It should be in any
form in any direction, and artists use it
very oftenly by expressing the lines
and then the depth of the drawing of the shedding
or of the dark area. So you can see here, I'm
mixing the patterns, adding them and creating a
hatching of my own choice. You can see here, I have mixed vertical and the inclined
one or diagonal one. So every time I'm getting
different results, this is the beauty
of cross tching. You are free to basically
get any results, any variant of that hatching. This one is the
most popular one. Both diagonal hatching, which are perpendicular to each other, and they create
cross cross tches, which are known as cross tching. So another form of hatching, that is known as curved tching. So the lines, which
were earlier straight, now they are turning
into a certain angle, and they are curved. They are not a straight line. So that is something
which we need to keep in our mind
because these are arcs. These are a portion
of the circle, which is known as arc. And you can see here, how finally we use in drawing. And they actually simply
looks so beautiful. So many times I've shown in the last lesson where we
were drawing a circle. You can see there over there. I have created some curved
hatches over there. This is very helpful
for still life drawing. Also, in portraits, we
are going to use it. Son in the next lesson.
7. Implementation of Shading: Now here we are going to
draw very different object, which is having a
difficult edges. And I'm just getting some outlines of this
object because it is a very different one because the shape is
not very defined, and you need to have a good
sense in the shading portion. Then only you can understand
the shape of this object. This is why I've chosen
it. So here you can see. I'm just going to draw
some rough outlines of it. And then we are going
to shade it out. So I'm going to start, as I've already told
to the darker area, and then we are coming
toward the lighter one. So this one, the main section
which is showing here, it is darker one. So I started from this just getting some
vertical hatches. So you can see here how
different hatches help us to create a different surfaces or surfaces with a
different angles. So here I've used
diagonal hatches, and then the vertical
hatches Then now here I'm going to use
some small hatches. You can see I am going to vary all the hatches to
use in the same item. Here, you can see for
the circular portion, the center belt,
I am going to use the curved hatches and then
the vertical hatches as well. Then the inclined
vertical hatches on the bottom of of this object. I'm adding it more
values to that because it is already shown
in this reference as well. Just try to make
the thing simple. And here you can see the handle of this object is very dark. So I'm adding directly high grade
pencil over there because I know the surface the color
or the value is very dark, so we can directly use the
dark pencil over there. No need to waste our time. You can see, I have achieved it just by using a single
pencil with a single layer. But this is not difficult. The difficult part in
this object is to get all the surfaces and just to
make it more realistic one. This particular object,
you have to observe. It actually don't need such explanation what I'm
trying to give it to you, but it actually eventually whenever you are going
to draw this object, then at that time, you should have a
feeling like how to the values into that and how
to get the lighter values, and then the darker
values as well. I'm just observing
the object from the from the closed areas, what are not visible
basically over here. Here you can see, I have
used the vertical hatches, then the horizontal hatches, then the cross hatches, and then the curved hatches. All these hatches, you can see, this one is the curved hatch. The cross hatches has been used in this particular portion, the crossche has also been used over here onto
the handle as well. And the horigontal hatches
has been used here also. The vertical hatches
has been used in the middle section
of this title. So all these hatches, you can see how I have utilized
in this single object.
8. Understading Gradients in Shading : Now let's discuss a
very unique topic. And I'm going to discuss about the basic exercise
that every artist should do, every beginner should do to understand how pressure
actually work in shedding and creating a gradient and
using the different pencil or the single pencil help you to understand the the
important role of pressure. It is very important
for any artist. Many times we are
going to say a key. We don't have that
much of pencils, and we have to use a single pencil or we have
only one pencil, how to shade. So this is how we should do it. So I'm here, I'm using a
very lighter red pencil, which is which is
something like. You see here. In a
lighter portion, I'm using the pencil. This is, is something
which is very hard. Now I'm going to
use the B pencil, which is a little darker
from the previous one. You can see here
how the gradient, how the grade of the pencil
actually affect the darkness. This one is darker one
from the previous one. Now I'm again going to
use another pencil, which is two B in grade, and you can see here, it is very darker as compared
to the previous two. You can see I am applying a same pressure,
similar pressure. I'm not going to add pressure, and you can see how
grade actually work. This one is the four B. This is why there are many
grade of pencil available in the
market so that you can use them without
wearing the pressure. Now I'm using the six B pencil. I'm also going to discuss about the pros and cons of
this particular thing. Six B is way more darker
than the previous one. The last one is the eight B, which is the darkest from among all these what I
have discussed here. You can see the black portion
is more in this grade. And you can see
how the gradient, how the grade has
actually worked here. I've used six pencil
to achieve the grade. Now, the important, the
interesting part is this, whether you are able to
achieve with a single pencil. I'm going to use a
six B pencil and just wearing the pressure
into the pencil, I'm going to achieve all these grades by
using the single pencil. You can see how. So I'm just applying more
and more pressure. I started with the
minimalistic pressure, then adding few pressure, then adding few more
pressure onto that and more layers onto that and just getting the
desired results. So this is very interesting
for those who actually use to create some excuses that they don't
have various pencil and they don't
understand the shading or they don't able
to they are not able to actually get
the shading thing done. Here you can see the
single pencil will help you to get all the grades
of different pencils. You just have to have
those skills in you and those skills will
help you to achieve the desired results
just by single pencil. You can see I am applying more and more pressure
towards the right, and here I have just
apply all the pressure, what I actually can
do because I have to achieve the eight B grade
from the six p pencil, which is again a
challenging one. But when you are going
to apply the pressure, the pencil will have
to do its work. Here you can see the dark
values has also been achieved. The lightest value of has also been achieved
with a single pencil. This is this is
the simple example how changing pressure can help you to get
all the gradients.
9. Various Tones in Shading: Now, we are going to discuss about how to change
the pressure of the pencil to achieve
various grades or gradients. So light, moderate, or
mid tones or light tones, we can define in such
a way or a dark tone. These three tones we need to understand and how we can vary the pressure of the
pencil to achieve all of them by just
using the single pencil. How to hold the pencil,
which is very important. Where should be the angle. Where should be the
point where we can actually grip the pencil.
It is very important. For light tones, we must pick our pencil or hold our
pencil from the center. Like the half of the
length of the pencil and just try to do as
light pressure, apply as light pressure
as we should can. So this is over the hand grip, and if we change the grip, here you can see, we have picked the pencil
in a different way. All of our fingers are
over to the pencil, and you can see the
pencil is lying, which is parallel to the
surface of the paper, and we are applying
more pressure. So by just changing the grip, we are getting different
tones as well. This is very
important for anyone, any beginner to understand
how they can actually change the grades just by changing the grip or by changing the
pressure onto the pencil. So this is very important. Let's do the dark tones. For dark tones, we should
use the tripod grip, which is very easy for anyone to understand because we used
to write by this grip. So you just have to apply
more and more pressure and our finger should be near to the tip or to
the lead of the pencil. When we apply the pressure, we can get the dark
tones as well. Just by using the
three different grape, you can see here we are
getting different types of grades and which is very easy
for anyone to understand. See you in the next lesson.
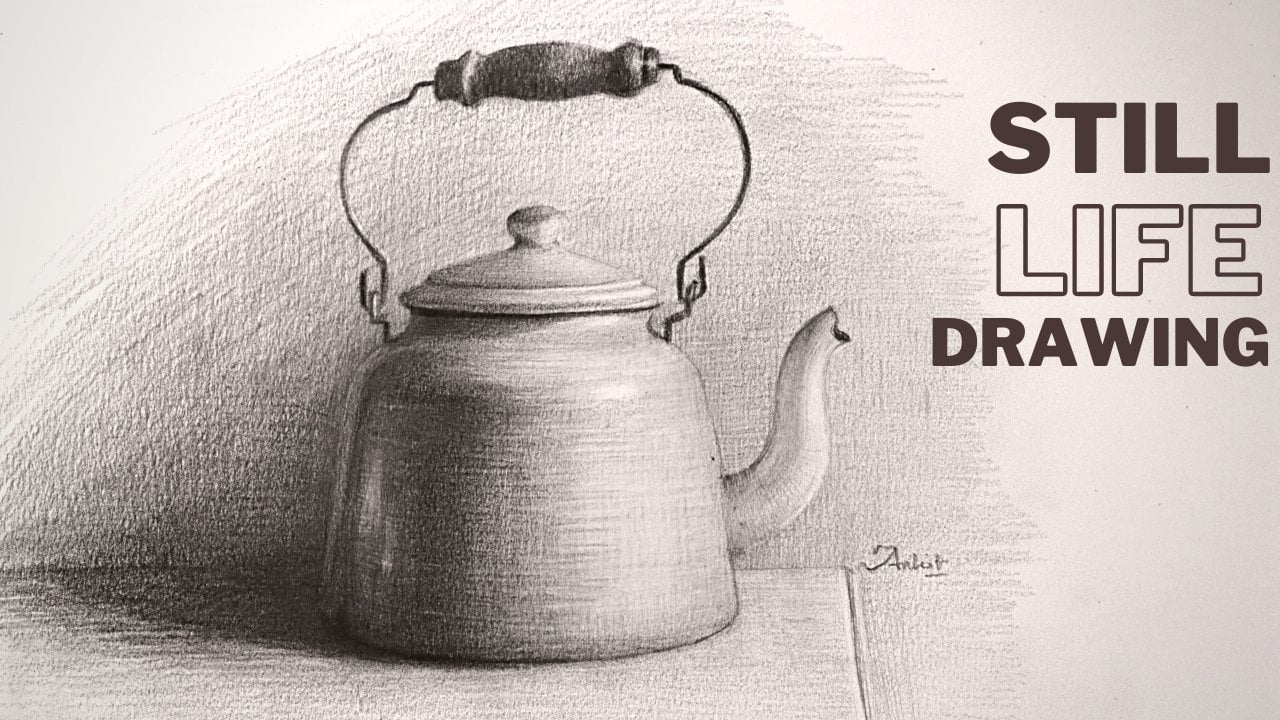
10. Shading Various Still life objects: After understanding the
grades and technique, we are going to
understand how to shade different
still life objects. So here I'm going to shade this class that outlines
has already been done. And you can see it's
a normal class, what we have used
in our daily usage. And you can see I'm
using the B pencil for that particular thing
to get the first layers. So here I'm going to use most of the technique that
has been used for shading here is going to
be circulism or contoring. Mostly in the curved
hatches format. So here you can see I'm using some vertical
hatches as well in the preliminary lines
because the center of this class is being filled
with vertical hatches, and a single layer has to be
all over around the object. Whenever we are going
to draw a steel object, you should keep this in mind. It will help us to get the realism when we are going to use the subtraction
method over there. You can see here in this
particular object as well. So you can see I am just
using the vertical hatches. Uh to get the first
primary lines. And then we define
few values as well. Now I'm going to use the curved hatches and which
is circular in nature. And following the real path, following the real
texture of this material. This is steel, and
whenever you are going to draw this stainless steel
thing, most of the time, you should do the circular ism or the curved hatches,
not the circulism, the curved hatches are
more and more important or the hatches are more
and more important. So this is the way we should do. And now I'm going to use the four B pencil for
adding more layers. So this is the second
layer in our drawing, and you can see
how gradually I am adding layers so that as of now, you can see I haven't
used any tool, and it came out beautifully. So even if you don't
have any tool, you can get the details as well. If you have tools or
if you want to get more and more realism into that rather than the
artistic results, you can do that as well. So you can see till now
I haven't used any tool. Now I'm going to use
a tool to show you the difference than that you
can actually understand. So I'm using the thin brush. It's a make a brush that
I've already told you, and gradually and very simply, I just mixing all those
things with each other and without having a fear of getting the things came out in
a different manner. Again, I'm adding more layers. This is the process
while using the brush. You have to have one stroke
of the brush, and then again, you are going to use the
pencil to add more layers, and then again, you
do the same thing. Now here you can see I'm subtracting a few values
that I've told you. First, you have to add all
the layers onto that drawing and don't be feared about
the highlights thing. Eventually, you are going to use to achieve it just by
the brush thing as well. Now we are in the
finishing stage of this particular glass, and you can see I'm using
the pencil eraser to define few high lights and which
came out very so beautifully. So you have to
keep this in mind, try to get all the
minute details in the reference image and
then try to achieve them. Into your drawing as well. You can see how the things have been gradually
changed from no tool, and here I'm used
other tools as well, and defining the values, defining the particular section. So this is about the
steel texture and how to achieve the different
textures of the materials using the
shedding technique. So now I'm moving towards
another a different topic here. I'm going to just let's
understand about the fur as well. And then in the coming section, we are going to understand it in detail with the
different objects, different subjects as well. So I'm going to draw the tail
of this beautiful squirrel, and just how to do it, just to understand it. You just follow the real flow of the hair of the
texture of the hair. So when you are
going to follow it, it will help you to create
it in a same manner. So whatever you see, whatever would be the kind of subject or anything
you want to draw, you just have to observe it and then follow it in a real manner. Follow it in the similar manner, which is already there. And you can see here, I just followed the path of the hair, and
I have drawn it. Don't be worried
about the tools. If you do not have
tools, even than that, you can achieve the realism just by following the
real reference image. Now let me use a tool
to help you understand how it how to differentiate the drawing
from without the tools. So I'm just gradually using the brush and then
mixing up all those values. And you can see that
how the mist has been created when you are
going to use such tools. This is just a glimpse of how to do different things with
a pencil and shade it. We are going to understand it in detail in
the coming lesson. So just be ready for rock and roll show and
understand the shading part. I'm going to see you in the
next lesson of this class.
11. Animal Portrait Shading & their Fur: Now we are moving towards
the difficult part of shading and which actually
seems to be difficult. Here we are going
to discuss about the animal fur and
how to shade them. For that, I have just pick this reference image of
a cute little puppy, which is a hairy one, and we are going to
understand how to actually get the shading
the fur specifically. So I'm just getting
some outlines. I'm just doing the free
hand thing and just trying to make a
similar one over here. And no such technique has been used like pencil
measurement, et cetera. Just a random strokes to let you understand
about the shading. So first of all, I'm just going to get the darker
areas as I usually do. And for that, I am not
following any exact pattern. I just want to have
some dark tones. This is the preliminary
tone, and for that, I'm using the tub pencil,
which is very important. Here, I'm using the
B or the tub pencil, which is quite a dark one and I'm just trying to
get event surface also. This is the first layer
where we have actually get the rough sketch of
that beautiful puppy. Now I'm going to add more layers by using
the four B nsel. Here I'm going to identify
the darker areas. First like nose and
eyes, also on the mouth. All these dark areas should be covered up by using
the four b vencil. The four b pencil help us
to get the darker area, which just apply
the light pressure. By just applying light pressure, we can get the dark area for other pencils like lower grade pencil, it
would be difficult. We have to apply more pressure, but here in four B pencil, when we are going to use
the higher grade pencil, we don't need to apply more pressure to get
the darker tones, and this is the
advantage of using the dark tone pencils
or higher gate pencils. Here you can see, I'm just identifying the teeth
of the dog as well. It's just a rough idea. I'm getting the teeth. I'm not going to follow the
real image real reference, not going to go to targeting the realism rather than just to understand the
basic phenomena, what we need to understand
and what we need to get in shading. Here you can see, I'm using the similar pencil
again for pencil. This is the third
layer, and again, I'm going to draw
to add more layers. Here you can see
eventually we can get all the dark tones
in a single layer, but this is not the correct approach of making a drawing, especially
for beginners. It is very important
to all of you should work layer
by layer rather than to putting all
layers in one go. Because there are certain
chances that you may damage the paper or you may went
up to the wrong results. So then you don't
have any options to actually correct those errors. So when you are going layer
by layer, you have a chance, you have an option to actually change the values or to the areas where
you need to work. You can see I'm again
using the fopen cel and just having some cross etchings,
which is very important. These are the diagonal tches, Let me understand you. You can see the flow
of the cross etching or the diagonal tching
should follow this pattern, but I'm showing here
using the arrow. When you are going
to draw the fur, you have to keep this
in mind all the time to follow this pattern
to get realistic furs. You can see I just follow the contours or you can
say larger contours to add more values and they are diagonal hatches as well and then the
contours as well. This is the process, what we're going to continue in the next lesson as
well. Stay tuned.
12. Adding Detailing in Animal Fur for Achieving Realism: So now in this episode
or in this lesson, we are adding more layers, more dark layers to get the realistic fur and how to add the details
in animal fur, which is very important,
and I'm here. You can see I'm following the
original path that we have already defined in
the last lesson and just following the path, using the two B pencil or
the HB pencil for that. And you can see I'm using the side of the
pencil and getting the hatches being done because when we are going
to mix all these stuff, it it will create a
realistic shaded values, what we can see in
the near future. So you can see I'm adding layers and
simply adding layers. That's it. Using the sides
of the pencil continuously. S. We should always
keep this in mind. Then whenever we
are adding layer, the layer should be
uniform and well graded. It should not be like
some patches being shown. So otherwise it will
damage the whole thing. So it should be uniform. Okay. Now we are
using the brush, and you can see with the brush, and gently and very softly
pushing the values and defining those areas where the dark values has
to be implemented. This also needs to
be very gradual, and it should not
actually the whole thing, the whole important thing
here to understand is not to damage the paper
while adding layers, which is very important. Again, I'm coming up with a two B pencil and
defining some edges of the e and just trying to get a few details
which are important. Each and every detail, each and every stroke of yours
will change the scenario. So always keep in mind that whenever you are
adding these stuffs, you should be very careful. Here is a tip that you
should always try to figure out the values from the larger area
to the smaller area. Always capture first
larger areas and add the details over there and then move towards
the small details. That will save a humenous
amount of time as well. After adding a few more layers, we come up to this result, and here you can see I'm
using the pencil eraser to define few highlights
of here like eyebrows, or some fur which
are highlighted. So you can see very
small details can be achieved by using
this pencil erasor. This is why this pencil
erasor is very important for any artist to have it
in their pencil kit. Even a single detail
like teeth or a tongue, which has been which is
requiring to add more details. O there, these stuffs
are very helpful. But always keep in
mind that you should not be in a hurry to
define those values. It should be very gentle. You can see a few moustache
also being reflected by this. And also, the more
you add layers, the more you go towards
the darker values, the more realism
you will achieve, because there will be a
light and shades drama, which has been
created subsequently. So you can see here
I am finishing it and working on the
year cap as well. And these values are dark as
compared to the face values. So I'm doing the same. And we can see how the
fur has been created, and what are the
results that we have achieved and By this, I think you can
understand how to achieve the values which
are there in animal fur. And the same approach you may use in any of
the animal fur, whether it is a bushy one or the small hair or
any kind of hair you can achieve just by
using this technique. So I'm going to see you in the
next lesson of this class, where we are going to take another animal and then find how to achieve their
first. Thank you.
13. Creating Shade in Eagle: So here we are going
to draw an eagle and see how it can be done
using the pencil. So I'm just draw the two lines, the horizontal and the vertigal, and then on this line, I'm going to draw the, the
beautiful eye of this eagle. And just by drawing
the eye of the eagle, it is very important to
get the correct expression of the eagle because
it looks very angry, and that need to be captured. Along with the eye, the beak
is also very important, and then we have to
take care of it. But here, I'm just adding
the layers into the eyes, and you can see, try to get the details
as near as possible. And with the help of pencil
measuring technique, I'm just following the
outlines of the fur as well. So here I'm using the two
B pencil, and eventually, after few minutes, I'm going to use the four B pencil as
well for the darker areas. Now I'm going to draw the
other things as well, like beak of the eagle
and the outer outlines, basically outlines
of the animal fur. So now I'm starting the
sheding part as well. And just using the
crossto the darker areas, and just following the
real image for that. Whenever you have
a reference image, you can have this option
to follow it completely. But just remember that you should not need
to copy that one, rather than just to take
this as a reference and then try to make
your own subject. So because it will not going to help you to understand
the shading process, if you are just simply copying the things rather than
to just understand and have an idea how the
work can be drawn. If you have no reference image, because many a times you
can find this that you have no reference image of the object and you
have to draw it. So you have to remember
and memorize this that how the animal fur were there when you are having a
reference image for that. So it will help you
to understand and to improve your muscle
memories as well. So here you can see I'm just
following the patterns of the fur and the
texture of the hair. Using the same
pencil will help me to save my time rather
than changing the pencil. We eventually going to
lower the confidence. So just use the same pencil and trying to vary the pressure, what I've told you in
the earlier lesson. So here you can see,
I'm just going to draw the big leaf like fur, and we are going to finish
it in the next lesson. And we will see how we can add layers to make
it a realistic one. We'll see you in
the next lesson. A
14. Finishing the Background: A Different Approach: Okay. So here we are going to
finish and define the fur. And for that, you can see
there's a black background, and here we are going to discuss about that
as well because background creation is very important and different
thing for drawing. So I'm using the eight
B pencil for that. You can see, which is
very dark eventually. And just creating a rough
background, not fine, not following the path or any kind of thing rather than just filling
up those areas, and then in the later on, we are going to smudge
all those things. So just creating a background, a black background for that, I'm using the AD pencil, which will help us to create to get the dark values
very, very quickly. So for that, I'm
using the AD pencil, and then you can see I'm just trying to mix it
up with the background and You don't need to follow the real thing or don't need to follow the exact thing,
what I'm also doing. Just get the
background for that, which I'm going to tell
you how to utilize them. Now I'm going to add
darkest layer in the eye. Why I'm doing, I'm just
going to understand you how the dark values help us or to change the whole
scenario, the whole drama. So I previously, we have drawn a puppy with a
lighter red pencils. Maximum four B we
used over there. But here, I'm going to
use the eight B pencil, and then you will
see the differences. And accordingly, you can choose your tools as well for
the shading purpose. So you can see here, I'm
going to use the brush, and then I'm mixing
those dark values with the background thing
and just trying to get the even
background surfaces. So for shading and
also in hyperism, saving time is a crucial thing. Otherwise, you will spoil your whole day creating
a portrait or a drawing. So for that, you have to have a smart mind as well to
save your time as well. In the less time, you can
add or you can do more work, and eventually it will save your time for other
works as well. So for that, you try to use darker pencils
and don't try to go very slowly specific in the darker areas where you know that everything is
going to be black as well. So you can see here, I have just done the
one layer thing, and you can see the
drawing has been. It looks like a finished one, and adding few more details will help us to achieve it
in a much less time. So we can see I'm using the phobi pencil for
the surrounding of the eye and also inside
the iris of that eye. The expression of the eye and capturing it, it
is very important. And if you fail to achieve the expression of
the eagle's eye, you won't be able to draw it. For that, you should
understand the expressions, and this is very,
very important. So now I'm just
following the path, what we have already decided in the previous lesson of
this particular class. You can see there, I
have decided or defined few values of the fur and the texture, the
flow of the fur. And here I'm just following the same fur and adding
the values layer by layer. And whenever you
are going to draw the darker value
portraits or drawing, you must understand that you should be relying
on the tools as well because dark values
are difficult to blend, difficult to be blend gradually
or in a graded manner. So for that, it is very
important to use those stuff. Now I'm doing some
reverse drawing. You can see here, I'm
using the eraser and uplifting those dark values
and defining the highlights, which is falling onto
the left of that animal. So you can see how beautifully
it has been created, and nature has given all
the colors, all the beauty. But the gray and the white and the black does have
its significance a lot. So for achieving those stuffs, you need to have a a
needed eraser for that. And you can see I'm just just observing the texture and then
following it accordingly. And then I'm using the pencil
eraser as well to defining more details into
the single leaf like for you can see here. And eventually, we are going to achieve
it in much less time. And now you can see, I am just finishing up with some rough
patches of background. You can see how the results came out with a
different techniques. I hope you like it, see you in the next lesson of
this class. Oh.
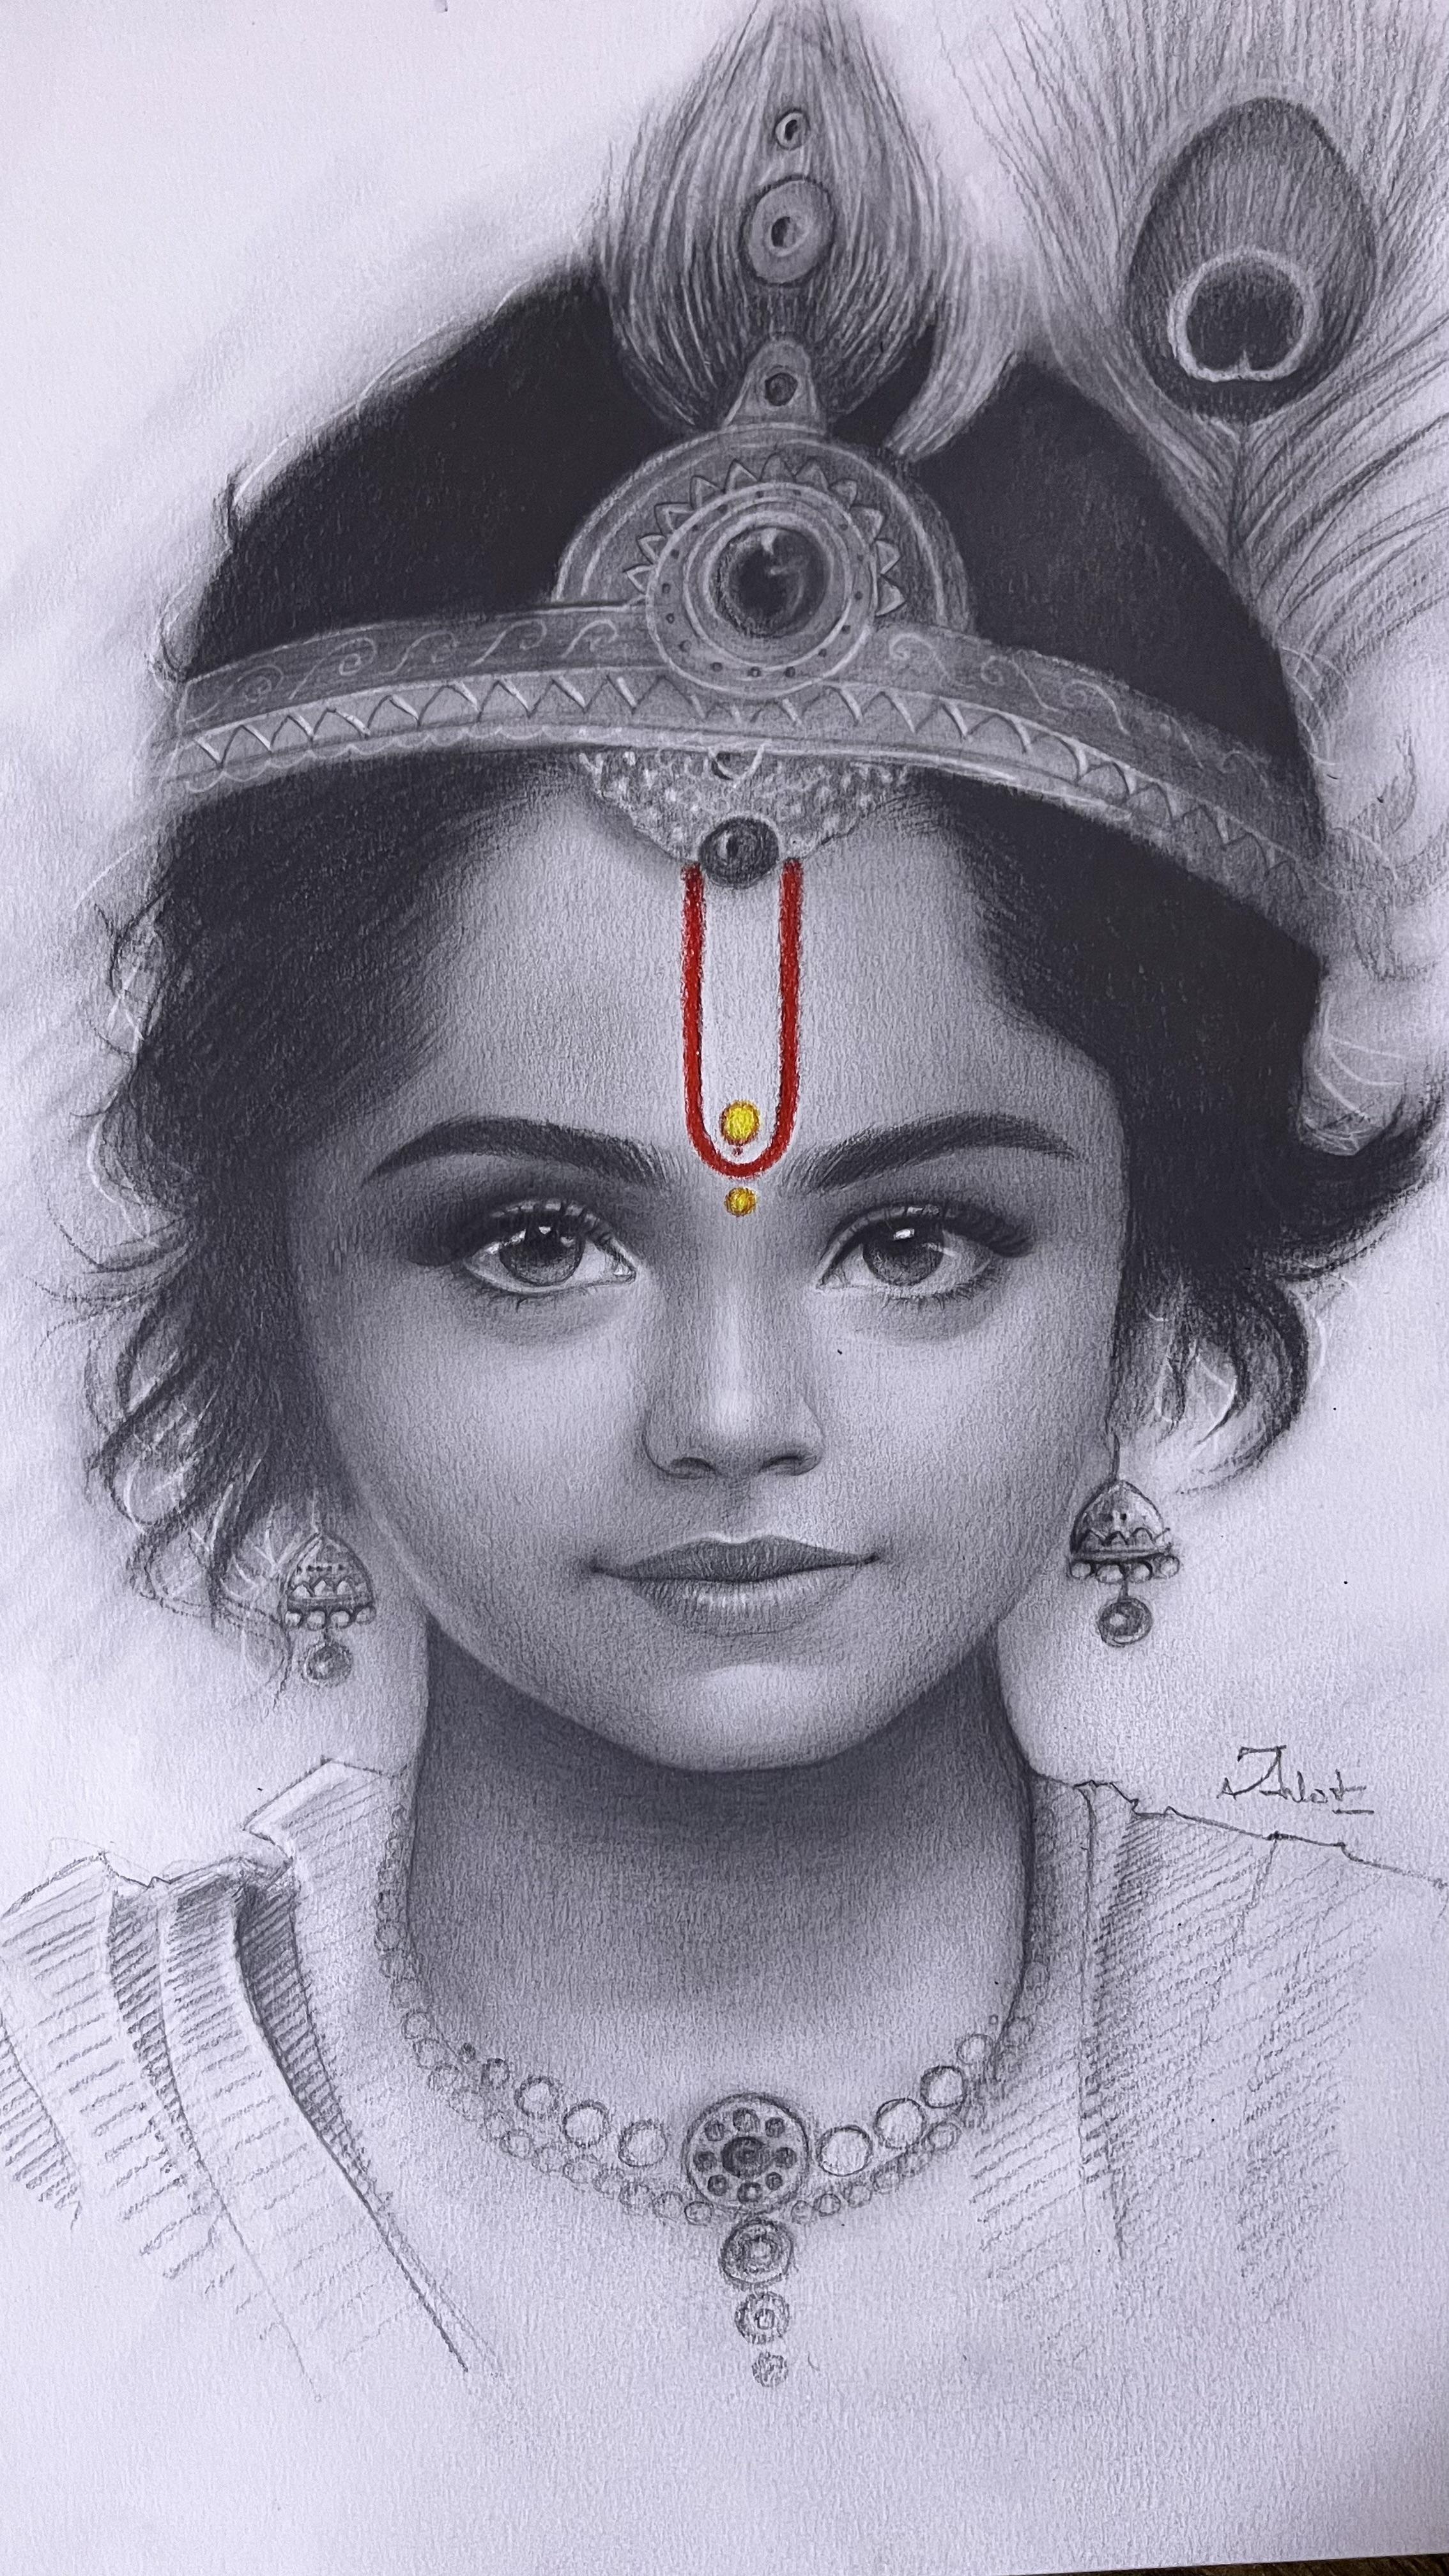
15. Basic Outlines & Shading the eyes of Human Portrait : So now the weight is over, and we are going to do
our human portrait, and this is the basic layer. The first layer, outlines I have already drawn as this is not the tutorial for this is not the class mean
for outline drawing. So outline have
already been drawn. This is by doing the pencil measuring things
and other stuffs. So again, I'm just going to
start with the shading part and I'm going to initiate
the first layer of I. So I'm starting with
the I and using the to B or B pencil for that, and just getting the outlines
as well using the HB ncil. And this is the HB ncil,
what I'm using here. And you can see I'm just
adding a few details as well. This is this is the
drawing of the kid, and it is a lot rama drawing. And you can see the innocence is there in the reference
image, you can see, and our whole challenge
while shading is to get that innocence and simplicity of that phase that should be
there in our drawing as well. So just doing the ase, the pupil portion first, and then moving towards
the upper portion, by adding a few more layers using the lower grade pencils, which may be HBB, or to B pencils as well. Then after in the second
layer or the third layer, we are moving towards the
dark layer pencils as well. And in the end, we can get up to the six B or eight
B pencils as well. So you can see in
the eyebrow as well, I am just doing
some garage etches, and this is the first layer. So you don't need to worry
about the finishing thing. Just try to add layers first and get the
things settled down. Then you can only observe
for which area you need to work a little bit differently or for which area you need
to add more things. For that thing, you
have to have patience. Those things you can't
see in the first layer. For first layer, you just
add layers in any way, just try to keep it very
light so that any changes, if needed, can be changed. Again, I'm using
the same pencil. For left and right eye, you should always
use the same pencil. Otherwise, the
results may different and subsequently it will create
a mess for your drawing. Don't allow those particular
things to be happened. And just to add few layers
of cross or diagonalizing. You can do it in any way. Uh, eventually, they
are going to mix it up. So don't need to be
worried about that. You just have to
have a rough idea of this particular portrait
or where you need to work, which area has required
more attention and which area not at all for
the matter of concern. So the first and foremost
area in any portrait, which are to be deal with in a very precise manner
is I, for sure. And if you are able to capture the beauty of that
particular eye or realism of that
particular eye, up to the level of 60, 70%, you have done a lot in
that portrait and you justify the thing in
realism of portrait. So that is very important that you keep in mind
all the time and just try to to give it a 100% in
the particular section of I. So I'm using the brush
you can see here, and I'm just adding or mixing the things so that more
layers can be applied. And you can see whenever you
are going to use the brush, you can see that a certain
change has been achieved, and that change, that particular change can
be a very fulfilling thing, or sometimes it is a very
fearful thing as well. It may change the
whole scenario. And sometimes you feel like
I have to do it all along, and you have to start it
from the zero as well. But here, I think we have achieved a good
amount of realism, and we don't need
to do it again. Our rework is not required
over here at least. And you can see the first
layer has been achieved. Then now we are coming towards the second layer and the
third layer as well. Just going to have a rough
idea of the forehead as well and just getting the
vertical hatches over there. You can see you in the
next lesson of this class.
16. Shadingb the Nose & Lips: So here, in the second part
of the portrait drawing, we are going to add more layers
to finish more features. And here we are going to
focusing about the nose, the lips, and the
cheeks as well. So I want your attention
all over here, and this is the second lesson of this portrait ring thing. And here you can see, I am adding again one
more layer onto the eye, what we have left
in the last lesson. We are going to start with
that particular thing. And you can see I'm
using the four b pencil. As I've told you, we will gradually enhance the
gradation of the pencil. Our higher grade pencils
will be implemented. So here we are going
to implement it, and you can see here Just
a very gradual thing. And you can see now I'm using the circulism
technique as well. Many of the area
in the small area, using small circles
to filled it. You can see here, I've
already zoomed it, how I'm using the small stuff, small, small size circles or contours to fill those areas. And here, I'm just having
an idea how the eyes can be seen and just subtracting a few values
using the needed eraser. And you can see how beautifully
it reflect when you use a highlighting
tool like eraser. So I always say
this that eraser is something which may be used for the highlighting stuff rather
than for the erasing stuff. So for any artist, it is very important to use eraser in an
intellectual manner, in a intelligent way. So whenever you
use it like that, you will achieve the results,
something like that. You can see here, a very, very interesting realism has been achieved inside
the eyes because I have created some glass like effect onto
the eye as well. Reflection. Has already been achieved just by putting some highlights
using the eraser. Now I am moving
toward the nose part, and you can see it
is a kid's portrait, so the nose and the lips should
be very soft and gentle. It It is under process thing because the
God has created like us. These things like nose or lips, all those features of the
face are not being developed. Over night. So it take time. That particular thing
should be shown, should we keep in
our mind before creating those portraits of specifically for kids as well. So you can see I'm using
the brush and just mixing up all the areas surrounded
with the nostriils. And a small highlight has
been left over there. You can see, just to let it keep it into the
three dimension. Now I am again using the
circulism technique. I'm creating a small size circle to create a very defined, very minute shading thing. For larger area, you
may use cross edges, vertical tches, any
kind of tches, as well. And now you can see I'm using the raiser and I've
created a small line, small vertical line with a tip with a strong tip of highlighted
portion, you can see, and eventually we have
achieved the nose, and the three
emenion of the nose has been achieved just by
the particular highlight. Now I'm working on the
lip portion as well, and you can see here I just following and just
following the pattern, the texture of the upper lip. In the upward direction, you can see the strokes are in upward direction
for the upper lip. And for the lower lip, it is downward direction. So always keep that in mind. Whenever you are going
to draw the portrait, and whenever you're going to draw the lip of that
particular face, you have to keep that in mind. Upper lip should have a
upper direction shading and the lower lip should have
a lower direction hatches. So the direction help us to
achieve the realistic lip. So for other things
like cheeks, chin, we are just filling those
areas with the cross hatches, diagonal hatches and
various hatches thing. And eventually we
are going to mix all those things just
by using the brush. So accordingly, we are working and moving towards
the finishing part as well. A small size brush will help
us to achieve the realism, and it won't let the things
came out from the border. So small size brush
really help us to achieve those
particular details. Now you can see I'm using the
thick brush and gradually, I'm going to change those values into the dark values
from the lighter values. And you can see I am defining those beautiful cheeks
of this small kid. And I think we have done our
part with the second layer, and the third layer
will help us to find the to find the
real realistic portrait. Here you can see. I'm adding
a few more details just by using the pencil eraser
over the lip portion, the lower lip portion, and you can see that when
I'm going to do that, it will help us to
achieve the realism, the realism or hyperism
in a different level.
17. Shading Hair & Finishing the Portrait: Now in the last topic. In the last lesson,
we're going to talk about the finishing
of the portrait. And you can see the highlights
has been reflecting in the reference
image onto the cheek of this beautiful portrait. So I am just doing the same with my drawing
and I have created a small highlight over there. So these are small detail help us to create a portrait
in a realistic manner, and if you don't
follow those stuffs, follows those things,
minute things. I won't help you to
create a good portrait. So always keep those
stuffs in mind. Now I'm moving towards the jewelry part,
which personally, I really don't like
to finish all of those because it is a very
much time taking process, and it's slow down the
process, the whole process. But here we are just trying
to get in a symbolic manner, and there is a crown you can see on to the top of the head, and just trying to get
a few details of that. Our main motive is to
to get the details of the face of the portrait
features of the face. But all the other stuffs
are also really useful. So you cannot skip
those details as well. So now I am going to
finish the hair as well, to initiate the hair with a lower grade pencil and
then finishing it out. You can see here and
just adding first layer by laying down the
pencil and just getting the first grade here,
you can see that. And eventually, we add
more and more layers and in a different direction so that it is similar to
the cross tching thing, but with a thick strokes, And now you can see, I just want to get
the fringe of here. Fringe here. You can say that. And with the similar stroke, I'm just finishing
those stuff as well. And then adding more layers
by using the same pencil, but I don't think that this pencil will help me to
achieve that dark values. So we have to add
different pencils as well. But first of all, we are
going to use a brush to smug those values and then see how
more pencil we need to add. So after having a
first layer of brush, I think that we need to add more layers and more dark value. So I am doing the same using the four p pencil and then
the tip of the pencil to actually get the more dark value and how actually
we can achieve it. You can see that. Even if
it is a darker pencil, but I don't think that it will help me to achieve
that dark value. So eventually we can see that more dark values if
that is required, we will add more
higher dark values like six B or
something like that. But first, we have to smudge all these stuffs so that
pain surface can be opted. Similarly onto the
other side of the face, we are going to add
more layers using the pencil and then see how much more pencil
grade is required. So every time you are going
to do the shading thing, you have to keep that
in mind and then decide according to
your convenience, to how much higher
grade pencil is required or how much high
grade pencil you want to use. But it has to have
some dark values, and it should justify
the portrait as well. If the eyelid or the iris or the pupil of
the eye is that much dark. So here should also darker
in the same manner. This is what gradation
is required. This is why you need to learn about the
gradation process, that equal grade should be equal dark grade of value
should be there everywhere. Monolithically. It should not be like hair is lighter or the uh the pupil is lighter
or why subverts of that. So this is why a six p pencil has also
been used over here. And now you can
see similarity in the black level in
the blackness of the the basically as portion
or the hair portion. Now I am working toward the
jewelry part as well again. And then I'm defining
few of the few of the pearls and the corals and the different type of Ratana So this is something which
is a very patient full work, and you need to have a lot
of patients to achieve that. And so over there, you can see there's a mad, big size madic, so
that also need to be to be finished up. And all these details
need to be added. But I don't think that
this is a part of the learning process because it's something that you
can do it by your own. And no such a specific
technique is required for that. You just have to
follow the real image, and then keep on drawing those stuffs like
pearl, emerald, or different type of jewelry
things like gold or silver, platinum, different, different
aspect diamond, also. So you have to follow
the original image. Now I'm using the brush to have a smooth
surface over there, and then I'm going to use the highlighted thing like
pencilator, or something. You can see here like that. So this is the way you should
finish or you may have, I think you may have
a better way to finish those stuffs
because this is not the learning process and this is not
our subject here. So we are not focusing
them more and more rather than just finish it
up in any manner, and then just focus
about on the real topic. So let me finish
these stops as well. Now I am moving towards
the forehead portion, and here you can see I'm
going to create a il, which is also there in
the reference image. This is the vaso basically, and then you can see
how I have done that, using the high thing,
pencil eraser. You can see, and then
I just removed a few of the dark
values over there, and then you can
see the highlighted portion has been came out. And then you can use
your creativity, actually, to add
colors onto them. And it will definitely
change the whole thing, and it will turn
around so many things. You can see here,
whenever I'm using this red pencil color, you can see the beauty has been has been eventually enhanced, and you can see the the
yellow ilk as well. So this is just the thing that if you have a
reference image like that, you have to do it accordingly. So that is why I'm doing
it over here as well, and you can see the
final results like that. I hope you understand
the whole process. I will see you in
the conclusion.
18. Conclusion: You made it.
Congratulations, my friends for completing this class. I hope this journey, through the fascinating
word of shedding, has been both enjoyable
and entertaining. Throughout this class, you have learned a various
aspect of shedding, like cross htching, diagonal
htching, vertigal hatching, and different forms of
contouring and circulism and the realism from basic to advanced methods used by
artists and professionals. I hope you have discovered how shading can transform
your brain, adding depth and texture. I'm sure that you have learned those skills which are required
for achieving realism. Whether it's in portrait still life or animal
portraits as well. But remember one thing, mastering shedding, it's
not about the technique. It's about unleashing
your creativity and creating your
own style as well, which is known as
your artistic voice. You have embarked on the path of becoming not just
an skilled artist, but a two storyteller. I request everyone to complete your project and submit the same in the project
gallery session so that your fellow classmates, and I also can see them and give you encouragement
and feedbacks. I hope that you
enjoyed this class. If you did, please make
sure to leave a review. And if you are interested
in learning further about portrait drawing and various
different techniques in drawing and painting, you can watch my other
skate classes as well. I have provided feelings
in the descriptions of my relatable ska classes.
Goodbye, my friends. Keep practicing
and keep shining. And I hope that I'll see you in my upcoming Skillshare
classes as well. Dara.
 Ankit Jasmatiya, Fine Artist