Transcripts
1. Introduction to Class: Once great artists
say, consistency beats talent when talent
doesn't practice. Most people think
drawing is a talent, but the truth is drawing
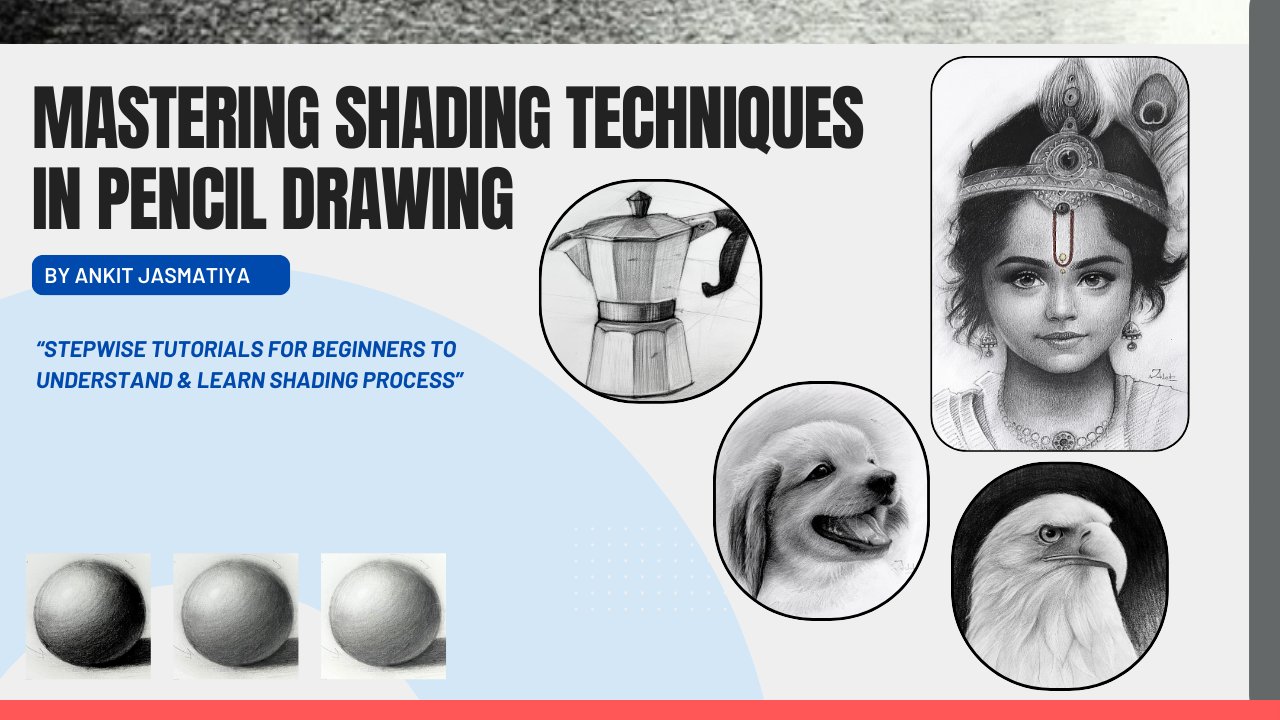
is a daily practice. Hi. I'm nk Jasmatiya. I'm an artist raised
in India and following my art passion for
almost last 15 years. And for that, I'm
uploading art tutorials on social media platforms
like YouTube and Instagram. This is my 11th class
on sketch here. I'm mostly working on hme media, and now I'm also exploring other possibilities
in paintings, in acrylic paintings
and waters as well. Welcome to Learn to draw 30 days drawing challenge in
which I am going to tell you about the
daily practices that will help you to
improve your drawing. In this class, I will show you a simple system to learn drawing
in a much easier manner. That even helped me improve my drawing
and shading skills. If you practice just
20 minutes in a day, I can assure that you will start seeing improvement
just within 30 days. So there are seven modules in this class in which I'm
going to tell you day wise practices and
week wide practices that will help you to learn
drawing step by step. In this class, you will learn
how to control over pencil, how to understand
light and shadow, how to build textures, how to create depth in drawing. And lastly, you
are able to create a realistic drawing
with a very simple way. By the end of this class, I'm sure that you will definitely see the
improvement in your drawing, and you are going to show it to me in the product
section as well. Let's begin this beautiful
journey of art and creativity.
2. Class Project & Material used: Now let's talk about
the class project and the materials that are
required for this class. The material requirement
is very basic. You need few basic
pencils like HB, two B, four B, and six B. Desirable pencil is
eight B if you have, and you need a normal eraser or you may have needed
eraser as well. For sharpening the pencil, you need basic
sharpeners as well. The most important
part is paper. So for practicing, you
may use newsprint papers, and for the good artwork, you need a little amount
of textured paper, not a very high textured paper, but a very decent amount of textured paper is very good like cartridge paper or
any drawing paper that is available
in local market. Now let's talk about
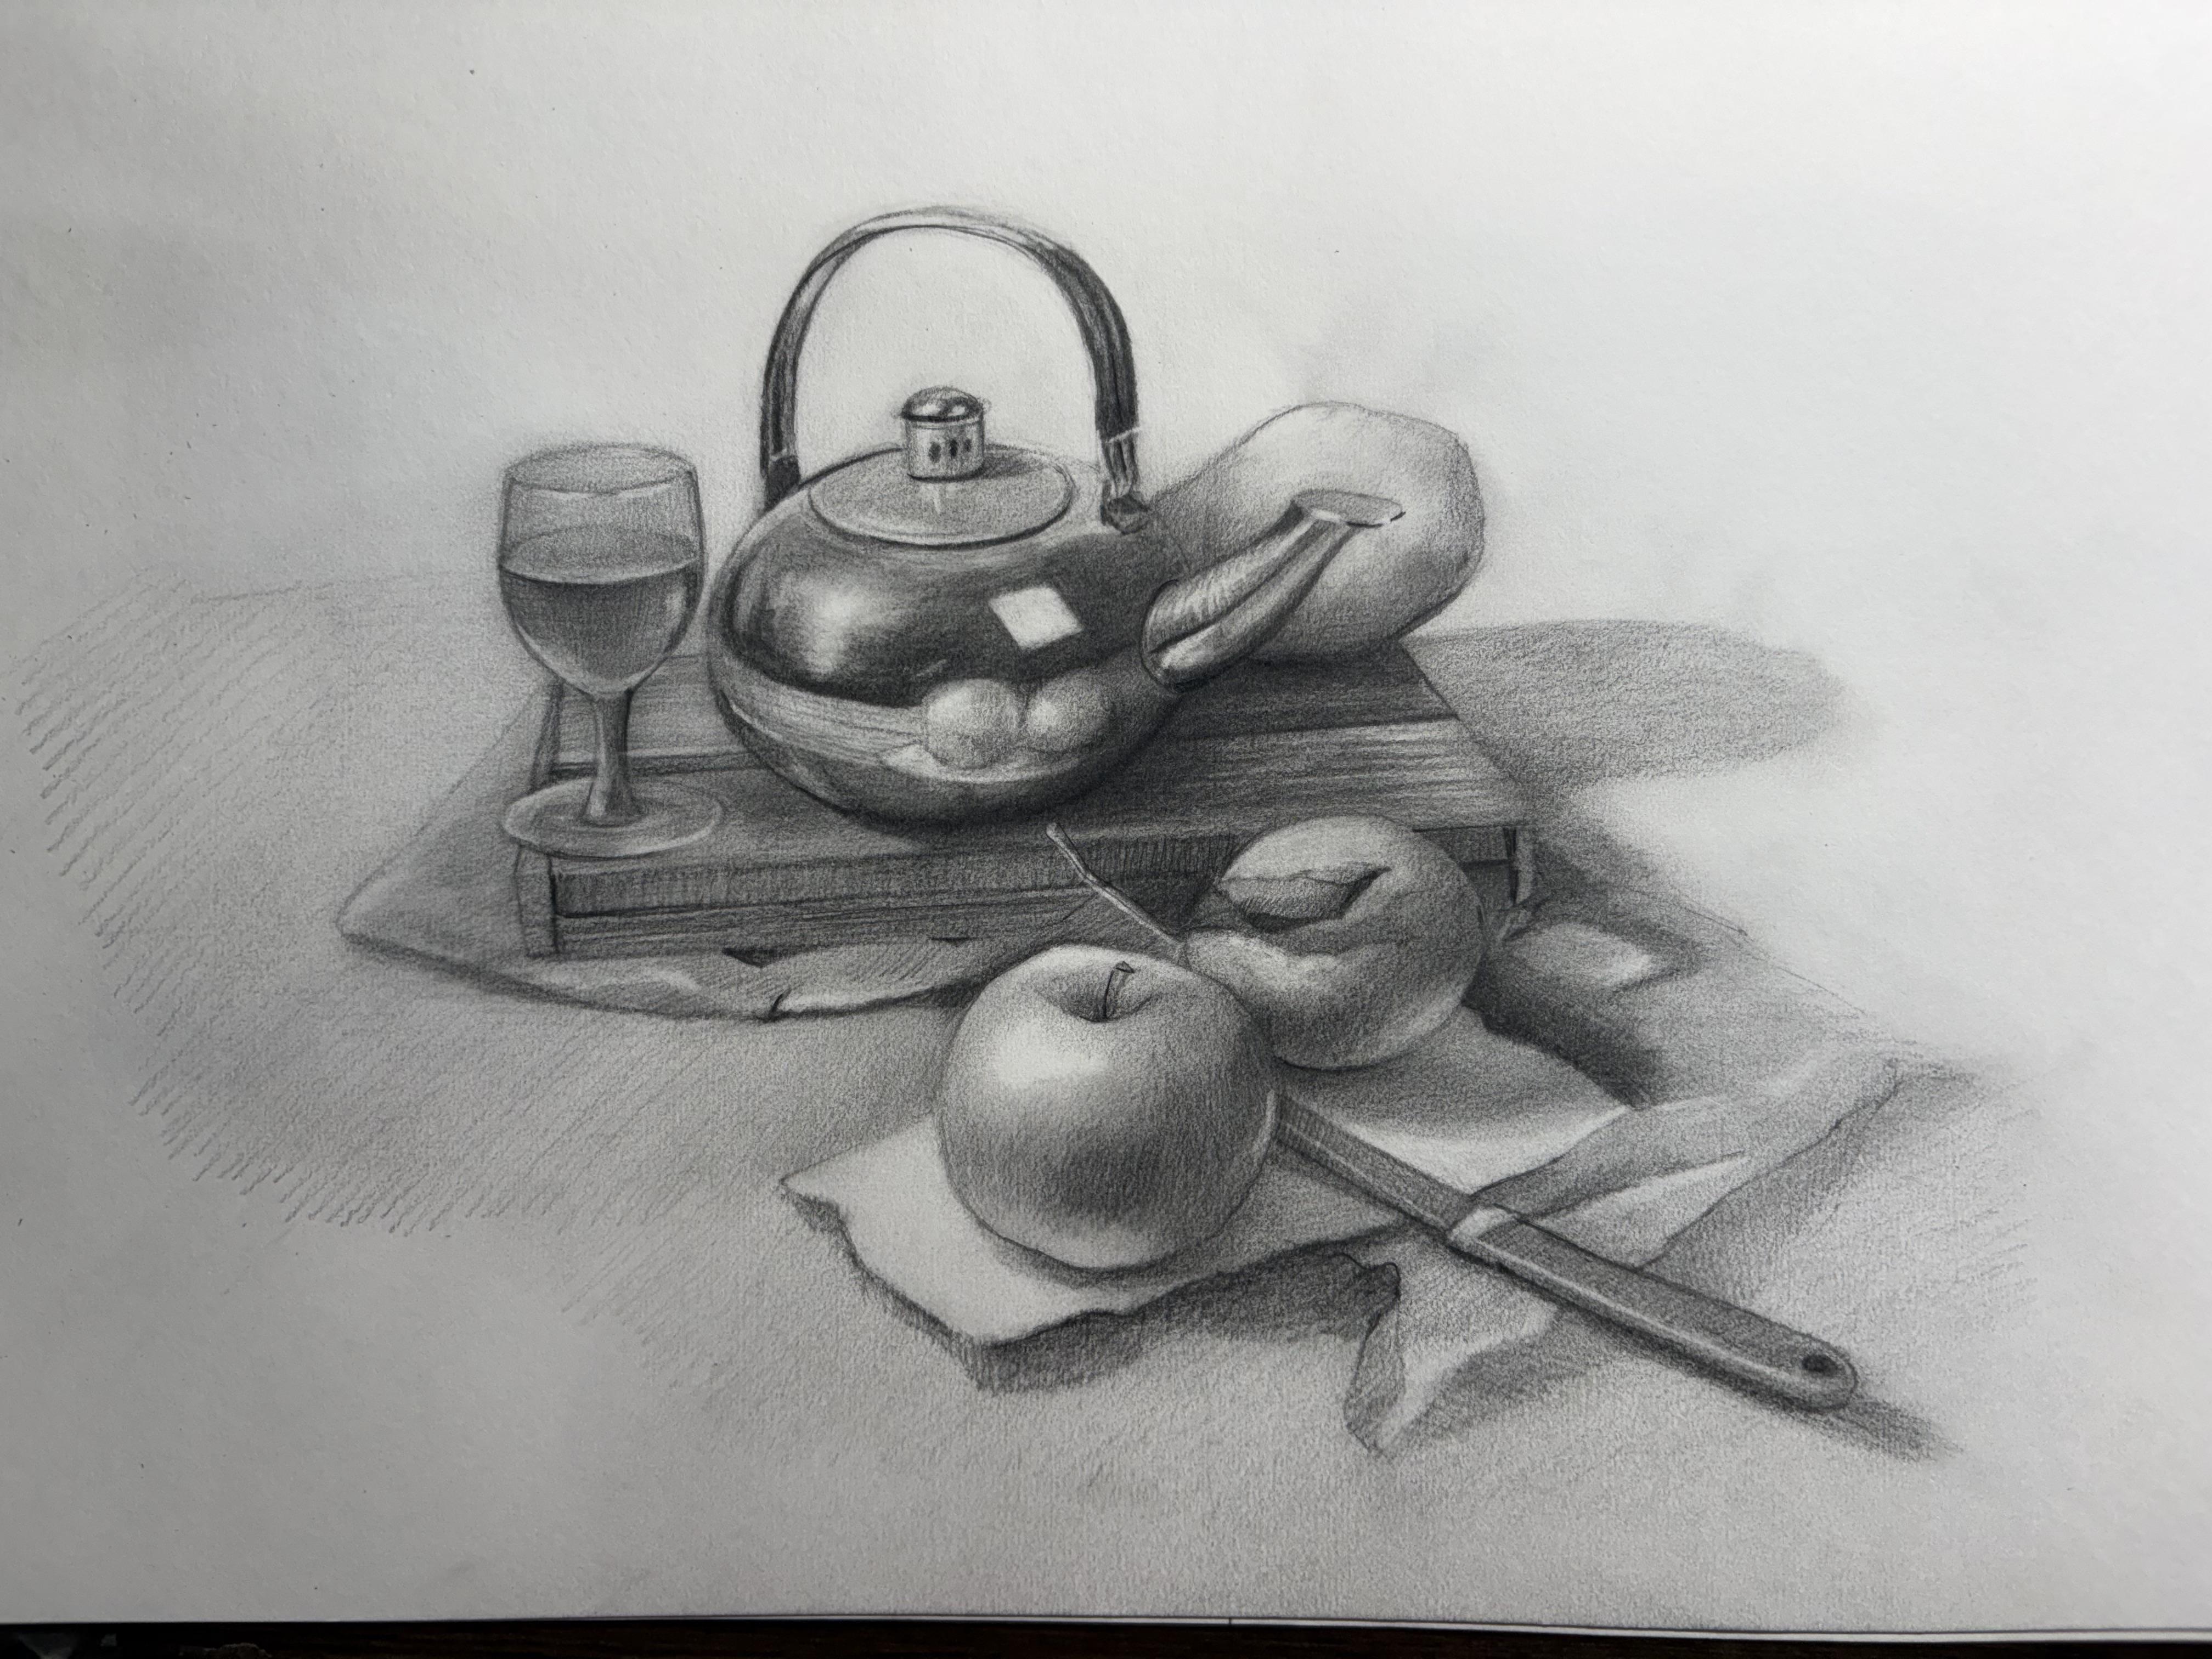
the class project, which is very important. In this class project,
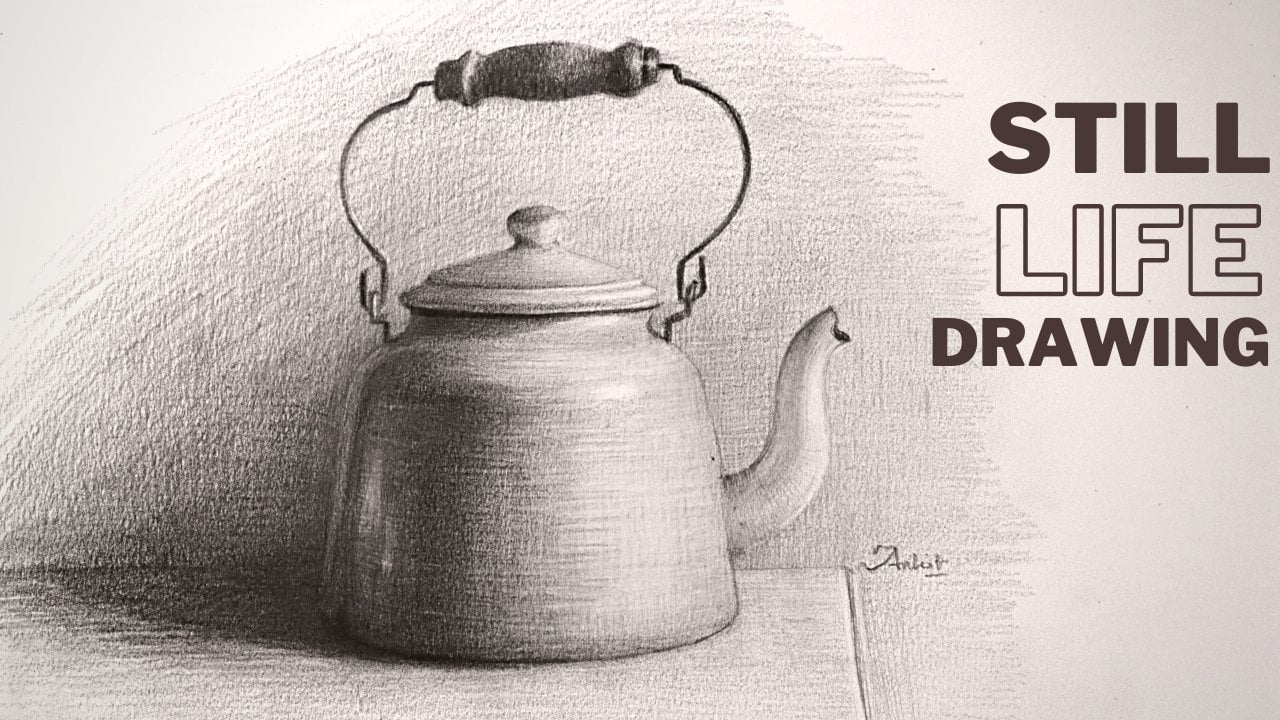
you need to create a simple s live drawing using sharing technique and task is to achieve the realism with
the correct proportion. Create your own
still life reference just to add some cups, jug, and some fruits and
try to arrange them in a particular manner and try to draw it as it looks like. Otherwise, you can use
my references as well, what I have already uploaded
in the project section. The other important part of the class project is
whatever the exercises, I'm going to tell
you, module wise, you need to put those practices
and your learning in the project
section and try to upload week wise challenges
that I have given to you in the first week what you need to do, and
then the second week. Likewise, you need to add
all these progress in the project section
so that I can see how much you have learned from
the class lesson itself. Let's begin a beautiful
journey of learning art
3. Line Control Technique: So welcome everyone. And let's first understand
the lesson one of this class. Here, we are going to talk
about the line control. This is the very
beginning of this class, and we just have to understand
what we are going to practice in from day to five. So as I've already told you, it has been a day
wide challenges, for the day one to five,
you need to practice this. First of all, we need to
draw the straight line. So let's understand this. We are going to
draw the straight line in a very slow manner like this without having
any breaking on it. No need to break it but how we are going to approach this is very important.
I'm not using the wrist. You can see that. I am using the elbow and the
shoulders for that. So this is how we're going to draw the slow line and
then the fast one also. This is the practice
that we need to do. We need to keep on doing that
for the whole class and for the whole lifetime for being good artist with a
good strokes ability. He need to understand this. The practice has
to keep going on. So here I am showing it
to you how the force has been come from the shoulder
and then the elbow, not from the wrist and
not from the fingers. They are strict.
They are freeze, only the shoulders and
then elbows are in action. Now the second practice
is parallel lines. So first line, if you draw, try to draw this parallel
line to the previous one. You need to draw it
very straight and with extreme amount of force has to be
applied over there. The lines may not be exactly
parallel to each other, but the aim is to make your
drawing with exact force, the line should show
a forceful line, not like a weakened line. Okay. So this is the aim to
what you need to achieve. The third practice
is curved lines. You need to draw curves. They may be parallel to each
other, most of the time. And if not, then also,
it is a good thing, but we need to understand
how to draw the curve lines. Again, here, I'm using
my wrist as well, so you can do it in both way. You can use the wrist as well
and the shoulders as well. For the narrow curves, you need to use
the wrist as well. And for the larger curves
with a lower arc value, you can use your
shoulders and the elbow. This is how we need to
draw the curve lines. Then the fourth practice that we need to do
is to draw ellipse. For ellipse, we
need to understand the circle that is having one diameter higher
than the another one, which is perpendicular
to each other. So here, this is how we
should draw the ellipse, just to make our hands free and to loosen
up a little bit of muscles it is just
like warming up sessions for any artist who
want to draw something. Let's say somebody wants to draw the portrait
or someone wants to draw the draw any
still live drawing, they need to understand first. I hope you understand
the line control. Let's meet in another lesson.
4. Control Pencil Pressure: In this lesson, we are going to understand about the
pressure control, how we can vary the pressure
over the pencil and achieve different strength of line and different thickness of line, which is very, very
important for an artist to understand drawing
in a deeper manner. So here, you can see, I am using the simple
pencil for that. I'm using the two B or the
four B pencil for that. Let's understand what is
pressure and just categorize the pressure from zero pressure 210 pressure
and 100 pressure. Hundred pressure is
the maximum pressure that you can apply
on the pencil, and zero pressure
is something which is no pressure over the pencil. So here you can see, I'm not
giving any such pressure. I'm just letting the pencil
to flow and very gradually, I am increasing the pressure. With a ten pressure, you can see that thickness of the
line has been increased, and with 100 pressure, you can see that I have given everything to the pencil to get the thickest
possible line weight of the pencil that we
can get from the pencil. Let's do it again. Just move your pencil from left to right, trying to get the
pressure gradually increases toward whenever we
are going towards the right. So this is simple drill. It is something which is very casually practice
that you can do. But it is very, very helpful
for you to understand when to give the pressure
over the pencil because there are many
artists I've seen. They find it very, very difficult to actually
vary the pressure. And they start the
project with a very much of pressure,
like 100 pressure. And then they think just
try to change something, but they are not
able to do the same. So we have to start any of our drawing with a zero
pressure or ten pressure, and then we gradually
increase as a pressure that we
need to understand. You can do the same thing with the side of the pencil,
what I'm showing you here. You can do keep on experimenting different
thing. You can see here. I'm doing the shading thing with the side of the pencil
and vary the pressure. So you can see not
only the line practice that we can actually
achieve by this method, we can also come to know
this that we can shade it in a certain way that you don't need any such tool for getting
the shading thing done. So you can see here this
is low and this is high. So how you can actually
go from low to high grading values of
the certain pencil. Also one more thing is very, very important here to let you understand the grades
of the pencil that we already have this
pencil in our stock and try to understand
this gradation thing. So let's say I'm using the B pencil and trying to
get the value of the two B, so I increasing the
pressure simply. So you don't need
a lot of pencil. You have to understand
it. Hope you understand. See you
in another lesson.
5. Basic Shading Technique: Now let's understand about
the basic shading and this practice that
you need to do from the day six to day ten. So here we are
going to understand the shading thing in
a very basic manner. Let's first understand
what is hatching, because many of you have
heard this word already. So hatching is something a line which is from a certain
angle from the horizontal. So you can see here, it may be a perpendicular
to the horizontal, but it may have certain
angle from the horizontal. Any line which is having certain angle from
the horizontal may be considered
as hatching line. So the bunch of lines, if more than one line is there, so we may consider
it as a hatching. So let's understand, let's break it down in a simpler way. What is cross hatching? Cross hatching is
something you add two lines which are in different angle from
the horizontal and they meet and they
cross each other. So the word cross
actually came out of it, and it is just like a mesh. Okay, it's a mesh of
simple lines and creating some grades that will make the drawing from two dimensional to the three
dimensional thing. So here you can see that. It's a mesh, and just to
actually express the darkness, the depth of certain things, we can use this. I'm going to tell you
how we're going to use first understand
the basic phenomena. You may sound it
very basic things, but there are many many students who actually don't
understand this. That's why I'm trying to get the things very easy for
everyone to understand. Let's talk about the third
one that is circular shading. So what is circular shading? We are going to create small or maybe the bigger
circular ellipse. Okay. And then we're going
to actually adding values. So you can see here let's took another simple
example of creating a cylinder and then
how I actually achieved it in a very,
very basic manner. Not going to add
any toll for that, just trying to get the lines
and the circular motions. You can see I'm showing you many different
circular shadings. Then the fourth part
is smooth blending. Okay. For a smooth blending, we need to understand we need to use the sides
of the pencil first. And you can see there are a lot of values that
we achieve over here, and this is how actually we are going to use we're
going to use our pencil. And then we may add some
tools as well for that. But first understand how to
use the sides of the pencil. We need to light
down the pencil, pick the pencil from its
back and then try to get most of the graphite
element on the paper. Then we're going to use
this brush, as I told you. This is the make a brush, and then I'm trying to smudge
all the graphite element, which is already there
on the paper and just trying to blend that thing onto the paper so
that we can actually get the smooth surface
of the shaded portion. So the very important
point over here is value in a scale. So in scale form, we need to understand
the values, how we can actually get the higher values just by using the same pencil and not going
to change pencil a lot. So that may reduce
the time also. And then that also increase the confidence
that you may have. So here you can see, I'm
just applying the pressure, as I've already told you in the previous lesson
of this class, how I actually enhance the pressure to get the higher
values of the same pencil. Only practice shading
for these days, I'm going to see you
in the next lesson.
6. Forms & 3D Thinking: So here from day 11 to 15, we are going to
understand the forms and our three D thinking
of any object. So here you can see I have
already drawn a cylinder. Let you understand how we can actually think of a three
dimensional object, just from the two
dimensional object, just by adding
shading into that. So you can see there is a line, and then I have created
a plane just from the line just by adding
some values over there. Here you can see the are
very simple example. I'm going to take a
cone and then try to have drawn a
triangle, you can see, and now I'm converting
it into a cone thing, this by adding few lines
and shadings over there. So you can see I'm using
the four B pencil for that. You may use a two
B pencil for that. There's nothing
different just to understand how you can
actually apply the pressure. Just vary the pressure and then get the different
results for that. So here you can see
I am adding values. In the first layer, I
just added the value. And let's understand
there is a light which is coming from the arrow I
have shown over there. So there must be a
shaded portion on the surface on which it
is actually relying. So that's why I have created
a shaded value over there. And then I'm adding values. And then in the end, I'm going to use brush for that and how actually to
settle the values, how actually getting
the smooth surface of that particular object
that has been created from a simple triangle
to a cone thing. And you can see that it
is very, very simple. You just have to follow the
correct process for that. If your process is okay, now here you can see, I'm going to use needed eraser. I've already mentioned this. So now for that, that portion in which the
light is actually impacting, so it may have a highlighted
portion over there, and then another part of
that particular object, which is not getting that
much of light, so it is dark. So by adding more values, and now I'm using you can see
the pencil eraser for that. I'm just trying to get some
contours over there of lines of white lines because this is very,
very useful pencil. You can see it is
a eraser pencil, and it will help us
to get these values. I'm going to see you
in the next lesson.
7. Shading Approach: So now treat this lesson as a bonus for you to
understand two more shapes. I'm going to tell you here. First one is the sphere
and how we convert the simple circular
shape you can see here how I am going to convert
this circle to the sphere. So I assume the light is
coming from the left. And as you can see, I
mentioned the arrow as well. And then I have
created some hatches. That's a very simple hatches. You don't need to
think of it much. Just try to lay
down the pencil and pick the pencil from the back of it and far from the lead portion and then
try to add layers over it. You can see here how I'm using the circular shading
and the cross hatching in a same object and just trying to get the particular shape of this sphere. And trying to get as
metallic as possible. And I haven't changed
the pencil yet. Using the lighter
grade of the pencil. This one is four B,
what I'm using here. You may use a two B pencil
as well for that and just trying to get the shape correct because it's a sphere, it should look like a sphere. It should look like
metallic sphere. So for that, I am just
finalizing its outline and then I'm going to add more layers onto
the surface of it. So now here you can see that
how I am actually adding more hatches and simply mixing up with the
circular hatches. So you can see how I am using
the both types of shedding. One is circular and
then another one is the diagonal hatches. I'm trying to mixing
it up with each other, not going to use
a tool as of now and trying to get as
close as possible. I'm continue to doing the same
thing in a simpler manner, and now I'm going to
use the brush as well and the surface on which this
object is actually relying, I'm just going to add a few
more horizontal hatches over there just to represent the shaded portion
onto the surface. Then I'm going to use the brush. The most important
thing that you need to understand and keep in mind, whenever you are
going to use a brush, you don't need to add pressure. Okay. So just try to get it as flowy as possible as
easy onto the paper. Don't need to put
a lot of pressure. Don't be too harsh on the paper, say in another manner. And then try to get the
details as real as possible. O here, you can see that. So this particular segment, it is the darkest segment, what I'm showing you here. I just give you
more examples which will eventually help you
in this particular class. So I'm going to draw a glass. You can see how I created
the shape of it just by using the vertical line and then the inclined lines as well, and trying to get
the two ellipse. And then I just imagine the light is coming from
that particular portion, though another one portion
is the darkest one. I'm using the same principle
as I use it for the sphere, just to help you out to
have some more examples, and you can practice it as well and show it to me on the
project section as well. So here you can see, I use the brush and then I have
come up with another layer, which is a darker pencil. Let's say, it is a
six B pencil and then trying to get the values
as dark as possible. Then I'm coming up
with the pencil eraser to get some lines over on it, to get the metallic
texture onto that. And then finally finishing it, I'm going to see you
in the next lesson.
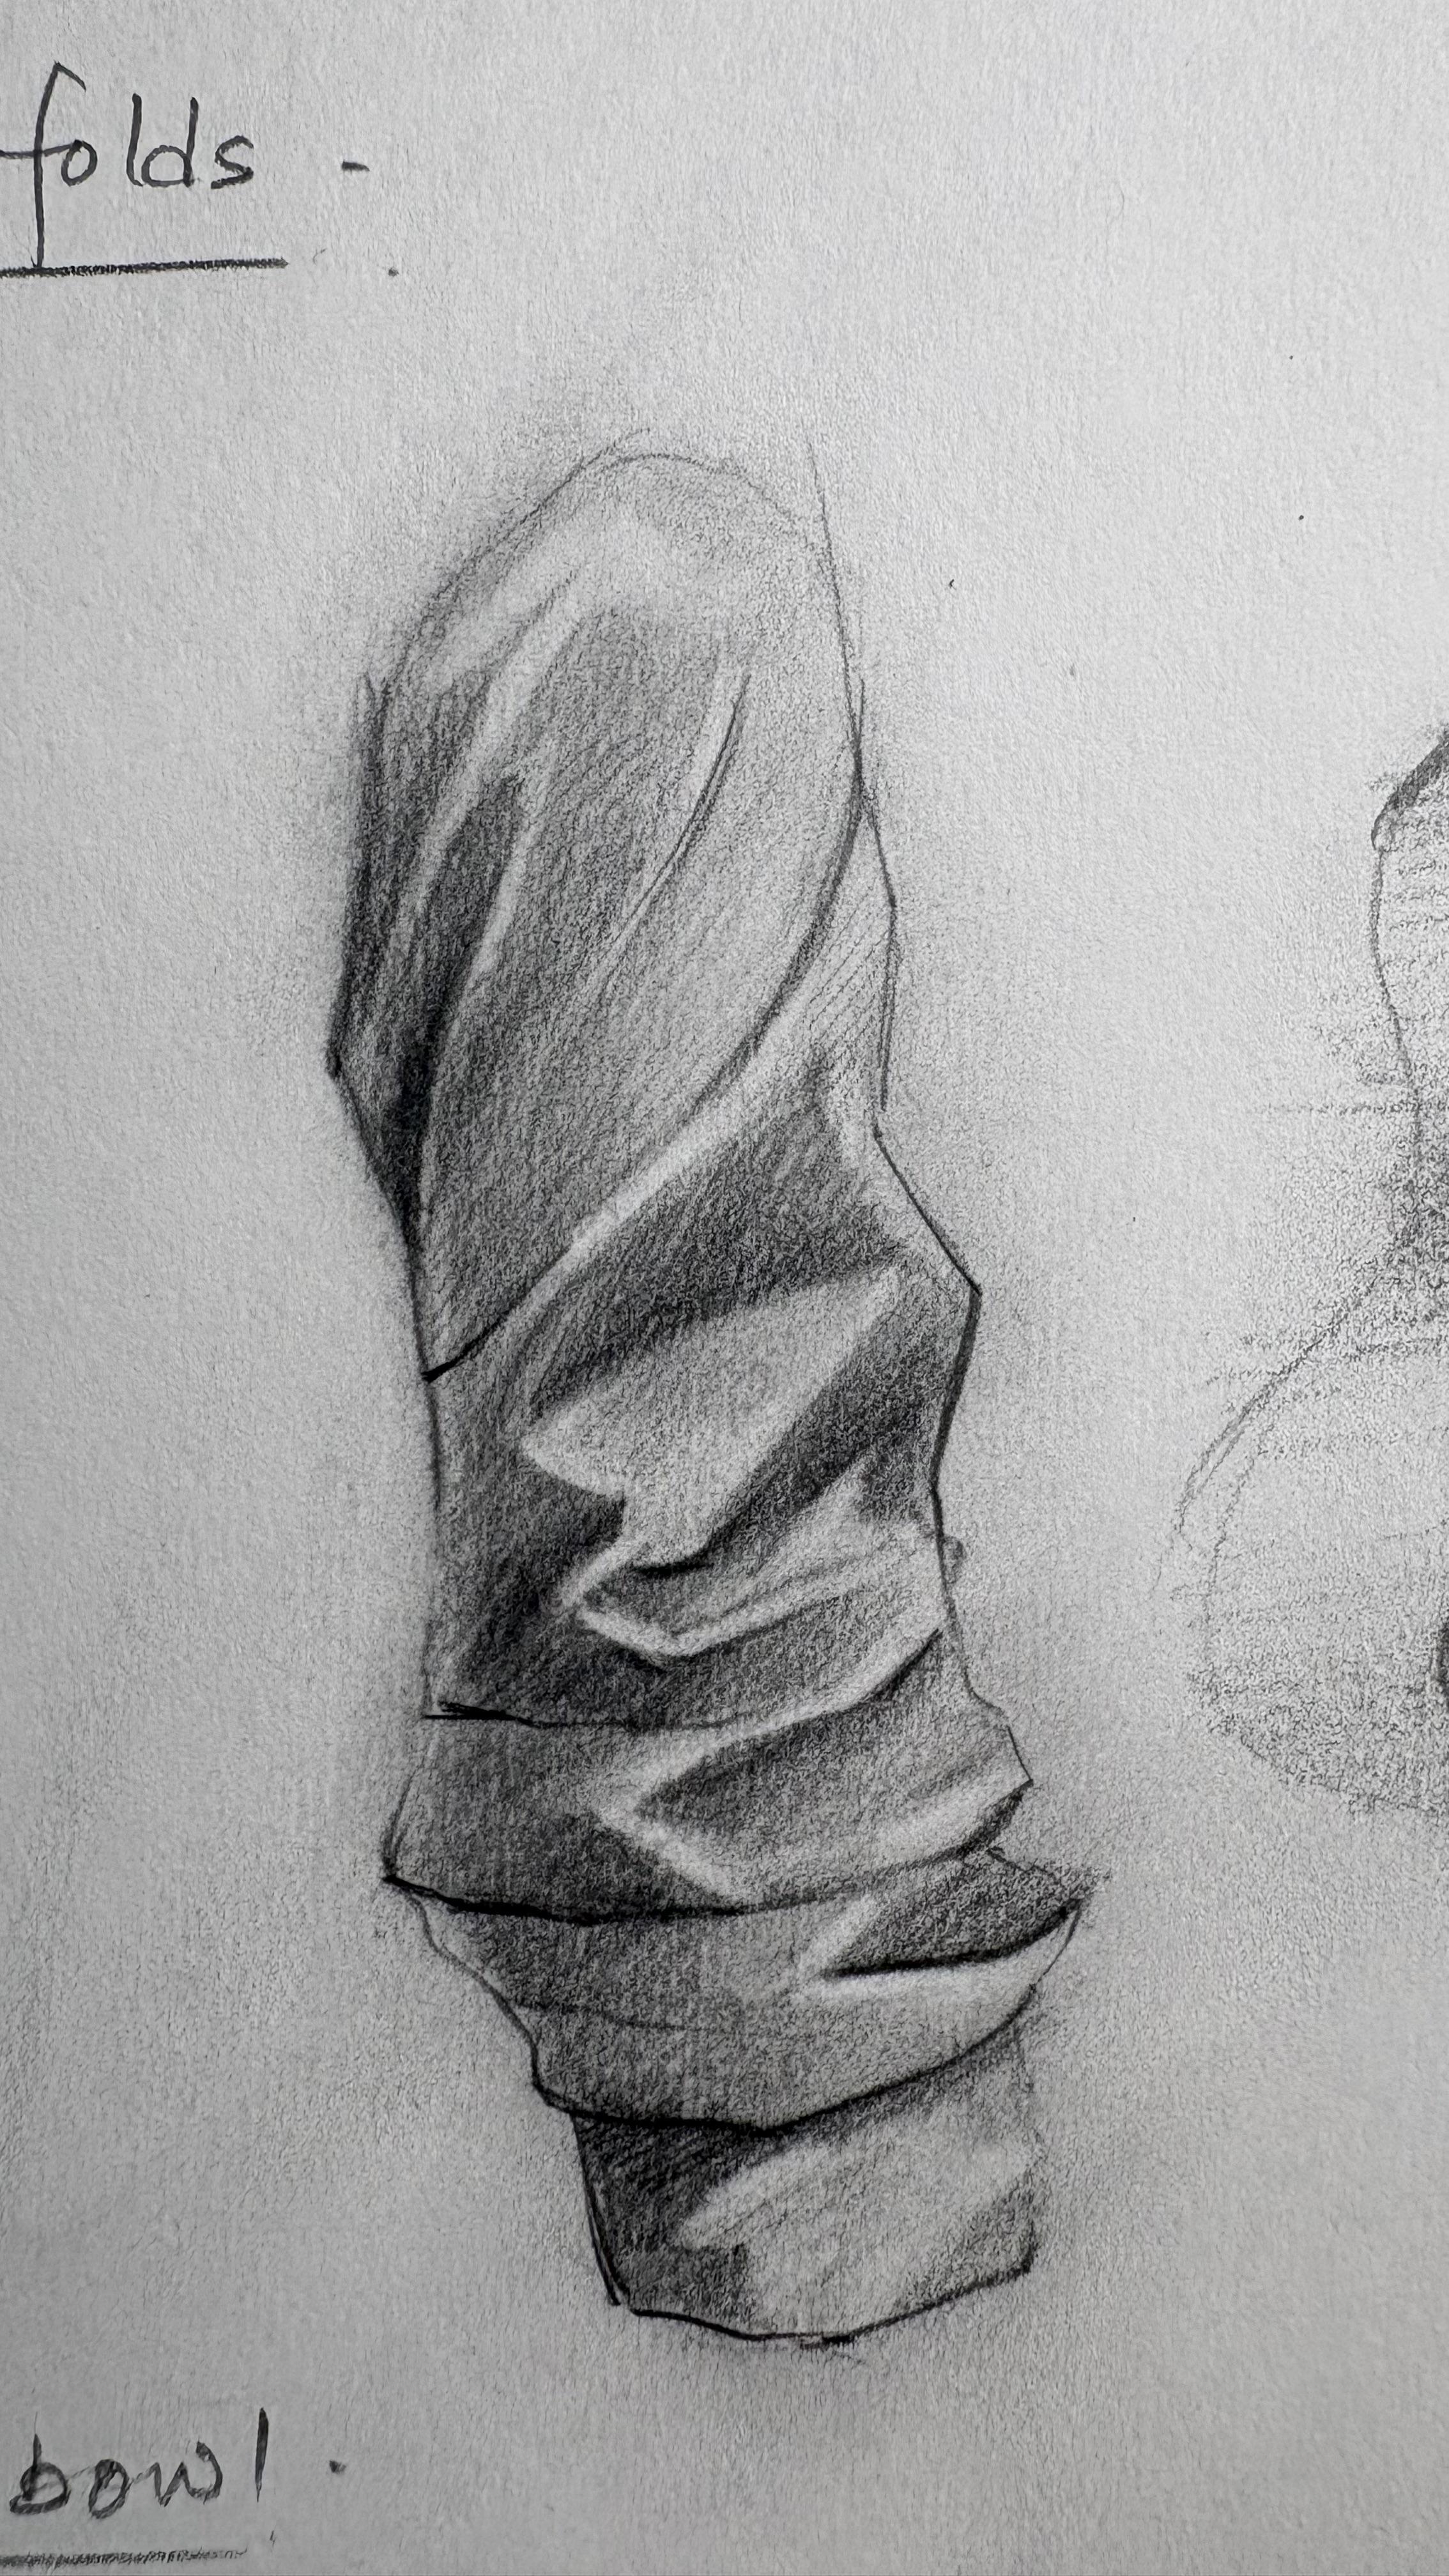
8. Various Texture Shading : Now let's jump into another lesson of this class in which we are
going to talk about the texture and how we're going to achieve it by adding
shading onto any object. So here, these practices you
should do on day 16 to 20. And here, I'm going to draw a clothe fold and how are
you going to represent? Because this one is
very, very important. And many of the artists and students actually
find it very difficult to get the exact texture and how to actually get the fold
over the clothes thing. So here I'm going to
take a simple example. And these are actually
cuffling of a shirt. You may treat it like this. And then I'm going to add more values over on it just by putting some
hatching thing and trying to get the
values as close as possible and trying to get the hatching thing all
over on the object first. This is a very important thing. First, you have to
add all the values, possible values in a very
lighter manner all over the object so that you
can see a gray portion, and then you can actually
find out where is the highlights and where is the dark portion of
that particular object. So first thing
first, you should do all the gray tone,
simple manner. And then trying to get the darker tones over
the paper by adding few more values by using
the same pencil or you may use a very another pencil
which is higher in grade, let's say, if you
started with a two B, then you may use four B or
six B for the next layer. Okay, so this is how
we should do that. And then we are going to
add values over on it. You can see how I'm
actually finding out the blocks first and then adding values onto these blocks. And the rest portion of this particular shape
has not taken care. So the portion on which
we have actually add values that are going to help us to find out
the highlights. So this is a very crucial
thing that every artist should understand and try to
implement the same process, what I have told you here
you can see, as of now, it looked like a two
D thing and with a very deoriated shading. But when we are going to use
tools to get the values, then you can actually
understand how things has been transformed and the real texture of the clothes actually came up. Many of you artists also think that how actually you can also achieve the
drawing in that realism. But initially, you may
struggle with that. But by time and practice, you
can actually achieve that. So here you can see, I am
going to use the brush, a flat brush, make a brush, and trying to get
the surface smooth. Okay, trying to get
the shading smooth. And then I'm coming up with a needed eraser to find
out the highlights. This is very crucial thing. When you are going
to do this now, then you understand your
object is actually coming out of the from the two D plane to the three D plane, actually. But you have to have
a good understanding of using this particular
needed eraser tool. Here, actually, the
skills are very important to get it correctly. I'm also doing in
a simpler manner. Every time I use it, I just create a tip of it
just by my own hands and then trying to get
to it again to remove some dark values. And then I'm adding few more
higher values by adding pressure onto the paper with a similar kind of a pencil.
Let's say four B here. And in that way, if we go like that only now, let's say for 10
minutes and 15 minutes, we can actually get the
real texture of the paper. Over here, you can see that. So this is how we should
approach cloth folded clothes. Now, coming up onto
another object, let's take another object. I'm going to take a
metal ball over here. That I'm going to
do it very quickly. It is just another
object to let you give a simple hint of another object and with a different texture.
This is very important. Cloth does have a
different texture, and metal bowls does have a different texture
onto its surface. So for any metal objects, we just rely on the
hatchings not mixing up with another technique, let's say, circulism, et cetera, we just going to follow
the hatching thing. Maybe it is a
circular hatching or maybe it is a vertical hatching, you can see here, I'm using
the vertical hatches as well. And then just trying to block it down few darker values and mixing it up with the lighter
values of bunch of lines. So when I'm going to do this, when anyone going to do this, they will definitely get the results as
close as possible. And it's about time, how much time you are actually going
to give it to your drawing. And if you give a
good amount of time, you can actually get the results done if you follow the
process correctly. You can see I'm using
the brush as well, trying to get the values a
little dilute with the paper, and then I'm going to use brush, ins which I'm going
to show it here. This is how we should
actually create the texture on the surface.
9. Hair Shading Bonus: Well, let's understand
the last texture. Here, I'm going to
show it in this class. So here I'm going to draw
the strand of a here, and let's understand the texture that is actually needed
to draw the here, which is, again, a
very complicated one. And in the right, I have shown you one example. It's a curly strand, and another one that
I am drawing here, this is less curly, but it is a wave that is actually we need to see how we are going
to approach it. So I just bifurcated the highlighted portion
and the darker portion. And in the same manner, I'm going to follow the path. So I'm going to use the four
B pencil, you can see here. I'm using the four B pencil for that to get the lines correct. And it's a curve lines. You can see the lines
are curve in nature and follow the actual
path of the here. And now I'm adding more values, just trying to
pressurize the pencil, pressurize the pencil,
not pressurize. It's pressurizing the pencil. And uh Then onto
another surface. What I have already
mentioned, the darker values. And then I'm coming up
with a brush thing trying to mixing up all these
values with each other. And you can see how I actually
mixing up with each other, smudging it up with each other, not going to getting the hard pressure just
with the brussels of this brush and trying to mix all these things
with each other. You should also do in the
same manner very patiently. And then I'm going to
use the pencil eraser and trying to get the
highlighted portion and follow the actual path that
already been drawn and just trying to add highlights onto the surface
of this strength. We can see how we are
going to do that. And when you are going to achieve Inw you
will find it very easy. The moment you achieve
it, you find it, this is not that difficult. But when you see and imagining something that is very difficult and not
going to do that, then you find it very difficult. So whatever you see
in your daily life, just trying to draw it and see how the things are
actually working for you. So I am adding more values
in the darker values. You can go up to the NE level, the most blackish value as well. But that is what you need to see that practice is all about how much you understand from it. So when you understand it, you don't need to go far. Okay, so this is
how about the hair. And again, I'm coming up with this brush this pencil eraser, then trying to add values. Hope you understand
the hair textures. I'm going to see you in the next important lesson
of this class. Stay tuned.
10. Creating an Object: Now we're going to talk about a real object shading technique and how to create an object, a real object, and then
how to shade it out. So this is the practice that we need to do on a regular basis to actually practicing about the outlines of any object
and then how to shade it out. So this is a day 21 to 25. And for this particular week, we are going to understand this how to actually draw any object, which we can see
in our real life. So here I'm going to draw
a cup, a simple cup, a tea cup and how we are
going to achieve it, how we are going to get the outlines of it,
you can see here. I just have drawn
a vertical line, vertical axis and
just trying to get the symmetricity of this object in the left segment and
the right segment as well. And then trying to get
the handle of this cup. So this is the shape, outline shape of this object, which may seem very flat when
we are going to start it. But when we are going
to add shades on it, you can actually get
the real cup shape. So for shading it out, I'm going to use a four B pencil and you can see how
I'm going to draw how I'm going to
shade it out by using the vertical hatches and the
circular hatches as well. So the technique is the only thing that will help you to achieve
the real object. And rest, things are
not that important. So any object you can take, but the technique
that I've already told you that has to be uniform. And with a minor
or minute changes, you can actually get this
particular thing done. So you can see here, I
have used two pencils. One is B pencil and
another one is four B, what I'm actually using
right now and trying to add more darker tones
onto the subject. And similarly, I'm going to use the brush for the
smooth blending of this graphite values and trying to get the even surface
all over onto the object. If it is a lighter shades, it may reflect the
lighter tones, and if it is a hard
and dark shapes, dark shades, it may
create dark tones. So by adding more layers, I'm using the six B pencil
layer, you can see, and just trying to get more
dark values of the surface. And then I'm using this
pencil eraser to actually highlighting a few values of the cup to make
it more realistic. You can actually use it and trying to get the values
as real as possible. Maybe it may be contorts, it may be curve hatches, or it may be the shaded
values of this object. And this is how we
finish this up.
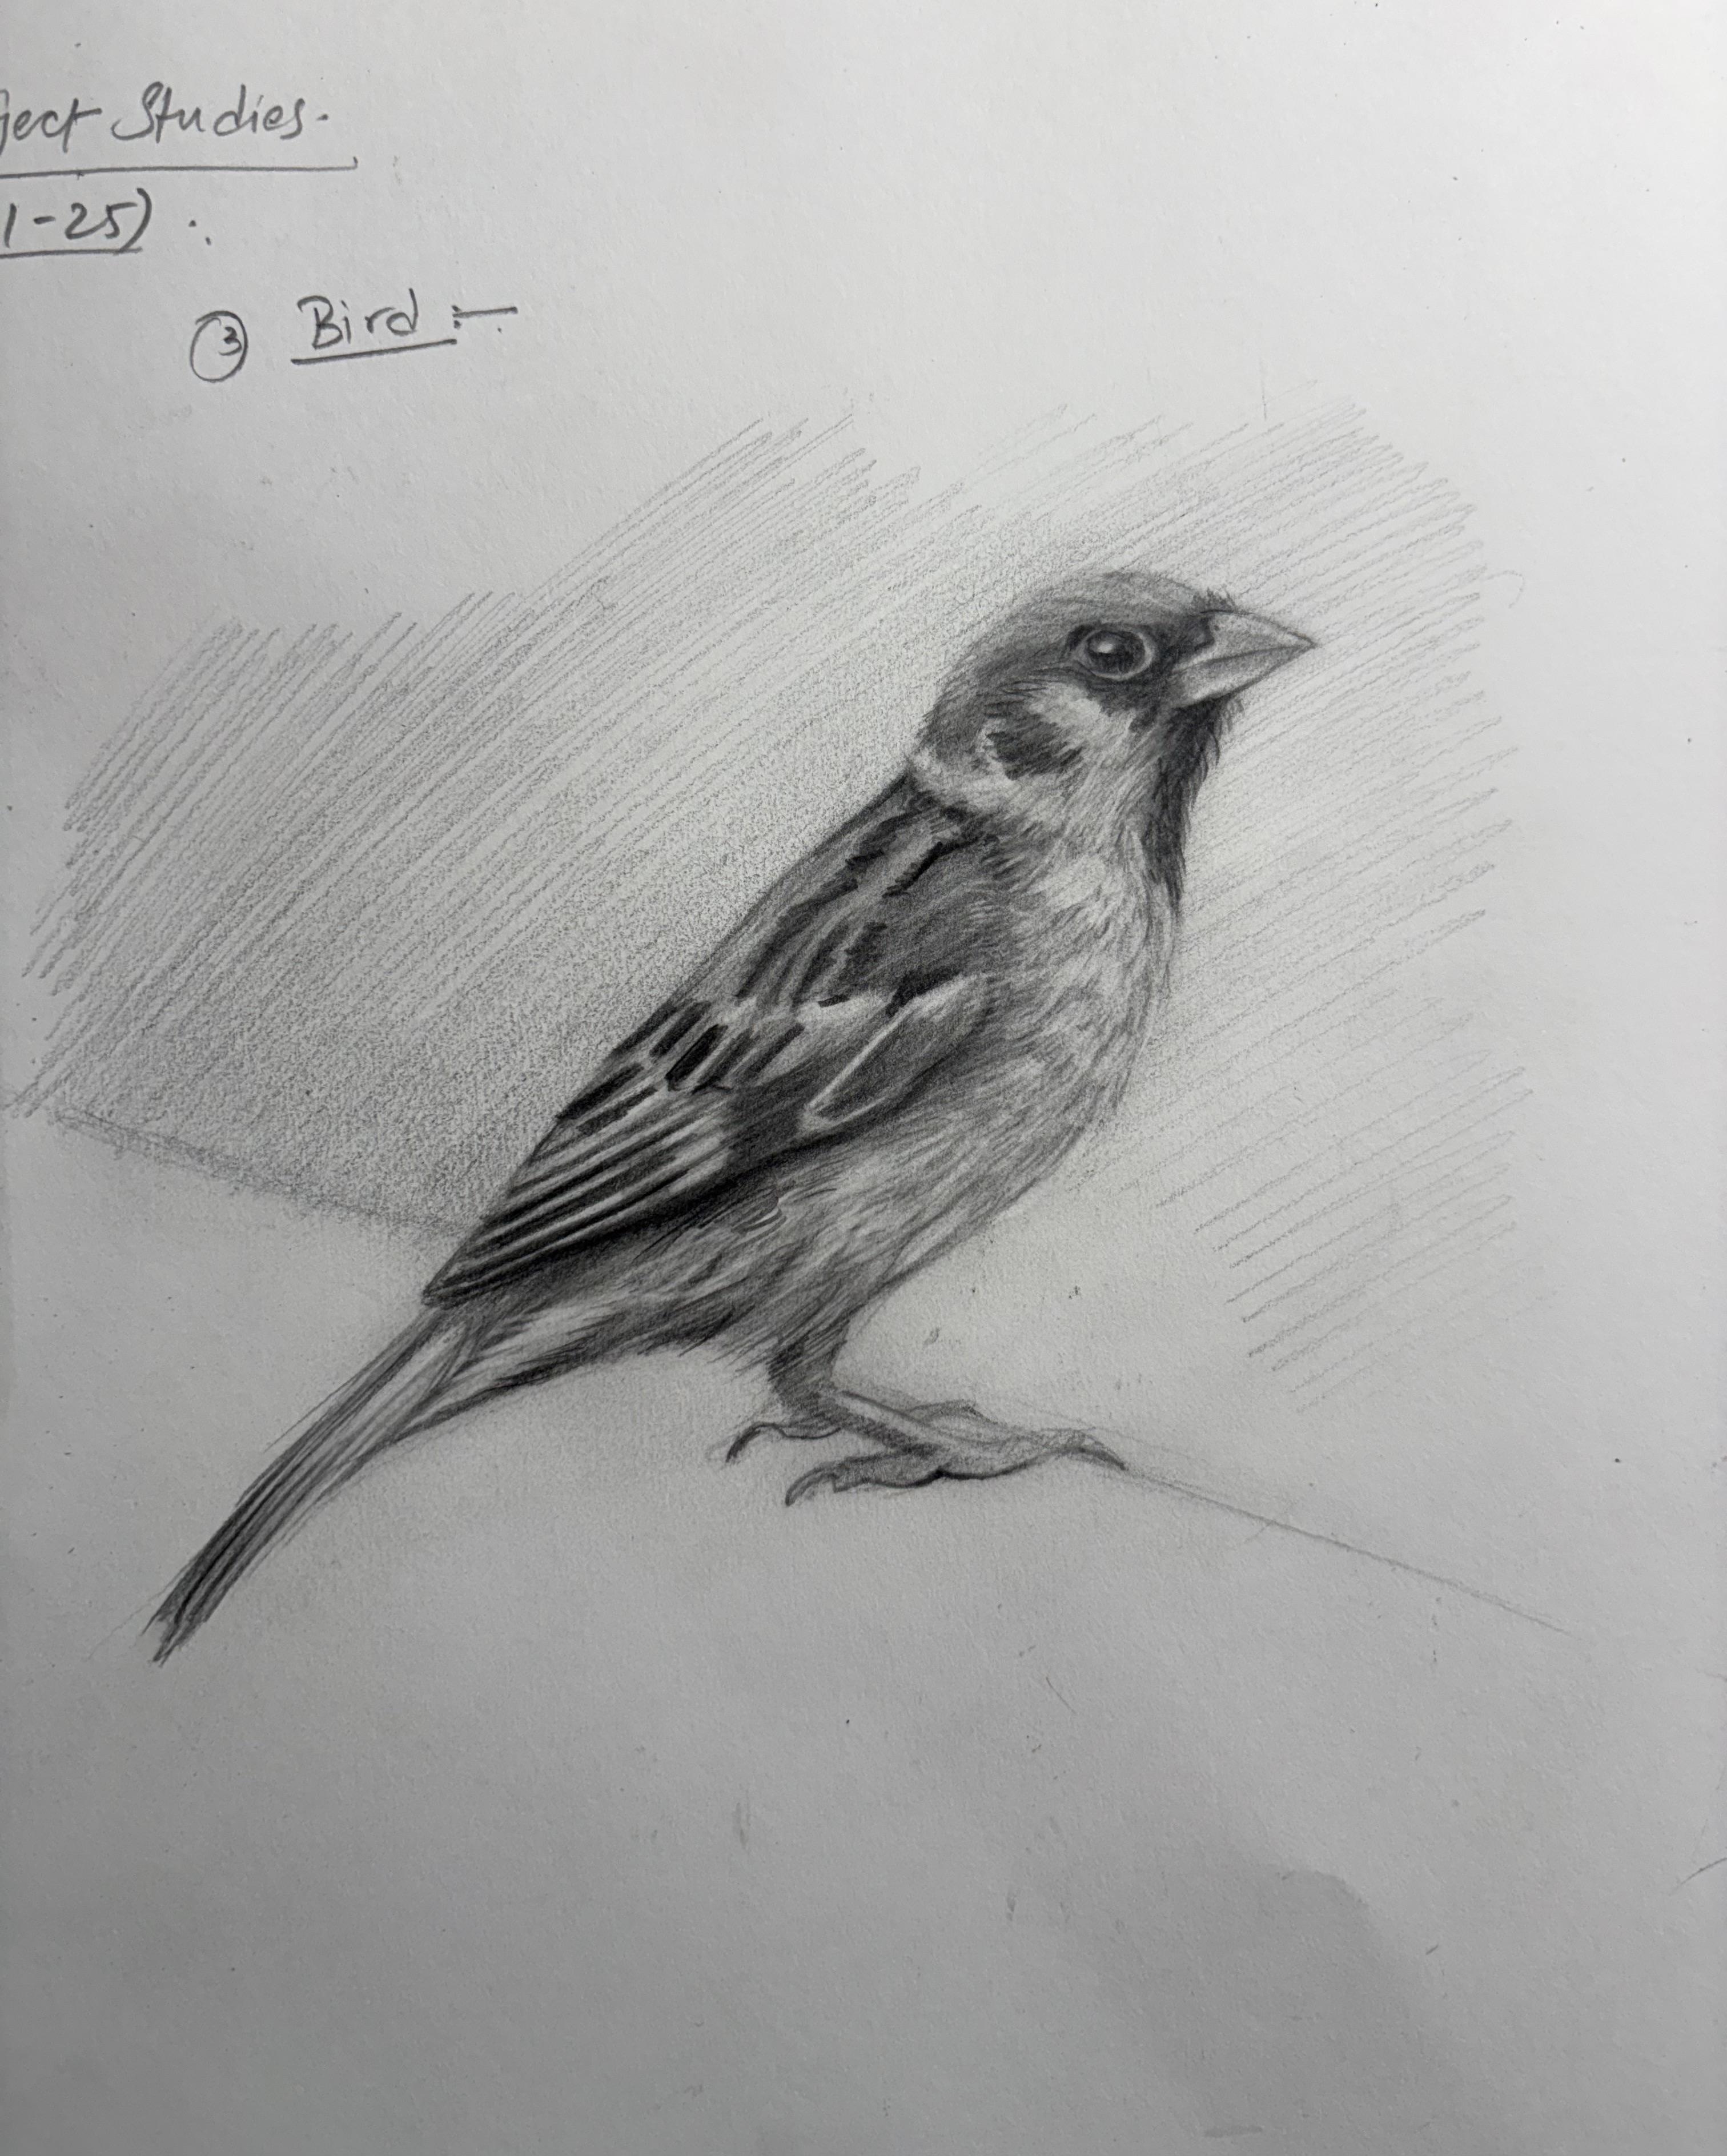
11. Draw With Shapes: So in this lesson, we are going to talk about
the outlines of the subject. We have taken a very
different subject, what we are taking in the
last lessons of this class. But here we are
going to take a bird and animal and how to
actually get the outlines. So you can see, I'm just
finding out with the shapes, first, the small circle, then the large circle. And then I created a
line that is actually intersecting the circle to get actually this is
known as the rhythm line. And then I am going to getting these details like eyes
and then the bird's beak. And then the other
details like where is actually black and
where is the gray, where is the brown and where is the white colors into
that particular sparrow. So also the leg portion, you can see how I am going to actually getting
into details just by adding few lines
into that and simply getting these details and then a little bit amount
of the background as well. Then I'm starting up
with the eyes thing. Finalizing it, and then the
back portion of that bird, I don't know the exact name of the scientific name or biological name of that
particular section of that bird. But what you can
actually see here, I'm just trying to get it as close as possible as
mentioned in the reference. So whenever you
are going to draw, just start with the
outlines by adding the details and starting
any kind of your drawing. Let's say, it's a human creation or let's say it's animal. So start with getting
the shapes of it. Like here, I have
drawn a small circle, then a bigger, larger ellipse, and then try to connect
these shapes just by getting the larger shapes and then find the
rhythm into that. This is very important
because if you are not going to get the rhythm into
that particular drawing, you won't be won't be able
to actually get the realism. So this is very, very important for any artist to find out the rhythm line to get the correct posture
of the drawing. And now I'm moving toward
the shedding part. I'm darkening few values just
by adding four B pencil, and then we may use six B
pencil as well for that. So start your portrait
with the B pencil, as I've already told you, and then simply move
towards the 2b4b, and then the six B
as well if needed. Also, you can use the crosshatching, what
you can see here. I'm just crosshatching all the values like
diagonal hatching, finding the gray values
into that drawing, then adding more gray values. And finally, when I'm going
to get the highlights, I'm going to use
the pencil eraser. So this is easier
method as compared if I leave that white
portion and add the dark portion that may have more time taking and will not
able to give that results, which is actually required. So whenever you want to draw
any animal or any bird, let's say, start
with the shapes, outlines, and then
finalizing the values, second point, and then adding the shading portion,
what I'm doing here. And in the end, you should go with the brush or with any
other tools that you may have for the shading of that or for the smudging
of that object. And then the end, you may use pencil eraser or any kind of
eraser, let's say, need eraser to find
out the highlights. So this is the procedure. Okay. Always remember
this process in your mind when you
are going to draw, that would help you to actually get the results
as close as possible. So you can see here, I
have already drawn this, and you can see how I
actually finished it. As of now, I haven't
used any kind of tool. So you can see you can get actually good results
without using the tool. But if you want more realism into that or you want
some smooth results. Okay. So you may
use I'm using here. You can see I'm using the
brush, the same makeup brush, and then I'm coming up
with a needed eraser to actually finding out
the fur of that bird. Or any animal you want to draw, let's say you want
to draw a fan or you want to draw
a tiger or loin, you may use these techniques. This will help you
to actually get the fur of that
particular animal, which is, again,
a very important for any kind of texture,
let's say, you want to draw. So you just know how to
achieve this as well, okay? So you can see here what
I am actually doing. Um to get the exact detail. And then, again, finalizing these values, adding
some backgrounds. You can also experiment with
the background as well. Like I'm doing, I'm just creating some
hatches over there. Hope you understand meet
you in another lesson.
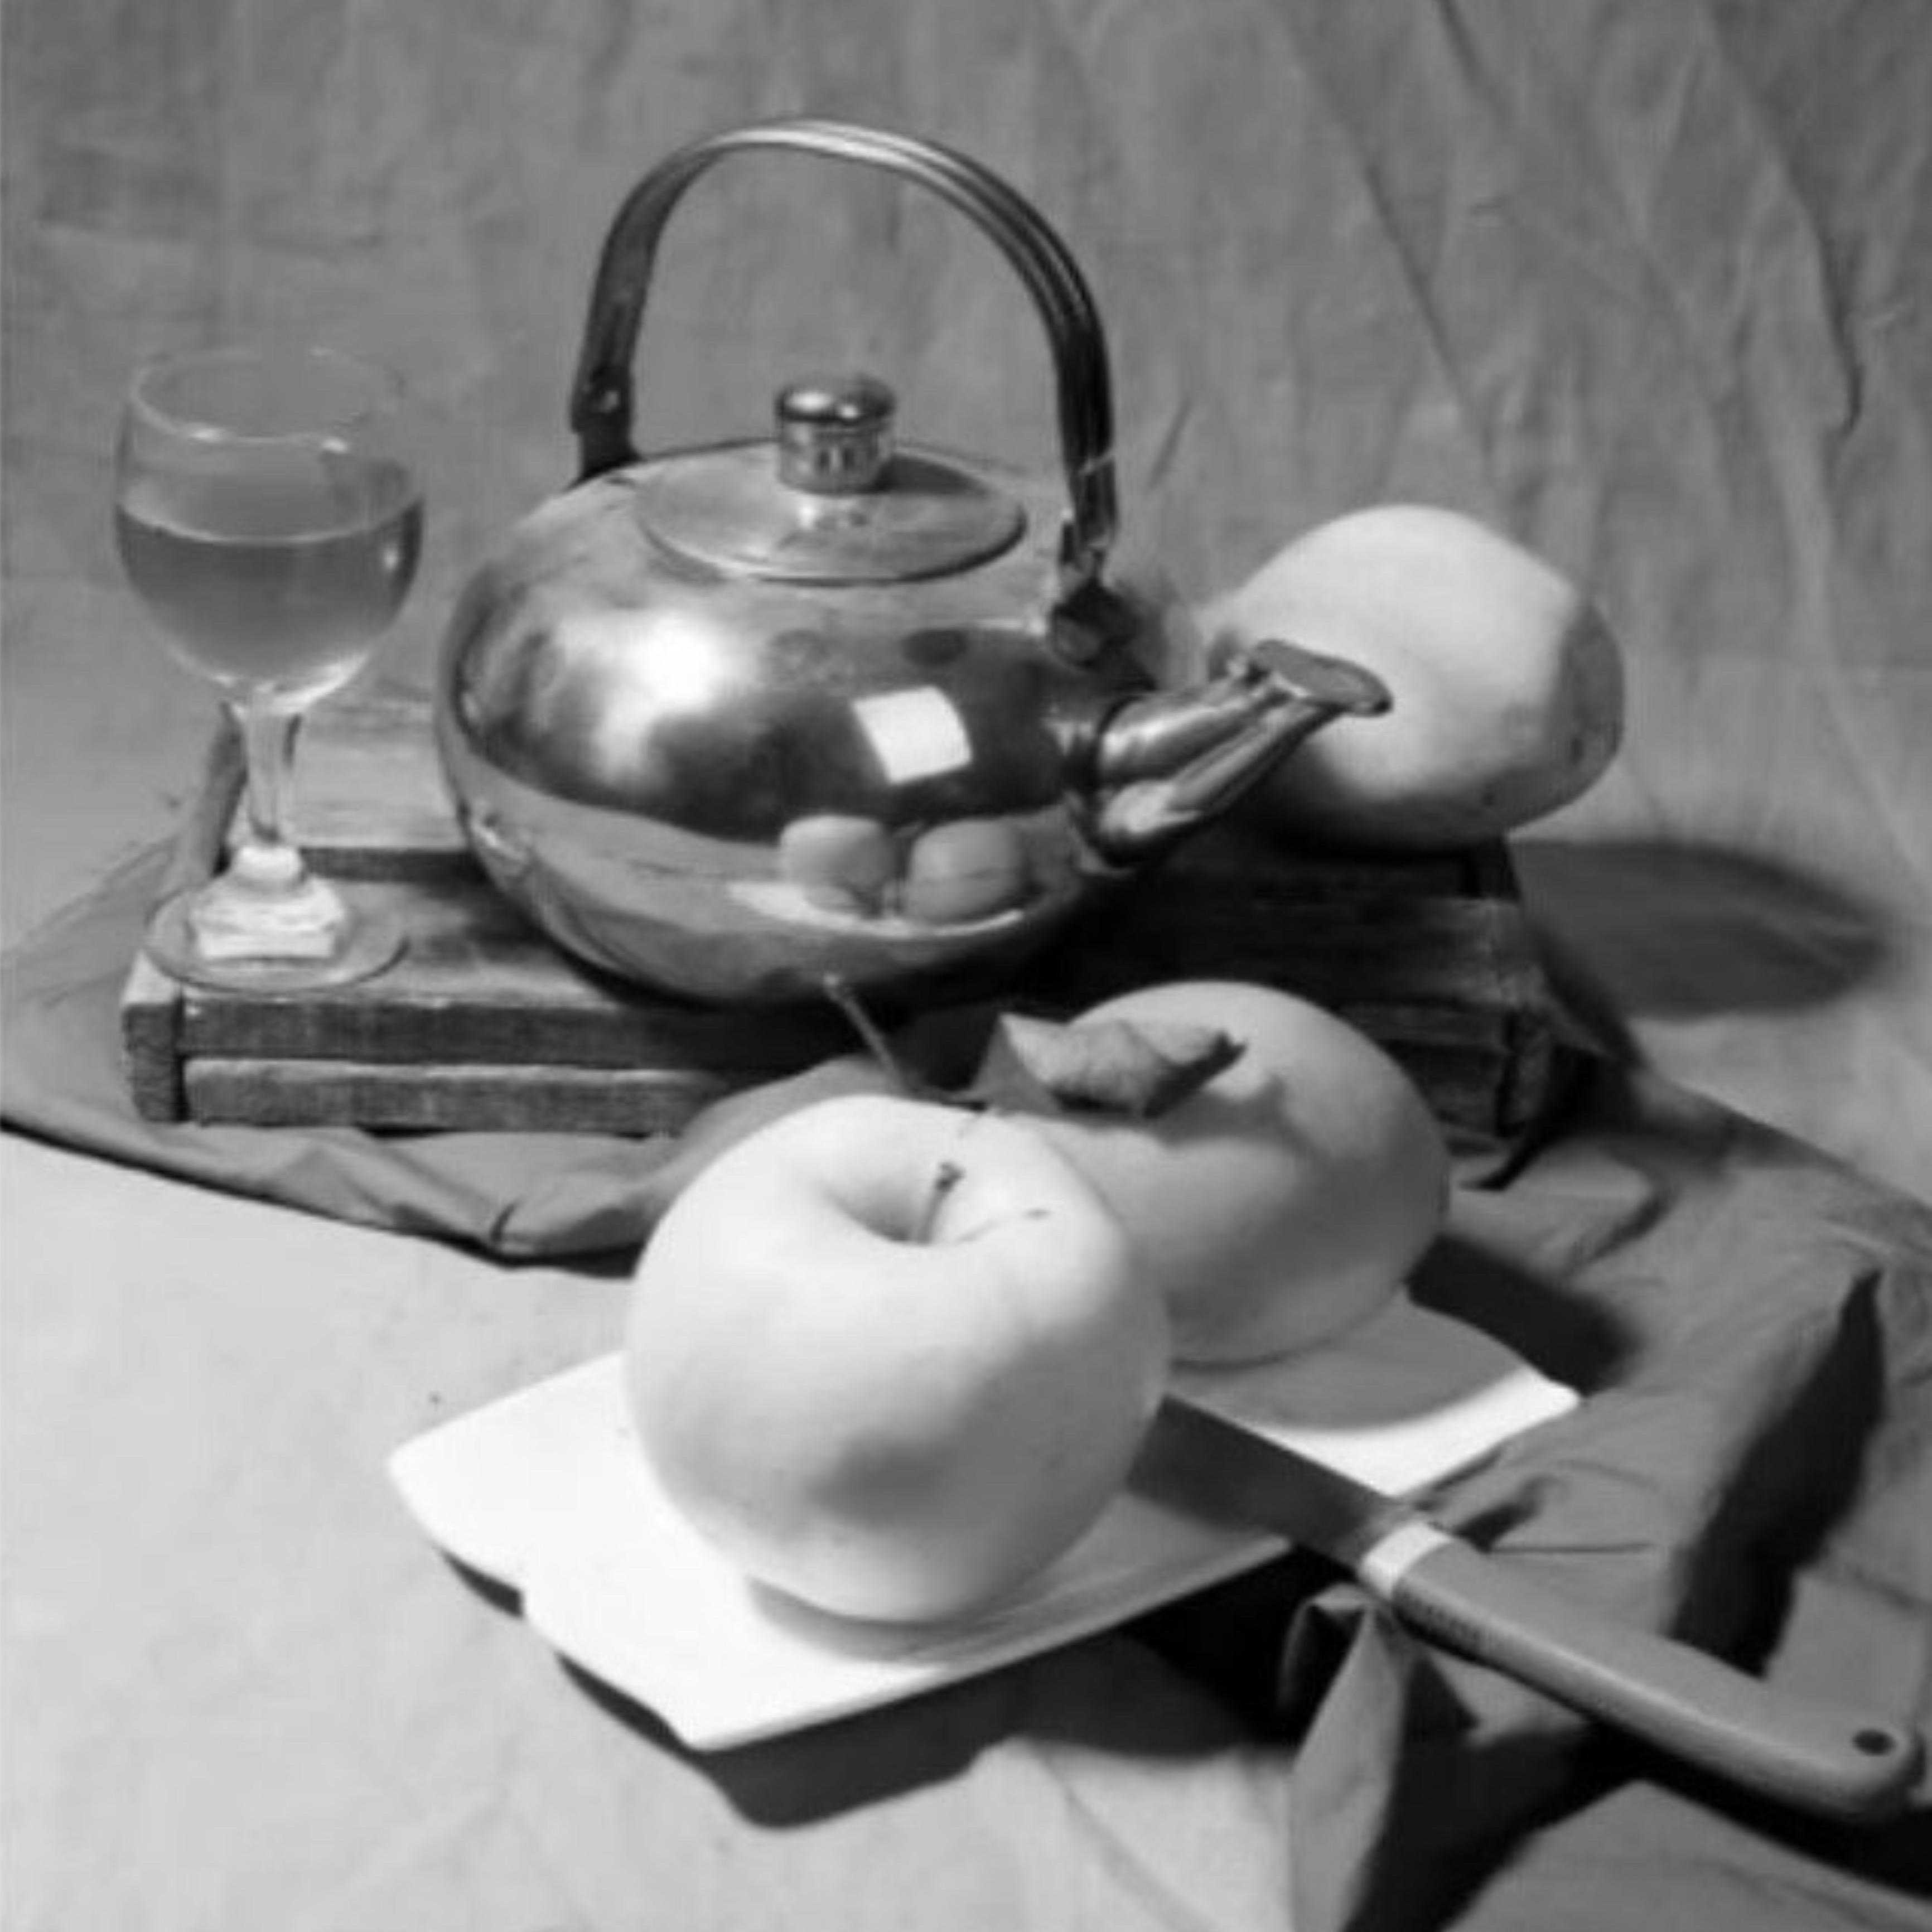
12. Stilllife Outline Drawing : So now we are heading towards the final project of
this particular class. Here, I'm going to talk
about the outlines, how we are going to draw the outlines for this
still life composition. And I'm here using
this reference. You can use your own
references as well for that. But here we are going to
talk about this reference. So you can see there's a kettle. First of all, I'm going
to draw the kettle, and for that, I am actually using the
lower grade of pencil. Let's say you may use B pencil
or to be pencil for that. Here I can use the higher
grade pencil as well depending upon how much
pressure that I need to apply. If you understand the pressure, you can actually draw this
as well with any pencil. So you can see I'm using the
shapes like circle sphere, and then I'm going to achieve the particular When for knife, you can see I have
used the rectangles. So that is what you need to understand
in this whole class, how to actually
find out the shape. And after having that idea, that exactly the
shape that we need to understand about the object. And then you just draw the
object with the shaped things. So this is the process of doing
it, and you can see here. Now I'm going to draw the
glass, the wine glass. And for that, again, I'm using the shaped thing. Maybe it is a vertical, it is a cylindrical one
and hempord at the bottom. So that is what you need to understand when you are going to draw any still life drawing. Or even in the portrait as well, you can use this
technique to actually get the exact outlines of
that object or any shape. And then I am coming up
with the darker values, thick lines with
more pressure on it, using the same pencil,
but adding more pressure, putting more pressure on
the pencil so that we can actually get the
perfect outlines. And then I'm actually
achieving the exact outlines. You may also feel that
if you are going to draw this and you may feel that outlines
are not that perfect. So at that case or even after
drawing so many things, then you find out
that it is not in the correct proportion or the
perspective is not correct. Don't be worried about that because practice is all about it is all
about the practice, and practice is all
about to make you understand drawing
in a better way and you may polish your skills. So keep practicing for that. Don't be demoralized if the initial shapes
are not that correct. Okay. You may see here that I am drawing the outlines very light
with a very light pressure. So if you add more pressure, that may find you difficult to change the any error,
change any error. Let's say you draw
something and it is not correct and you applied a lot
of pressure on the pencil, it may be very
difficult for you to actually correct that values. So always try to draw it
with a very light pressure. And then simply now I'm
actually adding some shading. I'm using the four
B pencil for that. You may start with a
two B pencil slowly and then add more higher grade
pencils like four B and six B. If you have good knowledge
of applying pressure, you may use with
a lighter pencil as well or higher
pencils as well. It is depending upon the
experience that you gain actually while drawing
these still life drawings. Okay, now I'm
adding more values. I'm referring the drawing, and then I'm trying to
get correct values. So basically, when
you are going to draw any still life drawing, the whole idea is that first, you have to draw the outlines
of that particular subject, and then gradually
and easily adding values by using six B pencil and four B pencil or let's
say two B pencil as well. In the darkest area, you may use eight
B pencil as well. But depending upon the process, what you are actually trying
to do with the drawing. And then here you
can see I'm using the brush, make a brush, and then simply and
very gradually, I am trying to actually smudge
the values in the drawing. And this process
actually help you to gain values on the paper, and gray scale
values on the paper, and that will help you to find out the further layers where to apply and where you need to remove the
particular highlights. Okay. So here you
can see I am not actually covering
the highlights, and I am gradually
adding values. I'm using the Pobe
pencil for that, and simply I'm adding values. Keep on adding the values. And this is the process that
will help you to actually, um, make a successful
drawing. Okay. So this process will
definitely help you. The process will always same. So that you keep in mind. Start with the light objects, light pressured object and
finding out the shapes in it. And then gradually, when you are confident
with the outlines, then gradually you start the darker scale values in the particular drawing
in the segment, and very slowly you
should go towards the higher values that
you always keep in mind. Don't be in a hurry or
in a rush to actually achieve the darkest value
because once you fix the value, dark values, especially, you won't be able
to change it out. So that you always keep
in mind when you are 100% confident that
the values are okay, the shape is okay, then you find out in the
darkest value here, I'm using the six B pencil, and then also I'm going to
add the AB pencil as well. So this will help
you to actually draw the segment going
to see you in the final
13. Shading & Finalizing Stilllife Drawing: So here in the final
project of this class, and this is the
finishing portion in which we are going to
talk about the details, the minute details,
what we need to add, and what we need to reduce from the particular subject
or the still life. First of all, I am
adding more layers. Like in the previous lesson, I'm just trying to
get more gray scales. So here is the process. You must understand this also. You may use some other
techniques as well, which is parallel to this
technique or similar to this technique that
may be known as gray, uh, not the gray one, but the subtraction method. Okay. So over there, what we are going
to do we have to put all the gray
values on the paper, certain dark gray values, and then we start subtracting the values from the
drawing itself. So that way, we can
actually reduce the certain values and create the portrait or create
the still life subject. But here we are not the
same doing that technique, rather we are actually adding values very gradually
because it is more big nerve
friendly and there are very less chances of
getting things wrong, rather than in that
artistic technique, it is possible that
things may got wrong or you may
fail in the result. But here, the chances
are very low. That is why it is
more comfortable with the beginners rather than that is for the
pro level artists. So you can see I'm using
the horizontal hatches as well in the platform as well. And let's say this is a fruit, and I'm going to
get the details, get the darker values. So I use the vertical hatches
and the cross hatches. And then I'm actually mixing
them just by using the tool, let's say, a brush
or anything else. Like, we can use our
fingers as well for that. But you should
always keep in mind that when you are going
to use your finger, it should not be sweat, and any certain kind of oil or anything should not be there
onto your hands or fingers. So this is the process,
what we need to do. Here, you can see,
I'm using the brush horizontally and trying
to smudge whole value. Let's say, there's
a fruit behind this kettle or there is a fruit, which is here in
front of the kettle, and you can see how I'm
actually adding layers and then finalizing these values just by adding few details like
there's a knife there. And with that knife, you're going to going
to put some values, dark values which can create this object as a
three dimensional object. The last part of it is
using the kneaded eraser. What I'm doing here right now, I'm actually
subtracting the value, like I said earlier. Here we can use the
same technique. Also, we can use
the pencil eraser for some minute areas
or some larger areas, we can use this needed
eraser or smaller area, we can use pencil eraser. Okay. So you can see here. I'm using pencil eraser
for the minute area where only a few details
need to add to add, and the larger area, we may use that kneaded eraser. And here I'm going to
use the darkest pencil, that is six B pencil
or eight B pencil. Whatever is there with you, you may use them and then try to get the darkest
value possible value, darkest possible value of that particular portrait,
let's say, still life. So this is a procedure that
we need to do all the time. And likewise, we can actually achieve the
results as well. And in this way, we may successful just
by doing this technique. And there's a very less
chances of failure or something which went
wrong with that approach. So just try to follow
the technique, the procedure, what I have
already shared in this class. And I hope that you
will definitely love this technique and the results that
you actually get. You may share your results with me in the project
section of this class. And you can see here I'm just
creating some curve hatches behind this object
as well just to make it more rough and vague. Trying to some artistic
effect as well. I hope you understand
this whole process. You can see how I'm using
the hatches is to create it more expressive and not
just the realistic one, rather it should look more
dynamic in the artistic range. So thank you so
much. I'm going to see you in the conclusion
of this class, and we're going to
share our experiences. Thank you so much. Take care. Happy drawing.
14. Conclusion: Alright, folks, you have
completed your class. And first of all, let
me congratulate you for this achievement that you have completed this
class successfully. I'm sure that by now, you have learned that art is not or drawing is not
about the talent. It's about practicing in
a right and correct man. It's about understanding,
practicing and sharpening your
muscle memories. If you continue
practicing in this way, only for ten to 20
minutes in a day, you will start to
see real improvement in your shading and
drawing skills. Just remember a few points. Make your basics strong, observe more and draw more,
then stay consistent. The third point
is very important because let's say you start drawing and then day one you are very energized and
you keep on drawing. But the day wise, hectic things are going on, you may be not able to do it consistently, but
this is the key. You need to get some time, at least 15 to 20 minutes
in a day to get practicing. Your journey as an artist
is just beginning and every small step you take will bring you
closer to mastery. I am super excited to see your projects in the project gallery section of this class. So don't forget to upload those practices
on regular basis. If you want to
learn more from me, you can watch my other ska
share classes as well. And just related to this class, you can actually
see other classes, which is much advanced from this particular
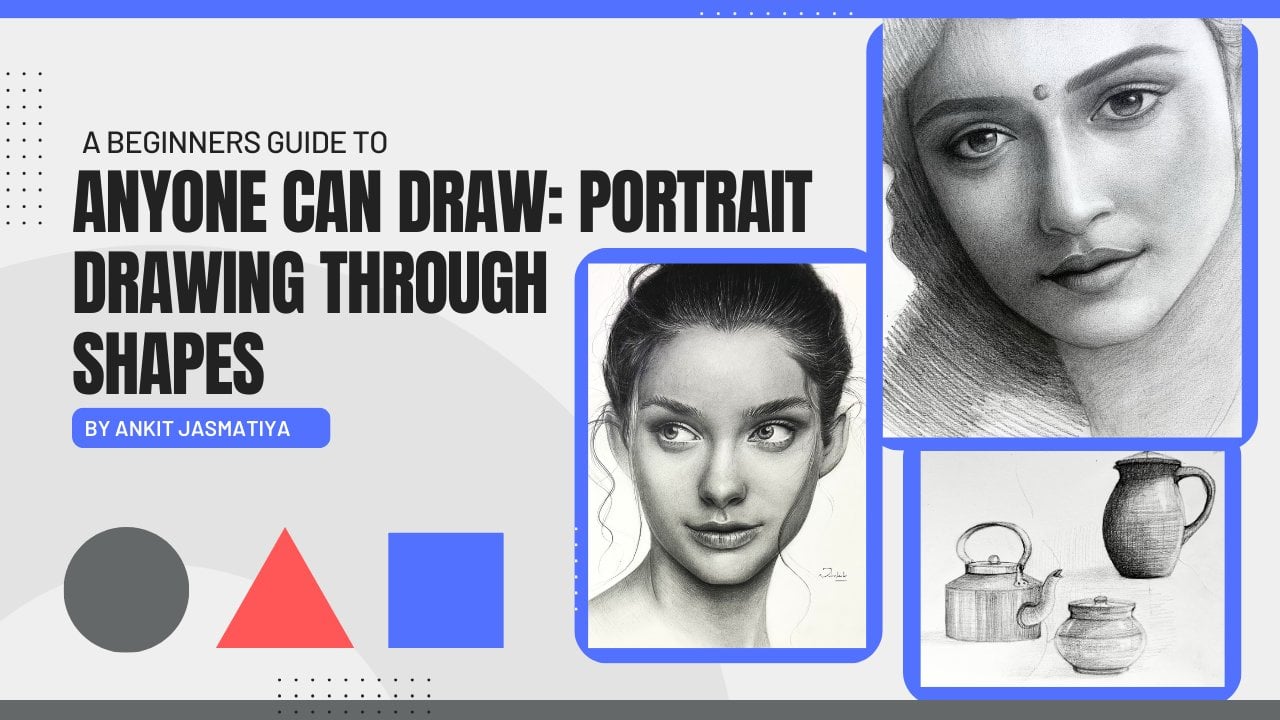
challenge class, and try to explore
portrait drawing as well in my BgnersGuide to
portrait drawing class. I will be uploading more
classes on Skillshare, so I'm going to see you very soon with my new upcoming
class on Skillshare. Keep practicing and keep
shining. Take care fox.
 Ankit Jasmatiya, Fine Artist