Transcripts
1. Intro: Welcome back. Near
Diner channel here. So today, I'm really excited because I'm
going to share with you all the full entire process of a photoshoot from the light
settings, not this one. I mean, flashlight. And sorry, I'm wearing the gloves because I'm going to show you the final
results straight away, and then I'll talk to
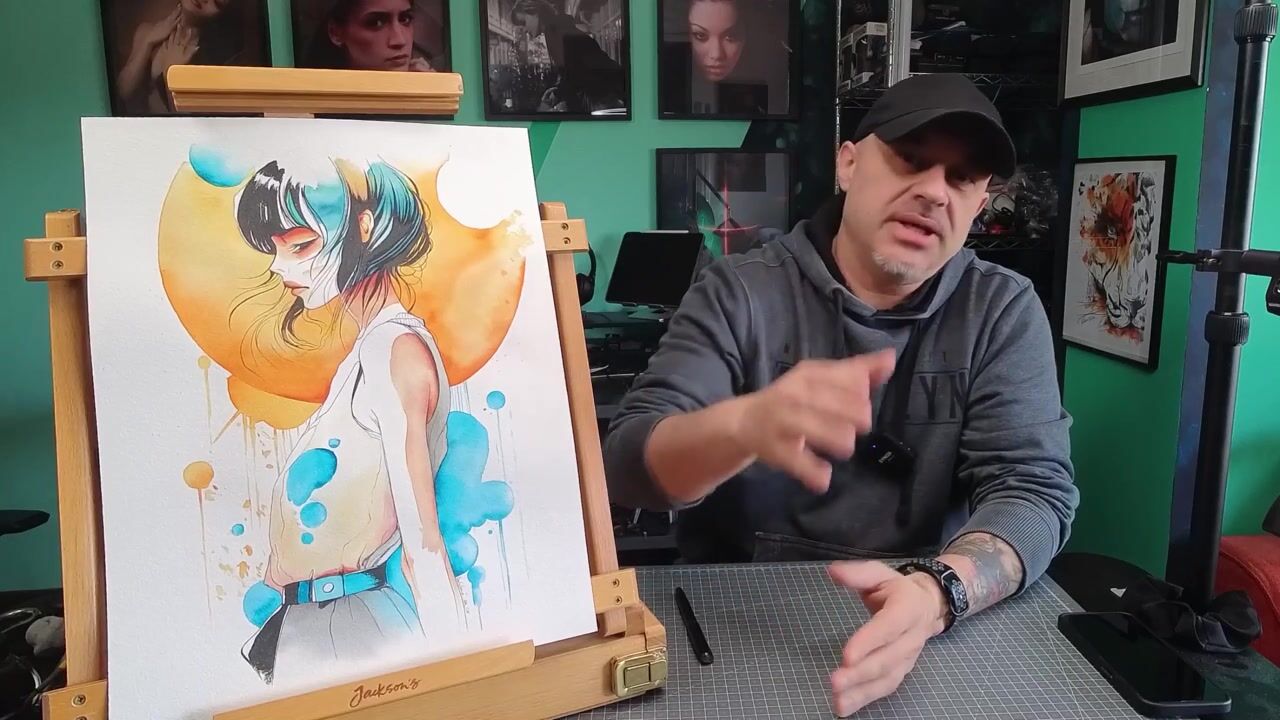
you about all the rest. I'm going to show you all
the full entire process of a photoshoot and how to get
a final print like this. I'm going to put the picture of the print somewhere
around here. So to touch the print, don't miss to wear some gloves because it's important because your finger
is always oily and stuff. So you're going to
ruin the paper and leave the fingerprint
mark on top of the paper. So back to the point, I'm going to show you how I set up the light,
the background, the backdrop I took more or
less three or four shooting with three or four
different models around this week,
the last ten days. I pick up this one
because I think is a good example about
editing because I'm going to show you all the full entire process
of my editing from light setup to shooting
to editing to final print. I hope you I'm going
to enjoy this channel. Sorry, this class. Just a quick remind I am using for editing
light room and photoshop. So if you are not using
those two programs, probably you're going
to get a little bit of different results because I will share
with you and I'll give you all my lots, all my action I've used in
Photoshop and more or less, how to create a setup
in light room and Photoshop to have a quick
workflow compared to, um, old school method, which is when I came from. To take the shot, just a quick details. I used the Sony A 74
with 50 millimeter 1.4 and the other A 74, which is Rconic
right now with the Sigma 85 millimeter
1.4 Sigma art. I'm actually impressed
of this lens. I have also the Sony 8,051.8. But to be honest, I didn't expect Sigma can make a lens absolutely
outstanding like this. This is going to be one
of my favorite lens. Ever the best lens
I've ever used in my 17 years of photographer
still the 50 millimeter, 1.4 from Sony Um, sorry, I am 50 millimeter guy. It's as if anyone ask me, you have to choose one lens
for the rest of your life, it's going to be
the 50 millimeter. That's it. Because
it's more close to the natural view of
your human view. And also, it's going
to be the 1.4 gave me a wonderful
separation of subject from the background because I
do also street photography, this in the nighttime is
absolutely outstanding. It's sharp, it's fast,
it's basically perfect. Okay, jump to the light
setup, the backdrop setup. Oh, I was going to forget. Everything in my let's say, bedroom can be your bedroom? It's in my house. I do
not have the classical, huge, expensive,
massive studio, okay? It's just Anything or everything you can do by your own in your home
and in your house. This is, I think, a very plus, at least from my point of view. Okay, let's go to shoot.
2. Light Setup: So I'm going to show
you my light setup. In this particular case, I use three lights. They are speed light flash. I like to use speedlight flash. First of all, because I didn't use flash for a
very long time and I sold my old big Elinchrom
portrait something. I don't remember. I was nine years
ago, but secondly, because with the speedlight, I can divide each flash
in a different group. So in this particular case, I have group A,
group B, group C, and from the trigger
here, to me, it's easy to set up the power of the flesh and the
zoom of the flesh. So so this is why I divide the group in three different because if I put
everything in the group A, which means every flesh
will get the modification. So if I up the power
to the group A, only this one is going
to get up or down. And of course, consequences
of the other two. So first, this is my main light. I know you think this
could be my main light, but not now and tell
you why in a moment. I'm doing a kind of fine art slash fashion
between that two. So typically, the beauty dish
could be the right light, but I don't like the beauty dish for many different reasons. It's too strong,
it's too bright. It's too, yeah, you can
put some soft box on top, but I don't like so
much the beauty dish. So this one is going to be the substitution of
the beauty dish, because I don't know if
you can see right now. I will move in 1 second. So I got a grid and
it's not parabolic, but the light is concentrate
back to the setup. Straight away on the
face of the model. So this is why I call
that main light. It's not the biggest light, but it's the main light
for the portrait. Okay? So, this one is the biggest, of course, is the feeling light. Um, I'm waiting for a
grid because this came, they forget to put the grid
inside of the soft box. I quite like use the
honeycomb or grid on top because I can direct
the light more specific. In this particular case, because there is no
honeycomb and grid on top, the light basically is
spreading 80 degrees. Is not 180 degrees straightaway, because this is a
little bit inside. But anyway, the
light is going to be more or less on this angle, which means I can take
this light very hop, but not straight on the model. So, which means I do not have a very big strong light
on the face of the model. Last but not least, this one, this is a strip box with
the honeycomb on top. This is actually
I have to change because it's a
little bit broken, but it is still doing the job. So what is this flesh? This flesh is the film light
on the side of the model, and that specific flesh
has kind of gel gel. So it's colored. This flesh
gave me an orange light. Of course, the gel can
change because there is a many different gel and
colors you can put on, and this actually depends
scenario by scenario. In this particular case, I have this backdrop here
is quite warm, so I think it's better make the skin of the model a little
bit warm just on the side. About the power. I cannot tell you the
power because it depends on many different situation. So it depends of the distance because
the inverse of square. So that's the most
important thing. But the only thing I
can tell you is if, let's say, the power of this one is one to one, so full power. At the moment, I
think is one on four. But every flash works
in a different way because someone has
power one to ten. This one is like a shutter
speed of the camera. So let me explain
as best as I can. So, if this is full power, this is going to be one
quarter, a quarter, so 25% of the power, and this is going to be 136. So, let's say, one
12%, 8% to 12%. So this is just a very, very small filling here
on the side of the model. Last but not least, this
panel reflector here. So in this particular case, I choose white,
why white because, of course, I can use
this big here, silver. But inside, I got gold as well. But the thing is this
because it's matte. Reflect the light, but a
little bit softer compared to gold or silver.
I can use a white. So inside of the big one here, I can have white, black, gold and silver. So I got pretty much everything, every single color I need. And you can say, Oh, you're doing
everything warm. Why you don't use the gold one? Because I think it's
going to be too much. I didn't try, actually, but the thing is, this is very big. And because this one
has the right size, so it's not full body. Remember, we are doing portrait. Here, I try to do full body, but portrait is still
the best scenario here. So this is going to take a
reflection from this one and this one is going to take the light and reflect
on the model. I try both of them and
this work much better. Probably because it's white, I think because it's matte. I think it's most important. So it can absorb a little bit
and release a little bit. This one basically reflect
more or less 90% of the light. And I don't want a flat light on the model because when
you do fine art, yes, you need to have both
of sides with details, but I like to have
three dimensionality. So I like to play
with the chiaroscuro, so between light and shadow. I think I told you everything. Hopefully, I'm going to
show you more clips of different shooting I I took
in the last two weeks. In someone, probably
you're going to see this an umbrella instead of this because the umbrella
is bigger than this. This is 90. The
umbrella I have is 120. I am waiting for
the honeycomb grid because I prefer to use this
one with the honeycomb grid. And I am going to probably to get another one slightly bigger than this
one. This is 35. I'm going to I think
to try 50 or 65, okay, 45, something like that. Just to see what happened
with a big I stick on the octagonal because I have
a square soft box as well, but I don't like so much. Oh, another important
thing last but not least, this one because
he got the square. Basically, is a rectangle
and not circle. I can use it to put
in case like this, like so, 45 degrees like this. Well. Okay. So you can take the light, reflect on the model, but block
this one on the backdrop. Just a few maybe other ideas. We have to try
because, of course, the model is going
to be different, the backdrop is going
to be different. The space is going
to be different. Of course, if you have a
bigger space, good for you. But I shoot in a
huge space as well. So I know it's better
to have a huge space, but in this particular class, I like to show you that
you can get a wonderful, amazing result even in a small space like this
because as you can see here, we have a let's say three meter, 2 meters by 3 meters. So it's a normal room, and I'm going to take
half of the full space. See you next time, go to shoot. No, see you next time.
We go to shoot now.
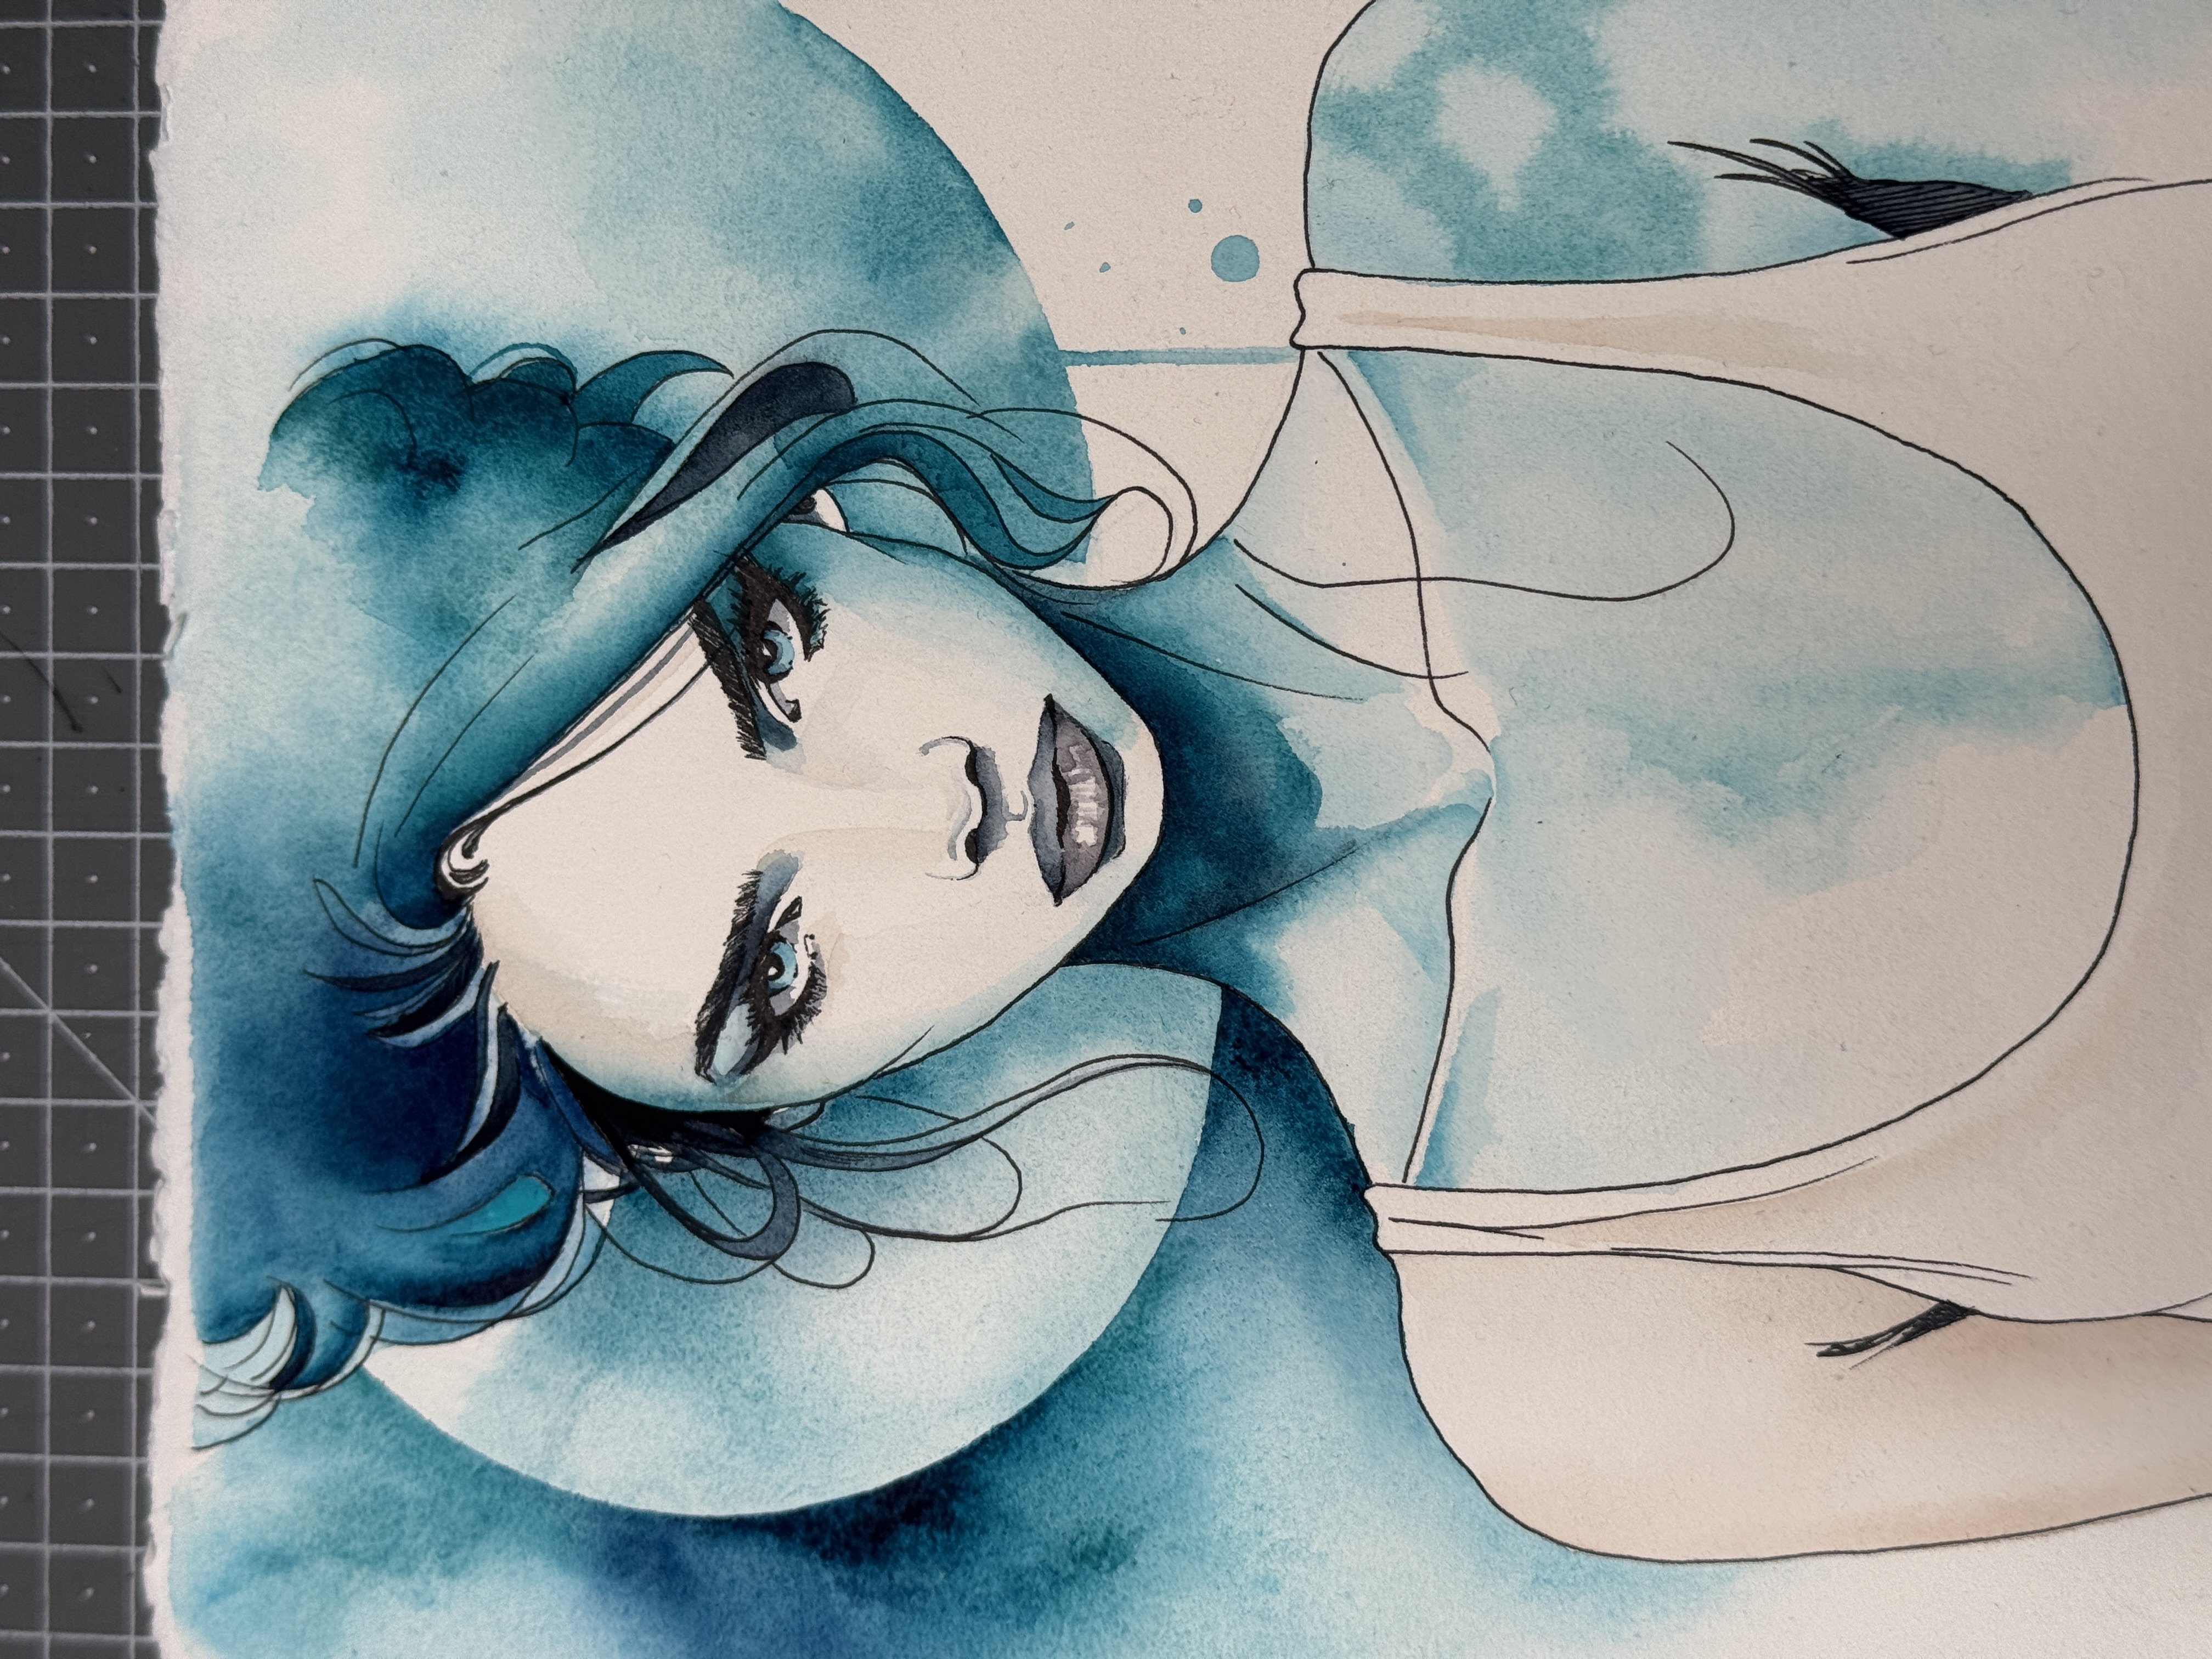
3. Lightroom Starting Process: So I choose to So I choose to edit this
image for a couple of reason, and I will show
everything in a minute, especially because I have something to remove
is not really easy, and this is my fault
because I should check this before start
before take a shot. What I'm talking about
is this clock over here. It doesn't look very good, so I already did it here because this is
the final edited image. I'm going to replicate
this image over here. Remove the watch. Just go here
on the section of remove, use generative IE
and detect object. So just paint quickly
over the watch. Like so it's going
to find the object. Leave as it does because we
need a couple of pixels. So the area needs to be bigger than the object
we're going to remove. Try to remove them,
see what happened. They should Light room
should be a very good job, but as you can see here, there is a few things
not work the best, especially because he's going
to create something weird. Try to see if the other
variation is going to be better. This is definitely
much, much better. I think I'm going
with the second. So it's a good job, but here, we have to fix this two area later in Photoshop with liquefy. Sometime you can get
here a square with the skins lighter than
the rest of the image, but in this case, not so much. After that, the first thing I do usually is to
clean the skin, so remove the tech object, still with the rubber
gum, AI generative. Make the brush a
little bit smaller and just paint over all the
spot you can actually see. Take every spot now and leave the application
doing the job. This is going to take some time because more spot
you want to remove, more time needs the application
to remove everything. So now I'm going to
pick up everything. I don't like this particular
things over here. This modi is personal, but because it's not relevant compared to
the rest of the image, I know it's a personal
things of the model, but in this case, it
doesn't look very good. This one is characteristic of the face, so I'm
going to leave it. Take all the spots. It can take 30 seconds,
1 minute maybe. But it actually doesn't really matter because this is gonna get a very,
very, very good job. After that, I will clean much better in
photoshop, other areas. But as long as I can see something I will probably fix the hearing
photoshop, as well later. Anyway, I think it's okay. And now just click Remove and
wait until it's finished. It's gonna take a very, I think, 1 minute more or less.
4. Lightroom Final Editing: Well, it took almost 2 minutes because, as you
can see the spot, very good amount of spots. It does a very good job apart from this area, but
I don't care so much. Actually, we can try
again to paint over here, but I think this is gonna be fixed better in
photoshop later. This is real time, so
just for those two spots, look how long it takes. So you can imagine for the rest. It was really 2 minutes,
two full minutes. Let's see what
happened. Well, not bad. I'm going to leave it. It's okay. So yeah, it's a good job, but I don't like this shadow. So you can actually
go over and over and remove the items many times, and it's okay, right? So typically, now I
create this preset, and you can do
actually the same. So you can create
your own preset. I'm going to show what this is. I'm not going to touch
anything here on the editing. I just go over the mask, pile detection, and I
create facial body, eyebrows in case, not this case because
she got the close eyes, but I will create the eyes
clear lips, hay, clothes. Create separate separate masks, and then create masks. So face just to recover body, just to recognize later. So those are actually, this doesn't is not
is not important. I'm going to delete.
Lips are important. Let you know later. This is hair, and
this is clothes. Plus subject plus background. So if you can select even
the e or something else, exactly as it is right now, you just can create a new preset and just mark only the masks. Put the name. So when
you click over here, it's going to create
all this mask for you. And this is quickly. Now we fold the mask. We can go back to the edit area. The first thing I'm going to
do is change the profile. I have many different
lots installed here, but I go all the way down and pick one of the
light room default image, it's going to call
vintage number one. Actually, the number four. The number four is better. So first things
first, the profile. I'm not gonna touch
basically anything here because this profile
brings a little bit up. The shadow, the eyelads are
exactly basically perfect. Clarity and texture. I'm not
going to touch anything. Vibrance. Slightly more. Curves. This is the curves I typically apply
basically all the time. So I'm going to open a
little bit of curves like ten of the output and then
recover some dark areas. With or without. It's going to make the image
a little bit softer and more creamy, more cinematic. The color mixer, I'm going just to touch
the saturation of the orange because we
touch the vibrancy here. And this is the most
important thing calibration. I typically remove
a little bit of green of the full
entire subject, basically, reduce the
saturation here of the red. I'm not going to touch the hue, just the saturation, but
this is a kind of magic. When you apply when you increase the
saturation of the blue, you're going to inject
a lot of skin tones. Without and without
It's not so much, but to be honest, I think I like a lot. The final result of
the color calibration. Color grading, I'm not touching
here right now because I like how it looks right now. Go back to the masks face. Here I got my preset and you can create the
preset, of course. Skin soft what basically does I reduce the contrast a little bit, increase
the eyelights, increase the shadow,
and most important, keep the texture and
reduce the clarity. Maybe it's a little
bit better like this. And I apply more or
less the same curve, but the black point it's a
little bit less than eight. Same thing for the body.
I'm going and apply to. Of course, if you apply
one preset on the face, apply the same on the
body because otherwise, can be a little bit weird. Okay, lips, first of
all, is too much. It's going to be
a over I'm going to remove slightly the mask here because I don't want
to go into the skin. And, of course,
I'm going to make also the border a
little bit softer. Lips. Here lipstick
is slightly orange. So what I'm doing right now
is increase the contrast, reduce the shadow, make
the color more cold, so more natural and, of course, desaturate
a little bit. This is more natural now. Um before and after, looks much, much better. The only thing I don't like
it some border over here. So I'm going to add wash, reduce and paint here on the border because
I still see ONG. Um, keep an eye on this
because if you go over. When you touch the skin, you're going to saturate the skin, and it is looking very gray. And it doesn't look
much better, much good. I think it's okay. The hair I typically have my preset here. And what I'm doing now is increase the contrast,
increase the eyelight. The shadow in this case, I'm not going to
go down so much. Inject texture and clarity
just to pop up the the hair, and of course, if she's blonde, you can play with
those three slides. But because the hair are brown, I'm going to dehaze
a little bit. Clothes I still here, and I increase
clarity and texture. Maybe reduce a little
bit of shadow, add more contrast,
and the highlights. Let me see it before and after. Much better. Probably No, the
texture is okay. Yeah, yeah, it's okay. Subject. And good to touch the
temperature of the subject. Make it a little bit warmer, not so much, a little bit. A little bit. This is just small amounts because on
the shot was already good. So I don't think you have to do anything special
on anything crazy. See, just ten, nine, 20, not so much. But as you can see, the
subject is gonna pop up a lot. For the background, I'm
going to do more or less increase the highlights because of the center of the background. The subject is going to
be more separate from the background and decrease a little bit of
shadow, not so much. So for light room,
I think it's okay. We're going to jump right
now in photoshop to make some other editing and
make this a real fine art.
5. Photoshop Firsts Steps: We are going to
jump in Photoshop, and to do that from here, so I'm not going to
touch anything else. Command E or probably Control
E if you have Windows, but I have a MX so Command
E. And as you can see, Photoshop is going
to start right now. He's going to ask me a very
important question right now. So convert documents
coloring in workspace. Why? Because the Embed image so the original image was Prophoto but because
I'm going to print, and in general,
it's better to use the Adobe RGB 1998 color space. Because it's more accurate when you edit a photo like this. So I'm going to start with the first thing first I do every time I
jump in Photoshop, and then I'm going
to use a couple of these action made by me. No worries because all the
action I'm going to use here, I will export and give you so you can use exactly
the same action. Those action are not very difficult. It's
just to save time. And of course, I
will explain step by step everything
about those actions. Okay, start with the editing. As you remember here, we
have to fix some spot here, so I'm going to liquefy. So this is just moving
up and down to make the arm straight again. I okay? Now, I'm going to
clean the skin a lot more because to properly clean
the skin on the last step, we need to use the
frequency separation. So this is why now it's good to take all the time you have and
make the texture properly. I typically use this
one for the quick spot like those small area, maybe this hair and
another tool in the same section to do something different like
to fix this part here, it's better to use
the healing brush, heat option, and
then paint over. As you can see, it's
much more precise, and it does a
definitely better job. You can also use the
patch tool like this one, but not in this case. So seriously, don't rush because what you do now can
save a lot of time later. So make this section
pretty much perfect. Because if you make
a mistake right now and you leave some spot, not in the right way to
come back is not easy. If it's possible, please
tell the model do not use glitter on the makeup
because look very I know, like I hate glitter,
especially in photography. Maybe it's not maybe it could be a good choice
in the video stuff, but definitely not
in photo because it looks like just a white random
spot spread in the face. And, um, I hate I hate
glitters. It doesn't. Okay, to me, this
looks quite good. And still use this to here to remove too much. Okay. First thing
first, save, save. Save, save, save,
save all the time. I already saved this, so I'm going to change
the name slightly. Right. When we did this, typically, the first thing I do is to make a
frequency separation. So because this image is 16 bit. As you can see, I got
frequency separation 16 bit and frequency
separation eight bit. I download this action
from a YouTube video, and I slightly change something. I'll tell you what he
is doing right now. So frequency separation
means separate the skin color to the
texture of the skin. If you don't know what is
the frequency separation, it's a very, very
long and complicated. No, complicate, not so much. But it's a long tutorial, so I suggest you to
jump in, I don't know, YouTube and check
it because there is a tone of tutorial about
the frequency separation, and now you can see
better what happened. I can do another thing before, but I don't like so much. So in neural filter, there is a smooth option. So there is an option
to smooth the skin, but I don't like because it's
gonna touch even the eye, the lips, and
something like that. You can play here with a slider, but let me show you what
is actually difference. So if now I go over
here and I put a mask and paint with black
to get back the eyelash. Because they don't want
to smooth the eyelash, even the eyebrows,
and even the lips. By the way, flow very low, like ten, 15,
maximum, not so much. So you can go over and over without destroy what you did and make a
painting very strong. Also, I have a Wacom tablet, so I can be more precise
and I can use the pressure. But if you have just a mouse, just reduce the flow
about ten to 15%. So this is before this
is after is not bad, but I'm going to play
frequency separation. Now, this is the cache and bleu. Every picture is different, so move the slider
until you stop to see detail. So this is too far. I think 11 is correct, so I'm going to put
11, and that's it. So as you can see, this is the group of
frequency separation. This is the color, so frequency. This is the texture. I'm going to show you what I
mean, and this is the color. So basically, this
is our gahableu. I called remove tool
because we have to use the remove
tool just a reminder. So those two are
pretty much the same. This is a copy of low frequency, but I'm going to
work on this one. And to do that, I'm going to use the
removal tool or other tool. I'll show you later. But What I'm doing right now is to remove
some area quite weird. And also, the other thing you
can do is hit a brush tool. So brush tool over here, flow, kip 10-15, increase
the brush side, sorry. Hit option to pick up the color and paint a
little bit over here. Pick up the color and paint, pick up the color and paint. So as you can see, there is some area, for example, here is too reddish. The other one has some weird, like, yeah, some weird shadow. So I'm going to fix
all of these things, and don't worry
because when you go back with a high
frequency level, everything will be absolutely right and it's going to
look very, very, very good. There is a lot of technique, other tools to do that, but to be honest, at the moment, this, to me, still
the best way to be precise and get the best result. About cleaning skin, I will show you in a minute
before and after, so you can see by your own
what I'm talking about, and probably you
will hopefully you will agree with me
about this technique. So I call removal tool, I should call painting
tool because this is a layer when we keep an eye on the
skin tone and on the color before and after. And this is the layer
of the neural filter. So Nurofter frequency
separation, I think it is much better
than frequency separation. In fact, I'm going to delete this layer because I'm not
going to use that at all. And I still paint a little
bit over here because I can clearly see something to fix. I'm just painting,
nothing special. I'm going to pick up the color here and I'm going to
paint over the shadow. So this helped me to remove here you can see the color I'm going
to use right now. This helped me to remove
some shadow and also to fix some weird
color into the skin. Oops. Take back the
hike frequency. General view. Much,
much difference. Save.
6. Photoshop Final Editing: The following technique is to create to use the dodge
and burn technique. I know you have the
tool right here, dodge and burn, but this technique I'm going
to use is not destructive. So here I have my action. I'm going to leave the action. I'm going to play the action and I explain you what
the action does. Basically, this is
the dodge and burn. Those are two curves,
but in luminosity. So we are not going to touch anything about saturation
of the color when you we paint over
those two layers. This one on top is
a contrast layer, so you can see better when
you're going to paint, and pretty much this
is a color fill with 50% of gray you can do by here. And this is the brightness and just a brightness,
contrast, correction. So this is gonna help me to understand
where I have to paint. In dodge and burn technique, and also I will use
later for another thing. I'll show you in a minute. First of all, Dodge. Dodge means we are going to
make some area more light. You're going to inject light. And of course, because
it's on luminosity, we are not going to touch
the saturation of the image. Again, brush, stay here
around ten to 15%. And if you have um Tablet, like a Wacom, hit
the press button. Brush, increase as
much as you need. White on top, and you just paint slightly carefully the
area you want to make light. Now, you are not
going to see so much, but when I'll show
you before and after, is going to be sometime
very surprised. So I'm going to increase
the highlights in the hair, especially in the
hair, especially here, some part of the clothes. This is why I didn't
touch the clothes so much in light room
because I prefer to do this technique
here because I can I can be more precise because every image
is different. So this is why I stick
to use the brush tool. Because there is not a
rule for everything. It should be amazing
to have a rule, hit one button and get the best result for
everything in one click. But every image is different. So I think at the moment, you have to play, image by image and do step
by step, especially, not in a massive
workflow of image, but if you want to print
this one, for example, and you want to be sure you're going to get the best result, I think there is no way you
have to do this manually. So again, now I'm still
using the dodge level, so I'm going to increase
the highlights, not so much, okay? I'm not going to do
anything crazy, but, um, I will show in a minute how much the difference is when you
do something like this. So the light is coming from top. So the bottom lip is
going to be in light. And the top lip is going to be a little bit more in shadow. Go back and forward
all the time, and now I'm going to burn
some part of the image. So make the image dark. I'm not going to touch brush and the color white because
this is negative mask. But this helped me to increase
the contrast in some area. I'm using usually more
dodge than burn technique. So more dodge level on the burn level because
the print would be anytime darker compared to the what do you
see on the screen? And this is why I don't
want to make it too dark because it's gonna be already darker than what I
see in the screen. Okay, this is do you think is right before and after,
before and after. I'm going to show you with
color before and after. It's from a point of
view, a huge difference. And I think it's much better because you can get
control of everything. If you think some
area is too dodgy, you just switch to the black and remove the
area you don't like. Why I'm using the
contrast as well, Because so you have
two options here. Reduce the opacity. Sorry. This one, reduce the opacity
and get back some color, but I prefer to do
something like that. Color filling, reduce
about ten, 15, 20%, is going to make the
image less saturated. Actually, I'm going
to go up to 20. And with the bright technique, I'm going to get down
until 25 maybe 30%. I'm doing this thing
separately because if I apply an opacity here, both of these layer are going to work in the same way,
but I don't want this. Sometime I want more color. So this is going to be 15, and this is going
to be 30 or 25. I think is okay,
before and after. So we start from here, and at the moment, we are here. Last things. I like to apply color lookup, and I already know all
Those are pretty much free. It is too much.
Actually, I stick to use this one KH ot two. I'm going to show you why. Okay, these make all
the image very softer. Of course, the
opacity 100 is a lot. So I'm going to
decrease about 50%. And as you can see
everything now is more soft or there is
another one down here. See, they are too much. It's not better than I'm 51. At the moment, I
prefer to stick to keep the KH two, because it looks I think it's more suitable
for this image, maybe go down 40%. It's okay. Save. So pretty much now
we are done here. The image is not ready
for the print yet, but this is going
to be another step. And the thing I like to show you is now I'm going
to save this PSD file, so with all of this, editing. But this is not going to
be the file I will print, because I need to
do other two steps and I don't want to
involve all of this. Levels because this print can go in some different
kind of final paper. So this is going to probably print on a
satan or made paper, but if you like glossy, you have to do something
different in the next step. So what I'm doing right now is go to image,
duplicate the image. Call this print 26 by 36. I'll tell you later why these numbers and merge
all the layers. So what I'm going to do here is I just duplicate the image with all of my
edited things here. And now I can play with this image just to make
ready for the print. So this PSD is going to be safe and I'm
not going to touch anymore. Now, here I'm going to prepare the image
for the final print.
7. Photoshop Final Print Setup: I'm actually doing right
now. Why I called 26 by 36. I'm European, so we
use centimeters. So this 26 by 36 will be my final image size because I'm going to print this
image 30 by 40. So why 26 by 36? Because the image needs to be 26 centimeter by 36 centimeter, plus two centimeter of white
frame or pass part two. Would this make the 26
plus two centimeter plus two centimeter 30 and
the 36 is going to be 40. So first, I have
to cut the image, and you have two options here. You can cut as I as
it is like this, or you can use the
generative Expand. Okay, now Photoshop God, I'll I'll slide it back. I don't know what happened
because this is going to give me this weird message. So I'm going to do the old in the old way because here we have just to increase the background and it's
gonna be very easy. So generative feel generate, and this is going to
be basically perfect. Sometimes the service and Photoshop is not collaborative.
Let me fix this. That was definitely a challenge because the server
drive me crazy. I don't know what
happened in Photoshop in last Adobe in the
last few weeks, but he gave me something like, I did something against
the guidelines. I have to do separately. Well, okay, go back. Finally, we did it. As you can see here, we
just change slightly. The background, and
I think it's okay. Actually, I don't like
so much the bands because I can see
some bunds here, but it's easy to fix this. So I'm going to
flatten the image. What is flatten image. Go back to have a background, and then use my favorite
heating brushing tool. I'm going to heat
option over here and then keep shift press. To go straight down
with the brush tool. I'm gonna hate now a lot. What happened? I don't
like when this I think the servers just can be quite busy at the moment because I actually don't
have an explanation. I never have any kind
of problem with Adobe, but lastly, in the last
few weeks, days, weeks. I still have a lot of error
like I got right now. And typically, I don't need to paint and do
something like that. But anyway, now it's okay. So now we've got
an image ready to print 26 by 36 centimeters, and it's going to be a tif. So I'm going to
save this as a tif, but it's not going to be
a huge tif with level. So it's the file is not gonna be kind of 1 gigabyte
or something. This is going to be a
very light final image is going to be around
121 50 megabytes, and it's actually 16 16 bit, so very deep and it's going
to be the RGB, Adobe, so I'm going to match perfectly the color space of the
plotter and the printer. Last things I have to do here because the paper all the time, is going to be softer
than the image. I'm going to add some sharp. I will show you again
what I'm doing right now. Don't exaggerate here
with as you can see here, do not exaggerate
with the radius because it's just a little bit. We don't make the
image too sharp. But as you can see, the difference is massive. If it's too much, just use
the opacity to get down. And what happened here, okay, this is a little bit
more than could be. So to sharpen image, you basically have two options. Go here, go to filter, and go to other and use
the high pass or you can use vivid make this
layer in vivid light, invert the layer, and play with the Gahanblur on the
layer underneath. I know it's complicated
to explain. I just save, actually,
to be honest, I just save the action and
I'm music because it's much, much better compared to
using just the high pass. As you can see here,
the difference is absolutely outstanding. And again, if you
play with opacity, you can go up and down. Until you have the right amount. Usually, 50% is
going to be perfect, especially in an image like this because we
want a soft image. But again, the paper will be softer than compared to the image you're
going to see here. Um flatten the image again. And actually, the last thing
we need to do is a proof. So we are going to simulate
the paper we will use. This is going to be much, much different for
any kind of paper. Sorry, I made a mistake. It's better to keep
the sharpening out. And now, yes, I think it's
much better in this way. So because the paper is
going to be different. So if I using a stan
paper like this one, I can see if it's too sharp. But if I'm going to use like
this because it's t paper, maybe I need to increase
the sharpening back. To see what happened here. This is very, very personal. The thing is you have to pick the ICC of the paper you
are going to use to print. Satan, of course,
is a little bit deep in the shadow compared to the matte paper and at the
Black point compensation, and you have two options here. Just simulate a black ink and
simulate the paper color. I usually I typically use
both of them because if your monitor is calibrate correctly and the
ICC is correct, you can see 95 90, 95%, what would be the
final result on paper? So if you don't like
the color here, you see there is a little
bit of shifting color. Okay? Not so much, but there is. You can go back and play with the hue and
saturation to save that. Also, this is perceptual. Try relative colometric. Pretty much those two relative colometric
and perceptual are the two tools works better
with the final print. Because when I'm going to use this when
the professional printer lay out from Cannon, those are the two options
the program will give me. To see the color
proofing, sorry, the paper proofing or turn
off is command Y. Okay. But this is going to
be what happen if you print the image
on a matte paper. I think I'm going to use
the satan paper because I like so much the kind of paper
for this specific print. The mat paper is gonna
get more softer. The black would be more The gamut of the
paper is not deep enough. So yeah, I think this
is ready to be print. And I will show you the fans
8. Final Result: Well, I really, really, really hope you enjoy my class. Sorry again about
my broken English, but I think you're
gonna get the point. Just a quick
reminder, let me sir, do not use your mouth to
clean the dust on the paper. Never because I
sometime I did it and a little bit of saliva go on the paper and I just
trash the print. I know it sounds weird,
but it's the truth. If you're a photographer, definitely you have
one of the, use this. Okay? A quick reminder. During the editing in Photoshop, above the Dodge and Burn group, we used a contrast group. Do you remember that? Perfect.
If you want the print, a little bit more
spring in saturation, the gray layer dropped down a lot because
if I remember well, I did around 20 or 25, I should go down on ten. Because this is very, very, very, very low in saturation. I like it because it's fine art, so I don't mind to
have a massive pop up. But I can understand probably a few people or a lot of people would love to
have more saturation. So drop down the gray layer
and you are going to be fine. And this is depend
of your printer. Move the light down
even on the brightness, so you can get more highlights
in the final paper. I actually love this one. I would probably
make another one a little bit more
saturated and a little bit more with some
highlights with the white, a little bit pump, but just because it's
just to compare, okay? This is absolutely fine. This is, again, this
is a test paper, so you're going to see here, I can see some bands. It is a very it's not
a professional paper. I have other kind of paper
definitely much better, and probably at some point, the black and the dark would
be more and the saturation, of course, would be more, um, tasty, if this can
be a good word to use. Anyway, don't forget
to message me, contact me if you
have any question, if you need more details, anything you want,
I'll be here for you. See you next time. So now, pick one of your friends because she is one
of my friends. She's not a professional mother. She could be a
professional mother, but she doesn't at
the moment, at least. So pick up one of your friends, set up your home studio
because I did everything in my home and in my house and
try to do the same thing. Even if you don't do the
last step like printing, it's okay to stop even
on just a digital image. You don't need to print. If you can print, it's better because actually,
I love to print. I have a plotter, and
it's a huge printer. It's a professional
printer because I love to print and I love
to sell my print. But this is not a
mandatory, okay? You can create a very
wonderful picture and a very wonderful image
even without print. I suggest you to print. But anyway, thank you so
much to join my class. See you next time. Show.
 Umberto Zanoni, Nero di Venere Fine Artist