Transcripts
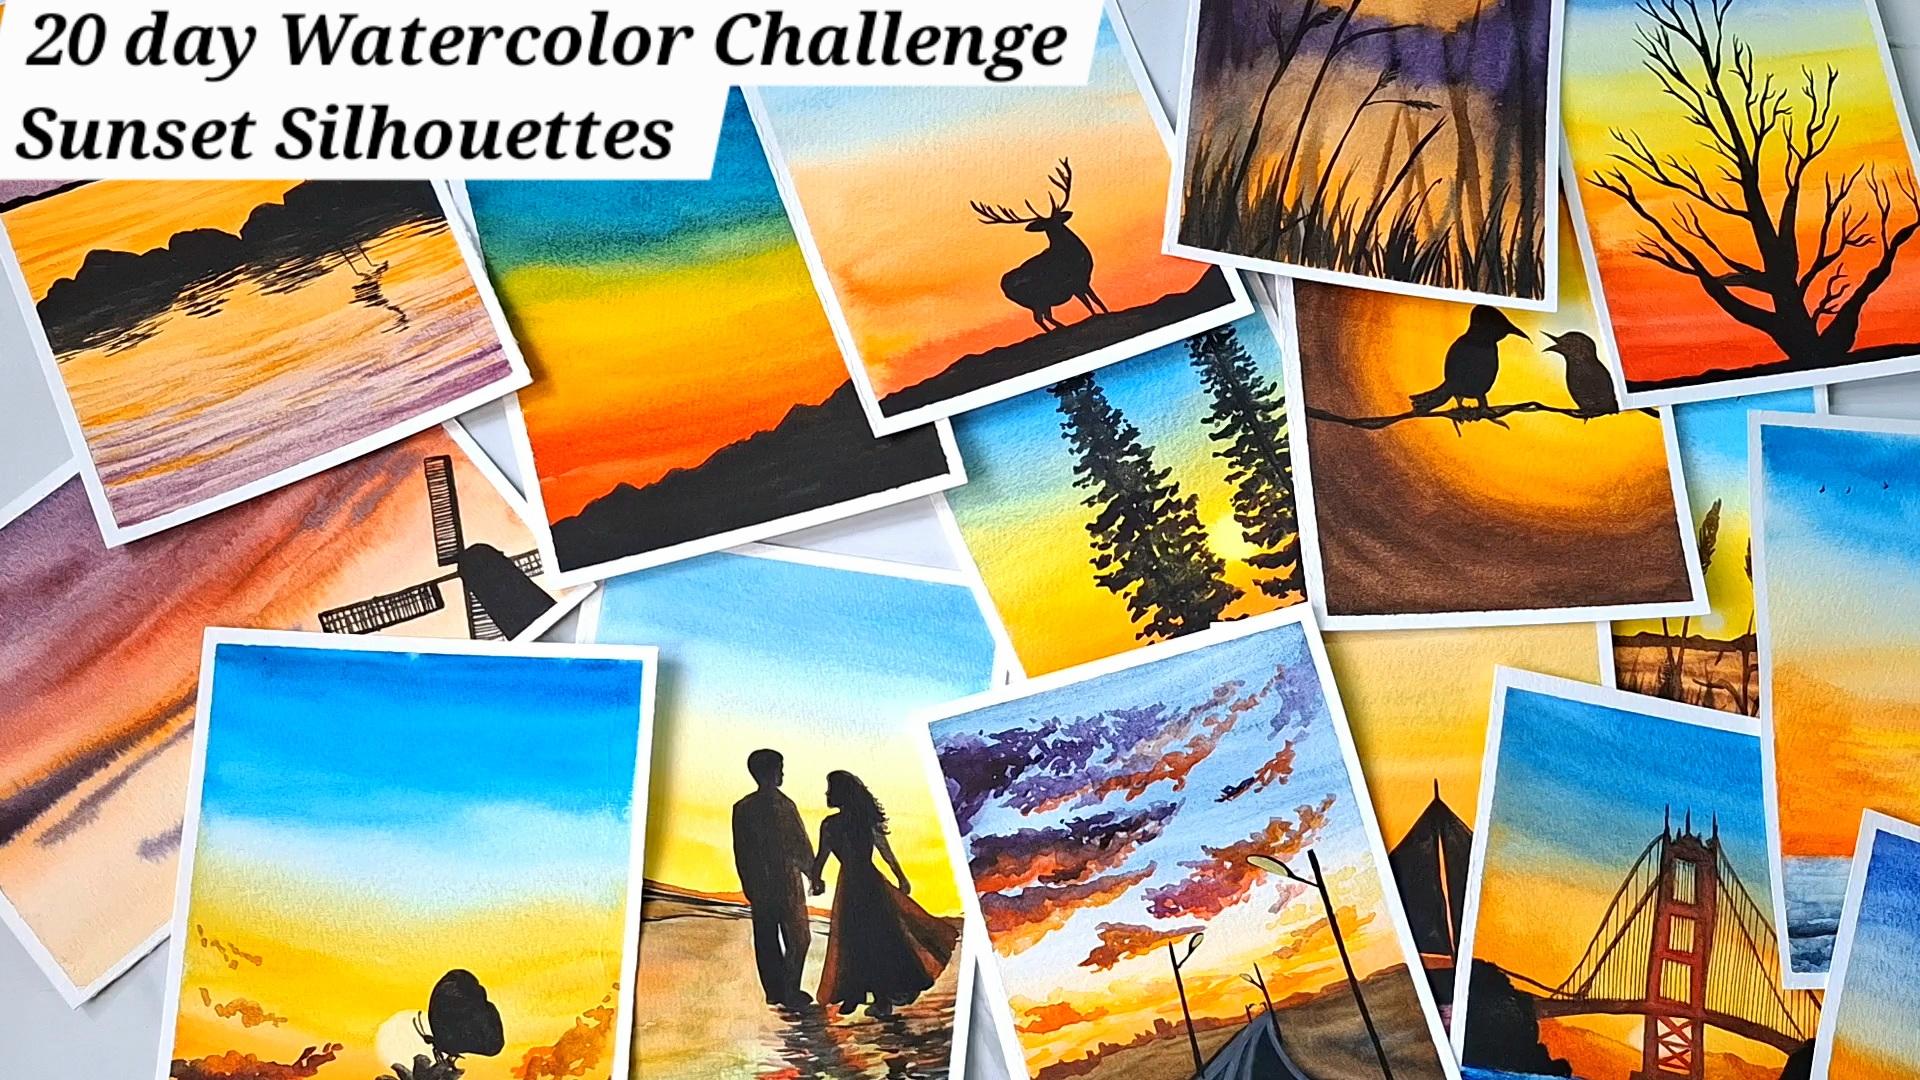
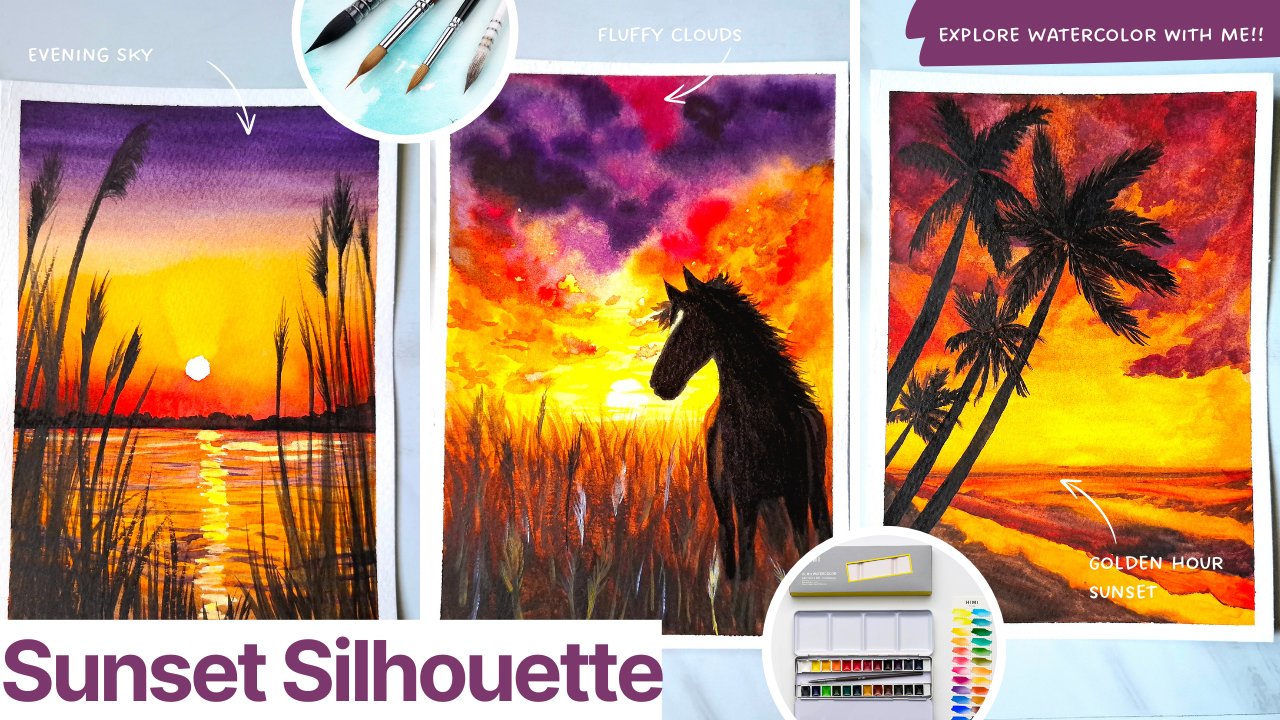
1. Introduction : Hello, and welcome. This is Shrimai artist and art educator with an experience in art field of more than six solid years. I'm so happy you're here. If you love sunsets and have always wanted to paint
them in watercolor, this class is for you. In this course, we'll create
20 beautiful sunset sell out paintings together using simple beginner
friendly techniques. You learn how to
blend vibrant skies, choose pleasing
color combinations and paint sell out like trees, birds, landscapes, and more to bring your
artworks to life. Each project is
designed to be short, relaxing and easy to follow, perfect for building
confidence and enjoying the process
of painting. Whether you're a
complete beginner or someone looking to restart
your watercolor journey, this class will help you develop a daily creative habit while creating a standing
collection of mini artworks. So grab your brushes, colors, and paper, and let's start
paintings and set together.
2. Art Materials to get ready with!: Here, we're just going to get ready with our art materials that going to be used for
this sunset painting project. So it's going to be
with these papers. They are like Canson brand, 300 GSM watercolor paper. So I have just cut
this into A six size. So it's actually a five, but I have just made
it into A six sizes. So we're going to make
many paintings or at least 20 of sunset still out. So let's go with this A six
size, it's comfortable. And if you want to try out
in a little larger one, you can just go
with your favorite it's like A five or A four. And next with the paints, I'm just have my mid half
pan set watercolor paper with 24 brilliant
pigmented shades. So it has, like, a swatch card, and these are the
colors in the set, you can see there
are so many colors. And it also comes with a naming board of all the colors so that
we could not confuse. You can just mix
with our colors. And this is more brush. It's very much useful to
make the color works. Holds good capacity of water. So next is going to be with
the other set of brushes. So they're from Bruce Tru Brand. So with this brand, I'm just going to use only two brushes. They are number six and sorry, number eight and
number three round brushes for making
the detail works. And next is going to
be with a napkin, a pencil, and a masking tape. That's it. And with eraser. So these are the things
we're going to use for our project works, and let's get studded.
3. Techniques : So here in this session, I'm just going to share with techniques
using watercolors. So it's going to be
with a little hags. It's going to be also
split with two parts, a basic technique
to use watercolors. And the second technique
that we are going to apply for all the complete 20
sunset Silhout paintings. So for all the paintings, I'm just going to
make a gathering of all the techniques together. So all the tips, tricks will be taught in the upcoming part. And with that
technique sessions, we'll be just putting up with
our entire main projects of 20 sunset Silette paintings. Now, in the first part here of the basic techniques, first, we are going to
learn all the first, we are going to learn
with wet on wet. So here, what we have to make is we need to just dip our brush. It could be your mob brush, so it holds good amount
of water to practice. And this is a separate
watercolor notebood for practice to learn
with the techniques. So you can just follow
with a separate paper, and we can just go with a
canson for the main projects. Now, with this water
brush, pre dipped brush, I just I have just wet
my paper over here. Now I'm just going to activate
with red colour paint. So even the paint here is wet, and I'm just going to put it over the already
pre wetted surface. So you can see the colors
flowing thoroughly. So you can see the colors
flowing thoroughly. And if we need with
good amount of pigment, we can just take again
with the paints. And this is a super technique
to make the blending, and it absorbs the paint
pigments very well. Also, it makes the process very easy with a
different effect. Now, on the other side, it's going to be wet on dry
wet on dry in the sense, it's going to be
the paint is wet, and next is going to be the
surface is going to be dry. So now my paint here is wet. So I'm just going to make it. As you can see here, it
goes with the hard edges, but it's here with a
soft smooth edges. As the previous surface here
is wetted and here it's not. Also, the pigment is a
little different here. Now, I'm just going to wet my
paint again and over this, I'm just going to make it
and see the gradient flow. So this will not travel and just make any different
effects on its own. I just in control of us, but it's not in our control. It just flows with
a water direction. Now, next technique is going
to be a dry brush technique. Now here in the next technique
with a dry brush one, I have my wet my
brush little wet, so I'm just removing the water. So my brush will become dry. And with this the paint here is going to be
a little watery. Now with a dry brush, I'm just going to lift a
little amount of paint and see how the stroke works. So the surface even here, it's not pre wet, it's dry. So this is the
effect we have got, and this is the second
coating I'm making it near. So with a dry brush, this
is the effect we get. So this technique can be used like in a seascape
make the reflections, but it should not be
with much moist brush. So also the detailings may vary in giving
width the effects. Now, for the graded wash, it's going to be with the color, and we're just going to make it from the dark to the light. So this is the place I'm just
going to fill with colors. I have just wet my place. And now with this, we
need to start making with a good bright red and just ending up
with the light color. So here, the water
flow will be perfect. And we need to make it look
like a gradient effect. Next is going to be with
a lift outt technique. So let's make a pre
wet with a color. And here the color is
completely filled, and we need to make a lift out to remove the color
pigment from the surface. So I have my napine and this is my completely clean brush. So with this, I'm just going to lift the colors and just
wipe it on my tissue, and same way, repeating it over again and again to
make it completely white. So we need to just remove
the complete colors from the brush and repeat the
process to make the effect. So this can be used to create bouquets and many
different blurry objects. Here in considering
with a sixth technique, it's going to be layering. So layering is with a little
pigment, more diluted color. So we are just making
it with a light wash. The color pigments
will not that bright. Now, second layering
is like you're taking little amount
of pigment and just making over that again and repeating the
process again and again. Repeating the process
again and again, we are just going to
take third level of pigment increase to
make the details. And you can see here
the washer slightly differs from the good pigmented part to the
light as to wash. Now again, just increasing
with the pigment, going to shade it fourth time, so this is the fourth layer. We need to stop it
smoothly like this, increasing with
the pigment again. So this is the fifth layer. Now, here we can just
add with lightest shade. So we can call even
this as a value scale, making from the light light side to the more pigmented side. This is our value scale. Now, the seventh
technique for blending, we're just going to use
with two different colors. Let that with red. So I'm just going to make it on one side with a
red. And stop here. Next, I'm just
cleaning my brush and wiping it out in the tissue. Next, it's going
to be with blue, and I'm just going to
take my ultramarine blue. So that blue is from
the opposite side, and let's see the
color blending. So it just goes with a purple and violet
family, blue family. So mixing both the colors and just ticking with the red again. And it's activating with
the water well now. And we're getting
the other range of color, the third color. Now, activating with the blue, the secondary color
gets produced. So this is how the
blending works, and we need to just slowly
change it with the water. Now, we just need to slowly
blend the primary color to the produced color that
is secondary color and make a gradient effect well. Do this we can make
with red again. So this is how a
proper blending works. We need to go with
a light change in water control and
make the blending works. So it looks completely gradedt. Starts from the red and
ends in blue and transforms into the secondary color,
the violet family. So next, you can just take a little break and mix with
any of your favorite colors. That could be with yellow
and orange and produce some kind of mid
at warm shades of yellow or any two
different colors that could be and produce
the secondary color. And next is going to be other
technique, and that's like, I'm just going to pre wet
my paper here completely, and show you a technique. So just pre wetting my paper. To this lo, I'm just
going to add a sky blue. A lighter version of blue
is fine to make this. This is just a
technique and evenly spreading the colors around
the pre wetted area. Now, I'm just going to
clean my brush very well and wiping
it in the tissue. Now with the green color,
it could be any dark green. And before the previous area, the pre wetted
colored area dries, I'm just going to make with a pine tree and let's see
the effect how it turns. So this is how I have made. And if you want, we can just go with some dark
shades of green too. Now, secondly, with the same
blue color as I did before, here, I'm just going to
make with wash again. Now, this time, I'm just going to allow the color to dry well. So this process, we can try
as wet on wet or wet on dry. That is only for this color. I'm just sharing like the wet on wet or wetan dry can be used to only create this first step. And now the second step before continuing
the second step, I'm just going to
allow this color, the pre colored surface here to dry completely,
very completely. Now here, the background
is very completely dry, and I'm just going to
activate with the same green. So the brush here is moist
but not that watery, and we can here make
with the details finely. So this is a difference
working with the waters with wets and dries. And Look at the difference. This can be used in
a bouquet effect and where the mist it goes, and this is like kind
of a sunny effect with a clear sky background. So these are the
first part techniques we have successfully practiced. And in the second
part, I'll be just teaching with the
techniques that we're going to apply for all our 20 paintings
of Sunset Silhot theme, and let's just get
started with that soon. Bye bye.
4. Light Shadow concept: Here in the second part, I'm just going to share with a technique using light
shadow theory because the sunsets allowed
it mostly played only with the sunset
that is light. So it depends which direction the sun just sets and the object that we focus
that becomes siloed. So we need to learn
with the theory here. Now, it could be
with, let's consider a sun being on this side. So it's a left side. So with this left side, we can consider an
object that is a tree. So this tree, it's going to be in in the right side.
So this is left side. The complete light falls
over on this side majorly, and it becomes dull and dark. Same way if this sun
is on the bottom here, the place it changes and the light the light
will be in the base here, and this top portion
becomes darker. And same way, it depends on the light from this
side on the top side, and it on changes with the placement of light
source with the object. Now, this is a basic thing. And if the light is so bright, let's consider with
some known timings, the light will be
so bright here. So let's consider with
a bright light source, and that could be with a noon. Let's consider with a noon. So by the time, each
and every object will produce the
shadow of its own, so that will be on the surface with a distance of the light and the
position of the light. Now, during the sunset, the shadow portions
will be little lesser and not that clearly visible because the light is
like it's getting dim. Now, this is the basic theory to understand with
a light concept. And the second concept
is going to be with a distance using the
light and the position. So let's consider this as
a horizontal line that is a surface split with
the atmosphere, the sky. And the landscape here. So this is going to
be the landscape, and this is the sky. Let's consider that. And sunset mostly happens in the base. So it just goes down, and this is where it's placed. Now, let's consider with
the object again, like, there are much bigger
trees like this. And it goes with a kind of a little tiny house
here as a second subject. So now what happens
is this light gets dimming and as a third object, we can keep our mountains. Now, actually,
this light is more like reflecting
towards the object here that is very closer to the light source.
That's mountain. And a second
focusing reflection, it just produces from
the house very lastly to the tree because we need to
understand with that depth. So this is the depth. This is in the first position, and this is the second focus, and mountain is the third focus. The sunlight reflection
the sunlight just falls over
the third object, that is the very near
object to the light, and it produces a
little amount of color. And that could be
bright depends on the object and how much
light it falls over that. Secondly, this light source, just falling over the second
object will be lesser in the color tone because it's a little far from
the light source. When comparing this, it could produce only
lesser amount of colors, just reflect one less
amount of colors, and that could be
even in dark shades, the warm tones, the
very dark muddy colors. Now, on this, this
is the very first, which is much,
much far away from mountains and the house
and from the lysos. So this will be
completely less in color, and it produces black because the shadow will be
on the front and the light will be
behind the subject. So it mostly goes
with the blackness, and this is the
main concept to be learned in sil hou thing, also during the sunset time. So this is the second part
the techniques I want to add, make a clarity to understand the depth of the subject that
we are going to work with. Now, let's get started
with our painting. So we're going to start with
our very first main project in the upcoming episode, and we'll be meeting
you there. Bye bye.
5. Day 1 - Where day meets night: Very first main project
I have here readily attached with the masking
tape on all the four sides. And here I'm just going to make with the background swatch. Let's start from easiest to
main project and end with the little challenging
main project so that it could be
beginner friendly. Also, beginners can go
to the pro level and learn so much techniques with all the 20 paintings
step by step. So this is going to be
literally very simple painting. Now first to blend the colors, I'm just going to
make with the swatch. So I have my halo green here. So I'm just mixing up my colors. So with this to green, taking good amount
of halo green again. So with this to green
to the other color, I'm just going to mix up
with ultramarine blue, taking good amount
of ultramarine Blue. It could be equal
parts and which becomes turquoise and
blending well here. So now with this color, I'm just going to make a swatch. So firstly, I'm just
going to make it from the top So here I'm just working with
wet on dry technique. I'm stopping it here. Moving from back and forth. The colors are a
little bit over, so just going to mix up
with the palo green. I have mixed with the color.
I'm just layering it up. Now, the top portion is
complete, and in the base, I'm just going to
make with the orange. So we can just use our dark tone of orange
as this is a sunset. And I'm just going to
make with so this is a complete sunset and a moon is a little crescent
moon is there. So I'm just going to make
with the dark orange. You can just go with a
vermilion or scarlet. So scarlet could be
even a little brighter. We can just go with vermilion.
That's a good choice. And above this, I'm
going to make with the cadmium yellow medium hue. So that we can just make
with some golden yellow. Golden shades of yellow
could be fine to make this. So these two color blending
will make a little greenish. I'm just going to
pick a bit amount of lemon lotu a bit amount of lemon lotu here just wiping
up the greens in the tissue. To this again, on the second
layer as a second layer, I'm just going to add up
with the golden yellow. Again with golden yellow, and taking a bit
of dark orange in the base blending all
the colors together. Now to the top with the previous leftover
colors of this mix. You need to blend and make it look like a gradient
till the top. A So that's it. And now to the base, I'm just going to
add a mountain. So that mountain is
going to be completely dark black because it's
like, after sunset, just a few minutes after sunset, and a little crescent moon
is completely visible. So these are sunset part. Now to this, I'm just going
to take my black paint. The tip of my brush, I have
added with the outline and just filling inside
completely with the black. We can just add with a little
more details if needed. So here the base
work is completed. Now we need to allow this to dry to make a crescent
moon on the top. Now here is my white guash. And with that paint, I'm just going to take my
triple zero linear brush. So to make the crescent moon, we need watercolors mostly just dilute and produce
some light shade. So to prevent that, I have a
selected guash paint here. Now, it should be creamy, not that watery, not too solid. So with this, we can just
create with the crescent. I Now to this, secondly, I'm just going to add a little amount of
gauche over as a layer. We are completed with
the crescent Monto. Our next step is to
slowly remove the tape, and our painting here
is completely done. So this is just a
very simple painting for beginners to get handy for the SilhouchO first
main project is done. As soon as you are just
done with the project, you can just group all the
projects together and put up somewhere behind with
a good background and just summit as a project. Or that could help just improvise for the upcoming
project workshops. Also, I could just
review your work and give the tips to improve
the artworks submitted. Thank you for watching
the first main project. And secondly, we
can just move onto a different sky with different
colours, meet you there.
6. Day 2 - Sunset through Pines: For our second mine project. And to this, I'm just going to wet the paper with a flat brush. So it could be any large
sized flat brush to cover the whole sheet
with water well. So I have my number
11 flat brush. So just putting up
with water all over. So can directly put up
with water or you can just spray it and
spread the water. Are very much well. Now the subject is
going to be with two trees standing together with a good sunset
background effect. And to make that,
I'm just going to activate my ultramarine
blue color, so it should be well pigmented, and I'm just going to
put up on the top here. So to the base, I'm just going
to add up with halo blue, just cleaning my brush. So with the To blue color, I'm just going to make it
with the second layer, just blending it
from the top again. So this is how the
palo blue glows. Now, again, with ultramarine, just putting it on
the top to show the change in sky color. Now, here in the base, I'm just going to put
up with my orange. So it's going to be
with the dark orange. I have in my set
added with Ponsio the color of the
orange sponso here. You can just go with vermilion any dark
shades of the color, starting it from the very base. Now to the top here, I'm just going to add
up with light orange. So this is cadmium
orange here, I have. And on the top, I'm
just going to make with cadmium yellow medium hue, just putting up with that color. I'm blending both the
atmosphere together. In the base, I'm just going to make with a light color
here as the sunset. Now, I'm just going to
add up the blending. Again with yellows. That's it. Now, next step, I'm just going to put
up with my lemon here. Now, I'm just going to
allow the colours to dry. And meanwhile, here, I'm just
going to lift the color a bit to show the sun
setting effect. And here I'm just going to
add with any dark colours. So let's add with a
yellow more again. And now I'm going to
take with my white, good amount of white, mix it around to show the difference
for the light source. That's it. So let all the
colors dry completely. Now, here in the base, I'm just going to add
up with the mountains. A small peak is enough. I was making with the outlines. Filling inside. Exactly below the sun here on the top. I'm just going to make a little lift up in
the black color. I just wiping it in the tissue. Not all over. It should
be just only on the top. And there I'm going to
fill with burnt ocher. Now, let the background here completely dry
to add up the trees. Now, the background
is completely dry, and now I'm just going
to take my black paint. So with that, going to add
up a tree starting here. So it starts a little
broad and ends linear. From the top, I'm just
going to make with little dots for
pine tree effect. Just increase with
a point in length. Now, slightly after halfway, just reaching to
the halfway, just increase a bit in length. We should not suddenly raise
the length just bit by bit. Then slowly just greasing
with more length. Now, next is going to be on
this side with good length. That's it. Just one
set of tree is done, and the other one is
going to be just near this And this is
going to be a task. So just try and just sum it with both the trees done
completely near by near. And I'm just going to
skip this alone as it's going to be the same repeated process of the previous tree. So it's going to be a task for you to complete the assignment, and I'll show you after
it's completely done. So these are the completed
portions of the trees. Now, just near here the
sun or the light source. I'm just going to
take a bit of browns. So it could be with the
burned timber or burn sienna, adding it in a light dab. To the corners to show up the sunshine effect.
Same way on here. And that's it. So we can
just remove our tape. That's it. Our second main
project is completely done, and let's get Mick with a different project in third
upcoming one until done by
7. Day 3 - Evening Breeze and Silhouette : Just got ready for
the third project. And in this main project, we are just going to
make a sunset sellout, but it's going to be a different perspective
that's horizontal. We're going to
make it landscape. So firstly, I'm just going to take my flat brush
number 11 and pre went the people all over Now, after making with this, I'm just going to
take my mop brush and pick up dioxine violet here. So just with this
dioxine violet, I'm going to apply it
on the top like this. So the concept here is to
make a evening scenery of the sunset a little time after sunset and sell
out of a windmill. So it's going to
be quite simple, but we're going to make a
challenging work with the sky, and let's just practice with
that in this main project. The applying good amount of
dioxine violet on the top. Onto the base here, I'm just going to put
up with Magnes violet. And next to this,
I'm just going to make a lighter
effect that's going to be with ponzio here that is vermilion orange or
any dark orange you have, and just applying that
color here and there. So below this, it's going to
be with some lighter shade, taking good amount of
orange and putting it back. And next is going to be
with the other color. So we can just switch to
the lightest shade of orange with this light shade, activating it too well
with water and just slowly moving from here on this side. Now next is going to be
with some pale shade. So we can just
create that effect using the cadmium
yellow medium hue here and mix a bit of white to this and create a
lighter effect. So as we have pre
wetted the paper, on applying these colors, the color may just gently
move and flow on its own, and that makes so beautiful. Covering the glacis perfectly. I'm blending
everything very well. Now let this completely dry. And so when it's like 40% dry, so 60% will be completely wet. So 40% will be dry. By the time, I'm
just going to put up a bit of magnese violet at here and there to make kind of thick clouds just passing by, but it's going to be not
with a dabbing technique. We am just going to make it with a straight solid heavy clouds. So let this dry at least 40%. So it started on the
top to make work. And here we can just continue. Until then, I'm just
going to wait for this. So this place is getting
a little whitish, so I'm just going to
activate a bit of pyl crimson and add it just below the dioxin violet with a good amount of water. Again, with Ponso,
adding it here. I was going to take my
dioxine volt again, and it's 40% dry. So gently just putting up
with the straight clouds, a heavy mass of clouds, leaving with a simple
strokes just here and there. C just go in a random motion. I just cleaning off my brush. So as it's pretty wet
already with 60%, the colors will float on its own direction
and that happen. By the time after
it's completely dry, I'm just going to
start up making with the windmill sketch and
just colour it inside, just paint it inside, and let's allow this to dry completely. Now, it's almost dry,
and in the base, I'm just going to add a
small shape of cylinder. So this is the spot
I'm going to work. Making very thin lines should
be very careful making it. It shouldn't be much straight. I should just get
narrow at the top. Closing the top ocean with the curve, and
filling it inside. Making a small
bulge at the sides. Now, here, I'm just going
to add up with you fans. Increase the thickness.
Now to this, I'm just going to very
linearly add with the line. Just add fan details. Adding fan details
with straight lines. Adding breadth on
the other side. Now, from this place, just
extending the third fan. Making good amount of black in my brush and leaving a little
space starting up here, just making it a
little broad again. We need to make a very thin
stroke as we did before for the other fan and
complete the rectangle. And Now to this, I'm just going to add a
stroke in the middle here. And exactly opposite to this
is going to be a lighter. So we have just
completed with the fan, and just over, this is over. Again with a simple
painting to make handy work with a silt simply
just removing the tape. That's it. We are done
with their main project simply with different techniques
in the clouds painting. In the upcoming project
session it's going to be with birds Aloud and get
ready for that. Bye bye.
8. Day 4 - Love in Sunset: Here starting up with
the fourth main project, we're going to make
birds to birds in salt. So firstly, as usual, I'm just going to wet the paper, so we can just spray it on here like this and wet
the paper very well. And with my flag
spreading the water all over the paper from
top to bottom, Now, with the more brush, I'm just going to
activate the brown. So here with this burnt umber, I'm just going to make
it on the corners. It's going to be a spiral
wash. And to this, I'm just going to take sepia, the darkest of brown and
add it to the corners. And if you feel less
with the CiPi you can just add more colors
to the corners. Now, in the middle here, I'm
just cleaning off my brush and going to add with
the light orange. So this is my lightest orange, and I'm just going to take that color and add
it in the center, but we should not
cover it on the whole. Even after cleaning the brush, taking my cadmium
yellow medium hue, putting up in the center
just after the orange. He next is with the lemon loo. So this much of the color gradient effect is
fine, the circular gradient. And in the middle, I'm
going to leave it white, make a smooth finish, remove the excess
colors in the white and just dabbing the
colors in the napkin. So the process here is done. The blending process is
done with a background. Now we need to make
this completely dry. Let that right. Now
it's completely dry. Our next step is
like adding wire. So I have just thickened
with the black paint. So this is going to be like a bird sitting exactly
in front of the wide, and the other bird is going to feed the one on sitting here. So I'm just going to make
wire twisted wires on this place so we can just go
randomly making like this. Dipping a little bit water. And the next step
is going to be with another wire just to
show a twisted thing. Now on here, I'm just
going to add with details, making the connection so
wire can just create a twist around This is fine. Next step is like
making with a bird. So I have here ready with
the sepia and black mix. So activating that slowly just going to make with a round. So if you're less confident
in making with a brush, you can just go creating
with the pencil first and just develop
with the brush next. So if needed, we can
just add with a bit of browns as it is exactly
in front of the light, can use browns too. So brown could be
with the burnt umber. Our next step is like
we can just make with the neck portion. I was me making for the wide open mouth.
Unfeeling inside. Perfect. So to this, I'm going to add a
bit of browns again. So the transparency should not be there to make
it more opaque. I'm adding little
browns Brown because it's exactly in
front of the light and it will not be that black, it just passes some color
through the object. We can just make with the pause holding the next step is again activating
with the color and making the base outline
like feeding thing. So it exactly starts from here. And from this place, we can
just add with the body. Making a good oval. From there, elevating
with the head. Now, with the black,
adding it in the top. And here comes with
the leg portion. Until a Here I have just completed
with bird scenery, this with a mix of
brown and sepia. This is with a black. Sorry, this is with
a black and sepia. This is with a complete plaque. And that's it simply completed here with
a sellout of birds, and next is tape removing time. Slowly, we can just peel off
in the outwards direction. Here is the picture
after removing the tape, and Hobeo just loved
making this easy picture. Next is going to be with a silo of animal as a
fifth main project, and let's continue
there. Bye bye.
9. Day 5 - Twilight Deer Glow: Here now, we're
just going to make the fifth project of an
animal in a sellout. So to do that, I have
my flat brush again. So just dipped in water and wetting the paper
before I start. Now, the thing is we have
to make the background. So to do that, I'm just going to pick with my Prussian blue. So here is the Prussian blue
just activating it well. Good amount of blues
just coloring over the top and just leaving
it little white. We need to blend with
the previous color. And again, taking to make it
a little dark on the top. Now, next step is
like, I'm just going to take an empty brush and just washing that colored thing to the whiteness of the paper. Now, next step is like we
have to take our pons. The torque is orange with that color painting in the base. And next with the
orange light orange. And here in the middle
just I'm going to take my cadmium aluminium
hue painting it well. Leaving this part
little whitish. So let this completely dry. Next up after it's completely dry is to take up
the black paint, again, adding with a landscape. So just making little peak
effect for the surface. Now, next step is to take up the pencil because we're
going to make with a tear. So with a pencil, I'm going
to make a sketch of the tear. Here I have just zoomed
up to make the tear. And in the center here,
I'm just going to start up with making
a little rectangle. So this is, like, we should not make it so bold. So this is how the body is made. And to this, the end, I'm just going to add with
a leg behind legs are made. Now for the front neck portion, the body is going
to be like this. Okay now after this, I'm just going to make a little bulgy next up with the years. Next step is to make
with the antennas. It goes like a tree branch. That's it. Next process is to paint
with a plaque inside. Here, I'm just taking
my mob breast to fill inside this body ocean. Here for the antnas, we
could either go with any triple size brush
or linear brush. Then just go with a very tip
of the mob brush itself. Now, this is the final result I have completed for the
fifth main project. And the task here is like adding with the gradient
effect of the background sky, and next is going to be with
the practice work of Deer. So that was the task here. And next is like untaping it. Hope you enjoyed this
session and we'll get back with the sixth main project in the upcoming session.
Bye bye for now.
10. Day 6 - Beautiful butterfly : Here for over six project, it's going to be with a
butterfly on a flour silt. And here, again,
I'm just going to wash the paper perfectly, spraying it up and
with this flat brush, spreading water all
over the paper. So here, I'm just going to
use prescien blue on the top. So this is our Prussian blue. Dipping water again with this good amount of Prussian
blue only over the top here. To the base just
using with sky blue. Now, after this,
I'm just going to slowly add up with a flat wash using just water and again with a sky blue on
the top, one on the top. Here, we need to just
go from both the ends, adding Prussian blue to the top. So the colors could blend. Now the next step is like, I'm just going to take with
my cadmium low medium hue. So with this color, just
making a gradient effect. So blending both the colors with just white space of
the paper in between, because the yellow
and blue mixing may just turn it into green, but I don't want that result. So to avoid, I'm just
going to use only cadmium yellow here and
blend with the whites. So let the colours flow and
create some magic on its own. And next is going
to be a orange, a light orange is fine on here. Now, in the middle, sorry, in the base, I'm just going
to put up with Ponso, so you can just go with
scarlet or vermilion orange, a dark orange shade. Now, again, just going with
the light orange on here. Now, the task is we need
to add with the sun. So the light is like Again, we are just going to take over napkin and in the center here, just below the orange
exactly on here, I'm going to make her removal. And this is going to be our light source can use the tip of the
brush to make it more precise and get exact
image result we need. So this much is fine. And next day we are just
going to make a smooth blend, a soft blend to make it bright. And next step is
going to be like, I'm going to tab a little bit
of clouds in the base here. So to make that clouds, I'm just going to again,
take the prussian blue. So with this prussian blue, just here and there,
start dabbing. It's not going to
be with a strong, very fluffy, srt cloud thingy. So it's going to be a
minimal cloud type. Just spot it here and there. For this, I'm just going to keep my brush as much as flat down. So also, I'm just going to make it with the dioxide violet, too, with a good
thomotf dioxin violet. Can randomly go in the
direction a little upwards. We can just use
our spiral crimson just tiny dots here and there. And next is going to
be with a dark orange, or you can just go with
a light orange and make the clouds on the top here. So it's kind of a dreamy sunset
with a mixture of colors. Now, next is going to be with the grasses in the
earth surface. So here it's going to
be with the grasses. So for this, I'm just going
to take my pines gray. So this is the pines gray with the thalo green mix and a
good amount of black colour, So with all these mixes, I'm just going to add up with the small, small grass strokes. Keep it with a tip of a brush, just make with a curse. With a good amount
of black, again, just going over to
show the depth. Now, next step is like, I'm just going to add
with a good big flour in the middle here,
high this much. So let's just draw a small
holding cushion for the flour, and from there, we can
just make with a sepia, sepals and the petals. So for petals, we need to
make it a little lengthy. So this flower is a
complete whole bloom thing. So we need to create
it like a semicircle. So consider it making a
semicircle, and inside that, we're going to cover the border of the semicircle
with this petals. So we can just make it simply by adding the petals around imagining like touching
all around the semicircle. Now, again with a
good amount of black, adding the base portion
here and just making a good work of sepals and adding the details.
Even for the petals, And from here, I'm
just going to make it a good strong stem. Now the flower is almost done, and to this, I'm going to make with the butterfly
sitting over here. Again, taking the black. So with the black,
I'm just going to add the body of a butterfly just adding with
the head a small, beautiful circle of head
and the body portion. So it goes with the legs. Now, over this, I'm
just going to build up with wings the beautiful
wings of butterfly. This. And finally, adding with the antennas. So that's it, a cute little
butterfly picture like a dreamscape with
dreamscape of clouds around we have just
created with the thing. And the top here,
I'm just going to remove a bit of color to make the see portion
of that flour, just reflecting out of sunlight and just a small piece of a bit lengthy
grasses here and there. Same way by this
side. And that's it. We can just simply
remove our tape. I hope you all enjoyed making this dreamscape
sunset silo painting. And next is going to be with
a little intermediate level. So first six paintings,
we have done with a beautiful easy, big enough friendly, very
handy things to learn, such kind of paintings
we have just completed. But from now on, it's going to be kind of a
little intermediate level to become a pro in watercolor Sil hot painting
so that we can just improve into advanced artist. So just I'll be meeting up with a new project
in the next episode.
11. Day 7 - Serenity by the water : This main project
is going to be with a seascape, different try. So as we are traveling in the
intermediate level, here, I'm just going to make with one single tree and in a sunset, so there'll be two escapes It's going to be a horizon
line here and in the base with the seascape so it's going
to be with a seashore on the very base and top with
the beautiful sunset sky. So let's just breathe the paper with flatbush Now, next it's going to be
with the division. Firstly, I'm just
going to start making with the Prussian blue. Sorry. Firstly, I'm just going to start
with the Taloblue. So with halo blue on the
top, just painting it. Now, just cleaning my brush. Until here it's going to
be with the sky area. So it's going to be
the horizon line. So I'm just going to
take my Ponso again. So here I'm just going to
take my Ponso and with that, just making the split
for horizon line. Nextly it's going to
be with the orange. And and fewer plays
in the middle. So next I'm just going to take my cadmium low and go over. So this place is
going to be with a white blending
with the damp brush. Now next, it's going to be like, I'm just going to lift from here and with napkin on the side, just
removing the colors. So damp brush should be like much perfect
to remove the colors. At this place, I'm
just going to clean my brush very well and
just activate lemon low. So with this lemon lo, I'm just going to
make with swatch. And again, just activating
the same lemon loo. Very base, we can just lift with a little circle to bring
out the light effect. This much is fine. Now we can just take our
regular orange, the light orange and
just extend with the sky scenery on the sides on the other side, Okay. Now the next process is like, I'm just going to activate
the Prussian blue. This is the seascape. Just a bit of ultramarine. Here again, adding with good
amount of Prussian blue. Now to this, I'm
going to again take a little bit of Prussian
blue and the black mix, again with the Prussian
blue, a little ultramarine. So with these colors mix, I'm just going to make
a little wavy textures so it can be from this place. Can use a very linear brush. So the closer waves
will be much broader and visible in a good thickness. But the very far one will be so, so linear, like a
little thin lines. Leaving a bit of gaps here
and there in the middle. Now, next step is like, I'm just going to take a bit
of light orange and remove excess water from the brush so the paint stays up. And with this color,
the orange color, I'm just going to
add a little bit of orange juice here and
there as reflection. Now, next step is with
cadmium o or light low. We can just go with
any yellow shades. And with that, again, adding so simple small
linear lines just near the light source as that place is little far
from the viewer's eye, just slowly just increase with the length when reaching
near to the seashore. The next step, we
can just add with the waves just ticking
a bit of pins gray. So even the waves here will
produce a bit of darkness, The next step is going to
be with adding a big ship. So we can just make it a little far adding with
details like this. Now to this object here is just much closer
to the light source. I'm going to take a bit of
red and add it on here. So if the color is not visible, we can just lift
the previous color. Filling again the
place with red. Now with the lemon low, I'm just going to add with
details again over here. Now the next step it's going
to be with making a tree. So we need good amount
of black for this. So rightly, we need to make a management of placing the
tree exactly in this place. So we need a little observation, and we can just complete that
work by adding sketching. So if you are much
confident directly to paint with a brush,
we can go with that. If not, to locate it very
properly and precisely, we can just make
a eye observation and just make a
markups with pencil. I'm just going to
start up it here and the height is going
to be till this point. This is going to be the thing. And from here goes
with splits of leaves. Now with the trunk, I'm just going to paint it exactly a complete black
color with this more brush. Now, next, I'm just
going to switch my brush with a linear thing. So this is triple zero
sized linear brush. Now activating the black color. So this we can start it a little broader and make
linear at the end. I'm going to extend
up with the details. So as this is in
the lower direction facing towards the down surface, we need to just extend
with the leaves. We can just extend it as curves, short shot style is enough. We need to start
it little lengthy and just when reaching to
the end of the branch, we should decrease the length. And as it is facing
to the ground, we need to make it a
little facing downwards. Next on here, again, I'm just going to
make it downwards. This should not be upright. Instead, we need to make
it a little slanting. It's a little facing
towards the top, but not completely
straight as this, but it's a little tilted. So to create this, I'm just
making it the same direction. Not perfectly
straight partitions. Now, this side on the top, it's going to be
little facing up. This is completely facing
to the other direction. So for these, I'm just going
to make the bottom side. So it's like visible with only
one side, not the top end. This is mostly facing downward. So here, the lines will
be visible on both sides. So that's it. We are
done with our picture. Additionally, if you
feel to add with some little cute
flying of a birch, can just go simply
adding with those. Just a tiny little
birch will do. So if you want to add
with more numbers, also a little bigger, it's like you can try
with your own ideas. And finally, just tipping it. That's it, we are completely done with our
seventh Min project, and hope you enjoyed making this process and learned
so many new things, making with the reflections, and we'll be meeting you with a different intermediate
level painting in the upcoming
session. Bye bye bye.
12. Day 8 - Crane and Stone: Here in this eighth
main project, we're going to make a
beautiful sunset sil out of but crane sitting
on a stone way path, and it's going to be
a seascape again. And mostly the color
palette is going to be with oranges and yellows, only oranges and yellows
and sil out with a black and a bit
of rose family. So this is going to
be our color palette. So here, I'm just going to
try it without wetting, so it's going to be wet on dry. And our horizon line is going to be on here at this place. So this is a sky portion, and this completely
goes with the sea area. Now to make it, I'm just
going to take a bit of rose, the piral crimson and with that, just making a split. So to this, I'm just
activating dioxin violet. And a bit of Magnes violet. This place is going
to be a little light. So here, the sunset
is happening here. The light source
will be around this. So next to this, I'm
going to activate with my Ponso the darkest orange. So that color will
be like on here. About this is going to
be with a light orange. And before that, I'm going
to take my a bit of lemon low and just create
with the light source. Just removing the excess colors. So we can just freely fill
with the color inside. Now, to this inside, I'm just going to
paint with lemon low. And with the cadmium low
just a little above, painting with the
sky portion again. Now, with light orange, painting it around the sun. A now this is okay, perfect. Next is going to be with
the top ocean here. So as the base,
I'm just going to make with a cadmium yellow wash. This on the top, I'm
going to take a bit of orange and paint. Just activating with
my Magnes violet again to paint on here. So the colors every colors
will blend thoroughly. So the top portion is almost
done, and additionally, we can just repaint to make
it good bright effect. Nto this with a
little bit of orange, making simple, lengthy strokes
to elevate the beauty. Bit of ponso So that's
it with the sky part. And here below,
I'm just going to completely wash with lavender
here and orange here. So this is just a background, and it's going to be a seascape, so there will be
more of reflections, starting with the magnes
violet in the base. So even this is going
to be wet on dry. And in the top, it's going to be started with light orange. Just make a blend
of both the colors. Again, with light orange. So we here have a good
transition of both colours, starting from the magus
violet and the orange blend. So let the colors dry well. Now, it's almost dry, and to this split on
the horizon line, I'm going to make
with a black split, so it's like mangrove,
mangrove forest thing. Just adding a little
bit of bushes kind of things because
as this is much, much far from the viewer's eye, we need to make it as
small as possible. So next thing is going
to be like I'm going to make with a crane just
sitting on a stone path here. So to do that, we can
just very randomly create with stone effects just leaving a little space for the sea
and just starting up it here. So this is our guiding line. So with this line as guide, I'm just going to make
our little rectangles. So we have to build up
with the stone Now, again, making it with
another rectangle. Same way, just keep on building
up with different type of rocks. The other one. Finally adding a little
space in between, so that we can show a
difference with a small rock. Sh. Now on here, I'm just going to add with the reflections
of all the rocks. And here and there, we can
just increase with the height. Next, we have to make with reflections and to create
that exactly below this, we need to create a
mirror image and just start making with the strokes in with the very
tip of the brush. Here, it goes a little
curvy on the top, so we need to create,
like, a curve strokes. So it starts like this,
in a semicircle way. So here it's like lower in the slope on the
side and higher up. So we need to create
something this way, higher on here and
lower on this side. Now here, the task of
making the path is over. Next is to make a bird. I have a spencil in my hand. It's just starting
up with making legs, so it has a big thin legs. With this, we need
to create the body, and it's going to be kind of cone shape like this. And from here, it's
going to be with So here, I'm just going to take my
triple zero linear brush again. Fill inside with thick
consistency of plaque. Now, finally, adding
up with the lex. You can just make with
the changes needed. Now, to this as reflection, I'm going to exactly
in this right, make with lex, here, too, and randomly make a bird
body just starting it from here as reflections and
goes linear on here. Next, it's going to be with the color change here I'm going to pick with my
Magnes violet again. With this magnes violet, making with bigger thick
strokes just near. Now, after this, just
switching with the color. So I'm going to take my
orange orange strokes. So now, again with
the orange just filling up with a little
strokes on the top. So that's it. We are
done with our painting. Next is going to be the
removal of tape session. Hope you enjoyed this
painting very much and we are nearing with
the intermediate level. So we are on the way in
the intermediate level. And next we'll be with
some beautiful sunset again and with good new
techniques. So meet you there.
13. Day 9 - Friendship in boat: Now here in our
ninth mine project, I have selected up making with board as a
bigger object for sunset sellout it's
mostly with the seascape here and the skypatT is going
to be the horizon line. So let's get started
making that. And for that, we have to
just activate the Ponso. So with the pose
in a good amount. I'm just going to
split a line on here. Our next color is going
to be the light orange. So with this light orange, I'm going to paint a little
space in the middle. So the top portion, it's
going to be with cadmium low and a little
Prussian blue shade. So I'm here going to take a Prussian blue and
paint it on the top. So when we mix this prussian blue colour and
the cadmium yellow colour, sorry, we can just mix
with the cadiumylow here. It will produce
kind of gray tone. O on the top here, again, adding a bit of
orange to desaturate. A bit of earth
occur in the base, I'm just going to make
with dioxide violet, with a dioxine violet,
coloring in the base. Also not going to stop
with just dioxine violet. Instead, I'm going to pick
up my piral crimson here. With that just overlaying, it will produce different
shades of color mixing with the dioxine violet,
blending evenly, changing to the rose Now, again with a rose.
A good amount. Byron crimson in the base. Just a bit of dioxin
let again to the base. Now, that's it. The Sea Effect has been made with three
different colours. Now the technique here is
like I'm going to lift up because the sun is going
to be on here, this portion. So I'm going to use
the lift up technique. Wiping it in the tissue. Now to this, I'm
going to add a bit of white to make it very bright. Tick consistency of
white would be fine. Now the next step is going to be with making the
mountains just behind. So to that, I'm going
to take my sepia brown. So just from this
point, with the peaks. It's good to go with the
closer shade of orange, not very light shade of brown, so it could be with
some dark range. So I have chosen with the sepia. And again, here on this end, it should be much with darkness. That's it. Next step is like, I'm just going to allow
the colours to dry. And here it's almost
okay. It's dry. Now, I'm just going to
pick up my dioxin virt. So with this, going to
create a bit of strokes, pairing with the details, just randomly going here and there. So completely here,
adding up with all the wave textures
with dioxine violet. So that's it with making waves. And next step is like
adding with a boat, the main object for Silhout. I'm just grabbing
my black paint, and this is the place I have
chosen to put up the boat. So just adding a straight line and creating the
basement of the boat. Now the next is like two
couples just enjoying sunset. So to draw the couples, I'm just making with
the body portion and a small head
potion, that's fine. And the other one is just
facing to this side, making head potion on here
and with hairs if needed. So next is, like, we have to elevate with the net Holding the
brush up, right. Now, here inside this, I'm just going to
add with the black. Same way on the other side
with adding the black. That's it. So here and
there with the blacks, I'm just showing the depth, the shadows of the waves, and a bit of reflections
of the boat on here. That's it. Now it's
like peeling off time. We all enjoyed
this easy painting in the intermediate session and just share a pick of all
the projects you have done. And that helps me just
review with a class project, also review via
work and improvise my art style and teach better. So thanks for watching
and we'll be just continuing with the ten project
in the upcoming session. Bye Bye bye.
14. Day 10 - Dry Tree Silhouette : This is our tenth main project. And so far, we have done so
many beautiful paintings, and it's going to be simple here with just one single
main object of silo. So it's going to
be a dry treating. I'm here going to use
wet on dry technique. And to that, I'm just here activating with the dark
orange that's ponzu. You can just go with milion
or scarlet any oranges. And from the base, just
painting up that color. Adding a little bit
of reds to the base. And on the top, I'm just
going to add with the Ponso. In the middle here, I'm
just going to put up with the cadmium aluminium hue, just a bit of cadmium
aluminium hue. To this, I'm going to
add up with the lemon, taking good amount of lemon
lo and adding it on here. So here we are not going to
add with the light source, but it's just after
the sunset and leaving the space little
white after this. Next with the Russian
blue or ultramarnlue, you can just go with
ultramarn blue on the top. To the base here, I'm just putting up water so
the colors will flow. To this, we can add
tailb if needed. Just removing the colors here,
wiping it in the tissue, and adding just a bit of
water so the colors flow from the top washing it again. And that's it. So let
everything dry well. Now, it's completely dry. The next step is to add
with our tree silo part. I have chosen my round brush
number three, and with this, I'm just going to
create a surface with improper line and fill in with the black Now, the next step is to
add with a tree. So here to make this tree, we have to start
a little broader, and it's completely dry tree. Consider desat. And here it's going
to be solo too. So I'm just going to elevate
the tree from the middle, starting with a breath, good breath and just reach
a top turning narrow. N task is like we
have to branch. This is the first step
in making the tree, and the second step is
like we have to branch. So it's going to be like a
second set of branching. So it's the bigger one. Second step is
going to be little smaller than this,
the sub brranches. So it starts from the
branch in the base here. The other small branch
just crossing over. Fill inside. And the next branch
will be from here. Next step is to make with
branching like this. So this is a third
set of branches. It will be smaller comparing
with the second set. And next is with the fourth set, which is much, much smaller,
combining the third one. The major branching process
is completely over. And next step is to make
with the tiny branches. So I have switched to
triple zero size brush, and with this, I'm going
to make it so linear. Can keep it short or make
it a little lengthy. Just ending up very linear. So it's like we have to
keep on creating with the size decreasing procedure. So it can go in any direction, but it should look
pretty realistic. A so here, that's it, very simple thing we have practiced for our
tenth main project. Here, the main task is to branch it very perfectly for
making that tree. That's the main task.
So you have learned something new making
with the branches. So if anyone learning
here is, like, um, feeling difficult to make with the branches
that dry tree, it will be really, like, I can guarantee you can
just with the steps, you can just make it exactly
as it is with a tree. And if you felt difficult, just practice one
or two times in some separate thing
and you can just jump into the main project. So we'll be meeting you
the second half set of the painting in the next
episode until then. Bye bye.
15. Day 11 - Lone Bird in Dusk: The second set of paintings in our 20 sunset siloed
painting work. So here, the 11th painting is going to be with
a bouquet effect. In this project, you will
be learning how to create a bouquet background that is
a little blurred background. So you will be learning how
not to make a sharp edges and use very flowy smooth soft transition of
blending works. So we are going
to learn that and our project here is to
learn with a bouquet effect also to focus on one
subject that is going to be a little grass
and a bird over that, just a bird sitting on that. And the other grass here
and there around will be incomplete blur effect. This is the thing
you'll be learning. You're going to practice
mainly in this project. To make it, I have my
paper ready taped. Next is going to be
with a flat brush. I'm just simply going
to wet my paper. This is the procedure to
create a bouquet effect. So here, the color palette is going to be for
the background is with a little orange and yellow forthcan and here
with a little orange. And in the middle, it's
going to be with a violet, so we're going to mix with
dioxin and Magnese violet. So firstly, I'm going to start making with a dioxin violet. Just with that color, going to make a swatch in the middle. So just with a random
swatch in a horizontal way, I'm going to make it. Same way as the reflection. Taking all colors, and
good amount of water. Now, cleaning off my brush
and activating the oranges. Good to go with light orange. Your speed is important
to make the bouquet et. As soon as the water dries,
we need to keep on making. Even though if it
dries, we can just replay with water and
start making the work. Now, here in the base,
it's completely dry, so I'm just pre
wetting the paper. So the colors can
move well along the paper with other colors and blend much well naturally. Now with the orange again, just activating with
the dioxine violet and moving with that color. So let this wet and before that, I have to just remove the
color to make the sand. So this is little bigger, so just again with a
lift outt technique. I have my damp brush and just lifting the color where we are just going to make
with the light source. A just going to activate with my lemonlo and leave the top of the circle
a little whitish. So more lemon allo with a base. And let this dry completely. So this portion here, it's wet. By the time, I'm
going to make with the lengthy wreats so
they are not in focus. So it's going to be again blood. Now, to make that, I'm just
going to take the pins gray with good
amount of pins gray. Making reads. Now, just before making
the other works, the read color changes to sepia. So I'm just going to
switch with a sepia here. So with this color, let all these dry well. So the main subject here, bird the focus is on the
bird and other set of reads, so they are focused well. So this focused
part should be made after all the background is completely dry, so I'm
going to wait for that. Now, the focus point is on the red and a
bird to make that. It's completely dry
now. I'm just going to take with my black paint. So with this, I'm
just going to make a very precise black grass S. Splits just make a split here. So this is kind of a dry plant. The branches and adding
all the details. Hold the brush very close
to make the fine details. Or you can go with
some linear brush. It should not be watery
to make all the details. The bird is sitting exactly
on this place, the top here. So here I'm just
going to make D, the alphabet D. And on the top, I'm just going to make
a little rectangle to draw the head. So it's exactly
on this position. We can just make
like a dome shape, or you can consider it
as a semicircle shape. Just extend for the tail and fill in the body
with the plaque. Also the head portion. Taking good amount of
black paint again. Now to add the peak, it's little sharp and
cute bended in the front. That's it. Next, with the wash. So we are done. Now here, I'm just going to
add small small reach around. That could be in black
or in the brown. Next step is to tape.
16. Day 12 - Sunset through Window: This is our 12th main project, and here we're going to
make a different painting. So it's going to be like a
balcony of the house and a window scenery insilo
so sunset to a window. So we're going to make
little plants just behind the window and beautiful clouds, fluffy clouds here and there. So I'm just going to make
it a little slanting, like a perspective
from this side. So to do that, I'm just going to grab my
ultramarine blue. So this is not going to be a complete painting just
making a complete swatch. Instead, I'm just going
to make it leaving a little space here
and there for doing the clouds because overlapping may result in some muddy colors. So to avoid that,
I'm just going to directly use with paints, giving little gaps and fill
there with the exact color. So just making, like,
a little curves, with the tip of
the brush, we can add up with like a details. Now, from this place, I'm just going to wash my brush and activate the Magnese violet. So with this color, I'm
just going to slowly make a blending work and
add the violet. Making a light wash, you can just go
with a light wash, creating a cloud effect. So this white space are
going to be filled with different warm shades to
show the sunset thing. So this is like, without
a Hari and Hazel, we can make slowly with patients just enjoying the
process of reading the clouds into my dioxine violet and adding with the cloud forms
just here and there a bit. That's enough. Now the next procedure is like, I'm just going to
clean my brush. And now the step is like we have to take our light orange. So with this color, I'm just going to make a
flat wash in the base here. So add the details
in the top later, so let the colors bleed. You Now, I have added a little
bit of orange to this, just making the extension
works like a fluffy cloud. And the top place is
going to be added with W W pyrolGrimson, just going to add it on the
top portions of the cloud. With a dioxine violet, adding small small pieces, parts of cloud here and there. Thinkers like I'm just
going to take a bit of light orange again
and put it on here, making it look it vibrant. Now, again with the
Magnese violet, I'm just adding up
little vibrancy. The base here, I'm just
going to take with my cadmium me and
just add the color. We can just blend it in
all the white spaces. With a lemon low, I'm
just going to add up with a little
sunlight and just add with a light color to add the brightness where the sun sets because light
sources more there. And even on here. Next step, again using the Magnes
violet covering all the lighter plechs lifting up with a little
small white circle. So this is the effect that I wanted to add up to
make a sunset thing. Next, in the base here to make a little warm effect because the light source at this place
will be a little lesser. It will not travel that much. So here it's going to be with different warm shades and
I'm going to pick up my red. So with that red, I'm going to add it on here a
little bit of burnt timber. Making it more dreamy sunset. And adding with muddy shades of cloud mixes here and
there in the base. Now, in the bottom here, I'm just going to put
up with more amount of black and make the silo work. And with the sepia, making the blend on the
burnt number two. Again, with a black
mix. Now, with a good solid
consistency of black, extending up with a line. Now the next task
is with the black. I'm just going to
add up a diagonal, a little slanting
pillar like this. Now the next step is
to again add with the grills all the
window details. So with another line, so it just cuts here making
it very perfect line. Now the next opposite
side is going to be a little in
another direction, moving to the downwards. Next on the top here,
just adding with small lines of steel bars. Now, exactly with
the same point. So let's go with here to
here and this point to this, we need to make a parallel
line to this bar. Now, the next thing is, like, we need to make a split, just leaving sand in the middle, and I'm going to put it up
behind, just on the sides. Even this should be
parallel to this bar. Now, the other thing should
be exactly on this side. Now, adding with the
horizontal row of steel bars. In the middle just
adding only two lines. Again, with a bigger one.
The other one on here. Okay. Final one at this point. Next on here, it's like
exactly at this place. We need to extend in different
parallel. Same here. A here. And we can add
up with extensions line. So here and there,
just out to the bars, I'm going to add up
some leaves showing up, trees showing up in silo. So to do that, we can just randomly make with
some branches, allied branches here and there. And put up with small leaves. Same way, just adding
with bushes kind of can simply dab closely
and show up the textures. So just adding like
a climbers with more leaves hanging
on these steel bars. Now, that's it with our painting and just we can peel off. Hope you enjoyed and learned something new with a
different perspective, we meet you with a new project
in the upcoming session.
17. Day 13 - Rural Towers: Project mainly focus with making of cable towers, the
electricity towers. So we're going to create sell
out of all these towers. It's going to be
with a bigger one, a smaller one, a
tiniest like that. So this is quite simple, but a little difficult
with the tower building. So it's very much
good for beginners, also, like in all levels, who struggle to make towers such heavy tangled components. All these can be just learned
with tricks on this thing. So I'm just going to make a wash with a
Prussian blue here. So with good wash of
Prussian blue in the top, a little bit of ultramarine. Again with good amount of Prussian blue.
Painting on the top. Also an ultramarine blue mix. Blend of colors,
smooth transition. Now in the base here, I'm just going to put up with orange light orange
on the sides. Again, with orange on this side. So elevating with our cadmium
low medium hue on here. Now just cleaning
up my brush very well and slowly allowing
the colours to blend. Now, just lifting up with
the sun light on here. Just below this, I'm going
to put up with my black. So just showing up the surface, all the bushes in the base. We can just randomly make shape and fill in with a
black completely. Just starting with
small tiny details. Leaving a little gap
here because we are just going to make with orange shade. Swing, like, the light just
falls over this place. So we need to just lift
this up at the top. Now, wherever it has
with empty space, I'm just going to fill up
there with orange again. And a bit of reddishness
in the base. I have my deli brand fine
liner pigment fine liner. So this is waterproof,
and it goes with ten different sizes, so you can see ten
different sizes. So it starts from
0.15 MM to just goes with 0.5 M and
has a brush too. So with this, I'm
going to choose a minimum very
pointed fine liners. I'll just mention the sizes when we proceed with our tower. So you can just go
with any fine liners because it feels very
precise to work, and we can get the
exact accurate details. So I'm going to start up this bigger one because it's
much closer to the viewer, and this is a little far. So I'm just going to pick
up my 0.30 MM thing. So just keeping that, we can just start making the elevation. Center two slanting poles
of lines will be like this. Much closer, and the other
one should be a little far goes with a
slight bent inwards and just touches the top. Same way on here.
With this point, we have to just make a
section of three divisions, starting from a lower
one, a smaller length, and the bigger
length, and again, with a smaller length of lines, making it with a small
spring kind of in the sides for each corner Now, to this, I'm going to
add it like a triangle, an attachment to the top. Same another triangle
a flat line, then disclose it with
a slanting line. Here inside this, we can just
make up with our details, just going with slanting lines and making straight
lines here and there. So I will attach the
reference picture in the project section area. So here just going
up with a crosses. To make a crosses, we can
follow our easy step. So just making a Rombus kind
of thing from the top to connect all the four differently
standing straight lines. So all the four pieces should be connected together
in the middle with Rhombus. Now, on this side, we can just make up
with X kind of things. So this can be done with
the same sized fine liners or we can just switch
with the size. So randomly adding
with much lines, so it looks like a tangled
together and looks realistic. Now the time is to
add with towers. And before adding
the wire connection, I'm just going to
make up with another tiny two to three
electricity towers. They are going to be
much with a distance, so I'm going to start it here. So it's not that detail
and not visible that much, so we can just directly make with two lines connecting
together at the top. Now for this, so starting
it here with 0.20 number to show up the distance Adding the same details
again, repeating it again. And as we did here
with a triangle, we need to make it even here. Now, next step is adding with straight lines, the
detailing works. Now, here, this is not
that much visible, making with the straight
lines directly and adding with much of
excess in the corners to a bigger one than
one on the sides. The other two small things
should be at herein with three things and adding with small collectors, then triangle. Same process, but
the size varies. Now, it should be very
much smaller than this. Next step is like we have to add with all the
wires connecting. Now, 0.15 have changed
to the other fine liner, the very first finer.
It's like, very thin. We can make with all
the details here, making a wire thing and
connecting it to the top, bringing it like this. So other one from here
can hang up at anywhere. This place. The other
one from here to here. I need to connect both the inch. We are done with the picture, just slowly removing the tape. Now, 13 main projects
are completely done and seven more to go
for our Sunsets Silo thing. So seven is going
to be like we are shifting from intermediates
to advanced level. So two more left in the intermediates and
five for the advanced. I'll be meeting up in the
next session. Bye bye.
18. Day 14 - Cityscape : Hey, all. This is our
14th main project, and here in this
just going to make with our sellout in cityscape. So cityscape the skyscraper is all going to be with
light reflections. So we need here with little detailing
works to show up the glass that's reflecting
with the sunlight, also the clouds colors. So we need little patients
to create that A a few. We can just go with any gouache, white gouache or white colour acrylic markers,
anything we have. Now just I'm going to
work with wet on dry. So firstly, I'm
just going to take my Prussian blue and
just put it on the top. So so just getting that in good mount and just allowing
it to flow on its own. Now the next step is like, I'm going to take
my Magnese violet and just start blending it with the blue as a next step, I'm just going to
put up with red, a bit of red and
the rose colors. And finally, with
a bit of orange. So it's dark orange. I'm here taking with a Pons. Now, again, we have
a light orange. This leftover space is going to be with cadmium
yellow medium hue. Now, finally with a lemon low, light allow, putting up it here and mixing it with
the previous color. Now, let's allow this to dry completely and start
with our cityscape. Just activated my color black here and with our
regular more brush. I'm just going to
carefully build up with the buildings
and skyscrapers. So here we are just building only with our black portions, and the details will be with some highlighters like acrylic markers or we can go with guash. It's our choice
with what we have. And I'm just going to make a random height
buildings like this. The other one with
little length, so I'm just increasing
the height, finishing the rectangle here. It's like a little narrow
building, not that broad. With this a center.
And from here, just going with single line. Then just leaving a little gap, making a rectangle and
completing it at the top, just leaving a little gap. Just randomly leaving
with a space in between. And next, it's going to be with a elevation like a four
to five story of blocks. Closing it exactly at here. Same way, here, I'm going to fill up with little
different spots. So whatever comes to your mind with creating
for a building, you can just go with
exactly you can. Now I'm just going to leave a little time to dry completely, and we can just
add up with lights using white gouache or
white acrylic marker. To add up all the details, I have three colors in my
hand with acrylic markers. So they are liquid acrylic
markers from Del brand. So this is with a white and orange shed
and light cadmium mellow. So with these three colors, I'm going to put
up all the lights. First, starting with our white. They are not glossy finish ones. They will not
reflect their matte. So you can just go with
anything you have, so it can be with gouache
pins or acrylic markers. Now for the top of
the building here, I'm going to add up
like lights Okay. Just to create the glow effect, I am swatching up a little
with a white marker. Now with a yellow shade, I'm just going to add up
another set of lights. And here just putting
up with little yellows. Finally, with the
orange shade showing up the reflections. Then on here. So here, completed with all the light effects, and that's it. We can just remove
with our tape. Now, it's completed with the
14th main project and six more to go so happy on just traveling with
this Sunsets Lujourney. And I hope you
feel so excited to make with all the six and
complete it successfully. So meet too in the
15th session. Bye bye.
19. Day 15 - Distant Hills at Sunset: So we are just entering
into the advanced level, and here is just going to be a theme with sunset
in the mountains. So there will be like
light differentiation from the very far shade shapes of
mountains to the closer one. So the color difference
plays a major role. So you're going to learn with major in the color difference. So here I have my
mop brush again. I have my color ready mixed
here, pre mixed here. So this is a mix of sky
blue and magnese violet. So mixing both colors, I have got this
and a bit of pink. So on the top here, I'm
just going to put up with this color and spread the
colors evenly together. So also in the base, I'm going to put up a little of sky blues and make
it with water. Make that with water. We've been taking
a little bit of the color and adding
it on the top. Now, just clearing up the brush and with the light orange shade, putting up the color on here. And now washing again.
Putting up with orange. Now, the middle shade here should not blend
with the orange. Instead, I'm going to
put a bit of white. So we need to keep on
cleaning the brush often. And with this white color, I'm just going to make the
colors blend with orange. Now, with good amount of orange, adding cadmium mellow medium
hue, just above the orange. So this is wet on dry. So as it mostly goes with
a shade like yellowish, I'm just going to add a
bit of orange on here, washing the brush and again, blending with a bit of white. So yellow and white, let them mix together. And again, with the sky blue
the previously mixed color, just making it again. Clearing my brush
well after wiping, taking a bit of white
and going again. So that's it with the clouds. Sorry, with the sky. And next to create the cloud effects, I'm just going to here
and there lift off the shape of clouds with
a wet brush like this. Just we can hold the brush
very closer to the task. And the other one on here. With all the sizes, it should not be much
fluffy and bigger lift off. It should be with all the sizes. So I have lift up
here and there, and now to create the cloud effect I'm
going to put up with a light orange base of colors so it should not be with hard edges. We
can make it soft. So randomly creating
up with the shapes. The very far one will be like so linear and not
that much visible. We cannot see the exact
shape of the far one, so just creating with stripes. Now, again, just adding small fluffy structures
with a mops. Adding depth with
pigments increased. Here I have the darkest shade of the color to just
paint it as a shadow. So we're going to mix
a bit of pins gray and a bit of earth low together
and a bit of browns, just a tint of brown. That's it. And I have just my
colors ready here. So if you have just pines gray, just dilute well and add a
bit of earth low and brown. So with that color, I
have over the clouds, I'm just going to add like
a shadow effect like this. And similarly a tea. Here and there adding
a bit of violate. So Manganese violet
will be fine and mixing violet and gray to
make the clouds adhere lifting up with a little bit of color here
to add the light source. The colours are completely dry. The background is
completely dry. It takes a little time to get the paper wet and
lift the colours off. Just putting up
with white on here. Create the mountain
effect on here. The closest one to the sky just near to the sky will
be kind of orange mix. So I'm going to lay out with
a structure in orange shade. Now, this orange continues in the center here because
the light source is exactly at the center. So we can just confidently make with the
orange in the straight. Now the next task is
like I'm going to add up my Magnes violet
on the sides here. Now, again, so these spaces are filled with a bit
of Magnese violet and orange mixes, and I
have spread the colours. At the top here, I'm going
to put up with a tar violet, so that's dioxide violet, taking up with my dioxine and violet and just making
a regular wash. Just to build up with the layers of the chains of mountains, we need to start it exactly
from the back side, not from the front
and go rivers. So I'm just going to take
my Magnes violet again, the lightest of violet, and very carefully just make
with mountains. Not the distance here
and show the cap. Just again, taking my orange. Adding a little more depth. How we can just build
up with the mountains and blend all the
colors together. The next step is I'm going
to take a bit of mixes. So this is good amount
of magnese violet. On the other side,
it's going to be with a mix of dioxin violet. So just adding a bit of dioxinevilet to the
manganese violet. Also I'm going to add a bit of pyral crimson to this color and dilute it with a little bit of water magnese violet again. So it's lightly just
good rich in pigment. So it's strong than
the previous color. I'm going to add a change from here and add the peak on here. So just go to the base and
finish with the mountains. Now, as soon as it
gets a little dry, just we need to allow the previous surface little dry and we need
to paint it over. So carefully making
with the shape. And the next task is
like we need to add up with the dioxine violet,
so just wetting that. And with the dioxin violet, I'm just going to make it on
here and let it just pass the previous change height and just extends
to the other end. Now we are going
to make a change like we need to start the
top of the portion with dioxine violet and the bottom portion
with Magnese violet. So here, the difference
is not that great. So again, I'm just going
to take my dioxine violet. The base would be just made
with the lightest shade. Have so much of empty
space here and here. In the upcoming layers, we need to cover all
those empty spaces by adding the layers
in the front of mountains layers of
mountains in the front here and build up
with the structure. So we again can start
with dioxin violet. So as the color is empty, I'm filling up here.
With this color. The surface here is very good, completely dry, making
it in the front. Now, on the other
side to build here, I'm going to add a
little bit of pin gray, just a bit of fines gray
to the dioxine violet to rich to increase
the color pigment and just moving on with a
random position on here. Dioxine violet and
pines gray mix. Just check whether it shows difference with
the previous layer and can add up with the grays. Now finally, just again, adding with a good
amount of pines gray to this dioxine violet. And now starting it from here, spreading up the
colors from the top. As a very final mountain
to add up on here, I'm going to take my free green. So it could be with olive
shades of green and put on here as this is closer up to the vers eye and with the dioxine violet
and mixed together. So it creates some kind
of wine shade and adding a bit of pine gray to this
mix a little bit of water. So this color shade, it just goes from here. And I'm just moving the brush
in the downward direction. Also, we can just directly add with the tree green at here. So creating depth with showing the difference
in breast strokes, adding a bit of pins
gray again to here. Or to show more difference, we can just lift
off the color from this place and add a bit of pyrrol crimson to the top
and let the colors blend. Again, taking good
amount of pyrrole. So for Pyl crimson, you
can just with a good mix of crimson and dark deep roses. That's it. Now, the
final task is to just clean up the brush very well
and have the tissue near, and we're going to
create the rays or just from the light
source this way, lift up with strokes. So it should not be this way. It should be from
the light source to the mountains because when lifting up in the
opposite direction, the colors will
reach to the top. So the yellow background here is lightest shade Vilet
will mix up to the sky, just lifting off one with
the top to bottom lines. Now the next step
is to just add with the cadmium low of colors on here to make up the rays to white inside again to just
show the light depth. Now finally, with the
cadmium low again, making the lift adheres. So it should be with
a damp brush again. Every time after
making the strokes, we should keep on cleaning the brush to avoid
the colors or mixing. That's it. We can just
slowly peel off the tape. That's it with our 15th work. Next, heading up with
the sunset sell out in some grass field area where two bigger animals or
some kind of inner desert. Yeah, let's jump into there.
20. Day 16 - Giraffe : Now just jumping into our 16th painting
here, I have, like, just going to make with
two animals that's special in the tropical
area, so in Africa. So it's going to be
giraffe and big trees. So all these inner
silout I'm going to make some beautiful violet
family sky background, and with the grassfelds
in the base here, this is going to be horizontal
and two animals on here, the trees will be with a silouts at this place or with
different heights. So to make with the
background first, I'm just going to make
with a light wash using our light orange all over, a very light wash. Again, this technique is a
wet on dry technique. With the orange. A little bit
of camium mellow on here. It's going to be with rose, discrimating the paper and
adding a lighter shed of rose cleaning up my
brush very well, removing all the excess water, blending the colours again. This base should be covered
with a tree green to show up the dryness Now, let this dry well. To add with the clouds or you're again going to just
lift up with a bit of water jam brush and make small lines for
the cloud effects. Again it's not going to be with some deeper fluffy clouds. So in this lighter area, I'm just going to fill up with lemon for making the clout. Just keeping the brush
a little slanting on the top weg upright, I'm just going to put
up with lemon low and create the effect with a cadmium low just
putting on here. Adding one ly with
the cadmium mellow, it at all the removed places. So this is over
unremoved the whites. I'm just going to
add cadmium mellow. So it turns kind of a orange. Now with the lighter
shade of Magnes violet, the violet family just going to add up with small cloud
effet again here like this. I'm taking a bit of rose. So the previously
washed color of rose, it's like little light
because we have blended that color with orange and now it's a little pigment rich. So it shows up more
in the pigment wise. So it shows up more. So this is mostly passing clouds effect, just
adding here and there. Now, to create the mountains, I'm just going to
focus on making a light shade of Magnes
violet at this place. Filling with colors again. So just washing with
lighter amount of rose. My brush again. So
with this, again, ticking with the violet,
the manganese violet. Rose mixing both colours
together to create this piece. Here I'm going to add up with the earth yellow colour just
to show the grass fields. Top here, it should
be with the green. At the bottom here, it
should be with the greens. Again, tree green. Just lifting up when it's wet to show
the effects of grasses. With of to greens adding up. Just a bit is enough. We need to blend the tree green and
Telo green together. Now, finally, behind
with a sepia. So the darkest
brown, I'm going to add some kind of,
like, bush affix. So this will be like colorless and just below the mountains, showing the depth
with good sepia. Just adding with the good effix Now just elevating
with the trees. I'm taking my black. And with that, we're just going to start it from this point. It starts broad. Goes still here. Let's
just go with the hi till here and just branches
up only on the top, keeping the brush upright and branches one in the very top. And at the top, I'm just
going to put with the head. So all the leaves, the
dried up things are grouped together and it's
completely on the top. All the branches will
be visible clearly. Also, the dents of the
leaves are not that great. It's widespread
and short not that much reach to the hal parts. Instead, it's only on the top. Let's first create with
all the main things and create all the details. Destroying some kind
of sticky things as this is a dried up tree. Randomly moving
on all the sides. Even with the other giant tree. So it's a little height
lesser than this on here. Now with the sepia, we're going to
create a small tree, which is much four.
It's not that black. Instead, it will be kind
of a lesser in tone, so I'm just going
to take a sepia and create a very, very small tree. Now, a main task is to
create with giraffes. So two giraffes is going
to be ever heroes. I'm going to place one on here
and the other one on here. So first, I'm just
going to create a simple sketch using
pencil to create this. The first one that I'm going
to create here will be with a rectangle
shape for a body. It's too small, a small
rectangle shaped body like this and goes with the
legs and from here, it's going to be a simple trapezium ace shape for the face and the
ears and the top. That's it. So this is just a skeleton
to create a giraffe. Now on the opposite here, so just again making with a slanting box and
with the legs, Now, with our black paint, you can just give the
exact structure to this. So it's like standing
ads in the grass, so legs are not that
completely visible. Y Now, finally, with the tree green, again, just lifting up
with the grass affix. So that's it. We are done. And finally, just removing up the tape to complete
the painting. And we'll be meeting you in the next painting of
17 to one. Bye bye.
21. Day 17 - Highway Vibe: This painting is going to
be a little rural roadway, highway and sunset sosal out
of all the road lights on the side and little freaky
clouds in violets and oranges. So this is just of
creating the picture, and I'm just going to make with a blend of the Prussian blue. So just with the Prussian blue, making it on the top here. So again, this is wet
on dry technique. Implying russian blow
in a good amount. Making a light wash
with just water. Now with the white, I'm going to make it on here. So next upcoming color is
going to be with orange, and we need to blend
with that color. So adding a bit of white. Using light orange to
start with the blending. With vermilion orange. And with the light
orange mix on the top. Blending with the
whites on the top here, where both colors meet. Now with the pines gray, I'm going to make a roadway starting it like
from this point. And just ends in the
center point here. Same way exactly, it starts
at the opposite side on here. Like this. And just
filling it inside. Also on the sides,
just developing with little rural area, the city escape by adding
little curvilines. Base orange color, playing
with a gray on top, it settles as like
a natural effect. Finally, I just adding with the ultrarine blue
only for the roadway. Adding a bit of pines gray
to darken this point. Now, with a black color.
Adding for the roots, So you can see the
difference in, like, a little raw colour of, like, brown shades, and
this is a complete black. Now, in the very far place, I'm just going to put a bit of burnt ocher to
make the buildings effix showing up
with rectangles. Tiny works will do. So it could be with mountains or any kind of like buildings, forts, could be anything. And just adding with a yellow, could be with a light
lemon low color on here. For showing the sunset
and just a bit of clouds thin forms of clouds just spread
over on the sides. Now, as our next step, I'm just going to increase
the colour tone to cadmium mellow medium hue and add with
the cloud forms on sides. Thin thin strokes will do. Also, little forms of
little cloud forms like this by tapping the brush. Now, working with orange,
the light orange. So here minus the
cadmium orange. Again, making with a bit of orange color on here just
over the mountain or the distance object just below the light source to show
the color difference. I'm cleaning my brush now. So with orange again, Starting with these
small forms of clouds. Switching to the ponzu color. Again with quantum
in good amount. A with light orange, so it goes with a switching of colors. Dioxin and violet,
I'm just going to put up on the top here
over the oranges, but not at all the
places, only some. So starting with violet family let's start with lightest
color Bangs violet. Now switching to dsingt. So we are almost done with
all the cloud sceneries. Now finally, just
adding the whites on the roads with whites on the side just making
thin line patterns. So this is like we don't want a perfect white, a bright white. We need just a white, so it's
okay with the watercolors. If we need something bright, we can just select with
Gase or acrylic markers. Starts broad and ends so linear. I have made a mark,
and with whites, I'm just going to
brighten it up. Now the final task
is to add with the lamps on the
sides starting here. This we can directly
either go with a brush or any pigment, black pigment fine liners. This is how the shape looks and this hole is going to be filled with yellow or any whites. The other one at a
distance on here, but it should be shot in
height comparing this. O. Added at least five things with difference in heights, and the middle portions are
to be filled with yellow now. So I'm going to use my
acrylic marco for this. These marcas are from deli brand and going to fill inside. Now just peeling off we are
done with the painting. Met you in the upcoming
painting session. So we are left with just
three main projects. So I hope you're
enjoying all these learning new things
and practicing a lot. So meet you there. Bye bye.
22. Day 18 - Steel bridge and Sunset: This main project
is going to be with some beautiful thing
of steel thing, a big steel bridge. So making a sil out
of a bridge and a little seascape reflections
of the sun sunlight. So just I'm going to take
my flat brush and make a gentle wash here,
all over the paper. With my mob brush,
I'm going to use the ultramarine blue and color the top Now, just taking my orange and
gama melo medium humix. So with the orange color, just putting up on the sides. Cleaning up my brush and
using a bit of white, so the colors splend again with orange playing light white
colour, building both. Now with the cadmium yellow, just putting up
colors in the center. Adding with the Prussian
blue colour in the base. Now, just adding up with two big huge mountains on the sides to
connect the bridge. So taking up my black
color for making that. This could be done over here. Likely just coming up. Filling all inside with
plaque on the opposite side. Like this. So let this dry, and I'm going to activate with orange to create a
background scenic mountains. So cleaning my brush, much, much well, taking
a lighter sheeld of the brown that could
be with a burnt tumber. So I'm making with swatches
for mountains just behind this grabbing my
brown in good amount. Now with the cadmium melo, just adding colors on here. Or we could just do with orange and dark
orange on the sides. Over burnt umber is also fine. Just lifting it here with a damp wet brush and filling that empty
space with white color. Okay. Now with the
burnt sienna or sepia, Sepia will be very
perfect to make the slot. I'm just going to extend
it from here this point, and it just slowly moves
to the other side on here. And on the base here, I'm just going to make up with a different set of
colours on the top. This part is going to be
with the sepia again. So just roughly making with
the structure adding with the two lines with the tip
of the brush till top here. Just extense. So
from this point. So now just splitting up with a little rectangles.
Starts here. The other one. The top one. I'm just filling the top place with a good amount of sepia. With the same sepia color, I'm just going to make the
bottom part a little stronger. Now, just with a bit of red. Taking the small parts of red, making with the X
spot in the base. So the line that reflects in the middle portion
becomes little reddish and the other
areas go with the sepia. I'm just hanging up the other side hanging. Here, I'm just going to use with my file liner black 0.15 size. So with this, I'm
going to extend up making with the lines for
the hangings on here. Same with the opposite side. Just one connection
to this line, the other connection
to the top one here. So the mid portions just leaving all the rectangles we should make with
the break lines. Now with the mob brush, I'm
just going to choose up my Palo blue and a little bit of
ultramarine Blue mix and make with the wave format. So the closer ones
are going to be little bicker strokes of waves. You need to fill with the gaps, either with palo
blue or ultramarine. Ultramarine is like, okay, but Palo blue suits
really very well. We need to use the
dark tone of blue. Again, switching to
the ultramarine blue and putting it here and there. So this is a little far
from the viewer's eye, and we can go with
not that broad waves. With a little amount of blacks, I'm just going to create with a shadow effect
over the waves. This will create some depth, and this shadow effect mostly
covers in the near portion, and we need to go with some
lighter strokes behind. Final touch up with
the blue color. So again, with the tal blue. That's it with this painting, and we can slowly remove it. Met you with the
second last painting of our main project. Sansa Zu. Thank you.
23. Day 19 - Grassfields : Or in the 19th main project. And in this project, we're
going to make a Sunsets allowed in a firm field
with a bigger grass fields. So it's going to be
a simple painting showing the depth
in the grasses. So just starting with applying application of water all over. Now in this with a mop brush, I'm just going to put
up with my Talal blue, just a little bit of
halo blue on the top. Now, next color is going to be with cadmium yellow, medium hue. For the sun, making it a little darker lifting up with the damped brush and just
wiping it in the tissue. Lemon low, just
coloring on the sides. For a long distance,
I'm going to use only the Earth low
and just color it. So with good amount of
earth low as a pigment, putting it just near
the light source, extending it just near
the light source. And just with light browns, I'm going to make it over the earth low to
show the difference. A little bit of burnt sienna and a little bit of
earth yellow color, both mixing together, Wilpds
kind of the golden shade. Now, in between,
I'm just going to put up with burned tumber. So here, it'll be a little widespread on
the closer region, and we have to keep, grating with lines to show the depth so this is how a grass field look. So after this process, I'm going to take a
bit of earth again. So in thick consistency,
not to tree. And with this, just
going to create with small grass effects only
in the light areas, so not covering up with
all the brown things. So it should be only on here. So it just goes in everything
in between everything. Creating with grass effects. And if needed, to
make the new ones, we can just take
with a little bit of burnt sienna and create all the grass effic again, with the burn sienna, just
creating it with Manson here, all the grass effic and
the mix of earth low. Now in the distant, we can
just add some kind of sepia, just a little bit
of sepia very far to show up the bushes. And just a mix of burnt timber. So with sepia, we
can just create with the grass fields or the bigger
silo portions of grasses. Creating with short
forms of pieces and adding with a
gracifix at the top. So all these are making
sill out with one le sepia. So again, taking
with good amount. You. So using black colour may give a different effect. So at this places just away
from the light source, we can use black, but it's a little bit near to
the light source. So mixing with Sepia
that works great. So this is purely
with black colour and adding little
gracefx on the top. So in the very front, I'm adding with
little blacks and creating grass effects
also over the sepia. Finally, with my
0.20 fine liner, I'm just going to add up with birds flying here and there. Showing the depth in the middle. And that's it, and
we can just peel it. We are done with our
Laakilas painting. This is quite simple to create and has blended out
beautifully with the colours. So we're left with
one last painting of our entire episode
with Sunsets Allot. So happy to make
all these happen, and we'll be meeting you
in the upcoming session. Bye bye.
24. Day 20 - Couple's Walk : This is our last main project of this sunset sellout episode, and I'm going to
make a flatwh with water to use wet
on wet technique. The idea here is to
create a background of sunset sky where the
usual colors we do, but it's going to be
not that much orange. Instead, it's going to be
with blues and yellows. So here on the top, I'm
just going to activate my palo blue and put it
on the top, that here. And just a limited amount
of Prussian blue over it, so both the colors mix well. Now to this, I'm going
to add with white. Now, the upcoming color
is going to be with the cadmium mellow
medium hue on here. And let this color
blend with the white. And this is going to be a beach. So it's going to
be completely with water scenery and two couples just walking towards
the sunlight, and they are the salut. So this object, the
couples will be like in colour transition from black to some kind of brown
shades in their costumes, just reflecting the light and a little reflection
over the water here. And to make it,
I'm just going to put my pines gray on here, just starting with the
pines gray on here, and slowly just move out again
with pines gray on here. To show the water scenery
and with the Prussian blue. So just with a Prussian
blue color over the top on this side. A few shades of orange, so light orange will
be fine on the side. So let it blend. And lighter shades of
cadmium low medium hue on here as reflections. Showing it up a slanting way. And finally, with the
lemonelloO the middle, it should not go all over instead spreading
greatly at the top. And in the distance here
to make a supression, again, I'm just taking my sepia. So with sepia, building
up the bushes far. Same on this side.
Creating an island defect. Just to hear adding
a little bit of yellow Damneo And finally with the white. So just lifting the color here. Adding some whites
in the reflections of water in the base here, just exactly opposite
to the light source. With orange shade in the middle to complete the island effect. Now, just taking
with my black color, adding shadows and
little small stones over the water surface,
a small thing. So this match of the
black details is enough. And then with the Prussian blue, just making soft light textures, And with the pines
gray, finally. Now the task is to just
build up with sell just the outline of
couples with any pencil. So I have my Phobe pencil here. So this is the place where
I'm going to put up with the boy and the height
till it goes till here, and the girl will be this place. Now for this, we need to make a separation of the
legs and the body part. So the legs will be
from here to here, and the body part will reaches a little top high
till this point, that this could be
with the head portion. And for girl, this to this
will be head portion. So we can slightly
just build up with a small So this is
the head of a boy, and for girl, it's going
to be the opposite side, pretty with a straight line. I a D structure with a
jaw line and a nose. Headlines. Adding with smaller bulges to create the nose,
eyes, eyebrows et. And from that, grating
with the neck of a boy. Shoulders just
making a slanting. And with the hand. So here or like both their
hands or tangle. Having elbow, lifting
up with the hand. Just building up with the hip. Holding with gowns, and
furs just reaching the top. And finally, with the shoes. This girl, like,
holding with her gown. And for the boy, it's
going to be on this side. So this is a sellout, and next with the shadows, it's going to be on
here, exactly the same. Now, firstly, just
taking up with black, filling carefully inside. The spaces to be filled with some reddish orange
tones for the girl. And now taking with once you stark orange and
blending with the black. So it creates kind of a
transparency in the gown, reflecting out
with the sunlight. Now with the black colors, I'm just going to
add with reflection. Creating with blacks and
oranges as reflections. Yeah. And with ponzio finally. Now, putting up with
light orange, this side. And a bit of pin gray here. Okay, with ponzio That's it. We're done. Final step. You are done with
all the 20 projects. Meet you in the
upcoming session. Wrap up. By
25. Wrap up: Very final state, so happy on completing all the 20
paintings of Sunset Salut. Each speaks with some
different memories started with some beginner level and just entered into
the intermediate and finally finished with
the advanced trainings. So there are so many
levels we have passed by and so many lessons
you might have learned with this
journey and feel so warm and very colorful
with all these warm tones. I am so happy with all these outputs and shared
so many techniques now, just please complete
all the projects or even if you complete
one simple project, you can just put up in the assignment
submission area so that I could get a good feedback and also review your work
on how you have done. I will motivate
other people to just put their hands to try on
with some difficult things. And so you have to please upload with the works
in the submission area. And thank you for joining me in this beautiful session and learned so many
things along with me and meet you with very good episode in the future with some
watercolor paintings or with color pencils. So everything depends
on the reviews I get. So if people are
interested in watercolors, I will be making with
more watercolors or not with some
different mediums, too. Thank you so happy. Bye bye.
 Srimathi, Artistcastlebysri - Art Educator