Transcripts
1. Introduction: Hi, hello. I am
Shrimati art educator, based out of Tamildu India. Welcome to my class on painting
Wooden Barrel of lemons. I'm so excited to have
you join my class. In this class, we'll be painting a beautiful and
realistic wooden barrel of lemons using
watercolor paints. I'll be guiding you
through step by step with detailed
instructions. Let's go.
2. Art Materials required!: Here I'm going with beginner
friendly art materials. You can have any cold
pressed watercolor paper of 300 GSM. I personally use
factor nose brand. Next paints will be fiber castle 24 shades watercolor
paints and for palette, you can ready with
B ceramic plate. For brushes, I have chosen rostros veluch brushes finally
with water and tissues.
3. How to Sketch Lemons & Wooden barrel?: Welcoming you all
guys to learn sketch. You can be ready with watercolor sheet and HB pencil
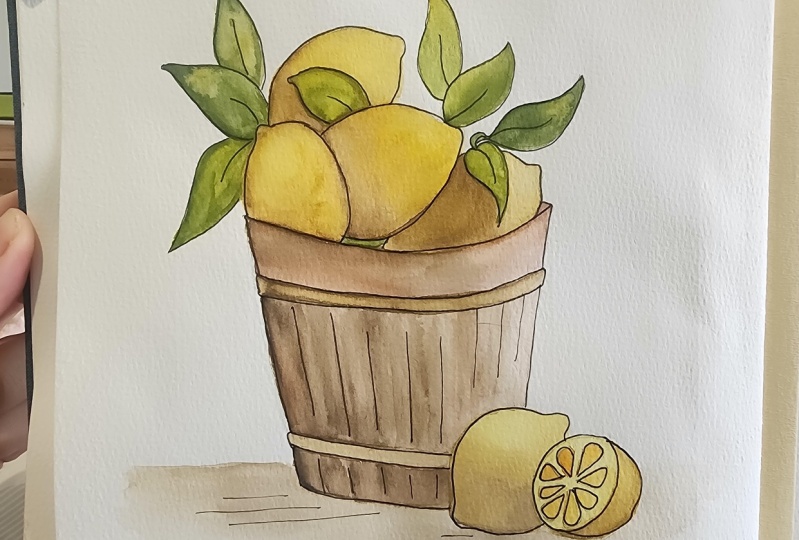
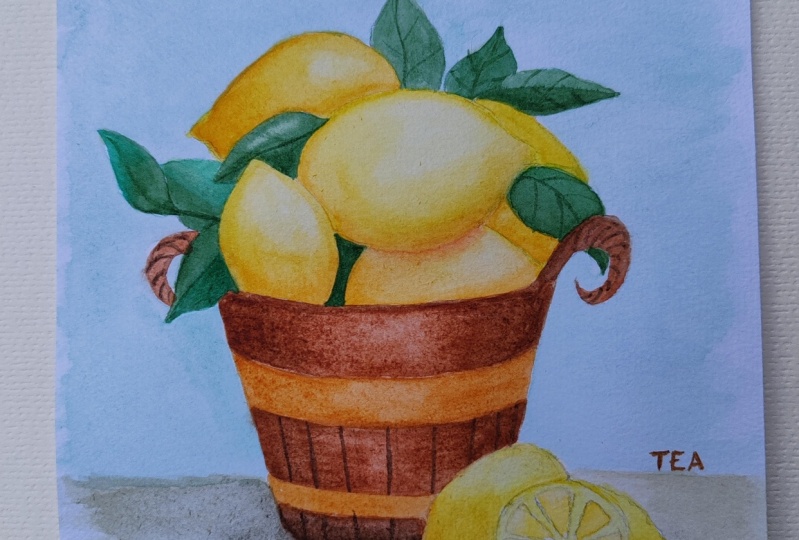
for drawing the sketch. Above, I have attached the
final output of reference. With that sample, you can find easy to make the sketch
and draw it along with me. Basically, sketching can
be made very easy by finding out two D shapes
and three D shapes in it. Here, as you have seen, I just started with oval for mouth of
barrel and for lemons, I used a circle and a
semicircle in the bottom. You can still just
continue, listen, also draw or if you
want to make a pause the video and then continue so you can just
go with your choice. Also, I want to add
on information. It is very important to know that what sketch we have chosen, that is what reference
we have chosen, and here we have chosen
the wooden barrel. So we need to make a feel
like how the wood will be, how the texture will be, how the appearance would be. So we have to just implement all the feelings in our
painting, the basic sketch. So that plays a
major role because whenever we want to
just improvise our art, we need to give all the
specific detailings that feel like the ***** cues
that touch feel paintings. Continuing to that, to make top portion of barrel
filled with lemons and leaves here there are so many lemons which
are placed overlapped, the shapes will not
be complete and here it goes much with one
it curves mostly. In upcoming videos, I'll just try to make a separate
detailed topic of video tutorial
on how you can just start making with sketching
using two shapes, di shapes, lines and curves. Finally, you can add with
detail ings over wooden barrel. It goes with belt on two side and little wooden partitions, which you can make
with the strip lines. You can upload the sketch
picture on project Aa, so even I can just
get along with you. Thank you guys. Waiting to see you in the
painting session. M.
4. Painting Lemons: Welcoming back to another interesting session
on painting lemons. We can get ready with the
colors light cadmium mellow, cadmium mellow, and
dark room Mellow. I have squeezed out
little amount of pains. Firstly, taking dark
row mellow color in my Bruto round rush. First, I'm going to apply on the bottom portions of lemon. Next, by taking cadmium mellow, blend with the previous
dark row milllo using a bit of water. Here blending is
very much important. You need to make
a gradient effect with all the colors
that you blend. Just starting from the darkest range to the lightest ridge. Now taking a little bit
of light calm mellow and blending smoothly
with the previous color. Now we have to
create a highlight. To create a highlight
with the wet brush, the process will be
like you have to wet the brush and just make a round or some lifting
process over the lemons, as I'm doing now, with
a wet brush and just keep removing the paints and
wiping it in the tissue. Just keep on making this process to create
a good highlight. It shows where the light
directly falls on the lemon. The colors will start fading and produce a
white hight effect. As lemons are being placed overlap with light
shadow effect, we have moved from darkest range of color to
the lightest range of color. Also, here we have
given effect of light falling from
the top angle, paint same way in every
lemon, each and every lemon. As you can see here, I'm just repeating
the same process for taking with a
dark room mellow, applying underneath
and in the middle going with the cadmium
mellow and at the top, just light cadmium mellow
because the light is on the top side and some kind
of a area right angle. The depth goes from the
darkest to the lightest, starting from dark mellow
to the light cama mellow. Also, I'm going to repeat
the same process on each lemons kept
over the barrel. Now let's see making with
the bottom two lemons. One is just half cut and kept. And for that bottom
and just applying only the dark omello as
you can see on the top, I'm just going to use the cam milo around it around the pulps, the sections, you can use light cameo milo
all around here. For the behind one,
the complete lemon, I'm going to make with the
process as we did on the top. You can keep watching and do
simultaneously if possible, I'll be waiting for the
results in the project area. Thank you guys. Y
5. Painting Leaves: Welcome back to painting
of leaves session, guys. There are so many
wide range of greens, starting from darkest
to lightest values. Selection of the
color depends on the light and shadow values
we have in our project. Here, for our project, I have chosen permanent green
l you can take a bit of permanent green olive paint and you can dilute it
with a little amount of water to make it very watery
texture in your palette. With a round brush,
here I am creating leaf structures with the
tip of the round brush. The tip of the hash
will help much in creating a finey texture, detailed precise
structure of the leaf. So, you can just keep on painting and the end result
you can upload in the proexi.
6. Painting Wooden Barrel: So welcoming back again to the second last session
of our painting thing. Now we are going to focus on
painting the wooden barrel. To start painting it, we're going to move from
the top of the barrel. I have taken two
different brown shades, which are burn taker
and Van Diac brown. To paint on the wooden barrel, as I said in the
previous session, we need to create effect with paints using solid
or loose structure, using a bit of
water diluting it. For the edges of the barrel, as you see in the video, I use tip of my round trushF the very lighter
areas of the wooden barrel, I'm applying more dilute
portion of the brown So far as we are done, painting with a wooden
parl using crowns. Now I'm going to
make with the bells. You can see for belt, it goes with a lighter shade
that is you're going to use some kind of yellow
ocher or dark room allow. Finally, to make the
texture of the wood, I'm going to create
little lines, very thin lines using
a bit of black. To the bells of the barrel, I'm just leaving it
as it is yellow, and I'm going only in the
middle portion of the barrel. Here we are just nearing one last remaining to
complete our painting. Let's check it out in
the upcoming session. Thank you. I
7. Painting Shadows: Here is very final
step to complete painting and to make that
is creating shadows. Every object that we paint using light shadow theory
will be having shadows. If there is light that can be shadow and we are going
to paint that today, I have chosen here
two different grays, maybe warm and cool gray, starting from warm gray and just using that near to the
base of the barrel as that portion doesn't
have much light at all and extending it with
cool gray by blending. So as it slightly increases with a light effect when it is
reaching out of the barrel. You can do with this
using the Run crush.
8. Thanks for watching: So finally we have reached
to the last portion, and I'm so thankful
that you have patiently watched all the lessons step by step and created a
beautiful painting. Let me know your
comments in my ID. Share to your friends
too. Thank you.
 Srimathi, Artistcastlebysri - Art Educator