Transcripts
1. Master How to Create Kids Educational AI Videos Step-by-Step: Welcome to AI video
creation Mastery. In this video, we are
going to be learning how to create kids alphabet, educational AI videos from scratch. My name
is George Steve. I'm a software developer
and an AI video creator. So I love creating AI
videos, and today, I'll be showing you how to
create your own kids alphabet, educational AI
videos from scratch. So it's going to be
a practical project, and we are going to learn something by the
end of this course. Let's go ahead and
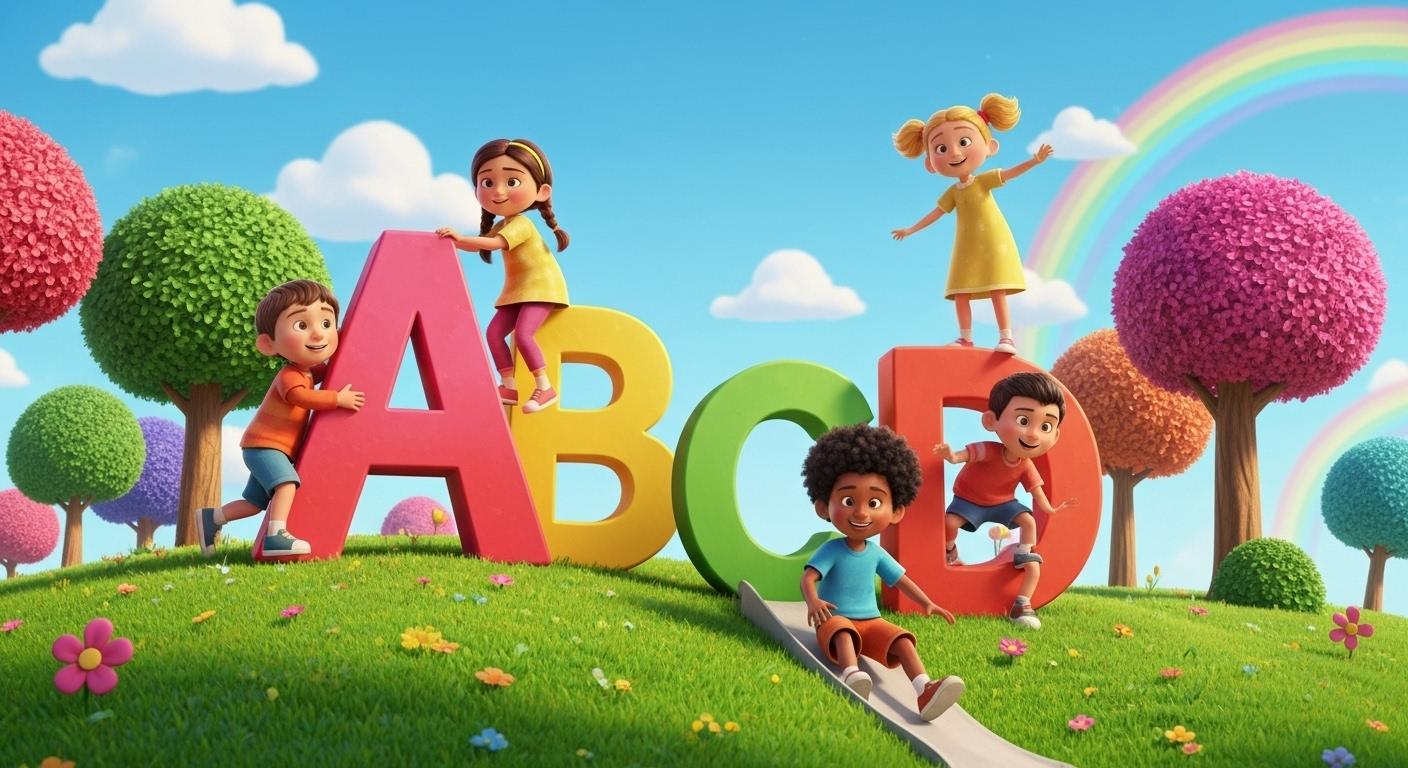
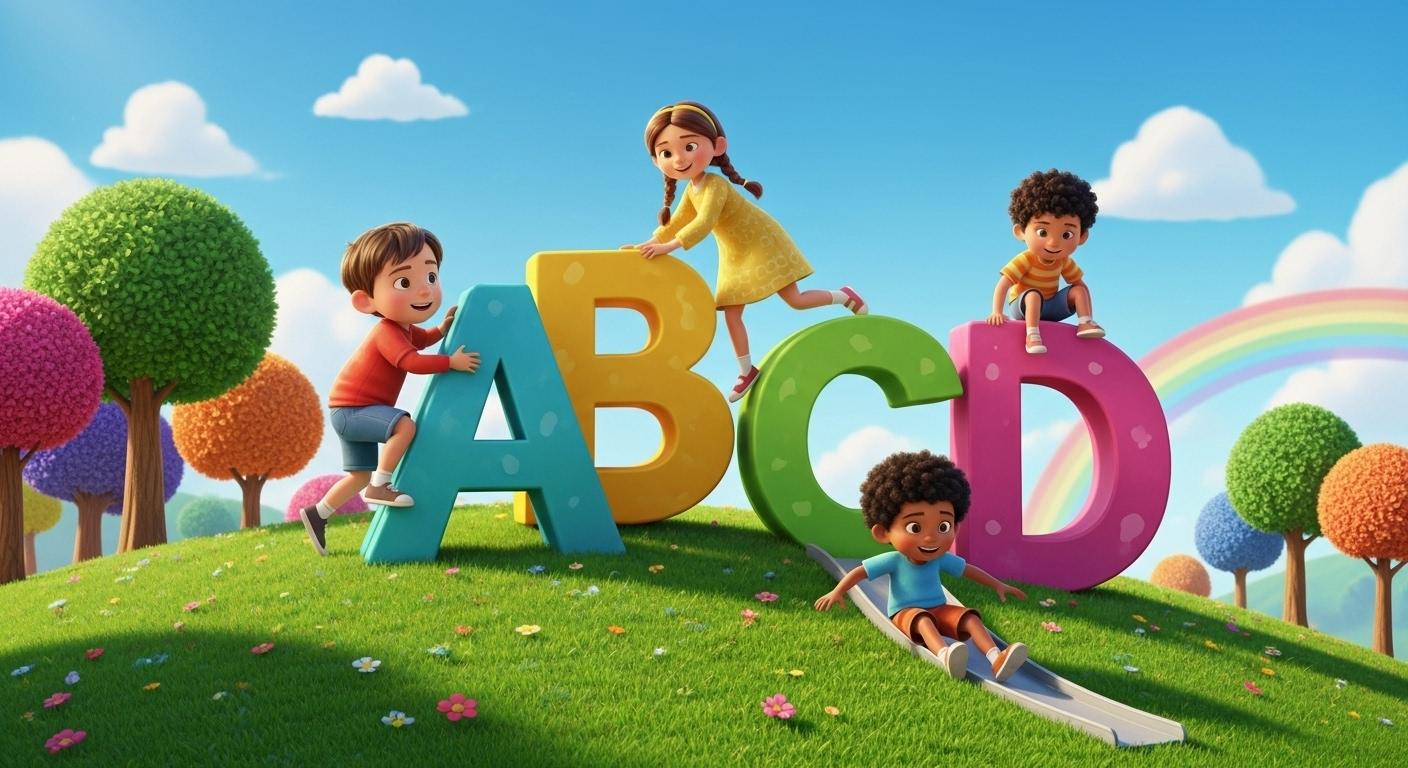
see a demo of what you're going to build in
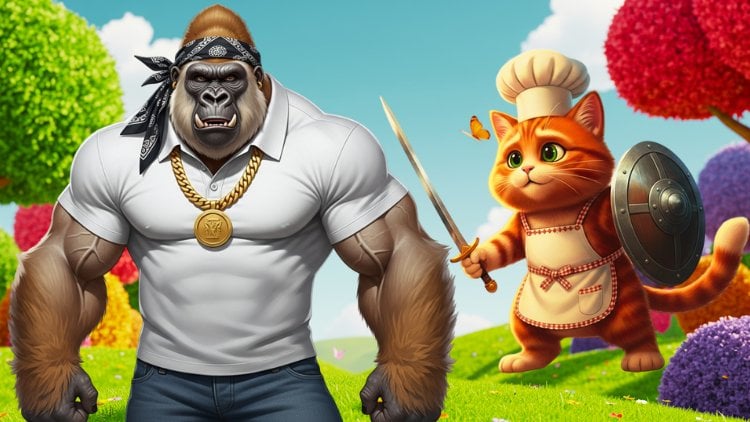
this course step by step. ABC, sing with me. Learning lettuce, H belief. Clap your hands. Doctor Fees. Alpha bed. It's such a creep. As for Apple, red, and sweet. B is for ball that
bounces on the street. C is for cat who says now now, B is for dog Wagytail right now. E is for elephants
big and strong. F is for fish swimming
all day long. C is for guitar, so
I'm a happy song. Come on, kids. Let's sing along. ABC, sing with me. Learning lettuce. H believe. Clap your hands. Doctor Feet. Alpha Bd is such a treat. H is for ha you
wear on your head. I Gs for ice cream. Yummy, call the
bread. J is for junk. We go up high. A is for
kite flying in the sky. L is for Lion the mighty Roar. M is for moonshining evermore. Learning ABCs is fun. ABC sing me. Learning letters. Leave. Clap your hands. Doctor Fees. Alpha
Bd is SutuTrek. P is for net. Swear
little birthday. Oh, is for orange
Bright every day. P is for penguins,
sliding on the ice. Q is for Queen, regal and nice. Or is for rainbow. Colors that shine. S is for
fish swimming all day long. E is for turtle, slow as can be. Learning letters
is easy with me. A B C. Sing me learning letters. Tape. Clap your hands. Down your feet. Alphabet
is such a breach. Us for umbrella on a rainy day. V is for violin. Let the music play. W is for
whale swimming in the Sea. X is for solophonePlay,
along with me. Y is for Yoyo
spinning up and down, Z is for Zebra with
stripes solo round. Now we've sung from A to Z. You learn the alphabet with me. ABC. Now we're done. Letters learning. So much fun. Sing me at loud.
Sing with Green. We love the alphabet. Alright, so the video
you just saw now is a video of Wagon to secute
in this course str by style, and by the end of this course, use TAT to upload onto YouTube
channel quality AI videos, which you have made from
scratch using free AI tools, which Google FAS to us. So by the end of this course, you must have something
so cool to deploy to YouTube and show your
friends and families. Thank you so much and I glad
to see you in the class.
2. Step 1. Generate Video and Image Prompts: Welcome to AI video
creation Mastery. And in this video, we are going to be learning
how to create kids alphabet songs
using ChatGPT. Now, head over to ChatGPT, and what I need to get
started is just a prompt, and we're going to
generate prompts for kids alphabets step
by step from A, B, CD to Z. Let's go ahead and do that. I'm going to past this
prompt that says, create a fun cachi
kid songs that teaches the A to Z
alphabet with rhyms, repetitions and
engaging melodies. Let's go ahead and
check that out. So we are getting that ready, and now we're having ABCD. Et out A to G, Done, then H to M, done, and then we get that to Z. And we now have the song ready. Okay? So this is the
very first step. So now you have the song. You are going to also generate images that's going to
represent all this, right? So in order to generate image, I'm going to show
you how to do that. So we're going to write this prompts and
write and pass that. So remember that
all these prompts are there for you
to download, right? So this says, creates text
prompt based on the song, provided a both or
variant kid friendly, three D later Z on a colorful glassy filled with
a blue or bright blue sky, profi crowd and shiny son and playful elements like
what he colored bows, a subs and a wooden fence. High quality carton is and
engaging for children. Let me go ahead and also
make that to be Pixel. Let's say it's going to be
Pixar sty three D images. So I want to say create text prompt based
on song provided above of three D Pixa sty, vibrant, keep friendry
three D letter of this. So that Pix style is
very important to me. That is why I always
add that day, let's go ahead and
generate that. So we now have this and, we then is that HAGETP
only generated this for one and want to tag hAGETP to
give me that to 26 prompts. I'm going to ta ChargTB to C. Give me 26 text prompts. Representing each letter. So I want all of them, I just want one. I want all of them. And this is coming right now. So Z pront and I have that
for A. I have that for B. And now have that for Z, and it's good to generate
this from A to Z. And that is what we need.
So once we have this ready, we start creating the images. After the images, we go
ahead and create the video, and then we go ahead
and edit the video and make the video and
also add the song. And we're going to do
that step by step. So now we're done with
the very first step, which is creating our prompts and we're not gotten
everything ready. So join me in the
next video lecture, we're going to generate
our images stop by stop. Thank you so much,
and I'm going to see you in the next video lecture.
3. Step 2. Generate 3D Stylish AI Images: I will call you back
again Tanaa video lecture in AI video creation Mastery. So in this video,
I'll go ahead and introduce you to nano banana. I'll go to Businesnano banana to create images and videos, and it's gonna be very,
very sweet, guys. Let's go ahead and check it out. So let's go over and open up
GAG and I'm going to Gogo, and then I'm going
to type nano banana. So quiet and type nano banana. And now, but what I want us to be using is the Google
AI studio, right? So Gemini five flash
Image nano banana. So gonna be using this to create both images and videos, right? So I want you to
stick with me to the end of this because it's going to be
very interesting. So experience more model
from Google Deep Mind. So for now, I'm
going to close this, and I can go ahead and accept. Remember, I'm just using this
for the very first time. And I believe you're also using that for the
very first time. But there's new problem. I'm
going to show you how to create everything
using nano banana. Now, I'm right inside here, and you can go ahead and also sign up with your
Google account, so it can be to save your work. It's actually important to
save all your work and C, and I want to save this. I can call that to be
A two Z Alpha bets. Right, Guy ahead unsived that. And allow drive Access. I'm going to allow drive access, and I'm going to choose
the account I want that and they'll be saved
right inside the account. So it's very important
to always save your work so come back
and see what you have. Now, let's go about
to chart GPT. And now I have all this, and remember we have already created image prompts
for all this. What I need to do is now see the importance of
using nano banana. I'm going to create
every image of this at the same time instead of copying and pasting
the one by one, just like we have in
other Veo creations. While I'm copy that,
I'll move to nanobnana and I'm going to say, Create. Now, create different images of Z alphabets using the foreign
prompts for each image. I'm going to tell you to use
the image or the prompt, I'm going to using the
using the prompts below. Alright, now I'm going to pass this prompt
right inside here, and nano banner is going to
generate each of this image. And I want this image
to be on a landscape. Then I can be able to generate each of
them on a landscape. So if you want to generate
image Bobi device, you can actually
do that, and I'm going to show you
that after this. Then we go ahead and run this and nano banner
will start to create each of these
images one by one. So we need to exercise
patience and wait for this. So let me go ahead
and wait for that and start to create
A, and after E, it to move over to B and then to then create that from A to Z. So let's go ahead and
wait for that, guys. So at the moment, we
have this from A to J. Now, I think I'm seeing safety Edit safety
seties and actually, there's nothing wrong here. I can go ahead and
every of these are off. L we go ahead and continue. Let's go back and copy that from K. Let's
guide and copy from K, and then we continue again. Guad and copy this.
This a chart. I'll go ahead and say, repeat the same thing
you've said before, create different images. So now, what I need to
do is to go back and copy let go ahead
and copy it from J, where it is actually remaining,
and then we'll move on. So I'm going to start from J
and then I'll copy it to Z. And once that is done, go ahead and copy the
remaining once. So go over and move right inside the A, and I'm
going to past that. And now let's go ahead and
continue creating this, and it now starts from
Q and then move over to Z. Rison will have to be patient enough
to wait for this rate. Alright, now, I've able
to create all images, and then you can see
we have all images. Right here, I have downloaded
all the images from A to Z. And that looks so
cool. And you can see the part of nano banana. Very easy, very strasforward. So in the next video, I'm going to show
you how to create image based on the
lamp skip you want, and that makes it much or makes it to be much
easier for you to choose the type of
device you want to create videos or
images for, right? So now sit tight, and let's go ahead and move about to the next video lecture, and I'm going to learn
how to create image based on the device type and then why I get
started immediately. Thank you so much, and
I'm going to see you in the next video lecture.
4. Step 3. Create Images for Specific Device Choice: I'll call it back again,
turning a video lecture. And in this video, we're most creating images
for mobile device. So if you want to create
for large screens like for YouTube TVs, and so on, you can go ahead and choose
any of your device. So what you need to
do is to head over to generate Media and right inside, go over to Imaging
and click on this. So soimage addition with imaging AI has limited
free quota for testing. So to generate images beyond this limit or integrate
imaging into your product, please use the Gemini API. So this, in case if I have been maybe a few
projects and so on, you can go ahead
and choose maybe the mobile device,
which looks so good. And you can go right
inside the air. And let's go ahead and
copy the prompt for image. Let me say I want to
generate image for A, or I need to to go
ahead and copy this. And then go to Germany and uh go over to nano
Banana and Gemini. Go ahead and run this and it's going to create
this for mobile device. So it will take a little
time and donarrate this, then you download that, and
it creates the next one. And in this way, can
be able to create all your AB ABCD to Z. Let's go ahead and
download that. And let me go ahead and put that right inside here, right? So that is now downloaded. And in that way, I can go ahead and maybe select this
again and I'll go back. Let me choose 16 by nine. Right. So always refresh this so that the settings will
actually be the same. Okay? So I'll go ahead
and choose 16 by nine, and I'll go ahead and paste that and let's go ahead
I'll run this, and it's going to give us
this by 16 by nine ratio. And in that way, it's
going to look good. So we're going to
create maybe like four or five images we want
to use for this video, and let's go ahead
and download this. And this is being diluted. I'm going to name this
to be E or Apple. So this is the image
I'm going to be using for this project, right? So let's go ahead and
copy the second one. I'm going to copy the second
one and let me go back here and I'm going to delete this
and past and run this again. It's going to create a
different image for me. And that way, we're
going to create like four to six or ten images. So we have safe changes, and I'm going to leave that
because as I always say, you have to always change
your video or refresh, so it can be to
sil automatically. Now I'm deleting this, and I'm going to see B is for Bo or Bbow It
actually know that. Now, let's go ahead
and uh refresh. And once you refresh this, it
will save that immediately. Okay, let's quiet and copy this. And now let's go back
and refresh this again. And that is coming. So remember I'm going to remove this I'm choose this again
and let's around this. And it's going to
generate C for CAT. And now we can go
ahead and generate each of these images one by one. And from here, we cannot get experience on how to
create images for different mobile devices or
for any device that we want. I want to see C for cart
and go ahead and save this. Now let me go ahead
and generate for D, and let's go over to this point, and I'm going to download
this, and that is coming. So this one is for D.
I also download the, I'll guide and download
maybe two or three, and this is just for us
to learn what we need and guide and download
this and D for DC. All right. So we still download maybe this
and let's go over. And press that and
let's run this. So you have now learned
how to download for mobile device and for landscape, maybe for TV sizes, for image, or any type of image you want, and it's gonna look so good. And you can see that
images being downloaded are look so good. Right, they're required
and downloaded. And let's go over and
get this as well. And now I'll get over to
this point and run this, and that is for F. So
once you create L, we can go ahead and stop
at F. So we have one, two, three, four, five, six. Okay, I'm going to
make that to be seven, so let's just go to look good. So I is for fish and served it. And now I'm going to
make that to be seven. That is why I need
this last one. And now let's go over and paste that and run this code
and check it out. So that is actually coming, and then that is for
G. So after the G, that's going to be the end for video creation or
for image creation, and then we head over
to video creation. So G is for Jitter and serve. All right, so you can now
see they can be able to generate for square
for mobile device, and for TVs and order mobile
for Instagram and so on. Now, you have been
able to create images using nano banana. Just sit tight and see
how cool this video will actually look in
the next video lecture. So I'm going to say
thank you so much, and I'm going to see you
in the next video lecture.
5. Step 4. Create Music Background for Your Video: I will call you back
again another Video Chow, and now we go ahead and create a background music
for our video. So we have not created
this video yet, but let's go ahead and
generate a background music. And then the next lecture, go ahead and generate the videos. Then go ahead and
mage the video and the music together and generate an awesome video for kids. Now, let's go over to ChatGPT, and let's move over to
the very first music we created right here, and I'm going to copy all these. So go ahead and copy all this, and I'm going to take this down, and I'm going to get all this. So move over to snow AI. Now we have snow AI, and because we have
generated our own music, the corus and vases, we head over to Custom, and then we go ahead and paste
that right inside the ear. So ensure that you did not
select the instrumental, you actually close that. Don't actually select that,
so can be able to have our rics and can be
able to hear the music. Now, we have to select the type of or the style of
the music you want. You can also go ahead
and select anything. For me, I'm going to go
ahead and select classical, and then I'm going to
add a little bit of emotion right inside here. So Conga island check for
party item, high tone, anyone. So I think I'm
okay with classic. And he's energetic as well. Alright, so I think classic and the mood energetic
is good for me. Now I can go ahead and
name this to be kids. I forbid. And now, I'll go ahead and
create this audio. So I'm want to use this audio as a background for our video. And once it's done, we're going to have the
audio writers idea. So that is actually
being generated, and without wasting much time, we have these different
audios right here. Let's go ahead and check them out and they are already done. You can go ahead and refresh
this and check them out. So refresh that. And you're going to see your
output right here. Okay? And that is it. Now you can go ahead and
play any one of them. Let's go ahead and check
them out one by one. ABC sing with me. Learning, lettuce, help belief. Clap your hands. Doctor Fees. Alphabet Santa treat. As for Apple, red, and Sweet. B. Is for ball that
bounces on the street. C is for cat says now now, B is for dog
Waggontail right now. E is for elephant
big and strong. As for fish swimming
all day long. She's for guitar, so
I'm a happy song. Come on, kicks.
Let's sing along. ABC. Sing with me.
Learning latticce. Help Bleeve. Clap your hands. Doctor Feet Alphabet
such a treat. Light, you can see, that
is action in Louis God. Let me go ahead
and minimize that. And you have different songs you can
actually select from. So anytime we generate
songs for you, it generates different, like, about four different songs, and you can go ahead
and select any one of them and go
ahead and use that. So I'm really very
impressed with what I'm seeing and anyone that
suits you better, go ahead and use that, alright? So I'm going to select
any one of them, and then go ahead and use that. So in the next video,
let's go ahead and move over to video creation, and then we go ahead
and get our videos and then our audio together
and blood on with them. So the next thing
is that now we have these videos or the music
actually gyrated for us. All we need to do is to get over to this point and
click on the Double. This triple icon and go ahead and download any one of these. Alright? So the music I created and the one you created might
not actually be the same. So any one of them,
you just create it, go ahead and click on MP
three and download that. Okay? So you can
actually go ahead and upgrade this to get commercial license for all your audio, and that will actually makes
very good sense, right? So pull it down, and
I'm very glad we actually right inside
the sunny next video. We go ahead and create
our videos one by one and then go ahead and
match them together and have something
exciting right out there. Thank you so much,
and I'm going to see you in the next video lecture.
6. Step 5. Create Animated Videos Step-by-Step: I will call you back
again. And in this video, we go ahead and start creating videos for all the images
we've just generated. So what I need to
do now is we go ahead and head
over to nanobnana. So go over to
astudiolatg go.com, and this is nano banana. And let's go ahead
and go over to Generate because we
actually have this. So click on Generate because we go ahead
and try nano banana. Now, we got to head over to VDO. So this is VE two. It doesn't actually generate Voices is only generate
videos without voices, right? So if you want to
generate voice, come going to use
GeminizepGeneration to actually generate voice for
your anything you want. We've actually used the
imaging to generate images. And now let's go ahead
and click on VEO. Go ahead and click on
VEO and now you have a limited edition of this Google AI studio
to generate videos. You have to generate
only number of ten videos that is number of three generations that are
remaining for this model. It is ten out of ten. So after then, you can go ahead and sign up with
another Google account, and you're going to get
ten out of ten again. So we can sign up with
different Google accounts into Google AI studio to generate
different amazing videos. And now we actually make sense. So you can go ahead
and check that. So it says Video
generation with a VO in AI Studio has limited
free quota for testing. So to generate videos beyond the free limits or to integrate
video into your project, please use the Gemini EPI. Let's go ahead and close this. Right now have to
generate images. All we need to do is
to go ahead and upload all the images that
we want to use. So for any image I want, I'll
go ahead and click on this, and I'm going to upload that, and I'll go ahead and
acknowledge this. So its for Apple. Now, in short I have
this on landscape or you select mobile in case if I generate it for mobile device. So I'm actually generating form actually generating
landscape, right? So for anyone you want, you go ahead and actually choose that. Now, all I need to do is
to head over to ChaGETP if I want HAGETP to
actually generate a video, I can go ahead and copy each
of this or I'll go ahead and tell video to actually generate video based
on whatever I want. So if you want CGTB to
actually help you that, you can tell CHADTB to create video prompts to animate this image prompts
or animage image. Then I'll go prints that, and I'll go ahead and
click on this and Sho DB actually creates
a video prompt for me saying animate this of
this and this animates a vibrant two pixel
style scene of a giant glossy red letter A standing on this and
walk out have that. And that is actually
so long term for me. All I need to do is to
head over to Google Video. I want to make this
much easier for us so that leman can actually know
what is actually going on. But if we actually
start going to hGTP every time for
something so simple, it makes it work so tedious and understanding
will look so bogus. Now, I'll get over to video,
and I'm going to say, create a video and
make the apple and the letter E to dance
around or to dance. So I'll say a video to make the Apple and
letter A to dance. And let's make it to also jump. I'm going to say
create a video to make the Apple and letter
A to Joe and dance. And with this, I'll go ahead
and actually create this. Now, if you check over this, you can see you have
number of results too. So if you're creating
two Rambo at generals, you actually be counting twice. So actually, go ahead and
set this to be one, right? And I'm going to leave
this to the landscape. So if you are actually
using mobi size, you go ahead and
select mobi size. Now, go ahead and click on
this and generate this video. So the video will actually
be generated very soon. So it says fail to generate quota exceeded due
to high demand, Vigo is currently running capacity. You have to try again. Now, I'm going to point
out this problem if you're actually using this VO to
actually create videos, you'll get in this program
because lots and lots of people are generating
videos at the moment. So you always go ahead and click on this
to generate again, or anytime it happens, you can go back and then click
on Veo upload that again. Oh ploidy beat again. So this is one limitation of
using this system, right? So we have to be patient
and get this to start. You can see now it
has now started and it's going to generate
this video for us. So most people are actually using this. So you
shall use free. If you want to actually use
this, you have to be patient, and when we try again until you get your video
generated, right? So let's go ahead
and wait for this. And once it's
generated, we go ahead and generate or videos or or images pad into videos and kick start
this journey immediately. Now, I have this
actually generated, and if I go ahead
and click on that, let's go ahead and see see that is actually
bouncing and dancing. And this is what I
want. I just want to do that to all the videos. So anyone that has
cat or elephant, I can make them to
move or do anything. It's all about creativity in order to create
all these videos. So anytime you
create this video, you can go ahead and
export this to drive, can go ahead and export
this video to drive, and this video will
actually be exported, or go ahead and
download this video, and your video will
actually be downloaded. You see that? I'm
actually downloading this video, and it
has been downloaded. Now, without wasting
so much of time, I will go ahead and
upload every one of them. Let me say about
six or from A to G, and they will go ahead
and create this video. So on your own, go ahead
and generate all your own and they see how
that actually works. And then after we go ahead
and start off immediately. Now, let me go
ahead and generate every other one step by step,
just like we did for E. And I'm going to do
that very quick, right? So let's go ahead and
check it out, guys. Right now, I've just
created Audi videos, and I have E is for Apple, B is for Bl, and F is
for fish, you can see. And then this is E is for
elephant, and that is it. And now I have T is for dog, you can see that the
dog that dancing and uh G is for
Gita, you see that? And that is cool.
That is where I need. I just wanted to be pouncing. I shared that that's
actually method. Okay? So this is all I want. Now, if you have this ready
of A to G for these pups, so you can go ahead and
extend yours to maybe, like, 20 to six alphabets, and then that is
gonna look amazing. So pull this down, and if
you have any question, and you go ahead
and let me know. But before then, I want
to let you know that you have what is called hero AI, which I've actually been
using in this curs, and uh you can also
guide and use that. So I will also be letting
you know more about this. So if you have any
question under this, so you actually going to ask me, and I'm going to answer you
anything about hear AI, and you can go
ahead and use that. So now that I have actually
seen how this actually works. You can go ahead and
create some videos and kickstart this journey. Thank you so much, and
I'm going to see you in the next video lecture.
7. Step 6. Edit and Publish Your Video: I will call you back to
another video lecture, and in this video, we go ahead and finalize this video creation
for alphabet for kids. So kids are going to be very, very happy that you have made
something so cool for them. And now it's time we go
ahead and check it out. So let's go back to
media, and all the media, I have all this video imported. Remember for this course, I generated just A to G
in order to build this. And I've also show
you in this course how to generate A to Z, and we actually did
that step by step. But for this video to
actually be faster, I just collected A to
G. And now I have this. I have my audio
which also generated and we already have them. So I've already added
them right inside, and I have my audio here or I need to this to go
back to transition. And if you're not
on a pro version, you can actually
look for free ones. So if you're on a Pro version, you can always use mix
to actually do that. So I'll show you how to use
mix, and we also exported. So for people who are actually
using the free version, I also made this video so
that it will be much easier. So I'm using something
for free now so that people are using free
version can also see that. And this does not
actually it's be best, but it's just for video creation or for
lesson purpose only. So in that way, you
can go ahead and use anything you actually
want, right? Let's go ahead and check it out. And let's go ahead and see
how that actually looks. As for Apple red sweet B. It's for ball that
bounces on there. C is for cat z now now. B is for dog Wagytail right now. E is for elephants,
big and strong. E is for fish swimming
all day long. She's for guitar, so
I'm a happy song. Come on, kids. Let's
sing along. Hey, BC. Sing with me. Learning letters. Leave, clap your
hands. Dop your feet. Alpha Alright, so you can see that our video has
now completed, and that looks so good, right. Now you can also go ahead
and export your video. So remember that if you're
using free cup codes, you are not allowed to
export pro oficials. So if you have anything pro,
it will not be exported. But if you're using
free cup codes, you can also export things
that are free, right? So you can go ahead
and hit on Export. And try to export a video. I always recommend using four K or eight K or anyone
that is above. So that's the video
actually looks so good. And then you can
go ahead and name your video anything and then go ahead and export this video. So go ahead and put this down. And remember, if you have
any question on this video, please go ahead and
use the question and the EASection and I'm going to get back to you
as soon as possible. Thank you so much, and
I'm going to see you in the next video lecture.
So let's go ahead. I have the time to see
the video you have just created at the end
of this lecture. See you, and thank you then.
 George Steve, Senior Software Developer & AI Content Creator