Transcripts
1. Welcome: Hi friends. How are you? Let's see, let's get going. Today, it looks like we have a few people on
which is fabulous. You might hear some clicks
from me because for life. But welcome. This is Mandala
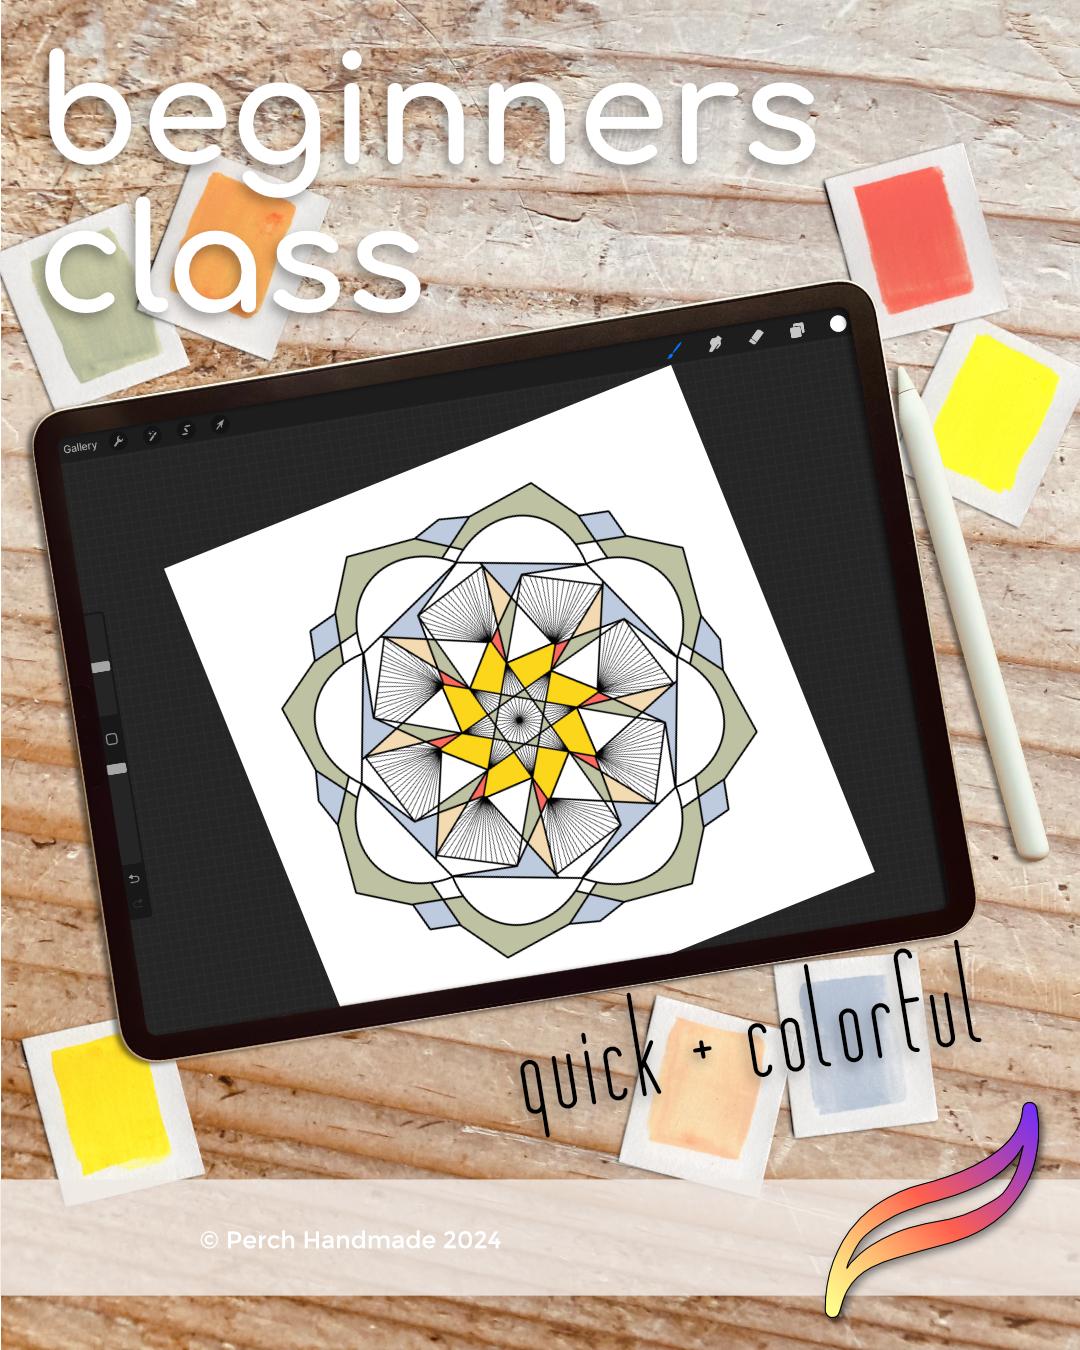
Magic in procreate. And it's just a quick and
colorful beginner's guide to procreate. And we're going to be
making mends today. We're going to be looking at the beauty and
versatility that you can create and mends
in your artwork. Lots of fun. Just
spending a few minutes, 30 minutes today or more, can help you focus
your attention. I know when I get started on working on these,
everything goes. I don't know about you,
but it's a lot of fun. Let's just jump right in. Let me show you some
fun inspiration that helps us find mandals
throughout artwork, and architecture,
and everything. All right, we've got this. It wouldn't be a live show if we didn't have some hiccups. Along the way in art, you find mandalas everywhere. People draw these
amazing mandalas. I love this one with the
sunflower connected to it, but there's so many
different ways to find it in woodwork, in pottery. I know this isn't
exactly a mand, but finding it in nature
is amazing as well. I love this one here because, I mean, it's just wicker, right? I love this one with the blue. It's so detailed. That one is hand drawn. You can have them in gardens
in Henna work and digital. We're going to be
working digital today. Right here, the dandelion puff, I know it's not quite, not quite a mandala, but it uses that
Fibonacci Sequence that you find all
over in nature. So today let me show you what
we are going to go over. We are going to go over
setting up our canvas, designing with symmetry,
adding color to your artwork. And printing and beyond. All right, we're going
to get through this. It's going to take
a little bit extra. Today, I'm Katie, and
I'm from Pray Chan made.
2. Setting up Your Canvas: Let's begin in our first module of setting up your canvas. Okay, let's go. I have my app here, or my ipad, right? And I'm going to open
up my procreate app. I like to add covers
to all of my stacks. And we're going to go
to my Mandla stack. And we're going to start by, let me go back a little
bit because some of you might be complete beginners. Here's procreate and we have
stacks of your artwork. If you create a new
piece of artwork, it's just going to go
in as one piece. Right? If you want to select
multiple or add to a stack, you can add into a stack by
holding and letting it cover. If you don't want
anything anymore, you can duplicate
it, share or delete. I'm going to delete
that one because I don't want to work on that size. I created covers just by. The very first one is going
to be the top of your stack. I just made a piece of art
that really is just a title. I'm going to add a new one into this stack with procreate, you have your plus
button up here, and that's where you can
create new canvases. If you don't have a square
canvas going already, I have them here. But you can add the
plus button and you can create inches, pixels,
centimeters millimeters. I never work in
centimeters millimeters. I mostly work in pixels, But inches is great too. If you want a specific size, today we're going
to be working on a ten inch by ten inch canvas, or a 3,000 by 3,000
pixel canvas. That 3,000 by 3,000 is
roughly a ten inch square. I'm going to work in pixels, and I'm going to type
in 3,000 and then change the height to 3,000 I
always want to work in 300. Picks a DPI, there are
different settings for that, but always change yours to
300 P. Then hit Create. It brings you right
into your canvas. I'm going to go back a minute by hitting the back
the gallery button. I want to name this right off the top where it says
Untitled artwork. I'm going to write Mandal
and hit number one. That way it's named,
I've got it set. We're going to get started here. The first thing we need
to do is in procreate, you've got your wrench tools or your action tools with
a little wrench button. That's where you can add things, work on your canvas, share, create videos out of your artwork and go
to your preferences. You also have your adjustments
with the little wand where you can change the color, the gradient, you
can make a blur. You can have fun with some
of these extras down here. The selection tool
is where I might go for freehand and
select an area, it's like your lasso. Then your move tool, we have layers on the side. We have a eraser,
your smudge brush, and you have your brush tools. The first layer we're
going to get set up for working on making a
symmetrical design. What we're going to
do is go over to our wrench tool
and go to Canvas. From Canvas, we go to
Drawing Guide and hit Edit, Drawing Guide in the bottom. You have different
ways to do this. Perspective, isometrics,
your grid or symmetry. It starts out with a
vertical symmetry. What we want to do is
go down to options, We want to check
radial symmetry. You can change the
color of your lines. I usually just keep it at black. You can change the thickness of your lines and the opacity. I usually have it around 30% and here around 50% It gives me a little bit of
something to work with, but it's not overpowering
on my screen. And then I'm going to hit done two fingers pinch in and
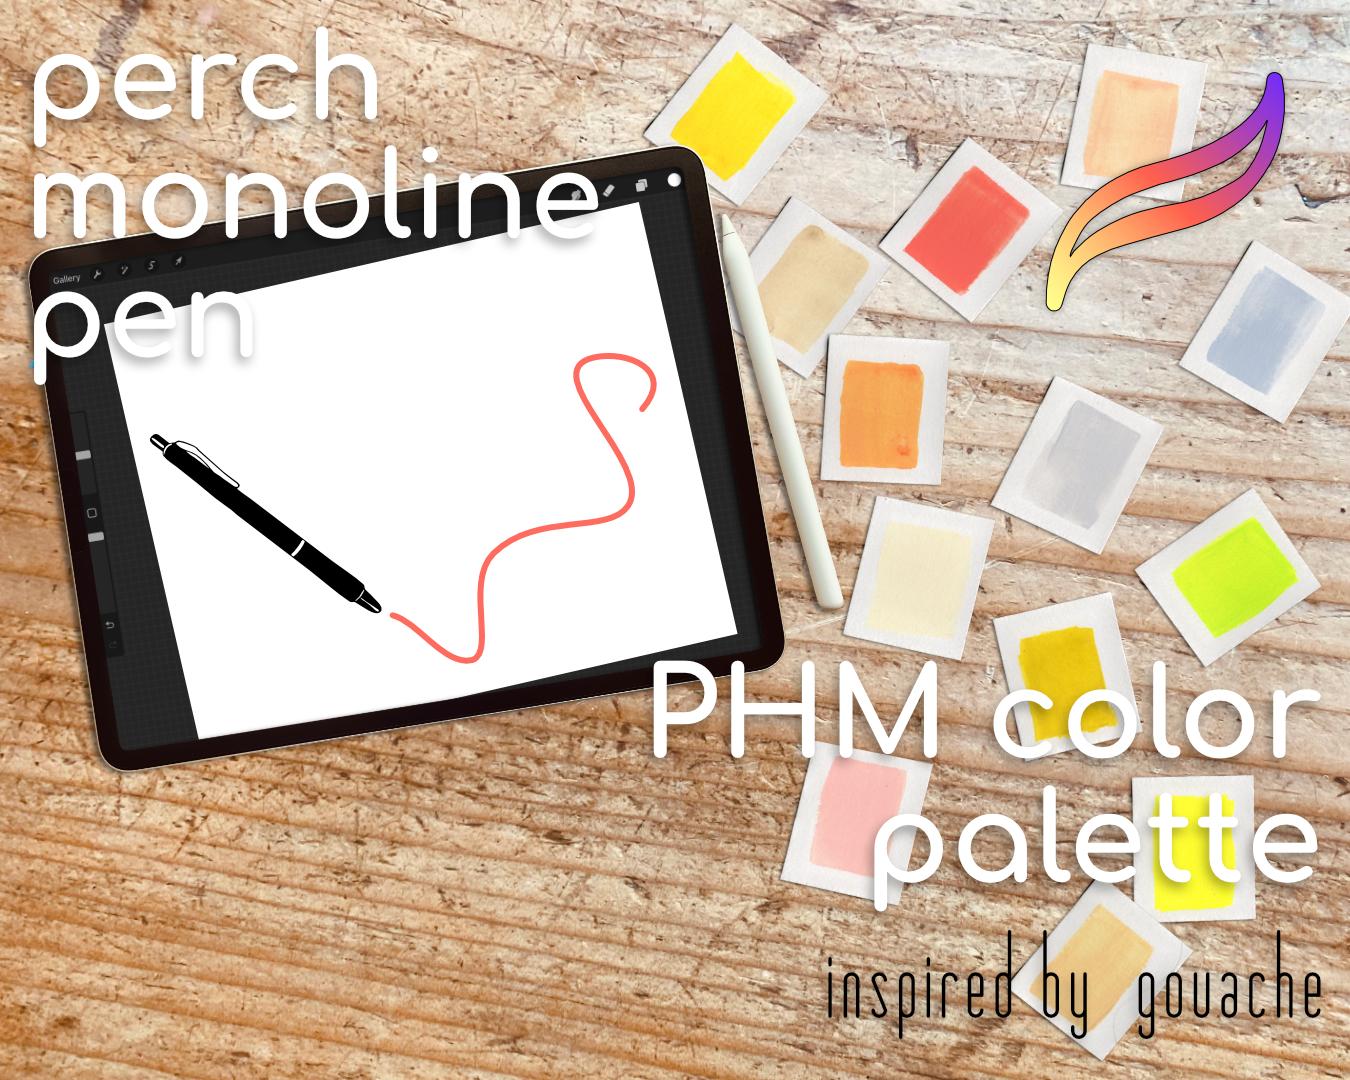
out will zoom in and out. But let's get our monoline pen that came with the
class today set up. The first thing we
want to do is find that folder that you saved
your monoline pen in. I have one saved for this
class in my resources. I'm going to hit monoline pen, it's going to directly import
it right into my list. It's going to go
to your imported. If it's just one, it's going to go to
your imported file. There's my monoline pen. This is when I created. If I pick a color, then I have the color there. Let me show you real
quick what happens when I make lines on the symmetry. That's just this layer, and right here it says assisted
if I make a new layer, and it doesn't say assisted, it's just going
to make your line happen just like you normally
would on a regular page. You might notice I have different settings over
here, different lines. These are where you can save
your sizes and percentage. The bottom one is the
opacity of your pen. This monoline pen, I
didn't give it an opacity. No matter what size or
what opacity it is, it's still going to be dark. Two fingers tap, does an action. A three finger redoes an action. A three finger tap. If you
want to save a size I have, the max you can do is four. Sometimes it's better if you tap on it and then
I take one away. I want to save this size, I'll tap on it and
add the plus sign. That way whenever I need to use it goes right back to the spot. You can see how they have
percentages on here. That's the percentage of
the size for mandalas, I usually work in a 15% for my bigger lines and a 7%
for my smaller lines. That's the first part of
setting up our canvas.
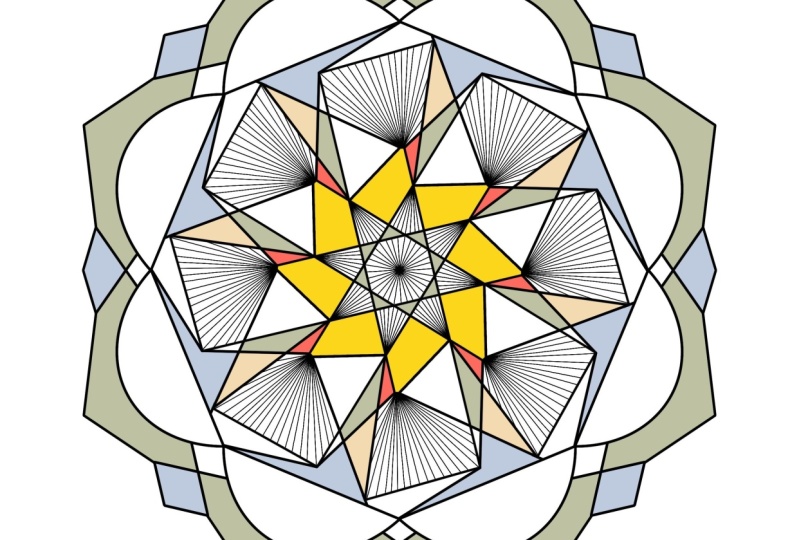
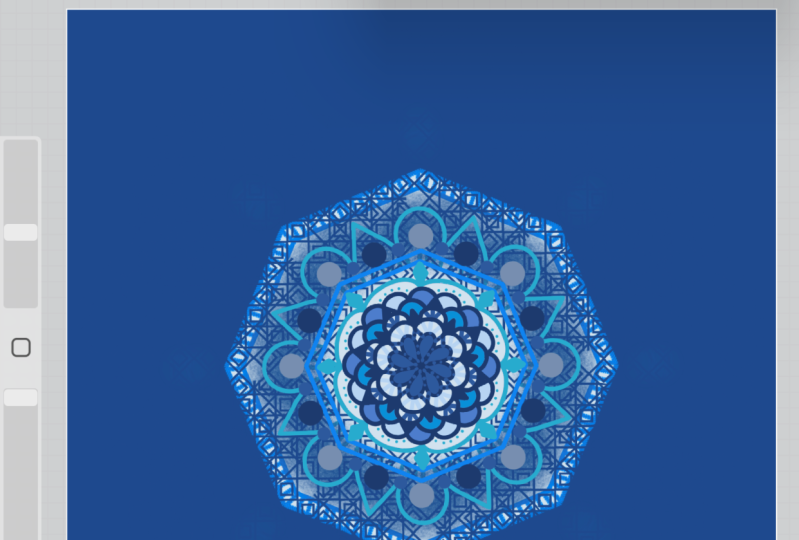
3. Designing with Symmetry: Next we're going to be
designing our Mandala. I'm going to go over a few
more of those touch gestures. As we work, I will show you even more
of those touch gestures. Let's get started. We have our canvas
already set up now. It's just a matter of finding a fun design that you
want to get started with. I usually in and get started, it's a matter of just, oops, I'm on that wrong layer, I'm going to delete that layer. If you slide to the left, you can delete a layer, since I don't need that layer. That's what I'm
going to do and I'm just going to work
on one layer today. I have my mono line, I have a truck. You go to your colors and you want to get
to a true black. Go over to disc and
bring it to black. If you tap on it, it's going to bring
it to a true black. I have it saved in
the color panel. Same with value. You bring everything
over to the left side, every slider over to the left
side, and have it at zero. That's going to be a true black. This is where you can
put in your hex codes. True black is 00000,
lots of zero. Just type in the zero
is a true white is. But we're going to go
work with a true block today and create our mandal. Let's get started. It's just about having fun and
creating your designs. If you don't like something, let me show you how
you, if you want. I already have it on
my monoline brush, but if I want to keep it on the same brush
that I'm using, if you just hold it after
tapping on your brush layer, then if you hold on your eraser, it'll bring it to the exact
brush that you're using. You can come in here and erase areas if you don't
like how they're looking, but I'm just going
to keep going. I like making different angles and different things
to create my Mandela. And if I don't like something, I just go in and erase it. Since you're on symmetry, you're really just
working in one triangle. Another thing that you can do is if you want a perfect line, hold your pen
without lifting it, and it really straightens
out the line in the top. If you want to
edit it, it'll say you'll tap on edit and that's where you can move it along
and change where it connects. Then I tap on the brush
again to change that out. Another way to do this is
with an arc or a circle. If you want a perfect arc, then you can do the
same thing and hold it. You can edit it.
And you can move the points around to get it exactly where
you want it to be. But it makes it really
easy for making designs like that one
a little bit bigger. We just keep going. I like to add more texture into my designs by filling out
the spaces in between. But really, it's up to you
however you want to do it. Let me show you what happens
if you make an angle. Say I want to make an
angle that's really sharp. I can hold it, I can change it. This makes a lot of fun with putting together
your patterns. Just like that, I have a whole new section
of design happening. You can do the same like this and create your
designs how you want. You can edit your
polygons, become polygons, and change the designs
up to fit your needs. And it making these Mandelas
really, really fun. Another thing we can do, change it up a little bit, is work with changing
how the symmetry works. Right now we're working
radial symmetry. That means when you do
one thing in one spot, it mirrors it on the other side. But if you go up
to your anchor or your wrench tool and go back to canvas and the drawing guide, go back to your options and toggle the
rotational symmetry. Watch what happens when you add rotational symmetry
into your design. Let's find a spot where I'm going to find a spot that is the
highest point right here. Rotational symmetry makes it so it's going rotating
around your canvas. Now, it's not connected here, because in this spot it's
connected at the highest point. But that's okay, because I
can fix that and change it back to radial
symmetry in a minute. But see how this one
went off the page. That's the closest
point on that side. What I'm going to do is the two finger tap to undo that one. I still like that design, but I'm going to make
it in the lower section and I'm going to
go back and change my drawing guide
again and go back to rotational symmetry
done that way. Now I can come up here and create a design to
connect those pieces. Because I'm working
on the quadrant area. It's only connecting
those quadrant sides, not going into the other
section over here. The angles here, Mendell
is a really fun to create and I think we're going
to stop here on this one.
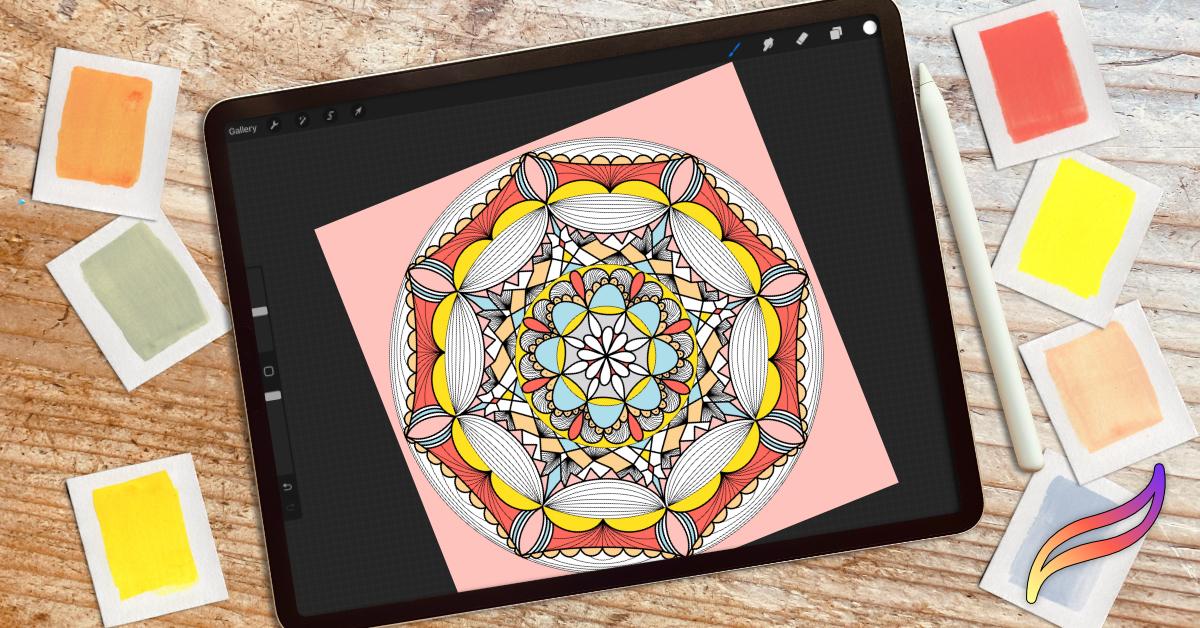
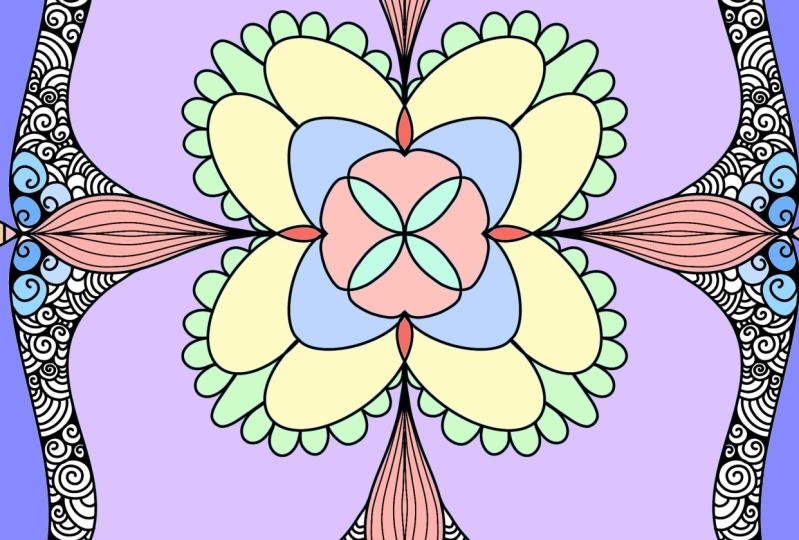
4. Adding Color: Next we're going to work with color and adding color
into our design. In your packet, I gave you a bright color palette based off of my paints that I love. So let's work together
on downloading those, importing those into your file or into your procreate app. And I'll show you
where that goes. All right. I'm going to
swipe up again and go back. Since my file is
already open and my resources are here and
I tap the acrylic wash. This one gets a little tricky. I'm going to go back
to my palettes. Yes, I have it
here, but for you, color palettes move
all the way to the bottom if you want
to bring it to the top, or if you want to set
it as your default. You can set as default. Anytime you open your color palette,
you're going to find it. Another thing you may do is hold it to hover and get it
to go all the way to the top. You can keep holding here
and pulling down with your finger and move it
to the top of your page. Since I already have one, I'm going to delete this one by hitting the three
dots and hitting delete. Here are my fun colors. Colors. I always give
you a true black, a true white and a
gray to work with. You can come in to
different layers here, and if you pick a color, you can find the harmony with the different
complementary colors. You can split
complementary colors. Here's the blue and here's two
split complementary colors analogous the triad and tetrad. It gives you four
colors that match. But we're just
going to be working with this palette today. It's my acrylic wash. The next thing I need to do is I need to tap on this layer. Click Reference. I also need to add a new layer. I need to tap on it
again and hit Drawing. Assist that layer two, I'm going to pull
below layer one. To do that you might
have seen you tap on it, hold it until you see
it wanting to move, and you drag it below this layer because I
don't want to work on it. I'm going to lock
it by sliding it to the left and hitting lock. And we're just going
to work on layer two. The reference tool makes it so anything on this layer
are shapes here. When I drag and drop
colors or anything, it's going to reference the area that is
already drawn in here. This gets super easy to color. This is where the fund comes in and adding color to your design. Tap on your color, pick
one that you love. This coraly red has
been my favorite go to, in this palette, what you do, oops, did you see what
just happened there? It changed back to
a different color. If you hold it too long, it will change back to
the color you used prior. What I can do is slide it over and drop a color
because it's on reference. Even if I turned that off
by clicking the box here, it's still just doing the
area that is referenced here. I'm going to pick another color. Actually I'm going to work with this color a little
bit more and add that in and get all my color pops. I'm just dragging over and over. But what you can do, let's
switch to a new color. And let me show you
what happens this way. If I drop here and then
hit continue coloring. I don't have to drag
and drop anymore. I can just tap into the
areas that I want the color. While it still has that
blue check mark here, I can pick a new color, drop those in as well. It makes it easy to
color in your designs. I love how fast it is
to make that happen. You can zoom in and find your
spots you want to color in. I don't know if you notice
this blue line here, but if you want to
color in more or less, if you go all the
way to a threshold of 1,000 it's going to
fill in the whole page. But sometimes you
have areas that don't fill in the
color all the way, especially in corners like this. That's where you want to bring your threshold to
a different level. Let me go back to this color and drop it in and
see what happens. Because I brought
the threshold up, it filled in that
space even more. We're going to get one
more color, pops of green. Pops of green. That's a little too much
green for my liking. And let's see, get
some blue in there. Anyway, it's a lot of fun. Let me show you what happens because these aren't closed off. If I tried to drop
color on this spot, it's going to fill
the whole page. Your color needs to go to a space that is
completely closed off. Otherwise, it will
fill the page. I'm done. Yes. Yeah, I think that's
where I'm going to leave it.
5. Printing + Beyond: Let's move on to what you
can do with your prints. They're a lot of fun. If you go all the
way to the edges, they will match up if you
want to make patterns. And that's a whole other
class I have as well. Let's move on to the next lesson where we're going to show you, I'll show you the
different types of printing options
for your mandalas. Okay? I have a slide show. I want to show you real quick
of the different options available to use your
Mandelas out in the world. Your different printing
options are printing at home. Just print them out on your
comp, on your printer. If you do them all
in black and white, then you can color
them in later. You can save them
as Jpegs or PNG's. If you save it as a PNG with
a transparent background, I'll show you that in a minute. Then you can add them to other things by
printing on print. Maybe puzzles or art prints, That's a really good
way to use them as PNG's Printful is
really great websites Printful.com for
getting your art printed on products to sell in a store or just to order
for yourself at home. You can make fabric with
yours at Spoonflower. Spoonflower.com is a
another great place and mends and the
square makes it really easy to make patterns and fabric out of
your mandla prints. This new one I just found was coloring books
with a company called Lulu.com You can create your
own custom coloring books. Yeah, I think it's really fun. Who wants to make
coloring books? I do. I want to make
coloring books. Let me show you really
quick how to save them and set up your canvas if you want to
make coloring books first, let me show you where
you go to save them. You go to your Wrench tool
here and you hit Share, and you can share them
as your procreate file. But sharing as a Jpeg is usually the best if you
want to print at home. If you fill it all in and you
want to get to spoon flour, if you want to share as a PNG, you can export it that way. But the one thing, if you want it as a PNG
without the white background, you need to remember to turn
your background color off. I know it looks dark here. But once you share it as a PNG, then you save it to your file. And it saves without the background whatever
is not filled in. Like if you want
these pieces white, then you do have to fill them
in white before you print. And then anything else, like these pieces here, will be printed with
the background of the fabric choice or the
art print that you choose. Let me show you real quick. I'm going to unlock
this one real quick. Say you want to create
a whole coloring book. What you can do for each of you can make groups by
sliding to the right. I have two layers here,
it will make a group. I can just rename that
like say, that's page one. If I make new layers, I can turn that off. I still have drawing assist on, I can create another layer. Right? This is just
quick to show you. If you see it this way, that one is on top of the other one and it
doesn't look great. But what I can do is go to my
wrench tool, go to Canvas. If I go to Page Assist, that's going to turn each
group into a new page. This is how you share as
when you go to share, you share it as a PDF. If you want to make
your coloring book, it will share each
group of pages, but they have to be
grouped together. Otherwise, if I say, if I move these out, see if I can get
this to move out. Each one is a different layer. Each group is a different layer. You need to make sure that
they are in your groups. That's our quick
class for creating our mandalas and learning
how to set up your screen. Set up your canvas to create fun mandalas that you
can print and add onto fabric and art prints. And even make your
own coloring books.
6. Many Thanks: Oh, I want to say thank
you for showing up today. Have fun making these. If you want to take
more classes from me, pop over to my website
at Per Chan Made. If you want to be a part
of these live sessions, just click the link and sign
up for one of my classes. Check out my website. I have a lot more
procreate classes and affenity designer
vector classes. If you are social media, which I know a lot of us are, find me at Perch
handmade or my hash tag. It's creating with HM, I want to see what you're
creating and I will most likely share it
with my community. Okay, thanks for joining, and I had a lot of fun today. All right. Bye guys.
 Katie Simmons, Digital Artist | Perch Handmade