Transcripts
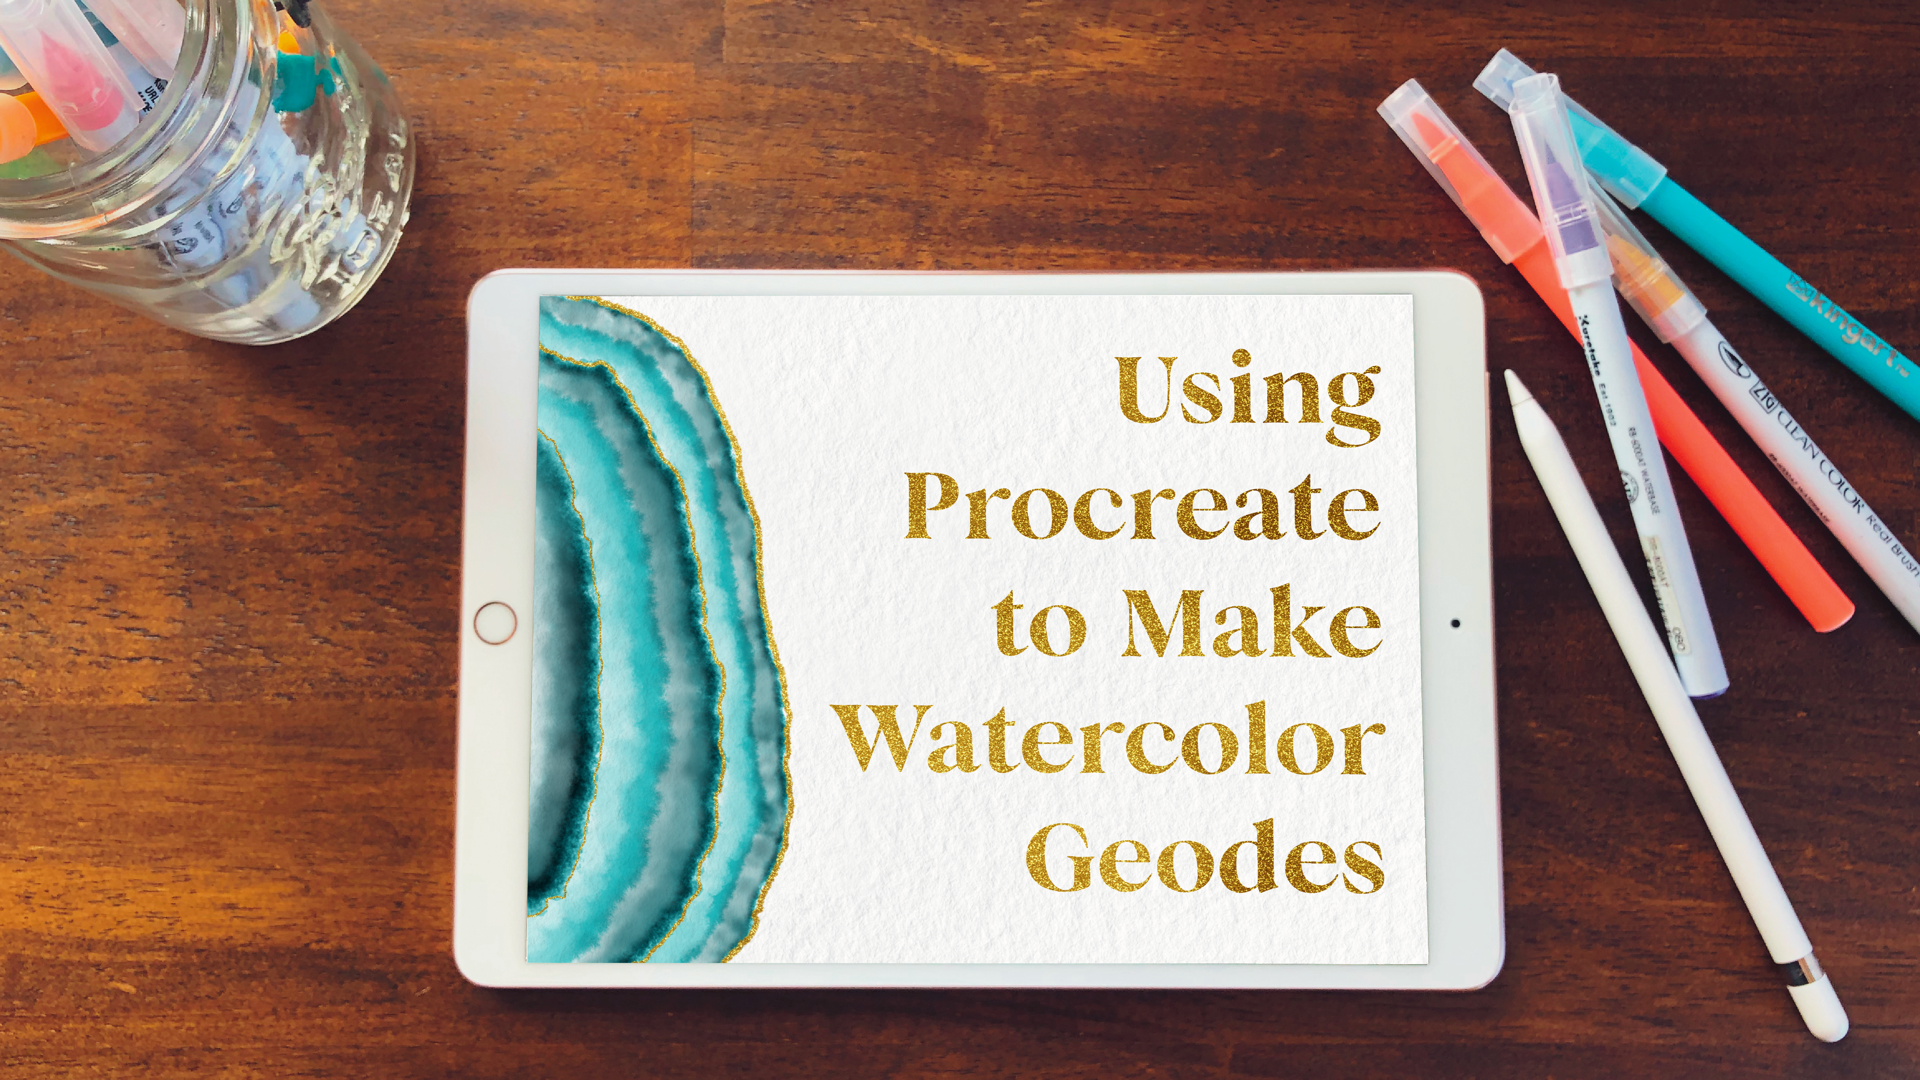
1. Intro : I'm Katie, owner of Desire from Perch in Me for this class of them to teach you how to make a stunning watercolor geo. Using the procreate, you'll learn the basics of setting up your canvas with layers to make something truly beautiful. After adding your favorite quotes or song lyric and a pop of shimmer, you'll be able to send this out as a text printed at home or from your favorite online printer. So get your iPad and your apple pencil and let's get started.
2. Class Project: All right, everybody. So today's class is a beginner's class for procreate. You don't need to know anything about it. I'm gonna teach you all you need to know. We're gonna learn how to make our watercolor geode using appropriate off. We're gonna grab ideas from interested. I have a great interest board, beautiful ideas. I'm gonna show you how to set up your campus so you have all the layers to go through. I'm also going to teach you how to use all of your brushes and have a blend of those brushes throughout all of those layers. Because we're gonna be doing a lot of blending today. After you finished making your beautiful watercolor geode, we're gonna add some text layer and a glitter background to make your text and that some outlines on your geo really parking shipment then will learn how to stand it out and share for all to see. I can't wait to get started, So let's begin
3. Inspiration + Resources: for today's class, we're gonna need your iPad pro on your apple pencil. You'll need the apple pencil because it's great with pressure. Sensitivity on the tip works really well. Whether it's straight up and down or shading on the side. You're gonna need that for your blending, so you'll also need your procreate. So in your project, resource is center. You're gonna click on your resource is and download. This is where this is where you'll download all your resource is to use for today's class. One of the pages I really love is color hunt, and that's linked at the bottom of the page is, well, it's really great cause their colors are really cohesive and you can click on them and you can save them into your files. I am save it for later so you can download the image. If you like it download and that will come up over here and then you can send it off. I write straight into your procreate out for use later. You'll also find the link to my Pinterest page geode inspirations, and there's so many things to look at and shoes firm for getting your inspirations for today's project so many great color combinations. But today we're gonna probably stick with just one color combination similar to this one here. Once you download all your files, they'll go on to your file app on your iPad Pro. I renamed mine into a file called Geode. Resource is, this is where you're going to keep your color palette, your gold glitter background, your watercolor paper and your brushes that he'll be using today. When you click on the brushes, it imports them immediately into your procreate up. So it's so easy to use. So I will do both of those and we'll have them. They're here Is that color hunts that we haven't earlier, which is really nice, so you can see the colors later. When you're watching the video, it's best to do skill. Share through the safari out. That way, you can conduct sit down and watch it while you're working on your piece. It makes a really handy for working and and seeing what you need to do next. So you are now all ready to get started. So let's begin
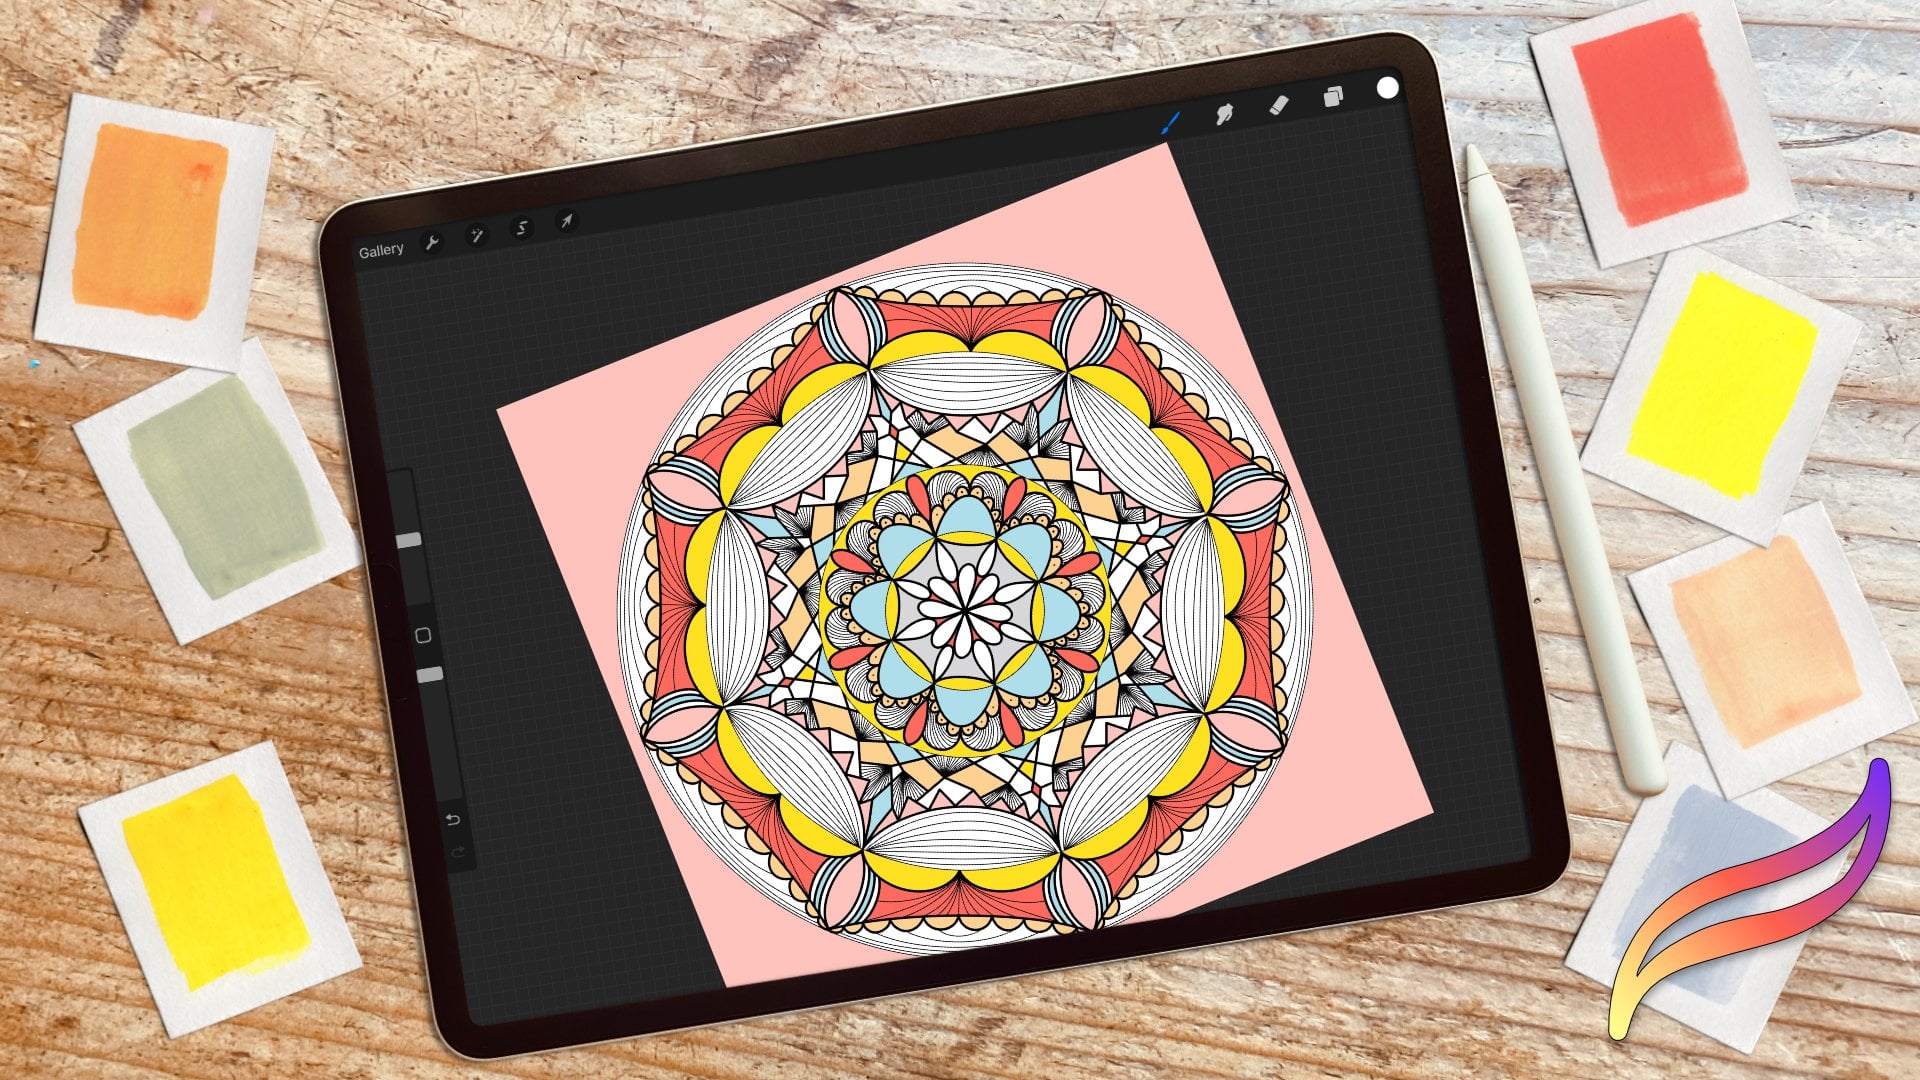
4. Setting Up Your Canvas: Now that you've downloaded all of your backgrounds and all of your directions, it's time to get started on setting up your canvas. So first we're gonna open procreate. I always go to the section and I'm gonna be working in. So with today, it's gonna be the GOP. I'm gonna add a new canvas over by hitting the plus sign. And for today I'm going to set up a new canvas completely. I'm gonna set it two inches because that's how I like toe work and 10 and shoes by 10 inches. And we always have the dp. I said it 300 That way the picture when it prints out or you're sharing is the best color possible. So then we can hit, create, and to go back and show you real quick. It's set at untitled artwork, and we can change that for now. So I'm going to change it to a master copy. So perch and made watercolor she owed, and I'm gonna have master copy so that when we're all finished with this, I can share our duplicate that leader. So first we want a few layers in here, so I'm gonna just start adding some layers to begin with. The first layer we're going to import by hitting the tools, the actions button over here and then hit. Add an insert file and I want to add my watercolor paper that I've already downloaded. And so this watercolor paper, as you could see on the outline, is smaller than the square. But we're going to move it up to the top and see how, when you move it, you have the line there. That's because the Magnetics Iran, and that's gonna keep it in place. I'm gonna hold this button hero, click and zoom out rope lick. And then we will set that up and we'll add that one. And I always just add a second file the same when I'm setting it up and I'm gonna flip it so that the pieces connect and that way it stays in place right there on Now we got that all filled in. I'm gonna pinch those together and hit look, because they want that just to be so see when you look at it Now you have that beautiful watercolor texture behind the next couple of layers. We're gonna set to multiply and you'll see Why later and then meal Do you repeat that more times and that duplicates those multiply layers. Then we're gonna add a later with the gold background. And we're going to do that same thing at the perch in me gold now a little bit smaller. So we're gonna move that first someone is, you know, a little bit. We're gonna move it up into the corners, the same process in this time. Flip down, you know, mind it up the other one flip or non Italy, This top one. So they're matching next one horizontally and vertically. Watch this that way were no pinch all those layers together and walk that layer. And that's our goal Glitter earlier. It doesn't matter too much that you have the spaces coming together and a little bit of a non form. That's okay, because once you have it underneath your other layers, you're not gonna notice that I'm gonna turn that layer off right now. But clicking that because we don't need that for right now, then we're gonna have our another layer we're gonna rename It are outlined layer, and one more layer is going to be our quote later, layer Now we have our whole canvas set up and ready to go. Close that off. We'll be all set. So now that you've got it all set up here, we're gonna go back to gallery, and we're going to slide it to the left and we're gonna hit Duplicate, and we're gonna save this one for another day. Whenever we're ready to make it, we're got it all set and ready to go. This one we're gonna change, too. How about we do first watercolor geode? Because this is your first watercolor geode. And now you're all ready to get started, and we have all of our layers ready. We've got him set to multiply so we can see the water color layer underneath later, and we're all ready to go.
5. Building Your Brush Gallery : right Now that you've got your canvas all set up, we're gonna build up our brush library by building up our brush library. It makes it ready and available in the future. One. When you want to make, uh, geode watercolor or when you want to do anything else, you know exactly where your brushes are. So first we're gonna hit it, click on our brushes and you'll see those two brushes that were downloaded Already. We're gonna scroll this down a little bit, and we're gonna write Geode Brush set. Or we can just read Jude, actually, and from the imported. Sometimes I like deploring this down because it doesn't like to go into that top one very easily. So I will click on the small crowd brush and a kind of hover around the top one. It's crazy as it sounds, actually, what's hover over this? There we go, and then we're gonna go back, and we're gonna bring the purchase cloud brush over tell it's there. Next, that one's we're gonna use are already on your brush library. We're going to go into the water brushes and the school that backed up to the top again and we want to bring wash, brush the wet plays, brush the wet sponge brush and water bleep brush. We want to bring all of those. And as you see, I click on one and slide them to the right, and it groups them also. Now, I could take all four of these and hover over diodes and bring them in. And now we have our whole brush gallery set up for our geo brushes, and we're ready to begin.
6. Integrating Your Color Palette: All right, So now we're going to open the Geode Colors Page that we downloaded earlier and saved into the color palette file again. The color palette file is great to have on hand and go back to later on. And that way you can have one thing saved if you want to get rid of some of your color palettes on your other page. But I always like to have a nice visual. So click on the color palette geo, and we're going to start by clicking on the color up in the top corner. And we have all over color poets already set and ready to go. But we want to make a new one with our geode colors, So click on the plus in the top. Yeah, that's pinched that. Next we're going to hover and hold on that color palette and it changes up here. And then we're going to add that color by tapping the squares because these are all little boxes and it will put it right there and we'll go to the next color and hover on hold and then click. And that way we're placing all of them in a row. I like to have them color coded so that you can maybe choose earlier turquoise or all your bush or all your emeralds, Um, or you can go for whatever color you like, But it's nice to start off with something new that's all set. So next I like toe. Hold on the gold, and I like to put that over to the side, not next to all the other colors. That way, when I go to it, I know just where to find it. And thats for building out your gold outline the grey I also use sometimes for my paper brushes. It's a great color for making the watercolor background. So now you're all set. So now you have all of it set up. We're gonna title geode, and it's all set and ready to go. If we go into a disc here later to clear that out every time you use it, let's go to the main gallery and look at some of these colors room quick. So we're gonna pick up our first Waller watercolor, and we have all of our colors here, and what I'm gonna do is every time I use a color, it shows up in our history and the history is really great. So if you need to go back to color later, Ron, or if you change it a little bit off, so there's a great emerald, but maybe I want to change it to a little bit lighter color, and it's not in our gallery. It is going to be in our history right there. So that's the color we use just a minute ago. And it's really great if you if you switch up your colors a little bit and if you've forgotten toe, place it into your palate, you know just where to find it. Later on, there's these other pallet sections that you can change, and I like to use value really great if I want to just move it to a brighter or darker same with classic. You just move it brighter or darker on the same Hugh line, or you can change it all together, but in the same value. You can also change to any color in this one, but sometimes when you're staying on one color and go any classic and just want it, lighten it up a little bit. But not changing, too much. It's a great place to go clear out this layer and get it all set for us to get started.
7. Finger Controls + Apple Pencil: All right. Next, we're gonna work on apple pencil and finger controls. There are some great shortcuts when you're working with your iPad pro and I'm gonna show you. The 1st 1 is I just showed you It's two fingers, two finger touch. Pinch on to make a bigger If you bring your two fingers and snap them together, it brings it back to the original size. If you draw something and you don't like how it looks to fingers tax and will undo that, if you tap back too far and you want to put something back on their three fingers will bring it back. If you want to see the whole screen and get this line in this line out of the way forefinger tout. We'll do that just for you. It's really nice, and it's great to see your screen bigger in the full view. You can change all of these in your references in your gesture controls, but I didn't like Teoh. Keep mine all set up just right, whether you want to smudge or race using your fingers or pencils. The eyedropper here all are setting so smudge. I just keep him turned off. Erase I keep him turned off assisted drawing. I keep tucked turned off as well. The either upper, though, is great to have the first tap on the square that will be over the side to get the eyedropper toe work. Also, if you just hold down your finger and touch it, the eyedropper going as well as using your apple pencil. But the quick menu has turned off full screen. It's just the forefinger tap turned on, and, um, first scrubbing back and forth with sorry with three fingers on any layer will will clear that layer. So it's a quick one, but I don't use it as often. Copy and paste is a three fingers swipe down will bring up your menu for copying paste players I have turned off. And then with the general, it's just the pinch to rotate your picture. So that's the pinch and rotate. So those air your your quickest controls. There's plenty of places online to find more controls, but those air my easiest ones. Another quick is changing your brush sizes over here using your apple pencil. This is changing your brush size, and this is changing the opacity of your brush so if we stern out here, it's a bigger or versus the smaller, and if you bring that color down, he can barely see it. Another way to change rapacity to is just a light touch versus the dark. Touch here is that I drop for that brings that up and you can bring it around. You want to use a color that's in this one. You can do that. Change of just two fingers to delete all about. You can also have your brushes up here, but you also have your your blender and brush and you're eraser. And when you have your brushes here, you're blending brushes. Might be on something else. But if you make sure you have the one here open and if you hold on to this and hold it down , it prints it on the same one that you're using likewise for the eraser. It will bring it, Justin seem one you're using. So if you just want to smudge it using similar brush, zoom in when I'm smudging. That way gives it a similar wear. Look, it's nice when you come to the edge, it blends out nicer, so we'll go over this a lot more as we're making our G o. But he can just slowly blend and blend and blend to your heart's content and then the eraser. Seen because you can also change the opacity of your eraser as well. And your smudge er. So I erased just that one. You could still see a little bit underneath, and it leaves some detail behind if you like that, or you can take it all the way away. Another trick to Liz. Let's clear that one out. Another trick is well, is. If you got what you brought something we're in on one player, man. Let's let's pick up the different colors and onto another layer, and when you're ready, you can emerge those two layers because at this point they're two separate layers. But once you pinch them together, there emerged and on one layer. And when this is really helpful, when you are doing a big project and so every project has canvas, you'll see it has a maximum amount of layers, so this one has 55 layers. Eight are used right now and 47 available, but if you end up getting more than I know it seems crazy, but I've had it happen. You can pinch the layers that you're ready to put together, and then it will be all set. Another thing is, if you want to slide it over, you may do Pull, take That way, you may lock it so nothing can be done to that layer. So if I try to delete it, it's gonna say loft layer, and then you can unlock it. And if you need to, you can delete layers a swell very easily. I'm gonna clear this layer, and it will be already snapped out back into paints. So I think we're close to make her project.
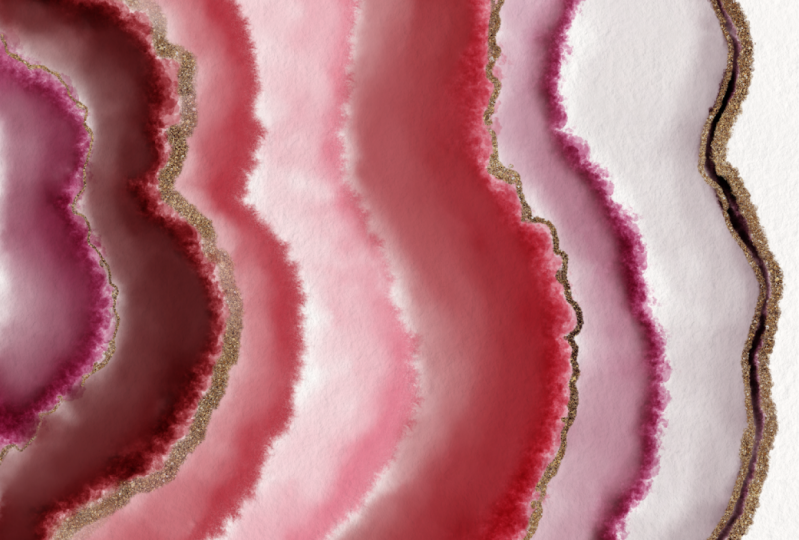
8. Building Your Geode with Layers + Blending: all right, friends. So now we're at the exciting part. We get to start building our geode, so let's begin. First, let's pick out which brush to use first. I personally like to use a small cloud brush, um, to begin with and I use the big cloud brush sometimes. But the small club rushing's and then my favorite Let's pick a color to choose from on. Gonna think that I start with this lighter blue ish because they'll build up really nicely . Wanna see where my color sizes? You know what? Maybe not Maybe I'm gonna go Is one of these deep purple igloos Yeah, that one will give me that look of am a fist. And I like to bring my capacity down to about 70% because they don't want it to get to dark . And we can Yep, that's perfect. And my size is just right. I'm about and maybe I'll go to 15% in the beginning and we start by just making kind of a Jaggi half circle. Maybe I'll stick it out a little bit. Perfect. And I know that looks really dark, but we are gonna blend and bring the capacity down a little bit, so let's go on to our next color. This is such an easy project to do. You'll be. You'll be flabbergasted. So next we're gonna go to the wet glaze. That's next when I like to go for and let me see what size were out, one of build out our layers to be a little bit thicker, and as we get to the center, they'll be a little bit thinner. So let's start at 20 and let's see where we're at. I'm also gonna bring that layer down to the bottom should have started at the bottom to begin with. So let's go to the very next layer. And again we have him said it multiply so that you could see the You could see the watercolor paper underneath and you'll see that better with this wet glaze color. So we're on the second layer here. Yeah, and depending on how dark, how much we push down. See how you could see the watercolor paper underneath There really beautifully. Keep going back and forth with each With each section on, we go back and forth between a couple of different brushes. I personally like to use that small cloud fresh and the wet glaze brush and gives me those that nice to bleed and look at the edge there on that one. It's just stunning on the next layer, so we're all set. Always check your layers because sometimes you'll end up building up on a couple of on one layer, and then it makes it more difficult to blend later. Not impossible, but a little bit more difficult, so always check your layers. Bring that sides down a little bit. Let me see. Yeah, perfect, And may I keep close. But I don't overlap because overlapping will happen later. And I probably need a couple more layers so I can duplicate those really easily. And you can always take away layers later on. And so they're all multiplied. They will say all layer for, but that's not That's not too big of an issue. No one has a nice texture. And you know what? This is where, like a shaky hand is totally okay. And later on, if I want that to be a little bit brighter, see how light it is on without having to go over a second time? I could just duplicate that layer. It gives the perfect amount of extra color, and it keeps it so your definition and everything is perfectly on point. And then I'm gonna merge those two layers together. You can also Franken, let me undo that. I'll show you. So I did that. And I see you've got the two layers you could see. It's hard to see on here, but you can also hit Emerge down, and that's another way to do it. So I've got those layers. I like the color and, like the contrast, I like all that fun definition there. It's okay if your hand is a little bit jagged, adds character to your picture. All right, so I think we're good there. Now. I'm going to start lending the layers always turn off the layers, except for the one that I'm working on and maybe allowed a second layer on later to see the underside layer. But we're working on this first layer, and that's when I bring the the blending brush over. So we have those old all those opened up, and I always like Teoh use either the wash with the wet glaze for this darker because I want to smooth it out quite a bit and keep it well, you'll see you'll keep it. So it's not quite as thick is this? So I'm gonna go. I'm going to go for the wet glaze brushed Are started, the wash brush Except that capacity work that size bigger. I really like the way it blends. And I'm picking up my brush every so often to help give it that fun definitions. If I went all the way through, you don't have a quite as much as when you just pick it up and down again. Really? However, you want it to look in the finished product. And like I said, you could blend for ever to get it just the way you want it. And sometimes Ideo it's a lot of fun. Video gets fed up, you'll understand. All right, all right. Next we're gonna open up the next layer, and this is when I like to keep the layers open so I can see how it lends into this next layer because they will blend into each other sometimes. And that gives another whole dimension. T your g o. So when I'm on the wall when I'm on the wet plays. I like Tico over here to the big club brush and blend that with out separately, and it gives just more texture to your picture. So again I'm picking it up, putting it down, and sometimes I'll go through and go all the way, but it Smoothes it out too much. So did the two figures back to delete that, and it's going to give it a little more definition. It's just a matter of blending and see how. And I'm. Since I'm on just this layer, it's not doing anything to this layer underneath it. That's when if I had accidentally had them both on the same layer and I went down here to blend, it would blend out all this beautiful definition. Do you like that dark? Which against it? And see when you see that happening right here, and it's adding a shadow above because we have the layers multiply, its having a shadow on the on the bleed edge of the knees, something that I really loved have watch, happen and unfold while you're building these out. The more you go down here, build into it, it pushes the white up. But if you start on the edge, then you're pulling the color down when a speed up and I'm gonna get through all of the layers and then we'll meet your liver. - So when you finished, make sure you go back and look at all your layers and make sure everything is looking just how you want it. I'm loving how this is looking right now. I love the contrast and all the colors, and we just use one color. But look at all the variation in that color. It's really great. So now we're ready to go on to the next step.
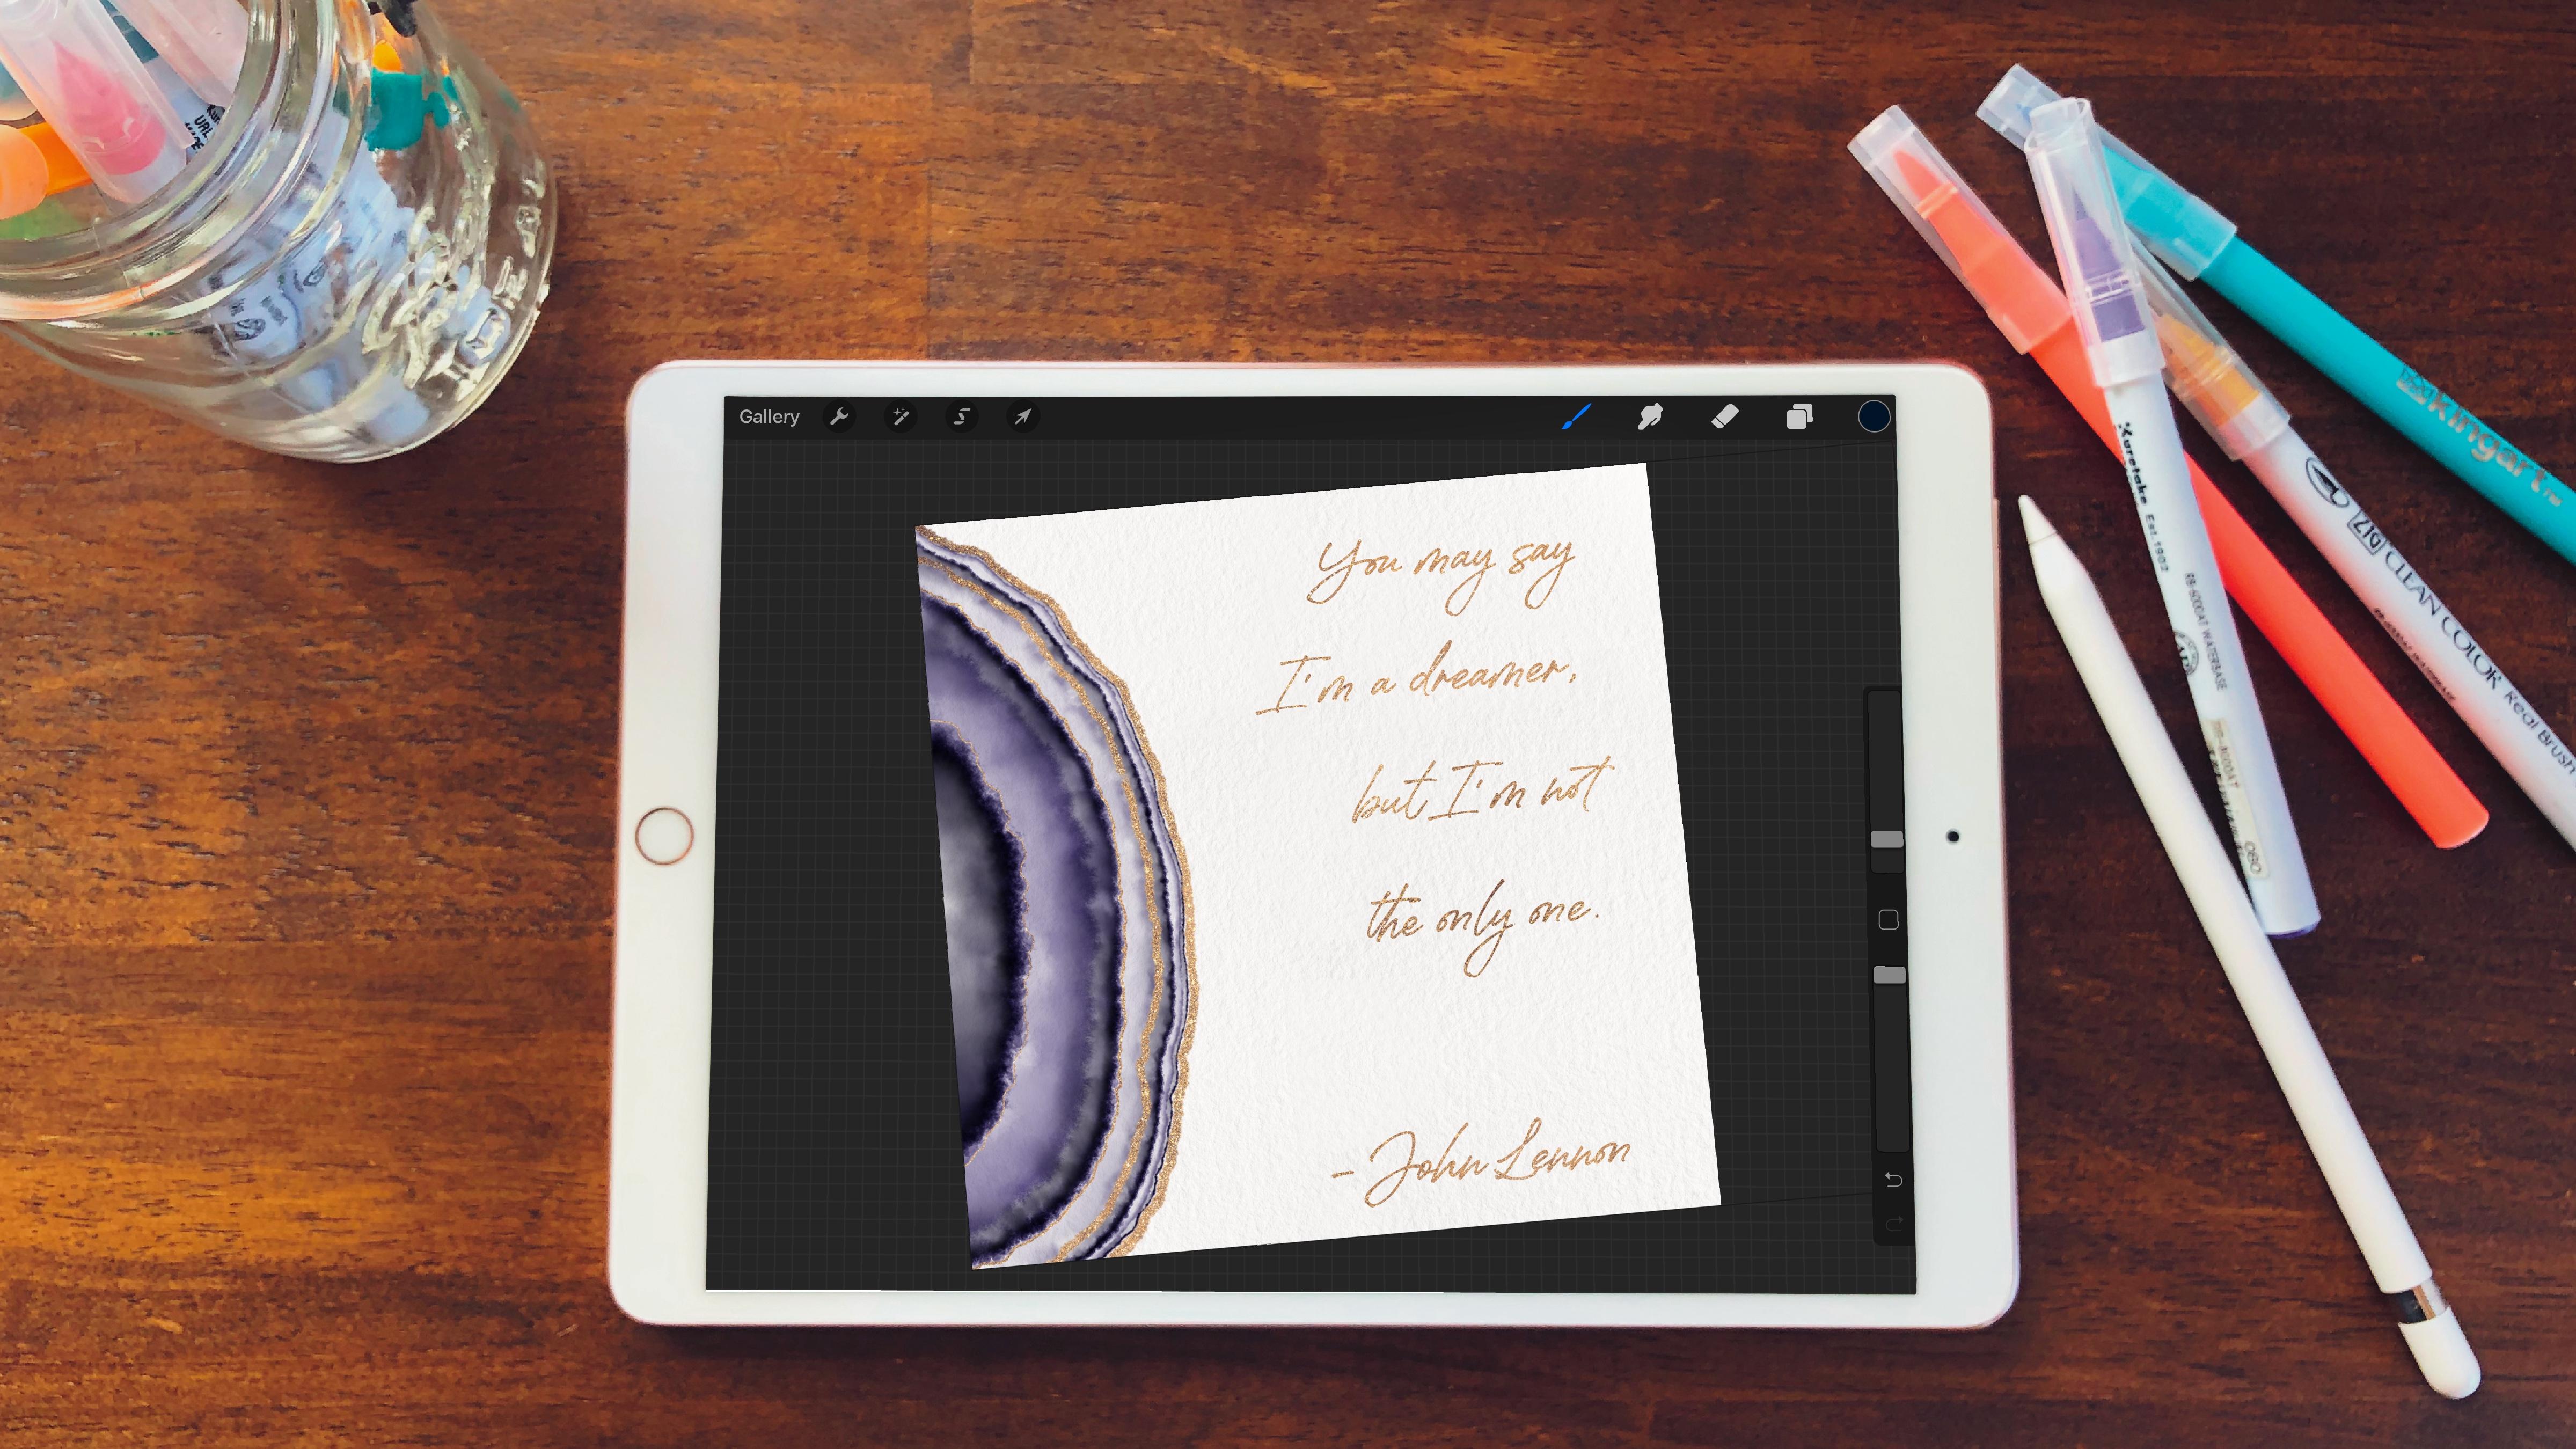
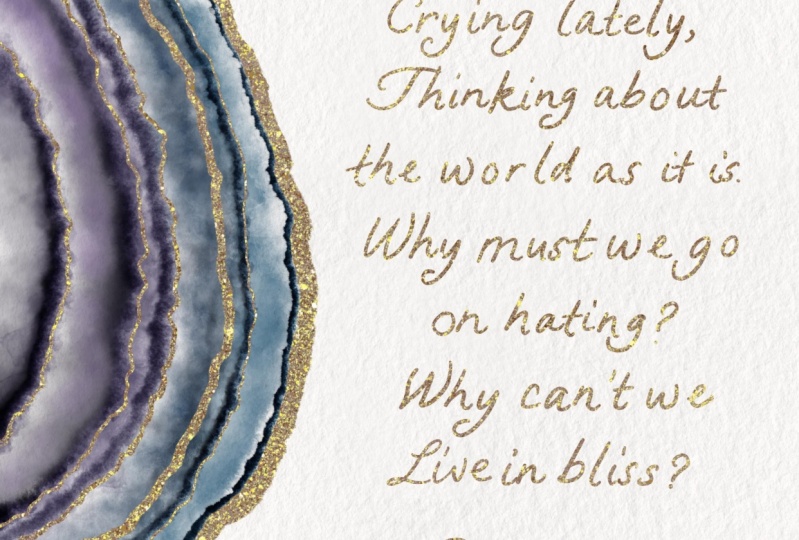
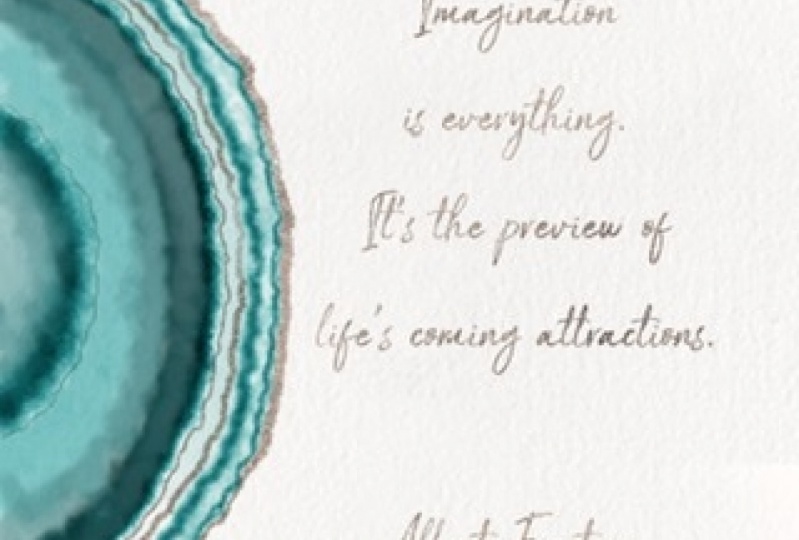
9. Adding Text + Sparkle: all right. Now comes the fun part, adding shimmer and text to your geode. I love using song lyrics when I'm putting out a text because sometimes the quotes come across as kitschy on by love music. So this is the way I can out into my peace. First, we're going to go to that outline lane. We're gonna pick from our favorite colors the gold That's gonna be just for the outline. And I always like to use the wet plays and I keep this starting about 4%. We keep that capacity up in 100% because we warm it to come through later on perfectly and show show the copied piece. So start out. I'm gonna move it around so I could see it just perfectly again. And we're gonna keep close to this edge. Try not to go over it. You know, I'm going to keep it a little bit further away because I could move it later and I will show you how to do that way. We're not covering up the tiny privilege there, but we're getting pretty darn close again. That shaky hand comes in great because it adds just more definition that looks great. I'm going to bring it down just 1%. That's all we need were at 3% and I'm going to go on to a different a different area. So what I'm gonna do is I'm gonna go to this edge here. It's hard to see it, but we have that layer in, and I'm gonna come here and stick close to that layer, keep going all the way, and the shaky hand gives that more definition. And we do this two or three more times. So I'm just gonna fax forward a little bit. All right, Now we're done with that. And this is where it can use my move tool to which is this tool here. And I'm gonna move things over just a little bit. But, you know, I don't need to move every layer. So this is where we can hit our select and then hit free ham, and we can go around this first layer and you'll see what can happen there. It's really great where you just want to move one piece of that section. It makes it really easy. So now I hit the move tool when I have Magnetics on and keep it on that one. See how just the one piece is moving. So I'm gonna keep it close on that line. I see. Like how that went over. So another way you can do this, IHS. By hitting show you way. Hold here and move it. Then you can move it without moving the whole move. Tool. Let me show you what? When If we hit next to this stock, it's just moving one pixel at a time. So now I'm gonna move it so you can see it. So it's a budding right against that purple, but not going all the way to it Seems that's perfect right there. Yeah. So let's see how it's couple areas. We can move those individually by going into the adjustments and clicking on liquefy. Haven't on push. Yeah, my size. Let's do this a tiny bit bigger. We don't need very much, but then we could just move this in just a little bit. Just in the one spot. I'm going to bring that size down for that little corner there. Look angry thing a little bit. It's just little movements. It's not a lot, but just enough. I think that's perfect. The other areas look pretty great. I think I'm gonna move. Use this push tool to push in at these little areas. Just gives it a little extra definition later on. When you see the final result with the gold in there, it's beautiful. All right. I think we're done with that. So next is the fun part of Adam text. So we do that by keeping him on the gold, we're gonna come over here to our actions. Then we're gonna hit ad and then add test. And I love to use those beautiful song lyrics. So I'm gonna type in a song lyric. I love John Lennon. So this one is going to be I always remembered at who wrote your lyrics so you don't have any copy infringements there, and next we can go to edit style. We've got the words in there and I can tweet him later, So I'm gonna select all by tapping a couple of times, and then I'm gonna find a front that I love. There's many funds that you can have that it comes with, but I tend to download many, many fonts and creative market pixel surplus design cuts. These are all great places to get purchased funds that you can use, um, with licenses. Or you can sign up for their free ones, and you can use them for your own personal use. See him out with one a little bit bigger. But I need we'll get a space heater. That one's not working. So I'm gonna go back here. Yeah, just have that. It's style. This is where the size comes in. You can change your size. You can change. Sometimes it gets a little tricky. Doesn't want to move into different spots. You can change your leading base and you're tracking so that you can bring your font up. But still beyond your seen page. Everyone is going to be a little bit different, so you just have to tweak it. You can change how close the words are to each other. How far apart if you want a little more space between them. I usually keep that it zero, but I changed the, um, the leading often, so I'm liking where that's at. I'm gonna hit Don so that when you type in add text, it gives it its own vector arised quote layer. If you want to rast, arise it. That means it will be pixelated and you can't make it figure. You can always make it a little smaller, but can't make it bigger. You can change that later, but it always goes here if you want to do your own handle letter. Unquote, I have some great rushes for that. Um, but that's a whole other. Relax, and so you can do that and put it on your own quote layer. But we're not gonna do that today, so clear that out. We're gonna stick with this, so I'm liking how that's looking. Um, Now it's time, Teoh. I'm gonna push these together by merging them. It will put it all on one layer. And now it's Rast arised. All right, but its OK, so what we're gonna do is we're gonna click on this layer we're gonna hit, select, and then we're gonna hit invert. And this is where it gets a little tricky. So we want to have the yellow with the little lines on it that we know we know that selected because we're gonna come into the next layer, gonna open up this and I'll lock it and we're gonna hit clear and know everything that wasn't selected. It is cleared away, and this is where it's so fun. Here we go Now, Now we have our glitter layer. So we turned off the outlying layer. That was just for that purpose. And now we've got a beautiful glitter shimmer outline and all of our words with glittery to How beautiful is that here if we'd like, we can go down a hue and saturation and we can change those. It's always best to start with a gold or yellow when we're changing the hue. For whatever reason, that works the best. So see how I can change it to whatever color I want. I like to keep it a little more original, but sometimes I like to bring it to a little bit more rosy gold. I also, for my own purposes, I let to bring the saturation down because it tends to sparkle just a little bit more. And then I could bring that up and look how much more sparkly that IHS. But so pretty. All right, so I think for now I'm liking how that's looking. It's always saved, but we can share it to our camera roll, or we can send it off as a file to a friend. So let's I'll show you that in the next.
10. Sharing Your Artwork: Now comes the fun part, sharing your beautiful artwork with your friends and family. Let me show you how first you're gonna go into your actions and hit the share button. I usually save mine as a PNG, and then you can hit save image. Although if you'd like to send it to your printer, the best way to share is as a PdF. I always hit best and export it to print. That way you could print it at home, and it will bring up your printer that you might have on file. Here we go, and it just takes a couple of seconds and you're ready to go. It'll print up full sides and best quality. Always fun to do so once you have it in your photos. There it ISS. You're now able to send it off and share it as a text or in an email. This is when you'll send it off to your favorite online printer as well. There's so many great options to choose from online that you can't go wrong, and it's so easy to send it to somebody you barely have to lift a finger is just a couple of art work pieces that you're gonna make and you send it right off and we'll ship it for you.
11. Final Thoughts: thanks so much for taking my class today had so much fun. I hope you did too. This is one of those really easy projects to do. It takes almost no time at all and you could send it out. And it's just a really fun thing to do for people, on friends and family or just for yourself. Whatever you choose. If you decide to share on Instagram, don't forget to hashtag create wave P h am that's per champing and I could follow along and see what you guys are up to. Also, don't forget to download into your projects. Calorie and I can check in with you and everybody else could check in and give some great feedback or comments and praises again. It was such a great time to be with you. Bye.
 Katie Simmons, Digital Artist | Perch Handmade