Transcripts
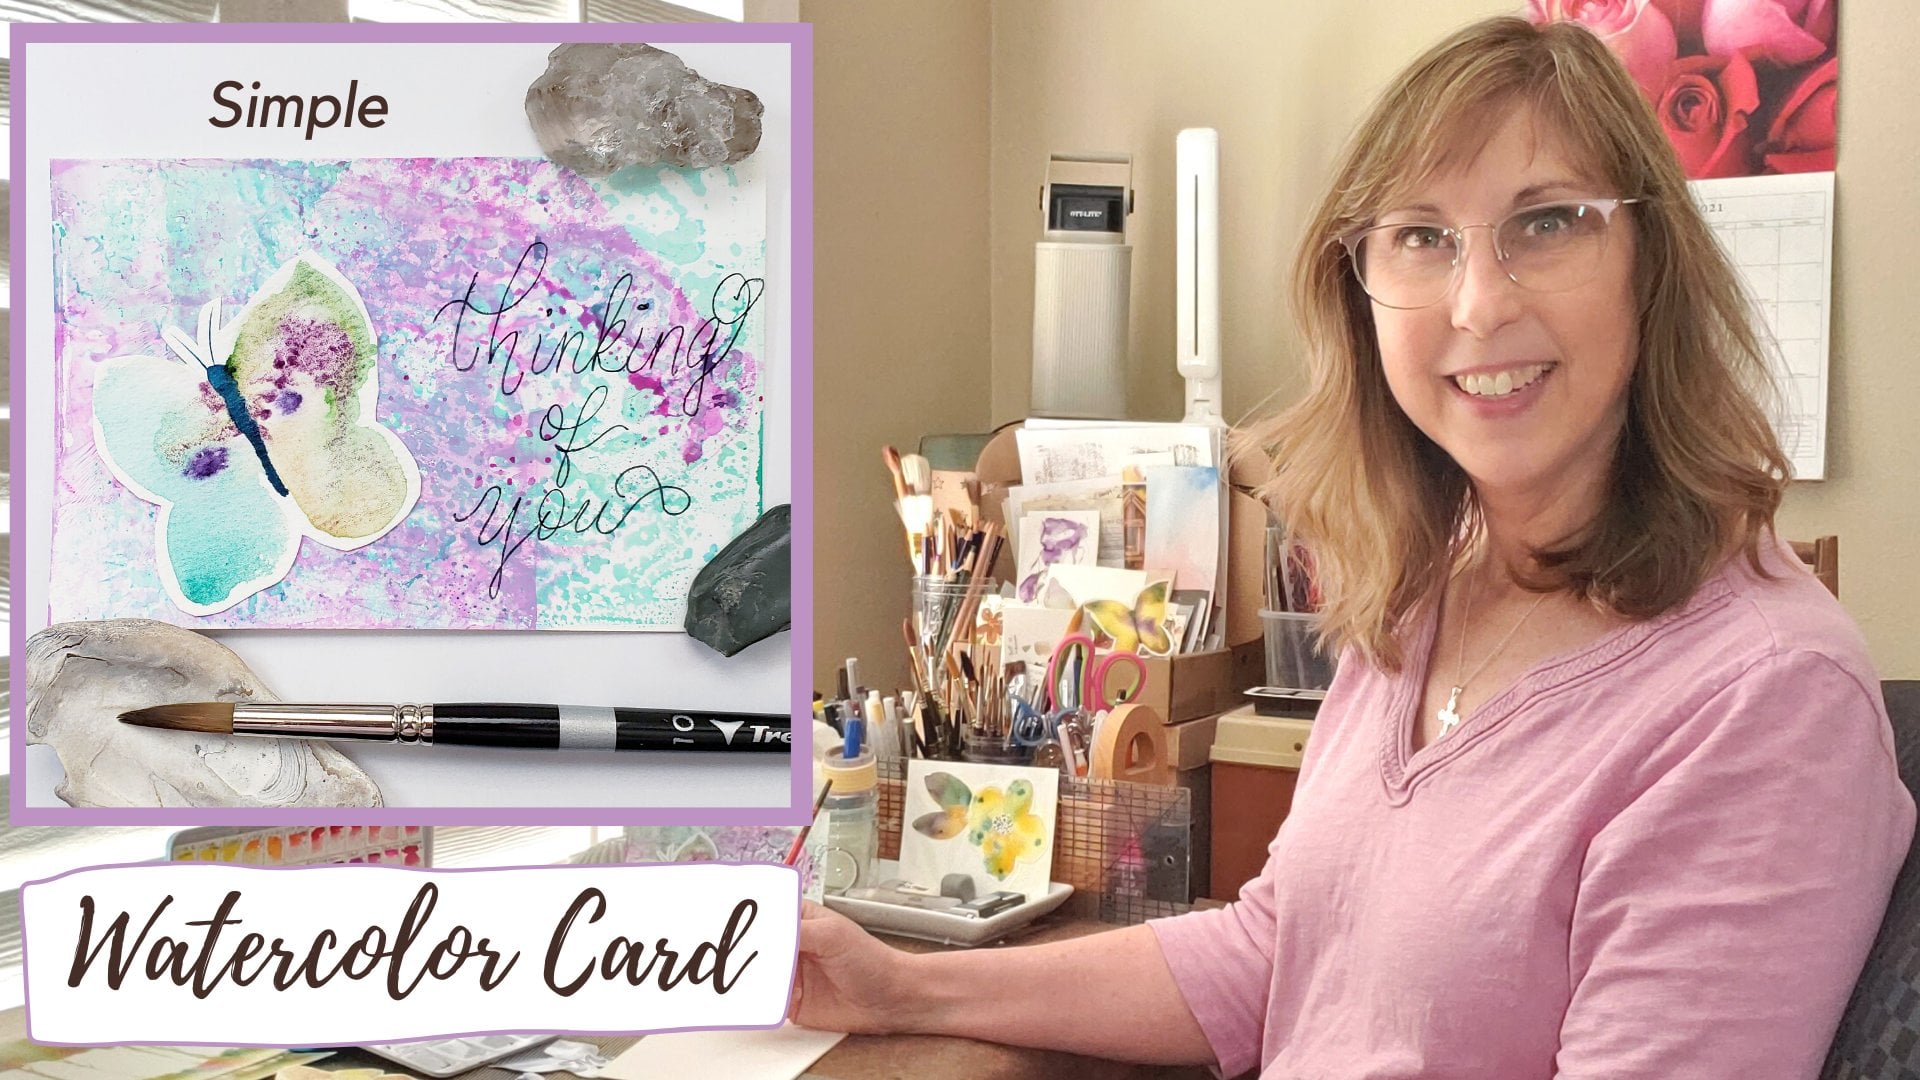
1. Making Art for Yourself: Hi, friends. It's Tammy Prera and thank you for joining me. Today's class is a
little unique as this is about art for yourself, art that may never
see the light of day. To do that, we are going to explore our water
colors in a very relaxed and no expectations coming up except to have this
experience in the moment. I am an artist on Instagram
and if you follow me there, you will see I love all
different kinds of art. I love collage, watercolor, hand lettering, paper crafts, collage, all of the stuff. I recently heard about the idea of doing
art for yourself. Artha doesn't have to be seen. I was really
intrigued with that. And I got up my watercolors
and just started playing. When I say play, I mean we
are engaging our materials. Lots of water, lots of paint. But there's also
something I'm adding and that is practice therapy. Now, that's not serious therapy, it just means a moment of meditation and relaxation
and letting go of expectations when you play with your water colors and I
mean play experiment, do new things and do it
over and over again. A different color, maybe a
slight variation in shape. And it's so meditative,
it's so calming. There is a project at
the end of the class. You can either include your practice therapy time
and share that with me. Go ahead and take your work and decide I want to share
this with the world. I have a project that includes doodling with different pens
on top of our water color. And it's up to you if you want to share it with the world. Or maybe you'll
just tuck it into your journal as a reminder of that moment when you were free to play with your colors. Join me as we engage and do some warm up exercises and then get into that
practice therapy.
2. Project Suggestions: Our project today is just to
play with your water colors, or you can take what you've created that time
you've spent at your craft table and decide
how you want to use it. Now, I created an
artist trading card and a postcard out of the paper that I was
using for our class. I doodled on top of it in a few different colors and
cut it to the correct shape. You may also want to
create a journal card, or maybe you will
keep your piece whole and fold it and
turn it into a card. You may scan it and
maybe you will make a Zene with the background
page that you've painted. Not all art has to be hidden, but it's one way of looking at your time at the craft table, of being time for yourself, making art just for
yourself and enjoy that. I would love to see your work. Please share that with me in
the project section of this. I would love to see
how this helped you move into really
engaging your water color. And maybe for the first time, I'd love to encourage you
and to see your work. Please share it with me.
3. Supplies: Very simple supplies for
our watercolor practice. Do you have a set
of watercolors? This set I created myself, these are all Windsor
and Newton colors. You only need, say, four or five colors and
you'll be good to go. You don't need that many
watercolor brushes for practice. We are mostly using a
larger round brush. I have a size eight. I have a two and a fan brush just to make some unusual marks. Just to practice water
or lots of water, I may use two jars and
clean my water regularly. Watercolor paper, this
happens to be 220 grams. I am not using high
quality paper. It doesn't need to be
cotton or 300 pounds. Whatever you have on
hand for our project. I have different
kinds of markers. I have a silver and gold
roller ball there sign. I have a white also. I have these master touch. They are graphic pens and
they are very waterproof. I love that in my art. If you have any
mark making tools, bring them along and
we're going to get started practicing
our water color.
4. Engage: So I'm choosing my paper. This one is says it's 220 grams. It's by Jen Craft. It's an unusual size, It's a five and by nine, I'm going to check my color wheel because I'm really drawn to
the greens today. If I line my arrow, I'm going to do very
light green, green. The complementary
is a red violet. Before I activate my
Windsor and Newton paints, I'm going to look
at this and really decide where's my red violet? I don't have a color named
red violet I could look at. My permanent move
is a good choice. Paraline violet is actually one. I prefer that permanent move, I know from experience
is more opaque. I just love the way the
Perlin violet blends. As looking at this, if I'm going to
choose some yellows, maybe come over
here in Rossienna. Quaquidone Gold is another
one of my favorites, but looking at my greens, I think I'm going to activate. Olive green is really
a great fun green. This green gold is why I'm leaning towards
this yellow side. Then something green, probably
the sap green, Hook green. These three greens,
maybe a dark green. I'll do the Perlin Green. I'm going to activate those. I have my little
tiny water bottle. This one's Parallene Hooker, permanent sap, Olive
green, green, Gold Road. I said the Perlin violet. I'm choosing some
analogous colors, then one color that's going
to be its complimentary. My colors are activating these pan colors
or getting ready. I have my eight artists loft, something large for me. Anyway, I always start
getting my brush wet. For this exercise,
we're just engaging. We have activated our paints. We have our water ready to go, and we've decided the colors. The next step, I'm immersing my brush
over and over again, mixing up the water that's on the top with the
pan of paint below, and I'm wiping off that excess. I'm going to actually
put brush to paper. You never know
what might happen. Looks like my paint is
not fully activated. It's coming across very light. I'm going to really see
if that's activate, I'm going to reach
in some more and I'm going to.it along the side. Now see that's what
I was expecting. This is what we're engaging in. We're observing, we're
experimenting, we're touching, we're playing, we paint
and water around the page. I am funny about my
water and paint. I don't mix very much. I like to keep my pants clean. That's just my style. So many artists love to
let the mix mix, mix. Then I feel like I can't see the color that
I really want. I try to keep them as
clean as possible, but do not feel like
you have to do that. Now you notice this
green was dry on this edge when I
touched my next color. It just overlapped.
We're experimenting, we're just activating
our paints. You can really see the
texture of this paper. It's got all those tiny pockets. Let's see what happens when
we just kiss that side. This color is coming in, but it pushed this color away. That's something you're
going to notice too. We're going to
take note of that. Observe what's going on. This was permanent green. I'm going to olive green next, touching just that side. You notice when I swooped
higher than my first line, there's a slight line. I'm going to blend that
out with just that water. My paint is still wet. It hasn't dried, and I'm
going to erase that one line. I can just see a slight bleed, that's what it's called, when the colors meld into each other. This one really ran off, but I had a lot of
water on that side too. Going to go for my
paraline Violet, one of my favorites look at
that, isn't that gorgeous. See what your brush can do. See how much paint it can hold. See how fine a tip
and line it can make. A friend of mine shared on
her Instagram page that she said practice and
practice is like therapy. I really want to
coin that phrase. I love that idea
that we are having practice therapy with no agenda, no plan except to observe. If making a shape is
important to you, practice rounding your corners. Just observe what
your brush can do. What your paint can do. This is called wet on dry. When we don't our paper, the only thing that's
wet is our brush, is our pat and the paper is dry. This is what effect
we're getting.
5. Engage Pt 2: When we don't wet
our paper first, the only thing that's wet
is our brush is our paint, and the paper is dry. This is what effect
we're getting. Take your paint brush
and just wet your page. Drip, drip, drip it
everywhere you can leave it. When it dries, you can find
out what look it creates. For me, touching my
neighbor is an experience. I want to see what happens. I want to know what
colors I can create. I'm going to try another one. Take my Hooker's green. Such a bright, cheery green. Did I wet over here? I'm not 100% sure I did. I can't quite see the shine on my paper from where I'm sitting
in my light source, it's like we're making
little gemstones. Right. I decided to really
just stay with four colors. I didn't get into my
green gold at all. Now that this is wet
and some is dry, I'm going to come down here. Let's try on the side too. When I make a
sample of my paint, that's something
you might notice is I'm very heavy on the paint. I clean my brush and work
backwards to see how faint, how light can I make
that one color. Really liking this experience, I think I'm going to leave a
little doughnut right here. That's the wonder of water
color is using the white of your page instead of
adding white to your page. Grabbing more water without
really rinsing my brush. Just incorporating more water into the paint I
had on my brush. What happens? Stay observant
of what your paint is doing. I think it's time
for another violet. See how using the top of my
brush was a bit more dry. I was using the side
and dragging it, that's a dry brush
technique on dry paper. Come back in with more water. I did not rinse my brush, I just added water to the tip. I leave this little tiny
highlight and look, I can this paint to the side, pulling it up around the edge. Permanent sac green. That's what that
is. That's okay. No, that's what that was
remembering my colors. They can lift some color
of push the paint. They can going to go back
to the Perlin Green. I've got white. I've got water to the side and touching just to the very edge, reactivating that color and
watching it swim across. This was engaging our color, our brush and just
getting a feel.
6. Warm Up - More Watercolor Techniques: For our warm up, I still
have my same colors. I'm going to continue
with my size eight, experiment with my colors. Again, just making
simple shapes. I'm playing with the water. I just love playing
with the water, pushing my pain around. Do I want to keep it even? Do I want it to pull
up to the side? Do I want to try to scrub
some of that green away? But I also want to play
with another tool. I have a fan brush. Now you may notice it's a little harder to
get it in the pan. It is really big. One trick you can do is
take some paint out of the pan and onto your
palette from here. It's very easy to get that
straight on your page. Fan brushes are
unique, aren't they? Yes, you can get a
really wide stroke, but you can get some textures
freely flat and turn it. Of course, that didn't
have much paint on it. I had used it all
up playing before. Just experiment. Let's just keep playing. This is a size two round
is so much like the eight, It's just tiny to move your paint takes
a lot more work. But what if I want
something tiny to happen? Lettering, skinnier
brush strokes, fine, fine lines. So go ahead, take that tiny number two and see what it can do. I go to go back to my eight and really give
it a workout this time it does have a point. Look how thin I can get
that compared to the two, but you already know it can
do a really broad stroke. Can it make a circle
flat on its side? Definitely more water. Let's try that again. You can, or you can use the tip. All the water is
pouring out the tip. See how everything's
just pouring out to that tip? Fantastic. Makes me love that color
even all the more. Let's, let's try
our fan brush with the proline a little wet. I'm going to hold it
to the side because did you notice when I
had it to the middle, my middle is all touching and the sides
are barely touching. If you want lots of leaves
or grass fun lines, you might need the side
of your fan brush. Fun, fun, fun, fun. Okay? I want to
make some shapes. This round brush, you see the same as tiny as that tip is. That's where the
water and the paint is literally pulling to. Let's see, what else did we do? Can treat it like a fan brush. Look, when you touch and lift, touch and lift, Look, I still have a lot
of paint on here. It is really loaded up. Now we're getting to
be a little drier. But compared to the fan brush that gives you multiple
leaves at once, this just gives you that
one stalk that's beautiful. This was a wonderful warm
up experimenting with your tools and making
new shapes with them. We're moving beyond the engaging
the water and the paint. Now we're really getting into what can our paint brushes do.
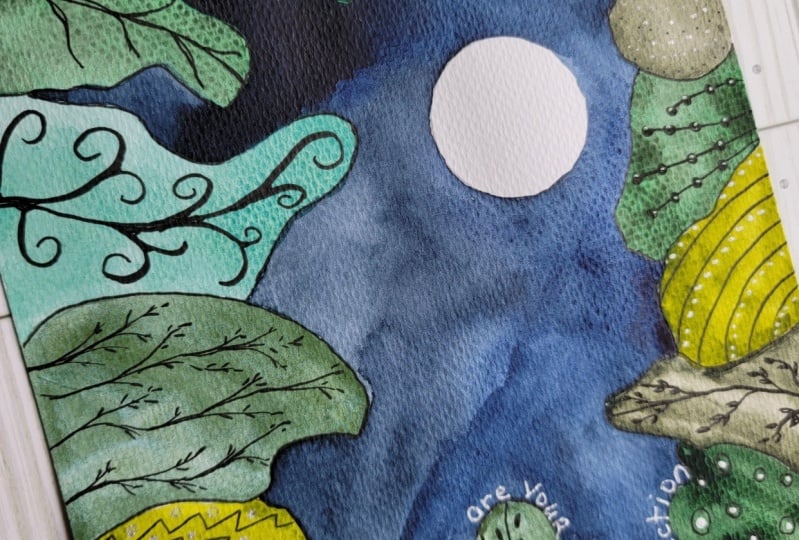
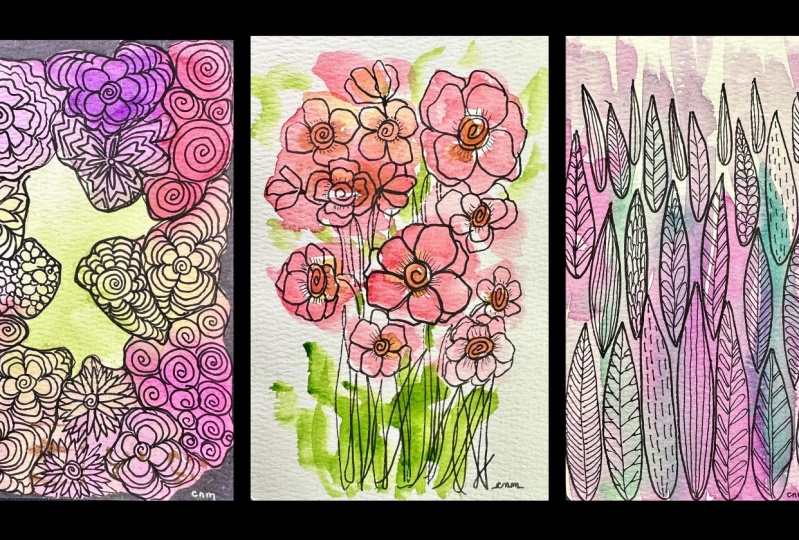
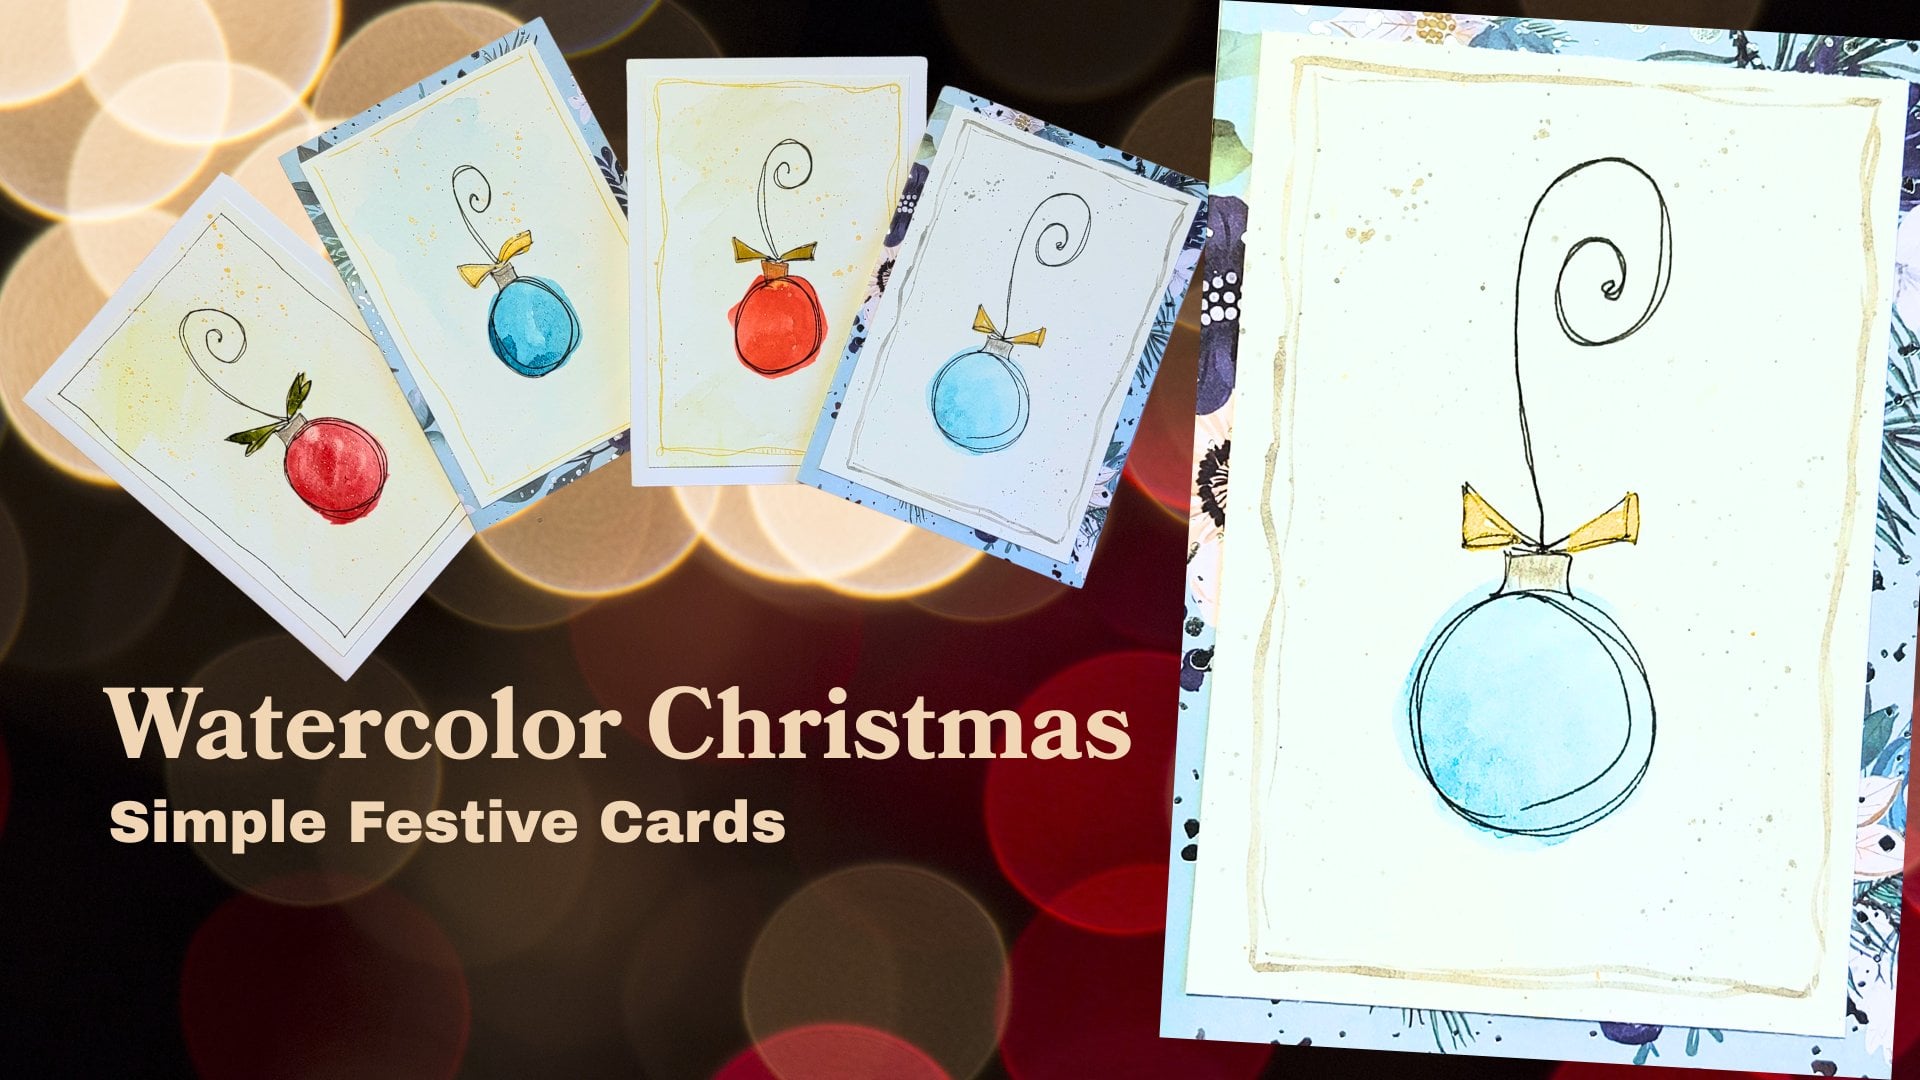
7. Practice Therapy: I was inspired by
some art I had seen. And I created this ATC card and you can see the shapes
that I was working with, and I just made sure
they were very close together and I doodled
with pen afterwards. Here is a scan of
Valentine's card I made, and it's just a basic shape, making sure I'm touching
the one next to it. Here's another color combo, just outlining it with
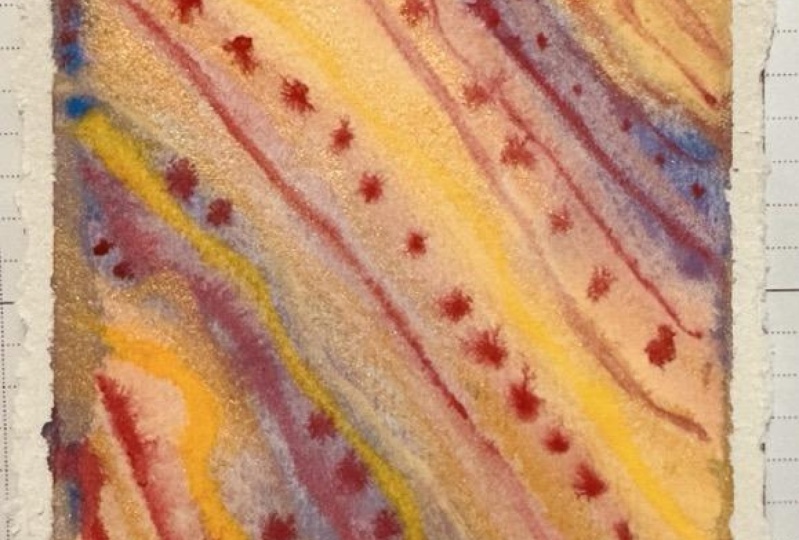
pin, adding a word. This is some splatter
paint that I added. I wanted to make more shapes on our paper to give it more time. We are going to work on
our practice therapy, just engaging with our colors, again, learning from them. Now, if you want to
activate more colors, maybe moving from the green, I think I'll get more
yellows this time. I didn't really dig into
those like I had before. And I'm going to pick
some of my favorite. I really like aqua green, Palo turquoise, maybe a red. I think I'm going to choose the Alizarin Crimson and just got my water.
Activating these. I want to make shapes
with more of a purpose. I'm going to make sure
they're very close together. But shape isn't a
being with our colors. Playing with our colors,
experimenting more. Let's see if my thalo
turquoise is ready. I'm scratching that around, activating that the shape
that I was inspired by was a bit more leaf like the
doodles were more leaf like something more rounded on the top and a bit more
pointy to the end. You see how easily
that could lend itself to a heart
shape, can't you? But the tricky part of that one project was
how do I fill in all these tiny places when it's round on the top
and point on the bottom? It did leave some space that I filled in with more
of a complimentary color. I'm calling this practice
therapy because we're just going to make a bunch of these. It's dragging the tip around, moving the paint, making it
fatter to fill in a space. It's nothing too
difficult, technical. You chose, you lead. What's your intuition saying about the color
that's coming next? If we build them up
next to each other, I think I picked the
exact same color. So much for intuition, Right, there we go. Treat it as it's being
behind something. Make it nice and fat
so we can fill in more space if you like, that high light leave it in. In fact, I like these
two colors melding together like a little
balloon there, doesn't it? That's inspiring putting
in a balloon shapes, as round as you want to make it. Adding more water to my brush that definitely did not
cover like I wanted it. Yeah, I like that idea. If we're making balloon shapes, then that tip can be whatever
you want to make it, and this bleed is looking cool. It's terribly important
when we're doodling, we just playing with these. Let's move into that Aqua Green. If you have Daniel Smith colors, you might really
enjoy this process. He has some gemstone
colors that granulate who, when they granulate, that means those colors build up and
disperse differently. Were like, look at this color, it's completely a
transparent water color. What you see is what you
get this triangle here. When my paints are drying, I can fill in those
with another color. Or maybe a softer
green. A paler green. Let's get into my olive green. Did I use you already? Not yet. When I'm dragging my brush
and I see all that white, I know that it could
use more water. And I'm just going to dip it in, get a drop of water and
help spread that around. It's fun starting top to bottom, top to bottom, blue down here. It's such a gorgeous like I could just imagine
the ocean with this one. We're just going to fill,
fill our page with shapes. That's the idea of
practice therapy is doing something
over and over and over and over and over. It's the moment with your water, it's the moment
with your paints, it's what you're learning. I think that's what
really drew me to water color was I was
a real water baby. My dad took me to the pool at our first apartment.
I had to have been. I don't know if I
was even one yet. And then growing up, the
company at his work, every summer I'd have blisters on my feet from
playing in that pool. You don't swim, Of
course you play. There's just something
about water that I adore and that makes me happy
to have my water colors. We're going to continue
on filling this page.
8. Final Touches: Finishing up filling in my page, I decided to really make some
big long tubes instead of the balloon shapes just having a grand time
filling in the white. Just using the tip of
my brush to really get in filling in all
the extra spaces, which is technically
not necessary. But I figure, hey, I call him this far, I'm
going to keep going. It's like I don't want
this session to end. I have so much pain over here, it really bled like
crazy over here. And I can still see some of
my paint is still very wet. I'm just filling in, I think that's why I decided I like that
term, practice therapy. I heard the most incredible
quote, Pylydia Barlow. I saw her on Instagram
and she shared this idea that not all
art is going to be seen. That struck me. So yeah, a lot of my work, it's for me, it's a
moment for me to play. Like I said, I'm a
water baby. All right? I want that experience And
it's quiet time for me, my husband might be napping
or out in the yard, my grandbaby away, and
I've got this time at my desk that's just
me practice therapy. I like the term ugly art, but it just doesn't have the same feel as
having that idea of I'm practicing, I'm
enjoying learning. That's practically
my middle name. I love to learn. I'm going to carefully
flip that over. That's what this
experience gives me. An opportunity to
see what colors do, what my brush can do, what my paint is going
to do with each other, what my brushes are up to. Those are all
wonderful experiences. This art may never be seen. I have taken up scanning because sometimes I feel
like it's not a masterpiece, but it might not be done yet. I don't want to lose
where I've been. The process is really
important to me. I don't want to lose that space, that moment of when it
looks just like this. Before I added any doodles
before I cut it up. I want to keep this
moment with that, I'm going to let this dry and then we're
going to come back and play with it some more.
9. Art for Yourself - The Project: I have my finished piece
that's completely dry. I did take a scan. I wanted to preserve my original idea that's
saved in my computer. My idea today is to make a
postcard or an ATC card. Now an ATC card is just two, a 23.5 Think about what
section might be work. Well, for that, a postcard
can be anywhere from three, a two to 5.5 If I look here, 12,345.5 long by 3 " tall. I'm looking about that size. Or it could be by six. That would bring us
up here by four. That's a bigger postcard. 123456, right about here. And if I'm at six,
then I could get, I still have my 2
" for my ATC card. So I think that's how
I want to cut this. And I do want to leave
it in this orientation. It seems to make the
most sense for me. I do want to cut this down
at 66 will be my first cut. And six by four and a quarter. I do want to know
this, I think I do. I want to start here
postcard size project. For this, I just need 2.5 because I think I want
to make my orientation tall. 2.5 Do I want the gray side
or this colorful side? I think I'm going
to do it that way. 2.5 taking off most
of that gray side by 3.5 that leaves just
a couple scraps you might be able to
collage with those. I don't waste anything. That's my ATC card. This would make a great
background for collaging. Putting multiple layers on. I'm going to save
that. We're going to concentrate on the postcard. If you've taken my
doodling class, you might have an
idea book in it. You'll have your doodling ideas, shapes and things that
you've saved to remember. The original idea came from a Christmas gift I received
this year from my daughter. It came with watercolor paints and the paper that
I've been using today. And just something
about this design, the colors really
were inspiring to me. And then the doodling fun marks. Now I know they've
used some paint marking on here and pen mark. I want to work with this concept while I am
looking at my piece. Basically, I think I want to
outline some of my shapes. And even where that bleed was, I can still see my original
shape. That works for me. I can use these marks here to work with my doodling ideas. Whatever comes to mind. I'm following this outline. I just decided to maybe
make this spiral shape. What can I do out here? Free handing in your art is fun, it might be nerve racking. It depends what
your mood is today. I brought up the quote
that I had seen on Instagram was actually
an interview with this woman where Flydia
Barlow had said, there is plenty of art
that is never seen. It just struck me as
something encouraging. I wanted to feel encouraged. What I do. It's okay if it's never seen, it's okay to be just for me and still be
called an artist, I think is the bottom line. Her comic continued
making work that does not have a destination, has its loneliness and its sadness about
it and it's heroic, The creative act as a
deeply private experience. I just took such courage from that concept that this woman, who's an artist who does shows and does
events with her art, said something about my art. She said something that said, there's plenty of art
that will never be seen. Isn't that incredible? It was, it was confident building
that just putting paint to paper was not something to feel
discouraged about. That it's not beautiful, that it's showble, that
it will never be seen. And she thought that was heroic. That just touched me so much. One of the interesting
things about doodling is how do
you build up ideas? I find when I was
working in my idea book, my doodling book, the
concepts were so simple. Make a dot, make a bigger
dot. Hey, what do you know? It's turned into a circle? Do I fill in the circle? Do I leave it empty? Do I make it oblong to me? I see it as almost
all the same shape, but they're different also. It makes it so simple for
me to think about doodling yet then I struggle
with what do I do next? Having my idea book
handy is so important. Although I admit I don't
always write in the idea book. I have a collection of
screenshots on my phone of incredible doodling
ideas, ideas. I want to remember, I
need to remember to get those transferred into my
idea book and have it handy. I know that's kind of
reminiscent of a flower. It's like I'm layering
the petal leaves. Yeah, this is my flower
center. There you go. I'm not going to
fill them all in. I do feel like I need one more and then I'm
going to call it good. Maybe white here. Let's see. Well, we'll see
how our pin does. Still streaky bit, I
think it's the paper. Try to fill that in
a little bit more. A Posca pen would be good. A paint pin would fix
that really neatly. I think that would make
a really fun postcard, a very personalized
individual piece of art. Or stick it in
your junk journal. The back is fine for you to
write on. I love that look.
10. Wrap Up: As we wrap up our lesson today, I want to thank you for giving me the chance to share some
new concepts with you, and I hope you take those skills in and sit at your desk again. Maybe use a different
color combination. Maybe create some
different shapes. But either way, I hope
this serves you well. As you spend time
making for yourself, I truly encourage you to share
your project or your work in progress with me in
the class project area. Upload a photo. When you are on your desktop or laptop computer, I'd love to share some
feedback and to encourage you. Won't you take a moment
to review this class? Let me know if I've met your expectations or
things that I can improve. I would love to hear
from you again. Thank you for joining
me today and I truly appreciate your time
now. Have a great day.
 Tammy Prara, Making Matters