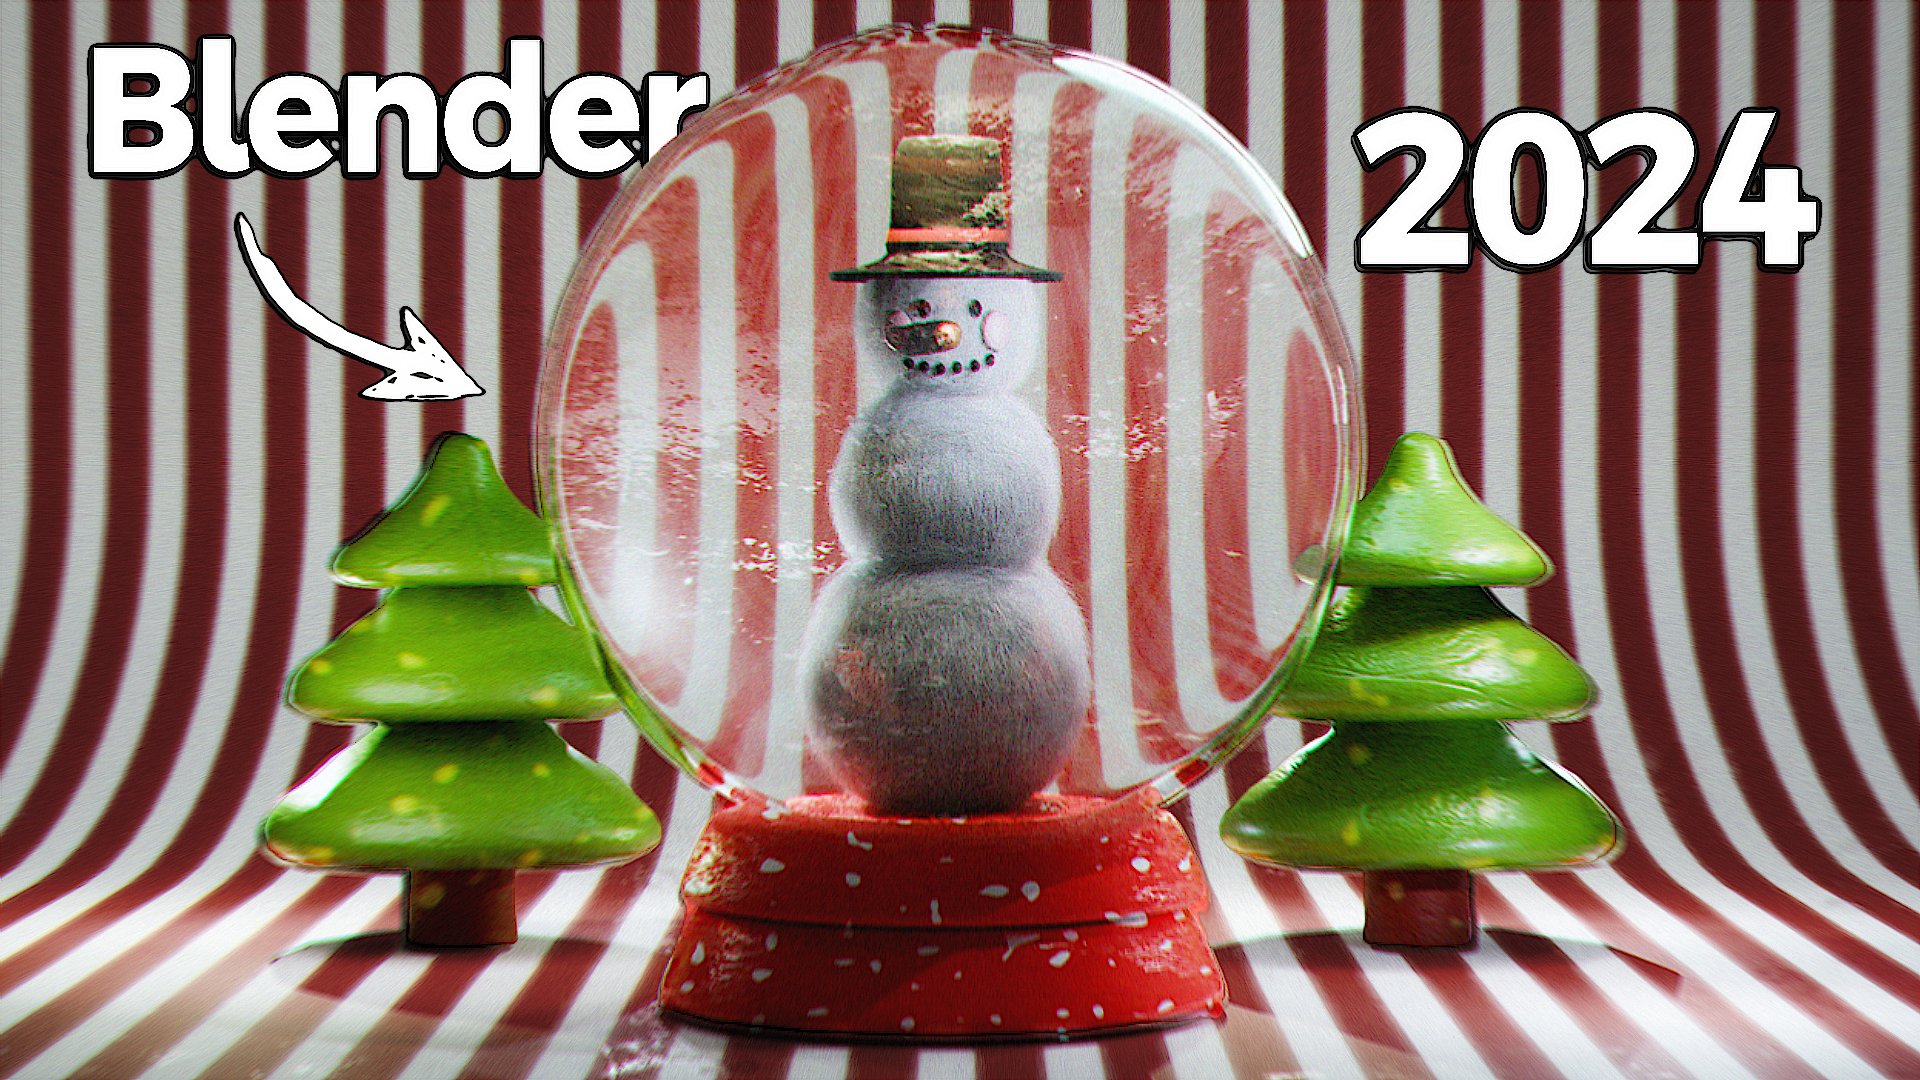
Transcripts
1. About that class: If you have that inner
desire to jump from beginner level to
advanced, welcome. In 11, 2 hours, we'll navigate through
many blender key blocks. Modeling texture painting,
lighting and particle system. Now allow me to tell you why that class is
worth your time. First of all, we're
going to delve into the world of modeling
and sculpting, where beginner friendly
technique will help us to turn Blender Cube into such a
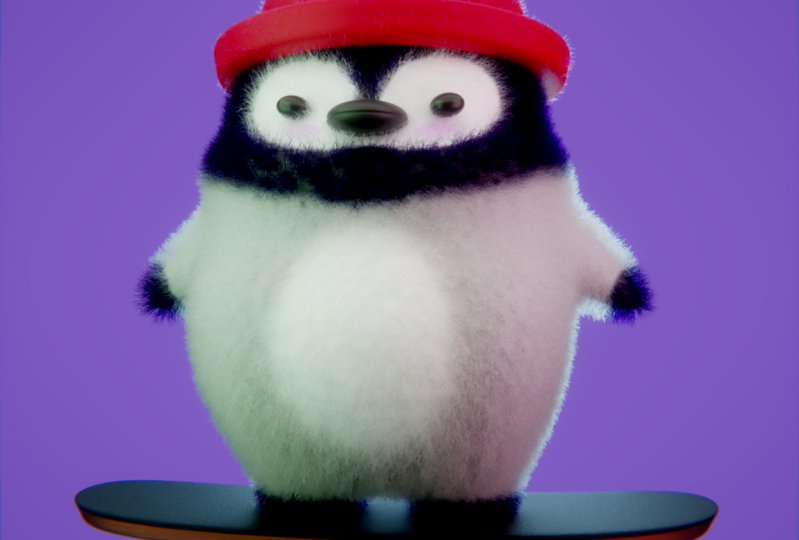
tall penguin on skateboard. There we will establish
the lighting which will elevate the
quality of the scene. Block number three
texture painting, if you never even
touch this section, hesitating all the while, not after this class
with simple examples, I'll explain the
process of creating our first texture painting
and applying it to our model. Next step, realistic fur. We'll dive into the particle
system and step a step, cover our entire
Penguin with fur, creating a completely
different effect for our work and making it
look more professional. After that section,
particle system will not scare you anymore. Even here we don't stop. In the last section, we'll apply some realistic materials
over our skateboard. All in one will
make you very proud of the final result
that you will achieve. And the most pleasant
part is that we'll apply our
knowledge and practice, be creating that
cool Penguin skate. I encourage you to share your work after you're
going to finish that class, to inspire others and remove
their hesitations off trying three D and for whom this class require
minimal knowledge and experience and blender. But if you never touch
it, don't worry. Stubborn attitude a
little bit more time and you'll get it definitely
at the end of the day. What if not solving difficult
tasks will help us to grow? That is the type
of result that you can expect to have at the end. So in conclusion, let's have fun through learning and
improving our skill. Get your great mood. Coffee or tea. And let's start.
2. 1.1 Penguin Modeling and Sculpting: Hello everyone and welcome
in the lesson number one. First of all, everything
that I press, you can see in the left
corner the second one. If you are a complete beginner, it can be a little bit more difficult but stubborn attitude, pay attention to the details and you definitely will get it. The third one we need
to turn on to Dons. Go to the edit
preference, Dons here, search for extra mesh objects, turn on, and the second
one loop to also turn on. Now we are ready to start delete these two
except camera X, delete one in an M ped shift A. Here we go, Themes
and How we can See. We have a few more
additional objects. We are going for the round cube, then we go toward
the settings here in the left corner
and in the radius, press one, Create, right
click, shade Smooth. Let's apply the subdivision
modifier with control. But if you go in the edit mode, you can see that the
shape ain't so smooth. We need to turn
this function on. You have the same
result as if you will apply the subdivision
surface modifier. We go with A to choose
everything and press and X, make it a little bit more
bigger here and then Greek. Good, transparent mood, one
for the vertices and choose this one below X and delete vertices out of
the transparent moot. Two for the edges. Outleft click to choose this entire loop. And we go with zero. Create the same thing here, out left click zero here
to make them better. Choose this one below
and make it bigger. With, for a scale
that now let's ex, go for a scale, is down as a little bit inside. One more time is like
that. We have gap here. Don't press first of all, we have to extrude inside
something like that. In the last moment we press, we're going to clean
this topology. So one, then we go to the t a
little bit lower like that. Choose this loop, make it
a little bit more bigger. Nice, then let's
delete half of him. We're going in a
transparent mode, one for the vertices
and choose this one. We go to the X and
delete vertices out. We go to the object mode out of the transparent mode modifier, mirror modifier, Move this one above of the subdivision
and turn clipping on. We have a gap at the moment
right now, Don't worry. Coach the edit mode. Choose this one, press and
then three for the faces. And press, move this one inside like that X
and delete faces. We're going to make his
legs at the moment. Right now we don't
need this edge loop. What we're going to do is out left click X, dissolve edges. Great. Then choose
this one here. We're going to use the
second Don that we turn on. Right click loop tools
to turn in the circle. The problem is that if I
want to make them smaller, they're connected here
in order to solve it, Check off from the
clipping as for a scale now they don't
have that connection a little bit on the site like
that one M Pt and then we go with the down a little bit
more toward each other. Do we need to extrude
one more time? I think no, we can go with the ES inside in
the last moment, press Create, Now we have
good topology, one Pt. This shape remind me of the small characters from
this popular game among us, but soon it's going
to be the Penguin. We're going to choose this loop, make it a little
bit more bigger, create our shape right now, probably the best one. A little bit later,
we're going to move on in the scoop mode. Now it's time to create hens. Actually, not hens,
but his wings choose these phases
which are in the middle. And then we go inside like that. Then we go with the
X, delete pace. Choose this loop, right
click, loop circle. Then one in an Mp. As for a scale, this one
a little bit outside, and then we go with the E. Extrude rotate as for scale. Go down one more rotation
like that one more time. E strut make it smaller. From here we go with the S at center,
choose this vertice. Then we go with the
control plus on an empt one more time
to, to choose this part. And then we go with
the E and make it a little bit more
thicker like that one. On an empt, I'd like
to choose this loop, this one outside, small
rotation or actually not. What about this one? Make it a little bit more
smaller like that, probably. I would like to make this
one also control plus faces one and make it smaller. And then a Good. Now let's save our file
before we move forward, we go with the control
choose folder. Let's call this one
Penguin on Skate. Save blender file, the second
one, let's give him a name. You can go here via double
click or you can have your object emphasized
press and give it a name. Penguin underline body look. Actually not bad, but we
can make him even better. If we'll go toward
the scoop mode, I want to bring them most of the knowledge that
I can in order for you to make you feel more
confident via using blender. Let me show you one thing we'll not use here,
a lot of tools. And don't worry, you
don't need a tablet, a mouse more than enough.
Let me show you something. If we'll try to draw at the
moment right now you can see the result is comp out. We go to the object
mode and first of all, turn on clipping and then apply the mirror
modifier, the same thing. Now come back to the sculp mode, try to draw how you can see. It's still not enough. We need to increase
the amount of polygons in order to make
our work more detailed. But the problem is that not
like the problem I'll say, but when you increase
the number of polygons, it starts to be more heavy. Blender can crush and many
more of these things. My solution, we go
to the object mode, apply the subdivision
surface modifier and this is our topology
at the moment right now. Then come back in
the sculp mode. Let's try to draw something a little bit more better than in comparison
to what we have. But still, the
shape is very ugly. But this is blender, which means we have always
a solution for it. Controls that being in the
scoop mode, press control two. You can see that this is the same hot key that we usually use for the
subdivision surface modifier. But this time we have multi take a look how clean
it is right now. This thing was created
specifically for the Sculpt mode. It's allow you to imitate, create this illusion of the bigger amount of
polygon senior object. Which allow you to make it more detailed and more easy for
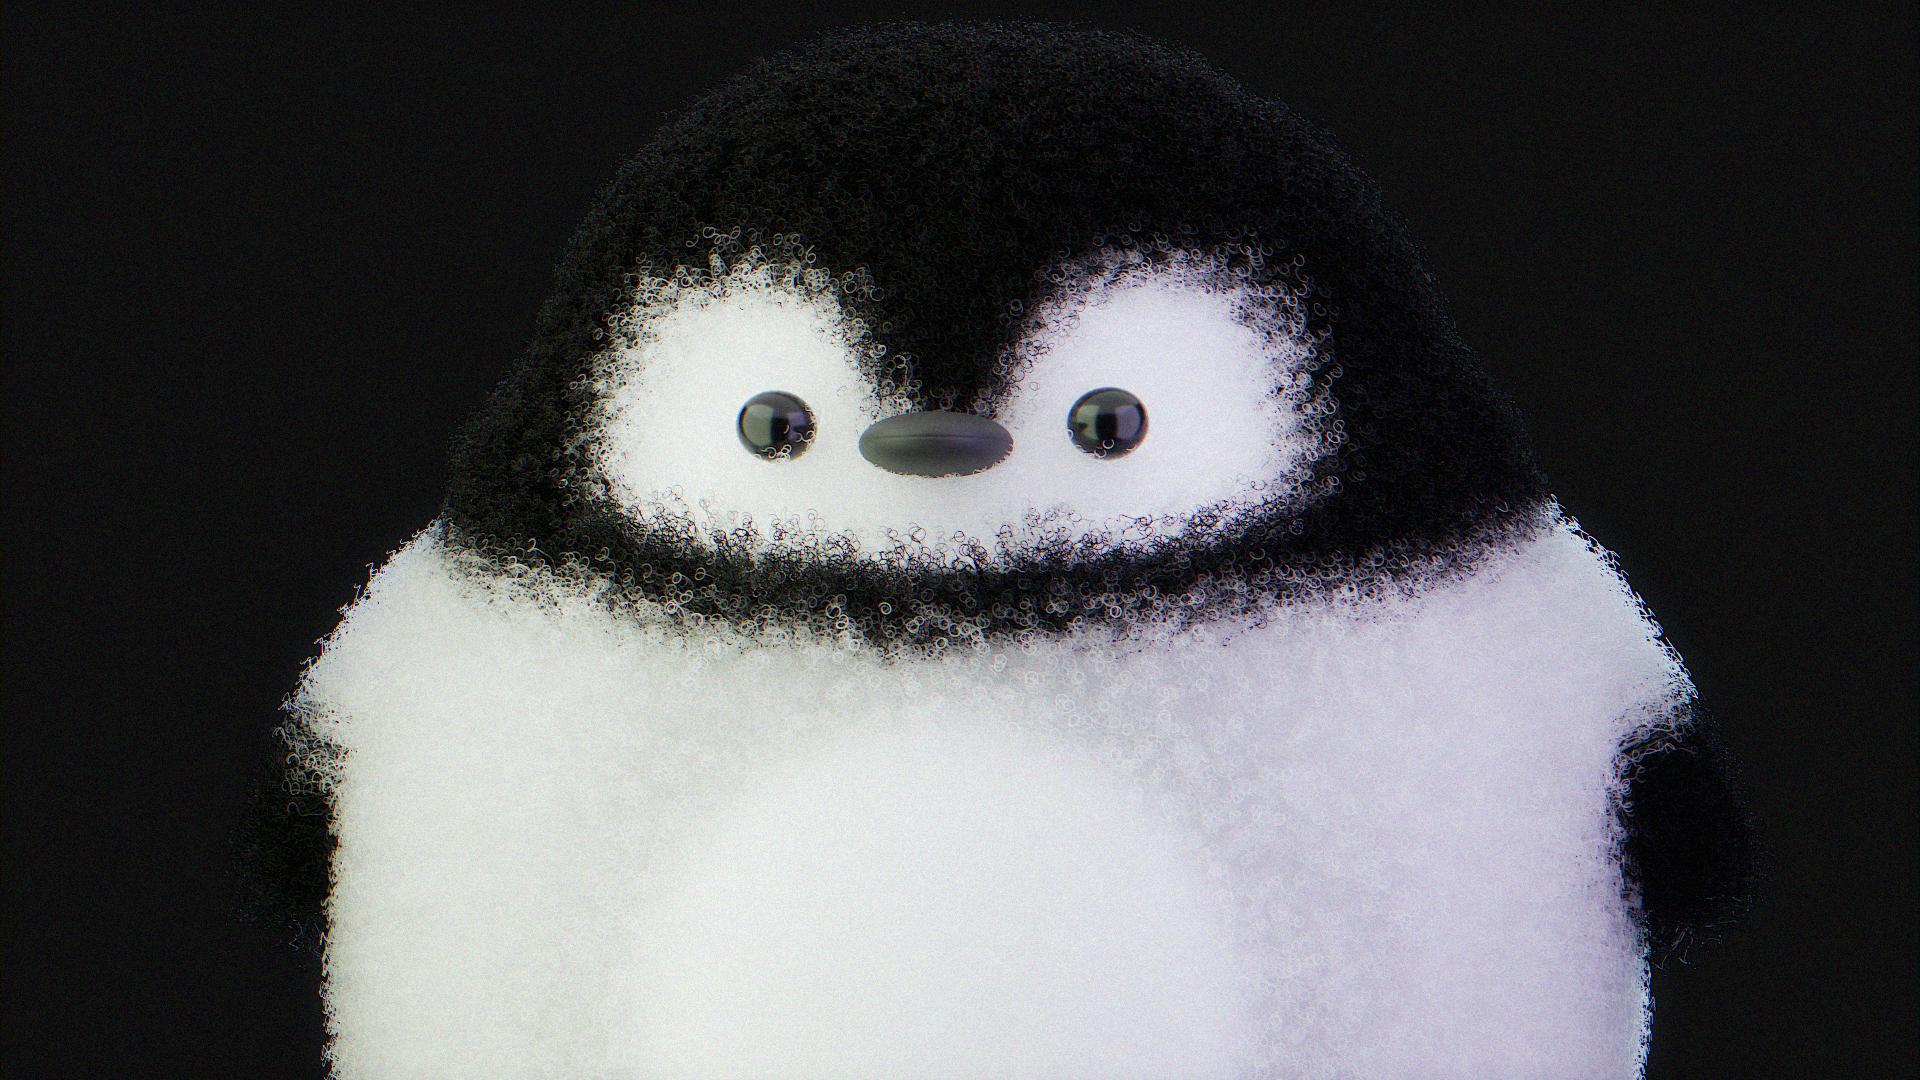
your PC, for your blender. I hope it does make sense. Right now we can start to sculpt our Penguin
control to safe. I know that I save the
blender file to too often, but blender can surprise
you in any moment. That's why I want
to be prepared. Let's go with the grip Gp, then turn on X, which means we're going
to have a symmetry on if you want to make your
brush bigger and shift, if you want to
make the influence stronger or less stronger. I'm going to keep this one
in the health zero five. Let's start. What
do we have to do? Seven and ped, first of all, I want to make this
one more roundish, so we go the F, let's plus
this one inside, like that. Inside like that. I want for him to have a belly. We're going to move this
one even more like that. And here also, good. Let's go with a control seven, which means to look below. Let's move this one. Let's move his legs. A little bit more aside. From each other. Good. If you're going to
hold shift and left click, you're going to smooth it. You can see right now, but you actually smooth. You can see right here on
the outline. So take a look. Let's just some random movements here on the legs
relatable to his wings. Let's move them like this. One more insight a little bit, so a little bit on the right. Let's go with his head, move this one like that. Great. One more thing
that I would like to do is to choose the
first one, draw. So take a look what we have. I want to create here
a layer of thickness. Let me show you and then
you'll understand shift toward 0.3 something like that. For the scale is here. Take a look, once it's some, let's say just move
this one here, here. Now we call the shift left click and smooth
this one a little. If you're going to
hold the control and left click in that case, you're going to achieve a
opposite effect in that case. Let me show you left click, control, left click
outside and inside. Let me go here and bring
the control left click, a little bit like
that and smooth. I think honestly this
is an individual work. You don't have to copy me. You can be completely creative. I encourage you to stay creative through our entire
class. I believe in you. This is actually
what we have to do. We need to have fun. So a little bit here,
a little bit there. I'm going to grab one more
time and make it bigger. And here, a little
bit inside like that would I like to
do something more? A little bit here, a little bit here his head. Hope probably his
wings a little bit more bigger or
probably not good. La, that is control to save back to the object mode. But if you're going to back, you can see that we lost
everything that we work on. This is why we have
in the Lael viewport, we have the value zero. Bring it to now, we have the same Penguin that we work in the
sculpting mode. That is for our first lesson. I hope it was useful, especially if you
are a beginner. I hope your results
satisfied you. Let's go forward to
create his head, the skateboard and many more. But for now, goodbye.
3. 1.2 Beak and eyes: Welcome to the
lesson number two, which is going to be very short. We're going to create beak
and ice. Let's start. I already practiced a little
bit and first of all, let's move our Penguin right here. Let's
go in the middle. Then we go in order to place the three cursor In whatever place do you want? Shift, right click,
right here we go the shift A mesh cube, this is going to be our beak. We go to the solo mode, which is slashing and empt
as for scale as x a Greek. Then we go in the edit mode. Choose this phase and make it
a little bit more smaller. Like that. Out control Che for the subdividion
surface modifier. And then edit mode, choose this phase behind
and press for the X. Move a little bit
back for scale out, make it a little bit
more thinner, like that. Then we're going to
apply our subdivision and one more time, Control. Right click, shade smooth. Then we go in the edit mode. Choose this loop in the middle. And we go with the control which usually is used
for the bebbles. Go control, drag the mouse that. Then we go with the
S for the scale and extrude inside and
move it inside like that. Then we go with the out. This is what we
have for our two, let's call this one, two point. Be easy out three empt let's make it a
little more smaller. Ge move this one
a little bit more further because we're going to have hair a little bit later. Why don't worry. This is through the illustration at the end of the day and not an anatomically
right penguin. We go with the probably
no control Shift, right click right here, shift a mesh sphere, x 90, right click, shade smooth, co control for the Sabarion
surface modifier. As for a scale, I want to
keep them in one line. This is what we
are looking for or probably we're going to
make it even like that, we're going to make x and
smaller rotation like that. Then you go with the
modifier surge for mirror modifier above
of the subdivision. Mirror object, our penguin body, and then you go with
that somewhere. Here is good. Let's
call this one, two, let's go more
time, two, three point. Let's go to the Penguin body
and let's go with F two, and at one point at the start you're going
to be more structured. That is for our second
lesson I told you very easy. The third one, we're
going to start to create the skateboard.
See you there.
4. 1.3 Skate desk: Lesson number three
where we'll start to create the desk for
our skateboard. I want to keep this
lesson short in order to make them more
easier to comprehend. One N M Pet Shift,
Sor World origin. Let's create another
collection. Right click. New collection, double click. Let's call this one skate. We go with the shift, a mesh and cube. Then we go with
the z, x as that. One more time, G. Then we go in the edit mode. Okay, move this one down. Then we go in the edit mode. Control error to add and
loop straight in the middle. Left click, left click, then transparent mod one. Choose these vertices
and delete them. Then we go in the modifier
search for mirror modifier. Now we are here, I don't know for what reasons,
but just for example, in case if you have here a gap, just merge which means
increase the value. Good. Now we go with
the control for the subdivision surface
modifier and then we go down, let's start, we go
in the edit mode. Choose this phase E, make it a little bit
more thinner like that. Then we're going to
add two more loops. Control air here. Move it up one more time. Control air, move
it down like that. Then we go in the
transparent mode, one for the vertices, choose the lower health. Then we go in the mirror,
turn the clipping on, then we go in the
X a little bit, a little bit like that, out of the transparent mode. This is our shape at
the moment right now. Right click, shade smooth, still not the best
one? Yes, yes. What we have to do
next is firstly, let's call this 121
underlying desk from here to make it a
little bit more thinner. Our next step, go in the edit mode control and add one more loop
somewhere here. And press x zero
to make it flat. Transparent mode. Choose
the vertices in front, We go with the T and move this one a little
bit more higher. Okay, without just like that, at a little bit more thinner, create probably I'd
like to make here. Also we go in the
edit mold E. Good. Now two more things apply. The subdivision surface
modifier and one more time, control two and control S. This is our final form that is for our desk
lesson again, very short. The next one going to be
probably a little bit more harder because we're
going to create the trucks and wheels, but for now we see you
in our next lesson.
5. 1.4 Wheels and Trucks: Lesson number four, we're
going to create trucks and probably wheels
for our skateboard. Let's start, we go with a shift, a mesh circle, then we
go in the solo mode. Then we go the x 90. Then make this one smaller. We go in the edit mode,
one for divertises, choose everything and
go back like that. Then we go in the modifier, search for solidify modifier
and drag this one toward -20,025.25 Then we apply Create It mode. I think we can make
this one just a little bit more larger
on the green one. And then we go with
the right click, set origin origin to geometry. Good. Then we go
in the edit mode seven and choose
these two phases. Then we go zero, and then we go extrude on up. Then one more time up. As for scale, let me make it to understand what
we're going to do here. We're going to create this part that connect wheels
and the desk. I hope now it does make sense. Then X, make this one a
little bit more thinner. Then we go with one
more time up that part. Make all ready, bigger, good, right click, shade smooth. Go here in the data properties, open normals and check
in on the auto smooth. Then we go in the modifier and
search for bevel modifier. Here in our settings we're
going to have first of all, the number of segments. Amount zero, five
here in the shape. Increase this one towards 60. Oops, 6.65 like that. Then what if you're going to increase the
segments toward five? Here is 0.05 is more
than enough angle. No, it's already good than 30. That is what we have here. We can make it a
little bit better if we're going to add two
more additional loops. We go with one more control, er, one here and one on the right, one in the middle grade. What I'd like to do is
go in the edit mode, Choose this loop out, left click, and move this one a little bit
inside like that. Okay, probably I'm
going to choose these faces above all of them, just like that, 300 M Pt. And then we go with the Ed. Move them up one
more time like that. That is for our final
shape of our track two. Let's call this one
two point, oops, two point truck, part one
out of the solo mode. Then we go for a scale down. Let's go for a scale and move
this one somewhere here. Then we're going to align the rotation
a little bit later. For now, leave it like that. Three on an empt, move
this one in the middle, actually, even more smaller. Something like that
is going to be great. Then let's create this
tube that's going to be in between where we go. Let's go with the
shift cursor to select it and now shift a mesh. We go with cylinder, where you are,
here you are x 90. And make this one smaller like that is a small
gap in between, going to be more than
enough, three empt. Then we go the SE, make this one longer. Then we go with the edit mode, transparent mode, control err. And what one loop right here. Create, then delete this one which are behind X,
delete vertices. Then we go with the
modifier, Mirror modifier. And instead of X Eric solo mode, out of the solo
mode, right click, shade smooth normals and
check in on the auto normals. Great. Then we go right here
toward this phase and we go with the like, that we're going to make a
small shape one more time. And then from here
we're going to go with ex inside. For a scale, one
more time extrude. Now this time forward. Then we go with the S F here at one loop, one, two. In order to avoid this artifact, we're going to add
one loop right here, one loop right here. Now it's better control two for the subdivision
surface modifier. Let's delete this phase. Please delete it. Then choose one more time. The last loop we go with
the S S one more time in now it's perfectly flat. Then we go here
at one more loop, even if no one will see. Let's make some quality work. One loop please. Right there. Okay, 300 and Pat, we need one loop here, one loop right there, and one loop right here, one loop right here, and probably one more
right there. Great. We can add a Bevel
modifier also. Let's go toward Sl, Move this one above the
subdivision already. You can see something
before and after. Let's go toward the
two segments here. We're going to keep it on 0.3 profile shape
toward one control. To save two, let's call this one two point
truck part two. We're actually
going to be great. Okay, we're going
to go with three. Let's call this one tube. I think it's going
to be more easier. This is the shape our wheel to be right here in that part. Let's make the tube a
little bit more longer. Let's go with 100
ped shift a mesh. Thus here in the thrus
make the major radius 0.75 This one word, 0.3 Right click, shade, smooth, control to x 90. Then make it smaller
like the 300 ped. Make it thicker a little bit. And then we go with the
ops GE right there. I think this part is too big, even if it look great. But let's go right
in the edit mode, one for the vertices
and choose all of them. And we go with the E and
make it thinner like that. Then we go with the E. Now it's better, now it's more
realistically one a line. Great. What we have to do as
proposer for scale, what we have to do next is to align the truck
and everything else. Let's start with our truck. We go with the air
for the rotation, make a small rotation,
then choose everything. And we go with the like that, probably a small rotation
like here, great. Let's mirror everything.
Go in the cylinder. Apply the mirror modifier
and go toward the T. We go mirror and choose
object, our desk. Then we go toward tube mirror. Move this one above of
everything and choose our desk, the same thing
here on the track. Move the mirror
above the last one, we go toward our wheel, let's actually call
him 2.4 Wheel. We go in the search
for a mirror. And from here, mirror object, choose our T and choose
the one X one. Apply. Oops, apply our mirror. And then one more time modifier mirror and
this time object, our skateboard, we
impact control safe. Probably our desk can
be a little bit lower. And then choose
everything and go up, voila, our skateboard
on the desk side, I would like to move this one. Air for rotation is a little
bit higher like that. Great. Now it's all. Probably this lesson
was a little bit more difficult in comparison
to what we did before. But how I say it's not
for complete beginners, but there is also
nothing so hard. I'm more than sure that you've done this one in a great way. I think we can make our wheels
a little bit more thicker. Let's use the solidify
modifier, so subdivision below. So the second one, and let's go toward
minus, let me check. Great, now it's
more thicker here, control is just safe. The last lesson we're going to create the head for our Penguin, and we've done with
the modeling block. I hope you'll already
deliver something, even in this short
amount of lessons. I hope you found it interesting. And if not, or you have some sort of review,
please leave me. I'm looking forward
to hear your opinion. But in rest, I wish you the
best and see the next lesson.
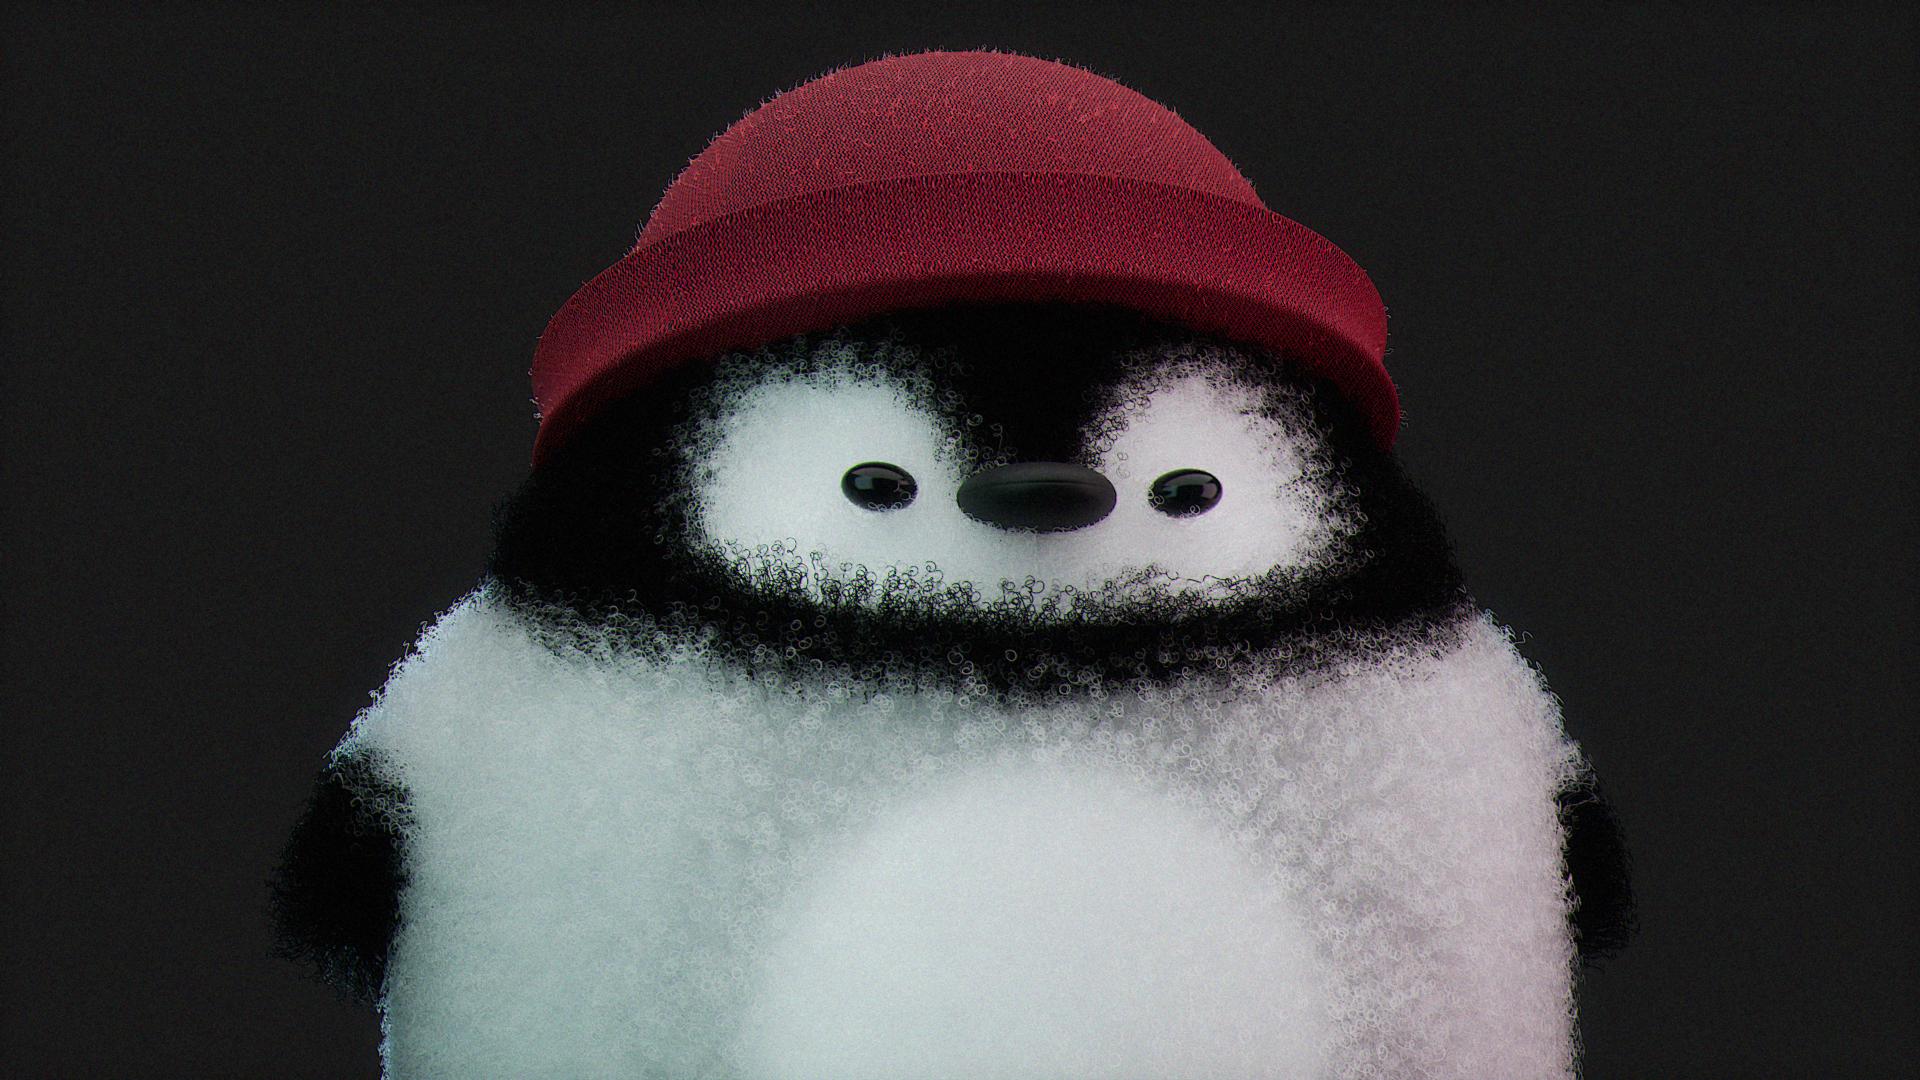
6. 1.5 Hat: Let's lesson from this
block where we're going to create the T for
our dope Penguin. I hope you're satisfied with
the quality of this class. And let's go where
we go, I don't know. We go to shift, right
click right here. Actually go shift
cursor word region, then we go here in the view, I suppose here we have
three Crsor location. Let's increase this one
toward somewhere here. It have to be now it's in the middle of
the head of our penguin. Then we go the shift a
mesh circle for scale, and then we go three in an
Pt and we go with the air, make a rotation, set
it somewhere here. No eyes make it like that. X, great. Don't worry about the big how
I say a little bit later, we're going to align this one in the right position
because we don't have fur that are going to cover
our Penguin to the circle. Let's move this one
in the collection apart, new collection three, point t, then let's call this one two, and
we're going to edit. H is everything.
And we go with the, move it up like that, then we go with the ES, move it a little bit
lower than one more time, S, then three P, we go with the Z, up. As for scale, is at up. As for scale, one
more time is at up. As for scale is A. We go with the S at center, then we go with the
proportional three. Make this circle a
little bit smaller, and just move this one a
little bit higher like that. Great, it's already done. Okay, joking. We have
a little bit more. We go toward what? We go toward the solo mode. Choose this loop,
which is below. And then we go with the ES. Then we call it the
proportional ting of. Then from here, E M center, great, right click,
shade smooth. We go to the data
properties auto smooth and then control to it. Actually look already nice, but we have to add some loops
in order to make it better. We go in the edit mode. Control one loop
right here, great. Choose this point and we go control plus to an
empt control plus. And then we go with
the move this one. A little bit more like that. Then from here one loop here and move it inside a little bit. Meanwhile, choose
these two loops, which is up and down. And as for a scale, then we go with the one loop
right here, one loop inside. Okay, one loop we
added here also, which I think is
more than enough. What I think is to
add a bevel modifier. We go here at bevel
for our corners, move it above at four segments, and then we go toward amount, we're going to decrease
this one actually toward 0.03 but it look also very sharp which
I don't really like. We can increase the
angle toward 51 without. And it's control a
relatable. Here we go. In the edit mode, we have two loops which are
very close to each other. As for a scale now better and probably I would
like here to add one more. No out of the solo mode, one ped as probably
I'd like to do. What if I'm going to
make this part a little bit more bigger like this and I'm going to decrease this point with proportional
three in an med, that easy for smaller rotation. I don't remember a good
that is my friends, I think it was for around
1 hour of this block. The next one going to be
a little bit more easier, but in rest, I hope
you're satisfied. We've done Penguin,
we've done Head. It's usually look very hard just because you look at
the final result. But remember that everything
which is complex is build step small attempts that we
easily created three objects. In the next block, we're going to texture at four and we'll make it even better. Thank you so much
and I'm going to see you in our next lesson.
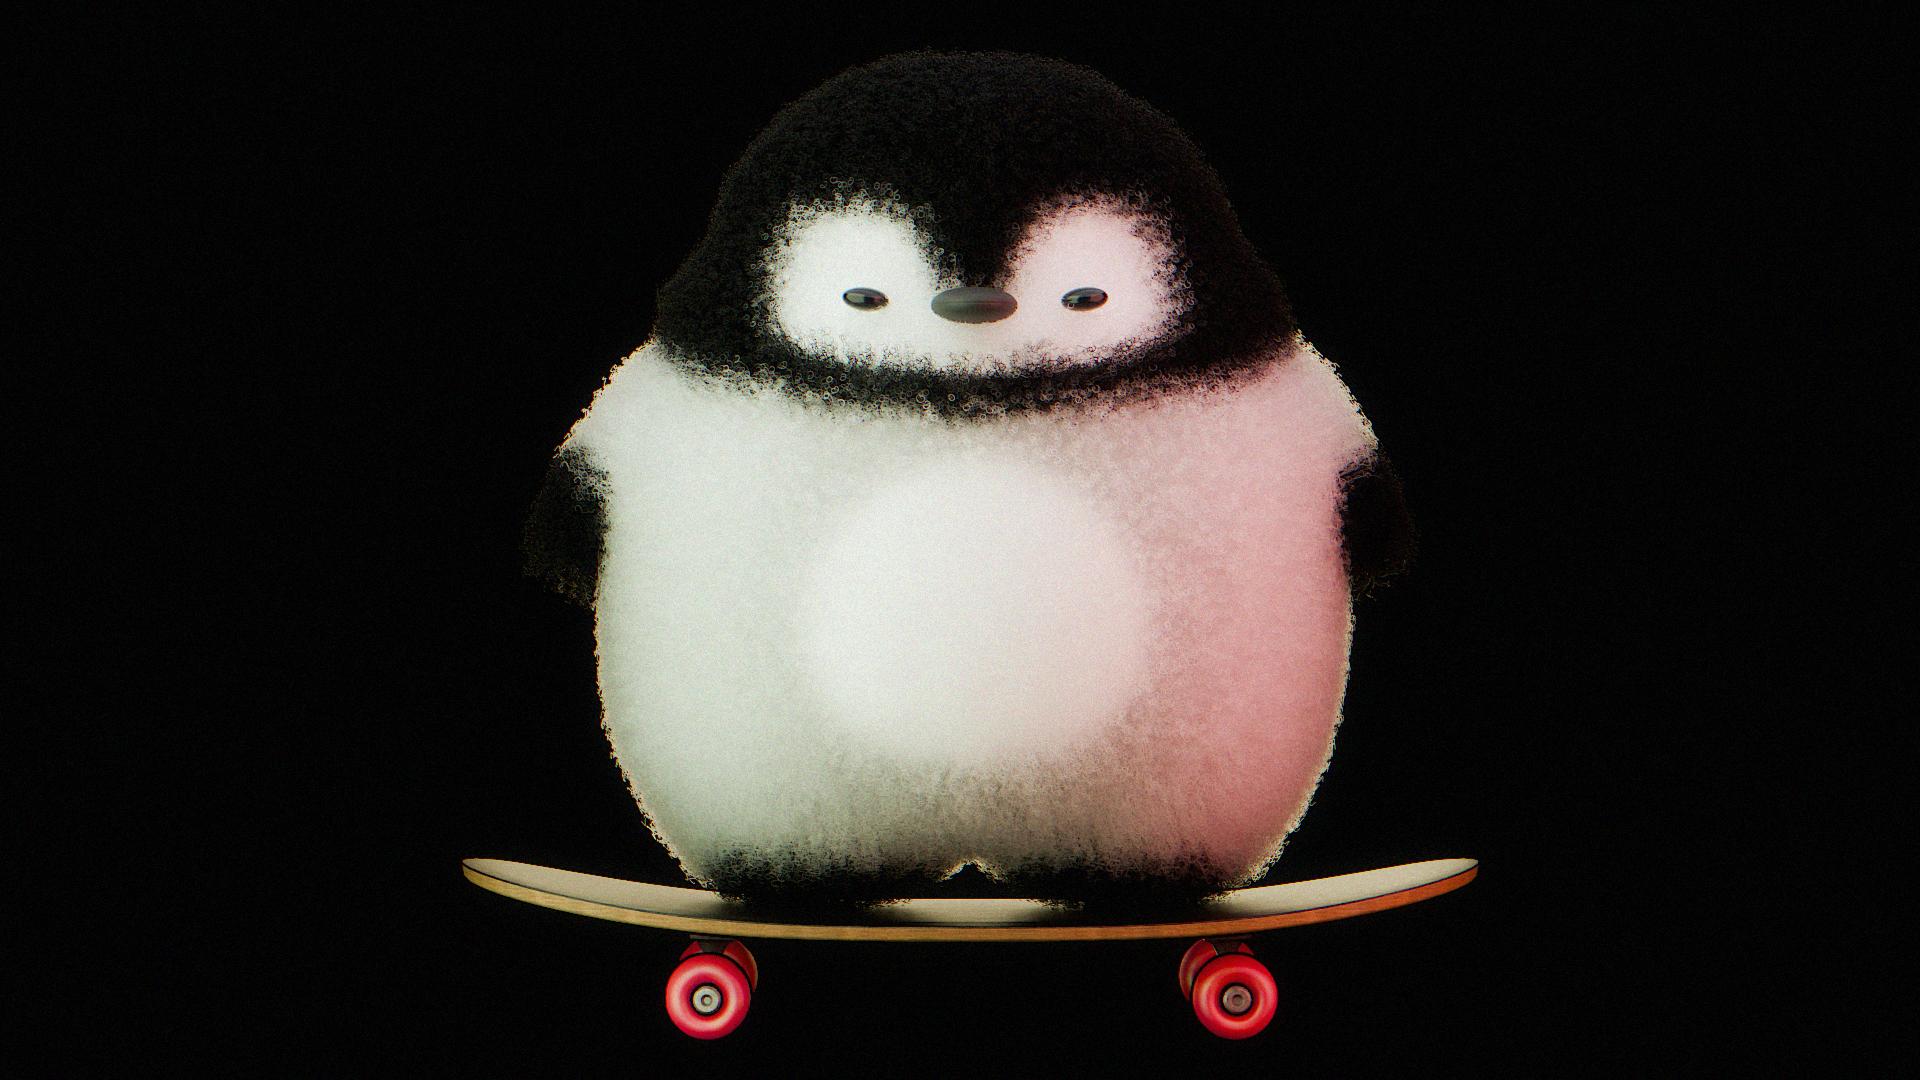
7. 2.1 Lights: Block number two,
lesson number one, where we're going to establish the lighting for our scene. Let's start first
of let's choose everything and move this swan a little bit more
higher like that. Then we go to the shift S, Scr sor world region. Then we're going to
create new collection. Let's call this one studio. Oops, studio. Let's start with our first one. We go with the
shift, a light area, then we go three ped, G, E, move this one behind A rotated, move it a little bit above. Let's switch our render
gene toward cycles. Let's go here in the last one. Also, I like to decrease the world go in this
icon for the color, make this one more darker
then let's hide the overlay. Now let's work
with our lighting. First able, instead of
square, choose a rectangle. And let's open the
second window here. Right click Vertical split here. Great. Here we can
turn on the overlay. Our setting is going
to be 5.5 and seven. Let's increase the
strength, the word 250. Let's go toward the color. I need some blue,
blue like that. I want to move this
one a little bit more above smaller rotation. Not really a more
toward the head. Let's increase the E one on
7.5 grade controls to save, probably a little bit lower, to also emphasize the wheels. Good, Then we go seven
where the pivot point. Let's choose the three D cursor. Now choose the area, and let's go with
the shift D and make a rotation on the
left side like that. Here our color is
going to be more toward something
white and green, very low, green like that. Choose your own colors, you
don't need to repeat me. Completely relatable to our
E. It's going to be 765, the power 220 control to save. Then we go with the shift D and one on the right side here. We're going to choose
something toward red, pink, red, something like that. Great power 230 probably here. I'm going to move it
more toward blue. Let me check if I
like this one more. I think, yeah, I think the color
palette of blue and red are looking more
better with each other. And then we go with the
shift, a mesh plane. As for a scale, this is going to be a
general lighting one in an Pt is that move
this one above. Let's have to recall
this one, general light. Let's go in the material
properties create new. Let's call this one
light above here. Instead of principal
BSDF, choose emission. And now we have one more
additional source of light. We go with three Empt, GE, a little bit in front air for a small rotation, G up here. The strength 1.3 the let thing go in the
render properties, go down in the color management, in the look, choose medium, high contrast, voila,
coontralS safe. I think this one behind, we can move this
one more closer. And also I want to
make it to word 218. Coral safe. Very easy, very quick. Like always. I
hope you enjoy it. And let's jump in our
next lesson. Guess what? We're going to create the fur for our Penguin. See you there.
8. 3.1 Texture Painting: Hello everyone, and welcome in that block we're going to
paint over our Penguin. I remember in the previous
lesson I told you about fur, but I forgot a little bit. In the next one, we're going
to add the particle system, but for now, let's
quickly paint him. Open your second window
and go in the shader. Editor, choose our Penguin. Go in the Material
Properties and press let's call the Swan Penguin
underline paint right here. Shift a and search
for image texture, create, connect color first. First of, let's go over the new, let's call the name
Penguin paint. Then hold the left
click and drag it down, then multiply on. And for the color we're
going to choose gray. Like that. I think going to be great. So this is the hex. You can copy. Then
you press okay. Then you go toward
the color base color. That's what we have at
the moment right now. Let's turn off our head. We don't need it actually, Our skateboard to next step. Let's go in the viewer shading. Good. Our next step we
go in the texture paint. Yes one, let's go right there in the viewer shading in
order to see what we paint. Here we have image, which means we have to
save our texture map. We go to save,
choose your folder, and save as image. But right now if I'd like to try to draw something I can't because we have to create an UV unwrapping back
toward the layout. Go to the edit mode, two for the edges, 300 ped. Let's choose, for example,
this one in the middle. Hold out left click here, okay? And then from here, shift out, left click. Let's check it. And here we choose this one
in the middle here. Let's play a little bit. Hold shift, left
click, left click, left click, left click, in order to connect them. Well, we have one more here. Okay, let's do this
one. The same thing. Shift left click, left click, left click, left click. Control three for the
other side. Seven. Let's great we go. Right click marks,
then we press a wrap. Now back to the texture paint, Now we have our
texture map here. If I'll try to draw, I can draw very easy. Our next step under this class, we can found the folder with references which we're going
to use in order to paint it. Go in the layout one ped, we go with a Shift A here
for image reference, then bring it here, here we're going to
choose this penguin and make it a little smaller. And move this one somewhere
on the side like that. And then choose your Penguin. And back to the
texture paint create. Now we can start to draw. Firstly, what I'd like to do
is to make his head black. Right here, we can turn
this one, swept the colors. Now we're going to
draw with black. The second thing that you can
do is to turn x symmetry. Which will save you
a little bit of time to make the brush
bigger or smaller shift. To make the influence
stronger or not, I'm going to keep
the strength on one, I'm going to decrease the
radius. And now let's start. Just draw over his head. Here going to be the line
or who know probably. No, it's okay like that. Then we go three, create. This is the process
where you can put a music on the background or something pleasant to
listen and control. One, just have fun drawing, but I'm going to do this
one in the real time in order for you to
not miss important. Now let's swap the colors. Let's create this white part. Here is our. Let's go from here. Oh, good, like that. Mm hmm. I'm going to
add a little bit here. At. Despite this isn't
as a reference, I'd like to add black on
his wings, swap the colors. And I'm going to go here making this one control onsttroly careful. Okay, wings are done. No draw like that one. Good. Let's go to the Alex. The same thing right here. Control one. Control seven. Me a little bit, not really what I like. I'm going to try to
make it more cleaner. Three on the side. Okay, control one. Here we have to. Good. I'd like to create a belly for him
and for this one, swap the colors and let's make
this part white like that. From here the thing is
going to be the blushes. So we are going towards
some pink color. Choose a random one which
you personally would like. I think this one is O. Yes. Let me do one, two, and three. Very nice. Or actually move this one a little
bit more higher. Okay, let me try. What if I'm going to make
this one here under the ice? One, two, and three. Good. Then how we can see
above of near our image, we have a star, which means
we have to save our changes. We go toward image sad. Now come back toward the layout. Go in the render mood that what we have at
the moment right now, still look boring. Don't worry. In our next lesson, when
we're going to bring the fur, they're going to be
and before and after. Let's quickly create the
material for our ice. Also emphasize your ice. Go in the materials,
press new ice. Let's make the base color
black and roughness to 0305. The same thing with A. We can go to the beak shift, left click on ice control
L, and link materials. Now they both share the same
material control to save, but actually I would like to increase to the
roughness to 0405. Great head skate, our guy is
already done for something. I hope you're satisfied
with that lesson. How we can see texture
painting in the hard part. You just create texture wrap, draw and safe. Easy. Yes. In our next block, this time for real, we're going to create fear for our Penguin. See you there.
9. 4.1 Fur and Particle System: Hello everyone. I
hope you're excited about this lesson
because now we're going to create the big before and after in comparison to
what we have before. Because it's block number four, we're going to create
the Let's start, I cannot wait, shift a mesh plane X go this
one on the right. Why we do this one is because I want forest
leak to explain some things in case
if you are very scared of the all these
particle system settings. And then we're going
to apply our new created particle
system on our Penguin. Go here, press plus hair and let's call this
one Penguin underline. Third grade, decrease
the number of parents, which you can see right now, two or three at the moment.
Right now we don't need more. Hair length going to be 0.15 Go down and
go in the render, Open it and press Spline. When you have a check in here, your shape going
to be more smooth. But in order to make it
even more better viewpoint display strength steps,
we go toward five. At the end before our render, we're going to increase
this one towards seven. But why I don't need to
do this one right now is because it's a little bit
too heavy for the PC. Then we go toward the children and bring the interpolated one, increase the display amount
toward 50 and render also children are the amount
of hairs that going to be a round of each parent hair. In that case one is always
for the parent 49 our children's just remember if we have 100 for example
of display amount, it's going to be one
of parent and 99 of children's grade then go lower. Clamping. Clamping is something
that can group our hair. If I'm going to direct this
one toward one, take a look. I can group from the
endpoint of our hairs. And if I'm going to go
to the negative one, I can group from the
roots, keep it on zero. But a little bit later, we're
going to come back here. Roughness, this is where
the main magic can be. Uniform is something that brings the distortion over your
general hair shape. So take a look, if I'm going to drag this one on the right, if I'm going to
decrease the size, which is going to
bring more distortion. Definitely not the hair that you want to have in the morning. That's why let's go
toward the uniform. We're going to have
point where it is, We go toward 0.0 45. Meanwhile, size going to
be 0.9 small distortion. Good. Then we go
toward the end point which just shows the
direction of each hair, in particular, on the
right, on the left, actually only on
the site like that. If clump is something
that group the hairs, endpoint is something that
work with each one individual, we're going to have the
endpoint on where it is, end point 0.0 88. Then we go toward the random. The difference between random
and uniform is because uniform bring the distortion
over your common shape. Random bring the distortion over each one hair
in particular, we go here toward 0.140 Meanwhile size is the same
but we didn't finish, we go lower toward the king. King is something that
can get the hairstyle. You have different hairstyle
like in the real life, we all have different hairs. In our case, we're
going to choose curl. Here are a few settings. Amplitude, show how
I just take a look. Amplitude, you can make it very big or you can make
it very small. In our case, we're going
to keep it on 0.0 14. Like that clump, the same
thing as we emphasized before. And it's going to be 0.9
Then go over the flatness. Just take a look. You can make it flat
from the roots or not. We're going to keep this
one on 0.1 frequency. This one is interesting,
let me just show you. You can increase the amount
of spirals of each hair, in particular, for example, 44. Now I have actually an image. The more value you have on
your frequency setting, the more car it's
going to be like. In the real life,
this is like zero. This is like 44, 33
and many, many more. I hope it does make
sense at the moment. Right now, we're going to
keep our frequency toward 3.2 the shape going to be 0.9
because I want shape shape. Actually let me show
you with shape, you can show on each
part of your hair. You want all of
the settings to be applicable or of the end of
your hair or on the roots. For example, if I'm going
to drag on the right, take a look, the roots, the steam of our
hair is straight. Meanwhile, all of
these frequencies, all of the settings are more applicable to the end
part of our hair, vice versa, if I'm
going to go down, you can see that the end points
of our hair are straight. Meanwhile, all of the
settings are applicable here. Our shape going to be point. Nine. I want to have
a straight steam with this beautiful spirals
at the end of our hair. That is actually not is we
go toward the clumping. I want to group them
from the roots. I'll go with -0.5 like that. We have a few more settings
that we're going to add, but before let's apply all of that on our Penguin before let's hide our reference to go toward the Penguin and press
control A and apply scale. Another thing because
for some reasons, let's say our result
may be different. Let's check the
face orientation. It have to be blue. But
in case if it is red, for example is our head. Let me show you what you can do. Let's do this one together, because our head probably
all we have red. So we go to Red Edit mode A. You choose everything
and you press Alt N and recalculate outside. Now the face orientation, the direction of your
polygons are right. The same thing if
your Penguin is red, do the same thing. Now, come back. Check
off, go on your Penguin. Go here plus and choose our Penguin for
increase the number of parents toward 3,000 Let's
adjust our head. We go, oops, we go here in the pivot point and change
in individual region, then we go on our head and
make it bigger like that. Good three S, E one
more time as good ice. Probably only let's go only with our ice three and move them. Ge like that. What about our big
small rotation? It's good. We go with our skate. Emphasize it, oops, on our Kate. Is it go down and let's
go toward our render. Let's see what we
have. It's nice, you probably think so. But I can prove that we can make it even more better
on the question, how I'm going to show
you the golden rule. My friends, always, when you
create hair particle system, you have to create
a material part. That's why we go into material
properties here and bring new Penguin underline
in the surface. We have principle SDF, but we have also
principled hair BDF, which was created for reasons. Now go here, relatable. Go in the penguin paint, choose emphasize our
image texture control. Go here, control, bring
the color right here, then we go toward the roughness. Let's make some settings
and then you're going to understand what mean. We go toward 0.40 0.4 coat, we go toward 0.7 Iowa, we go toward 1.2 and random
roughness toward one. Come back to our render
and take a look. There is no difference, You
think so because we have to go in the particle system
here in the material. Choose Penguin for if the previous one
principal Penguin paint, the colors are flat. There is no outline of our
lighting, it's not realistic. Meanwhile, when you go
toward the penguin fur, you can see the outlines. You can see the
colors is completely different and it's more relatable to what we
see in our real life. Remember, always create
a material apart. Let's go here and let me quickly explain roughness and
radio roughness is something that show how reflectible you want to
have your hair like, to not react on your light or to react
a lot on your light. I'm going to keep
this one on zero. Four code is something
that can make it again. Another way of making it
shiny more as a diamond. One, if you're
going to increase, it's going to be more
like a diamond less, less a diamond IO. The intensity is more like
the saturation of your color. So let me show you for example, if I'm going to keep
this one on five, five. I say, you see everything
is how this pale. Yeah, this is the right word. I think if I'm going to
keep this one, for example, 1.1 the result also not the best one, keep
it in the middle. 1.2 is something
that's going to make it saturated or even more like 1.3 I think it's
more than enough. Random roughness
also is very useful. We probably will not
see a big difference. But it's something that randomize the way how the lighting interact
with your hair. I usually keep this one on the big value because I think
the result is more deep. In that case, take a look at
your Penguin. Isn't he cute? I think more than enough. Let's turn off the head. Let's delete this one. We
don't need it anymore. Or if you want to play around, actually if you like to play around with the settings
of your particle system, you can keep it watch there and then apply
on our Penguin. But I personally
want to delete it. What if I'll tell you
that we didn't finish. There are a few more
settings that we can use in order to make our Penguin even more cooler
than the way how it is. Our hair right now
is pretty thick. We go in our particle
system settings and there is a thing
like hair shape. If you're going to change
the value right now, you'll not see the difference
because the difference can be viewed only
in the render part. But the diameter root, the less value you have, the more thin going to be
the roots of your hair. And the bigger value, the
more thick it going to be. The same thing with tip, tip influence over the end, over the end of your hair. Right now it is thick, we can make it more thinner. We go here with 0.2
meanwhile diameter going to be 0.4 And now we're going the render and
let's check what we have. Great, let me show you
the difference here. If I'm going to keep on one. I'm sorry, I told you I
missed with the words. The more bigger we're going
to have the value on tip, the more thicker
it's going to be, The less, the less is the value, the more thinner it is. We're going to keep this one on 0.120 Meanwhile,
the diameter root, it's how you can see we have here this small spirals
that I personally like it. You can increase, for example, the amount if you like so, but at the moment right
now, he's very chubby, fluffy, and really very cute. Let's check it. Let's
increase a little bit. The world lighting, a
little bit more like that. Here it is, our Penguin. He's already ready
for the render, even without skate,
even without hat. We actually finished with
him and I hope you're very satisfied with the value that I try to provide, even
if you're a beginner. And it probably is too much
for you. How I say before? A little bit more time. Coffee or tea and you'll get it. My friend remember to have fun. But our Penguin is
dope is very top. I really like him.
Let's check it. Remember how I say in
the first lessons, it can look difficult when
you look at the entire image, but step by step, step by step, you build your character. You make one thing,
second thing, and then you multiply them, compose more correctly to say have a very pleasant result. Let's go in our next chapter where we're going to
bring the texture for our skateboard, for our head, and then
we're going to render. And then I'm going
to tell you goodbye, but for now, see you soon.
10. 5.1 Addon for texturing: Welcome back my friends
in the last block where we're going to texture
the head and our skate. For this one you'll need
Blender kit add on, which you can download for free. You're going to
download a zip file, then your next step is to register very simple
email password. That is after your zip
file is downloaded, done unpack it, go
in the Blender. Edit Preferences,
dons install here, Sarge, for your zip file
and press installed on. Then you go again toward the preference
add ons and search here for blender kit and make sure that you have
a check in right here. Then you press and
for the site menu. And your blender kit going
to be appeared right there. You'll have here login, bring your e mail password. And after that one you'll have, you'll have access for a lot of materials like 10,000
models and many more, which we're going
to use in order to create our next textures. Do this one, and
after you've done, let's go in our next
lesson where we're going to create our skateboard.
11. 5.2 Skateboard texturing: Let's start with our skateboard. Texturing here, let's
hide our Penguin. We don't need him at
the moment, right now. We need our skateboard. Let's start with our wheels. Bring materials here. Search for plastic
and press Enter. There's the thing,
which one I like it. Plastic shader, sweet plastic, cheap plastic. This one. Then you just press
double click. Then we go toward Did this one. Also going the materials. Let's play around here
with a reflection. What if I'm going to decrease
this one toward 380? There was the thing like roughness I suppose,
or displacement. The displacement is something
that we can keep it on 0.45 in order to have more of
the small dots right here. You can see which
is more realistic. Which is more realistic then
we go toward the roughness. I'm going to decrease
this one also toward 380 to have more
of the shiny part. I think about the base color, I'm going to increase it more toward this
type of cherry one. Then we go toward
our tracks here. Search for metal.
I already have it, but let me press with
you one more time. Let's check something that
we personally would like. I want some thing with
small scratches too much. What about this one? Let's copy this one right here, which is metal zero one in my case because
already played before. It's so I'm going to
decrease toward two. Let me check right here, but I'm still not sure
if I like the color. What if you're
going to delete it, which was shift right click. Let's make our base color
more toward this type of grey but not very
dark like that one. I also like to apply
the bevel on our first, let's apply the mirror then
apply the bevel, it's okay. That is for our truck metals. Yes, it looks very nice. Probably not really,
as in the real life. We can go toward the scale right here and decrease
this one toward 1.21 0.2 and 1.2 In
that case we're, we're going to
scale our texture. Great. Then let's go toward our desk here. We're
going to divide it. Go to the edit mode seven
to take a look above. Let's hide our general
light in order to see this one emphasize
this one above. Great. Let's go with
one more control. Plus, in order to
emphasize one more layer. Then we go to, let's
call this one, desk under line, above sine. Then here we press control
in order to reverse. We go with plus. Let's
call this one tinow. We have here two materials. Let's start with the
first one which is above. Let's go in our render
moot out of the edit mode. Let's create it, first of all, let's make it black,
like that roughness, let's increase toward 0.6
From here we go with bump, connect normal toward the
normal and then we go with a noise texture color
toward the height. From here we press control in order to have our mapic and
texture coordinate. In case if it didn't work, you go toward the
edit preference ads here for Wrangler and have
a check in right here. But before let's apply our mirror a modifier and then we go to the
control A and apply scale. Great, now it's better than it was what I would
like to do next. Firstly scale, I'm going
to increase toward 35 or even probably more. I want to have small dots
right here. Probably 55. Let's go, I don't know how
to pronounce this one. Go toward this and increase
toward 3.5 Distortion. We're going to keep it on 0.01 probably the
scale once again, 85. Here in the mapping.
Let's increase the scale. Or three. Three and three. Now we have small dots
around of our desk. If you don't like that one, you can go here, you can play. We can invert it also, but there is no
necessity to pick again. It's a three illustration. We don't see all of these
details relatable to that part. Below we go to Word Materials. Again, blender, open. Let's turn on our general
light right here. Let's search for wood. Choose the second material
of our wood. Which one? We'll like to apply
something again with scratches. Search for it. I found what I
personally wanted. I think this is the
page number eight or something and unfortunately they all have the similar names. So this one is called
wood double click. It appear right here, relatable toward our metallic. I don't think that I need
to keep it on that one. I think 0.25 going to be enough. Let's hide it, let's
go toward our texture. Okay, let's increase
the strength. Let me just try 0.2 in order to make this one more
emphasized, but it's too much. We're going to keep this
one on one hungry 20. What I'd like to do more is on the rotation 90
degrees on the z axis. In order to make
it like that here, we're going to press
25 on the x one. What about strength right here? What if just one? I'm going to press it,
not really something. I'm going to keep it right here. Great, let's turn. That is our result. I really like it, and I
hope you're satisfied. Your result also how we can see, it didn't took too
much of the time, of our time like always, let's turn on our Penguin
where it is. Here you are. In the next lesson, we will have to create the texture for our
head and we finish it. But for now, thank
you so much and I'm going to see you
in our next lesson.
12. 5.3 Hat texturing + fur: We're very close because one thing that we have
to do is our head. Let's start here. Let's hide our Penguin
skateboard and turn on our head. Emphasize it one in an M Pt. Let's go on the render mode. Let me one, okay, blender kit materials open here, search for fabric, then we
go toward our second page. Third one. Actually, we
have here the fabric. Zero two, double
click. Wait a second. That is what we have
in the shader mood. Let's play around right
here. Go in the mapping. I'll like to decrease
this one toward three, two and two to make
it more emphasized. Or probably even more. I'll like to one and one create. Then we can have a
smaller rotation on the 1405 or actually -45
feet will be more right. They are, in that
case, more straight. Then let's apply our bevel, apply and then let's go with the control and scale Gretjap. One more thing that we can do is apply our subdivision
one more time. Press control two in order
to make it more smooth but decrease the level of
viewpoint and render viewpoart toward one because we don't
need it really so much. Then we go toward the
normal map displacement and increases one toward 1.1 0.5 That is what we can also play a little
bit with the roughness. If we're going to
drag this one down, it's going to be very
effective. We don't need it. I would like, personally, to drag this one
more in that square toward the border of
that square then. About the base color, I
personally like the red one. But if you don't like
it, you can shift. Right click Deleted Control,
right click deleted. Then choose wherever color
do you personally want, Red, blue, green, Wherever? I personally, I'm going to keep it with the same cherry
color that it was before. To make it even more better, we can create the particle
system for our head quickly. Let's go new hair. Let's decrease this one
toward 350 hair length, going to be 0.0 222. Let's increase this
one to 0.08 or actually 0.05 Control
save, go down. We go toward Spline. Check in View steps
five and Interpolated. Then from here we're
going to press 25 and 25. Let's go again and decrease
this one toward 003. I think that is
more than enough. Then we go down clump, going to be a 0.2 in
order to group them. And then go toward the uniform. And here it's going to be 0.0 22 to bring a small distortion. Then the end point
going to be 0015. Then toward the random
going to be 33, correct. Then where is the
size going to be? 0.95 relatable toward the clump. I'd like to decrease
this one towards zero five because I don't need
the big groups of them. Then we go down toward the hair shape and
let's decrease this one toward zero three
and zero one did. Got something to do? Yes,
to create a material apart. Here. Let's first
of all see what we have. That is our result. I still think that we can
decrease it decrease toward 23. I want to keep it on 23. But they are comma, I can say that this is bet, but let's make it better. We go toward the particle, toward the material plus new. Let's call this one
head underline F. Let's switch
principal SDF toward the principal hair BsDF
here in the color. Let's try to adjust. And you found something
similar to this cherry. One more brighter like that. In my case, this is the X. If you like it, copy and then we go toward
our particle system. And here in the material, whereas in the rendered
tap, switch on the head, fur, should I say something
about the difference? The difference is day, night, then we go here and
toward the roughness. Let's keep this one on 0.55
and here also going to be 0.6 are going to be 1.25
and random toward one. Let me make the color a
little bit more toward tlalet's decrease the
amount of hairs to 210. Very nice. And now let's
go and turn our Penguin. Let's turn our skateboard. Let's check once, if you want a full screen, you press control space. Control space bar, and
that is your result. That is my friends
for our class. I hope you really enjoy it. Don't worry, we're going
to render in the next one. But we've done
everything, modeling, even sculpting, even texturing, even texture
painting, everything. I really hope that you found it useful and I really
hope that I was capable to explain things in
a very simple and clear way. If it is, please
read me a review. But now let's go
for our less part, where we going to render it. See you there.
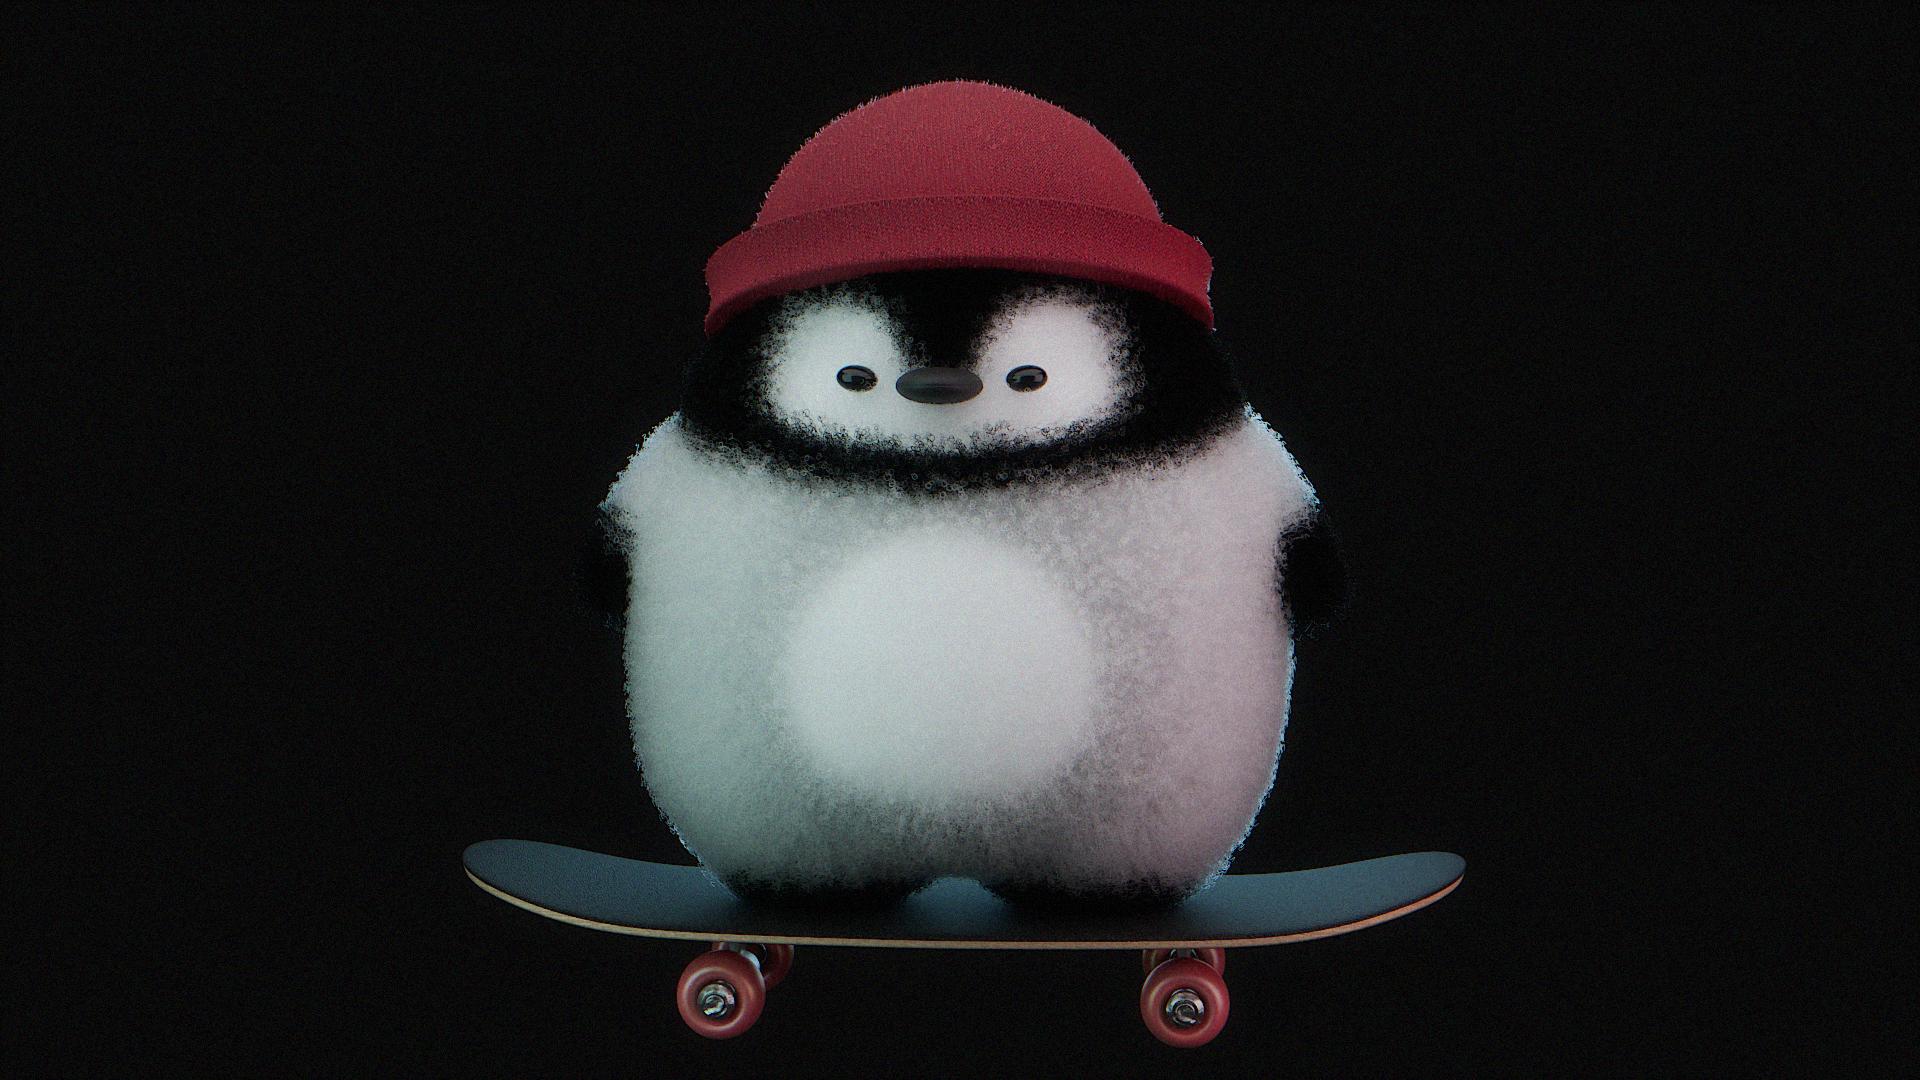
13. Render + Compositing: Final, render a look at him. Remember how we started
and take a look right now. I really enjoy your final result and I hope that you're enjoying also control Spacebar
to come back layout. Let's start with our camera. Firstly, do we have it? Yes, we have it. In order
to place your camera angle. In order to place your camera
from wherever angle do you want you press Control
out and zero on an M ped. Then we go in the end
camera here, make it red. Let's adjust this one. I want to have this
type of angle from the site like that
grad. Let me check. Yes, then we are going toward our properties right here and
medium high contrast is on. Then what I want to do, in order to have a
really quality render, you have to have a big
amount of samples. But my recommendation, this
is how I usually do bring it. We're going to make
a test render. We'll check if
everything is on point, then we're going to increase
it for our final render. Let's check if we
don't have anything to hide which mean like for example our reference which you don't see in the Viewpoort, but the camera is on
which means it going to be in the render turn off also. They all are turned off gray, then go toward our Penguin in the particle system
properties here. Remember I told you
viewport display increased towards seven to make it the best control to
say one more thing, I'd like to increase
the lighting of our general light
toward 1.4 probably. I'm going to increase
with the value of five for each one right here. Five right here,
also five grade. Then what about the world color? It is enough actually. We will hide our world, which means we go
toward the render. Go down. Probably
probably performance. No film. Yes, and
here, check in. And the transparent
in that case, we're going to have a
transparent background. Why? Because it
will save you time. It's going to be a PNG
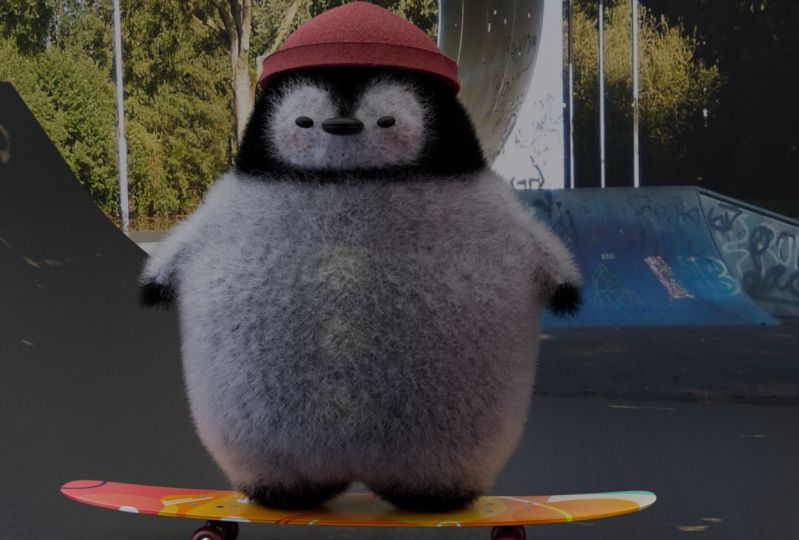
render only of our Penguin. And then in the compositing, I'll show you how we will
easily adjust wherever color, black background, white
background, red background. It will save us a lot of
time in comparison if we'll render each time with different color of
our background. I hope it does make sense. Control S, Let's make a test
render with three samples. Render image wait for a second. Okay. The quality is of course terrible but
that wasn't my point. I just want to check
if everything is here, here, we don't have
nothing else. Close it. Then we go toward our. Wait a second, I want to
make sure that our okay. It's a good good Don't
worry. Let me go here. Relatable to the samples. If your PC is weak or average, I'll recommend to have
something in between of 600800. But if you can, for example, to increase toward 2000, 403,000 it will take more time. But the final quality will worth it personally because
I did a few renders. In order to prepare
myself for this class, I'm going to keep
this one on Six. Okay, let me go with
the 700 control to save choose the samples independence of how
strong your PC is. Then we go toward the
render and render image. I'll see my friend after my
render going to be done, my render is done
and how you can see the result could be a
little bit more better, but 7,700 samples,
what do they expect? Actually, I think I can render with this one with
the better quality. But again, I didn't
already have myrenders. There is no necessity
for me, but not for you. First thing, first we
go toward the image, save and choose the folder. Let's call this one
Penguin Penguin Done. Or let's call this
one Dope Penguin. Save as image. Then don't close this one. We
go in the blender. We go in the compositing tab
and let's turn on use nodes. Bring this one on the side
shift a series for viewer, bring it here and connect
image toward that image. Then V if you want to make it smaller or Alt V
to make it bigger. Then hold Alt and mouse wheel to direct this one somewhere. Then we press shift
A and for alpha, alpha over and bring it here. Connect this one with
the image below. That's how you can
easily establish wherever color of the
background you want. I told you very easy, there are many options. Like for example,
bash is pretty nice, pink is pretty nice. But I'm going to keep this
one on the classic one, I'm going to get it on something
like more toward black. That is then even without
pressing at anything, you just have to connect image from this to
the compositing one. You go toward your
blender render and your background is
already applicable, was applied and then
you go toward the image Saves Don Penguin with black BG. Let's go for example and make one more with white background. Good, Come back, image, save do Penguin with white BG. Save image my friends, if you want to hear
some words from me, like to congratulate you, you can go toward
the next lesson. But if not, it is what it
is. Thank you so much. I hope you found this
class very useful. I hope I hope I'm looking forward to see your
results and your reviews. Thank you so much that you
spend your time with me.
14. Congratulation: Say before. I just want to
say a few kind words for you. First of all, thank you
so much that you make the decision to spend
your time with me. With that class, I
really hope that I was capable to explain
everything clear and simple. But remember, the golden
rule is always to have fun. Don't compete with
someone or wherever. Just enjoy the process. I'd like to ask you
for two things. First of all, if you like it, I have other useful classes in my profile that can also
boost your knowledge, That can also enhance your skills in three
D. The second one, if you like it, a few good words like from you in the review
will be very pleasant for me. Or if you don't like it, okay, you can say this one also. I'm open for constructive
critique and rest. I wish you the best. It's not the last time when
we see each other. Or at least I hope goodbye and take a look at this
penguin. He's amazing. I really like all
these penguins. Ducks, bears, chibi,
chubby, they're so nice. I hope you really enjoy
your final result also.
 Sasha Luvr, Work in third dimension