Transcripts
1. About that class: Have you ever thought about
diving into a new hobby, one that's not only
enjoyable but could potentially shape
your future career? If you're wondering where
to begin, look no further. I introduce you to
our skillshare class Blender Fo 0.0 mastery. This course is the key that will unlock your talent
as a three D artist. Here's what you'll learn
in this exciting process. You'll master
blender fundamental tools such as navigation, working with modifiers, camera
placement, and many more. You'll create your fair
three illustration from scratch to final render. You'll learn to work
with particle systems that will level up
your final results. You'll emphasize specific areas via different sources of light. You'll gain confidence in
using blender creatively. But what if you have zero
experience? Don't worry. This class is beginner friendly
and suitable for anyone interested in three animation,
illustration or design. No prior knowledge of blender or three D modeling is
required to get started. All you need is a
computer with Blender 4.0 that you can install
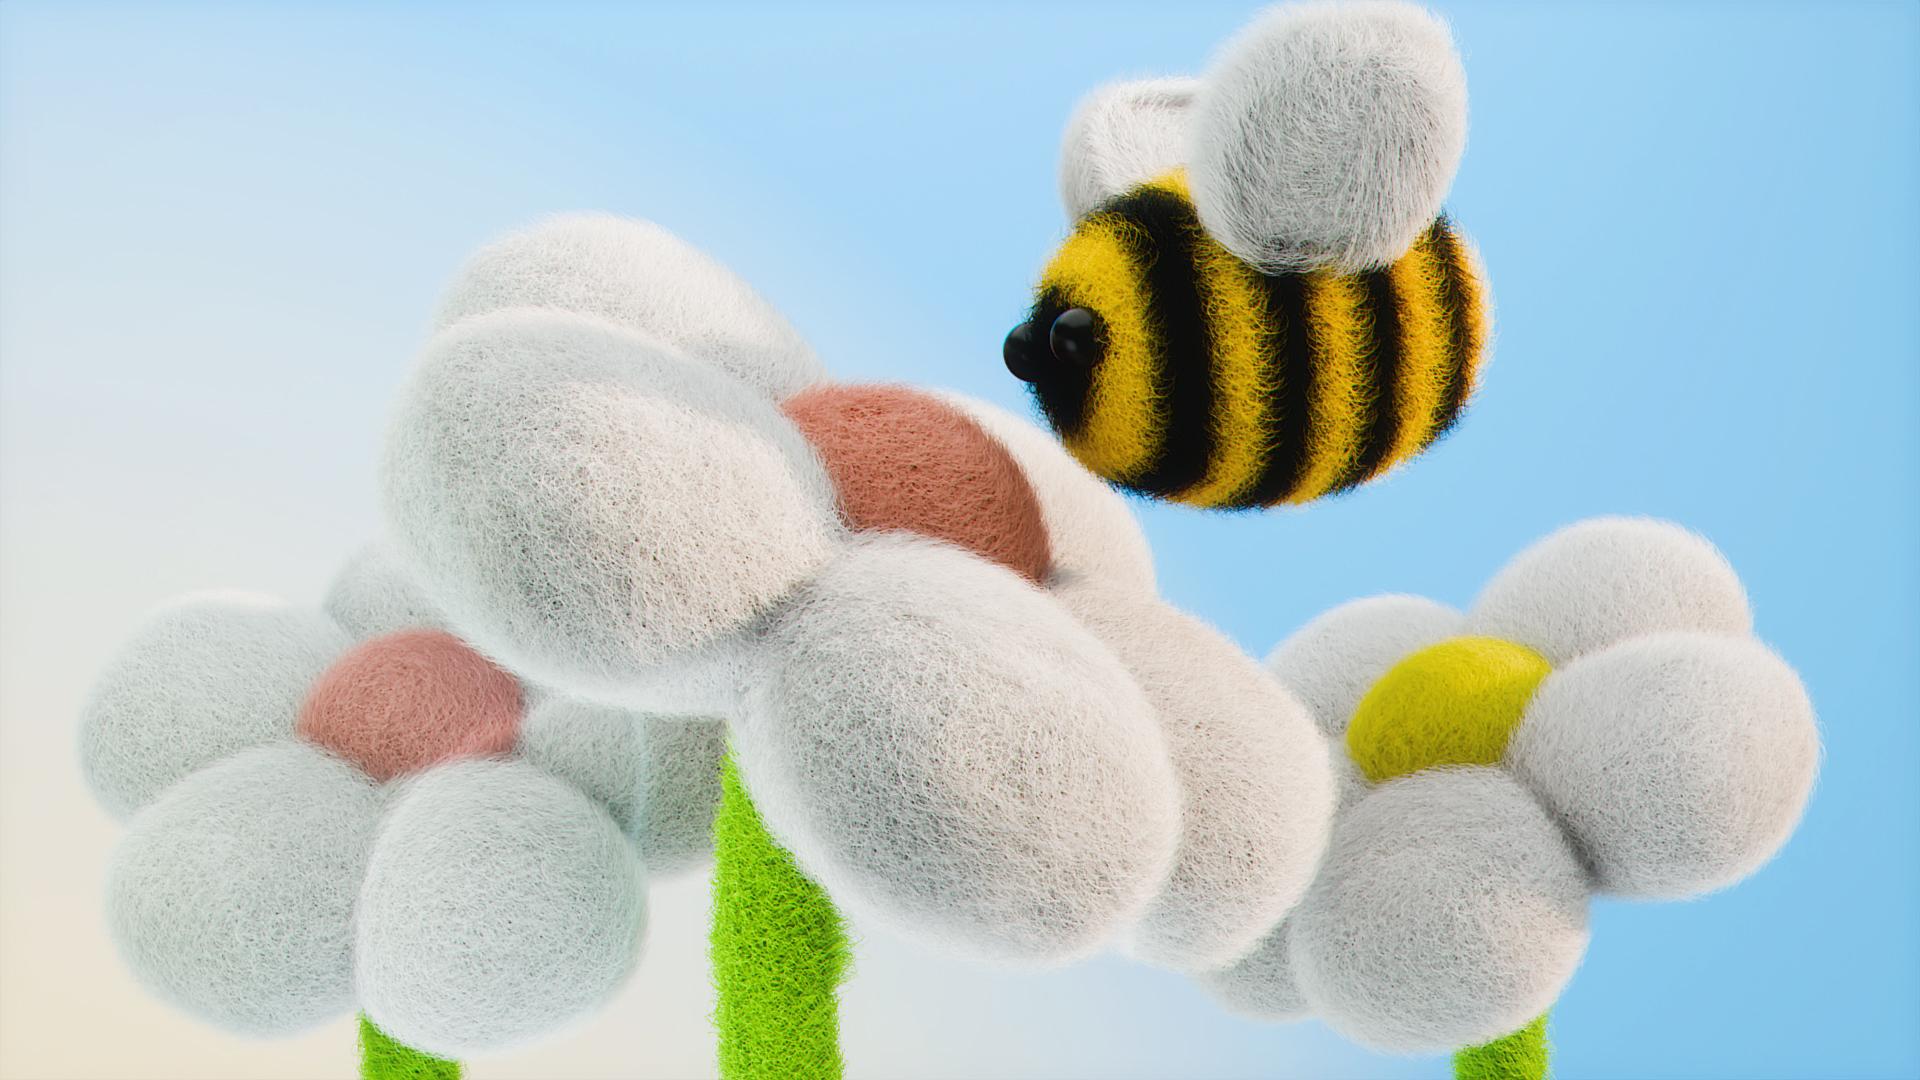
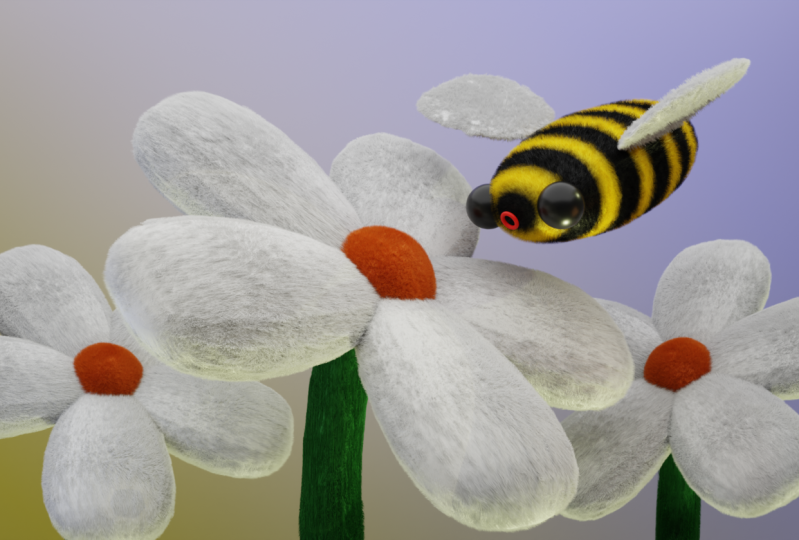
for free from Blender Org. I'll lead you through our class project where you'll create your first three
illustration with a fluffy B around the flowers. In summary, learning
three D not only unlock endless career
opportunities, but also provide a dynamic
and exciting journey into the world of digital
art and technology. Join me on the
skillshare class today and let's open that
wonderful door together.
2. Lesson 1: Create a Bee: Welcome everyone.
Lesson number one, where we're going
to create our B. Before we start, I want to say that everything
that I press, you can see in the left corner. In case if you
have any question, just take a look
right there in rest. Let's start. I'd like
to delete our point. Left click on your cube control for the subdivision
surface modifier, which you can see
appear right here. Then right click Shade Smooth to make it a little
bit more bigger. Then we go the X to make it
a little bit more bigger, only on the side or
on this red one. Then we go with a seven on
an ped to take a look above. I actually like the
thickness right there. Let me check right here, we can make Gk also a
little bit more bigger. You can see it isn't
really smooth. The next step, after
you created the size, go here in the modifier, tap and press Apply. Then one more time control two, and now it's much
better than it was. This is going to be the body
of our B. Let's go here. Double click, underline body. Good. Let's move forward. Our next step going
to be the ice. I hold the mouse wheel, bring myself on the left side and in the last moment hold out, and that's how you can
catch this straight angle. You probably noticed that our mesh usually appear
from the cursor. What we can do is shift
click right there. Now the I will
appear right here. Shift a mesh, the sphere, to make it a little
bit more smaller. Now we have the I in the
position that we need. Right click, shade smooth. Then seven on the
naped to look above. Go a little bit further
because don't forget, we'll have the hair system, we need to have our eyes a
little bit more further. Then to duplicate our I, we go with the shift, Greg, and move this one on the other side what we have
at the moment right now, I think for me, they're a little
bit too big, so I'm going to make them a
little bit more smaller. This one right here. This one right here. Okay, let's call them, this is going to be
left under line. This is going to be
right under line. Good. The last one
going to be our wings, which will be a little bit more harder than what we did
at the moment right now. But shift a mesh and cube. Want to work solo with
some specific mesh? Press on the need. Good, now we are in
the object mode. Let's switch this one
on. The edit mode or the hot key, Tap, tap. Great. We go make it
smaller than seven on mp. To take a look
above, I would like to add one more additional loop. What is loop? Every mesh
contains three important things. Vertices which are these points, or one on the keyboard, two on the keyboard
are these lines, and three are faces. In our case, we press two, then seven on an M Pt and
go with the control err. And how you can see a
yellow line appear. We need this one. This will add additional edges
around our mesh. One time left click, move it above, and
second time left click. Now how you can see, we have additional
vertices, faces and edges. To choose this entire loop, press Hold Alt and left click, and now we have
this entire H loop. Choosed seven and put. Let's make X and a little
bit more thicker there. Then I want to choose
vertices from this side. The life hack, let's call
this one like that, Al. Al is a transparent mood. This is the transparent
mood when it's blue, It means that you turn
on, when it's gray, it means that you turn off al one for the vertices
for this point. Then I choose all of
them from that side. How you can see,
we choose all of them and make them smaller Erik. And the same thing right
here, smaller Erik. A little bit there.
I think it's enough. Out of the transparent mode. Control two, right click, shade smooth, good out from the solo mode
which is slash empt. This is our wing which I think can be a little
bit more thicker on the one grightGgrik
move there. Then let's go in
front of our B Z now. Just a line under your body. Good. Probably a little
bit more bigger and I think it's enough. Is it? Yes. Again, hope
shift D to duplicate. Move this one on the right side. Control for the mirror
modifier and Greg, which means we choose the x left click and move this
one on the right. Let's save our file, which is of course very important
and control. Choose the folder that you want and give it a
name skill share. Save blender file. I think I'll do them a little bit more thicker on the red one. On the X, X, X. And like that, this is
it look very simple, but when we're going
to add the materials, when we're going to
add the lighting and everything else
going to look up. But this one is the
same as this one. Don't worry. Let's
give it a name. This is, this is
left antral safe. Let's move our B upward,
a little bit more higher, G x, Let's make it a
little bit smaller. Let's apply our transformation, our scale, which is
going to be control. And apply our scale, which is going to be very
important when you're going to add materials
and everything else. But for now, we finished
with our lesson number one. I hope you enjoy it. Let's move forward for our next lesson.
3. Lesson 2: Flower: Number two where
we're going to create our flowers. Let's start. First of all, let's bring
our cursor in the middle, which is going to be shift a shift cursor to world region. Now we're going to go
with mesh and UVsphere. This is going to
be the center of our flower. Right click. Shade smooth. Let's bring this one in, the
collection apart, which means new
collection flower. Okay? Okay. Now we have a collection
apart for our flower. Let's call this one fair middle. You can give your own
name. This is my name. The way how we're going
to create the petals are similar in the way
how we create our wings. We go the shift, a
mesh cube solo mode. Let's start as, but let's
keep this one thicker. As Greg, like that. Seven for the page seven page. Take a look above tap for the edit mode which means
right here, control error. Let's add additional loop. One left click, a line second left click, make it thicker. Then out of the edit mode
control right click, shade smooth out
from our solo mode. Let's go with the Greg, let me take a look because I
did them pretty thick so I think we can make
this one first ble smaller but thicker
on the red one. Take a look one time. If I'm going to
duplicate and rotate, it's going to
rotate around self. What we have to do,
control controls that. Okay, we go right there and press instead
of median point, we choose three cursor, which is um, aligned in the center
of our world right now. Take a look. I press
shift D to duplicate, and then, and now
it's move around. That, how we can
create our petals. Shift shift D. A. Good. Then I choose, we should call this one petals. Now we have to
rename all of them. Okay, M to move them into
the flower collection. Now let me make this sphere
a little bit more bigger. Right there, probably
I'm going to make the cube also more thicker on the one like that. Great. Let's first of all, let's set our camera view. I think something like
that will be great. The hot key is pretty simple. For example, you
choose this window, this angle, and you
press control out zero. That's how you can set your camera from the
point that you need. Probably. I'm going to
move a little bit aback in case if you don't
know how to bring yourself into the camera
or out of the camera, it's zero on the pat. Okay, I'm going to
go a little bit behind and I'm going
to choose this one. If you want to set
the camera being in the camera for the
side menu view. And here you have check
in on the camera view. Now you can set your
own angle and I think this one will be
better than check off. I'm going to choose our flower. Just choose all of them. Let's rotate
something like that. Move it a little
bit up, prob them. Going to move our B. Let's go for our B
except camera Greek. Then somewhere there now, I like how we can see. Now we have to move back for the median point. Median point. And it will be easier
to roll with our B. Now it looks like the B is
looking toward the flower. The flower is looking
toward the B, probably. That S is the green parts are don't know the name
of this one in English, but we go down under our sphere, shift right click to
set our three decursor. Then shift a mesh and cylinder. Then one on M ped. We go make it smaller
one more time. Go down shade smooth,
let me take a look. Probably even a little
bit more smaller, something like that,
which is good. But how you can see we have
this type of curve shape, it's actually very easy. Press on your cylinder, tap for the edit mode. Let's go in the
solo mode to make it more easier for
you to comprehend. Control a search for the loop. One left click, move it
above second left click, and then x and go on the side out of the
edit mode, control two. But you probably don't
like that and that part very easy to solve. Back to the edit mode. One more time control, search for this one. Go down left click, go here, left click, go up, left click. Now this shape is much better, and that's how we created our curve flower.
The name is steam. I search right now. Steam. Oops, Steam. I will not rename the
petals because too much. I think it's enough
with one of them. How we can see, I have
three flowers right here, but I'll recommend we're
going to add them at the end. Now we're going to
set the materials, and then we're going
to make the lighting. Then we're going
to make the hair. And only at the end because
it will be much easier. And we're going to save
more time to duplicate the flower and to move
one here and one there. But to the rest, we finished
with another lesson. Thank you so much, and
let's move toward the next.
4. Lesson 3: Materials: Less. Number three where I'm going to show you how
to create materials. And it will be much more
pleasant lesson I suppose. But before we need to create small lighting
source of lighting, just to see what we've done, one of the main techniques, one of my favorite one shift firstablelet's go
with a new collection. Right click new collection, Let's call this one lights. Then from here shift a mesh
plane and let's double click plane underline light and make it bigger z and move
it up, Don't do anymore. Then we go to the
render or shading, which means the less
circle at the moment. Right now you don't see
anything because we have to switch from V to the cycle which is
the render engine from V go to the cycle. Again, you don't see nothing because we didn't
establish our light. We press on your plan light. This circle right now is where
we can set the materials, press, then we go within, let's call this one plan light. Now the magic part. Surface instead of
principle BSDF, we choose emission val, first source of flight. Here we can make it
stronger or less. I'm going to keep this one on 1.5 then I'm going to
move this one retal, say zero on an M. Ped's enough. We're going to have
a lesson apart, which I suppose the
next one going to be the lesson where we're going to create more sources of light. But for now it's more than enough how to create an
additional window in Blender. Right click, you go
here on this border, you can see two arrows
and press right click, vertical split drug, this one on the left and we have
additional window. We're going to check
the results here. We're going to
establish our materials how left corner and
choose shader editor, direct this one under right. Let's go with our B for example. Let's call this one our B
already have the material. Let's call this one
underline body here. We can choose the color
but have two colors. Let me show you tuck. If you want to go to the white, just bring saturation
toward the zero. If you do this one for the
first time, take a look, shift A search for wave wave
texture, bring it right. Here we go the shift A and
search for color ramp, which will allow us to
set the color color connect to the base color and this color connect
to the factor. Something interesting appear. Let's set our colors. First of all, let's set
the scale for these lines. Probably here you can play
around, do what you like. I think I'm going
to keep somewhere like 1.3 and I'm going to make the black
one more thicker. And the white one, we have
to change toward the yellow. Now our start to look like a B, then probably like that. Let me check this one right now. I think 1.4 it's already
what works for me. Great, Quantral
Save. Is it hard? I think, no. Then we go to
our and press new material. Let's call this one,
let's make them black. You just bring this
one toward zero. We have here a thing
like roughness, you can see here or here. You can make it shiny, or you can make it shiny. I'm going to keep this one on 0.3 which means more toward
shiny, but not completely. Then you have two options. You can choose this, search for the material and choose
the ice or control. You can press on that. Then shift left, click on this control L and
link materials. That's why two ways of how you can bring the ice about wings. I'm going to keep
them white because we're going to bring
the hair around. We actually don't really
need special color. The same thing with our flower. Let me choose this
one new flower. I'm going to keep this
one flower underline, middle base color. Let's choose something.
Choose your own color. Choose your own color. I want to keep this one on red. The last one, the color
for our steam, new. And let's call this one steam, it have to be green. Let me go on our camera. This is what we have at
the moment right now. Again, it's very simple. But this is a great
illustration of how in blender, from very simple
things you can turn something more
specific because of the lighting
materials and hairs, and many, many more
what we've done. I know you probably want to add additional
flowers, but again, I don't say that this is wrong, but it will be much easier
and you're going to save more time if you're going
to do this one at the end. Also you can see our
petals aren't very smooth, so you can go to
the modifier, tap, apply subdivision surface,
and then add additional one. But I will not say that
we really need this one. It's more than enough
because they're going to be covered with hairs
or probably will do. We'll see. But at the
moment right now, thank you so much.
Another lesson. Control S save and let's bring ourselves
for the next one.
5. Lesson 4: Lighting: Lesson. I don't say
it will be harder, but also we have a lot
of freedom right here to play around and to copy
everything in the same way. How I show, let's start direct
this one on the left here. Let's search for a
three D viewport here. We're going to play around. I'd like, first of all, to
show the thing very easy. Go here in the render settings, bring yourself down in the
color management look. You can choose the contrast. This is the first thing that
you can choose for yourself. Can make the colors more
emphasized or less emphasized. I personally would choose
medium high contrast. Also you have here like standard filmic, just play around. Especially if you're a beginner, it would be very
useful exposure. I'm going to add additional
five at the end. It's more than enough for me. Let's go forward and bring
our background shift, a mesh plane, four scale, then x 90 Gs, Eric. Move it behind. Then we can turn this
one toward our camera, and this is what we have also, we can play around with this one X X. I actually didn't
tell you about this thing, but you can move
them along the X. Or for example, we rotate our lighting
plane and I can press X, and one more time
X, how you can see. We have one more additional X, the same thing, Greg, or move this one on this Xx X. Make it a little
bit more larger. Cool. Let's go and at
lighting lighting, we're going to have a
lot of sources of light. I need one here, one here, one there, and probably
one here, and one here. Sounds a lot, but it will
be easier shift a light and let's go with
sun in the way. If you want to set
your lighting, you have the data. You can even transform our sun into point
sun, spot or area. We're going to keep it on sun. Sun is very strong. Remember that, that why we don't need to increase
toward hundred, it's enough. Just 1233 will be enough. Then let's move this one. Greek now start to rotate our sun toward our B. I need this color to
fulfill the entire scene, not to emphasize something. I want gradient in
between of my lighting without this type of
sharp shadows that Why? Let's choose, first of
all, something to yellow. Let's say small yellow. Then we're going to play
around trying to search for, okay, this one is good. Then A, I don't have here a
lot of things to comment. I'm going to just try to move it under the petals a
little bit more probably. I'm going to move this one
a little bit more in front, toward the scene like that. We have sharp here. I don't like it. I have
to correct this one. I think this one is great. And now I'm going to
decrease toward 05. Now the shadows are more soft. Okay, we go forward. Let's go with one ped for
the front view light area, X on the right, 90 -90 Let's all increase
the power toward 100. Now you can see we have one
color additional right there. Let's make this one more blue, that but not very pronounced. Let's make our spot
a little bit bigger, which means size, for
example, toward six. Let's try to keep it above. I like that. I want
this slide to be in between of these
two petals, Greg, and that where we can
add now you can see even our shadows start to have gradings in between of
the color here, here. But I don't like
the steamy worry. We're going to go
and play around. One more spot area. I'd like to. On the right side. What
we're going to do, we're going to shift and then we press Rich 180 to turn
this one on 100 degrees. Then Erik, let's make
this one more toward, I think something
yellow and red. Probably orange will be
more toward the red One. Good. We want to increase
the power toward 150, and you can see the color here. But also reward a little bit more closer to
our petals. Now let's check. Good, great, let's
make our background. Let's turn our background in
some specific colors Chose. Go to the shader editor. It's going to be very quick. Go to the Materials
new material. Call this one background. Let me show you quickly
search for gradient texture, then search for color ramp. Connect color with a base color and connect color with a factor. Now choose two colors. For example, let's go with
something like yellow, blue, like this blue. Then go to the linear and play
around with the settings. I'm going to keep this one
on diagonal is pretty cool spherical but quads diagonal. I'm going to choose diagonal. I'm going to just drag this
color more toward the left. This one here also. You can play right now in
between of the interpolation. Easy constant is
a straight line. Spline is the most soft gradient and these are less gradient, linear or line probably. I'm going to keep this
one on linear. I like it. I'm going to make this one
a little bit more white. Just small gradient right here. What if I'm going to
increase the contrast? Not medium but high contrast. I'm going to keep this
one as this one also. We can make our
world more brighter. You can see the planet
right there, world. And you have color and you can make it more brighter
or less brighter. Probably, I'm going to
keep it a little bit more brighter than it was
at the start Control, safe. Let's move forward. I remember that here I have
a source of light there. I have a source of flight
shift, a light point, which going to be right here, close to our steam, because we're going to have
one more additional flower right there, x. Let's go to our properties. Let's make it bigger
toward, I think the color. Let's just bring the red one, don't worry, make it stronger. Now you can see the area of influence. I
usually do this one. I choose the red one. I see
where the lighting and then you can bring toward the
white or something else. But at the moment, I probably
would like to move a little bit more in
front like this. Then I'm going to keep it
toward the soft blue, probably. I'm going to keep it
behind like that. Just have a small shadow
right there, probably. I'm going to make it toward 2.5. No three, great. Instead of hungry, I'm going to keep
it like 75 enough. We'll have more flour here. How many sources of light
we have the moment. Right now, it's
actually pretty enough, but we can add one more there. In the background, we
press shift a light a 90, like this line have to be
toward our background. Greek moved behind, the radio is going to be for seven
or probably even more. Let's bring the red one to
see the area of influence. Let's make it stronger. Okay? Even more bigger. Let's say 15 where it is. Greek. Greek Move it a little bit more close toward how we can see. Now, even our back
background can have an additional like the
small gradient because of the lighting color now to yellow or
probably more white. I'm going to keep without
with small change, but it's a good change. Great. Probably I'm going to add one more source of
light right here. One more source of
light right here. I'm going to choose this
point shift x greek. I'm going to move
this one in front. I'm going to decrease
the radius toward one. This power, I'm
going to be like 35. Okay, Let me make it bigger
that not really one. I'm going to move it more inside and a little
bit more down. A little bit more
bigger and soft. 151.5 Good. One more spot area, going to be right here. Let's call zero shift A light A. Turn this one toward our flower, to this one right here. But what if it will be the sun? Let me, yes, the sun is more stronger and I really
like because we have an additional
shadow right here. What if going to be red? Just to check back here to the three D viewport
for the second window. No, it doesn't work properly. Doesn't work properly. I have to turn around to Re X Greer, Greek. Just play around. I like this one. We
have like a above of our flower And it's a little bit more interesting
than it was. I'm going to choose the color yellow toward the white or blue toward
the white. Which one? I think yellow going to
make much bigger contrast. Instead of ten, I'm going
to bring like four, or probably even three. In the next lesson, we're
going to create the hair, then we're going to
bring our flowers, and then I'm going to make
it 1.2 Then we will render.
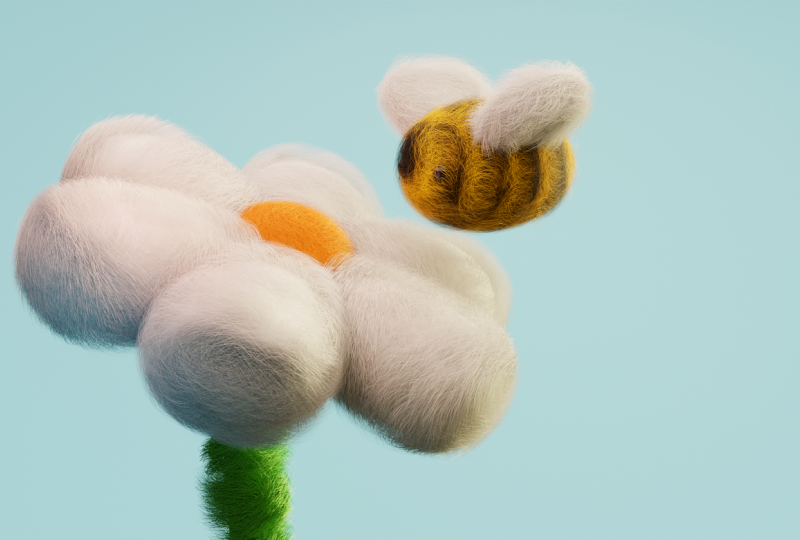
6. Lesson 5: Fur and hair system: Lesson number five
where we're going to create this fur
and going to bring the main difference in
between what we have at the moment right now and what we'll have after this lesson. Choose our body and then go here in the
particles properties, press plus from the
Emeter, choose hair. Then let's start to play around. Remember what I'm going to show is going to be the
general settings, but feel completely free to have fun hair length going to be for 1.3 Then open the Children
tab and press on Simple. There we're going to have
the king and open type. Just take a look,
for example, curl. These are some patterns of, of the form of our hair. For example, curl, radial
wave, brad, spiral curl. Personally, I'm going
to stop on this one. If you like something
else, no problem. Then just play around
with the amplitude. For example, you can
make it bigger or lower. I'm going to keep it on probably 0.26 And then also
with the frequency, I'm going to keep it for
round 1.6 or probably, let me check 1.88 also. No two was good. Great. Let me there is a
very important moment. When I was beginning,
I remember I stuck with this one and
I was very annoying. So you can see here display
amount and render amount. Let's say you render
this one right now, you'll have way more hair than what you see at the moment. Why? Because you can
see the settings. The value here is different
in the display amount. What we see right now is ten, and here is 100, which means way
more bigger. Why? In case, if you don't want to be disappointed in
our final render, keep them at the same value. For example, 45.45 or 25.25
I'm going to keep it on 25, and I'm going to decrease
the hair length towards 0.2 Great, let's move forward. Let's move forward because we have a few more settings here. For example, in the roughness
uniform and random, what we can use also
for example uniform, I'm going to keep it on 01. And the random k 0.300 it will make a little bit not so smooth and I
think it will be better. Let's go forward. Let's go
forward because we have a few more settings like
radius and roundness, which also can add
something dope in our work. 0.21 if I'm going to
keep it toward 24. And roundness also, I think
I'm going to keep it on 03. Great control to
save the last thing, that hair shape open. And here we have diameter root. If I'm going to change it,
you'll not see anything. But for example, let's go
to the render settings. This is how our B is looking
at the moment right now. If I'm going to change
the diameter root, for example 0.2 you will see the difference
the hair will display will perform completely
different on the render, not in the Viewpoard, but on the render it will make
it a little bit more fluffy and so sharp in
the way how it was. For example, when we got
the value of 11 more time, one you can see the difference. And one more time where we are
diameter 0.2 control safe. Actually, this is probably
everything about our hair. How you can see it
took a lot of time. Again, you can go forward, play around with other settings. There is no problem with that, but I'm personally
good with that. I would like to
make the black one a little bit more
thicker than the yellow. Let me bring myself into the
shader editor for the B, back open the second
video, second window. Great shader editor. And let me go to the render. And more like that, no good. I'm going to keep it like that. Qudraala, let me
check what we have. Yes, it will be more heavier, so that's why I decided
to keep it at the end. But this is our
fluffy and very cute. What we can do next.
This solution, you probably think
that we have to apply to create for
each one of them. But actually no, there is one very simple method.
Back to the viewport. Let's choose our
flower completely where the flower I hold shift. I forgot to show you
the screen cast. Now you can see everything
that I press again. Hold shift, left click,
and choose all of them. Also shift left
click on the wing. The last one, shift
left click on our B. How we can see, these are more orange and this border
is more yellow. The border of our B
have to be yellow. And then we press control L with a second. Copy modifiers. Yes, that's how in a
matter of seconds, we applied everything on
our hair, on everything. Let me check right
now. V we created. This is what we have at
the moment right now. Our next step, which could be, is just to copy our flowers. We go with the shift left click, for example on the X. Then go Greek a
little bit behind. Make it smaller. Back to the
window, back to the camera. Just rotate, grip three. Let me go like that now. Just set the flower where
you'd like to see one here. Shift duplicate. Wait a second. On the left side, I'm going to make
it more smaller. Erik, a little bit behind. The last thing is let's change the color of
the shape of the, of the sphere inside. Go to the materials
and duplicate this. One will duplicate the material, so how you can see we
have flower middle 001. Let's just press this 12. And I'm going to
choose the yellow. For example here I'm
going to duplicate. This is going to be the
material three here. Let's apply blue. Now let's go to the render V. This is what we
have at the moment. Right now, probably I would like to make this one a
little bit more bigger, the less flower shift. Left click, left
click, left click. Okay, a little bit more good. Now let me check, it will take a
little bit of time. What we can do also
go to the renders, and here in the
Viewpoard samples, instead of 1024, we can
press, for example, 240. And it will be a little bit more faster than what we have
at the moment right now. But ladies and gentlemen, this is our result. At that lesson, I hope
you enjoyed again, don't worry, you can now take a little bit of
time for yourself. Put this video on post and
just play around with a few. Make your own settings. But again, this is what we have at the moment right
now. Thank you so much. I hope you found it useful. And in the next
lesson we probably, I'm going to add two
more additional sources of light here and here. And then we're going to render.
7. Lesson 6: Render: In that lesson, we'll prepare our work for our final render, which will be pretty quick. Before I would like to add one more additional
source of flight. I'm going to copy
the sun shift D X somewhere on the left. Now let me play around, let me try to turn this one. Let me check how you can see. Yes. A little bit more slowly, but you can see the
small shadow of the yellow appear under which
emphasize our flower. I personally like it. I'd like to add one more
point from this one. Yes, shift D, Greek. Let me move this one a
little bit in front, under these two flowers, probably I'm going to
decrease toward 25. I'm going to make it
more toward green. Wait a second, great. Then I'm going to
choose the sun. I'm going to make it a little
bit more brighter, I think. I'm going to make this
one also the plane above, a little bit bigger. This is what we have at
the moment right now. The green one of our steam. I'd like to make it
a little bit more dark like that. Good. Now I like everything,
if you like, also from the point
of light colors, let's surrender,
which is very easy. Go to the render settings again. Check one more time.
Medium, high contrast. What about high contrast? I'm going to keep
it on high then. Noise I have the
default settings, just have the check in in
the render max samples. If your PC is strong, you can keep even on this value. But I'm going to
decrease because first of all I render it
once this work. Second one, it will
take a lot of time. I'm going to keep it on 400. Which, trust me,
just because it is lower doesn't mean that the
quality is going to be poor. The quality will be
more than enough. Very important moment.
Be sure that you didn't hide anything
in your work. Let me show you,
especially if you're a beginner, this
is very important. Let's say, don't repeat,
just take a look. I edit a cube. I can hide this cube where
this cube here is, but in the final render, this cube will appear. Why? Because we hide it
in the viewpot, but not in the render. Be sure that you don't have the eyes closed
and the camera on. Both of them have to be on or both of them have to be off. So I'm going to delete it. Let me check.
Everything is on point. Great. One more time. I like it now that all actually the toll
that I keep for my settings, nothing so special,
nothing so fancy. We go to the render
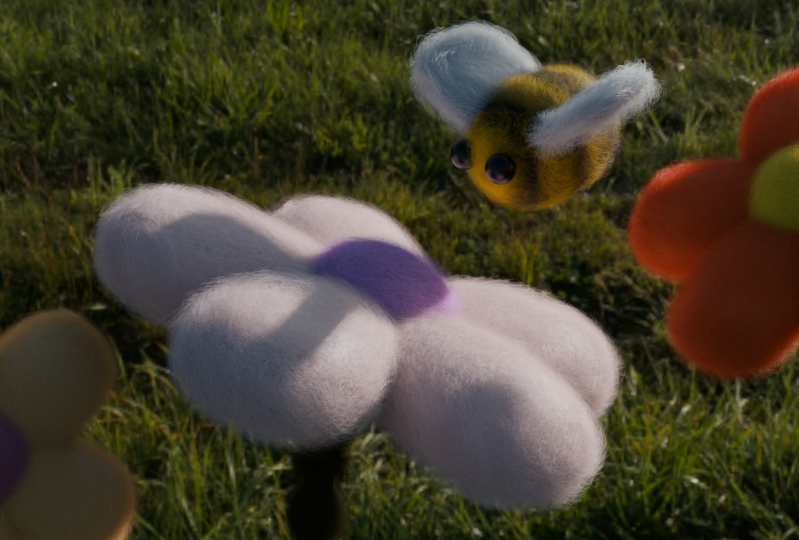
and render image, I will see you after This
is our final render. My last recommendation
is to bring this in case if we
didn't know how to save. Okay, let me show
you, go to the image, save, choose a folder,
give it a name. Then I go to the
Color depth and bring 16 and save as image
already saved. So I will not do
this 11 more time. My last recommendation, bring this one in Photoshop
or wherever any other photo editor bring some contrast
color correction. But that is, I hope you
enjoyed this course. I hope it was useful, especially if you're
a complete beginner. Leave me review with
a big pleasure. I'll hear your opinion and
if you have any questions, I also try to answer
all of them in rest. Thank you so much and
I wish you the best on that amazing path of
being three D artist.
8. Congratulation: Congratulations, you
did a great job. First of all, I hope this class is useful and
interesting for you. The golden ruling three
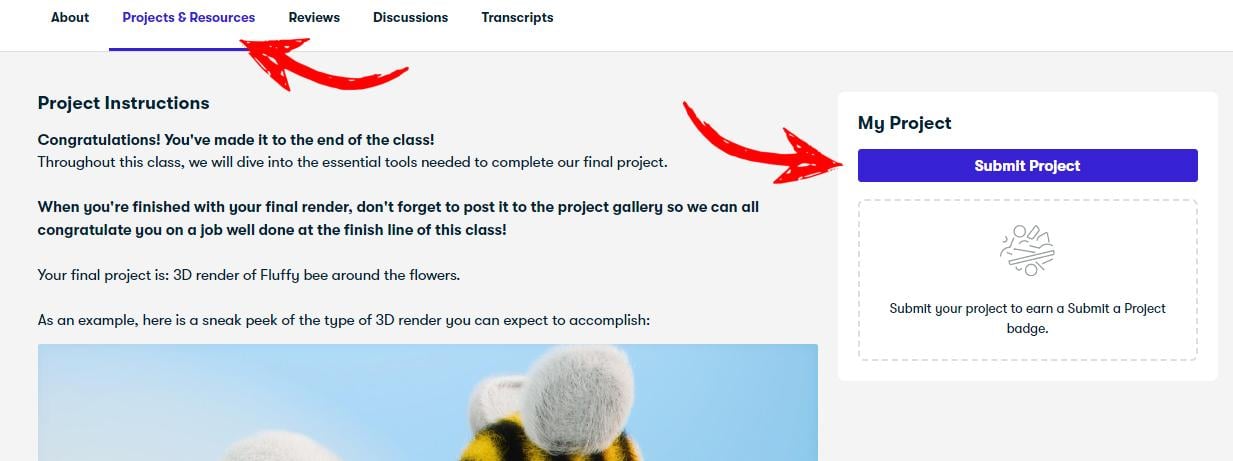
D is to always have fun. Now you can applaud your final
rendering project section, which will be very inspiring for other students to share
their own results. If you're looking
forward to dive into character design or
animation skills in Blender, there are other
useful classes on my Skillshare page that
you can try and rest. I want to wish you
the best because you are in the right
path. Keep going.
 Sasha Luvr, Work in third dimension