Transcripts
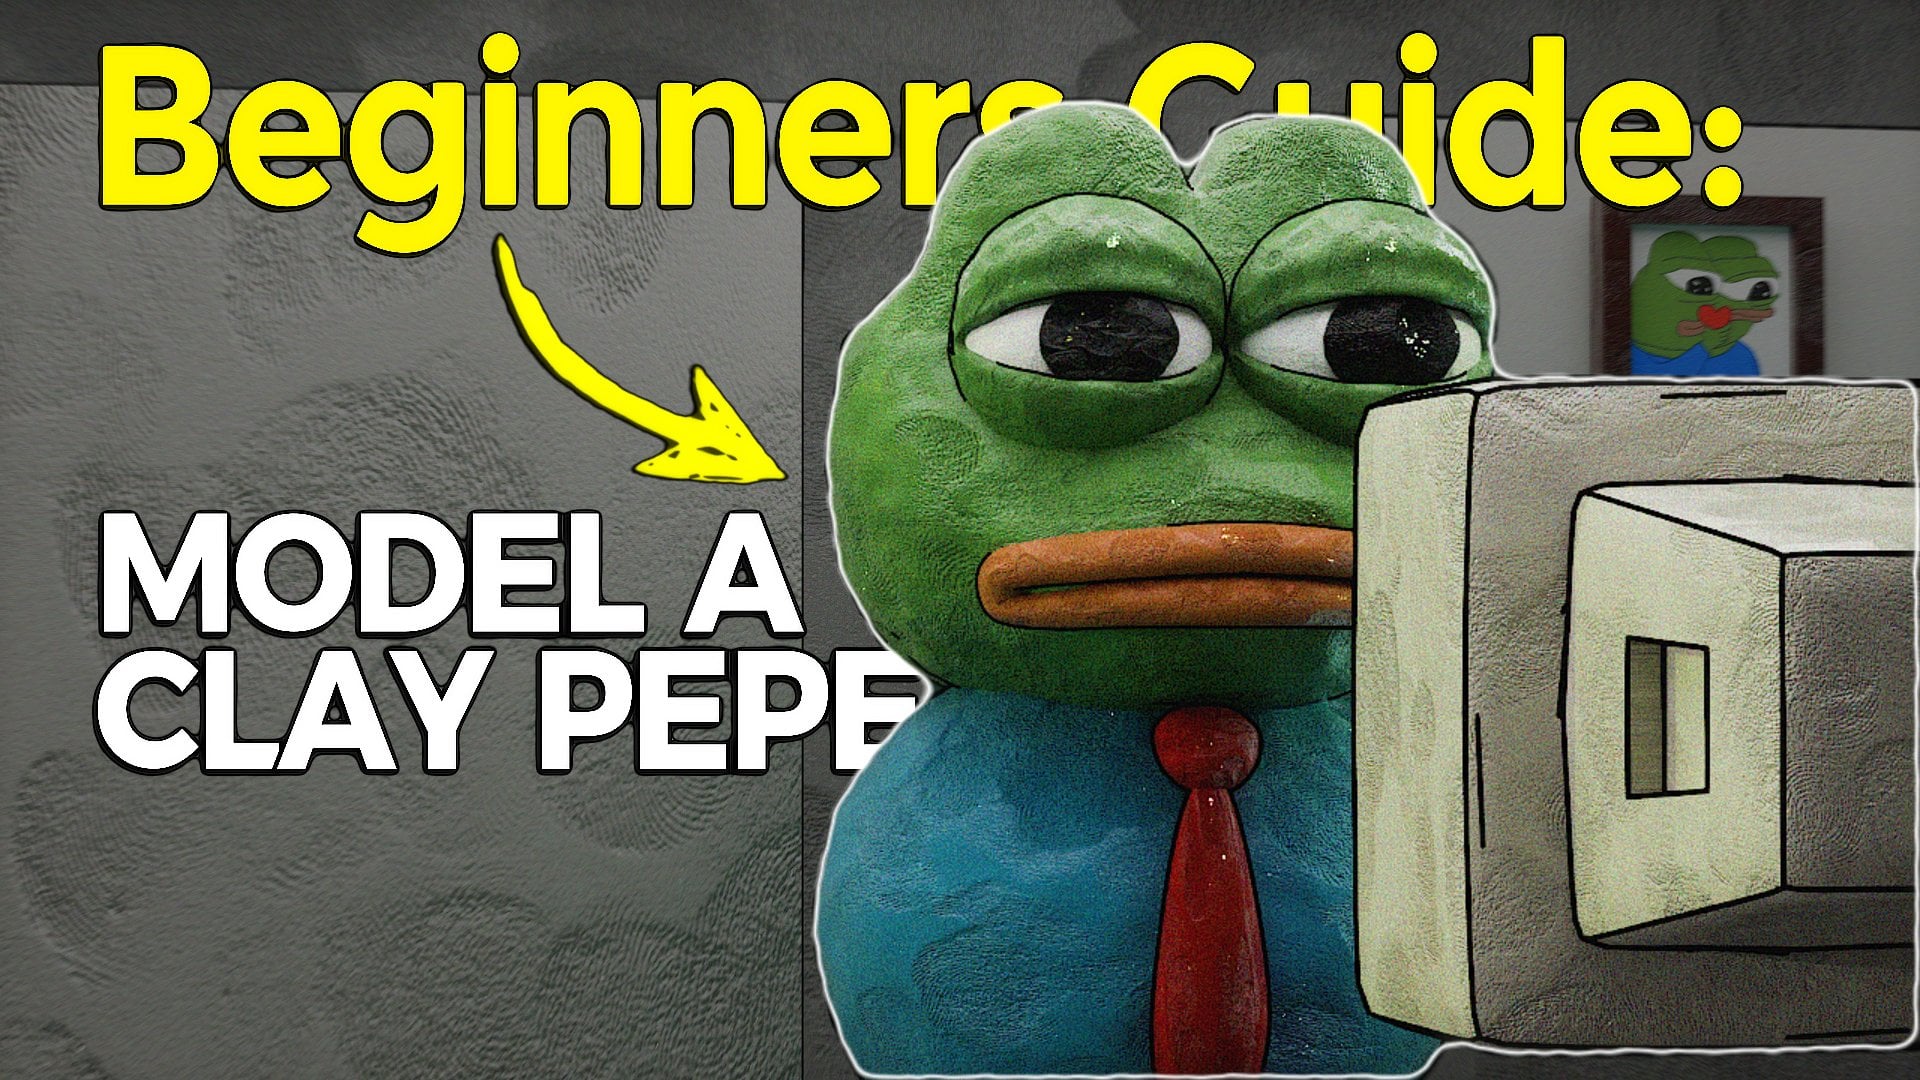
1. Class Introduction: If you're looking
forward to step in this exciting
world of three D, but don't know where to start. Welcome. That valuable class is structured into three
essential blocks. Modeling, particle system and texture painting
explanation. Now let me share wine. Wasting your time in this
class will worth it. First of all, we're
going to delve into the world of modeling with beginner friendly
techniques will transform blender default cube into an
adorable and amusing cat. In section number
two, we'll elevate our three model by
creating life like four. We'll dive into the
particle system and step by step cover our entire
cat with realistic fur, creating a completely
different effect for our work and making it
look more professional. And after section number three, you'll feel like you
reached a new level. Because here we'll delve
into the texture painting, if you never even
touch the section, hesitating all the while, not after this class
with simple examples, I'll explain the
process of creating our first texture painting, applying it to our model. Just 1 hour later, you'll notice a
significant boost in your three D skills and feel much more confident
in your abilities. But what if you have
zero experience? Don't worry if these classes beginner
friendly and suitable for anyone interested in the three imation,
illustration or design. No prior knowledge of blender or three D modeling is required. To get started, you'll need
a computer with Blender 4.0 that you can install
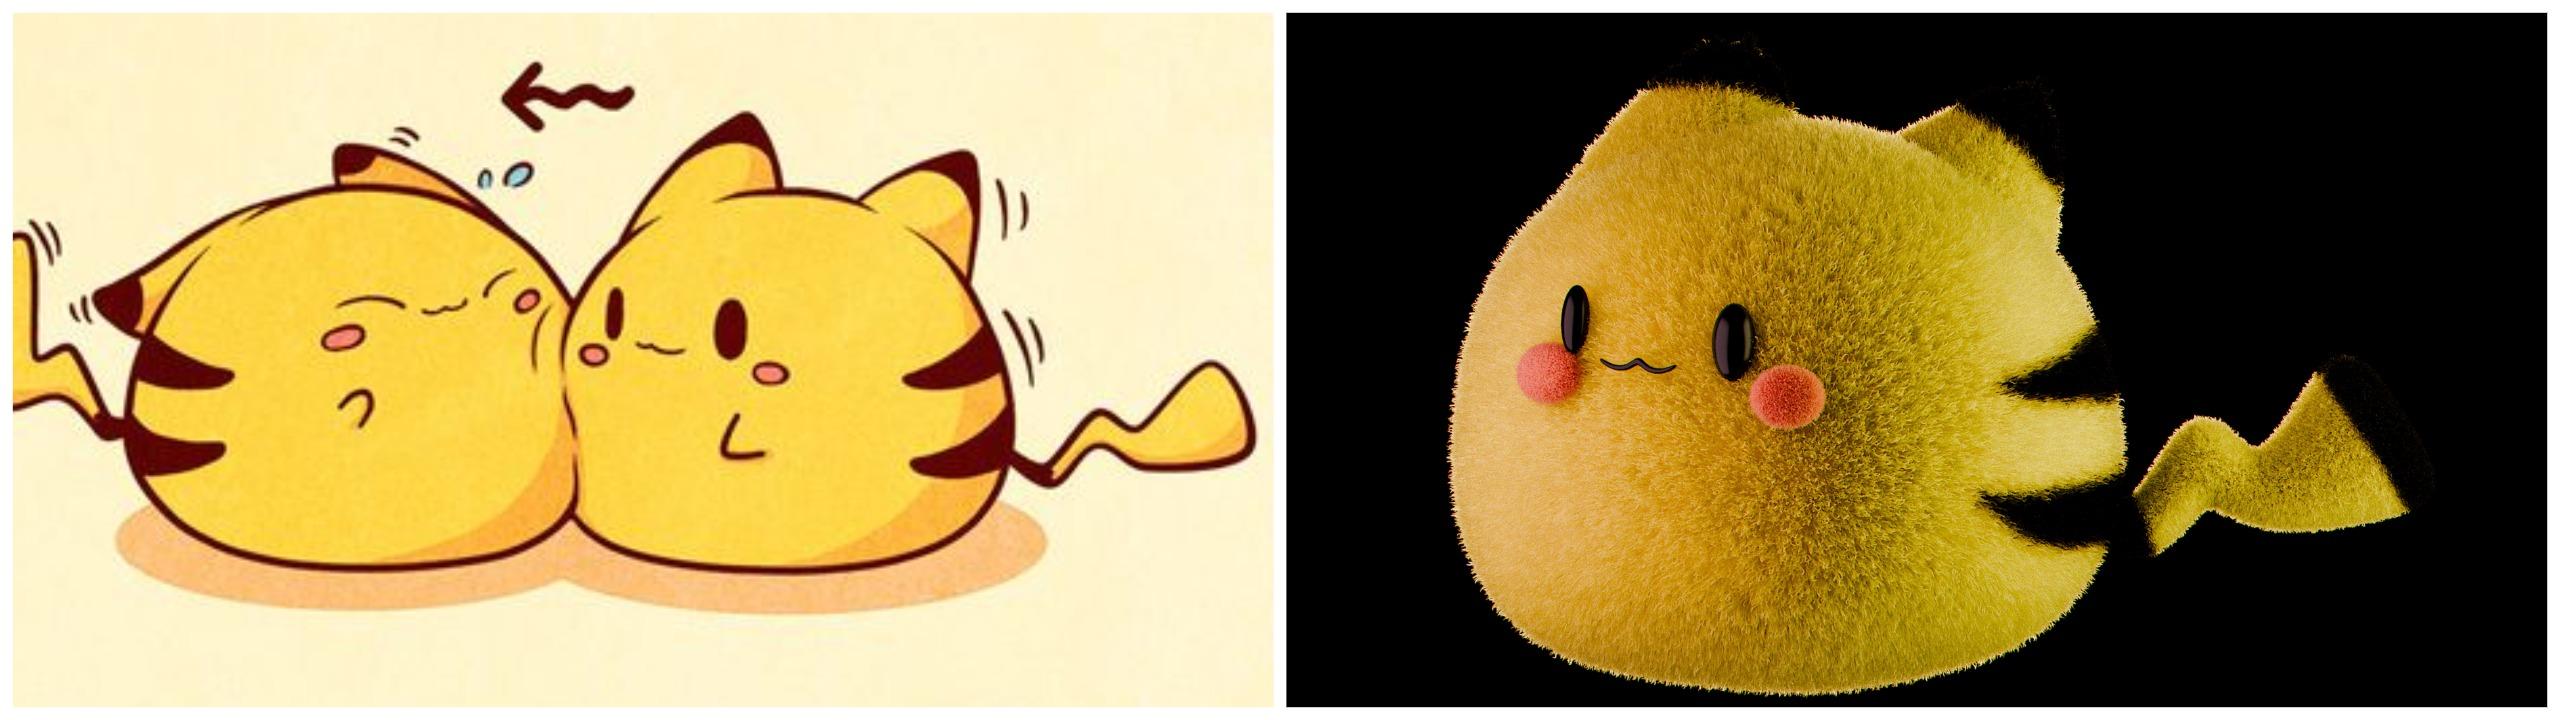
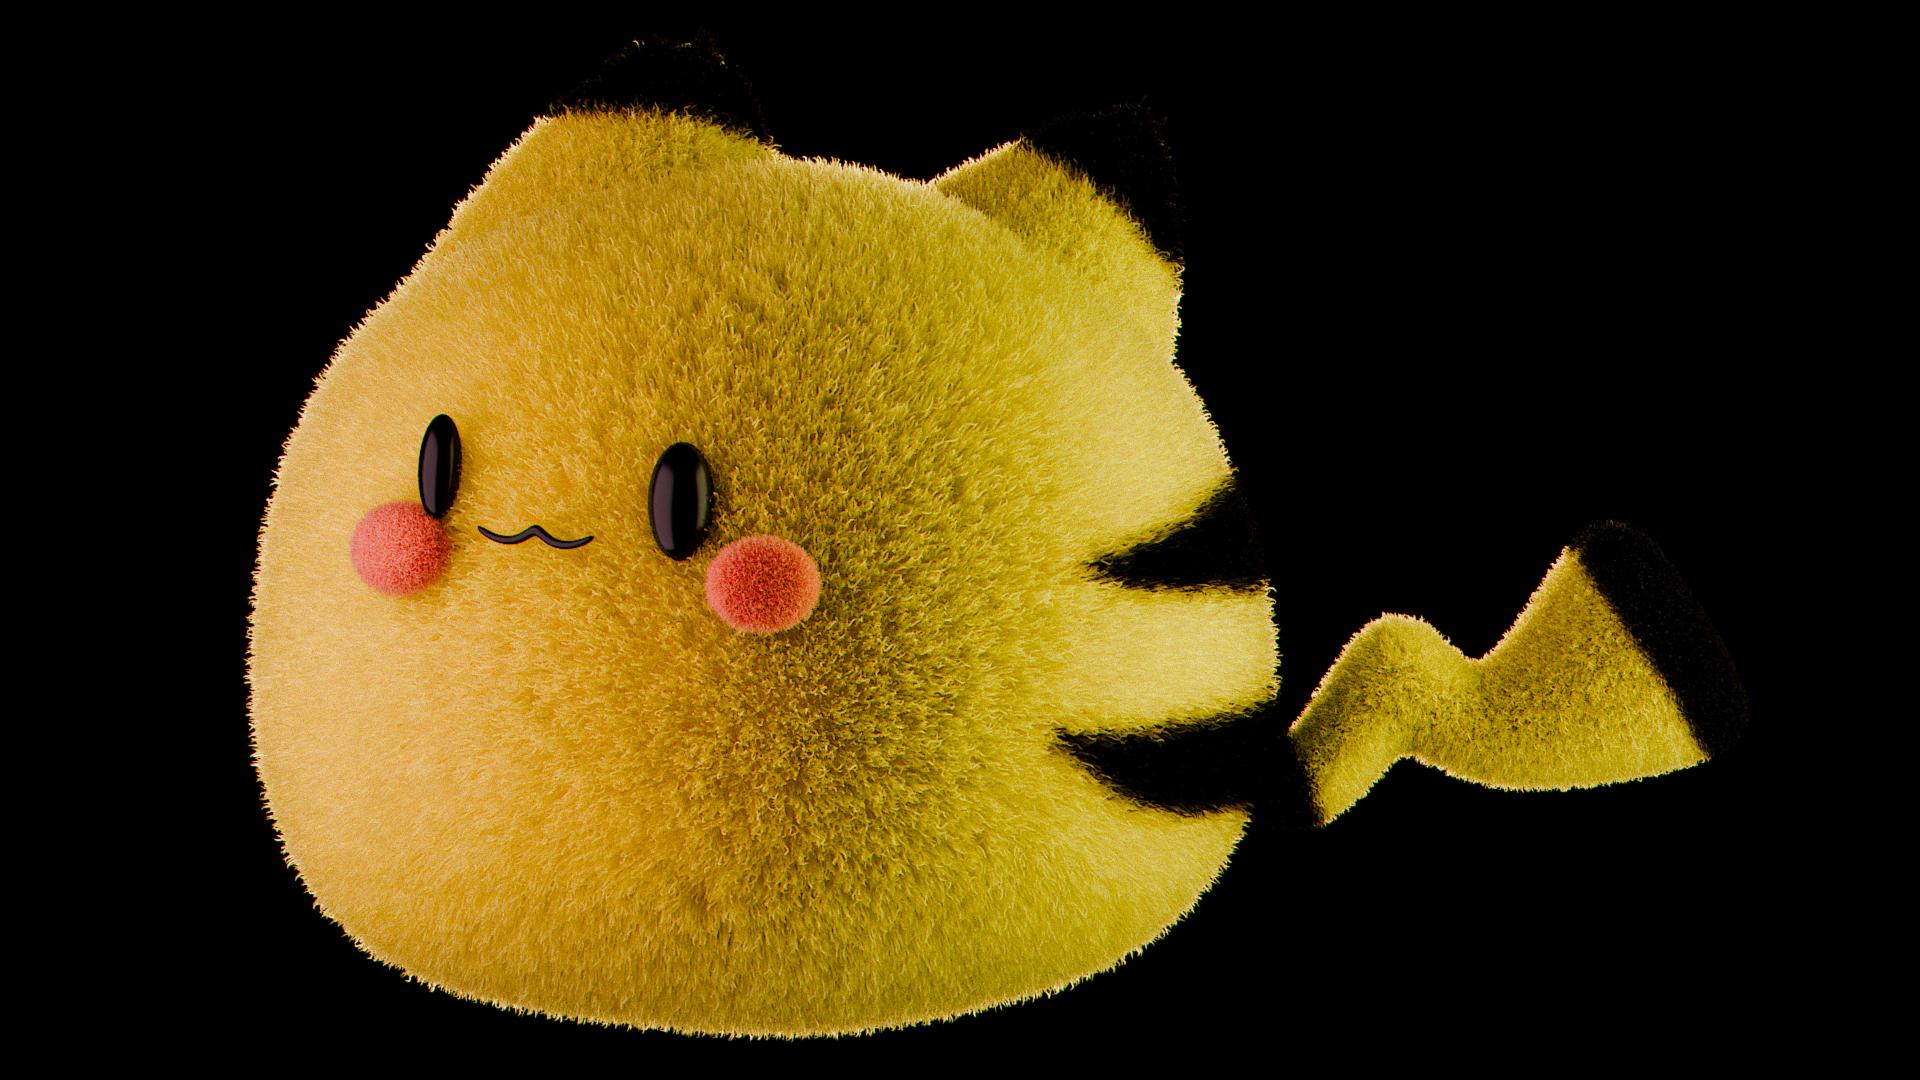
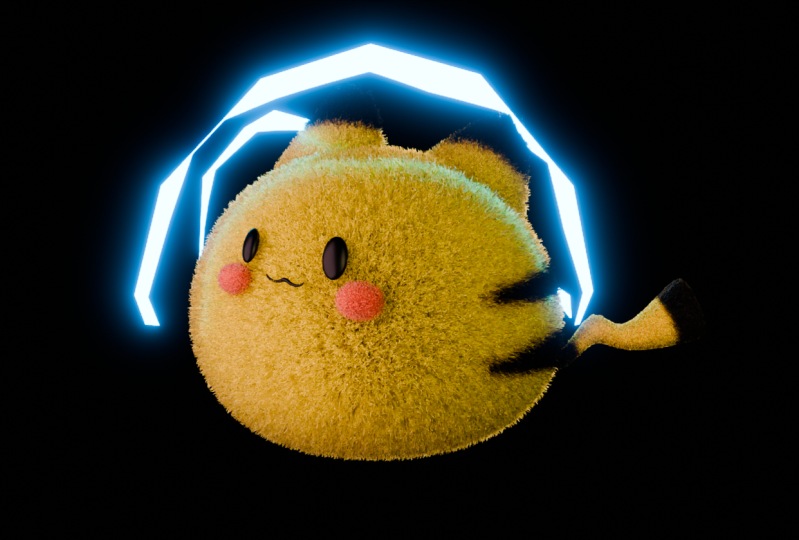
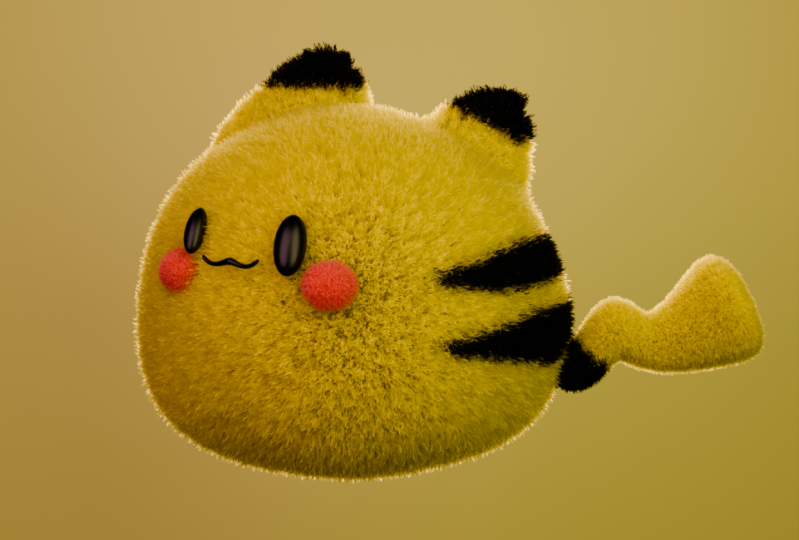
for free from blender, or that is the type of result that you can
expect to have at the end. In conclusion, let's have fun through learning and
improving our skill. Get your grade, mood, cofer, tea, and let's start.
2. 1.1 Model Body, Ears and Tail: Hello everyone and
welcome this class. First, stable, going to
be short but very useful. And second one, we'll
have fun like always. Under this lesson you can found a zip file with references.
Please download it. And then let's start A to
choose everything and deleted. Then we go one on Ped for
the front view, shift A, where is image reference, and search for the folder
where you download the Z file from here,
choose reference, Pokemon. Great. Let's scale with, then let's go to the
image properties here. I'm going to check
in on the opacity. I'm going to bring this one on 0.3 then I'm going to
bring the only xs. What does it mean if I'm
going to have a check off? When I move, I see my image. If I'm going to have only Xs, I will see only when
I'm in the front view. And then bring this one to
the front and front, great. Then let's save our file
from the start Control. Choose a folder, paint, Pokemon Safe Blender file. Great. We'll do this one from the right. Let's
start with him. In that first lesson, we're
going to create body, ears and tail somewhere here. Move it a little bit
above worry this chick. Great. Then we go
with the shift, a mesh and round cube. You'll do the same
and you'll find that you don't have the round
cube. Don't worry. Go to the edit preferences
here for extra, extra objects, bring the check in and you'll have
the same thing. Now let's go again, shift
a mesh worry round cube. Go to the properties and
bring this one toward one. Then let's make it a
little bit more smaller. Let's go to the edit mode. Choose everything
with a right here. Back to the object mode control
to for the subdivision. Then back to the edit mode. Turn on the
proportional editing. Let's go one for the vertices and we'll fit him
under this border. This is some, let's call this one Astdious work where you don't need
to repeat everything, just move them like that. If you see right now
all these edges, all of these corners are sharp. But when I'm back to the object mode, everything is around. In order to see how the subdivision
surface modifier work in the edit mode also, bring here and turn
on this function. Come back and now you can
see he save the same shape, it will be more easier for us to get to save
a little bit of time. Let's go again, bring
them here, here. Make it bigger like that. Smaller like that here. We can see that. Just move this one a
little bit on the left. This one above, this
one right here. A little bit more. Okay,
three for the side view. I like this one. Let's turn the, this one. Let's bring it a little bit
more in front that then. This one A little bit. This one a little bit. This one. This 11, come back control. I don't like that part.
At least I don't like. Probably get it better now. I'm good out, let me hide. Okay, I would like to make this one a little
bit more lower. I'm going to come back and I'm going to bring
it like this one. I'm going to move
above, this one above. Now, I think it's better, right? Quick shade, smooth. Come back. Let's call this one. You can rename something via double click or
you can press two. Let's call this one point body. Good. Let's go forward
toward our ears. Shift a mesh cube, go to the solar mode
and then three of the side view make it
thinner like that. One, control two for
the subdivision, surface modifier and bring this one right here, Edit mode. And then we go control to a cut, left click and left click then without
choosing everything else. Bring off proportional editing. Ge go behind that
one transparent mood which means this one
have to be blue. Choose the vertices above and
make them thin like that. Come back from the solo
mode via slash and empt make this one smaller. Now let's try to fit it
under the reference. Let's go in the added mode. Choose the, choose
the vertices below. Be sure that you're in a
transparent mode as good. Choose only this one. Move them on the side. This one a little
bit on the right. This one like that, all
of them as thinner. This one here, three
Mpat grade, GE. Move this one here, right click, Set origin, origin to geometry. And be sure that here you have individual origins like that, out of the transparent mood. Right click, shade
smooth, then come back. Good, and a little bit wider. Now, hide the reference. No worry. Right now
it is very sharp. But a little bit later we're
going to make it sharp. What's going on right here? How we can see at the moment. Right now we have
here some artifact. We have two options. We can apply subdivision
surface modifier, but I don't want it, at least
I don't want it right now. Go to the edit mode control and bring the loop
here on that line. Choose, click, come back and
then turn the reference on. Let's make it a little bit
that hid, let's recall this. 12.2 under line, right grade
shave D x to right here. Let's play right now,
transparent mood. Choose this one,
bring them here. This one move a little
bit more lower. This one a little bit
more in the center, right there, right here. All of them. I'm going
to move a little bit for the scale above, like that out. This part, I don't like
it have to be low, it'd have to be lower. As for scale, this
one, this one, great. Out, check a good. Let's recall this one ear left. What I'd like to do
right now because I don't like that shape. Just choose your ears. Three GE and move them
behind like that. Now we can see the
shape of our body. Then let's go with our tail. Let's bring them three for
the side view right here. Okay, we have to move this one
a little bit higher there. Mesh and cube control to make it smaller like that, Create. Then we go to the edit mode. Choose this face extrude, move it down. Rotate
a little bit. Move it up, extrude right here. Rotate extrude, Create. As for scale one here we have
to play around vertices, transparent mood
and choose right, like that, x zero to make
it straight for a scale. The same thing right here, x zero or yes. Make it lower. Good, right there. Rotated a little bit. Great. The same thing here. Make it smaller, higher. Let's go with this one. As for scale. As for scale, this rotate again. Come back, right click. She smooth control. We'll have the control. We have to make this
one a little bit big. We have, we can increase the level of the
viewpoard toward the three. Now let's hide the reference. Okay, but I would like
to choose this face extrude once and move this
one a little bit like that. As for a scale, Choose the loop via
holding out left click. Make it smaller like that. Let's move forward
or it is too big. Choose all of these vertices
and make them smaller. Let's fit it under
our reference. Create, even if it's not
perfect like in the reference. Don't worry, we don't have to
bother ourselves with that. I'd like to make this one
a little bit more thinner. This one a little
bit more thicker. This one a little
bit more thinner. This one thinner two
and move it inside. Great two. Call this 13 tail. That what we have at
the moment right now. Like always, it looks very simple at the start,
but don't worry. So we'll get a
great final result. Thank you so much. I'm going to see you in our next lesson.
3. 1.2 Mounth, Eyes and Cheeks: Lesson number to. We're going to create the ice mouth and cheeks. Let's start with his ice shift. Right click and shift a
mesh and heave sphere. Then we go first scale. Let's go like that. X
a little bit bigger, right click, shade, smooth
seven to take a look above. Bring this one a little bit
more in front because don't forget our cat or wherever
it is going to have fur. That's why move
them a little bit more forward then you like. So three for the
rotation like that. Let's call this one then four. I underline, right? Great. Guess what ship
And bring this one here. Make it smaller, make it higher. X7p, GE. Move this one not completely inside but
keep it close control. Three for the second side
of you from the left. One X or probably, You know what, I
don't want to keep it straight as in the reference. I'm going to keep
this one like that and double click, left height. Okay. Then control three. I'll move this one
like this one, pat. Great. Let's go with our chicks. Shift right click, shift a
mesh and this time round cube. Keep this one on one. Good. Let's go in the solo mode. Shade smooth control two, go to the edit mode, three for the side
view transparent mode, and choose these
vertices X deleted. Then we go out of the
transparent mode, choose the edges, this H loop
via holding out left click. Then we go zero, now it's flat, then we go with the
S S at the center. Now we have clean and
grade topology three, crate of the edit mode out of the solo mode, make it smaller. G grade three for the
side view rotation. Move this one a
little bit more in front even if there
is a small space. Again our going to have fewer. Then let's call this 15 chick, right Then copy X. Move this one higher. Move this one here. Control three, actually seven. Move this one in front rotated. Let's check X X. Bring it right here as it have
a bit here. Control three. Move this one in, Create. Let's recall this chick left. The last one is our mouth. There are different
options of how we can do this one in the same way, how we're going to create
how we created the tail. We're going to create the
mouth shift a mesh cube. As for a scale control
two as for a scale, then GE move this one in front. Three added mode three,
choose this phase. Extrude one here, one here at an additional
loop right here. And move this one more close to the end, transparent
moot vertices. And make this one smaller. Move this one higher, choose this one, move them
lower, this one rotate. What we're going to do is control air at a cut right here, click left click,
transparent moot. Choose these vertices X, delete them out of
the transparent moot. Let's go to the Solomode,
make it more clear. Then we go to the
Ed Modifier search for a mirror. And
that's what we have. Bring the clipping
on and move it above of our subdivision.
Let's go right here. We don't need the reference. Bring the transparent mode, this one make a
little bit smaller, this one a little bit smaller. This one probably a
little bit more wider. And bring it like
that right here. What if I'm going to rotate it and more toward
the center like that? A little bit lower.
Good out, right click. Shade smooth out
of the solar mode. Okay. Now seven, pet Erik, Erik. Move this one close to our body. Then rotated right there. Again, it's not perfectly as
in the reference, I mean, the positioning but
what should we have? It's look good out. Problem. I'm going to rotate
a little bit more like that. I'm going to choose this fo
and a little bit smaller, this one without
a little bit like that that I like
that what we have. But probably, I'll move
this one a little bit here. Let me check. Let me check. It's all good, except
this thing is too wide. It's not too wide. Okay.
But let's make this one E. Now they look great. Let's recall this one to six
point month at the moment. Right now, probably a little bit weird when I did
for the first time. I didn't keep the same size. I mean, I make them a
little bit more in my own, but it still look nice probably. I'd like to keep this one
a little bit more higher. I do this one just
for myself. Okay. Okay, good. Now I like it. Great. My friends we're doing with the modeling. In the next part, we're going
to establish the lighting which will elevate the
quality of our work. See you in our next lesson.
4. 1.3 Establish the lightning: Welcome back my friends
Where we're going to create in that
lesson, the lighting. First of all, let's
recall this collection. Double click, one right
click, New Collection. Let's call this 12 Studio. Great shift, cursor
to World Origin. Let's start with first
lighting shift A. Go toward the light
and choose area. Now we have to see
what we've done. Let's go in the render mood. From here, go to that icon, which means the world righting, decrease this one toward 01. The color here, a
little bit more darker. Then let's open the
second window here. Turn off the overlay part. Let's go to the lighting. Move this one behind
is that area? Yes, move this one
toward our cat, but on the small diagonal one
a little bit higher here. Let's go toward our settings. First of all, let's change the shape
toward the rectangle. Then we go toward the
color here in the hex. Bring 980 grade, then the
power going to be 290. Now we can see something. Then we go to the size X. It's going to be 4.8
size, 5.5 grade. Then let's go toward the render
engine and choose cycles. Now the quality is better, but it's too close. Move this one a little
bit behind, like that. Move toward the trade. The purpose of the light
behind is just to emphasize, to create the outline
of the lighting. Which means when you're
going to create the four, it's going to look very cool. That's why we have. Then probably I'm going to move this one a
little bit more higher. I want the light also here. No, no, no, no, no. Let me check one. Let me move this one a little
bit on the right, great. Now I like everything. Then we go seven
pt to look above. Then here the pivot point, we're going to bring
the three Dcursor. Choose our light shift D, air set, and move this one
on the right, like that. Great. Let's go to the
properties here in the color. We're going to choose 51. Good. The power going to be 350. Then toward the size x, we're going to have five size, we're going to have seven. What if I'm going to
move this time x x n? Yes, a little bit more far
from our t. Then shift. Move this one on the
right like that. Let's go toward the
properties here. Bring the good, the power
decrease toward 300 and then size x 3.67 Then move this one is
a little bit more probably, I'm sorry, but let's move this
one closer also like that. That's what we have at
the moment right now. Was it hard? No. Is it easy? Yes. Then we go here, bring ourselves down toward
the color management here. Let's go toward
the high contrast. What about very high? High contrast is enough. Let's call this one area
behind this one, left. This one right? Control. Save my friends. We've done with a lesson number three. That's what we have. Cool, I'm going to see
you in the next one. I'm going to think, or we're
going to create the first, or probably we're going to create the first. See you there.
5. 2.1 Create Fur for body - particle system: Hello my friends.
Lesson number four. I hope everything is moving well and we're going to create
the four for our cat. Small thing to say that I
have a class apart where in details I explain the
particle system for beginners. That's why I don't
want to stop on all of the settings that we're
going to apply today. If you want to level up
for real your knowledge, you can check that class. But right here
we're just going to fulfill the settings
with some numbers, with some value that I
prepared from the start. Let's go like that. Let's go to the solid mode, bring the overlay on, Let's go on our cat
body and let's start. The first thing that we have to do is to create the
particle system. This is not like, okay, it's not a mistake,
but the golden rule, and you can found in that class about the particle system, we have to bring
the material on. First of all, we're
going to create the material for our cat. Let's call this 11 body. Okay, then we have to add the second one plus two
body under line four. Here we have to change the
surface principle, DF. One principle hair DF. It was creating
for some purpose. That purpose is the
hair particle system. Great, let's hide this
window like that. Bring plus let's call this 11 body underline
for rock, this one above. Let's start number going
to be 5,000 hair length going to be 0.17 Let's go
lower toward the render. And here material
choose body F. Then we go to the spline and
check in View point display. Let's increase the
steps toward children. We're going to choose
interpolated and we're going to bring pot. There is important thing to say, of course our results may be
different because we scale, we rotate, and all
of that stuff. Let's go to, you can see
right now if you're going to bring the ph side menu item. We didn't play
with the rotation, but we play with the
location and scale. Let's go with the control scale. Let's go with the control. A location, how you can see
our eyes, We can see them. Let's go toward the hair length. Let's decrease toward 12. Great. Don't worry about
this one right now. Let's go forward
with our settings. So we're going to bring
ourselves toward the clumping. Let's move more closer to see how our result
is going to be changed. Clumping going to
increase toward point. Then we go toward the
roughness where the main major going to be uniform,
going to be 02. Let me long story short, in case if again you didn't
check the previous class, the uniform answer for the overall distortion
of our hair. Then we go to the end point, which show the direction
of the end of each hair. In particular, it's
going to be 02. Then we go toward the
random 0.07 Let's go, I hate this word for
my pronunciation. Three salt, I don't
know that part. We go to the point to
create control to save. There is one important thing
that we have to change. We will not see in the solid mode because the
settings of the hair shape, we can see only in
the render mode. But however, let's bring
them long story short. Again, for beginners
diameter root, show the thickness
of the root of each hair in the particular tip. Answer for how thick is
the end of each hair? We're going to keep the
diameter root on 0.8, tip on 0.3 Now let's go toward our render
to see what we have. Close the overall, the
color is the default color. Don't worry about
this one right now. How we can see even the
settings here are much more than if we have the
classic one principle, SDF. Let me show you, Don't
copy, just take a look. Let's go, for example,
color toward some red copy. Let's go to the simple
material and bring it here. Now let's go to the Body
F. Let's change from the principle Hair BSDF
toward Simple Principle SDF. I hope you see the difference. The color don't reflect. When we have Principle he BDF, the material is interact more
deeper with the lighting. It reflects the lighting. You have way more options. Meanwhile, when we have the
classic principle BSDF, the color is flat. Yes, the result can be decent, but we are looking forward
for just decent results. We are looking forward
for the best result. Now take a look, if I'm
going to switch back to the principal heirsDF
bring the color. You can see the
outline right here. The outline right here. The color depth is a little
bit better than then it was. I hope that moment was clear. Let's bring the
roughness toward four, going to be 012. Then we go to the random
roughness and I'm going to bring this one toward 0.7 IO, we're going to decrease
toward 1.3 Good. I think even right now you can see clearly the difference
in between of that. Let's establish the right
color from the start. Bring yourself in the Google
or wherever you want. Bring the online color
picker right here. Then we use your image
browser drop image search for our reference
with our Pokemon Go. Then bring yourself here
and copy that hex color. Come back to the blender. Let's go toward the color
control right here. Let's go control right here. That what we have at
the moment right now. What if I'm going to
decrease the OR toward, again, to make you believe that I know what to talk about. Let me again show
you the difference. If I'm going to turn back
to the principal SDF, let me bring the color boring, flat and boring, come
back different vibe then. What if I'm going to
increase this one to 08? In that case, the hair going
to be less reflective, but I'm not sure if I'm really looking
forward for that now. You know what? I'm going to keep this one on Golden middle. I'm going to keep this one on 0.60 51.65 I'm going to decrease this one toward 0.08 550. Great. I hope you'll already found something
new for yourself. Let's go toward the solid mode. Let's bring the overlay on. Let's go toward our T. I don't know why
is everything opened. Wait, give me a second. Second. Okay, then we
go to Choose Shift, left click, left
click, left click. Let's go seven Pt. And bring G. No, just bring G, E and
move them in front. Let me check. Great
control, save. Let's go from the
start. Let's bring the color for our ice, and we'll finish on
that, our lesson. Come back yourself here. Okay, go to the
materials, bring new, let's call this one point month. Let's choose the
base color, black. Let's go to the roughness 0.33 Then choose this shift
left click, shift left click. This one have to have
a golden border. This one more orange one. And you press control
L, link materials. Come back and enjoy your result. Now we start to have something
different from what we got from the lesson number
one and only lessons. In order to make it easier, we're going to create
the four of ears, tail and cheeks in
our next lesson. But for now, thank you so
much for your attention. And no, let's go toward 25. Good. I would like to
bring them a little bit, the ice inside like
that more. This one. Let me check. Even if they delve a little
bit in the hair, I don't see this
one as a problem. Great, thank you so
much, my friends, and I'm going to see
you in our next lesson.
6. 2.2 Fur for Ears and Tail: Welcome back my friends lesson, I suppose number five, our guy is looking cool. I promise you, just in a
few lessons we're going to make some drastical
changes in that one, we're going to create the
four for our tail and ears, and then we're going to create
the four for our cheeks. In the next one we're
going to keep it short. And we're going to keep it simple and we're
going to have fun. Let's start with our
tail. Open aside. Menu chose how we can see. We have to apply
scale and locations. We go with the control, a
location control, a scale. Now the value is great in case if you ask why
you have to do this one. Well, let me show you. Don't
repeat, you apply the scale, tation grade control Z. I'm going to keep on the
standard settings and you're going to
see what I mean. Let's go to, we have
to create materials, but let me quickly show you. Let's go toward the
particle system plus and choose body four. Let me show you Control a
location, control a scale. Now should say something, Should I comment something? The quality you can clearly
see that is different. We have some artifacts, but when apply the scale, now everything is on point. Let's duplicate our body four. Let's recall this 12 pale
underline four, create. Then let's go toward
the materials and choose body duplicate. Let's call this 12.4
then we go toward plus choose body four duplicate. Let's call this 12.24 Tail. Let's go toward
our settings here. First of all, we're going
to decrease toward 06. Then we go to the random, I'll actually decrease
toward five uniform. We're going to keep it
on 12 instead of two. Then we go toward the end, 0.15 instead of two. Then we go toward the clump and we're going to keep it on 12. What if not, what if, But let's go to the diameter
root and let's keep this 15 deep on. We don't see any change because the changes of the hair shape. Remember I told you we can
see only in the render moot. Then we go toward what
I think the length, I'll like to decrease toward 5.2 number I'm going to
decrease toward 3,000 Great. Let's go toward our ears here. You'll see the same thing. Let me show you plus
particle system. Let's go, for example,
with tail fur messy. But let's go with
the control scale. It's better location. No, it's not. We have
some artifacts here. I think we have to apply. Let me hide. Let's
go right here. Let's apply our subdivision. This is our topology right now, let's open the particle system. Now, everything is good. Now, everything is good. Let's check the item. The scale is on point, but we have to
bring the rotation. Also control a rotation.
What about the length? The length is okay. Actually, everything
is completely okay. One thing, let's go
toward our tail. Be sure that material
is for tail. Then back to the ears. Let's go to the materials. Bring new, actually not new, but let's go toward
the Duplicate. Let's call this 13 points. Then one more, choose the body for,
for example, duplicate. Let's call this 13.1
ears under line, then we go right here. That ear, same thing. Apply the subdivision
surface modifier, shift left, click on that one. Control L link materials and
then control copy modifiers. Also apply the scale. Apply the rotation. Great, let's check.
What is this? Explain please. What is this? Let's go toward the
particle system. We'll like to
duplicate three point, Let's increase this one toward 3,500 and the length
toward seven. Just a little bit, the same thing right here.
Choose the ears. Great shop, then come back. Let's see what we have
at the moment right now. Okay, he's very nice. He's already nice and he is
already great for the render. But we will make it
even more better. Come back, Let's check. I like honestly, for our ears particle
system to change here, two small things for example
here instead of two, we're going to keep it on five. Then the uniform, we're going
to keep this one on two, come back the random toward
the eight, not really. Toward 65, good diameter route. Let's go toward six, tip to five, right here core. That is my friends
for another lesson we created for everything control
save, don't forget always. I'm going to see you
in the next lesson where we're going to finish the F block with our
chicks. See you there.
7. 2.3 Fur for Cheeks: Hello my friends and welcome. In the short lesson,
we're going to create the F for our chicks. Let's go to the solid mode, turn the overlay,
let's emphasize it, let's go toward
the material tap. But before we have
to choose our color, so let's go toward
the color picker, choose the chicks, copy
back to the blanter, create new, let's call
this 14 point chicks, then base color control, create the second one. Choose for example,
by fur duplicate, let's call this 14 point. Chicks underline fur color control V. Let's go toward
the particle system. Let's create the new one. Let's call this 14 point chicks
instead of emeor choose, let's start number going
to be 2000 hair length, going to be 0.06 gate. Then don't forget
to apply a scale. In our case I have to
say something honestly. I already applied on this one. But if you're going
to check on that one N you can see we have
different location, we have different rotation
and different scale. Right here, control A Al
transforms right here. Also control A Al transforms back to our settings in
the render tap material. Choose chicks, f, is it
chicks for number one. Okay, Then we go to
the spline Check in Viewport steps four and
choose interpolated here. We're going to have 30.30
Good. Let's go forward. We're going to add
this one at the end, the uniform going to be 0.01 Then end point going to
be 0.007 and the random going to be 0.04
Then we go toward the clump 0.1 control to save diameter root going to be 0.3 diameter tip going
to be 0.1 grade. Then we go toward that chick
shift left click control, L link materials control,
copy modifiers grad. This is what we
have at the moment. Right now, I'm not sure if I'm
satisfied with the length. Let me decrease toward four. Okay. Now let's check. Okay, look pretty nice, but what I would like
to do is to increase the roughness toward 75, 75 here, a decrease towards 00. I'm going to keep the same. And the random roughness, I'm going to keep on 0.75 Good. Also I want to bring
that color a little bit lower even if this isn't straight as in the
reference I want it. Then let's check looking nice. But I personally would like
to make it a little bit more randomized back
to the solid mode. You can see the difference
in between here and here. Let's go toward the
properties quick. Quick. We're going to increase
the random toward 65, we're going to decrease
the number toward 17,000 We increase the uniform toward
12 and the clump to 13. Good random, 55 point word for up back that what we have. I'm not sure. I'll move this one a little bit more forward in the
month. A little bit. Oops. Why moving back here? Individual regions then K, move this one a little bit
inside, like this back. Let's see what we have. Our body is already very nice. Our body is already very cute. In the next lesson,
lesson, in the next, the third block I'm
going to show you, I'm going to explain you the
texture painting which is, trust me, very easy. And I'm going to show
you how we can turn this one into a lot
of cats like that. It's a process where you're
going to have fun and it's a very useful
process because it's going to level up
your knowledge. But at the moment right
now, thank you so much, and I'm going to see you in our third block
and the final one.
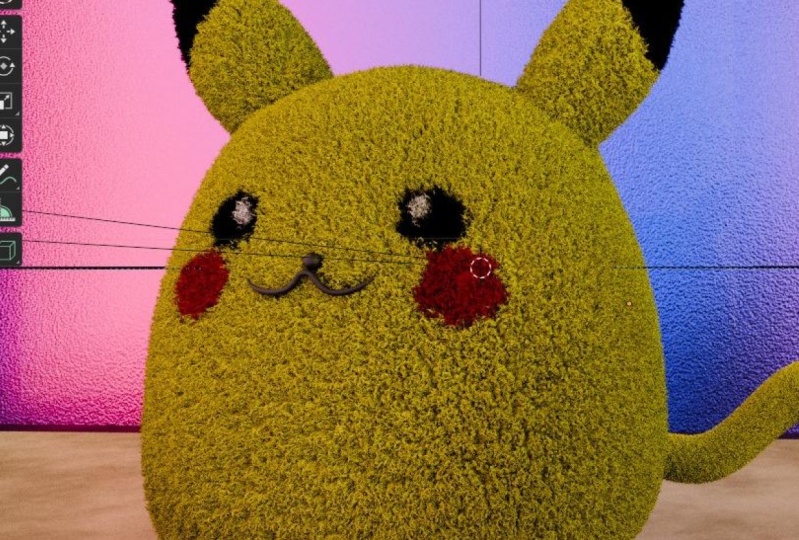
8. 3.1 Texture Painting introduction: Listen number one from the block number three where I'm going to explain
the way painting. Let's go to the solid mode. Let's go here, and let's hide our particle system right here,
everywhere, actually. Okay. Okay. Okay, good. Stop. Come back. They're far, but
it is what it is. Okay, Open the second
window, go right here. Then we go toward
the shader editor. And here, switch
toward the third tab. Where is the material
preview? Let's go right here. Let's choose the body
of our cat before copy that color and shift a image
texture, go right here. Then we go with, let's call this one point body
underline paint. Bring yourself here. And just click and drag the left button from the mouse
to emphasize both of them. Multiply on fo in the color control V
for our yellow color. Then connect color
toward the color. Great control S to save. Next point we have to go to the texture paint
one in an M path. Let's hide the collection of our studio because we
don't need them right now. Let's go in the
material preview. In order to paint, we have to make UV unwrapping. I did this one for the purpose, We have to see that
apology right here, but we don't see why
because we didn't make the UV wrapping
back to the layout, go toward the edit mode three, let's go to the solo
mode and choose the loop in the middle
with out left click. Choose the entire loop, right click mark, now it's red. Now choose everything you up. Back to the texture paint, now we can see clearly
our topology. Great. The next thing which
is very important, we have to save our texture. We go toward the image saves. You can create a folder. Let's call this one text
text for just save image. Great. Now we can
draw, go lower. And here in the first one
we're going to change them. Where is white? We're going to bring
our yellow color. What we have to do next, where our reference, what we
have to do next is to color. If you want to make
brush bigger or smaller press and just drag the males on the
right or on the left. You want to make the
color more emphasized, which is the strength
of the color. You can drag here or
you can press shift. That's how you can make
it lower or stronger. I'm going to keep
this one on one, then bring the empty, or in other words,
our reference. Let's start to draw
over our Pokemon. Now, when we try to draw, for some reasons, in my case, probably you don't
have the same thing. I can say nothing. Why?
Because I commit a mistake. I want to be sincere about that, and I want to show you how we can solve it. What
is the mistake? The mistake that we
are in the body Th, which is connected
to our four where, meanwhile we have to bring the
image texture to our body. Come back to the layout, now come back to
the materials and choose the image control C.
Go toward the body control V, connect toward the color. Now come back to
the texture paint. Now that is, sometimes we
commit things like that. But 1 minute and the
problem is solved. Then you can come here and let's start to draw the Pokemon part. The one more thing that
we can do is to connect. Not like to connect,
but to bring the symmetry on the
one we'll have here. Also, then reference. Let's start finally,
bring it like that. Good, bring it like
that. Hide it. Now, if you're going
to hold the control, you can bring the
opposite color. The shape is ugly. Yes, yes, especially right here. What we have to do is just with some flesh movements and holding control, just
bring it like that. This is some sort of personal work where you
don't need to copy me, you just need to do
on your own taste. Then let's go toward
the solo mode and let's connect this here. Control here. Also come back out
of the solo mode. One, I personally don't like it, I want to make it
thicker right there. Control like that. And
control like that. Okay, I've done on my side. Well, it took some time even if this look as some simple shapes. Now one important
thing that we have to make is of course to
save our updated texture so you can see even the star
appear right there were a. Then come back to
where the layout. Let's go toward the render. Bring the studio on, This is thing number one, then let's bring our
particle system. This is the thing number two. In case if you don't
have the same, just go and copy. And bring in the body, connect color with the color. That is our result. My friends, this
simple, simple things. I hope you get it clear. What is texture paint? You make our first steps via
creating this black lines. We'll finish with the tail, with the ears, but
you got the point. When you know the tools,
the one thing that it's left is just to work
with your creativity. I hope this lesson was useful. I hope this lesson was simple. And I hope you feel like
you get on a new level. Small but new,
updated higher level. Thank you so much
and I'm going to see you in our next lesson.
9. 3.2 Paint ears and tail: Well, I suppose it's going to be the final lesson
before we're going to render our T or Pokemon
or whatever it is. Let's go back to the solid mode. Let's go toward our tail. Before we're going to bring
all of the necessary things, we have to apply our
subdivision because it's not enough decrease toward two. And then apply then one more time control to
come back in the edit mode. Choose this one in the middle, out left click, solo mode. Let's make sure that
everything is emphasized. Right click, mark, Create. Come back, come back. Let's go shader. Go toward the materials, be sure that we are
in our F for tail. Then shift a image
image texture, then we go toward
copy the color. Let's call this 12 point tail. The width, the color
is already here. Okay, Then connect
this one and this one. Go to the texture paint, let's hide the particle
system on our body. Go to the aided mode. Teaches
everything you unwrap. And now let's go to where
the texture paint. Great. Go to the image, save, save image, and bring
the reference on. Let's go only toward
the reference, but we can see, go to the empty. Okay, there is the
black part only here. Let's draw. Make sure that we have the
symmetry on the eye. Draw the color right here. Good seven to take a look above, Let me hide. This one sold. The more polygons you have, the more slow it's going to be. But it is what it is. This is the price of
being a three D artist. Let's go control seven to look below control three
for the site. Let me draw right here. Okay, one and an MP control one. Why I see this? I don't like
it like that was great. What if I just want to
do this one for myself? It's not like in the reference, but I'd like to make
that part black. Also very interesting, let's
just say, just in case. Okay, let me make
this one smaller. I see it's Gingles When
the brush is so good, seven to take a look above. Let me draw here. And then for some
reasons I have this one. This one good one pet. Let me go below, Let me draw that side. One pet, I think more
yellow right there. Once again, good
control to save image, you see the star, which
means you have to save. Then we go toward the layout, then we go toward the render. And then copy and bring this one in the fur tail
color to the color. Let's see what we have. Bring
the particle system on. A beautiful. Then the last thing that
we have to do is our ears, which in the reference, let's go right here,
are black above. We go to the solo mode. Three pet, choose
this one for example, it doesn't matter, like
one of the loop, right? Or actually, let me
choose this one. This one more in the middle. Right click, mark a
P in the materials. Ears shift a search for image texture 3.0 color, connect to the color. What is important here
to do is to get out. Remember that the ears
share the same material. Let's go right here. A. Choose this one. Right click, mark A,
create the thing. Let's connect them. Control J. Now one more time, come back to the texture paint. Oops, come back to the texture paint out
of the solar mode, one Pt and then we
go toward the image. Save, save image. Now let's draw no
symmetry this time, just like that one here. Three, control one to
take a look behind. Good control three,
no one and pat. Then let's draw this one here, for example. Like that. And then holding control, let me redo that part. Actually, control one, draw three, draw right here,
draw right here. But unfortunately, we miss that seven to
take a look above, connect them here, draw where
we have to draw one on pet. This one is more bigger, that's why we have to, at least in my case, let me make it bigger here
also three on an pet. Let me try carefully
to draw on that side. Of course, very careful one, Let me redo a little bit. Control then image, then you go toward the
layout. Copy this one. Go to the four control, connect color toward the color. Now let's bring the
particle system everywhere. Here, here, here, chicks,
the second chick, good, let me hide this area, let's see what we have that my friends is our
result at the moment. Right now, I'll give you a
homework in the next lesson, but before that we're
going to render. I can say that we finished. I hope you found it very useful. I hope it wasn't in
some way entertaining. We learn about, okay, modeling, it wasn't
the hardest part. Particle system as
particle system, but the main point of that class was to introduce you in
the texture painting. How you found there is
nothing hard and it's very easy to bring the
colors over the model. How I told you before, I will bring this one
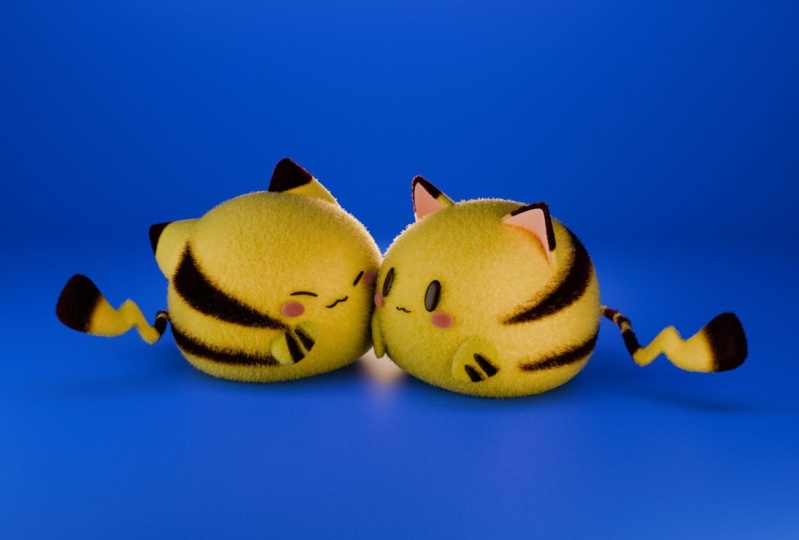
just for inspiration. You can search and Pinterest
for different illustrations. But spoiler as homework
going to be to render via drawing one of them. That was the Pokemon,
which is very simple, simple, and very cute. Now, thank you so much. I'm going to see you in the next lesson where you're
going to make some small adjustments and
then we're going to render it. Thank you and goodbye.
10. 4. Add Camera + Render: Hello everyone and welcome. First of all, I hope you're satisfied with
your final result. In that final lesson, we're going to establish
the camera first, and then we're going to render, I suppose it's going to
be under 10 minutes. If you're ready, let's start. Okay, the first thing first, let's hide our collection. Let's go toward the studio. Let's bring the camera, bring yourself a
little bit more, far from our shift A and camera. Then the hot key is,
oops, I'm sorry. Let me open. Okay. Now you can see everything that I press in the left corner, the hot key are shift
a zero on the pet. That's how you can easily
establish your camera from wherever angle do you
want? I'm going here. Okay. Control at zero probably. I'm going to move myself
even more closer like that, too far, but it's good. Let's open the side menu via N and then we go here
in view. Check in. You see the border is red. Now let's move back the thing. We can go checkof
we can go toward the icon here, the
camera properties. There are a few ways of
how we can establish it. We can bring the perspective,
what we have right now. We can go toward the orthographic
which is the same as if you'll press one
empt or orthographic. They are the same sharp angle or we can go toward the
panoramic or the fish. You can see this
one in the render. There are different
options but how we can see fish mirror, bowl, but we don't need
it for our project today. What about perspective? Or what about orthographic? Do know why I like this one? I personally like to
keep the orthographic, Come back then A shift, shift. I'm going to move
it then check in, Let me move it right there. I want to have here and
here the same distance. Probably a little
bit on the left. A little bit up, great. Now, check off, Let me
check over, lay off. Good, great, this is
exactly what I needed. Now if you're satisfied with your camera angle
with your result, we can bring it to the render. How easy? First of
all, let's see. Okay, our reference, we have to hide it
from the viewport, from the final render to make sure that the
eye and the camera, they both are on or off. In our case, everything what we need is on. Then we go here. We can play around with the color management
which is below, but I'm going to keep this
one on AG X high contrast. You also can play with Rec, this one is interesting, but again I'm going
to keep it on SRGB. I like the saturation is a little bit more, a
little bit more higher. This is my settings. Then I'm going to bring myself up to the render
here, the samples. I'm going to keep personally, long story short, the
more samples you have, the more better
quality going to be, the less samples will of course, quality going to be not so good. But also of course, the
more samples you have, the more longer it will take. Probably I'm going to
give this one on 1024, check in on the noise and
that all I don't know, Usually people expect that
when you want to render, you're going to bring a lot
of things but actually that alloys amount of samples, color management, I check here, check that everything is on. Now if you're ready my friends, let's go toward the
render image or 12. That is for our lesson. I'm going to see you after
my render going to be done, which I think will
take some time.
11. 5. Homework and Congratulation: Our final lesson. This is my result and I hope you're
satisfied with your result. Also, I bring a little
bit of the color dating, but at the end of the day, that is our Pokemon. Your homework. In
order to solidify your knowledge that you
receive through that class, use one of the cat as
the references or as your inspiration and
draw over our model. So in that case, you will
apply everything that you, you'll do a little bit of a loan work and in
that case you'll understand better
everything that we learn through that class. These cats are cute and
these cats are simple. I'm more than sure that you're capable to do your own
variation and rest. Let me say goodbye. Thank
you that you stay with me. I hope that was useful and I
hope you have fun through, I suppose it was less than
1 hour, which is amazing. We model, we bring the particle
system and we also draw. Thank you so much and goodbye.
 Sasha Luvr, Work in third dimension