Transcripts
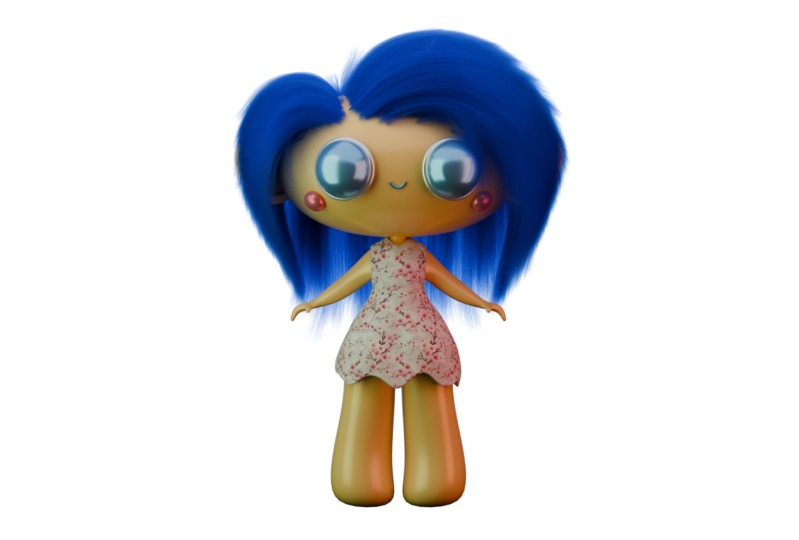
1. About that class: If you ever wanted to start
creating characters in blender but felt
like you weren't good enough for it, fear not. After this class, you'll be provided with
everything you need. In just 2 hours, we'll
cover five blocks, packed with all the
necessary tools to confintly create your un
Fredy character in blender. Additionally, these tips
and tricks will bring the freedom to
apply new knowledge to your future projects. With each block, you'll
gradually build your confidence. Here's how in block number one, we'll focus on modeling. Using the basics of blender, along with some dons, will transform a default
cube into a role model. Even here, you'll
discover something new. Block three is more
exciting as we bring our character to life by
establishing lighting, enhancing scene quality,
and applying materials. You'll see a
noticeable improvement by the end of this block. Block three is not less useful. If you've never
tried by painting or struggled with creating
realistic hair, you'll learn how to do so. Here we'll delve into particle system
settings and you'll be surprised by how easy it is to achieve a wholesome
result block. Foy the char on tap. I'll share a simple
Don that allow us to create different
textures in seconds, along with basic
unwrapping technique applicable outside of the class. Finally, we'll render
our character and apply simple compositing technique
for final touches. As you can see,
this class covers a wealth of available tools
for artistic elevation. The question is what
your level should be? Well, that class requires some basic knowledge of blender. However, even if you're
a complete beginner with a stubborn attitude and a bit more time, you'll
definitely succeed. All you need to
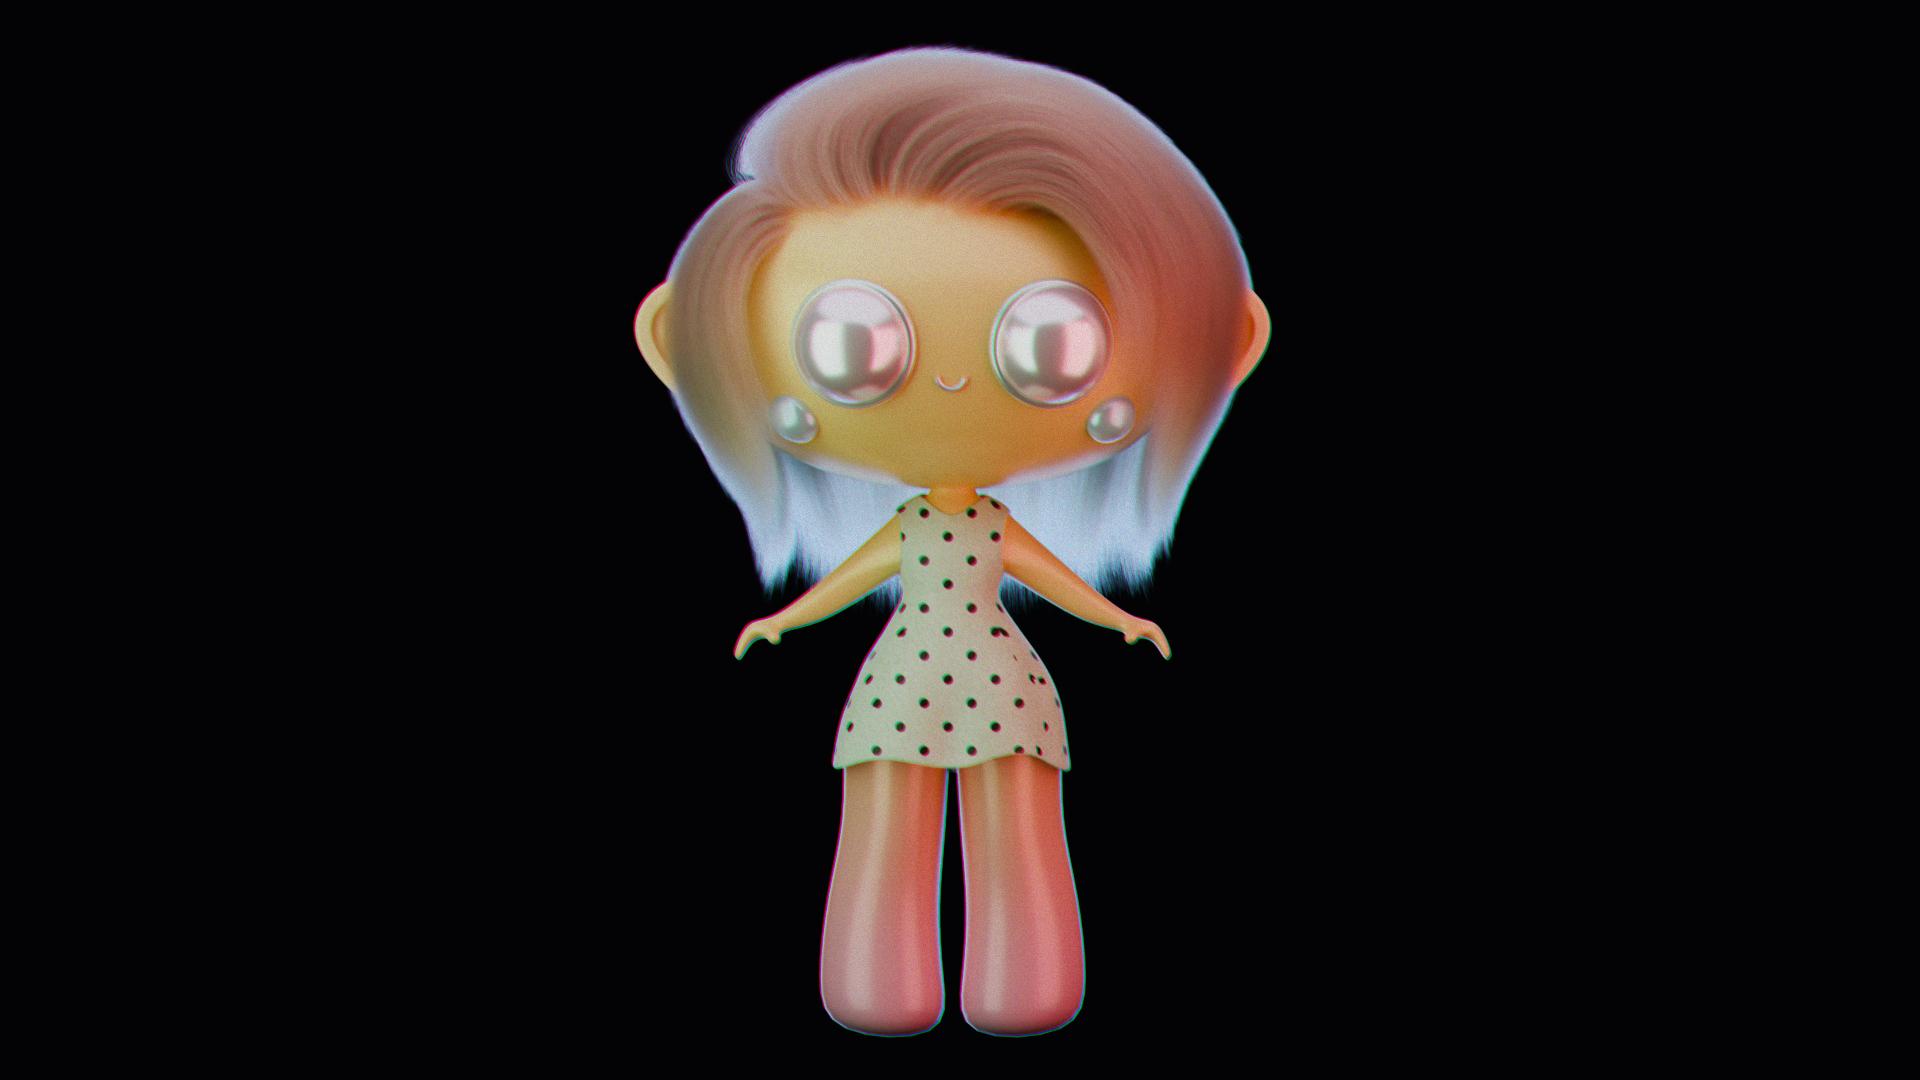
do is to download the folder with references and Blender 4.0 Learning can
be an exciting process, and with this class
I aim to prove that, let's have fun while
improving our skills.
2. 1.1 Head and Eyes: Hello my friends and welcome. So a few things to
say before we start. I know that it can
be a little bit scary because you never
did character before. And you can think that
this is very complicated. But remember the
golden rule is that we are here to have fun and
to enjoy the process. This is the thing,
number one, don't worry, because step by step we're
going to build our character, which means we're going to build your confidence
in creating them. Also, the second thing, bring your tea or coffee, because I don't know what
type of result you can expect when you don't have
your favorite drink near you. Now we can confidently start. And one more thing to
say it completely, everything that I press, you
can see in the left corner. So in case if you
have any question, just take a look right here. Now we can start
delete our cube. And then we go to Word
Edit, reference Ds here, search for extra extra objects and set a check in
why we need this one. Because right now we're
going to bring shift a mesh. We'll have a few more options. In our case, we need round cube. Then we go here, radius
toward one, okay? Now, right click, shade, smooth one in Empt. Let's go control two to bring subdivision
surface modifier. When you go toward the
edit mode right here, you can see it's not so smooth in the way how it is
in the object mode. We have to check in
that option right here when we're going to bring ourselves
in the edit mode, everything is smooth
as in the object mode. Now we're going
toward the edit mode. Choose a H, you
choose everything x, and make it bigger
as make it smaller. Right now I don't have the
reference for our head. We're going to make it plus
Minos in the same way. But it is good because at the
end you'll have more like an original character and not completely the same as
me, which is great. I'm going to show
you the tools and you're going to use these tools in our own favor as X. Okay, let's watch from the side. Good. Because this is
stylish character. Of course, we don't
have any anatomy here. At least at the head
that, why don't worry. Okay, great. This is a shape for our head at the
moment right now. Two, to give you the name, we go with one point head grade. Then let's move this one into the collection, New
collection character. Great. Then we go with the
control to save our file. Choose the folder
wherever you want. Let's call this one character
safe, Blender file. Now we're going to
create the eyes for our character shift, a mesh round cube. I have here one here. Make sure that we
have ph and one good. Then we go the
Chondral Two shift, right click, shade smooth. Let's go in the solo mode
which is the slash and mpt three for the side view, let's go in the edit mode. Transparent mod
vertices which is one or one have to be blue
and choose all of them. Then we go the X and
delete vertices. Then we go out of
the transparent mode two for the edges called Alt left click to
choose the entire loop. Then we go, Greg zero
to make it flat. Very important thing,
usually to close the gap you probably
think is the best option. But take a look at the shape. Right now we have some artifacts and the topology,
and the best one, how to make it better, K, We go the S, which means extrude inside. One more time S, let's
go one more time, ES, and we go at center. Now everything is
better than it was then 300 and P. Let's
make it a little bit more flat from here,
go in the edit mode. Choose the proportionaliting. Probably unitize that in the added mode the
form of the object. It's not so smooth in
comparison to the object mode. What we have to do
co the added mode, we have to turn
on this function. Now we have the same topology
as in the object mode. Choose one for divertses,
choose this one. Let's go with the, make this circle a little
bit more bigger and just bring it inside that. Okay? En turn off out
of the solar mode. Let's make this one smaller. Let's bring this one in front. Okay. And let's call this one, which is you can go with the
double click right here. Or more easier, more quicker,
22gx, somewhere here. And there is one more thing that I created in my character, it's not completely like this. We go in the edit mode. We go with the control er, bring one more additional
loop right here, like that. Choose the loop with
the out left click, make it a little
bit more bigger. Then we go to the faces, choose out left click,
like that loop. Yes, we go to the
ES and make it a little bit more bigger
like that. Let's check it. Okay, As for scale, great. Now this is the
form that we got. Probably I would like
to make this area smaller divertics which
is the most middle one. Then we go with the control plus on the Numpad plus, plus, plus, and I'm going with you make it smaller like that. Okay? This is the form that we got
at the moment right now. And then make it
smaller like this. And what if Semon mpedir? Then we go to the GE and move
it inside and try to align. Of course, it will
be some gap because our head is round and
that area is flat. Don't worry about
that. That will not make your work terrible. Again, remember that this
is illustration but not anatomically corrected,
correct character. Yes. Bring it a
little bit inside 17 to take a look above, And we got the G X, X and move this
one on the right. One more time like that, probably I would like to bring this one a little bit like this, G. Good. Then we go to the
mirror modifier. Modifier. Mirror. Bring this one above of the subdivision. Choose mirror object, the head. This is what we have at
the moment right now, look a little bit weird. I know it's always at the start, it always look terrible. But the more far we go, the more better it will look like. Remember that you
aren't on the exam, which means we can solve what we don't
like at the moment. Right now, everything is good. That was lesson number one. I want to keep this lesson
short in order to make it easier to
comprehend and better. Thank you so much
and I'm going to see you in our next lesson.
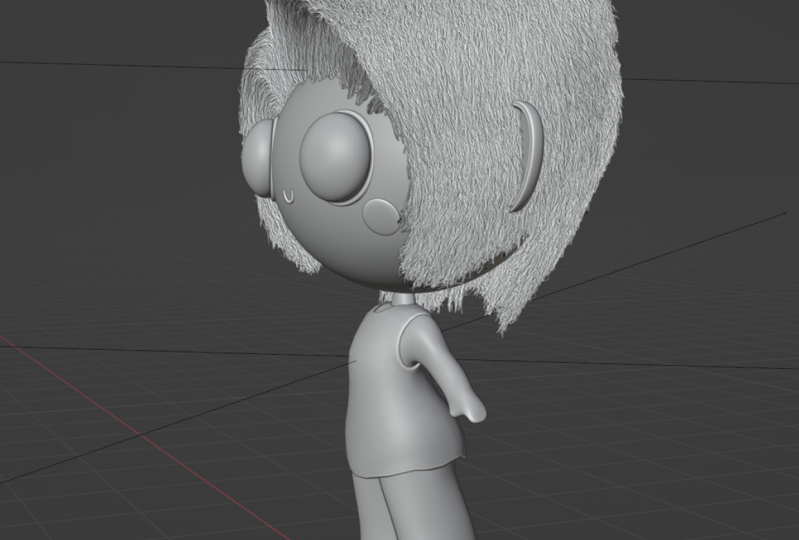
3. 1.2 Ears: Welcome in the lesson
number two where we'll create ears
for our character. But before under this
class you can found a zip file with some references,
images, download it, and then let's bring
the first one, shift a image reference
and choose character. Then we go toward make it bigger Alt to make
it transparent. And let's fit under
our head here. As for scale x, a little bit smaller
or not a little bit bigger, let's go with our ice. Let's fix our ice. We go lower x a little
bit toward each other, a little bit to make it smaller. Great, Then we go
toward our head. We go in the edit mode. Let's bring the
proportional dating on. Choose these vertices,
make this one smaller and just we don't have
the Miro modifier. Yes, no problem. We can turn this one on. Now, everything that you make on the right going to be also
appliable on the left. Then this one a little
bit inside from here. This one move a
little bit higher. What about this one?
I think we can make it a little bit lower like that. He also make it
on the one above. Now it looks like the shape is right eyes are where they
should be, Chondral to save. Great. Let's hide our image. I know we look very weird. Don't, don't worry,
Please let me make this one a
little bit inside. Great. We go with the shot A and mesh
and we choose circle. Here we're going to have
not 32 but 16 vertices. Then we go toward the circle. Let's call this 123 years x 90. Then we go to the
x on the right. Then we go the S to
make it smaller. Let's first abliorate the year, and then we're going to
adjust in the right position. We go toward control
to make it round. And then turn on that function. Then we go, we go
in the edit mode. And then we choose everything. And then we go
Greek and go there. Then with the same technique, we go the S S center, then we go on the front side
loop, choose everything. Then we go the ES inside, and then we go the E Greek, which is the green
one, inside like that. Then let's make it a little bit. Oops, Proportional ting off as first scale
just a little bit, and then we go to
the S E M center. Now in order to make it better, let's bring some
loop right here. One loop right here. Okay, what about one
loop right here? This is our ear. What edit we go in the
edit mode and then choose these vertices in the
center control plus plus, plus an M ped. I'd like to make it a little
bit smaller like that. Shift sheet smooth. Great. I think it's too
sharp right here, You think? So? Probably. What
if don't repeat? Let me just check. What
if I delete dissolve. Do I like it in the way
how it was? It was better. I think that we can make it just a little bit
more bigger here and this one a little bit more smaller and a little bit inside. Great, this is our ear to
turn on our reference. Let's move this one
behind like that. Let's go transparent mood here. The shape like that, what I did was first let's
bring our ear inside, let's make it smaller. Then we go in the edit mode, proportional ting on vertices. For example, I do this one, have this one bigger
and we go with the x. I think we can
choose all of them. Transparent mood on
choose all of them. And then X like that,
Choose this one. This, oops, more like here. This one also. This is
the shape of our ear. What if I'm going
to choose this one like that, this like that. This is a shape.
Don't forget that. We're going to have the hair, so we're going to cover the ear. But this is our form. I think I'd like to make this one a little
bit more to adjust. They look thin, remember, All of that is some
individual work. Don't repeat everything
straight after me. Just bring the shape
that's going to satisfy your eye where
you'll see and like, okay, I like it,
This is the most important to like
what you're doing. Great, this is what we have. Then we go the head
modifier, mirror modifier. Bring this one above of the subdivision and
choose the head. Let's bring this
one reference on. Let's make the multi
bit more smaller, not the same how I did
in my previous work. No problem. No problem that we have for
our second lesson. Okay. My friends, what I
didn't like is our rotation. Erik. Okay. Now is better. See you
in the next lesson where we're going to create
the chicks and the mouth.
4. 1.3 Mounth and Cheeks: Number three where
we're going to create the month and these
chicks years, I'm going to move a little bit inside because
I don't like it. Great. Then let's
start with our chicks. It's going to be a
little bit more easier, so we go with the shift, a mesh like always, round cube one here
for here, good. Let's call it the solo mode. Control two shade smooth, three med and transparent mode. Delete these
vertices X vertices. Then we go toward
out left click, choose the entire loop and we go the Erik zero
proportional editing of. Then we are going with
the M what we have, then we go the Erik. What if we're going to add an
additional loop right here, just to make it a
little bit more sharp. This loop, I'm
going to make it a little bit more smaller. We can also make this loop
straight as Greg zero. Good. Now a scale, actually get out of the
salamde transparent mood. Make it smaller. We go right here, a little bit more smaller. Let's call this one
chicks, four point chicks, then reference of,
let's bring this one toward our heads here. Let me check here, play around, don't repeat. Just adjust under the reference or without the
reference if you like, so and try to make sure that you don't have this
space right here. Okay, what about this one? To do is inside, probably a little bit
too much right here, but a good to use
these vertices and proportional ting then let's drag this one just a little
bit in front like that. Make it what if
I'm going to make this loop proportional
dating a little bit smaller. Okay, that's what we have. Then we go to word like always a modifier mirror above of the subdivision and
choose the head. Great chicks are done. And the last one is
the mouth shift, right click to bring
the cursor right here. And then we go the shift A, and this time we choose
curve and we go to word path, make it smaller. Let's play around go here in the data object
properties and geometry. Go toward the depth
and make it bigger, like 027 resolution toward 12. Then we go, we go
to the edit mode. Let's choose this
one and this one, let's go in front more
toward each other. Then we go to the field caps, because right now if we
go in the solo mode, you can see we have here caps, field gaps and we don't
have them anymore. Very easy out. Let me check a
little bit smaller. Let's bring this one here. Probably I'm going to make it 03 to make it a little
bit more thicker, probably I'm going
to choose both of them and a little
bit lower like that. Great J. That all. Then we got seven pat. Let's bring this month inside. Let's call this 125
point month Quantril. Seven. To take a
look under three. Let's hide our ice. Okay, Greek, bring
it inside like that. Then open ice that my friends, what we have at the
moment right now. Slowly, slowly we
build our character. I'm still not sure if
I like it like that. Great. Let me turn on, let me turn off there. The more far we go, the more adjustments
we're going to do. But we finish with our head, then we're going to create
the body of our character. But for now, thank you so much. I hope you learn
already something new. Even if these are just
small detail, small things. But wherever, let's go
forward, control to save.
5. 1.4 Body: Legs and torso: Welcome back my friends. This time we're going
to create body. I know it looks scary
actually this is going to be the first help we're going to create the torso and the lex, but when you're going to get
to the fingers, be patient. But right now let's start. First of all, let's
bring the reference. Shift a image reference
and we have body front. Let's try to adjust
it like that somehow. Front, front, great. Bring the front, front opacity. Check in and turn
and bring it here. I'm on the right. Good. The size is plus, minus is the same as
in the main reference. Let's hide this one.
Let's recall this one. Body front underline, which means reference control a three P. Let's go GE, like that. Where we go? Let's
go with the shift. Right click, right here we go. Image reference. And let's
choose the second one, okay? It will be a little bit.
Let's make it bigger. Make sure that this and this
are on the same X, okay? 300 Ped 90 and we go right here. This one we have to move also
in the middle like that. Anyway, we're going to make our adjustment through the process. So don't worry a good, good. Let's start my friends
control to save shift a mesh around turn on
the transparent mode. Here going to be one, but here on the
Arc, keep on two. Great. Then we go
the control two to make it smooth to add the
subdivision service modifier. Right click, shade, smooth
the right here, okay. And turn on that thing. Then we go to the G, E right here to make it smaller,
slowly, slowly. We're going to build
the main thing. Great. In order to make it
easy for you to comprehend. I don't want to provide any
information that you look, you did repeat and then forgot. Try see my steps. Try to understand my steps. Then it will be
easier for you in future to do this one
alone without any help. This is my purpose to understand what you do and
just to remember what you did. We go on the edit mode and
then we're going to add one more loop control air
and bring it down like that. Then we bring the transparent
mood on vertices. Choose all of them and then
we go to the G and go down. As for a scale like that, for the edges out left click, choose this 10 to make
it flat like that. Then we're going to
choose this loop, and we'll make it smaller. Bring this one up one more loop. Bring it here, make it
bigger, transparent, mood. Choose all of them. Good. One more loop right here to make it
smaller like that. I think our reference
have to be a little bit. I say reference
reference to move this one a little bit on
the right back to our body. Let's call this 126 point buddy. What I'd like to do in order
to make it more easier, we go in the edit mode. We go in the transparent mode. We go in the vertices
and choose this side. And guess what? Of course
we're going to delete it. Then we go to modifiers
mirror modifier. Bring mirror above the
subdivision, clipping, check in and we have
the same shape, only we're going
to save our time. Then what if this loop, choose this and this
and we go the zero. Then we go in the solo mode and pass choose this and this. We go for the insert
and bring it like that. X delete phases from here. We have to enable one more Don because it's
a loop tool Don. We go in the edit
reference, Dons here, search please for loops
and bring the check in. Then we choose the entire loop and we go to the right click. Loop tools circle, and
then as for scale, great, come back
one, empt solo mode. Then we're going to go with
just mobility to be down. And then we go with
zero to make it flat. And then we go to the
first scale like that and choose this one
proportional on the right. Let me go with the
only these vertices. Great. Then we have the
intersection right here. Which of course I don't
like bring it like that. Proportional off as for scale
in Nach, have here space. Then we're going to
adjust for scale. Then let's go with the extrude, go with the down, let's go a little bit
on the right like that. We have an intersection right here because of the clipping. Then one more time, x, then we go the lower. As for scale under, right. Then one more time is for scale. One more time is here. We can press, then we
have an gone here, which means we have to connect. Gon is when we have
a polygon that have more than four vertices. If we're going to bring
them statistics faces, how you can see we
have six vertices. But in order to make
the topology rate, in order to make blender
like what you do, it's perfect to
have pho vertices. We're going to connect
this one with this one J now, all good vertices. Let's go down then choose
both of these phases. As for scale grate slowly, let's adjust to what we have. Because at the moment right now, the form is a little bit comes, but we are very close
towards something that we need in case if this is face space for
you, you can put on post. Just repeat the steps till you're going
to get this result. And then when you're
cool, let's go forward. Great, let's go forward. Mean that we have to
adjust the shape vertices, choose this one x and move this one on the
right like that. This one X more closer, but be sure that they
will not be connected. Then we go with the transparent
moot. Choose this one. As for scale, then we can make a small
rotation like that. The same thing here, we
can make a small rotation. Then we go with this one, X. Cool. How about this one? As for a scale, we can go with this one inside, like that. Great, This one have to
be a little bit lower. This one a little bit. Oops, Choose only this. Make them like that. This, okay. No adjustments right here, because we're going to
make these adjustments when we're going to
create the hands. Now let's go for the side view. Let's work on that part
because it look very terrible. Let's start with, let's
start with the upper part. Choose this two and
bring them right here. This one in front. This one. This one. We go E this one and this one. We GE right there. Let's one here. Slowly, slowly, then we go. Let's make this one
more transparent. Going, where is this empty? Yes, where are the properties? Okay, go in the object mode,
choose this reference, choose opacity, and bring
this one toward zero. Great. Then let's back toward our body
transfer edit mode. This one which I don't like mostly of the proportional ting, let's go inside like that. Then let's go toward our lex, I think as proportional of
a zero to make it flat. As for scale, we have
to make sure yes, this is what I thought
it going to be. Okay. In that case, we have
to move on the vertices, on the front vertices
and the back vertices. Let me hide this one and
choose the front 13. And bring them in
front like that. And the same thing
with one behind that. Okay, let's bring this one and this one a little bit more. Oops, let's call
proportional Ding, play around proportional. Ting is very useful
when you don't want to broke the topology, but sometimes you have to
switch in between of them, start to get better, then transparent mood is on. Let's this one right here, like that, slowly
choose this one. G, like that, This and this also in front, there we go. This and this. Move behind
transparent mode K, choose this one, bring it here. Let's make the adjustments here. Okay, we get it. Yes, control to save. Probably not perfect here, but what if you're going to add an additional loop like that? Then proportional ting off. We go with the S zero
to make it flat. Oops. And then we go toward this three
like this and that. We go first scale. Let's choose this one
behind right here. This one behind grid. Choose this one. Erik
in front, probably. I would like to choose
this loop zero. The same thing
here. Zero. And I'm going to move this one
a little bit lower. I'm going to choose
these vertices, the two. And I'm going to move
them a little bit like that behind what we have. It seems like we have
the right shape. Yes, yes. I know when you do this one for the first time, it's very scary. You think it's not for me? I can't. I can't. I can't. But slowly, slowly, you build it, you try this, you try that, and then you figure it out
that it wasn't so hard. It was more hard in my
head than in the reality. And let's check what we have. Let me hide this one
because I don't like it. What I don't like
it is this part. You probably see this one. What we have to do is go to the edit mode and
choose this one above. We have here an intersection
of the vertices. We don't choose this loop, but this loop above, out left click X,
dissolve edges. Great, now we don't
have this line anymore. 300 pat, I think we have to move the vertices a
little bit more here. This one a little bit more here, but our body is done. Let me check. Let's
out of the solo mode. This is what we have at
the moment right now. Need some adjustments, but
we're going to make them in the second video
where we're going to create hands and fingers. But I hope till now
everything is great and have fun, enjoy the process. And I see you in
the next lesson.
6. 1.5 Body: Hands: Welcome back my friends. In that lesson, in
the second part, we're going to create hands
and neck for our character. Let's start first thing first. Let's duplicate, just
for some case, our body. Shave D and then hide. Come back to the
original one body. Let's create the neck. We go in the solo mode. We go seven, take
a look above tap, choose these phases, and press and just move this
one a little bit inside. And then x and delete phases. Great edges which mean to
the keyboard I hold Alt. Left click to choose the
entire loop. Right click. Loop tools, circle grade. Oops, proportional
ting of first scale. Greg, a little bit like that. Come back out of the solo mode. Let's bring up solo mode, then we go one more time. Is it? And first scale seven
to take a look above. Because this is
the mirrored part, we can connect these vertices. This is the same vertice, that way we can choose
the knife which is key, this one left click, X on the x axis, bring this one to the center, left click and enter. Now we have four vertices, which mean from the point of the topology,
everything is great. Come back, Come back, good. I think our body have to be
a little bit more lower. But let's first of all
finish it and then we're going to, we're
going to fix it. Another thing that I'd
like to say that we will not create the fingers like this one on
the question, why? Honestly, because we create a stylish character and we're going to render from
the front view, will not see these fingers. There is no necessity
to waste on something that we will not
see on the final render. That why only the big
finger in the rest? We're going to keep
it small, simple, minimalistic S
three illustration should be three
for the side view. Choose these vertices, then we go control plus on an empt, then three for the faces. You can choose the faces. These four faces, this one a little bit inside, like that. X delete faces, then
edges. Guess what? Of course out. Left click, right click, looptus circle. As for scale, for rotation, I mean this one to
be a little bit more straight and then
come back rate, we go with the x a
little bit on the side. As for scale, it will not be the same as the body that I created
before, But no problem. X zero to make it flat. Left click. One more time. Good. I'd like to move up
this point just like that, but this one, oops, this one. Move it lower like that. Then out left click
to choose this sloop. Let me check it from the
side. Bring this one on. The Greek, great. Then for the small, small rotation and
extrude, of course. As for a scale for
rotation grade, one more time trot,
some are here. Rotation one more
time, extrude here. As for scale like that, one more time extrude from here, and this is where the
big finger going to be. As for a scale a
little bit higher and one more time ex finish
it for rotation. As for scale and go three for the side view
control plus on the empt. Let's make Greg a little bit
wider than control minus, minus on the amped. And only that faces Greg
move this one like that. Then let's connect. Let's delete this engon, which means vertices choose
this one and this one. This one and this one. Then we go this one
and this one J. Then again, in some case
why we do this one, we need four vertices for edges. In that case, Blender will
say if Blender co pictures, he will say, thank you three. I don't like that. Let's choose these faces. Let's make a small
rotation like that. Probably I have to
move this two a bit more like this one a
little bit on the left. This one a little
bit on the right. Great three P. Then we go where? We're going to choose out
left click this loop. Move this one a
little bit higher, like that, transparent mood. Choose this one. Go a little
bit lower, smaller rotation. As for scale, it's time
to create the big finger. We're going to choose what
we're going to choose. I think we can
create an additional loop control right here. Then choose this
phase. And this phase. The Or give me a second please. What if you sometime you found
something in the process. So mode what, don't repeat. I'm going to delete
and I'm going to make loop two circle from here. It's ugly, okay? In that case, come back. We're going to go with the
insert X, delete faces. Always choose this loop. Right click two circle, make it smaller one on p. Bring it extrude E here. As for scale, one more time. As for scale, let's move this one a little
bit forward actually. Plus like that. Let's delete this. Not
like delete, but solve J. Great. Mm, there is something that I
don't really like. What if I'm going to
dissolve this edge? Now the shape ends are sharp
in the way how it was. You can do this one also for the rotation control plus and
move this one on the right. Seven to take a look above, a little bit forward,
smaller rotation, great. Let's choose these four faces, seven to take a look above Erik. Out. Make them a little bit
more smaller like that. Then we also can make it
smaller here, oops, out. Left click to choose this loop. And make it control that. Choose this one.
And this one also. Now one more time and make
it smaller like that. The same thing here. Great. Make it smaller. Good. What if he also smaller? And one more time
these four faces. Great job. Too far
like that is okay. Well, another thing that I
would like to do is choose this loop and move this one
a little bit back like that. We can say this is
as the elbow area. Then here I'd like to make
it a little bit more thin. Good job. This is
what we have at the moment right now out
of the solo mode one M P. Not completely as
in our reference, but, but let's fix this one. Go a little bit lower,
small rotation. Then we go to the
transparent hood. Choose this one. Move this
one a little bit more higher, then choose this one,
proportionally diting J. Bring it here. Great. Our neck is a little bit
thicker but no problem. Again, a little bit on the left. And three, let's take a look
if we like everything here. One thing that I'd like to do is take these faces once again. We can create perfude
from the start. It's always, you have to play around X and make them a
little bit more smaller. I also think that
I'd like this loop to make it a little
bit more smaller. I like this on the face to bring a little
bit more like that. Great, This one a
little bit like that. This one a little
bit more thinner. A little bit inside. Great, good job. Let's take a, let's take a
look from the side too thin. I'd like you to say
that. I'm sorry. But how I say before
you have to play. Going to be my final. That
go be my final in rest. Everything look
toward our reference is everything is a
line almost perfectly. There is nothing that
we have to do anymore out of the control to save. Of course, this is, ladies and gentlemen, is what we have at the moment right now. The next lesson going to be
the final one for this block where we're going to create
the dress for our Carl. Then we're going to start
with the lighting material. And everything will start
to look better than it was, trust me, but for now,
it is what it is. Thank you so much
for your attention. I hope you're satisfied. Everything that we
learn right now, and I'm going to see you
in the next one. Goodbye.
7. 1.6 Dress: Welcome back in our last
lesson from this block on one thing that I did in
between A the lessons, I make that part a little bit
more bigger from our wrist. If you're completely good
with your own no problem. Address shift D to
duplicate our body. And then we go toward
M New Collection. And let's call this one outfits. Okay, let's go in the solo mode. Let's go in the edit mode. Choose three for the
faces Transparent mode. Let's choose this part. Hold control left and undo here. Then we go the ship D to
duplicate left click for the selection and
that will help us to divide the dress from the
body. How you can see. Now we have two objects out
from the transparent mode, from the edit mode,
and delete the body. Then we go here two and call this one dress out
of the solo mode. As for a scale added mode, choose this loop, go down
As for a scale like that, then we go toward that loop. Transparent mood. Yes,
transparent mood. Let's make it a little
bit more bigger and let's make some
small adjustments. Choose these vertices,
proportionaliting on. And then we go with just go like that, take a look. All good except this one can be a little bit
more lower like that. Then we go toward
these vertices, and this one behind, actually both of them,
X dissolve vertices, then we go toward this
one in the middle, Y, move this one a little
bit more higher like that. This one, both of them actually
know only the front one. Move it a little
bit lower out of the transparent mode and
bring this one here. Let me make some
small adjustments up. What if I'm going
to delete this one? No, Okay, keep it here. One thing that I'd like to
do is choose this loop, like this one under Yes, and press X Dissolve edges. Now it's more free, like here, the transition
is more smooth. But we have to choose
K for the knife. Choose this vertices, bring
it here, take a look. The same thing right
here, Great job. Okay, now let's add a solidify modifier because it's very thin but we want to make it a little
bit more thicker. We go right here, we have to control S safe. Let's apply our mirror modifier. Be sure that everything
is ok. You like it, Okay. Now when you like
it, press Apply. Then we go toward,
then you know what? It's not like having a
paranoia but controls that. Let's duplicate just for
some case and hide it. Great, now let's apply
our mirror modifier and let's go forward at
modifier, search for solidify. Then bring the solidify more up than the subdivision surface
modifier, the small thing. And you say in case if
you are a beginner, well you can not. That here is some sort of
hierarchy in the modifiers. Long story short, make it clear the modifier below going to influence on the modifier above. That's why if I'm going to have the solidify under, take a look, the subdivision don't work
properly because it's above. That's why if you want
to see a great result, to make sure, for example, the subdivision in our case
is under the solidify, the same thing with
mirror and many more. Why? Just remember
the golden rule, the modifier below, influence on the modifier above and
not the vice versa. Then let's go toward
the solidify and let's go toward solo mode. Wait, keep this one on zero and let's
bring the thickness, bring this one
toward minus one and thickness to something as 09 or 01 -0.1 Come
back another thing. It's still sharp Y because we have to apply our
subdivision modifier. Let's go toward apply
and one more time, Qwow, everything is
better than it was. Then come back to the solidify, now it's thick. Let's go to. 07? Yes, sorry. 0.007 out of the solo
mode. Come here. Let's add an additional loop. Do we need it? No. All good. I still think it's too thick. So let's go to word 04. Correct. Then hide it
just for a second. Go toward the edit mode. Bring this one for
the subdivision, for the proportional ting
one for the vertices, choose this one because
we don't have a mirror, we have to choose
this from both sides. What we have to do is, oops, proportional it on. Move this one a little
bit lower like that. Then come back,
open the solidify. Now I want to bring the caps of, okay, three, some type
of individual work. Don't repeat straight
after me, great. But the thing is that I work on one side but not on another one. What we can do in order to solve this one and
to not waste our time, of course, we go toward
the transparent mood. Choose this health and delete
vertices, all of them. Then we go toward the
modifier, Mirror modifier. This is a great example. Move it above one more time. Above clipping, merge. All good. Control safe. Now what about the site here? All good, except I
think we can choose, for example, these vertices. And move this one a
little bit more in front like that control save. Then if you're satisfied
we can apply mirror one. Then we go toward
the solidify and apply it to the last thing. This is just some small touches, we can go toward the scoop
mode, which is here. Don't worry, you
don't need a tablet. Then there is the thing
like rep this one. If you never touch
the school part to make this one bigger and
shift to make it stronger, the influence stronger
or less stronger, or you have here strength
for the shift and radius for the F. I'm going to make it a
little bit more bigger. And just take a
look, just direct this ones a little bit lower, a little bit higher,
higher, lower this one. Let's go on the left. This one on the right. This one here. This one here. Just play around,
my friend three. The same thing here. I'm going to bring this one a little bit more closer
toward the body. Control three for another part. Good, transparent mood here. I want to bring it
like that control one. Just see from here. Okay, I move this one
above, this one here, this one here. Do one. What we have, if you want there, is the thing like draw sharp, which means we can make this
type of things in between. Let's try. The strength
is in the middle, radius 80 and just
small touches, even with mols like that. Then you can hold
shift left click, smooth it a little bit
here, for example here. Don't worry, we're going
to grab right now. We're going to. Let's fix this. Let's fix this. Let's fix this one
more. The left. This one more here. Great. A little bit like that. Great control. Let's just say this is what we have at the
moment right now, out of the scope object mode. My friends, we finish with the block number
one of modeling. I hope you found
it useful first. I hope you found it. Okay. Entertaining our eyes. I still don't like them more. Here, like that. Great. Here is a
little bit inside. Good. I'm going to see the next one where we're
going to establish the lighting materials. And I promise you
with next lessons, everything will start
to look better. But for now, thank
you so much for your attention and
see you there.
8. 2.1 Establish Lighting: Block number two where we're going to
create the lighting. Let's start without
wasting our time. First of all, right,
click New Collection, and let's call this one Studio. Why we are so low? Let's choose everything
and move it here. X, right here, great. Then we go with a shift
cursor to world origin. And then we go with
shift a light area. Then we go three an empt
air for the rotation, somewhere like that, not
completely straight. And then we go
toward, go behind. Then let's direct the
second window from here. Let's establish the Oler
settings. Wait a second. Go here, Render Engine,
choose cycles first. Then we go toward the
World properties. And we're going
to make it darker in order to make it for
you to see the difference. Go in the last one here,
everything is gray. Yes, yes, let's go here
and move it like that. Then we go toward the
strength and we go to the 01. Then let's hide this grid, which means turn off
the overlay part. Let's go toward the
settings of our area. We go in the light
properties right here. First of all, instead of
squared choose rectangle, now we have Sizic and Greg, which will allow us to get
the shape that we want. Then toward the
color go in the hex. And right 93, beef, nine power going to be 280, then the size X
going to be five, meanwhile size
going to be seven. Create is too close. That area will help to create this outline where we go a
little bit behind like that. Probably a little bit higher. Small rotation a
little bit that okay, control, I'm going
to decrease to 265. Let's go seven pat here. I'd like to duplicate
and to rotate but let's go toward pivot point. Going to be the three decursor. In that case we go
with the ship D, it's going to move around
the three decursor. Move this one on the
right, like that. Move this one a little
bit on the side. Let's go with our settings
for the second area. Let's even recall
this one area two, or going to be better to call this one area underlying right. We go toward the color
and here, right, 7487, then we go toward the
power decrease toward 200. And then the size
x is going to be 3.5 meanwhile is still seven. We go with one more which is shift and move this
one on the left, the color going to
be DB F CF 200 here. With the same settings, we can move this one probably
a little bit more closer. This one as this one behind, probably, I'm going to
make it back to 280. Then we go toward the
render properties here. Go down to the color management, and let's choose
medium, high contrast. Now, ladies and gentlemen, we have some lighting. We can have one more
additional one above, like a common light. Let's create it control. But first of all, let's
rename the left light. We go the F two, and
recall this one left. We go with a shift, a
mesh plane for a scale. Then we go to the, Move it up. Then we go toward the
material properties. Go here, press, which will help to create a material
for our plane. You can see it right now. Let's call this one
light underline above instead of principle
BSDF, choose emission. Now without and we have
some common light, that's going to be very pleasant for our image in general. We go here, choose it. Let's go a little bit in front. Small like that. Three. Good. Let's increase
this one toward 1.2 Control to save at
the moment right now. What if I'm going
to move this one a little bit more closer? Oh good. Is it
hard? No, probably. It was a very simple lesson in comparison to what we got
in the previous blocks. In previous block. Thank
you so much, my friends. In our next lesson,
we're going to create the material
for everything. See you there.
9. 2.2 Skin Materials: Lesson number two from this
block where we're going to create the materials
for our character. And you'll be surprised
again how easy it is. We go toward our head, go toward the materials
properties new and let's call this
one skin, great. Then we go toward
the base color. And here in the x, right 127d. Then we go toward the
roughness, Which means, because this is some
stylish character, we don't have a
necessity to make it. We'll make this one more shiny, this is what I want you to
say, 03 more reflective. And then we go
toward the metallic. We're going to 0.1 good because this is on
the value of one too much but one is
okay area behind. I don't like that light. So I'm going to move this one a little bit behind, like that. A little bit higher like
that. Small rotation. A little bit bigger.
Good. Then come back. I don't know what if I'm going
to increase the whiteness. Great. If here, not medium high contrast,
but base contrast. Medium high contrast is okay. Come back. Then we
go toward our le, let's go toward the
material for the skin. Let's duplicate this one. Let's call this one
skin underlying body, but we're going to make something a little
bit later here also. Firstly, let's go
toward our ears. Then we go again,
skin duplicate. Let's call this 12 point. From here, we will not make any changes except we can move this one a little bit more
toward the right juice. For a small, small difference. Coontrals safe. Then we go toward our eyes here, it will be a little
bit more interesting. Firstly, we go toward the new material three
point, let's call this one. Then we're going to
choose the base color. It's going to be 80b, 53, then the metallic
part going to be 0.64 Meanwhile the roughness
going to be 0.250 like that. But I want to make where it is this thing white
the border of. All right, let's go
in the solo mode. Let's go in the edit mode. Three for the faces. Outleft click to choose
the entire loop. And shift out left click
to choose this one also. Then we go towards the
material properties. And let's add an
additional material which means plus a sine. Now you can see the
border is white. Then let's call this 13
point ice underline border. Great sign one more time. Then we go toward
the metallic and we press this 1.7 Meanwhile the roughness is going to be 0.3 The color is white
out of the edit mode, out of the solo mode
one and an M Ped. This is what we
have at the moment right now. Let's move forward. The month going to
be the same as ice. I don't think that
I need to create material because I
personally want to make them share the
same, the same color. But if you don't like it, duplicate and create your own, go toward the chicks. Let's go with four I suppose point chicks in the base color. We're going to press
F17, B89, like always, metallic going to be 0.4 meanwhile the
roughness going to be 0.250 And how I say our legs, well there is something
that I don't like really. I think this is the
right light here. I'm going to make this one a
little bit more toward wide. I'm going to make it like that. It's O, but area behind also. I think G, X like
that in the middle. And then it's only
my adjustments if you like the way how it
look on yours, no problem. I just make something
that's going to satisfy me personally. Great like that. Control to save. We have outlined here. Outlined here, everything
is great except our ice. You can see here
the small shadow which means this
ice like always. First of all, let's
bring back pivot point individual regions
because now they move toward around
the three cos, we don't need it control
seven to take a seven, you're looking above control
seven is vice versa. You look under. Let's
move this one like that, then we go toward E. And move this one a
little bit inside. One more time control. Seven small adjustments
I think are X Like that. Still here, but
not a big problem. Gee, one to take a look, I think they're very close. We go a little bit. Oops, we now it's okay. The last thing is our legs. I want to make her
small gradient here. We have to play around, but
we have to apply the scale. We go with the control
and apply the scale. Then we go to W here
in the shader editor. Let's play around my friends. Good, we go with Shift, a search for color rump one, then we go toward the
gradient texture two. And then press control for these two nodes in case
if control didn't work, go toward the edit preferences as Wrangler and make sure that
you have here a check in. Then let me do this one
with you one more time. Gradient texture control. And now you have them connect color toward the factor
color toward the color. Wait a second. Let's
delete this one. We go with the control, right click, copy the color,
and now connect them. Now black. Move toward this one. Here in the white,
the way it look nice, The gradient right here, instead of linear,
we choose spline. Spline is the most soft
transition constant. How we can see is very sharp, meanwhile spline is very soft. Cardinal and linear are
something in between. I choose spline. Let's make one more additional. I'd like to make it more
towards some red like that. Let's play around.
Let's play around. I practice a little bit. You will not see this
one. I'm going to it that part. Cut that part. My friends, we
have three colors. Yes. In order to make
it easy, make it, for example, one of them black, and this one, for
example, make it red. Why we need the strong colors in order to see where they are? Because if you're going
to keep the same color, it's going to be very hard
to see the difference. First of all, we're going to
choose the powerful colors, only to see the transitions. Now in the practice you'll
understand. So take a look. We go toward Greek rotation, bring this one on 90,
like that actually. -90 then we go toward the x location and
drag this one up. Now it does make
sense, what I said. If these colors will be the same as very close
to each other, it's going to be very hard
to tie where the color is. But now we can play, we can check, it's
much easier. Okay? The black one like that, red one like that. And bring the skin
one more here. I just want to make
fits a bit more darker, darker, but just a little
bit more darker than the original one location. It's going to be 1.04
Let's go like that. Instead of black, we're going
to make it color picker, choose this one and
make it a little bit more darker like
this for example, and a little bit more
toward the orange one here. Also, we go toward
the color picker, Choose this one and make
it slightly different, for example, toward the
green or toward the red. Choose what you would like. You can go even toward the
pink one, for example. Why not It look pretty nice. I'm going to choose this one. I don't like that color. I'm going to increase and I'm going to move
this one toward, actually is some sort of
exploration right now. But I like it, I like the blue. Let me check. It's kind
of nice, honestly. I'm going to keep it here. My hex, you can see right
now. Copy if you like. Also, there is a thing
with the lighting behind that I'm not sure
that I like I think area. Let's back to the
three D Viewport. I'm going to move,
what if I'm going to make it a little bit
more bigger here, 7.5 and a little bit lower. I want to emphasize
the outline here also. Oops, like that. Now we have the outline here. But from the other hand, we have here this big part, which I can say
that irritate me. But we're going to have
the hair that's going to cover all of that at the
end of the day. All good. What if you're going to choose both of this, left and right? Is that a little bit lower? What if we're going
to choose our plane, will move this one. How it looked without too dark. Much better. A little
bit behind like that. Let's take a look
control to save. You can ask me what
about the dress? For the dress, we're going
to install the blender kit, Don, and we're going to
bring some other texture. But this is our result. I really like it and I hope you're satisfied
with what you see. Also, you can see, just in a matter of time, we turn something boring in something that
looks pretty cool, relatable to the colors. It was some experiment. If you want other
colors, no problems. Even for the eyes, for example, You can make them
not blue but black. Black like that, also
cool, no problem. But I'm going to go with
this one. Thank you so much. In the next one we'll establish
the camera at the end. And we're going to move, jump toward the next block
where we're going to create the hair for
our caricature, which will turn this one
into something majestic. The dress going to be at the
end like a cherry on top. But for now, thank you so much. My friends control safe. And I'm see you in
our next lesson.
10. 3.1 Weight paint Explanation: Block number three
where we're going to create the hair
for our character. I'll like to ask you here to not do nothing
in the short lesson. I want to explain about weight paint just to make it clear and easy to comprehend. In our next lesson, we're
going to apply on practice, everything that you'll
hear right now. Weight paint is an
opportunity to emphasize some specific zone with
which you want to work. As, for example, the hair style, The hair going to
grow up from here? Yes, not from the entire face. Let's emphasize this one, how we go toward our head. Again, don't repeat,
just take a look. In the next lesson, we're
going to do this one together. First of all, we
go toward the data properties, create new group, let's call this one test test. Then we go toward
the weight paint. And if I'm going
to draw like that, we have two colors,
red and blue. This green, yellow is
something like a transition, the breach in between of them, but don't
worry about this. Also, you can see that the
quality of the color is poor because the
subdivision is pretty low. The more polygons we have, the more clear going
to be your paint. But we don't talk about
this one right now. The red one, you choose the zone with
which you want to work. As in our case where the hair
going to be the blue one. Where the hair will
not be simple. Yes. For example,
I draw this one. Hold control to bring the
blue, the red is above. Okay. Let's say this is where our hair going to be.
We have this one. This zone is emphasized as
test test is the red zone. Then come back to
the object mode, then I'll go toward the
particle system hair. Right now, everything is messy, but I'm going down toward the vertical group density test. Now our hair will grow up from the emphasized zone
with the red color. That is about the weight
painting, two, 3 minutes. I hope the theory part of the theoretical part
was easy to comprehend. I hope you like it.
Let's go toward the next lesson where
we're going to apply and practice what I
told you right now.
11. 3.2 Particle System: Hair settings: We're going to have two lessons where we're going
to create the hair. Here we're going to
bring the settings in. The next one we're going
to create the hair style. Let's go toward our head. And let's duplicate
it where it is, shave just for some case
and hide it from both. Go toward the
original head here. Apply subdivision
surface modifier. This is what we got. Let's go toward
the weight paint. How I say in the previous one. Let's apply on practice. First thing first, we're
going to plus group, let's call this one hair style. Then we go toward
the weight paint. Bring the symmetry on, which means everything
that you're going to do on the right going to be
copied on the left also. Which will save us
time to make it smaller shift A to make it
stronger or less stronger. I'm going to keep
this one on one. Which means the
strength and like that. Let's start, let me show you the hair going to be like that. Plus, minus. Yes. Let's go some individual work. You don't have to
copy me completely. Just draw with your
red here and there. Three under empt still not enough polygons
like we can bring more. But there is no super
necessity in this 17. So let me draw here. Let's hide that plane that
is above. We don't need it. Good, great, great, great one. I'm going to make it like that. Three, just small
thing here. Here. Okay, let me go control
one from behind. Three P, transparent mode. Hold control left click to make this zone
empty for our E. That is what we have at
the moment right now. Control to save out of the
weight paint object mode. Let's go toward the
particle system. Plus, let's call this
one hair style hair. Let's go down, we go toward the vertex group density
and choose our hair style. Nice. Let's go right now
toward our settings. I have a class apart
on my page where I explain in detail about the
particle system and blender, why if you are a beginner, I will not stop here
to explain everything. I already have a class. But right now I'll just show you the settings
and time to time. I'm going to explain
you some things. The number of the
parent hairs going to be 4,000 hair length. Wait a second, I have my
settings on my phone. 1.3 great. But there is two
important things to say. First of all, let's apply
the scale of our head. We go to the control, a scale. The second one
probably for someone, the length going
to be different. We have to check the face
orientation is blue in case, if you have the black one, we go to word A, choose everything at
recalculate outside and make it blue that you will make sure that the faces are looking
in the right direction. Check. Good. Let's go down, we go
toward the render. We're going to create
material a little bit later. Spline check in, which
will make it more smooth. Steps going to be six, then we go toward the
viewpoint display. And here the strength steps. The more value you
have right here, the more smooth to be
each of your hair. If your PC is weak
or not the best, keep it right now on when
we're going to render it, we're going to increase this one toward the
maximum of seven, but right now is enough. Then we go toward the children. Children long story short are the small hairs that going to
be a for each parent hair. We right now have 4,000
of parents hairs. We go toward simple, now we have way more hairs. The display amount going
to be 60.60 which means we have 60 children hairs around of each of
the parent hair, which is a lot actually. Then we go toward the radius, it's going to be 0.03 Meanwhile, the roundness, roundness
going to be 01. Clumping, which
means the end part. We're going to move it a little bit more closer to each other. It's going to be 07. Now you can see the difference. The end of each one is more
is like in small groups. Good, let's go toward the
roughness where let's say the main magic going to be uniform which bring the common
distortion for our hair. Let me show you for example
on the value of one, it distorted very much. We're going to keep
it on 002 endpoint. Show the direction of each hair on the
right or on the left. We're going to keep
it on 00.0 75. Great. The random going to be 0.08 Meanwhile the size
is going to be 08. Coontrals, you say there
is the thing hair shape. If you're going to change
the settings right now, you will not see any difference. But the difference is
actually big diameter, root and tip show the thickness
of each of your hair, of the root of your hair
and end of your hair. But we can see that only in the red shading.
Let me show you. Right now it's very thick. Yes. If I'm going to decrease the diameter root
toward 01, take a look. Right now, now it's very thin. Again, you can see the
difference only in the render before was too
much like a spaghetti. Now it looked like a hair
tip going to be 002. This is what we have at
the moment right now, not what we're
really looking for. There is one more
which we probably should do as our first
step, but no problem. The material go in the
render and take a look. Right now the color
is very flat. We go toward our head. Here we have the
skin. Yes, we're going to add additional one. Let's go with new, let's
call this 1.2 hair. Let's make it for,
just for example, right now some blue. Yes. Then we go toward the particle system settings and here where the material
under the render, choose the second
material created hair. Okay, But the color
is still very flat. The color is still very boring. Please pay attention right now, because we are going toward the material here
in the surface. Instead of Principle BSDF, we have principal Hair BDF, which was created for purpose. Then we have to bring it toward
the previous blue again. Now we have more settings. Now you can pay attention
that the color so flat. Let's bring here some settings. We go with the roughness, which mean to make it more shiny, we're going to keep it on 0303. The code is to make
it more as a diamond. Another way of making it shiny, we're going to keep it on 035, Then we go toward, OR we're going to
decrease this one toward 1.2 and then we go to
the random roughness. We're going to keep
this one on 085. Now it's completely
different story. Take a look right now. We
have the lighting here, we have the small transitions
in between, the color. Meanwhile, let me, for example, to create another one.
Let's go with plus. Yes, Let's say again
another blue here. Let me choose this one. The difference is day
and night, flat color, boring color, nothing that we are looking forward
to be proud of. That's why this is the golden rule and the
previous hair, the material. Choose principal hair BSDF
and not the simple one. Then you can play around with the settings if you don't like it and let's
choose the color, because this was the random one. I got some of this
for my personal work, but because I want to
make it different, let me keep it, let me just play around and see what I like. You can do the same. What about green? Interesting, But probably I'm going to keep this one more
toward some sort of pink or toward I think blue. I'll like some sort
of blue like this. Mm hmm. More toward that. Let me check. Okay. Okay, this is my hex. You can check it. Also, again,
you can play right here. You can make the code toward 07. For example, the random
roughness to decrease toward 03 used to play around
or watch my class where explaining details
about the particle system. But that's all for our lesson. Don't forget you, safe. I hope you found it, again,
useful and entertaining. In our next one, we're going to create the style, the hair style for, But for now, thank you so much. Goodbye.
12. 3.3 Hairstyle for our character: Lesson from this block, which I suppose is going to
be the most creative one. Because here I will
show you the tools, but I will not show
you the steps, which means we all have to
work in our individual way. What I mean, all of that. We go toward our head. Yes, here in the object mode, switch to the particle edit, which will allow us to
create the main hair style. This is the thing
of the com hairs, again, the same thing. To make it bigger, shift
to make it stronger. The influence stronger or not. There is also the distance, which means how close you want the hair to be toward
the head, or how far. I personally going to
increase this one toward 0.75 I want the hairstyle
come back to the object mode. Let me choose this one.
I want the hair to be like that, Oops, like this. If you want something else, you have all of the
tools to get it. You can make it like
that or you can, I don't know, give
some difference. We go here toward
the comp and slowly, slowly increase the distance. We are going from the left
toward the right like that. Okay. This one drop down. This one on the right.
Three on the Mp. The best one. Let's
go up like that. Great one, let's start to work. Move this one a little bit, her, this one a
little bit lower. And one more time control. Three for another angle, seven to take a look above. Okay, one, let's check what
we have at the moment. Right now, back to the
object mode, It's nice. Actually, let's go toward the
render. I actually like it. It doesn't mean that I'll
not make the adjustments, but I think where the plane, I feel like something
is missing. And this is the plane
now over layoff. It's cool. I want here
to make it more closer. Let's come back to where the
work particle added turn on. We can move this one
right here like that. I don't, I don't like this one. Great. Now I think I like. Hm. Now let's move them a little
bit more here. Three on mp. This one also closer. This one, like that. Come back to the edit mode,
see what we have. Net back to where the
particle edged who you are. Okay, I see this one. This one is, we can cut it. I don't see the necessity in
him like that object mode. We don't have him anymore. I don't want to
waste my time trying to bring this one in the right position.
I'm going to delete. You also choose this
one and come back. See easy then here, it's a little bit messy. Okay, back to the article. It, this one. Like that, good one on an empt, back to the object mode. Let's check what we have. We have something very, very, very cute in just a
matter of one, 2 minutes. I was still work in this one
a little bit more probably. I have to explain
things more detailed, especially if you are beginner because I don't
look like this one. I don't think that this one
look as something hard, but let me, wow. She's very nice.
She is very nice. Come back to the particle edit. Okay, this one, how
you already understood comp is what helped
you to create the hairstyle To
bring the main form. Yes, let me go here.
Which is the smooth? Which mean you'll make it
more smoother than it is, but we don't need to create it. Ed is something that allow
you to add more hair. We don't need it right now, but just take this one
in consideration then. Length, you can grow
or you can shrink. For example, let me
go here and val, we make a long, long hair. Or we can shrink like
that, make it shorter. Control z. Okay. And then the same puff
is something that can, I don't know how honestly to
explain this one in English. But let's say this one
is smooth and you make puff bring more volume. Yes, I think this one
is a great explanation. Bring more volume. That it's stylish, Interesting but, but it's cool, honestly, I didn't
expect it probably. Let's come back. This is how usually we
look like when we woke up. I suppose at least me. Let me make this one
just small puff. Let's make the strength word 0.25 Just small touches here. Probably. Here, here
and here like that. Okay, lets check object mode. It's nice, but you
might volume for me. So I'm going to come back to
what I got, where you are. Why controls that? Okay? Okay, nice cut. How you already understood. This is your opportunity to cut the hair if
you don't like it. Yes. That all the last one. To be honest, I never
used this word. So I don't have the real
experience to tell you about. But everything is very simple. Don't even if this
is your first time. My point ain't that you have to get the complete
instruction of each step. The thing is that have fun, have fun, and enjoy the process you can make wherever you want. This is the pleasant
part of the blender. You can do literally
wherever you want. Everything is in your hands
and everything is right here. I'm going to add the length
a little bit more from here. Let me, let me just
try to bring it. Pops, not shrink, but
grow. Let me check. Okay, back toward
the object mode. Nice, back toward the render. This is what we have. What if I'm going to make
the code toward 09? And what if I'm going
to make the IOL toward 1.1 15, correct. Then we go to the
random roughness. I'm going to make it to 0.95 back to the object mode overlay. A little bit hard for my PC, but that is what
we have probably. I'm going to bring this one
a little bit more closer, but take a look at how the lighting is
moving in between the hair. Again, if you'll create another, it will be principal
simple SDF hair. You see already in
the previous lesson. The color will be flat, ugly. And most of the things what
we actually can do also, this idea came right
now in my head. But why not go toward the body, Choose all of them. Control C to copy and go
toward their control V, bring it here, then we go
toward the color copy hex. And let's make a
small gradient. Why? Why not connect color
toward the color? Nice. But now let's, for example, this one
close, bring it here. What if this pink going to be more toward yellow
or more like that? Now we have small
gradients right here which make it
even more interesting. What if you're going
to have it more toward the white, Not so strong. What if here? We also have to bring
this one toward 0.5 here and see the vineyard. Let's go with quadratic. Then let's make
this one as black, just to see where
are our colors. Bring it up, 1.51 0.8 to 1.55 Okay, let's come back to word that color that we
already like it, which was some sort of pink right here and
this one on the right. Meanwhile, this one
drag more on the right to not display but
cardinal or even easy. A little bit more like that. This color I'm going
to change more toward this smooth gradient that
what we have right now. I just proof of
what I say before, I didn't plan to do this one, but the idea come in my head
and I was like, why not? Why I'm going to keep it more toward this and play
around my friends. But that's all for our last
lesson from that block. Do you remember how far
around 1 hour before we went. Everything was gray, every
wasn't as it is right now. And take a look at our result. Isn't nice. It's very nice. In the next block, we're going to install the blender kit, and we're going to bring the
texture for our address, I suppose it's all. And we're going to render
and enjoy what we got. Thank you so much.
Wish you the best. Looking forward to see what
you've done and see you.
13. 4.1 BlenderKit add-on: Block number four,
lesson number one, where we're going to
finish with our address, and probably that is, then we're going to create the camera and render
our final result. Very simple, if you
never did it before. We go toward the Blender
Key.com This is the official, this is the website
where you have a lot of materials, textures, and a lot of things that
are actually going to help you in order to create
some great illustrations. For example, you go
toward the materials and here we have a lot of things
that you can download, but to work with each one apart, going to take a lot of time, your steps that you
have to do alone, put on, post this video
and then come back. First of all, register
this isn't hard. You create password
login that all. Then download the blender kit and you're going to
have a zip file. Yes. Then you go
toward the blender. After you finish it, all
of that, please come back. Now, I hope you did it. You go to where the
edit preference, add ons install and see it for the folder where
you have your zip file, for example, this is the
last one that I downloaded. Just press on that
and install add on. I already have it. And that all then you're searching
here for Blender Kid. Make sure that you have
a check in and a right. Now if you press and
for the site menu, you can see that we have
a blender key profile. Then you have to log in here that you're going to
have the button log in, the same password and the
mail, and then come back. Now you have the access for all of the materials for
a lot of things. Going to use it, but we
will use it right now. I hope it was clear. What if I'm going to make
this one as a lesson apart just to make it
easier to comprehend? Do all of the steps. And
I'm going to see you in our next lesson
where we're going to create the material
for our address.
14. 4.2 Dress texture: Hello my friends. And I
suppose this is going to be the final lesson
before we're going to render our character, which we came so far
for our address, I'm going to show
you a few options. The right one going to be
to unwrap our address. But let me show you
how we can achieve a great outcome even
without unwrapping. But then I also will show you how to unwrap
this one probably. I'm going to divide this one in two lessons in
order like always, to make it easy and
very comprehensive. Let's hide our character. Let's go in the render mode, let's hide the overlay. And for the Blender kit, open here, search for flower. Yes, I already have this one. But for example, I
like the texture. What you do, you just
drag and drop V. You have the texture
applied on your address. Be sure that you are
in the materials just for some case, and
then you can hide it. And to hide it, then open your character out
of the solo mode. Where we are out of the
solo mode one more time, we are here La. Just with a few clicks, we created texture for our
outfit, for our dress. Now that the key
message of this class, you have all of the tools
to create different hair, to create different
texture for your dress, to create different colors
that will allow you to create something unique
or different results. You don't have to copy.
That was my point. I show you the
main tools and you can use these tools in
your own creative way. That was what I tried to
teach you right here. But let's try something else. For example, not this flower. I also like, let me
go on the right. On the right where it is.
Where it is. Where it is. I probably it was not
flower but dress. Let's search for a dress. Yes, here it is, printed flower cloth.
Bring it right here. Double click, here we are with another texture
for our address. Which look, let me again high
the character, very small. We can go toward the
shaded editor right here. Choose our address
and just make it. For example, not ten, but
44.4 or actually even 11.11 To bring the
character again, hide the menu, Hide this one. Quantrals save and La. Very easy. Again,
for illustration, this is more than enough. If you want to learn a
little bit about unwrapping, I'm going to wait for
you for our next lesson. But even right now, we have a great result. We have great outcome that is more than enough
for the final render. Let's jump on our next final
lesson from this block, Play around, have fun. Goodbye.
15. 4.3 Unwrapping: Come back, I'll say that this is some additional lesson
where I'm going to tell you about UV and
wrapping the texture. Right now, the address
is good, is amazing. There is nothing else
that we have to change. But let me hide the character. Let me here choose
the UV editor, then let me go toward
the simple mode, show the overlays edit mode. First of all, when you create, when you want to unwrap
something you want to mark, like in the outfits
is the bridges that connect you have somehow
to divide this Iceland. We, for example, choose outlet, click this one and
then for example, shift outlet click here we
go with the control three. Which one? This
one and the same. This one right click. And we have here like Mark
Sm. Here is an example. This is what Sm look like. You have outfit outfit
the material material. And something that connect them. Like this one. Or
Yes, like this one. I hope now it's a little
bit more clear what it is. Come back then we go. Let me go toward
the render mode to show you how everything
going to be changed. Right now, we press HG, Everything unwrap, very bad. The question could be
why we need this one if the way how it was before was
good, like we don't need. Because now our work
is very simple. It just some three illustration. But the more complex
you make our work, you need evian wrapping. You need to place the texture on different sites that why. Let me show you how we can
make this one look good. Also that's going to be very
useful technique for future. Let's choose, for example, the squat or this, or
this doesn't matter. Choose wherever you like. So then press two for
the edges and then go, for example, on the right edge, right click, align
horizontally, align vertically. The same thing with this
one, align vertically. Then this one we go, I don't know how to pronounce
this word correctly. Choose this one. This one. Okay. Now we have
a perfect squat, which is aligned on the x. And Greg, then
three photo faces. Choose this one that we work on, then L to choose the
entire topology. Then you press right click, Follow active quad, which mean that one that we work
on follow active quad. Now we have something more closer to the topology
that we can work with. Then as for a scale, bring this one right here. Don't pay attention for
all of these vertices. This isn't something
that we needed. Now you can see the part behind is still ugly because we have a
cut in between. This is one island,
this is another island. That one is this that in front
that we work on right now. Let's go toward this one. And let's do the same thing. Choose the squad edges. This one align vertically. This one aline vertically, then this one horizontally,
and the same here. Then press L. You
choose everything. Right click, Follow Active
Squad A ferrotation. We can go with the 19. Yes. And then we go
to the S for scale. And bring this one right here. Let's try to align that one. It will be hard, but we can try not perfect but something here. I, I think that I found it. Okay, great. Now, as close as. Okay, here is the miss. The miss part. It is what it is. In that lesson, I don't have
a purpose to make this one. I just want to show
you for future some, let's say tools that will help you to understand the U
wrapping a little bit better. Let's go, let's connect them. Don't look messy. Then you can go, for example, toward the shader
editor, for example, to make it smaller or bigger. Oops. Let's go with
the value for 10.10 then that's how you can achieve some sort
of decent result. Of course, here is extended, here is more smaller, and you have to play
around in the UV editor. This is an additional work, how I say we don't need it because the way how our address looked before was more than
enough for a decent result. But for future, I hope
that one was useful. There are many techniques of
the way how you can unwrap something that is one
of the most basic one. Then you can play
with a rotation with the allocation
and many more. You can back to the UV editor, you can add more seams, for example, if you
like, for example, one here in the middle. And in that case, everything going to be
completely different. There is always space
to explore and to work. I hope it was clear how
I say we don't need it. That's why I'm going to come
back to our previous result. But that is what
we have right now. Don't forget to duplicate. It will be more easier
for you to restore the previous version instead of trying to control
that control that. That is in the next lesson, we're going to establish
the camera and bring this one toward
our final render. See you there, my friends.
16. 5. Render + Compositing: Welcome back my
friends, final lesson. But we're going to
render our work. And now you can
notice that it's a little bit different from
what we have before. This is exactly what I, what I've told you in
the previous lessons. You have the character,
you have the tools, and you have your creativity. I decided that the
previous scholars are similar to
what I did before. I thought, why do
you not change it? In case if you ask for the
material is white fabric, interest, pink, silver, that
all don't repeat after me. Do your own. Also in the studio, for example, you can
even change the color of the area of the
lighting toward the red. And you can see now it's completely different
from what we got. Like always, everything is in your own hands before we
render less thing to say, in my previous work, my initial work, I got
some jubilee Right here. You have all of the tools if
you want, you can create. This ain't the
hard task for you, even if you're a
complete beginner. You have now the blender kit, which allow you to
create the materials. You can bring the Jubilee
around her leg hands, wherever you want,
around the eyes. This is like your
homework you want to do. Don't, don't do. I will
not score you right now. We already have the camera. Yes, we have it in our
initial collection. Let's move our camera
toward studio, and let's delete this collection with light because we
don't need it anymore. Control has to save
now how you can easily to establish your camera from wherever angle do you want? The combination is control
out zero on an empt. Voila, Very easy. Then we go to where
the camera setting and I don't want to keep the
type of perspective. I'd like to have
the orthographic, which is the same
as one on an empt, one on an empt or zero. Then let's move this one
a little bit more far. And let me move this one that
a little bit on the left. It's now perfectly
in the center. Then we go toward
the setting first. First, let's go toward
our collections and make sure that camera and
I are both closed. Because otherwise, for
example, the reference, we don't see this one in the viewpoard because the eye is closed but the camera is on, which means we're going to have this one in the final render. Great outfits. Great studio. Great. Right now in the render, we'll have everything that
we see in front of us. Then we go to the is
pretty important thing. We go toward the render. Go down in the
performance no film. Yes. And check in
on the transparent. In that case we will
have some PNG Y because what if you don't like the black background or you want some perfect
white background, which will take some time. Waste of time, I'll say for us to create the background
to make it perfectly wide, to align the, the light
and everything else. Let's increase, for example, the world lighting toward 025. We're going to go, we're going to bring the
transparent on. We're going to render
only our character. And then we can
easily, you know, without wasting our time, can create different
backgrounds. Red, blue, white,
wherever do you want. This is at least how
I would like to do. This is my
recommendation for you. Also control as to
save transparent on, then we go to word the noise. We already have
the check in here, samples we look, the
more samples you have, the more quality going
to be your final work. Especially considering that
we have the hair right here, it will be very pleasant. For example, I'm going
to keep this one on 2,400 The render, of course will took more time. If you don't trust your PC, keep this one on
1,000 But if you can wait a little bit for
2000, it's going to be great. But there is one more thing. Remember when you
work on our hair, I told you that straight before
we're going to render it, we're going to increase
the viewport display steps toward the maximum in order to achieve the maximum quality. We're going to do
this one but before probably too much
information for you or probably I speak to you
first or I don't know. I hope everything
is clear till now. The trick that I do
always before I render decrease the maximum samples toward five. Quality is poor. Of course, let's just make sure that everything
is on point, the color there is
nothing will appear. Just quick re render image. Let's wait for a few seconds. Okay, we have our character with the colors
that I already set. With a dress with a
transparent background, nice, everything
is on point close. Then we go to where the max
samples under the render. Don't miss with the Viewport
under the render and back to 2,400 control as safe.
The quality is great. You also can set the resolution if you want to make it,
for example, bigger. No problem. I'm going to
keep on the simple HD, which is more than enough
for the social media. Now we go to render image, you can see wait a second, Wait, wait, wait, wait, wait a second. Okay. We have 2004 Hungary samples
and now, guess what. Let's wait before our final
render is going to be done. Thank you so much
for your attention and I'm going to
see you very soon. So my friends, my
character is done. This is my final result. The hair look awesome honestly, and everything is
actually great. First thing first, let's
save our image image. Save, choose a folder, give it a name right here. And save image. Great. Then you can just hide this one. Not close. Let's go toward
the compositing part. It's going to be
very quick so that why I don't need
to make this one as a different lesson or
probably I'm going to divide it. Who know, we go toward the compositing right
here, right here. And check in on
use nodes, great. Then in order to see
what we are done, what we've done, we
go to the shift A. And here is search for viewer, bring it here and connect
image to the image right here. Great. If you actually
make the image smaller, you press, you can see or what. Unfortunately here you can
see the key that I press. But V to make it
smaller and Alt, V to make it bigger, hold Alt and Mao wheel. Just to move this one,
your image around. Let's direct this one on the right V to make
it one smaller. How I say let's
create a background. Oops, let's create a background for our transparent image. We got a shift a and here, search for alpha over
and bring it in. This one below, right here. And that's how, first of all, this value bring toward
one which you can see, take a look at hair before
and after is better. And image, bring this one toward black or you can bring
this one toward gray. How I say you can choose
wherever color do you want? Personally, I'd like
to keep this one more toward this black. Then you connect image, then wait a second, you connect this
image to this image. That is, you go to Word back Back actually for
your blender render, and now we have our
background behind. Now one more time. Image saves. Let's call this one
after class with BG, which means background
save image. And now check that is
this is our final render. Now we can bring this one in
the Photoshop, for example, to add some noise or to make some color correction
if you like so, but that was the final
touches of our final render. My friends, thank you so much. In the next lesson, I'm going
to give you the homework, but for now, it is what
it is. Hope you enjoy it.
17. Congratulation and Homework: First of all, congratulations. I love stubborn attitude. And the fact that
you can came from the first lesson to
the end lesson toward the render already deserve a
praise and this is my way, my try to support you to say
that you did a great job. The second one I bring a little
bit of color correction, I bring a little bit of noise, but there is, there
is no big changes. Your homework, I tried in that class to provide
tools that will help you. First of all, to build
that confidence in the fact that you can create characters, you see, you can, There is nothing so hard, you just build it slowly, slowly modeling, then
lighting, then materials. And that's how you came to some sort of the final outcome that's going to
satisfy your eye. We also learn some useful tools that I'm more than sure going to help you will be very helpful in order to create
your personal projects. And not only what we did
here throughout the class. Bring your character
with your own colors, with your own outfits, with your own textures, using the skills and
tools that we learn here in that class. Also, I'll be very thankful if you're
going to bring me some sort of review in order to make
it more clear for me how good that class was or where
you think I could do better. I'll do my best. I
wish you the best. Thank you so much,
everyone. Have a nice time. Always, please, please
remember the golden rule, the most valuable rule that I provided
through that class. Have fun and enjoy the
process, of course, coffee. And this is the basics
of amazing work. Have a nice day, my
friend. Have a nice day.
 Sasha Luvr, Work in third dimension