Transcripts
1. Intro About that course: Hello, if you're a beginner
and you're a startup, your 3D career, making
your first steps, or just want to have fun, welcome to the course
that definitely will improve the amount and
quality of your knowledge. Here we will jump
deeper into Blender, modeling, text or
grooming and compositing. That is course number one
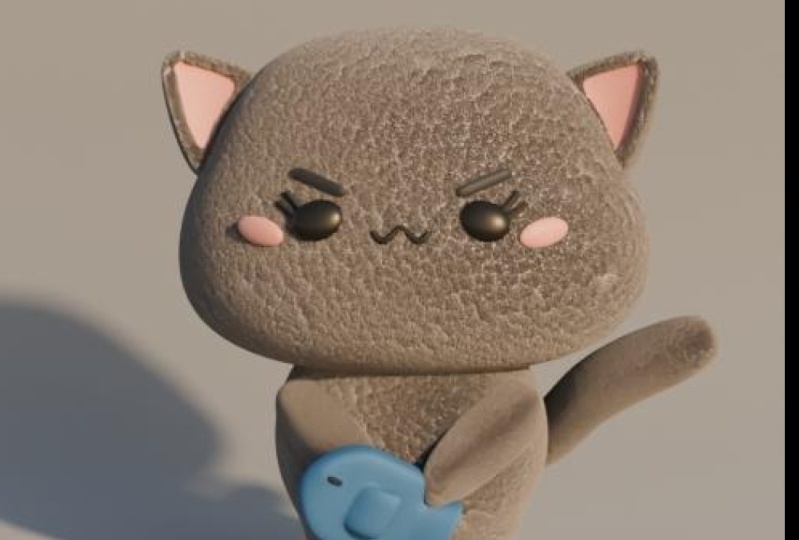
where we will create kit mail, which is your final work. Don't worry if you have
like an experience, I guarantee that they
explain everything clear and I hope for
your enjoyable time. Let's start.
2. Head Lesson 1 1: Hello. Okay, to think before we start, I want you to stay
but they'll work in Blender two-point entity
you today we had 3.23. I don t think that
this is a big problem if you are on another version. So don't worry. The second thing, if you're
completely beginner, you'll see everything that I click on my keyboard
on the left corner. So look left mouse as if you will not
understand something. Just look in the left
corner and you will see what are my keyboard to
achieve the same result. Great, Let's start
the third thing. Let's save our file Control S. How you see it.
Create a folder. Let's name this one. Male. I have this
one right here. Kept meal, sound
vendor file, good. Teachers, everything. Do it. We have collection
in the right corner. Double-click. Let's name this one. This should be a golden rule. Everything, should
you have a name or it will be too messy. The final of your work, mail. Good Control S to save. The second thing
under this course, you can find a reference images. Download this
police wanted to be very comfortable
to work with it. Reference cadmium and drug
into your 3D view port. In case if that doesn't
work for some reasons, let me show you another way. Shift a image or Reference, choose the same result. Okay, Click on that
one, Altair to place. Make it straight and one line, L x 90, good. G, e Greek and move
it a little bit behind something
that S, for scale. We need to have a little
bit of space between these bitumen. Bitumen here. S for scale, not too much, not like that, just
something in the middle. Good Control S to save. Great job. I click one ampere
to be in the front view. Now we are in a Greek axis. I think it's a
little bit more in the middle and there his
mouth will be great. One more thing. Don't try to make it completely like me because you
have referenced and this will help you to
achieve a greater result. So I'll just leave
you with some things, but interest to write your
work and to understand alone. Good. For his head. We'll create, will add cube another sphere if you think that sphere will be way
more better choice. No, trust me, cube, shift a mesh cubed. Okay, It's just kill Jesus
to make it like that. And now Control to, for a subdivision surface, this is, you will see
the same thing here. Let me make it a
little bit bigger. So we have some division. It gives the same results. So we can go here, subdivision surface
to the same result, only control chew it a
little bit more faster. As just scale on the z axis
as x to scale on the x axis. Good. If you want to see the image, the image behind you
don't need to make, lay this all the
time, just algebra. You can see, or you have here, you have two squares in it. And you can see a shortcut. I'll set it. What will help to see what
you have behind your object. Great job. Now we have something. We go to the Edit Mode
tab to choose Edit mode. Or you go here and
choose Edit Mode. Good. I hope you have your tea or
your coffee control error. And if you drag your mouse, you will see this yellow edge that will be surround
your entire mesh. Click and you see that
the shape is changed. The reason why we add this one, because you can see that this
isn't completely sphere. He had this thing. Chicks. I hope I pronounce
this one correct, so that one, and this is
why we need another edge. And now let's work
with his shape. Choose vertices that are
upward, S, and scale. Till you will not achieve
something similar. G, is it drag it down? Okay, Could the reason why
you should apply L, L, Z is because if you'll be here and you'll choose
these vertices, you choose only
this one in front. So how you see this one
are the same place, but you want to work with
them at the same time. And to avoid waste of time. And that you will
choose all of them. Okay, Let's, S for
scale over a bit more. Let's do this one from the down. Just move upward. Science, this line's good. Let's see what we have. Nice. He's jokes. I think we can add one
more edge, control error. Yellow line, click
and move it down. Four years. I wanted here, double-click. Good. We're still in this mode on our toggle x-ray or
just in some case, choose these vertices to x and move it a little
bit on your right. So you see, we don't need to
use all of these settings. If you're a beginner,
explain that for you. It's an odorous to know
a few things like G as Eric to rotate off
churches, something like that. Do move it down. Good, Let's do this one. Let's move than household
little bit, like the eggs. Just play around, just
play around science, you will not achieve the shape
that you want to achieve. And now you can see that
we work on that part. And if you don't want if you're a lazy
and I don't know if you don't watch your torch,
you do the same thing. Sunlit. Choose your object, Alt X. This is mirror on the x axis. And now you achieve, you heard the same thing. Or if you want, you can play around and
to do the same thing. For example, if
you don't want to make them because they are
incomplete, this similar. Here we have that shape and here is a little bit different. So you know what? Let's stay like that. I didn't do anything
hard for now. I just use my
reference to help me. Missy, cute, very cute. Control S to save. Three are numbered to
choose the same view. So we are here now
we want to be here. Three are numbered. Let me move this reference
a little bit more behind. Choose your, oh, I forgot. Let's rename this one
like always, do that. Three. K edit mode. Let's choose his faces. If you don't know,
this is vertex and this edge and this is phase, choose face or three. So this is the same thing. One, shift, shifts three for
the side view, G, e, Greek. And I want to make this shape. I think we'll choose on that. Air. Air peaks rotate a
little bit like that. Now choose this one only
below three or none, but g, e, Greek,
move it forward. Oh, okay. I see. I think
something like that. Good. It to mess right now and
not like messy low poly, we need to have a
little bit more smooth. But before that, my
recommendation always is heavy. Head a copy for that. M on keyword new
Collect. No, no, no. Excuse me. I may sometimes
I'll click on that. First of all, let's
create a copy Shift Z. Now have a copy right-click
to keep it the same, to call that in the same place. Now m, new collection. Copy. Good. Okay. Okay, and now we have one collection here and
one collection here. Here we will save everything before we want you
to do some change that we will save our
nerve cells in future. Height and good. Now we will work
with the main head. Let's move this one,
right-click Shade Smooth, but you can still see that this isn't completely
smooth for that one, let's apply our
subdivision surface. Apply. Now one more time control too. You see the difference? Yes. And this is the final visit, the finish of that
lesson that was head, but before, let's, let's
set our Render Settings. So let's create
light and material. Usually for light, people love, Shift a, go here and
choose something for that. My recommendation. And it's something that they didn't just say t
from my experience, shift a mesh plane S to
scale, something like that. G. Does it move upward? Go through the material, mu, name it, Light underlying. Blaine. Great. Go to the British Museum
for this surface. Click and choose emission. Now, before we move
to the render, know, go here on the one that looked like English from Render
instead of EV, choose cycles. And now you can go to
the Render Settings. So the different
that one doesn't work in EV, like properly, what does the word good
in cycles that make our big round a little
bit more darker. So we're here on the red
planet, world properties. And here we have the color. Click on color can make
it a little bit darker. So I honestly love
to work with it. Lightweight, lightweight,
more S for scale. Of course we will add a
little bit more light. I love final lesson, but for
now, this one is enough. We can go GE Greek a little
bit in front error to rotate. Oh, okay, let's create a
material for our head. For that one. Go here. Material properties. Mu. Okay, head, sea, which
means color, Base Color. Click here, choose. I forgot this name. Picker here, picker.
Choose his color. And voila, we have the
same color like our cat. If you want to change it, no problem goes here and change. Personally, I would like to make it a little bit more gray. I had done this. I like this one a
little bit more. Control S to save. Congratulations, we've
finished our ahead and let's move forward
for other lessons.
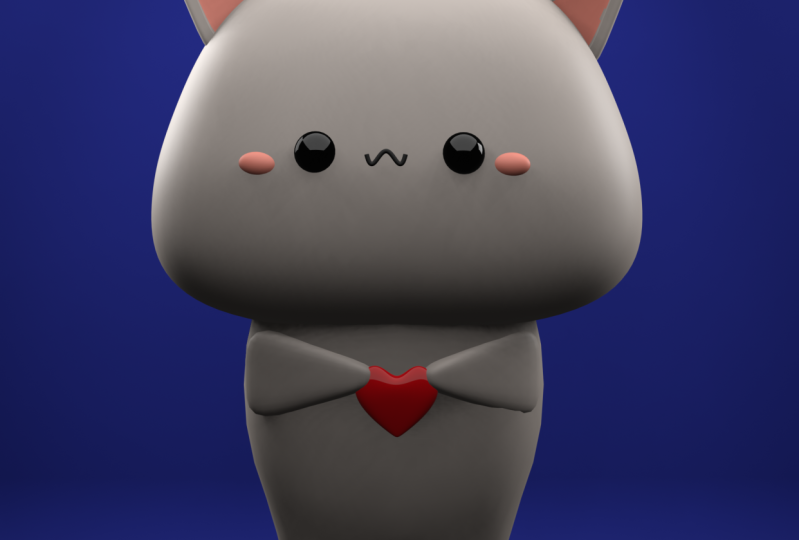
3. Eyes, mounth, shiny, eyebrows Lesson 2: Lesson number two,
I think this is the most simple one
we would create. His eyes, mouth and
this shiny things. But before, let's create
another collection. We will add our lighting, camera and other settings for
compositing new collection. Bg, which mean background. And here we have our plane, which is our light, double-click light
underlying Blaine. Good. Move to the BG. One or none. But let's go. Welcome to the video for you. This thing in a
coarser and usually everything that where did this courser there
will be your mesh. But because I don't
want, for example, the upgrade right now and I, I don't want you move
up from the right. You can move this course or with Shift and
right-click right here. And now, shift a
sphere, UV sphere. And the object will be added
here with your course. Or if you want to
return this one at the center of your 3D view port, Shift, Shift S, corso to world origin and its
return to the same place. Great. Back to his home.
Also get to see what we have behind S for scale. Something like that. G, x. Good. Right-click, Shade, Smooth. Let's call it where is our I? Our eyes is edit in the list
collection for instable. Let's rename this one. I write M, Mailchimp. Good. Three to this side of you. You know what? This is good. We don't need to have
like that or like that. So that one, you can move a
little bit on x to rotate. In Greek. It's good, it's good.
What do we can do? Select your, I select your head. Right? Now we have two eyes. Let's create materials for him. Choose your I knew
I underlying S, which means color,
base color, dark. And here we'd have roughness. Let's move this one to 0.8. Let's return to the render mood. Know we have
something similar to our address or you know what we can play
with their office. What if it will be more
like that? More shiny? Yes, shiny. Look more beautiful. Is 0.35. Nice. Let's create his shiny part. What we can do is mesh, shift a UVs here,
let me back here. S for scale. Move it. She said, I'm sorry, to S, to scale g, x, move it here. Good. Three to the side view of
three are numbered GE Greek, move it in front, somewhere here. Shade Smooth. Okay? You know what? I would like to,
let's try this one. Your plane, which means hush seven and input
to the upper view. Choose your very shiny thing. Let's call this one shiny. I hope this is the correct name. M more to the meal kit. And let's rotate this one
and move it like this. Good. Now, now is the better one or number
two, the front view. Choose your head. I'll fix it. So you see Nephi
character just a few clicks and you can achieve
that new material. Ah, shiny. Yes. They have the same color. They have the same
color like this year. So click here, base color, choose your color, picker. Go here. Next to the render. The reason why I forgot
to open our light, click on this eye and we
have our shiny thing. Nice. Let's create his mouth, which will be the last
thing for our lesson. Part of that lesson, we
will create his mouth with your shift a Here curve. I think this is a
correct and choose path. Where we're, we're,
we're, we're Hagrid. Your path is
hydrates right here. So g e Greek and
move it in front. And you can see this line. Make this line a little
bit smaller with S. And go to the Edit mode, G up, sorry, g, z. And move it up somewhere
where excuse mouth. For now, for now, hold it here. It's not the problem. What we will do, we
have here four vertices and these vertices will help
us to achieve that shape. But before I use here, this one is too skinny. We should add a little bit more. So now when you have a curve, so you didn't have, when you click on something
else, you will not see. But when you click on curve, you have this green object that the probabilities
click on that one. I think to the geometry. Yes. And we have depth that
you this arrow, you'll see. You actually can track with it. But you can see now
it's more thicker. I think something like something like 017 will be
more than enough resolution. You can make something
like 12 and fuel caps. Why do this? You can see
right now that this is empty. If you want to not
have that one empty, fuel caps, nothing card. Back. Click on that one step to the Edit mode or how I
saved it for edit mode. And now choose the vertices
in the center G. Move it. You see how the shape is. Shape starts to change. Choose this one. These two g said, move it down. Move it up. So I think where is our curve? Let's rename this
one like mouth. K, g, x, move it up. Okay, let's kill this one. You see that this point
is in another place. If you want to have one here. Right-click. Cetera region,
origin to geometry. Now, it will be more comfortable retool S to scale something
like that. Good. Now, the same thing, D juice you this reference. Don't look at the
lesson. Try this one. Let's say this is your homework. Move it up. These two Gs, move it down. Let's listen this, move it up. I think you can make this
one a bit more thicker. She said Mom. Mom? Yes. No, or something similar
similar to that one. But I didn't know for the
reason I don't like it. I think S to scale. Or now it's better. Use S to scale or make them one a little bit
more close to each other. Control to know. Go to the material properties. Mu mouth. Okay, let's make this
one with a big letter. Mouth. Color, black color. Ralph minus I here, I think here there are seven, will be more better. Good. It's too far from the side view. G, e, Greek, more
with more close. I think the same can help us. So when you click why
we should show hide our plane because when you
click seven are numbered, you see, actually you
can't see anything because the light
is what prevent us. So high delight. Good. Choose your mouth, G, e, Greek and move it close. Not like n, But like that. Oh, okay, one of them, but return your light with this. I Let's hide our our image. Good. It starts to look cuter. I actually forgot. I forgot about his eyebrows. I'm not sure right now
if I highlighted shape. So how I said before, if you want, you can do
the same thing here. Just click on your
head out through that. Now, I think better in case
if you like the previous one. Well, not a problem. Go here, you have, you can see that we added right
now hops mirror modifier. Remove any old boat
to the initial shape. So, okay, let's
work with that one. Remember you always have this
choice to change his shape. His eyebrows, a
shift right here. Mesh, cube, like always. Cube. Scale, s, sound. Think of it in Greek to move
it a little bit in front. One are numbered. Tag to that edit
mode. No, no, no. You know what control to do this subdivision
surface, but lead. Now we go to the Edit mode. Coin error. Use your mouse
scroll to add two edges. Click one time. Good. Now let's choose that one. You can click here or to, or to number, number to. Go here to this edge, but that only this one, but Alt, left-click and you'll choose every
one of these edges. So all the edges around do x and move it on the right
for that same thing here, alt click on your left, good. Right-click, Shade, Smooth. Don't repeat. Let me just see. Let's create the copy.
Copy for that one. Shift D. First of all, first of all, the
name, It's okay. We all need a little bit. I borrow left, no, shift D for copy and move
it to the copy collection. Great job. We should remove this
two to the male head. M mail kit. Great. S for scale. You can play around, make how you want to make Shift G to make the copy on your right x and move
it on your right. Now I can make them actually, actually you can create
the shade that you want. I would like to this one
a question like that. My render. So something like this, g, g, z, I move it up. Let's create another
material for this one, mu, i bro, black color. And let me show you one trick that will
save a lot of time. So for example, if you shoot, you add one color in
a lot of objects. Instead of choose
every object to go to the material
to add this one, which will be a waste of time. What you can do, choose that choose object where
you want to add a material, Control L. And now you have here materials
that will apply. What we will choose, that will apply for the first object. So we'll choose material. This one now have eyebrow L. So why not control? They'll make sure my mistake. So the last one should should be the object that had the color. Yes. So this shows that
control material, good job. No. They share the
same material. Looks like this. I don't know. We'll see we will see. Let's play around. High the light seven unhampered
to the view error z. Change megabit is the change that choose both of
them. G, e, Greek. Thing here will be enough. I think roughness,
I'll add to have 08. Now return your light. Look one more time. What about 05005057? If you want to hide this grid
behind, you can click here. And to restore health or here. I still can decide which one. Okay, Let's move forward
to the next lesson. Thank you so much.
4. Ears Lesson 3: Let's see one more time. What
do you have for now? Good. In this lesson, we will
create his ears. Like always. We choose cube for that one, cube, g x to move
it from this side. For now. Here it will be enough. Three or number two, this side view of S
e Greek and make it a little bit more thinner
but not like that. I think I think this
will be enough. One or number two, the front view tab
to the edit mode, I'll choose vertices
that are upward S, scale, and move them to
something like this. Let's make our yearly
little bit more smaller. Now, one thing, we have
here two colors for that. One we should do, We should
you create another thing? So three, to choose phase to that phase that
is in front of you. So you can see three. Where are my Screen case? I'm sorry, I'm sorry. Yes. To the insert. This phase that will create another face and make something like that if you
want to move it slower, hold shift and move your mouse. I think something like that. Only one-click, not
double-click, one-click. Good. In Greek, and move it behind. Something like this. But be careful to
not go to forward. I like abroad of
your of your urine. So this will be enough. Why are numbered? I now wish you chew how
subdivision surface like always. But if you click
Control chew right now, that will be our shape. And this is kinda weird shape
in my personal opinion. So what I find more butter
or go to the Edit mode, a four, choose everything. Right-click,
right-click, sub-divide. Now in the object
mode control tooth, and you see that shape. Now, it's my opinion is more better than this
one that was before. If you like that one
that was before. Well, they'll problem. Let's call this y. They all are in Vg. It's annoying me. Let's call it alright. Market. Let's create a copy Shift G
For a copy, M. Copy. Good. For now, for now. Material. Let's go to the
material property. We don't need to create
another material. We have cared head as they
share the same thing. But you want this shiny one. How we can do this one? For now, they share the
same color, right-click, Shade Smooth, and go to the tab. Back to the Edit Mode. Choose phases, and choose
that face, that face that. And it goes to the
material properties. Let me make this one bigger. Click on plus to add
another material. This is very important
to be in the edit mode. In other words, otherwise it
will not work yours here. And don't create a new material.
We don't need that one. And go here where you
have the list of all of the materials and
choose shiny one side. Now, magic only, it's weird. The reason why they should
edit mode as scale, make it a little bit bigger,
something like that. Even that. I don't like. This shape is too much. Wherever. This one is better. Yes. Let's move tricky his
head, he's here. Okay. I like it. It places on this side
d x d is it agaric? G is just place it. And I didn't know that one
is a little bit more bigger. Let's make our head a
little bit bigger too, just a little cheeks. And go into the Edit mode. I'll set one to choose vertices. Let's choose all of these
below S. S to scale. This one in the middle L. So just scale. Yes. And go into the render mode. Good. You don't need to create
another one to your ear. Choose your head out x. Let's hide our empty. I still can decide what type of shape of his
head I like more. I think this one is a
little bit more curator wherever we see the final. So you can play around if you'd, if you feel that you would
like to have this era, so a little bit more different. Go to David molt and feel free to work with these vertices
to be more comfortable. If you want to move. They said to the sideline
like not just the straight. One more time is it? And you can move
to another side. So let's make, for
example, more like that. You can choose all of these
vertices that are upward. Or another three could
all electric show you. So choose all these
vertices that are upward. And now you can look another option and move all
of them and they sinter. Well, I expect a little
bit a different shape. I think, if you will. Okay, Let's do this one l. So just to try their dead. And I'd seen her
wherever. It's look. I just showed you and just
in case you didn't know. Well, we tried, but no, I don't think that
someone who like that. Let's try to choose this
less chance. Control C. No, no, no control Z, control Z, control Z quench,
controls it wherever it. Remember this one is kind
of a useful thing when you want to add a few
vertices at the same place, I M and the center. But for now, that
doesn't work properly. Let's play around. Due to these whiteboards
peaks I like this one. That one, d x w x. I'll wake up early
to move this one a little bit more
close to each other. So that, that S for
scale and back. Good. What it will move
more like here. Now we'll just play around and don't copy if you want
to look at my workflow. Well helped me happy. If not, just do what will make you more happy
with the final result. I show you the tools, you use them, how you want. Okay, Let me quickly
to finish the lesson that I think I would like to move these three
elites are upward, something like this. What about this? Jesus had said,
Okay, I'm finished. Another lesson that
they expect to be for two minutes and this is
ten minutes wherever. Such a big question in my life. Which one to decide? Oh, okay. That was our ears. Like, let's look from the side. You can move them
a little bit more behind if you want,
something like this. Wiki, Let's move forward
to the next lesson, where we'll create
Bali and his legs.
5. Body + Legs Lesson 4 : Hello, I'm more
time. Let's Move. In this lesson we'll do body
and his legs without hence, the reason why is because it
will be more comfortable, should have our hands apart. It will give you
way more freedom to and give them
different shapes. Like always shift eight, choose cube, g, does it. S for scale control, too good as x to make it
a little bit like that. She put up three from the
side of U S in Greek. Make it a little bit more
smaller on this axis. One unknown path we
are in the front view. The next step will be go to the motif fire, blight,
our subdivision. Right-click, Shade, Smooth. One more time control to
make it way more smoother. Edit mode. Let's create
his legs for that one. We need another edge. One here, control
air, yellow line. Move it more close to
the center like this. One more time Control L. Move it more close. Or something like
that will be enough. Go under his body, three to choose faces. Should this, this, this and
that will create one leg. And then we will mirror to the other side E
and move it down. Just something like
this error e Greek to rotate or that shape S to make it a little
bit more, more. Good. Let's work with this area. Two edges, out and left-click. So you will choose this one. If you only will click, you will choose that out quick. You will choose, you
choose both of them. Sideview in Greek and move
a little bit forward. The same thing Let's
do right here. D, e Greek LFO bit forward. This time, I think our shape will be a
little bit different, but it's not such a big problem. You can choose the
vertices that is here and move it on x-axis,
something like that. Nice. Let's choose one more time that g x to move it a little
bit on your right. As far as smaller. For smaller, know, I
will return true that one out x on the right. Okay, it goes through
the materials. Choose his cat head. Let's see. Let's hide
our image is very cute. So it's not a
problem if this one isn't completely inelastic,
collision the line. Wherever I feel free if you
want to change the shape, go to the tab. Let's create our copy. Shift G, right quick. And move to the
copy M, mean move. Good. Edit mode. How I see it? If you want to change something, you have all of this my
recommendation on in not apply your subdivision
because in that case, it will be way, way, way more harder to
change something. So back to that one. I didn't know, let's say this t, e Greek, it would be tiny Greek. Eureka little bit forward. I think this one else
so we can move a little bit more up
or lower, know, up. Yes. And probably, probably, I think that one
will be good alt Z. So this query,
should she be blue, g e Greek, a little bit behind? Choose this one in front, g e Greek move, they move a little in front. It will make them a
little bit more thicker. Okay, very nice. In the next, we have
a little bit of more of lessons
where we will create his hands, heart,
grooming, rendering. And we'll finish.
6. Hands Lesson 5: Hello, lesson number five,
where we will create his. Hence, the reason why I
created his hands apart is because it's way more comfortable as we give
them different shape. If we, for example, we create these shapes
somewhere that can extend from here on x-axis. It will be very
hard to move them. In that case, we
should create bonds, we should show Rakim, it's a lot of waste
of time and energy is way more comfortable
and at the same time, pretty cute to create
his hands apart. Like always, shift a mesh cube, move that one on the x-axis, three or number two,
the side view as agaric, something like that. Just make them something similar to the thickness
of your leg up. Now as x, something like this, go to the Edit mode. I'll set or torn on
this two squares. So the same thing
I'll set or that one. I'll choose vertices, choose all of these
vertices that are upward, S to scale them,
something like this. Back to the object mode. Like always, we can apply
subdivision surface like that. But honestly, I don't think
that this one is very related to our reference,
if you like it. No problem, but in my
opinion will be better. Controls it to return. Go to the Edit mode
a on the keyboard, introduce completely everything. Right-click sub-divide. And now back to this object
mode controlled shoe, which is subdivision surface. And this one in my opinion
is probably better, not a little bit, but in my
opinion, this is better. What do we can do? How should this May 1 go
a little bit smaller. Good, Don't forget to
save shade smooth. I don't think that we need to apply a subdivision surface
because the shape will be, will not see this one. So we will not see
that it's comparable. Okay, well, let's name this one. Hence. I think a little bit smaller. And now you don't need
to follow me completely. We'll put his hands
like this and like that because we will
have a heart inside. So I'll just do the same
thing that we did before. 1990. Yes, g more summer here. G x close to his hand. You don't need to create
another hand will just mirror that 13 are numbered. Move, move it on the
axis somewhere here. It's okay if it will be a
little bit in his body. I think if you want to
have different windows, have you different
point of views. What we can do is to go here when you see
two arrows, right? Quick, vertical split. And now you can have one for the front view and
the other one you can just move around
or even more, you can go to the render mode. But we don't need
this one for now, L. So let's not forget about his material and go to
this one, the red sphere. See, I actually rename this
one that was our cat head. See, I just remove two that get color because actually
they share the same color, so I don't find the reason to create different
materials. Can see. Oh, okay. Let's go
to the solo mode. How we can go slash
are numbered bones, especially number to return seven and unpatched
for the app view. And move that one
inside like this. I think we can create that one. We can make the handle
a little bit thicker. But at the same time a
little bit smaller? Yes. Now, our zip for
something like this. Yes. Elizabethan x axis. Yes and no. We just need some
more of that one. And move it a little bit up, a little bit down. Let's see, from this site, per KG egoic, move this
one a little bit forward. Good. Now, choose your hand. Choose your budget a second. I'll mirror on that one. Let's see what we have. Much more of them. It will be upward like that. Those little bit far
from each other. But I still think that we
can do this one better. So how, so how I say it, just play around x. Now. Yes. I think I found the perfect one. Three, move them just a
little bit inside leg. Missy. Here will
be his heart. Yes. I like that. Okay. But we didn't finish
our lesson for it. First of all, if
you want to look to the one we know
what you can do. Right-click join area,
moving there, right there. Second, your question can be
How we can divide that one? Because let's say you want to have a right
hand and left hand. In that case, we
have a few options. Option number one, we click, we will apply mirror. But our hands are
still one object. The second thing that we can
do is go to the edit mode. And you have L on keyboard. That is kinda smart thing. So he can understand where
are the objects apart. So you click L and
you see he choose only one hand because
this object apart, L, l, L. So you can choose different things like
this is very comfortable, especially if you
do hard surface, that thing will save
you a lot of your time. So we can go L. And now in
the edit mode to change, for example, he's positioned,
let's say like this. And back. Of course I
don't like that one. That was just for an example. But your second
question can be How we can divide them like
two different objects. In that case, choose
your area with L, or what do you can do for now? And for this project, I'll choose everything is just
on the keyboard selection. And now you have a left-hand
and the right-hand, left and right, left and right. Good. Let me keep working like that. So if you want control that
and back to the one object. If you want to work with their
hands apart, no problem. It's comfortable to this one is hand pumps and write that one. Hand. Left. Herbie done something.
So I want to, I wanted to see a little bit off here is by the way, not so much. One more thing that they
found that the rate now, if you're a beginner,
you're probably can, nope. I want you to rotate.
And you see he, he's rotation is around
that yellow point. Though the name quark
name is anchor point. How can you have that one in the After Effects in
Photoshop in a lot of things. So actually we're especially
where he do motion design, original work with 3D. How we can put this one at
the center of your object. Her right-click. Set the region already
entrenched elementary know, everything will be
around that point. G, uric. Those may take one of you. I like that. I don't know. Probably I can play
around with I'm not sure. I'm not sure. I like that one. Probably a little bit more smaller. Yes. This one is more
than enough for me. I think you'll like always
ten minutes, like always. I hope you found something not only interesting
but useful for yourself. And let's move to
the next lesson where we'll create his heart.
7. Heart Lesson 6: In this lesson, we're
going to create his heart. I hope that one will
be under five minutes. So let's go. That will be between
his hands right here. I am in the outset. Good. Shift. A lake Always cubed, three, G, e Greek. Move that one in front. Ji, said, moving down. Let's call that one
leg right here. Let's make that one a little bit smaller and not
too much for now. And I think S, e Greek and something like that. Good. Go to the Edit mode. Right now. Control error, one line, one edge right here. Yes, control error,
one right here. Good. The next step is
kinda very easy. I'll choose all of these
vertices that are downward. S scale for something like this. Good. Chew that one g x. This one g x on the right. This one that are
upwards in the center, G. Move it down. Good. These two S animal them
for something like that. Good. We create our heart is the thing that this is weird. You're completely right. Control Chu, and now that
one look way more, better. Her right-click Shade Smooth. Let's create material for now. New material, heart,
which mean a red color. Play with the roughness.
You can make that one shiny or completely made. I don't know, I think I want
something shiny, shiny. The second thing, of course, we can agree that this
one isn't smooth. So what we can do, don't apply or change the player subdivision and just increase the level of viewport. But remember that one should be equal if you want to
have the render similar, because right now
the values to move up to the four l.
So now it's better. Let's move that one hare
agaric between his hands. Let's make that one a
little bit smaller. Smaller. Agaric, more inside. Yes. If you want to change it
one tab to the edit mode, let me, for example, outset to choose
all the vertices G, to move it a little bit down, these two has to move
them close to each other. We can turn all of
these vertices in one. I will show the trick. Don't repeat because I'm
not sure that that result, but just to show
you one more thing. So it shows them and
move them at the center. So how you see we have for
now only 1 on one vertices, but that look weird. G is not what we want. So, but, but for the
future and just, you know, just to make you know, how you can create for all
of them just only one. Good. I think I will choose
this G x. G x. Let me check from
the side with NO, like I think I would like to me that one
a little bit thicker. I'm from the below. Choose this one in front. Agaric more than in front. Choose this one behind,
move them behind. Good. Back. I'll like that. So yes, I think this one is the shortest one. I don't know. You just can play around with your heart invaded
more if you want, you can create more edges, which will allow you
to create a little bit more concrete, more clear shape. If you can say like that. But I'm not sure
that I am honest, I'm completely okay
with that one. They want one thing probably. I'll make this one
a little bit close, just a little bit up. No, As for that. Oh, okay. We finish
with our lesson. The most funny part coming is hair and after will
be rendered setting. And we'll finish with that
course in our acute male cat.
8. Hair , Grooming Lesson 7: So grooming or hair for our kit. First of all, I'll
actually say that, especially if you don't
have experienced before, it is very hard. But if your PC is very weak, be careful and save every, every step after every step, because probably
sometimes blender can crush if for example, it will be two
headed for your PC. Okay, That was an
important disclaimer. Now let's start. So we'll create for his
head and then after we'll apply it to other
parts of his body. Very important thing
for that lesson, we create a copy before his head that we have in
the collection apart. But for now, let's create one more copy and then a
bit later just after lunch. I mean, it's you understand
why we did that. So Shift D X. Left-click. Okay. Now let's start with that head. Go to the particle
brokerages years. I didn't know what,
what comparison I can create shoe
that I can go here. Plus. And instead of
emitter choose here, for now, you don't see anything. The reason why is
because we should, she'll go to the other
modifiers and move our particle settings upwards, upward between hops,
mirror and subdivision. Now you can see, okay, back to the
hair system settings. Let's name that one
like I do here. Yes. Motion the number. Let's start. Number. Pretty, pretty simple
thing, five, thousands. So that increase in number
of Harper's particles here length will be 0.02. Yes. Next one segment. So segments, I will not say that this is
something very important and you can see a big difference when you increase the number. But let's say that
improve a little bit the quality of
your hair particles. So let's say six. Yes. Here we don't need
that one for now. We go to the children, and this is a very
important thing. Instead of known,
choose interpolates it. This is why it's
usually tutorials look like one big thing, especially if you're
a beginner that eat a lot of my near of seals. So I remember I render it. I have an amount
of hair that they wanted to see what the
final but when I render it, they might have
here was way more, way more than I have here. I didn't understand why. Hello, I find it later. Then Chu thinks,
should she be equal? So that display amount shows you the amount of
hair that you have here. But the render amount
will be different if they will not have
the equal value. So that one is ten and
that one is on 100. Remember that thing? And that will save
a lot of your time. Here in display will change L, so it's 100 goods. And now you see the
amount of hair that you will see that final
of your render. The reason why I say to create a copy because probably for now, if you make the same thing,
like knee everything. So you have that empty space, to be honest, I don't know
why we had that empty space. What is the reason
probably blender. Don't like something. I want to say no, no. I don't want to lie. But of course, I know
how to resolve that one. So let's go here. And we go to the modifiers. We apply our subdivisions. First, we apply our hope mirror. The second. Now go to the particles plus the grade
anything, just go here. And this is the same
thing like your material. Jews choose our hair. Now you can see that we
don't have our empty space. Everything is good. Everything look good. This green, these gray
actually is the light. So yes. But another problem, either one of you apply
subdivision surface. I don't know if the bar
look boring for you, but all if I say is will
be pretty important. So another thing when you
apply subdivision surface, look at this topology right now. So if you want to change something in your head
shape, yes you can. And yes, it will be very hard because look at the
amount of edge vertices basically that you can for now choose everything can look in comparison to our previous one before we apply a
subdivision surface, whereas way more comfortable
to change something. So this is why I said before
they start, we shoot. You have a copy. Always.
When you hit a copy. Just trust me, you'll be
grateful the degree that one. We actually have a copy
collection that we should feel with other things
that we didn't before. But actually we have our head. I think we can create the
copy for our body shift, right-click m and move
through their copy. The same thing for
our left hand, right hand. Shift
Z, right-click. When you When you click on
the right-click on, I don't know how to use area. Right-click on your mouse. The copy is you stay
in the same place. So actually we had that copy. But if you want to have them at the same place,
right-click Copy. Let's do this one for a hardship Z or right-click and copy. And I think his ears shift. Right-click and copy. Good job. Now that wasn't example. So what we're gonna do, our Julie, that one. We have copy of our
head but juice for us, Let's create another copy. Or right-click on that one, delete the particle
settings we don't need. Now m more to their copy. So we have one head before we will apply it
subdivision surface and one head. That will work right
now where we will apply our subdivision surface. I hope you understand
everything that they said and how I say this is
kinda important stuff. Apply. Apply. No, Is it better? Let's look how we
look at the render. Let's look how it look. Oh my God. Yes. So I I think everyone
is beautiful in their way. Of course, without
any discrimination, without any judgment. This is beautiful. Kids, especially are they are more beautiful
than any human, no matter how they look. But wherever for our
work, a little bit, a little bit After
Effects journalist, I didn't know how this
word is pronounced it. And let's apply. Apply. Now is better in that way. You see you. So this is an example
when I say that blender crushed and an avian
don't want to cut that one. Just to show you that
we always can expect something like that.
Do they have a copy? Yes. And create an image or an image and if you will not
have their copy, this isn't just good example. If you've not had a copy and you wanted to change
something if the shape, but look at this now,
it will be very hard. This is why I saved
him a copy and save, you make one step, save
my recommendation. Download this add-on power safe. It's free. If I
remember, it's free. But he can create a
copy of your file so you like safe
point in the game. Well, thank you. If your patient to wait for all of these words, how I said, I will say for the last time I promised
this was important. Now, let's work with our hair. Okay, go to the render material. We actually have
only one material, but for future, if your object will have
a lot of materials, don't ask herself while that or don't create another material
apart for your hair, which you can do, but I don't find them areas. And for that one, you just
go through the material and choose your material steps. Steps is also thinking
that will improve a little bit the quality
of your hair particles. You go to this six. Yes, it will be more than
enough, but remember, that can be very heavy for your PC Control S
to save ourself. Columbia. I'm about to show you the
explanation from the Google. So clump is a small
group of threes. Are plants growing
closer together. But let me show him practice. Don't repeat. Just look, just for your example. I'll move that one for a 1
thousand done, repeat 011. Okay, There's going to
be better and go here. And now that clump have 0 value. And you see, so these hairs move each
other two little groups, like how Google say a
group of three or blends. The same thing we saw here. I am back to 5 thousand how's
and zeros here are two. Good one. Okay, I'm here. We can
move for round 0.1504. Now it look a little bit
weird, but don't worry, and that roughness is the
most interesting part. So from the start, especially
if you have a lack of experience in the system and the hair system,
don't worry. You have a lot of settings in
anything that this is hard. Trust me, don't worry, nothing is hard here. You just play around, play around a little
bit of experience and you'll feel very
comfortable right here. So uniform, I usually work
on the belly like 002. Endpoint will be
something like 01. Yes. Good. Shape. I think this shape can
stay the same value. Random highlighted one. Let's look more or less, make a zoom in and see how
random work or random work. So one will be like
that too much. I think something like 008. Yes. Because why did this? So we can play around with
something like 0 is 0. Nine let me see you that work, but in the render,
everything is good. Yes. The last one says
will be for around 0, gives me 0.8 or
even or even 0.415. Yes, there's one for me
is more than enough. All of this stuff, kink, kink is kinda interesting. We don't see the
reason to explain that one for dead course because we work a little
bit in a different way. So but this is kind of type
of hair that you can have, for example, more wavy or more, you know, more curly hair
or more straight hair. For the, I don't know.
Let me show you just for an example, Carl. Okay, it will look
better because you should you play
around and have fun. But just to remember, kink is the type of hair
that you can have. Good. Let's go to our buddy
plus particle choose here. Go here, plus choose
here, Here else. So let's take a look. If you want to play
around a part, which of course you can do. My recommendation
instead of, you know, create new particles to
repeat all these steps, you just go, for example,
on your body lift. You can look here
and that one will create a copy of the same here. Savings copy budget here. Now you have simple
hair antibody here. You're just can play
around with that one. For example here
length can be 04005. Then we get, when we go here, we can make this size one, which doesn't add a
lot of differences. But wherever your first shape, I didn't think that they
wanted to change something here except random 02. Okay. The same thing.
You can go and you do with their hand hair. Just copy, name that one. Hand hair or grooming
wherever you're at. Chile's ok. I think is 005. Yes. It's a little bit better. So that's how it was before and that is now uniform. 0.0010010 was good. What if you made 0
to random like that? Actually, I don't
think that this is a bit, let me take a look. You see how he started to
load way more way more hard. So let me close that one. Let me close that one. Sure. That hair. Yes, I like that. Random. You probably can hear how my laptop work now for your heart. Yes. There are 0.01
is way more better. We can move to the other hand. And to choose the same here. Hint. Hint here, pardon? Oh, no, it's good. In the next lesson we
will work apart with the ear because here we have two materials
and I went to explain that one to not make
the tutorial too long. So let's take a look on that. And I'm the true personally, if I like that, by the shape. Here. We are one step
farther to finish our work. So we will see, I will see you in
the next lesson.
9. Body + legs Hair Issue Lesson 8: Hello, this is
completely unexpected. They do that they do for now. And the reason is because
I didn't like the hair in the body of x in
the previous lesson, but I didn't want to have
that lesson too big, and I decided to
create another one. So when we turn on, let's see what is
our hair for now? For our body and legs. And this is how it
looks. You actually can see a big difference.
So like that. Don't like please. Good. The reason why, first
of all, the same thing, like with our head, we
should, should move. We'll go through them modifiers and go and choose
particles settings, which is our hair in that case, and move up upwards between
hot mirror and subdivision. Now we can see the difference, but at the same time here, the issue with this empty space, the same empty space we
have on our head before. So one more time we
can create a copy. Just to show you the difference. We actually have a copy
of yes, we have a copy. Let's don't use that one. Hide everything
except excuse me. Where is our body? We didn't create? Yes. Yes. We have yes, we have by the
legs, copies worldwide. Now. Our body, Let's copy
will move here. Look at the topology right now. They share the same topology, but this is probably
the problem. And what we can do,
a play subdivision, apply hubs mirror. Now everything is done
except our topology will look like that because we increase the amount of vertices. And it will be very
hard for us to change the shape right now. At the same time, we have our copy before with
a good topology. And if you have some issue, you always can come
back to that one. But at the same time, look at it here right now. I think it's way more better. We can see the difference, which we can see before. So we told yes, that one is way more bizarre. Thank you for your attention. I didn't want to
hide the problem. I actually even happy
that I faced a few issues here in the course because
nothing is perfect. Everyone had that one and the most important to understand
how to resolve them. So thank you so much for
your attention and let's move forward for
our next lesson, where we'll create
hair for our ears.
10. Ears Hair Lesson 9: Okay, in that lesson, we will create
here for our ears, the reason why I didn't want to have too much information
for one lesson. So in this way, divide. Let's hide our copy
of the bottlenecks. Let's hide this copy folder. Let's hide our hair
so quick here, he will not remove, but
only will we go here. Create new particles settings
for yes, create new one. And then we choose personally I found hand hair
like the best one. And you can see right now
that we have a problem, we have a problem that we
want to have that rush. Again, go to the
modifier and move particles settings
upward between hops, mirror and subdivision surface. Personally, I like
it how it look. But the problem is we don't
have that. We don't see that. First of all, and I don't
think there'll be one to have the hair inside his ear because usually kids
don't have that one. So what are we gonna do? We go here, back to
the object mode. Let's hide that one. Let's hide this here. For now. Go to the Edit mode, three, to choose faces. Choose this shift, that
shift, shift that. Good. On keyboard selection. And now we'll have that
throws like an object apart. We go back to our ear. So this is the copy. We will name that one year row. So now let's apply
our hair on our ear. So now we can see here on
our IR R rouge is clean, but we have one more problem. So if I would like to
move somewhere my year, the Roche part will
stay apart because we divide them and we have
two different objects that, and this Roche in Iraq. Why do we can do choose
first of all, the roof. The second one, your ear. Combination of control. B. You have object, keep transform. So now when your leg to move, your eyes select only my ear, but I move somewhere
like on the right. You see that the Roche follow the same path and it will be very
comfortable, for example, if you'd like to
do some animation, and instead of waste or time, animate a part of Russia are
animated about your ear. Control P, object, characters,
object, keep transform. And the problem is resolved. And at the same time,
you can manipulate them apart because you have
two apart objects. I hope that was useful
for you. Thank you. Oh, oh, of course we
forgot about that one. Yes. And good at annotate
this before I close the tutorial because we
should apply our hops mirror. If all they have to move my
ears right now. Where am I? D like this? You can see that this
Roche like that one on the left have different behavior and we'd done don't need that. One. The reason why is because we should to
apply our hubs mirror. Good. Now, they all follow
the same path. And of course, if
you like to divide the ear for it here I showed before in the hands tutorial. So you go to the tabs you
choose with Alan keyboard, P selection, and that
will help you to divide. Actually, we do the
same thing with our loose right here
and the tutorial. So be selection and you
divide to another object. I personally don't
want to do that one. I want them to be
ended place for me is very comfortable.
Thank you so much. See you in the next and
probably less lesson for that mini-course
for our acute mail kit.
11. Compositing Final Lesson: Hello everyone, For
our last lesson. Yes. So first of all, let me hide all of
these particles settings because it's too heavy, even if your PC is
poor full height ways. I forgot I did in the voids on the particle settings
bar to cause settings. Here. Yeah. Okay, good one. So first of all, let's create another collection. I usually do. We
actually have BG, which means the ground here. Should that one shift
a mesh and plane. Finally, something except Our
usually cubed S for scale, for something like that. 34, this side view, go to the Edit Mode. Choose edge, choose that one. E to extrude. Move up. E is the same thing like
that one extrude region. So you can see the shortcut is, okay, choose that one, Control V to bevel. Use your mouse
scroll to increase the amount of edges or
something like that. Back to the object mode. Right-click, Shade, Smooth. Great. And I think we can do one
more thing as worldwide. So very important the moment. Let's create a camera. Good one. We go to the view. So how to align your camera the same the same place like
how you see for now, you go to the Align View and
choose the second one alone, active camera view. Good. Go here. Where are under
the photographer? And let's say, I want personal to do a square if you like, and other settings
of your solution. No problem. I personally will do
square with equality. Thousand on 2 thousand. Good. For now. If you want to control that one, let me show you also camera. You go n and that
menu will appear. You go to the View,
camera, view. You see now it's torn
or read the border. You can scroll and you're here. Okay. The problem is that when
I click one or none, but this is my front view. And then once you
align to the same, to the same, do they seem contradictory to
the same point of view? When I go to the camera, which is 0 and M, but I saw a different
perspective. Remember that was a
problem for me l, So how I found a
little bit later. So choose your camera and you will see that icon off
camera appear here. Object data properties
can go here. And now type from perspective, you choose the second
one orthographic. Now, we have the same like on
one or num put 0 on camera, we have the same point of view. You don't need to go to the enemy and you
introduce that one, you can change the perspective using these orthographic scale. Eight is 0.4 is the perfect. Actually a really perfect. It like line-by-line, if
you like the previous one. Well, no problem. You can play around shoe the perspective that
you want like these, that he's making it for
the studio. He's cool. But personally, I
want the second one. The third one. You like the type of fisheye? Yes. Why he didn't change? I know. You should you go to the
rendering is very cool. You can play around
with that one else. So silent. Where are the silent? Yes, but the purpose of this course, so it
will be different. The fisheye is very trendy, fuchsia is what usually
skateboarders use. And you have even more
settings for that one. Great. It's very strange. It, He's very nice. Madame going to the second one. I hope that the device is
very useful for you because personally for me,
it was useful. We have two more
things to add right now is a little bit light. So we shift a light. Hurry. Yeah, Good. G, x on the right,
air, e, Greek. Sure. Rotate around an axis
like that. Let me see. Yes. Let me go here. We go to page that lamp. We have power. Ten is very small value. 1 thousand will be
elsewhere too much. We can choose something like 17. And I will like to
choose the colors. Something close July,
light blue thing, please. Yes. And I think I'll increase
the value chain back. We can see the difference. I would like to picture them. The white. Yes. Just
if you didn't know, you always can turn that S, respond for the white. So if you'll turn to the 0, it will be completely
white again. So I'll like something
like what if about lighter red or that
one is way more buys her? Yes. And that one is better. I think. I will go through
that 250 or even 200. Let's create a material for our backgrounds room,
new material, room. Underlying S, which means color. We got here, which
is the maximum. We can play around
with the roughness. I would like. They
complete the wind. And I want to copy that one
and you move on the left. So Shift Z, each move here. Then e, grip 1018. Great. Let's move. I make it a bit more lower
with e Greek sound like this. What if, what if I'll
move that one behind him? So G, e Greek, move something somewhere here. We can move power background. That one. Done copy completely, just understand the movement and everything will be great. Jigs said. And I would like somewhere
behind his shoulder like that. Pair X to move it down. Let me see what behalf for now. It's a good point Also. I think is a good point. Also, accept their color. I like the color white,
but I'm not sure. I made sure that I
like that point. So let me move
more on this side. More like here. Yes. I think is too high. G is at x. I'm not sure that
I get that one. Altair to return to
the initial rotation 0.90 x minus nine to the
Greek, move it forward. Or said something like that. Let me see now. Yes, that one. A little bit of highlight
from this side. Let me see without
Let me see within. Yes, this one is a
little bit more better. I also would like to decrease the value right
here on the red one. For i, something like
one to five. Good. One more thing before we
will say that this is over. So what we're gonna do, when you will render, you'll see way,
way more objects. The final result. The reason why is
because you can ask herself way if I
hide everything here. Yes. You hide in the viewport but you didn't hide the render. So you go here, which
is the filter quick. And you have here
that one foot abroad. And human explained that this
is disabled in the renders. So how we can see you hide your copy folder here
in the viewport, but you didn't hide in
the render settings. So now, if we do like that, no, you can be sure that
nothing will appear, nothing that you didn't expect will appear
in your final image. They choose our mail kit, you see are empty, which was our reference. Let's look, let's take a
look at our reference. They both are very, very cute. I didn't know who the creator of that gate, but if someone know, please tell me I want to say a lot of compliments
for that person. So high that one, high that one. And yes, one more thing, one more thing before we go. So we are here in
the render settings, and here below you see
the color management. You can choose that look
like they exposure. So very high contrast. I mean, you don't need an explanation, you
see the difference. I usually work with
medium high contrast. I like that. So with known and with medium high, It's
a little bit better. We also can increase that
light sources for 1.3 years, but I would like to move that
one up for the GE, Greek. Good one. And why do we have to
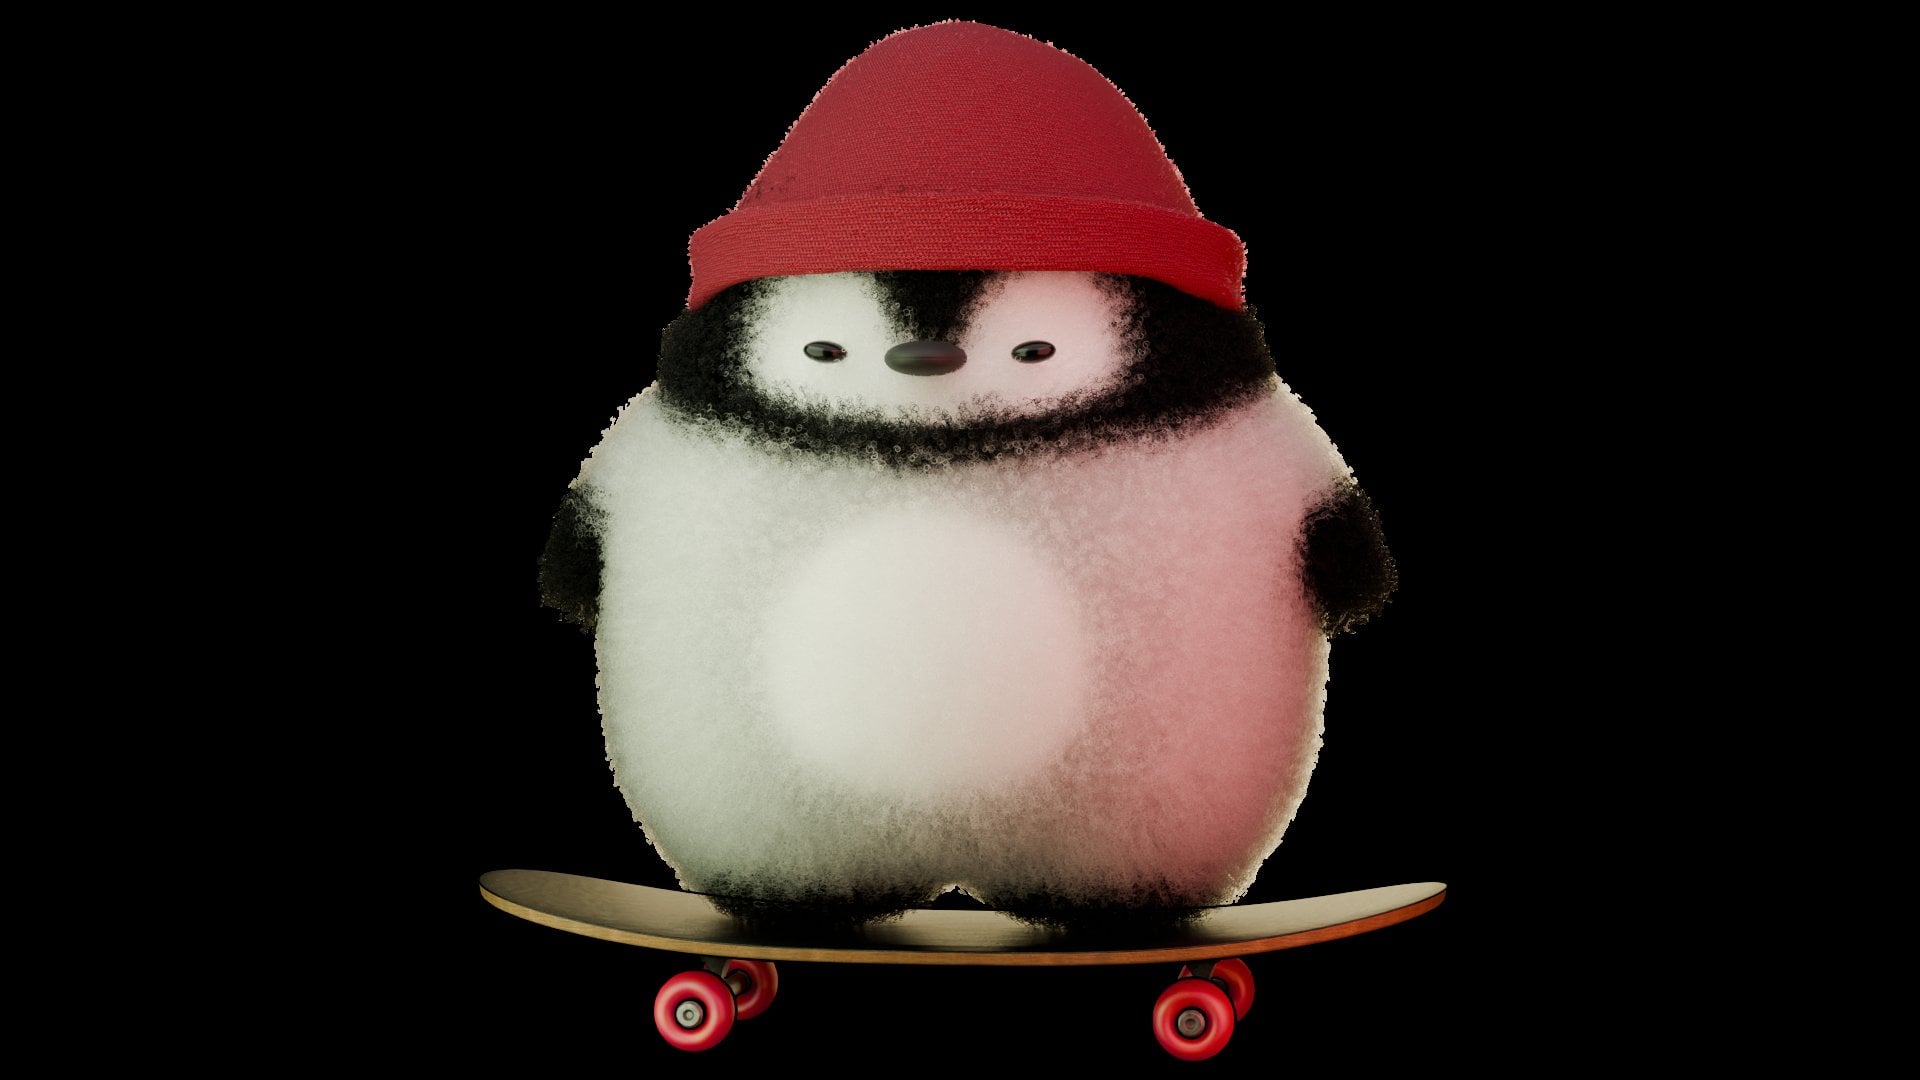
do more denoising? Denoising for a lot of
people are a big problem. I'll be honest with you. I render it my previous
image that I showed you in the intro of that course
without any denoising. So it was good how it was my recommendation
to play around. But objects or open
image denoising, or they are way more
better than NLM. You can see the
difference in Google because it will be a
lot of chicks planes. So just remember that these
two are a little bit better, but at the same time
that took way more time. But personally, I don't
want to render them with within nicer for me. It's completely okay with that. Yes. I think that these we can put that
one on the render. Let's actually render and see
what is our final result. So that is the final
of this course. I changed the size of the resolution and the rest
of the settings was the same. Thank you. I hope this
course was useful for you and I hope that was
enjoyable time. Humanize day and see
you in the next one.
 Sasha Luvr, Work in third dimension