Transcripts
1. Introduction: In this class, I want to introduce
you to some fun, new, exciting ideas
for mark-making. I want you to come with
me as we forage outside, as we forage our house, as we forage the craft store, as we forage their
our own art tools and figure out what marks
do I want to make? I want to figure out
what's going to be authentically me when I
create art going forward. In this process, we're going to make some
mark making tools, we're going to gather some
natural supplies outside, we're going to hunt
in our kitchen, and we'll go through all of the different art supplies for different mediums that
you might have collected. Or if you're not like me and you have all this stuff hanging
about and you're thinking, [LAUGHTER] I don't have any
of that stuff, hopefully, I'll introduce you to
something that you didn't think of or that you're
like, I really like that. Or I'll show you that things can be super cheap in
your art making. For instance, one of
my very favorite art making tools that I have a little discovery
here in class. I've long used
corrugated cardboard, super fun, cheap. Came in some packaging. I just saved the strip
of this stuff and cut a little piece out for the particular project
that I was doing today. Look how amazing
this turned out. I'm like, I definitely
going to put the cardboard in the box
for stuff going forward. This I loved. [LAUGHTER] I want to
show you and let you have some of those same
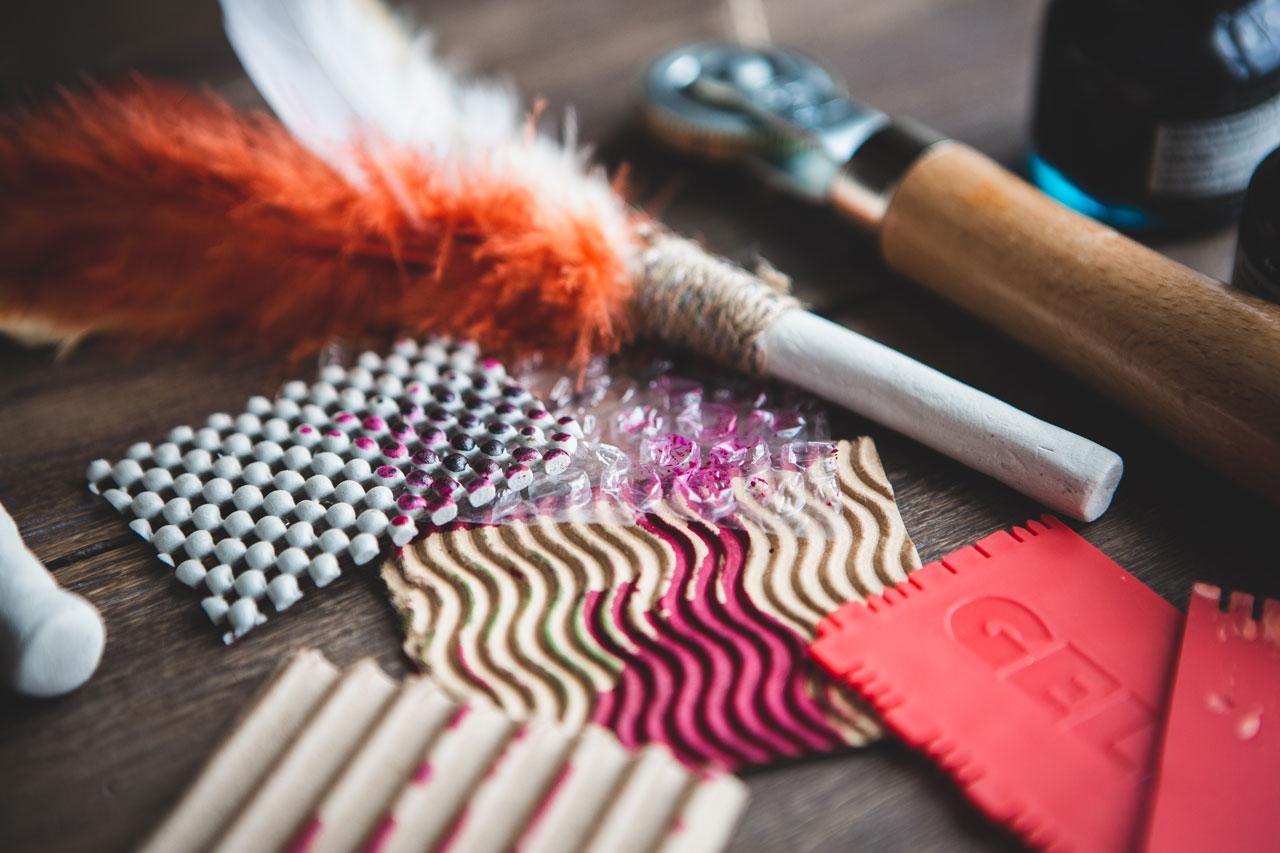
moments like we can collect bubble wrap
and shelf liner. These are four of my favorite
little art-making tools. There are things that I cut out from some packaging that
I got. So super fun. Your mark-making and your art creating don't have
to be expensive, but they can be creative. We're going to create some
maybe paper clay handles and gather some feathers and make
it something really pretty. There's all kinds of stuff
that we can make and create and forage and just find. Then once we find some that
were like this is cool, then you know that
that's something that appeal to you and it was
your favorite thing and we can put it in our little
box of favorites because I collect a little box of
stuff that I'm like, here's the favorite things
I like to mark make with. Then you'll have
some fun tools going forward that don't
have to be expensive. Some of these are all free. [LAUGHTER] Basically came in different packaging and stuff. Some little [inaudible], different things that
that I collected outside. They make the most
exciting marks and different things that I experimented with as I was just testing out
different things. I want you to have fun. I want you to discover
new things to use for mark-making and about yourself and what you like in this class. I want to introduce you
to things that maybe you didn't think could be
mark-making tools, you wouldn't have
even occurred to you. I've got some stuff from the auto store [LAUGHTER]
that I'm like, look how cool this is in class. I can't wait till you
come across that. I'm going to let
you discover it. [LAUGHTER] I want
you to figure out what ones that you love that are going to be authentic
to you going forward. The thing I like about some of these unconventional
mark-making tools is that not everybody is
going to be using them. Not everybody is going to
have the same discoveries and aha moments that you're
having as you're collecting and gathering and
trying these things out. As you go forward, some of these are going
to be unique things that define your authenticity in the art that you create,
and I love that. This is the things that you
can let your mind relax. You're not trying to
create anything major. Some of our pages are just used the colors of
paint you don't like, so you're not wasting it
and just try your stuff out and see [LAUGHTER]
what does it do? I love this or I
don't love this. We start off with some
mark making pages, just trying everything out, and then collecting
a box of the ones that we were like, I loved that. They will have a box of stuff
that's fun to create with the things that we know we
already like. I love that. This is how we're
going to get to a more authentic self
in our creating. I can't wait to share
with you some of the fun ideas that
I've come up with. Hopefully, if you're in a rut or you want to
step outside your box, so you want to try
something new, you'll turn to some of the spawn mark-making elements
and get excited and go out and find some new
stuff and come back and create some fun things
in your art room. I'm pretty excited about that. I'm Denise Love, and I'm an artist and
photographer out of Atlanta, Georgia.I can't wait to show you all the fun things that I've come up with for class today. I'll see you in class. [MUSIC]
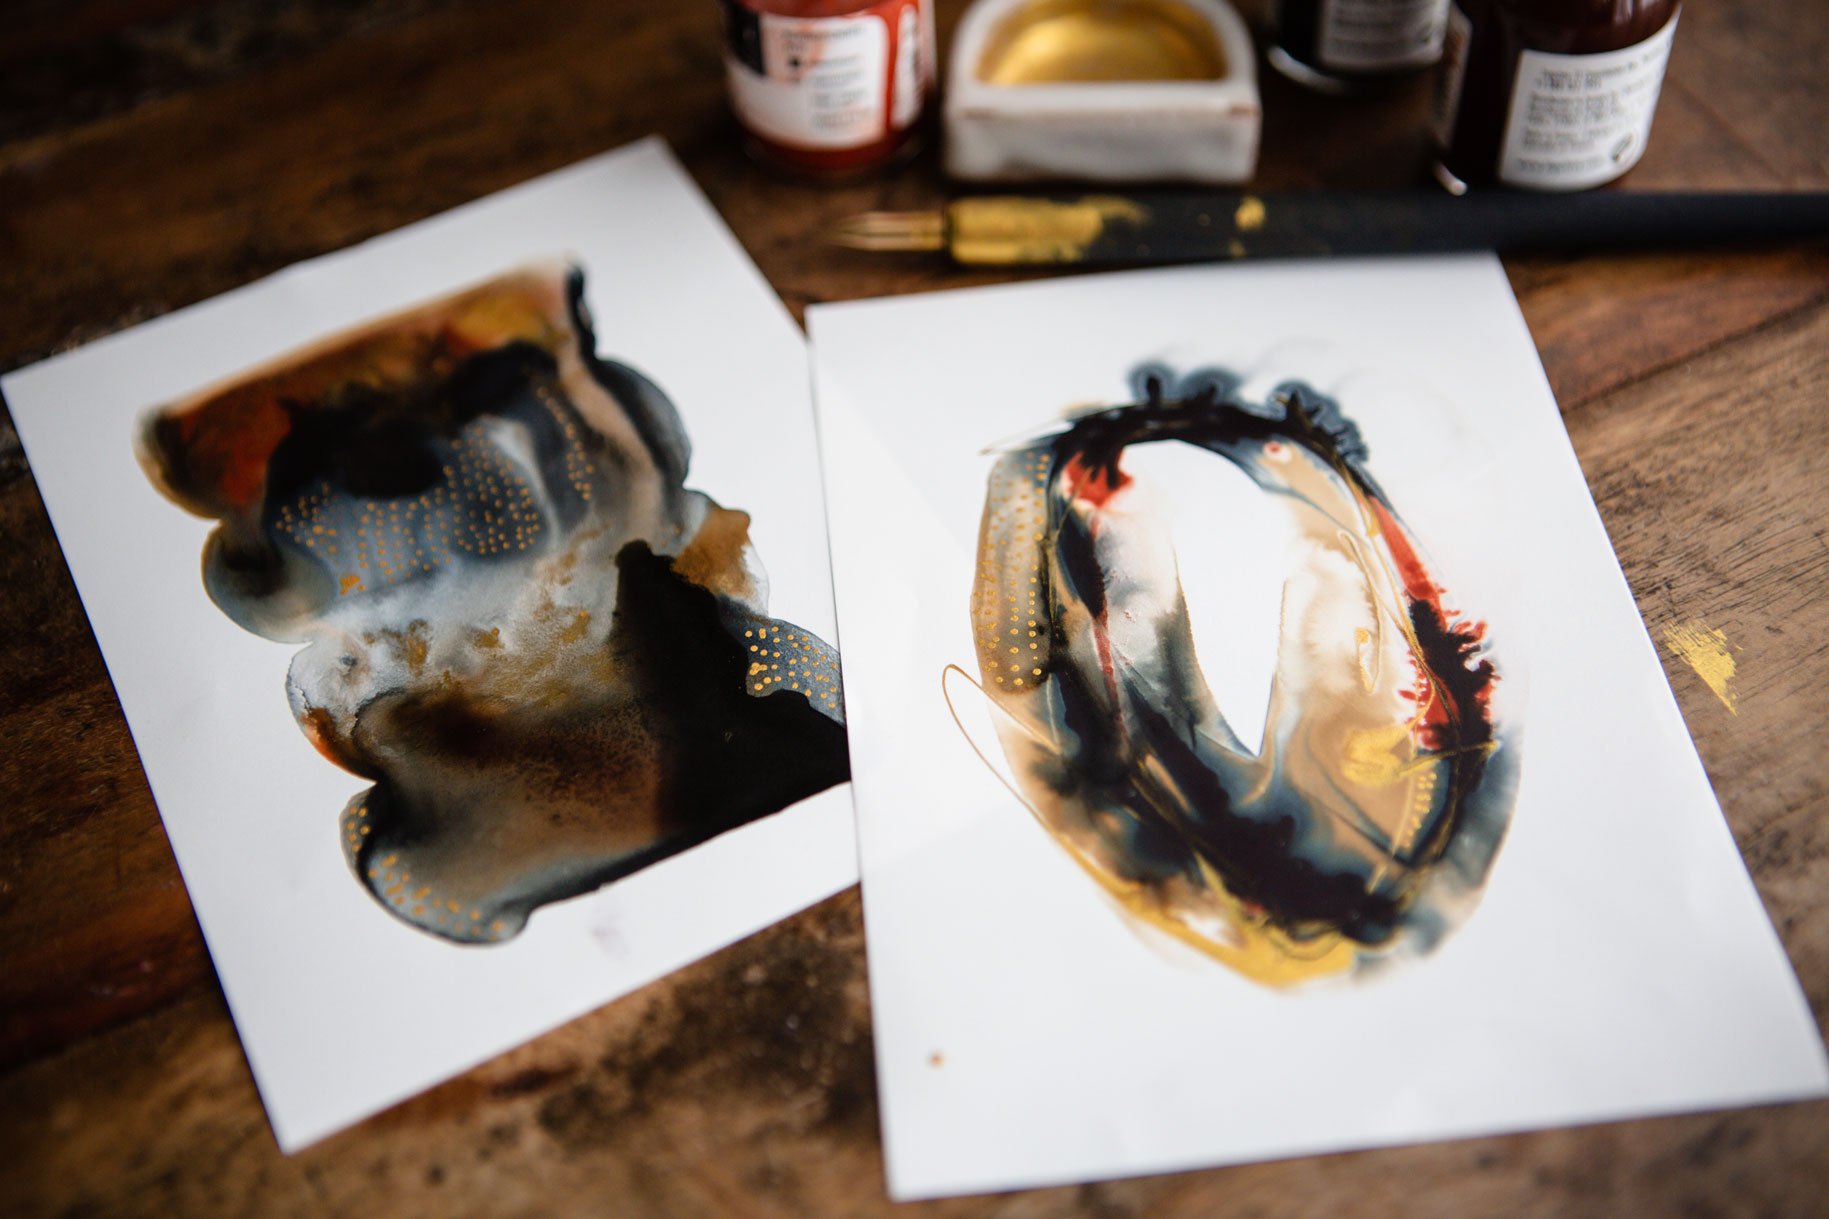
2. Class Project: [MUSIC] Your class project
today is to come back and show me
some of the really cool fine or interesting things that you made so
that we can see what you found interesting and
what you're going to be using to create some marks with
going forward in your art. I can't wait to see some of
your fun art making supplies. I'd really love it if you did some little pieces of art or abstract that played with some of these things
that you foraged, created, found or
used and you made some interesting marks
and you're like [NOISE] this is going to be something
I use going forward. I'd love to see those. This is one of my favorite
because after we make, forage, collect, gather and find we're going to then do some
practice pieces, or you create using your marks. Maybe we just create on a big sheet of just
a jumble of stuff. But we're practicing
with these pieces so that we can go [NOISE]
this is my favorite. Or, oh, I didn't like that. Let me just pull
this out of the mix. I want to see some of those scribble experiments
or any little piece of art that you might
have created with the new tools that you've discovered and you
had a good [NOISE]. I can't wait to see those. For me this was my good [NOISE]. One of my favorite tools
going forward is going to be some corrugated cardboard. How fun is that? What I love about making or discovering or
foraging or pulling together all of your supplies and your mark making tools
is then you're going to find things that
are unique and authentic to your art-making. Nobody else is going to be creating the same
thing that you are, so I really love that
aspect about it. So come back and share what you've found
or what you loved. Or if you've got some amazing
favorite mark-making, something that you already
have that you want to share, share that too, because maybe I haven't thought of that and
I'd love to see it too. I can't wait to see the
stuff you're creating. Come back and share with me, and I'll see you back in class. [MUSIC]
3. Foraging Outside: Let's take a look at some of the things I
got from foraging outside. Some of the coolest
mark-making things might be things right out in your own front yard or your neighborhood. I just took a little
shoebox and I went with my cutters for cutting
plants and branches, and cut off anything I found
that looked interesting. We can use any of these for some very cool
unique marks or as brush handles or as whatever it is that we're intending
to use these for. I picked up and look at the interesting different
foliage that's blooming. It's early spring
when I am out there. There's not flowers and
things that I could pick up, but there's certainly
new growth on cool trees like these maples. A maple leaf is particularly
beautiful maybe we could use those to print a leaf print
or to use as mark making. I cut a couple of yummy
greenery that was super cool. I also picked up pine cones because if
you live in the south, there's pine cones everywhere. I thought that would
be super cool. We could pull out one of these little fronds
and use it as a mark making tool
or we could use the whole thing as a mark making tool and stuff like that, so that was pretty fun. I picked up some bark that the landscapers are putting
around in my neighborhood. Those would be some fun
mark making elements. I also picked up these
sweet gum balls, which typically I actually hate these trees and I
hate these little balls because they get out there with my little animals walking on them and they hurt if
you walk on these. But for a little mark
making elements, it's a super cool
element to pick up. I picked up several of those. I don't know what this is, but it was over there near the sweet gums and it
was crazy, look at that. I got two of those
because I thought, what yummy marks can
those make? Super fun. I picked up a stick and
I cut it into sections. I've either got good
mark-making tools or a good brush handle. If I want to use these
as brush handles. I also found a fatter piece
of wood just randomly. We could use this as a handle. I could use it as a
mark making tool. I can also drill a
hole in the end of it and put some type
of brush material, glue some brush material in
there and it can be a brush, so that can be a brush handle. Then I also found some type of, I don't know, palm
leafy looking plants. This was really cool. I thought that would
make some great marks. I got two pieces of that. Then I also found not pine
straw but wheat straw, hay straw, whatever it is
that they put out that is this color over there with the pine straw,
it's more like hay. It even has some yummy seed
ends still left in it. I thought that will make super cool marks with these little elements that
are coming off of it. I thought maybe the
hay could be just really cool as some mark
making elements in itself, so I picked up some of that. I'd like you to
walk your yard or your neighborhood and take
your garden shears with you and just clip
off little pieces of some type of
interesting foliage, pick up some pine straw
or some hay straw, pick up some sweet
gums and pine cones, whatever it is you see that are dropped on the
ground because all of these were basically on the ground or dead
from last year. Then I did cut a
little tiny bit of some green growth just to see if it could make
something I liked. It may not, we'll see. A little pine bark. I want you to look around, take a little shoebox with you, and see what interesting
elements that you can forage that you
can then use for some interesting mark making
elements for your art and we're going to experiment
with these in class. Go on your little foraging trip and see what you
can come up with and then we will figure out
how we can play with these. I'll see you back in class.
4. Foraging Your House: [MUSIC] In this video, let's talk about
foraging in your house. I want you to walk
your house and find any type of interesting element that you think would
make cool marks, and I also want you to consider any craft supplies
that you're thinking. I actually went to the craft store and
looked around there also and came up with all
kinds of crazy fun stuff. I'm just going to pull out different things to
give you some ideas of what you might look for
and what you might love. I actually have
some wired ribbon that I got for some type of project at some point that
I've just never used, I think it was probably
for photography props, and I hadn't pulled
it out for that. But what I like is it's
a burlapy patterns, jute and burlap, and they're
really cool patterns, so I thought that would
be really cool as an interesting mark or
some type of fun element. Look around if you've got
anything fun like that. Also, maybe that could make the cool end of a piece
that dabs onto things, and because it's got
such yummy pattern, we're not going to get a
smooth dabbing on there. We're going to experiment. I also found something that randomly already looks
like the end of a brush. [LAUGHTER] We'll know
where it came off of, but I pulled it
out and I'm like, "Yes, that's a good one." [LAUGHTER] I also found some Rapier ribbon that was wrapped around
some dried flowers, and I'm like, "Oh yeah, perfect. Rapier coming out with me." [LAUGHTER] I found
some pretty ribbons that have a nice texture
to it so I thought, "Okay, that's pretty." It could either be pretty as a mark-making tool or
maybe to wrap something on one of my sticks to hold my mark making stuff on
the stick so I thought, perfect, pulled that out. I also have some
random fake flowers that I had planned for a
photography shoot and I thought, "Oh yeah, that's like
a stick and it's got different edges
and elements to it." That might have some fun making pieces in it that I could
easily just pull these off. I don't even have to cut it up, and then I've got my
mark-making element, so I pulled those out. These came from
some garden center that had everything clearanced, it's like 75 percent off. So definitely go look at the clearance things in anywhere
that sells fake flowers, any craft store, see what fun things you might find that you don't
mind getting dirty. I also have a box of, I'm going to call it popo reed, but it doesn't
really have a smell. It's random natural
elements and I got it for photography shoots. [LAUGHTER] But look at these
cool elements in here. I'm going to have to decide
which of these elements I would consider using as
a permanent art supply, or if I need to keep it
for my photography stuff. But what I really liked
about it is in here, it has these fake sticks and that would be perfect
for a handle perhaps, so I liked that. It has these random
flowery-looking things, but look at the shape on this, and I thought that was so cool that it might be
something I could consider sacrificing for my art. [LAUGHTER] I also
have one of these, it's some dried plant
that was bleached. But it's really
cool though stiff. I think that they would make
good mark-making elements to give me some cool
organicy-looking lines, so I pulled one of those out. I got a whole little
bouquet of that. Photography prop of course. I also found a cheap set of paint brushes
and the reason I pulled these is
because when we're making our own brushes and I
wanted some brush material, not just things I foraged, it's really hard to find
bristles for making brushes. So I thought, okay, we could buy some
cheap brushes or some brushes made of
material that we like. I like the hockey brush. I have ordered some new hockey brushes so I can cut the
bristles off of those. Let me see where I've put
one of those and I'll show you. Oh, yes, here we go. This is a hockey brush
and I like it because the bristles are soft. I think it would be easy
to cut these and use these bristles on my own
mark-making brush tool. I do have some of
these that I've ordered specifically
for cutting up. If you can find loose bristles, this is sheep, I believe, is what the hockey
brushes are made out of. If you can find some
synthetic bristles that you can make into brushes and you
have a good source, great. I found that hard to find, so I just ordered a
couple of paint brushes. I don't mind cutting
up and we'll cut those bristles off
and maybe use those. I like the hockey brush so, I thought that'd be a great
bristle to experiment with. I also got a whole
bunch of rubber bands. We're going to be using
a bunch of rubber bands. This would be really great tied onto something like a
wood skewer or something, and then these could be
our mark-making element, row of rubber bands
if we wanted. We could do a lot
with rubber bands in addition to holding
our stuff together. [LAUGHTER] I also
got a piece of felt, and I thought something
like this would be really cool as a dabber, we could get that on our little handle and then we could use it as some type of
dabbing-type element. I was thinking the jute could be a dabbing element,
so we'll see. I'm just spit-balling
stuff out here. [LAUGHTER] Also at
the craft store, because it's one of my
little craft finds, I got a bag of feathers. One, because I can use it
in photography setups. I've purposely picked colors that I thought were beautiful, that'd be able to do
multiple things with. It's such a big bag that's
not going to bother me to use these as mark-making
tools in my art, and it was not expensive,
super fun element. If you've got some bird feathers
that you found outside, then that would work too. But I like just having a
bag of fun colored feathers to use as props and as
mark-making things, and so we'll be playing
with some feathers. I also, at the art
store, got pom-poms. I got different pom-poms
because I'm like, all these pom-poms
are different. I need them all. [LAUGHTER] I was thinking we can do different
things with pom-poms. I like the variety. We could also, perhaps I'm
just spit-balling here again, glue these to stick. We could glue one
or we could glue a whole row and it could be a whole row of
mark-making things. I'm really liking soft, fuzzy, round things. I also found some pre-cut yarn [LAUGHTER] that I
could easily just take a little section of that for
my mark-making elements. I went ahead and instead of buying a thinner yarn and
cutting it all up myself, I was lazy and got
some pre-cut yarn. Then I got this stuff which
is called craft fluff. Look how fun that is. I thought that would be a
really fun mark-making element. It just looks super fun. We're going to do
craft fluff, possibly. Got some fun elements
that I'm going to use, maybe with some brush making. Let me just set
these to the side. [NOISE] We'll get to
those in a minute. I also found one of these, which is different elements. It's got the fuzzy balls, got pipe cleaners,
but I got it because I liked these little straws. Straws are a good choice. I got a really fun
pipe cleaner package. Of course, I got pretty
colors because I thought that could be a
really pretty element for me to photograph as props around my pieces if I
don't use all of these. Maybe I'll use one or
two or some out of this package instead
and this could be like the photo prop.
Look at those colors. I encourage you, when you are out
there looking at say like the craft store for different elements to
use in your pieces, even though if you actually
use it in your piece, you're going to get
paint all over it, but some of these
you can save for props and photography
and stuff like that. Save those, get the pretty ones, get the ones that have
colors that you think, "I love those", which is
exactly what I did on these packages because they
can have multi-purpose uses. Then one other thing that
I've gotten here that I foraged from around the house is some grasp things that sprouted out of a dried
arrangement in the house. I went through and just
sacrificed some of them and thought how great would
those be for mark-making? It really reminds
me of the pieces that I got when I was
outside foraging, it was that same texture. Super fun if you've got any
cup of dried flowers around the house that you
are willing to sacrifice a few pieces of, that would be great. I got more stuff sitting
over here I forgot about. Look at here, this
is shelf liner. Look at the texture
on this stuff. This is, it's rubbery. You can't move stuff on it, it's the no-slip stuff. But I had a whole roll of it, so I just cut a strip of
it. That was perfect. Another thing that I particularly love is
corrugated cardboard. These came in packages
that got delivered. You can see the
packing tape here. I have two. Look at this one. This one is my favorite. I love all the yummy
wavy pieces of this, but I love the straight of this. Any kind of packaging
material that comes, save anything like this that looks interesting because
these are amazing. I love this in some of my encaustic projects,
my paint projects. I love that I can stamp it down into things or I can
cover over paint and use it as a stamp
or I can drag it through paint and make lines, it's got so many uses. I love having a great big
piece of that because I can cut little pieces out
of it and put it away, and then when this piece is
so used that I feel okay, I need a new piece,
I can come and cut a new piece out of it. This is just like the gift
that keeps on giving. [LAUGHTER] Packing materials. This is a forager house. See what interesting,
unusual things that you can pull into your mark-making that maybe you're not
going to be able to find at the art store. I want you to think outside
the box on this assignment. Forage your house for anything
that looks like it could maybe be something interesting to make marks in your art, and then I will see you back in class and we'll make some
fun stuff with this. [MUSIC]
5. Interesting Handle Options: [MUSIC] Thought I would give you some ideas for
some brush handles. We can use the different things that we get with our fingers, but let's say that maybe you're working with
something that you don't want all over your
fingers or maybe you want a little bit of distance
between you and your work, or maybe it's something that
you can use over and over, then maybe consider mounting
some of these on handles, whether it'd be temporarily
or permanently. I thought I'd give
you some ideas of different things that we
could maybe use for handles. I picked up sticks
and those make great handles and
mark-making tools. If you get some that
are thick enough, you could take your
little drill bit and just drill a hole in the end of the stick and you could put your stuff in the
stick and glue it in. I'm just going to be
using some craft glue, some Elmer's glue, the kind that is white
but it dries clear. You can use any kind of
Elmer's glue for that. That's just what I'm going
to be using in class. You could also use rubber bands to attach
things to our sticks. Say that we don't want
something permanently attached, but we want it for
a couple of marks, we could use a rubber band to attach our mark-making
elements to our stick, get it all situated and then just rubber
band it right on, and then we're ready to go. This would be if I were wanting to use
something that I know wasn't going to hold up for more than that day of me painting, I would rubber band it to
my element and now I've got a stick or a holding
element for that piece. I want some rubber bands and some glue as some possible
attachment pieces for these. I've got a cute little tin to put my rubber bands in
there and I'm ready. I also have some twine, because what if we made
something really interesting, a beautiful brush that we could maybe use over and over or maybe we're using our brushes
as photography props. I've got some handmade
artist brushes made out of ceramic with
bristles glued in. This feels like the hockey brush bristle that I showed you, it feels like the hockey brush. That's going to be a
good choice for that. I may never use this brush ever. I'm going to just
photograph it every chance I get and
I have it hanging on my wall as a decoration because it's truly
a work of art. This is a really good choice for something that
we could do with our brushes and I
think it's really fun if we attach a piece, then we use some pretty twine over the rubber band perhaps, and maybe put some feathers
off of it and maybe we have a beautiful art
piece that we don't even want to necessarily use, but maybe we'll photograph it in all our pictures
with our art, so think about that. We can have some things that are utilitarian and we can have some things that are beautiful. In the beautiful realm of stuff, I've started making
some plain in some paper clay and I'll
show you how I made these. They might not be like the perfect artisan play piece that somebody that's
been working with clay for years has done, but they're beautiful to me and there really be an element
that's unique that nobody else will have that
I will be able to use in photography and stuff and
so I actually made several. I made a big fat piece and I used pretty stencils
to make a pattern in it and the thing about paper clay is it dries
in a couple of days, just air dries, and so the paper clay just
came to me and I was like, I should make some
handles of that stuff. I've never played with it
and I want to play with it, so let's experiment with that. I got this great big
piece package at Michaels and it's a 16-ounce
package for about $12. It's way more expensive if
you get it from Amazon. It was like eight ounces
or 16 ounces for like $20, so you judge. I apologize, the
mowers have showed up, but I want to show you
my stuff that I got here so we'll hear some mowing
maybe in the background, I'm sorry about that. I got some stencils.
I molded these into what I wanted and then
put some stencils in it, and then a couple of them, I actually took a paintbrush
and just made a hole in the end of it so I could glue some brush material in there
and that could be a brush, like the one I was showing you. We can just glue our
material in there and that can be our fancy brush, and once this clay is dry, it can be painted
with acrylic paint or whatever paints you have and so you can just make
them beautiful. I'm excited about that and I'll show you
how I make those. I made a bunch of them. We can also use popsicle sticks
if you want to just have something easy that maybe we can glue stuff or attach stuff to, and I'm probably
going to glue like my fuzz balls on these, and I can use the fuzz balls as something to drag
across a piece, so I like that. With the paper clay, I
have a dough cutter, but I think you could
cut that with a knife or you could probably just pinch some off because
it's pretty soft, you can just pinch [NOISE]
whatever you want off. I've got some pretty
stencils that I found at the Michaels. This is a stencil that I used on those fat ones and I could
just wrap it right around. I looked all around
the craft store for interesting things that had a raised pattern that
I could use as a stencil. This is called a Sculpey Tool and these were just over there
with the clay materials. They were just packages of double-sided stencils
and I'm like, oh yeah, that has a lot of use, I can use that. I particularly like this one with the little crosshatches, and this one has a
yummy dot pattern, and I like dots, I think
I'm going to like those. Super fun for mark-making and for pressing into our clay, and so the pattern is real subtle because as you
press into the clay, you're squishing the clay, but it still worked
out really well. I liked that some of these have that soft little pattern, but you don't have to use
those if you don't want. I just wanted to hopefully get something that I love and can use as a photo prop
because can't you see some of these
very interesting, maybe some brushes attached
or double attached and then that being part
of the photo that I take of the art that I
made with some of these. [LAUGHTER] I cannot wait and hopefully you'll
see some of those in the class preview photos
and you'll be like, I can't wait to make that, and so that is some ideas
I have for you on handles. We're going to make
a few handles, we can make them
pretty if we want or utilitarian, your choice. Sticks, popsicle sticks. I've got a couple
of sizes of those, these are great craft sticks that you can just get
whole packages of at the craft store in usually
the children's crafting area. I have lots of packages of these because I use them to stir wet things like when
I'm using epoxy stuff. I can still have
my stirs and I can stir up paint when I'm
doing fluid paints. Lots of uses, but today
we're going to use them as possible handles for our mark-making tools
that we create. Look around, and see
what elements do you have that maybe you can use
as some mark-making handles. Too, you could get
something like a cheap palette knife tool, and use this end to attach
things to with a rubber band. It doesn't have to all be
random things that we foraged. I can use some of my art
tools if I needed to. I could rubber band stuff to the end of it and that
could be a handle also. I just wanted to give you ideas, things that you could look for. This is a nice tool. This is one of those things that you seal the edge of paper with. A darning tool, I think might be what
it's called, I forget. Again, I could rubber band stuff too,
anything like that. Just look around, and see
what do you have that might be interesting as your own
mark-making handles and tools. The paper clay, I'm
particularly excited about, so that was something I wanted
to play quite a bit with. You might consider getting
a package of paper clay. The eight ounce would
have been plenty for all of the brushes
I created yesterday, and I'm going to create
some more in class. But just to give you
an example of how far eight ounces would
go, pretty far. [LAUGHTER] Because I was testing the paper clay and seeing how my stencils worked, and deciding if I wanted
different handles, I also happen to think which I'll probably make in class, this is about eight ounces. See how many that makes. An eight ounce little
package would get you a lot, because I have half
a package still left and a whole package left, to show you and to
create stuff later. [LAUGHTER] I happen
to think though, I made all of these to
attach other things too. But I had this one that
was a little bit longer, and I thought if I made some of these that came to a point, that would be a good
mark-making tool also. I could have also made
some of these that had different edges that I maybe
cut different things out of. I could have been more
creative with some of my ends, like this paintbrush has fun sections cut
out of it there. I could have done something like that with the
paper clay too. I could've made my
own maybe bigger, flatter with some cutouts
on it. I don't know. We're going to just have to get creative with the paper clay. As I'm just sitting
here thinking out loud, I'm, "I could do this
and I could do that." That's what I want you to do. I want you to see some of
these ideas and think, "I'm so inspired,
I could do this, I could do that," or whatever. See, this will be fun
if I had some big, pretty squatty ones, and I had put a hole
in it like I did this. Then I could've glued some stuff into the end of it,
like this right here. These are still slightly soft, so it takes more than
one day for this to dry. Because I made these yesterday,
and they're not dry. The package says,
2-3 days possibly depending on how
thick these were. Expect 2-3 days. But see how we can just
slip stuff in there, and then that's going
to hold our element. Whether it be raffia or whether it'd be
something like a plant, or whether it'd be some brush
material that we cut out of our hake brush to make that
little bristles like this. [LAUGHTER] We're going
to get creative, and just see what we
can create in class. The paper clay is a fun option. Twigs are great option, so pickups and sticks and twigs, and whatever it is that you can find out there in the yard. Popsicle stick is
another favorite for some elements that
I want to create. Then just see, what
can you come up with to make some of your
mar- making tools? The last thing I want
to show you too, as you're foraging around your house or the antique store, anywhere that you could go
looking for fun things that, who knows what they
were for originally, this is for yarn. I think they were
spools for yarn and stuff for making clothing
or cloth, or whatever. But you can find these at the antique stores
pretty easily. They may be like a
spool core or a spool, or yarn spool, antique yarn
spool, something like that. But I've come across
them a whole bunch, and so I actually have quite
a large selection of these. I'd say, I probably
have 10 of them. As for something that
I have a bunch of, that weren't really expensive, I might consider
sacrificing these to be art tools, going forward. Because a lot of
my antique stuff, especially boxes and old
cups and old containers, they're all art storage for me. Why not use a few of the
old things as our tools? If you're out looking
at the antique store, and you come across something fun like that and you think, "What
can I do with that?" Well, we could use them
as mark-making tools, and we could use them as elements to attach our
mark-making stuff too. These actually
have holes in them so we could put brush materials, some type of material
in the end of it. Let's just use this
as an example. Then we have a really fine brush that we could use
for photographing. Could just be our photo element, or we could use it
to actually use it. What's fun about this one, is there's actually paint on it, which I find fun and weird. A little bit like, wonder if somebody used this for some art something before, because I know I have
not used it in art, but it wants to be an art tool. [LAUGHTER] Look around
the antique store too, find anything that
you're thinking that would make a fun shape or a stamp or a brush holder,
a handle, whatever. Look there too. I just wanted to
throw that in there, because I'm going to
throw this in my box of possible handles and
mark-making tools myself, since I just saw it. [LAUGHTER] I'll see
you back in class. [MUSIC]
6. Paper Clay Handles & Tools: In this video, I thought I'd show you how I'm going to make these paper clay handles
and I have a variety, I tried different links. I have several that I took a brush and made a hole
in the end of it so that we could then put
something in the end of that, like a brush material or fake
flower material, whatever. We could put something in
there if we wanted to. If it were perfectly flat, I could use that as
a mark-making tool. Keep that in mind
as you're making. These are still wet. The instructions do
say it takes a couple of days for these to dry. Then as far as long-term
mark-making tools, I would think you would just
need to be careful with these and not slam them around or drop them on stuff. Then the thicker ones, I think should definitely
last just fine. It's the long thin ones that
I'd be really careful about. I just made different
sizes and several with holes and several that
I stamped in a pattern. I think the pattern, even
though it's really subtle, I really think once
we paint those, that pattern would
just be really cool because once
you make these, they can be painted with any paint you want to pain
it with after they're dry. They do have to dry. Let me grab some of my stencils. Not stencils but stamps. This one is one of
my favorite and it is a sculpting tool and it's
an oven baked silicone mold. This is a mold and it's got
some stuff that you pour into it and then you
bake it and then you pop it back out
and you have this. I thought that would be
perfect for the clay. I took these little ones, just basically wrapped
this around it and squeezed it and
got a pattern on it. You can experiment with different techniques and
see what works for you. You might not like
a pattern at all. You can just do these with
no pattern and that's fine. I also got some rubber stamps, some of these that have like
a long vinyl thing on it. I also got some other
stuff to use as marks, but you can maybe
use these as stamps. These are over there in that clay area of
the craft store. I've made all these in their
drawing and I will use them to attach stuff in the end. I may use them to
attach stuff on the end and have it
come off of the end. Like maybe I could
rubber band or glue some raphe or something or
something fun to make a brush. Then these I had it
in mind to make as some dabbing thing and
it would be cool too. If we had it flat, we could use that as
a stamp making tools. As you're making stuff, just get creative and put your thinking cap on and look around at the craft
store and say, what can I find today that's
interesting that I can use. I'll make sure my
surface is clean. When you open the clay, you're going to cut off
pieces that you can use. Then when you store the clay, if you don't use it
all in one sitting, then you can store it in an airtight bag,
which is what I did. This is stored overnight
and the clay is still malleable and the package says that you can
add a little bit of water if it starts to dry out while you're
working with it. I'm using a specifically, this is called a loaf cutter. It's like a bread loaf cutter. You can use a knife. I just wanted that because
it's easy and it would cut this big thing for
me very easily. I think I'm going to
make some more of these little [inaudible]
things and a couple of these long things and just
show you how I did that. You could start off by rolling it in a ball
so that you've got it all mashed together and
you don't have big cracks. I didn't do that
as well yesterday, but you do get a better quality and you'll have
like less cracks if you get it all smashed
together really good. Work you're really good and
then you can work it out into a shape and we're less
likely to get those cracks. You just have to
see experimenting like what is going
to work for you. They don't have to be exact and they don't have to be perfect. I think it's more interesting
if they're not perfect. Just be creative, so now I have got this
squatty look and I am going to just roll that around
and then squeeze it. Really let that
pattern go on there. Look at that, one
one turned out great and it's not perfectly
perfect, but I like it. We're going to call
that one good. I like it. I'm happy with that. You see how fast and
easy that was to create, takes no time at all, and then set that to
the side to dry for a couple of days
and set it out of your way because I set these
in my way yesterday and then everything I did
like touched them and I'm like quit
touching those, telling myself stop it. For the longer ones, I did the exact same thing and you can make these a little
thicker if you want these to be thicker or longer. Just role that clay up really good so it's all
squeezed in there good together and then you can start rolling that out to the
shape that you would like and just work it until you get
something that you love. For the end, well, say, I want to make this
about this length. On the end, maybe I want to make this one that I'm
going to maybe put some brush material in. I just took the end of a smaller paintbrush
and as long as the brush is a little bigger than the thing I'm
sticking it in, I'll get a good size hole. If you're going to be
gluing material in there, then you'll need the hole
to be little bit deeper, at least a quarter of an inch. If you want this to be a shape
and I want to shape one, then it doesn't have to be
that deep and we want to make sure that it's flat enough so that when we go
to use that as a shape, it's got a flat end. Might just tap that and let
it have that nice flat end. We're going to let this
one be a shape one. Make as many as
these as you want. I want to have some point, a pointed end, I want the leaves,
a little diapers. I really love these and I can maybe attach something
to the end of those. We'll look at that
in our actually creating our pieces video. Then if you want to design
on these bigger ones, I actually think that these long skinny ones worked really well to put a
design on both sides, so these are recollections, clear stamps, and it
happens to be a buffer, a variety of them. But I like these long
stamps that look like this, because they're about the
length of the brush I made. I can press it on two sides and then brush might not be
perfectly round at that point, but look at that pretty
pattern that it puts in there. I like that and you can put the pattern on one
side if you like, or you can put it on two sides, you just play with that and see. Then maybe I want to make sure I didn't still got that flat end
because I want that shape. You can work your shape a
little bit if you need to, and then set this to the side. I'm going to do the
pattern on one side, so I'm just going to
have it on like that, and then when we paint
it, I just think the extra decoration on
there will be pretty done, you don't have to do it,
but I think it's pretty. Then we're ready for that
to dry, and leave it alone. Now that's thick enough
where it's probably going to take a couple of days to dry. It's not going to
be the one day dry because on all the ones
that I made yesterday, they're not a 100 percent dry. It's like they're dry
on one side but not necessarily dry on both sides. Keep that in mind. The other thing I was
thinking and let's just go ahead and make some
while we're thinking it. May be, we could do
some mark making tools that are flatter and have maybe some
shapes cut out of it. Let's just see, let's
just play here. I've got a metal ruler that's got like a sharp
edge, like a knife. I could've use this
to cut that clay a nice little ruler like
that would've done good. I should have thought of that. Well, I like having
a dough cutter. Alright, so let's get
that really worked in. You don't want to
work these two too long because this
clay dries out, but if it dries out we can come back and add
a little bit of water and moisten it back up and then it will work good for you again, so just keep that in mind. But what do I want to make here? If you want to use
something to help you flatten it out without your
fingerprints being in it, you could try something
to flatten it out. Maybe I want this shaped like
almost a rainbow shaped, flat or maybe so that
I have a handle. Paper clay is fine. If you've ever had an interest in anything like making
things with clay or whatever, this is the perfect
time to experiment. Let's just use this
flat thing to see. Flattened that's fun. I was almost thinking, once we get this flat enough that we could
use one of these as some type of a
shape spreader. If you're not getting
a flat enough edge, you can use something
like this to cut that. Maybe we can come through
and just create a design, and this could be something
unique mark-making, whatever, that's going
to be just ours, but maybe wondering if I've got something thin Exacto
knife over here. Might have to get an
Exacto knife out. But what if we cut
some of these out? Now we have a tool
where we can make a cool pattern from the
clay that's left and again, don't get stuck on
it being perfect. Our goal is just to make interesting mark making
tools for ourselves. It's not something we're
making for anybody else. But look at that,
like now I have a toothy mark making tool. That's pretty cool. Don't get stuck on it
just being round handles. Now we've got something
that's really fun, look at here we can even maybe try one of the use
of flowers on it. I think I'll try that again. I didn't press very hard. Look at that. Now that
just became very fun. I could try that on the top, if we do it like right here, we could try something like
a box, squish it on it. Of course, I squished some of the pattern off of this side, but that's pretty on that side. This makes sure we got an edge that's
going to make a mark, and look that fun little tool, like a little comb, like
something that we made. Don't just think handles, think mark-making shapes
and tools too, super fun. Exacto knife might
be handy for that. To get some nice shapes cut out. Then if you're looking at it and you really
do want it to be a little bit nicer on the
spot so you cut it out. You can maybe just go
back with the edge of a brush and smooth
that out, like that. You could work it a little bit. I just wouldn't overwork
it and don't get hung up on the overall
look of the tool, but see some of these tools I
want to use as photo props. That might be a cool
photo prop once it's dry and I paint it, and then maybe it's
just sitting there as part of my toolbox of stuff as I'm photographing a finished
piece of artwork, so I'm loving that. Let's use that over there, and then I wanted one of
these that does something like this but comes even more to a point and then I could
use it to draw in. That might be fun.
7. Clay Tools Continued: Maybe we'll cut off
another piece of this and make a long round one. Since I haven't made
one of those yet. You can put a little
bit of water in here if we feel like we need it. Then I'm going to get that
work done in my hand. [LAUGHTER] Then start
rolling it out. Now I guess I did
make one long one. [LAUGHTER] Already forgetting
what I've made today. [LAUGHTER] I've noticed too, as I'm picking these up,
I'm looking if they're not completely dry,
they're malleable. I don't want them to
be super crooked, so I'm careful in
touching some of those. They might be drying
with a little curvature just because it's a
long skinny shape too, you never know. It's just trial and error with some of this, get creative. Think outside the box. [NOISE] Have a
little bit of fun. Have fun painting and
decorating these, and then there we go. Just getting that
edge coming down, which we may be creating an edge that breaks
when we try to use it, but that break is
something interesting. So there we go. It might not keep a sharp point as we're using it and
pushing it on artwork. I thought it'd be
interesting to at least have something with a point
and now I've got that. I touched this. I
didn't mean to. [LAUGHTER] I'm just going to rub some water in it and
some of these will crack. The side of the package
says if you get a crack and you really
need to fill it in, you can fill it in with
some more crack clay and let that dry. I'd probably recommend
a little bit of water when you're
doing that to do that. It says that you can do that, you can fill the cracks, but I don't really care if this crack. If I have this crack
on here on the bottom, that's probably
because the two pieces of clay that I squished together weren't quite squished as good as it could have been. As far as a very
interesting tool that I can use, it's fine. So now we've made a long one, doesn't have to be perfect. We've made a long one
with a stencil and a hole in the bottom that
we're going to use as a stamp. I've also made lots
of them with longer, bigger holes so that I can glue some brush material down
in there if I wanted to. I have some of these
two that I can just use to attach some material to it and have it
come off the end. Lots of little variations here. This one I'm
particularly excited about is the little
cone tool that we made. That would be
particularly unique to you because you could
have your own weird shaped teeth and can
be really pretty painted and used as
a photography prop. Then little fat guys, those are some of my favorite
because I can attach something on the end and we can have dabbers and
things like that. Or in the case of like
I did this one here, we could actually put
a hole in the bottom of this and it could
also be a shaper. Before it dries now that
I've thought about it, we could let this be
a stamp of something, it could be a circle, it could be whatever shape
you want to make it. If we have an indention at the bottom and we make
sure the bottom is flat. That can be a shape that
we stamp into our pieces. Think of those two shapes that you might want to have stamps. They're weird shape but
[LAUGHTER] it's something. [LAUGHTER] Really if I had something like
maybe this would be better like the bottom
of this ink pen, that would be the right size. So there we go. That's a better stamp maybe. You have a little time to play. We've got a little
bit of a stamp on the bottom of that one. After a bit, it's not
going to be really malleable and you're just
most likely to break it. We're going to let those
do their little dry thing. Then once you have your clay, if you've used it all, great. If you get the little
eight-ounce package, definitely use it all. If you get the bigger
package and you want to save the clay and work with
it a little bit later, seal it in a plastic bag and
try to get all the air out. Then I actually double
sealed it just to try to get the air [LAUGHTER] away from it. It did last overnight, but once you open it, that's
not going to last forever. I'd say probably plan on
using it fairly quickly. If you're just going to make a nice little
selection of brushes, the eight-ounce one will
make quite a lot of brushes. I made all of these
yesterday with half of that 16-ounce package and I got all of these out of there. The eight is definitely
a lot of clay. Look at all of these that I got. You could do a bunch with
one eight-ounce package. I can't wait to
use some of these. These I actually need
to finish drawing. I may go ahead and start making stuff with
them before they're completely dry [LAUGHTER]
because I don't want to film my class
while I'm inspired. [LAUGHTER] The really wet
ones that we just created, I'm definitely going
to set those out of my way so that they
can actually dry. I can't attach anything to
it while it's this wet. While they're mostly dry, I can attach something to that. I could conceivably use it if I really wanted to take
my time on them though, I could let it finish drawing. I can paint this
white or whatever, and that'll give it a really
good protective surface that art material then won't soak into like
inks and stuff. It won't soak in, it will sit on the surface, which is fun. These are art-making materials and so I might want
stuff to get on it. I don't know. You just decide. [LAUGHTER] You make these
and you'd love them, then you can make
some prettier ones. So can't wait to
see what handles that you make in the clay if you decide to make some of those. I'll see you back in class. [MUSIC]
8. Putting Together Our Tools: Let's go ahead and start
making some tools, and that way, we'll get your
creative juices flowing. We can then start looking
at art that we want to create with some of these tools because once we
make these tools, I want to practice
with the tools. Let's start making
some of our tools. One of the things that
I was thinking I would like is to maybe have
some of these cotton, these little fuzz balls. Maybe have some of those
as some art-making or something I can drag through
like a drag tool maybe. I was thinking that just
on a Popsicle stick would be a really nice way to have these to be able to drag stuff. I'm just going to take
my craft tool and start gluing some stuff down and setting it to the side and
letting it do its thing. Doesn't really
matter the color of ball that we're using
because obviously we'll be sticking that into paint or ink or whatever
and dragging it. But go ahead and make it, so it's something
that you could use. Glue it down, set
it to the side. These are a little bit possibly disposable because
once you use these, you might consider
making some of these brushes for a
collection or an idea that you have in mind and maybe making a couple
because once you use these, that might not be usable again with dried
paint all over it, and you may not be able
to actually wash this. Not all the tools
that you create are going to be permanent tools that you can continue to use, but I'm going to do a
little fuzzball one. I really wanted to
do some dabbers, and I'm thinking
that this material is some good dabbing material. I'm going to make
it enough material that I could rubber band
it on my piece here. I'm going to cut a
pretty good size square, don't have to be perfect
unless you're trying to make something pretty that
maybe you're going to use to photograph stuff. I've got enough a
little pom-poms here, then I'm going to use a
pom-pom as my center. If I can get one of
these pom-poms open. There we go. You can use cotton balls
or stuff like that. I don't want this to necessarily be permanent because again, this might be something that's
a little more disposable. I got my rubber bands here. But just because
it's not permanent, doesn't mean it can't be pretty, so I'm not going to glue this on here because I want
to keep using this. But I want that to be the
center of that dabber, and then going to rubber band
these on with a little bit of a rubber band so
that it's pretty-ish, and now this is our dabber. If you wanted this to be
pretty enough to photograph, we could then take a little
bit of some pretty twine, and we could put some
twine around that. Where's the end of this twine? Here we go. If you wanted it to be something that's
pretty in a picture, you could then take some twine and tie that off and then
that's much prettier, and we could use it
as a photo prop, but we still have not
permanently attached this. It's good, we could use it. Now that's our dabber. We could have trimmed
up these edges, but we've made it
pretty enough that we could photograph and
do stuff with it. I've got something to
dab and mix blots with. That's what I was feeling, I wanted to be able
to do with those, some type of fun dabby stuff. That's the one choice. I've got these fun yarn pieces. Let's go ahead and see how we can do the yarn. I think I'm going to
attach these to a handle. Because this is again, a more temporary end, it's not an end I'm
going to be able to easily wash out and
use over and over. A lot of these are just
not the same as if I were using a brush that I
could wash in the sink. But let's say I wanted something flimsy and floppy that I
could do stuff like that, you can decide how much
of that yarn do you need. You see why I like this
package of these pre-cut edges because now I didn't
have to cut all these pieces the exact size. I do like when I can find things that make these types of
projects just a tiny bit easier. I think what I'm going to
do is go ahead and rubber band some of these together so that I'm not fighting with them. These rubber bands, man, look at that, they just stretch and
stretch and stretch. That's pretty cool right there. Then if I have one of
these that is hard enough, I could then poke that
up through the edge. I feel like if I do that though, I might bend my clay
that's not completely dry, so do be careful. Look, that worked great. Just slide it right down on
as carefully as you can. You can see my tip is
poking out right there, and now I have a fun
little moppy brush that I can make some fun
lines and marks out of. You can just play with
your pieces then. If you've got any
that are hanging out, and you can't figure out where
it is, you can trim them. Now we have a little
yarn mop brush. I saw some long leather pieces at the Michael's
when I was there. I could too, now that
I'm thinking about it, make it pretty with a
little piece of twine. I did see too, some pretty pieces of leather, that would make good
floppy pieces like that. The leather you
probably could wash paint off of and reuse it again. The yarn is a one-time use, so I don't want to permanently
attach it to my holder, but now I have a holder, and I'm not trying to wrestle all those pieces of
yarn, super fun. Here we go. Look at this, it's like
that wool that they make pictures out of, and I thought that this could
be another kind of dabber, or I don't know, I'm thinking dabber. That's really cool. Some of your ideas
will say it could be even like something
that we attach, and it's in a drags things. It could be something
that drags ink across. How fun is that? This reminds me of the little troll hair, in a little troll dolls that were around when you were a kid, or at least they were
around when I was a kid. What looks like
little troll hair. How fun is that? We could cut a couple of pieces, we can rubber band
that and we can have some thing to drag
something through. I actually like the very
first one even better than that piece I just
cut, but that's okay. Again, I cut rubber band this to my little fat stumpy
piece I created. This is again, this is more
of a onetime use material. It's not going to
be one of those that we can use over and over. But we can attach it
with a rubber band, and now we've got some weird, let's drag something
through mark-making brush, which might be fun for
some abstract stuff. I don't know, we
got that one there. This other stuff, you know, as you're working,
you might think of some other uses for this stuff, so don't put it away when
you're done with it. I also liked these fuzz balls. This was another I thought
would be really good as a mark making tool. I just might go ahead, and glue that down. I could glue 1, I can glue
15 doesn't really matter, but it might be nice
as a mark-making tool. Let's just go ahead and
get one of those ready. What do we got here?
I've got all of that. Now another handle
that we could be using an all this is our sticks. Don't forget the sticks
that you got depending on what you want to use as a mark-making thing
with the sticks like, we could attach some great
feathers to the sticks. We could use the
feathers on their own. We don't have to
attach it to a stick, but some of these, we could go ahead and attach
to a stick and we have a little bit longer working arm. Some of these are really fuzzy. Feathers make great mark-making
tools because they've got the stiff inner their
part of the feather, and then they've got the pretty feather part of the feather, and some of these
are extra fuzzy. Some of these are
nice, and stiff. Different mark-making
that we can do. We can attach one or several to a stick to get some mark-making interest
here if we wanted. Look at all this fun stuff, then these two would be some
really pretty off hangings on like a pretty piece
that you created. Maybe you want it to be nice and photogenic so we can attach some feathers off of
one of our longer handle things if we had
the right end on it. Just something to keep in mind. Feathers are fun and
we can be really creative with what we do
with our feather brushes. I really loved that one. Again, you can either
use a piece of twine, little piece of rubber band. I know a rubber band
might be a little harder. Let's just go ahead and see if I can get that over may after. That's all right. There we go. Then we have a little feather on the end of our thing pretty. Different fun things that
we can use on our pieces, and different things that we
can use to hold our sticks. I've got, several
different fuzz balls. I like these because they have these little pieces that come off like these longer
a little pieces, which is a completely
different mark than the other two fuzzball
things that we have there. Let's go ahead and we'll make stick with this
fuzzball on it. I mean, we could pick
these up and dab them, but then you're
going to be getting paint all over yourself and might be easier to control
being able to do that. But we can always
use our fingers so you don't have to attach these to a stick
if you don't want. Just choices. Then the feathers might be particularly pretty
coming off with something like this as a decoration on these, especially
photographing. Like look how pretty
this would be on there for our photo. Then if we had some type of
brush material in the end. Let's just get our hockey brush. I'll I have to get
some more of these. I'm going to recommend
if you get a brush like this and you're wanting to cut a brush up like I'm doing use a rubber band to help you out to
keep these together. I mean, I might want to get
like this much of that. If I decide that that's
how much I need, I'm going to rubber band
that much off of here. So that rubber band can hold all that together for me maybe. Then I might take my
exact dough knife, and very carefully with
a very sharp knife, just work my way through these. Be super careful if you're going to use
an exact dough knife, you could try that
with little scissors , might be easier. Then we've got some
that are coming out, we can just go
ahead and cut these because I'm not going to fight with these
little bristles. Cutting these over here
over the garbage can, so I don't have all these
little flyaway hairs on everything like I just did. Then what we could
do is then we could, I have actually seen this done with like a piece of paper. Wonder where I've got a
little piece of paper. Well, let's just use
whatever this is. Wrap it around like
pretty good there. Then you use that
to help you guide your brush into your hole, and then you can remove
the little piece of paper. Seen it done with like a V-shaped thing like
this, more like this. I may have too much
brush here with us. The thing I saw was metal, but we can use this
to reign in a rush. Of course, I reign in
every side with the side, and then our brushes in there we can
pull the paper out. If you want it permanent, I've used enough brush
where it went in. Mostly could probably use this exact dough knife to
get the rest of it in. Then if it's, enough brush, we could take the
rubber band off, and then there's our brush. This is a shorter one. I could definitely get some
longer bristles to do this. But I put a little bit of
glue in there and then I would stick the brush and
if I wanted to permanent. But this one option, look how fun that is. If you don't want to pull
the rubber band off, we can just cut the
rubber band off. Then we could pull
any flyways out. Then anything that you've got as a sprig that's not
quite where you want it, just trim it with your scissors. Then you have your own
unique little brush there. This was probably
too big a handle. I probably should've stuck that in one of my little brushes. But how cool is that? Then if we really
wanted to get fancy, we can add some
feather decoration and use some of our pretty twine
and just have it pretty. But this is pretty by itself. Another thing I like about these is they've got these lines. Those lines might make some pretty lines in our
piece. That's pretty cool. That's probably how I
would make all my brushes. I would work them in with
a little piece of paper, and then pull any
extra little hairs off a little bit of glue down
in your little stump there, and then trim it to
the shape you need. Once you get it in there. Super fun. That's some good ideas that
I have for you for attaching some of the things that
you're going to be finding around the house, or out in the yard. Just some ideas for you on how to make these
usable in your art. Some old stoppers, a
feather, some fun fuzz. Just see what can we
create with some of these fun mark-making things
that we've now come up with. I hope you have fun creating your handles
and then attaching random weird things to it
to come up with things that are going to be
very uniquely you. Don't forget, raffia could be a fun floppy handle so I could
have definitely done that. That could be fun and floppy. Then attached to a handle
that would be really cool. Think outside the box, look at the different
handles you got, and think how can I attach that little rubber bands
are very handy. Glue if you need it
to stick down good, or you want it to be
something that's permanent, and then we'll just see
what you've come up with.
9. Cool Feather Brush: I made a pretty
little feather rod, and I thought I'd show you
real quick how I did it because it's so easy, I know you're going to want
to make a couple of these. I've got one of these where
I have a hole in the end, and I picked enough feathers
to stick into the end. For this pretty decoration, and I could've painted
it before I did this, but I went ahead and
did not paint it, but I have some of this cording. I got it over there in
the beading section of the craft at Michaels,
the craft area. I cut a length of the cord. You can be a little more exact, but I don't want to
hold you forever here. I decided where I
wanted that cording to start down here, and I want this to be a little longer and hanging up there, and then I started to wrap
my handle with the cording. I did this one after I
did the feathers but [LAUGHTER] if you'll do it
before you do the feathers, the feather part really is the easiest and it's not permanent, so when you use the feathers
and you're like, okay, I can't use these
feathers anymore, you can replace the
feathers because we're not going to
glue the feathers in. [NOISE] I stopped for the little dog is barking
because the UPS man showed up and he brought my
new little hake brushes, and I thought these
would be good for cutting my bristles out, but now that I got it, this might be a really fun
painting and mark making tool. It's different than something
that I normally use. I'm going to put this
in my heck, yeah, pile. [LAUGHTER] They
brought this stuff that looks like a broom, and I thought, oh yeah, mark making fun stuff. A little weird. Also that means if you're out looking
at the grocery store, look at all of the different
options and things like that or if you've
got an old broom, broom bristles, great
for mark making. [LAUGHTER] Anyway, when
you get to the top, tie these two pieces
off together and then we can cut this. I'm not worried about
it raveling because I'm then going to take a little
bit of my craft glue and put the glue right across the
top because this glue dries clear and I don't mind that
the glue will be there. That will dry clear and
then this will be like the permanent decoration
on this brush. Then to make it this
pretty feather brush, I do not put glue down in there. I went ahead and pulled feathers out of the
feather basket here. Some of these have great ends on them for mark-making.
Look at that. I pull enough feathers out
where I could at least get a variety that
were the same length, and I started setting
these in here. Once you get enough feathers
stuffed in the hole, they hold each other in there. You don't have to glue it in and you don't have to
do anything else. Once you get enough in there, it's stable and we're good to use this as a mark making tool. You might let that
glue dry first. But, yeah, you can stuff
the hole with feathers, and once you get enough
in there, it's firm. Then we've got a great
mark making tool. I thought I'd show
you that since I made one and I loved it so much. [LAUGHTER] I liked the
feathers and how easy is that, so I can't wait to see some
of your feather mark tools. Then when the feather is used
and you can use it again, you pull it out and put
a new feather in there. I love that. All right,
I'll see you back in class. [MUSIC]
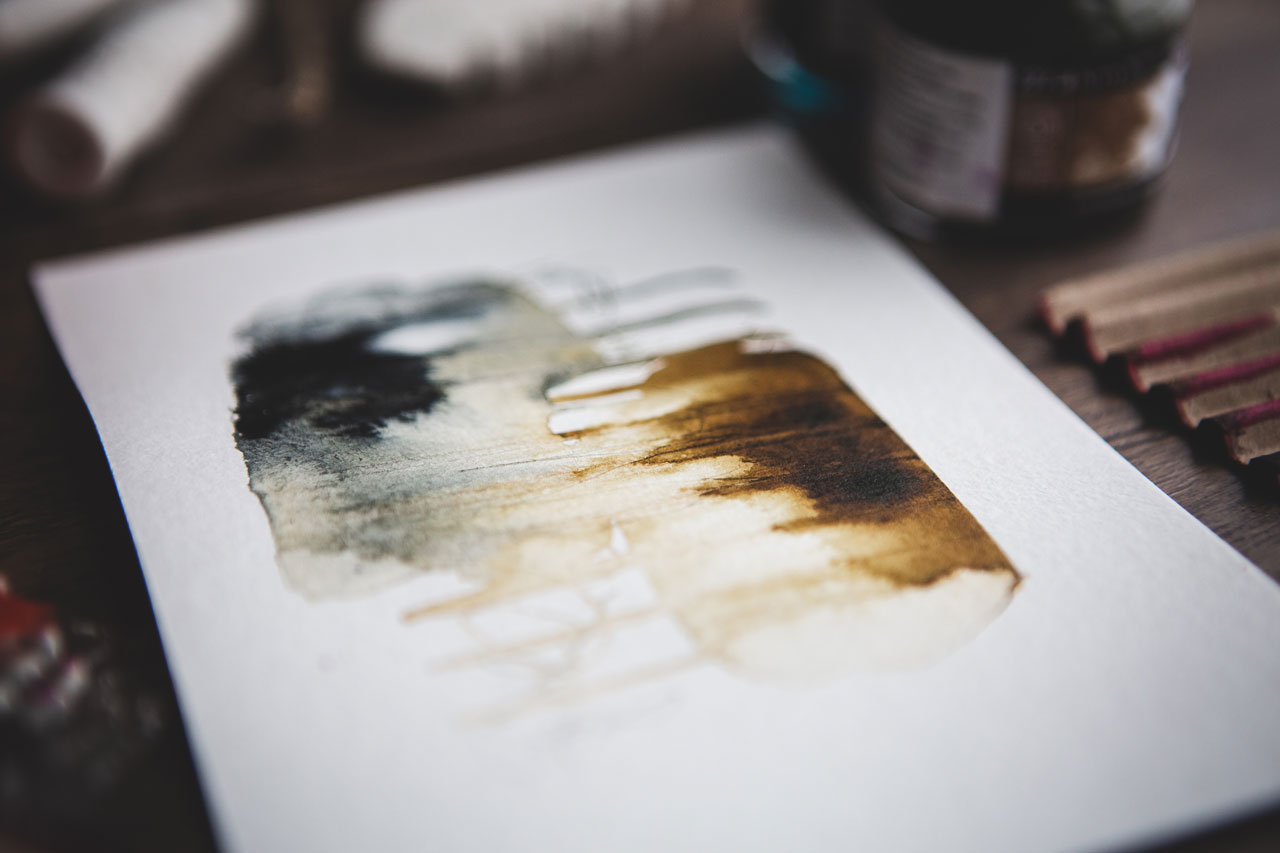
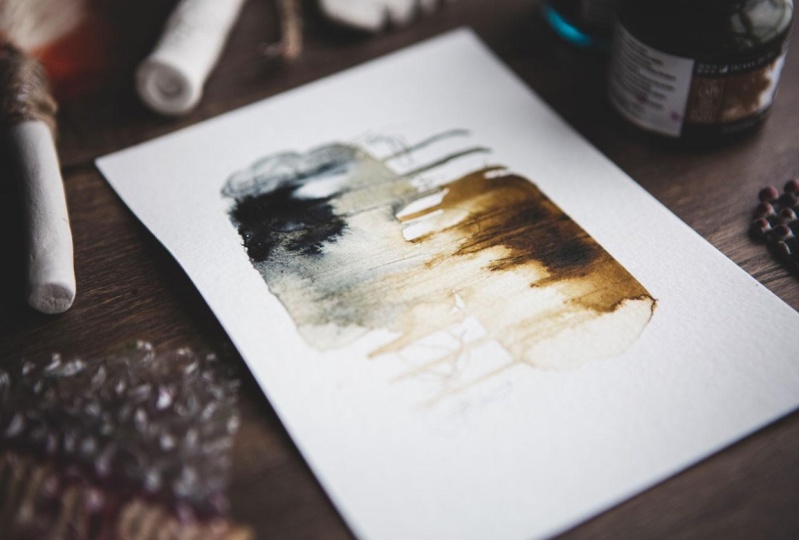
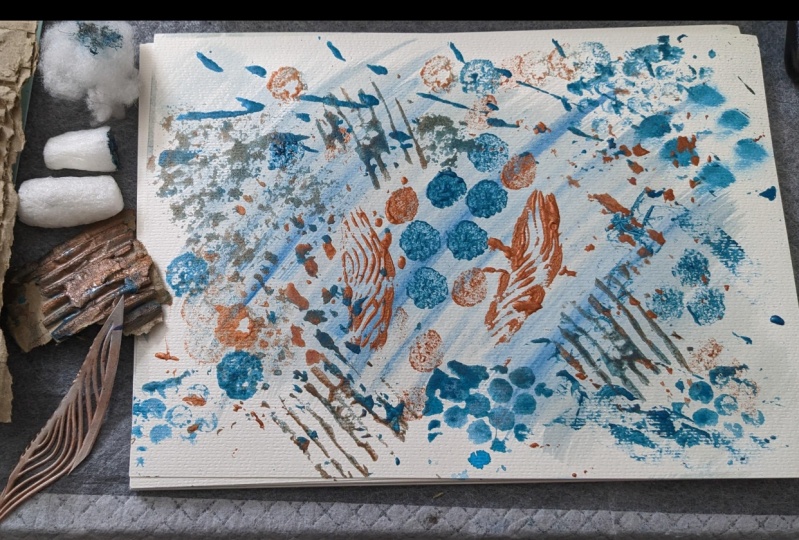
10. Mark Testing: Let's test out
some of our marks. I'm going to be using
some acrylic inks. Some Some these will work
good with thicker paint. Some of them will work
good with thinner paints. Some of these you're
going to do and think, oh, not quite what I thought, but let's just get some ink out here and see what
we're going to get. These are the brushes that we just made in that brush video. I also took a little skewer and put some rubber bands on it, and I thought that might be a cool way to make
marks. Let's just see. Oh, look at that.
Oh my goodness. Now that's a fun mark. It might not look like
a lot, but it is. You can always
paint on something and drag these through and also, so I'm going to use
these as trying to get like a little bit of a
mark and see what we get, but some of these might be
better as a stamping it into paint tool or get a
little bit of the ink on, say, a bigger piece of it. Look at that. We could
do that right there. I like that or maybe we use it as a
stamp. Look at that. Oh my goodness, I do love
corrugated cardboard. Let's see stamps.
Oh, look at that. Definitely get
yourself some boxes. Oh, yeah, I love
that right there. Favorite tools right here. This was that shelf liner stuff. Let's just see what we get. Oh, yeah, dots. Oh, I love things
that make dots. You can be a little more
careful with it than I am, but I'm filling dots. Bubble wrap. I don't think I've mentioned
bubble wrap before, but I opened a drawer
and there it was. Keep some bubble wrap, and let's just see oh, let's be a little
softer with it. Look at the bubble wrap. I'm loving all
that, and then once you see some things
that you're like, that's a favorite
mark like this. Cardboards, the dot thing, the rubber band, weirdly enough, the rubber band thing, you want to do some of these. Once you get the
ones that you love, set those to like one side. You see, I love
that right there. We can also use the skewer. This one happens to be broken, but that's okay, can be
a mark-making tool too. Look right there. Oh,
I like that, skewers. I have a little mini skewers, but you can also get
the big skewers at the grocery store because they are in the area where maybe their are picnic supplies and
stuff because you're making [inaudible] so go over there and get a package of those
big long skewers. They work just as good. I feel like I found
these skewers at the grocery store too
but I don't remember. It's been several years, but there's like a
whole package of them. It's like there maybe hors d'oeuvres is what
these were for. I'm sure that's probably
what those are. Hors d'oeuvres sticks. This was my favorite section because maybe you'll be able to reuse it and
maybe you won't, and you want to be able to
say, oh, yeah, look at that. Even though I've got this
on one of my sticks, the raffia, look at that, I might like it better
with more control. Keep that in mind. That's a nice fun mark-making thing. When you find stuff you like, set that to the I like it side. When you find stuff
that you're like oh, not really what I thought. Then set that to the not
what I thought side. Look at the yarn. That's super cool and I
think I can keep using that because it didn't
really cover all my paint. Onetime use may not
mean just one time. It may mean many times and then you eventually
need to swap out the yarn. Good to know. A feather, let's see with the feather does. Let's drag a feather through. Let's see, right
there that's fun. Oh, look, I got some really nice fine lines with the feather. Feathers are fun. We can get all fine lines
so the feather is good. All of these are my
favorite so far. Let's start on another
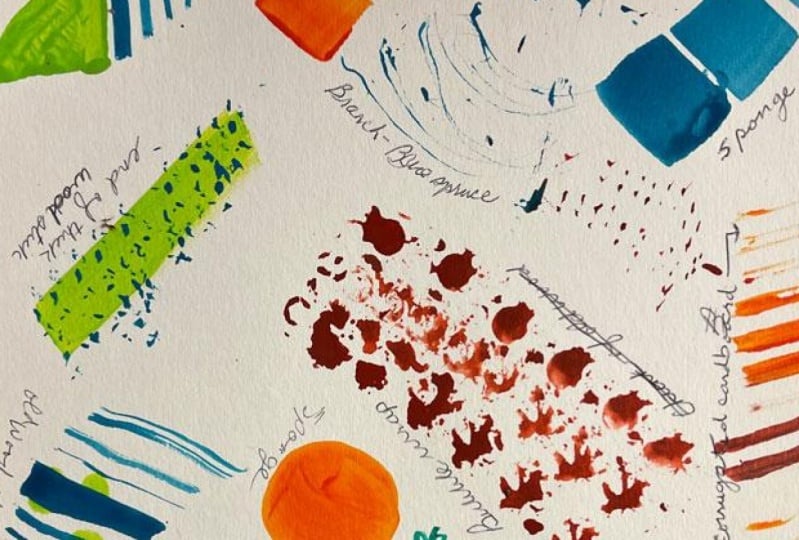
piece of paper. You could be really fancy
and tape this off into squares and do the mark in each square and write
what that mark was, what you used like
your corrugated paper, you could have done
a box of that, and right underneath, that's what you use there and be a little more exact
about it because then you could use this as a mark-making reference
guide and you can remember what
tool made that mark. I do recommend that even though that's not
how I started out, I really wanted to just
dive in and start playing, but if you go ahead
and divide this off, you can then do each mark. Look at that in its own square and then right
underneath what that was, I used a fuzzball with the little shiny parts
sticking further out. This one's more like, I don't know, a yarn ball. Oh, look how fun that one
is. Let's try this one. That's interesting. That
one's not my favorite. We're going to put that in
the not my favorite side but it may be your favorite. Don't let me
influence you there. This was just the plastic
twiggy thing, and that's okay. It makes some
interesting, fine marks. Maybe not my favorite, but it could be your favorite. Let's try this
weird, fuzzy stuff. Oh, look at that. That's interesting. We can get some interesting
drag marks out of that. I'm actually liking
the buzz stuff, and because you only get
the paint on a little bit, we could probably
keep cutting paint out and use that for
a very long time. Just some little tips
is we're going there. Let's see what the
little dabber does. Look at that, unexpected. Totally unexpected. I expected it to cover the whole thing and just make
a black, like just a plop. But that strategically made something pretty. I like that. Once you're like, yes, I love this, set that on your I love it side, or no, I don't love it, set the on the I don't love it side and then you'll know, I did love that, let me put that on there I love it side, then you'll know, okay, I didn't like the plastic thing, I probably won't do that
again, the fuzzball stripe. It was okay, but
not my favorite, so I probably won't
do that again. If you want to be more
exact and cut these into little squares or
tape it off into little squares and
then put each mark in their square right
where that mark was, that is a really
good way to do it because then you'll
remember, oh, yeah, this was the
fun pink thing, or oh, yeah, this was the
feather, or oh, yeah, this was the dabber, you'll know which one made that mark
so that when you're ready to create your abstracts or whatever it is
you're creating, you'll remember what
created that mark. These are super fun and
you'll think, what was that? Then you'll go, oh, yeah, that was this. I don't remember now. This is why that's good, because tomorrow you'll be
like, what made that mark? No. I have to watch this video again and see
what made that mark. I do recommend if you
really like some of these, make your own little cheat sheet as to what each one
one these does, and then you'll know shelf
liner made these cool dots, or corrugated cardboard made whichever thing that you liked. I really liked these lines, or this corrugated cardboard
that made these lines with the little jetting piece out of there that
was real pretty. Then it made these lines
that were real cool. You'll remember what those were. I liked the rubber band
thing on this skewer. I like the skewer marks. We've got a lot of
ones that we love. Once you figure out
which ones you love, these are the ones that
we could then go and try out in an abstract piece. Play with the pieces
that you made. I'm going to get our nature pieces so that we can see what
marks those make. Let's set these to the side, and let me grab those,
and I'll be right back. All right, I got
some of our men, our foraged stuff, not man-made stuff, our foraged stuff. I want to see how some
of these make marks. I've put my favorites in a little tin over here,
so I can be like, here's my favorite
pile that I want to use to make some abstracts with. Because after we
make these tools, I want you to practice
with the tools. I might take a rubber band with
this raft here, because I remembered
that I really liked as I was
pulling stuff out, one of those I really liked was, this thing of the raft here, which might be real
raft and it might not. It was something on
a plant in my house. This is something I
picked up outside. We could take a rubber
band and go ahead and just get some of this
stuff banded together. Cut off the edge and this could be
our mark maker. I've got that. Also, that out of the way, like
the ends of this hay stuff. Those could be our mark maker. I liked the little
sweet gumballs, which normally in life I think they are
product of the devil, but in art might be fun. Let's just see what
these look like. Again, if you want to
really be organized, tape your paper
off into squares, use each thing in a
square and decide, do you love it, do you not? You'll remember
how it is that you got that particular mark. I could keep all those on there, but I want to see what
I get without them. Look at that. That's some
very interesting marks. Yes, I still like that pile, because it's just
like that other one. Look at this green
tree, whatever it is. That almost looks
like that raft here, and because this is wilting, it might be something
you have to grab fresh and use right away. Good observations. Let's just see what
these look like. We could do with this, maybe use them as a draw. Look at that, yes. These are nice as a random
abstract drawing marks, because the ink is
picking up on several of the big edges there, and it's better than
just a single line. Super fun, I like those. We'll put that in our like pile. The end of the wheat thing, it's good for a drag
mark making tool. It's okay. Pine cone. Not so even, so it's
harder to pick up on enough spaces that
are going to draw. If we pulled that out of here, look here, we can pull up. I did not get enough of a
piece there. Here we go. Maybe we could use
these little pieces. Look at that. Now
I do like that, I broke the tip off. If I still had the tip there, I could get some nice sharp
edges drawn. Super fun. Maybe I can get
one of these off. This is a very dry pine cone, it's apparently been
sitting there all winter. Good, this one's still
got the tip on it, and maybe that can be used as a writing utensil. I love that. For the pine cone, I like the individual pieces as a drawing utensil. There we go. Now we know, and here's
a different pine cone. But I think I'm going
to feel the same, but you could try out
more than one pine cone to see what you get. I like it as a drawing tool. Then I've got some of
these pieces of wood. Those could be an
interesting drawing maybe. I wouldn't say
that's my favorite. That's some of the
natural stuff. Then I also got some
twigs, hang on, with a bunch of edges, and these could be like
a random draw tool. I don't know, paint
might need to be a little thicker for that to work, but I could drag this through
some paint on my piece. That could be a drag it
through the paint tool. We'll keep that for drag
it through the paint tool. Then once we have tested out all the ones that we like
and we have a like pile, we're ready to make
some abstract. Let's make some abstract
art with these. Then no matter what it
is that you create, it's going to be
something very unique and individual to you. That makes me very exciting. I hope you are enjoying making and searching out
different mark-making things, and I can't wait to see what tools you end
up liking and using, and let's make some art.
11. Gathering From Your Art Supplies & House: [MUSIC] We have talked about foraging outside and foraging
the art stores and stuff, and making some of our own
yummy brushes and stuff. Now I want to talk about
foraging the art store, or your art supplies, or your kitchen because, you can make a mark with
just about anything. But what the goal is, is to find the things
that really speak to you, and make some marks that you find particularly
interesting. Over the years, I've collected all art-making tools that
live up here in my art room. If you pull anything
out of your kitchen, like a fork or a spoon
or something like that, then definitely make
those art only uses. Don't get your good forks, and use those as a
mark-making tool, or invest in plastics, silverware, and keep
those in your art room. You don't know how many
times playing an art things, I have found the need
for especially a spoon. I bought a nice set of
plastics silverware, that just lives up here. Then when I need a spoon
or fork or a knife, then I happen to
have it up here, so get a nice quality of those. These are good for
stirring paints, they're good for stirring
epoxy materials, if you're going to
pour resin on things, and they're good
for mark-making. Search the kitchen for
or get plastic knives, and spoons, and forks. I also like from the kitchen, silicone spatulas, and I have some spatulas that just
live in my art room. I don't take them
back to the kitchen. Once you use these
for art supplies, they are art related only. Don't go make food with them. [LAUGHTER] But these are really great for working
with lots of things. You can spread paint, you can make marks, they're great for
encaustic work, they're great for
resin projects, where you're spreading
resin around. They've got lots of uses, and you can see this has still got some type of art material, probably encaustic wax
on it that's dried. They're easier to clean
because they're silicone, stuff comes right
off of them and kitchen spatulas work great. Raid the kitchen, but if you pull things out
of the kitchen, don't put them back
in the kitchen. Another thing that
works just as good as those from the art store, are this Master's touch
and these catalyst wedges. I particularly like
different wedges and things to paint with. [NOISE] It's fun to paint with
something nontraditional, something that's
not a paintbrush, to really get unique
looks to your work. The catalyst wedges
are really cool, because they come in
different sizes and they got lots of angles, and straight, and some
different options. This master touch
ones are really fun. They're silicone, paint
comes right off of them, they look like a paintbrush, but they're rubber, so I've had fun with these quite a bit. As far as the rubbery things go, this is another catalyst wedge, you've got lots
of options there. This is a silicone bowl
scraper by Messermeister, I think is the name of that. Could be off, but look for silicone bowl
scrapers on Amazon, or on the Internet, or at the kitchen store. See not everything in art supply use comes
from the art store. This is the absolute best
wedge for painting with oil, and coal wax product. You see, I've got lots
of paint on here. This has got lots of use. It's silicone, the paint
wipes right off of it. I could go back and clean
this off if I wanted. It hadn't been as important as keeping the edge clean for me. [LAUGHTER] But it's one
of my very favorite tools for spreading and manipulating my oil paint and
coal wax mixtures, when I paint with those. You can get some
other spreaders. I think this might have
been from the art store. This might be bowl scrapers too, I don't know, but this
one is my favorite. This one has had a lot of use, but it's not my
favorite, the catalyst. Keep in mind, not all art stuff comes from the art
store [LAUGHTER]. These are from the jelly
plate manufacturer, maybe, or it's called jelly arts. I don't
know who makes it. Maybe, it's not jelly plate, but what I really
like about them, is that siliconey feel. They're great for mark-making. Look at the edge
of some of these. They've got different
edges to scrape, paint and create pattern. I love having different
scrapers like these. I also have some older ones, that I got from the
Ranger company. I don't know if they still
sell these or not but any edge scrapers that
create a pattern, those are super fun
for mark-making. Now, I can just come and
pull something interesting, and look at all the
choices that you get, when you get a little package of mark-maker's like
that, super cool. Another favorite thing
that you might not think of as a mark-maker, is a mechanical pencil. It's one of my very favorite
things to draw and scribble and make lines in paint
or add decoration. A mechanical pencil is super
fun for making art with. I use this in all stuff. It's one of my favorite pieces, so that would go in
my favorite box. If you start practicing with
some of these and you think, "Whoa, that's my favorite." Put those in your favorite box. I've already started collecting
things here in the box, that we've already
forged and looked for, and this would definitely
go in that box. Another fun thing, are some of these
little brushes that have little mark-making ends. These are Jane Davenport. It's a little sad that came from the craft store basically. I also saw a set of these, and I thought I'm
going to get those. The other day when I was at
the craft store at Michaels, looking at clay tools, because I wanted
something interesting. I was looking for a scraper
or something and I thought, look at those, and they had a whole set of five
or six of these. They were cream colored, not this pretty teal. I thought I need to get those. Then I saw something else, and I got distracted and
I didn't go back to it. I think I'm going
to definitely make a trek back to the craft store, for more of these, because
this one that looks like a comb is one of my favorite. I love using that one,
which by the way, if you have a fine tooth
comb for combing your hair, that would be a great
mark-making tool also. [NOISE] Moving right along, you can see here, I've got lots of
fun, palette knives. Those are fantastic
for painting with, and making marks with. I love that they come in
all of these yummy shapes. You can also get a
collection similar to those little paint
brushes I just showed you, that have mark-making ends, instead of a regular end. That's really fun for
dragging paint through. These are called FX-effects. FX-effects is what
these are called. They come as a whole set, so you'd have several of these, [NOISE] in that collection. I think I got a
gigantic collection, because I have a whole bunch
of these really big ones, [NOISE] and a whole bunch
of these that make marks. I think it was a package
of two different things, like this, and it came
with all these fun shapes. But, if you have one of
these silicone spreaders, that I was showing you earlier, it's the same thing. These are doing the
same thing basically. Some of them may be a little different than
the ones I already have, but they may be the exact same. I'm just all and overkill, I want all the options. [LAUGHTER] Another thing
I want to show you, let's move some of
these out of the way, are these super
fun little things, and these are from
the auto store. They are seam rollers, for sound deadening material, that you install into
a car, apparently. But they're the
coolest thing ever. I think I first
discovered this when I was taking a gene
all over art class. But I freaking love them. I got a whole set of
these three off Amazon, and they were not very
expensive at all. They were $17 for
the set of three, which [LAUGHTER]
that's fantastic, because these are heavy-duty, and will last you your
whole art life [LAUGHTER]. We can make a pattern with it, we can drag this through wax, you can do a lot with those. Another thing too, that you could look at, rollers. These are ink rollers
for printing in stuff, so that's super cool. I also like dip pens. This are great for mark-making. You can dip them in
ink and make marks, or you can drag them
through paints. I really love a dip pen, and that gets lots of use. Clay tools. This clay tool that looks a little bit like
a mini ice pick. [LAUGHTER] I don't know if
you remember ice picks or not, dating myself there, but when I was a kid
we had ice picks, and so that looks like
a little tiny ice pick. But it's a clay tool, and
that little ice pick end, is my favorite for dragging marks through paint and stuff
that's wet, so super fun. I have several of
these apparently. I do like this. This one has
the plastic tip still on it. But clay tools are super cool, because you can see
all the little edges, and things that you can
drag through paint. But it's also great, for making marks
and doing things, when you like to
do encaustic wax, which is why I have these. Then look at this fun thing
with a brush on each end. That would be really
great for making marks, making a pattern,
maybe splatter paint. Lots of good uses there. That's an awl. It's one of those things that
you poke holes on paper. [LAUGHTER] Again, another ice picky looking thing that
would make great marks. [LAUGHTER] This is a cutter. Got a couple of spoons in here. Clay tools, this
little fun thing. This is a clay tool, but you can find this in the grilling section for different grill
brushes and things, that you can get
bigger ones of this. That'd be great for mark-making, and it's just got
some fun shape to it. I love that. I keep all
these little tools together. I want you to look
around your art room, your art supplies, and gather everything that might be
interesting for marks, including some paint brushes. Look at these. This is the
FX-effects brush collection. I just want to hog wild
with those FX-effects. But look at all the shapes, that these come in. They make different effects
because the brushes are cut, different links and shapes. How fun is that? [NOISE] Hunt your art room, hunt the art store, [NOISE] get some spoons
and forks, super fun. Spatulas or catalyst
wedges, love those. This pair of auto rollers,
definitely super fun. Then let's take some of these, and make some marks with it, and see what we can get. [MUSIC]
12. More Mark Testing & Ideas: [MUSIC] So I've just pulled out a random
little high flow paint so that I can put some out and see what different
effects that we can get. So maybe I want to use a
catalyst wedge. Look at that. Maybe I want to spread some paint and we could see if any of our little
wedges would drag through. That's fun. See, we get a good pattern
if we use this. I also want to, let's get some paint on
one of these auto rollers. Not too much, so I
don't want it so much that, look at that. See, that's super fun. I love the auto rollers. That's a purchase that [LAUGHTER] I will
always appreciate. [NOISE] Then I'll
just wipe those off, [NOISE] wash them
under the sink. If I've used acrylic paint, just move those
through the paint. [NOISE] See, super
fun right there. I'm in love with these
little auto rollers. [NOISE] These are worth making
a trip to the AutoZone or getting them online and seeing what fun stuff
that we can get. I love spreading paint with different spatulas,
look at that. Then we can use them as the
end for tips like that. [NOISE] Some of
these are better for dragging through paint and
getting an effect that way. Look at that. See,
look at those. [NOISE]. See that thing right there, personal favorite, I love that. You can also use these
spatulas for spreading paint. These are really nice for
doing large abstracts. So that would be super fun. I like any wedge. Any type of pencil or marker, I particularly love
scribble in my artwork, especially starting off a piece, I like to scribble to start the page off so it's
not blank anymore. Scribble is one of my
favorite ways to do that. So definitely pull out all
your pencils and pens and mark-making and
anything that you could use to create some
interesting marks and lines. Those are fun. Another mark-making thing that I love are some micron pens. Those are super fun for
mark-making, drawing, doodling, scribbling,
anything like that. Love it. Micron, I liked the O5 and you can get different
sizes and that. Also one of my favorite
mark-making things is this gigantic
piece of graphite. Super fun. Great for scribble. Love that right there. [NOISE] Yes. Another thing that
I really love, and I know I've got a
box of them over here. Let me get this box open, are my paint pens. My Posca paint pens, my most favorite tool
for mark-making. I love acrylic paint pens. These are good for
drawing, doodling, dot making, and I really
particularly love making dots. So most favorite art supply in my whole room probably
are some of my paint pens. Then I really like for
mark-making especially, some of my pencils
and my crayons. So crayons, so I like the ink tints Derwent
pencils because they're nice and
vibrant [NOISE]. On top of that, they
are water-soluble. Let me just grab a
paintbrush and we can move that around and
get other things happening. Sometimes graphite's
water-soluble, charcoal was water-soluble. Charcoal is a good
mark-making option. I have tinted charcoal pencils. This is the neo color to
water-soluble crayons. Another absolute
favorite must-have for me in my art room. What I like about these is they are vibrant colors and
they are water-soluble. So I can add touches
of color and stuff throughout my
piece very easily. I just have just a
random collection. The fun thing about these, you can dip them in water and draw with them with the tip wet. Or you can draw
with the tip dry, or you can come back and add
water to it after the fact. How fun is that? [LAUGHTER] I want you
to look at some of your tools in new ways and start gathering
anything that you think. I wonder what mark this can make and start experimenting
with some of these things. Then your very favorite
things pull together as, okay, this is a favorite
mark-making thing. Pull together a little
box of your favorites. So I have a little box of
crayons that are my favorite. I have just all random things sitting around that I'm like,
yeah, that's my favorite. Then I'll turn around
and I'd be like, yeah, that's my favorite. So everything my
favorite. [LAUGHTER] I do love having lots of options. You can also use the end of your paint
brushes to make marks. If you've got some
fresh paint on something and you want
to draw mark through it. The end of your paintbrush is a good mark-making
scribble tool too. Move that paint around. I do that a lot. Also, a lot of times if you have especially inks like watercolor
inks or acrylic inks. The Daubert thing
that it comes with, I make a lot of marks
with this. Look at that. It has the dropper in it
that will suck up paint, so then you can squirt
out a lot of paint. But I like using the dropper itself as my
mark-making element. Look at how fun that is. Definitely consider
your mark-making tools, your paint tools, the stuff that comes
down into your paint, sometimes as your mark-making. If you're using
high-flow paints, that might be depending on, that might be an element
where you could get it just right and get some good
scribble out of it. Look at that. [NOISE]
[LAUGHTER] But you've got little by little test that or you'll end up
with big blobs of paint. Then I don't know what I
was combining right there. But just in this experimenting, how fun is that? Let me tell you, this is
not my normal colorway. I would not normally pull quinacridone nickel azo gold for anything because
it's a puppy gold, a baby puppy color. But in mixing with that
olive green acrylic ink, which is one of my
favorite greens. Look at that amazing look. Now, all of a sudden I'm like, maybe I need to look at
this color in a new way. Because that was totally
unexpected that it started to merge and it
looked very exciting. If we look at this
as a cut-out piece, because I like to cut
out my art and we make little abstracts like
I could come back and these little
mark-making sheets and be, let's cut this piece
out to be my abstract because even though the big
thing looks like a mess, the little sections
almost look exciting. I was pulling out paints
that I don't normally use so that I could not waste
the good colors. But now that I've
done that, I'm like, look at that fun discovery,
there. Super fun. Look around your art room, pull together pens, pencils, mechanic pencils,
scrapers, spreaders, anything with a pattern to it. Any wedge that you have, a catalyst wedge,
silicone spatulas, forks, spoons, knives, any interesting auto
thing that you find, it don't have to
be these rollers. It could be some
washers. Who knows? Things that rust,
paint pens, pencils, crayons, water-soluble
things, anything silicone. The goal here is
to think outside the box and expand yourself on the things that
could make some pattern. Another thing, let's
just some string or yarn or thread or something
that we could drag through. We cut a piece of this twine. Cut some twine here. What if we just dragged this thing through wet
paint and just see what can we get dragging thread through painting stuff that can make some interesting marks. So yarn, thread put
a globe of paint, or you could soak this in paint and then drag
it across your piece. That could be fun
for mark-making, so think different things at the fabric store that you
might look around for a different mark-making
and dragging and drawing and
things like that. I want to just start expanding what you're
looking for for your marks. It doesn't just have to
be a pen or a pencil. I want you to start getting creative with some
of your marks. Because the more creative and the different types of
tools that you use. How many people, more after watching this
class obviously. [LAUGHTER] But how
many people you think are going to go
to the auto store and find this exceptionally
cool roller and think I want that
roller in my art. So it would definitely
be really unique to you and your art that you're
creating. I love that. I love using something that nobody else maybe is
using or thought of or might have come
across and people looking at that and
thinking, what is that? It's so interesting,
I wonder how they did that. That
kind of thing. I want that to be an
interesting mark that makes you think twice and makes people come look a little
closer and think, wow, look how they did that. Look around and start pulling
together things that you forged in your art supplies
and in your kitchen, and the auto store
and the craft store, in addition to all
the stuff that we've made and forged from outside. I don't want you to limit
your thinking into thinking, I can only do this, or I can only use that. I want you to get creative. Think outside the box while
some of these things that you use for making your art. [MUSIC]
13. Lets Make Art: [MUSIC] Once you've started making and gathering your tools, then I want you to experiment a little bit with making
some art with them. I'm obsessed with the little abstract acrylic
paintings that I do. [NOISE] I'm going to just take some water and
dip some ink in and then maybe use some of these
mark-making tools [NOISE] to create or drag or add to my, these are some of the
minimalist things that I like to do and
we'll just experiment. I'm going to dip ink in and
maybe use my ink dauber as my mark-making element and just see what can
I get these to do. Because I'm getting
started here, but maybe I can
start and just see, can I drag this through, and look that, and get it to make any pattern? [NOISE] Maybe I can use this thing that looks
like a comb. That's fun. Maybe I can add some
of this other color. This is Payne's gray
and antelope brown in my acrylic inks, because these are just super, some of my favorite. See, we can drag
these through and just get a little bit
of pattern in there. Super cool. We could also do some mark
making with these feathers. [NOISE] I can see the
feather being a favorite, especially the ends for making some of these
yummy interesting marks. Love that. We could also take our sweet gumball. Took me a second to
even think what that was and see if [NOISE] we can spread some of this ink around for
some little dots. That was super cool. [NOISE] We also
have all kinds of stuff in our little
palette of stuff we made. Got these fun
brushes that I made, got our little hockey brush. We've got our piece of
string that we just used. [NOISE] We could dip something in some paint and
maybe do some little bloop. [NOISE] We might try
that. Let's see. Let's go ahead. Let's
do another one. That's some of the
most favorite part of making the little abstracts, is watching the
ink do its thing. [NOISE] Look at this over here. We've got some really
super cool water splatter. I like that. I might just do some Payne's
gray dripping and again, using my little ink
dauber as my mark maker, I might come through
and do some fun marks. Could come back in and do
some more splatter like that. This even though it's yarn
and I'm doing painting, I'm not necessarily
washing it out every time. It's going to actually
last for a while, so I can keep using this and then when I finally
get to the point where I'm like that yarn is
saturated and it's hard and it's not doing
its thing anymore, I can just replace the
yarn on it because remember we rubber banded
this to our handle that we made so it doesn't
have to be thrown away. We can just replace
the yarn part and then we have a fresh
new mark making tool. I like making some of these
that are semi-permanent. We've got a nice handle but
then we can do something like this and just use it
until we're done using it. If I put a little ink over
here on my paint palette, [NOISE] we could try our dauber. [NOISE] Look at that. I like that darkness of color that that just threw
in there, super fun. Again, this too, we can use that until we're like it's not working
like I thought. Take it off its handle
and make a new one. That one's super
easy to replace. [NOISE] Another
thing I have down here are my little
cardboard pieces. I cut off big, small enough pieces where
I could really let this. [NOISE] Look at that. This was that shelf liner. [LAUGHTER] I love
the shelf liner. Then making little
samplers like this, especially experimenting
with anything that you've made or foraged, you're going to discover
a few super favorites, like this is my super favorite. Maybe let's just make a
couple more of these. I'm just going to spread some water so I
can drip some ink. I'm telling you I could make
these things. Look at that. That right there, was super
exciting. Look at that. [LAUGHTER] My goodness, I could just get so
excited about doing these every single time. I really like these
cardboard things. Look at that. [LAUGHTER] Drag that through and just let it do its thing. [LAUGHTER] Look at that. My goodness. Super fun. That right there is like a
finished little abstract. I know that I'm going
to love that one. Do I want to add
anything else to it? Maybe a little tiny
bit, maybe not. Maybe pencil like this could be an opportunity to add
a little tiny bit of scribble and just make a little extra
excitement on there. Not too much, but
enough to be like, look what that did. These little abstracts
are super fun and they're excellent for color
testing and mark-making. We're not using a lot
of supplies and we're learning and discovering
fun new stuff. Look at that.
[LAUGHTER] I love it. Let's do a purple
one. I love this. Olive green and purple lake, but I may not have the
purple lake or where I can get it easily. Here it is. Let's do these. Let's do it. I definitely
love this one. That's probably going to be on the little promo
card for this class. [LAUGHTER] How funny. Always got to be thinking, how can I make this
as exciting for you as I've just made it for myself. You can do your experiments
with any paint. You don't have to
be using the ink, I'm just currently obsessed
with my inks. I love them. Look at that. My goodness. Let's just get a little
more green go in here and then let's move that paint around with
something interesting. What have we got in here
that we haven't tried? I do like this little guy. It's the other
piece of cardboard. Look at that. That's
a really nice way, for moving that paint
around. Look at that. That's super fun. I'd like
stamping these. That's fun. [NOISE] We could use a twig to see if we can drag some
of that paint around. [NOISE] That's fun. Maybe I want to add
some more water in here and let those paints
move a little more. Maybe a little extra color. We can use again our little
stick here for mark-making. I love watching
things spread out. That's like the most satisfying. Look at that. You know
what else we could try? We have in our little
stash of stuff, [NOISE] little piece
of bubble wrap. I like some of these
common householdy things. Look at that. For some of our experimenting and mark-making
because they're cheap, they're easy, and
they usually come in a box that you got delivered. That's super fun. This is the raffia's fun. [NOISE] Not my
favorite for this one. [LAUGHTER] Super fun. I want you to do a bunch
of little experiments. I want you to pull together all the different things
that we have collected, made, gathered, and
start testing them out. I expect to see 100 little paintings if you want to do little abstract
paintings like I like to do. That's an excellent way to
say, this is my favorite. I know that this
corrugated cardboard, that's a personal
favorite of mine. This is the most exciting piece. What you might do is if you create some of these
and you're like, that was amazing, then on the back of that
piece when it's dry, write down what it is
you use to create that. If you used acrylic ink
and you used a piece of this corrugated cardboard
and you used a pencil, write down these four
supplies on the back of that little
sample and save that in a little journal or sketch book as your
project for that day. These are really great for the 100 day project
if you think, I'm going to come and use
some mark making tool that I've never used before and we'll see what
we can create. That's an excellent way
to discover new colors, new mark makes, new pieces that you think
that's a favorite, and little pieces
of art that you can then write down
what you loved about it and keep that for future
reference when you want to make more or bigger pieces or you think, how did I do this? I forget, then you
would remember. I hope you really have fun
making some art experiments. I'd love to see you
start something like 100 day project in a sketch book or in
little pieces of art. If you do that,
come back and tell me and then show me some of the yummy discoveries that
you have done and I can't wait to see what you're
creating in class. I'll see you next time. [MUSIC]
14. Final Thoughts: [MUSIC] I hope you really enjoyed
all the fun things that I shared with you, the ideas that I've
come up with for foraging and finding and
looking around and creating. I want you to hopefully
have come a way with a few, "Aha I love this" or "Oh, I didn't think
of that" moments, or "I found a new thing that I'm going to use going
forward in my art, a new discovery that's
going to be uniquely mine." I hope you've had some of these moments in this
class because this is more of a
foundational class where just presenting and showing different things that I've
learned and discovered and tried throughout the years
to just introduce you to some new things that
maybe you didn't think of or maybe if you're
in a rut and you're like, what can I do differently
or what can I explore? What can I sit in
my studio today and create with that maybe I
don't normally create with? How can I step outside my comfort zone and do
something different? That's what I want you
to take away from this. I want you to step outside your normal creating and
try something different and get a new excitement for your art and come away
with something that's going to be authentically yours to create
with going forward. That's how we come
across and create and develop into our own
style of art-making. Because we can take classes
and things and we can duplicate what the teacher is doing and we can
create those projects. But in the end, in doing that, the reason why we do that, and they've done that
all through history. We see if you go
to Louvre I went to Louvre when I was
like 20 [LAUGHTER]. There were artists sitting
there replicating the masters. Trying to replicate
their colors and their brushstrokes and
their techniques to create a piece that
looked identical to one that was hanging
on the museum walls. I don't know if you can
still do that today because blue gets
packed [LAUGHTER]. But local museums around you
have that same practice. But I was fascinated that even people in school and stuff, that's how they learn too. They copy the masters, they copy the things
that they emulate, they want to create
in that style. But for the most part, you're never going to be as
good as that original because the original person was being
authentic to themselves. But in this learning and creating and trying
out of new things, you can pull pieces and
parts that work for you. Then the longer that
you create and find things that are fun and
that you particularly love, the more you will develop into your own style and you'll be creating with things
that people are like, I wonder how she did that? I wonder what tool that was? Look at these marks? I've never seen
something so exciting. I want you to just
learn and develop. Make yourself a little
box as you're going through this process
of creating, and say, "These are the things that
in my practice, in my play, in my scribble, in my discovery, these are the things
that I loved." Then when you go to
create art in your room, you have a little
box of things to pull from and grow from, and then you just keep adding and subtracting
and taking away and creating new things to add to your box
and use in your art. It's almost really fun if you decide at the
beginning of a collection, I love these three
mark-making tools for this collection and you set forth a goal for
yourself in creating. Then the next collection
can be a different set of tools that you use
and create with. That's a fun way
to think of that. I hope you have fun gathering
and collecting and creating new things to make marks and
interest in your artwork. Can't wait to see the things
that you've come up with. Definitely come back
and share those with me and I'll see you next time. [MUSIC]
 DENISE LOVE, Artist & Creative Educator