Transcripts
1. Introduction: People started carrying
pocket journals everywhere. Here's how you can
easily make one for yourself with the advantages of tailoring it to your needs. Hello, and welcome to my studio. My name is Ido Agassi, and I'm a book artist. I've been making books
and boxes for 30 years, and I would love to share
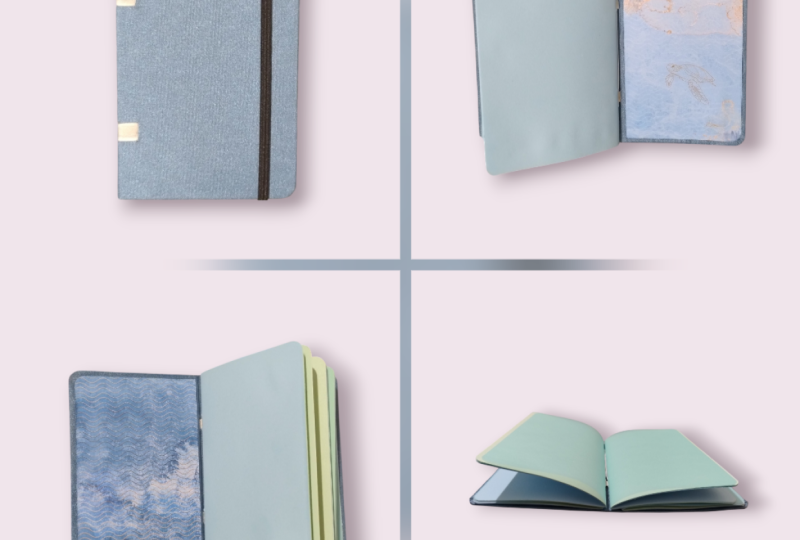
my knowledge with you. In this class, we are making a pocket journal
with a soft cover. I designed in a new and
innovative way with the ability to easily change the inner paper
according to your needs. You don't need any previous
knowledge or special tools. You'll be amazed how
simple it is to make it. And also, I will
show you how you can improvise with tools that probably you have
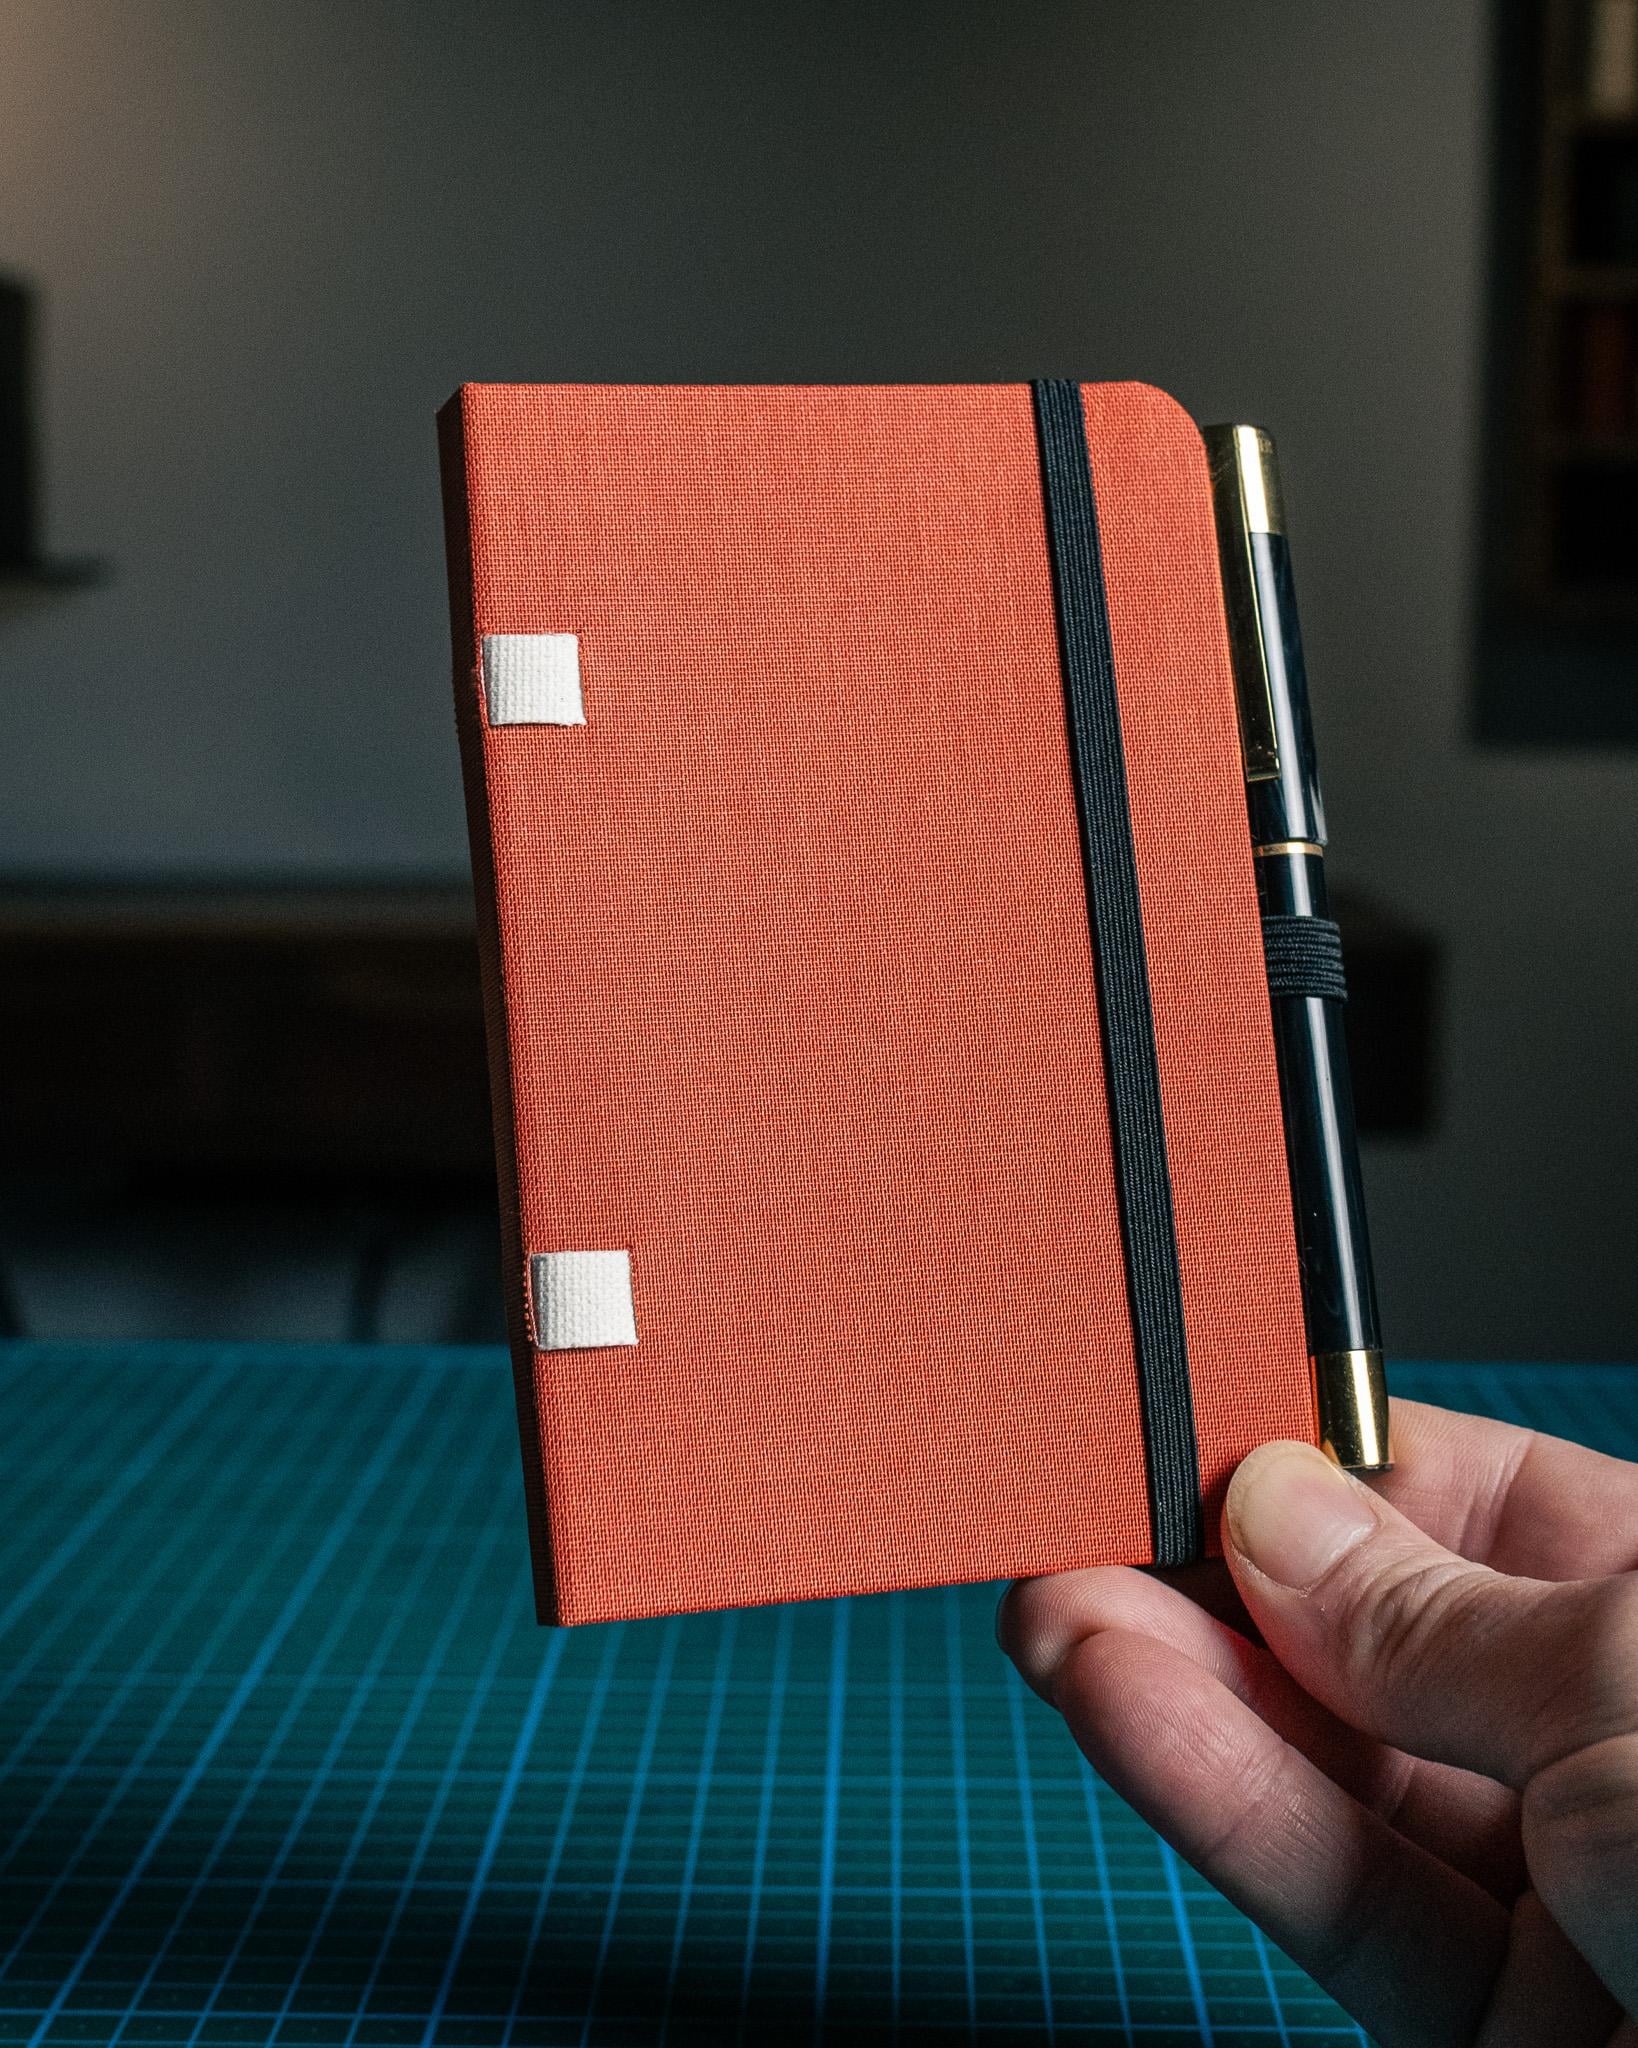
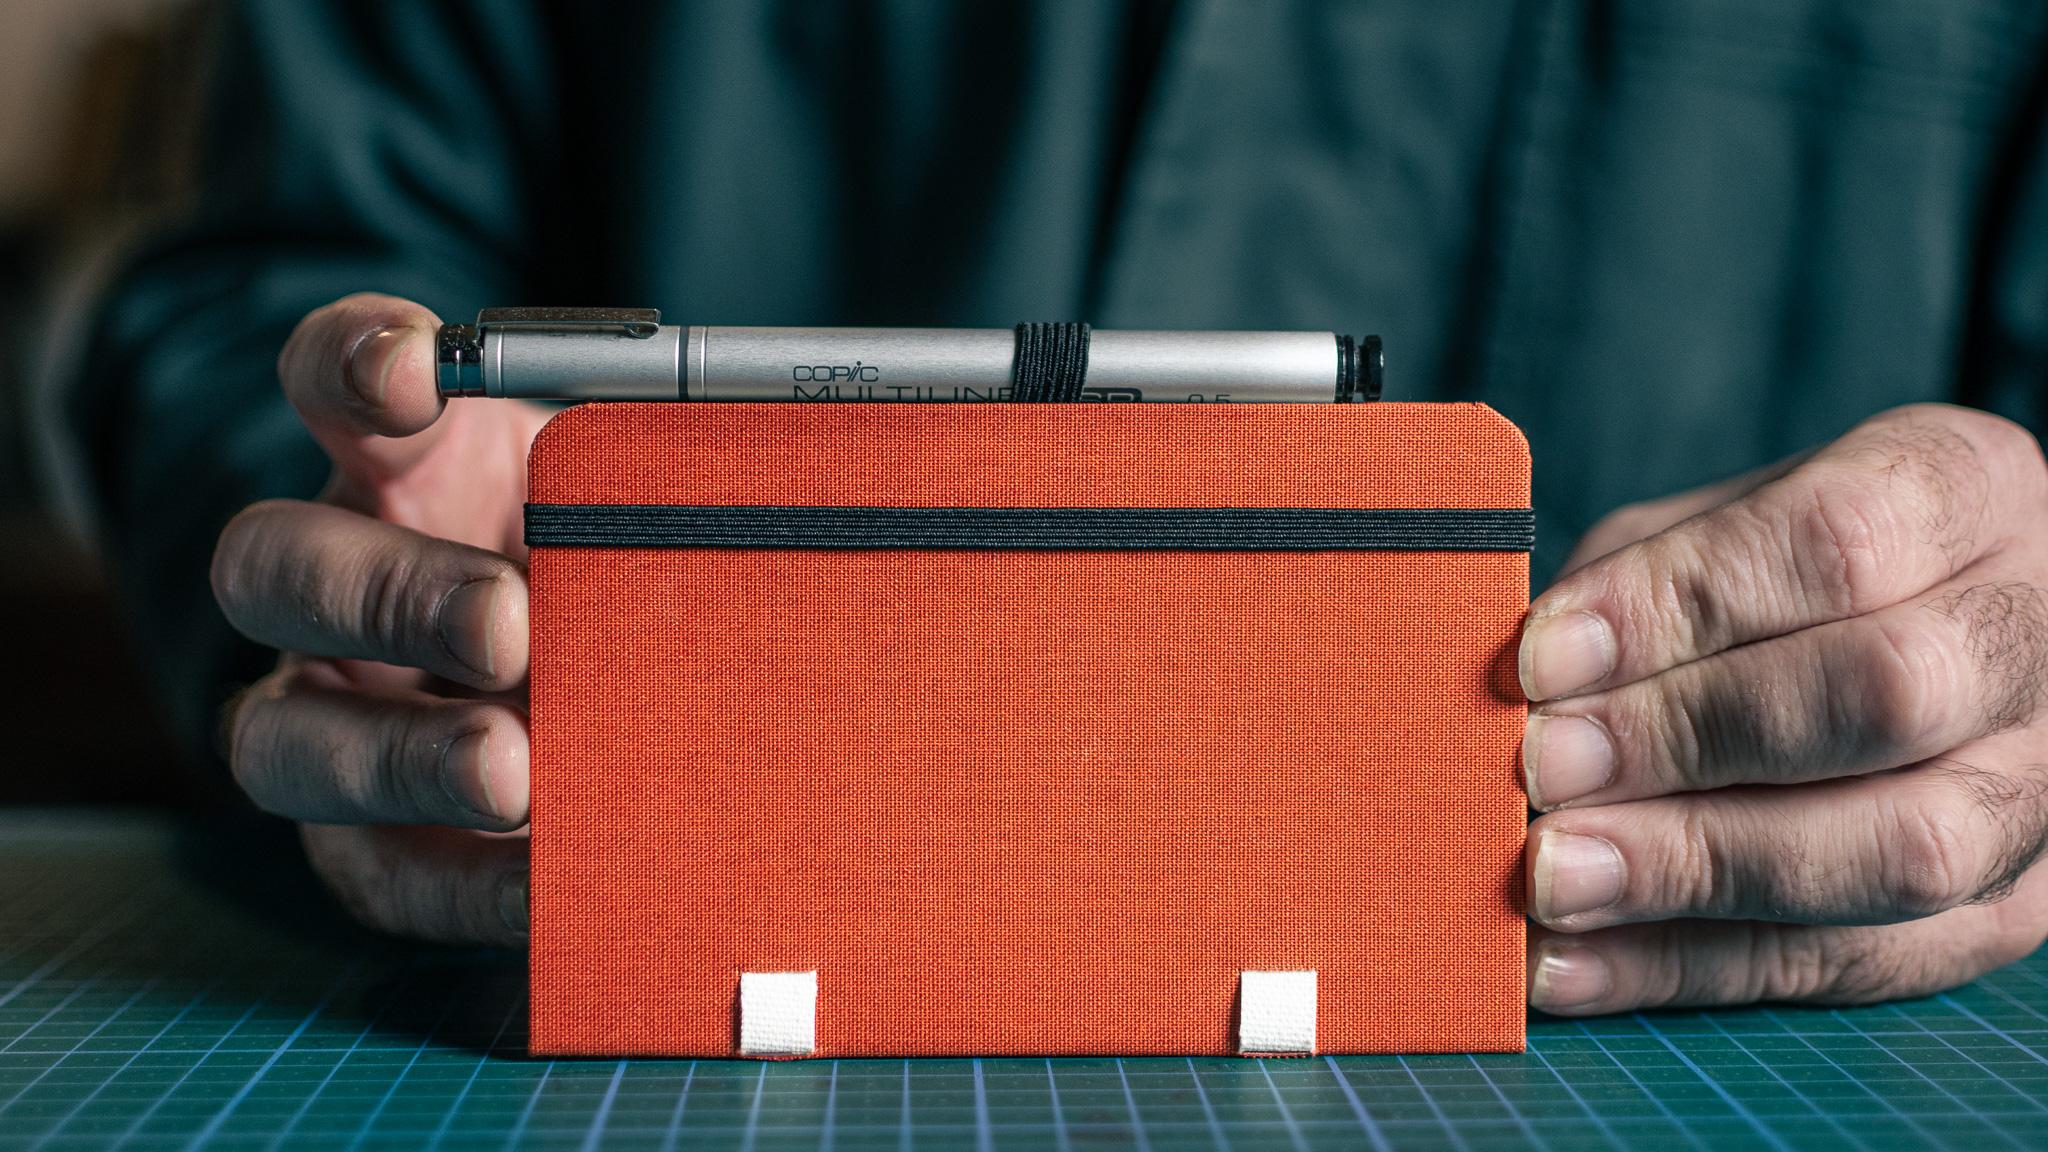
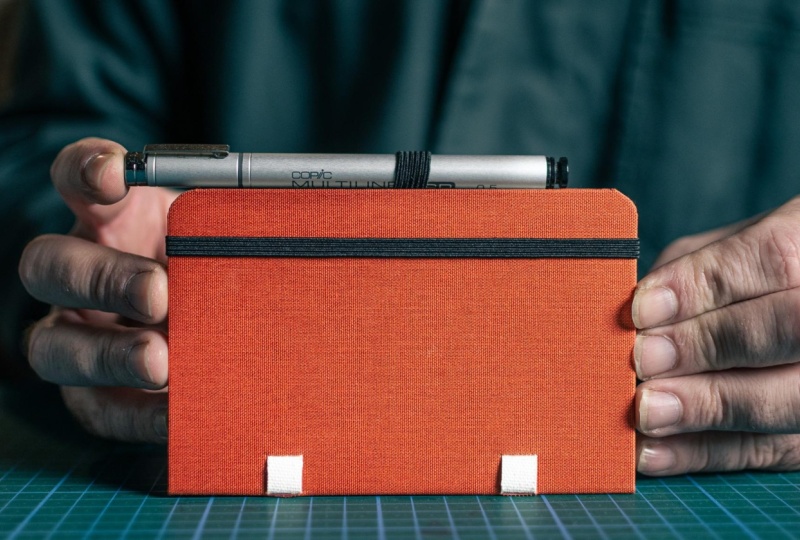
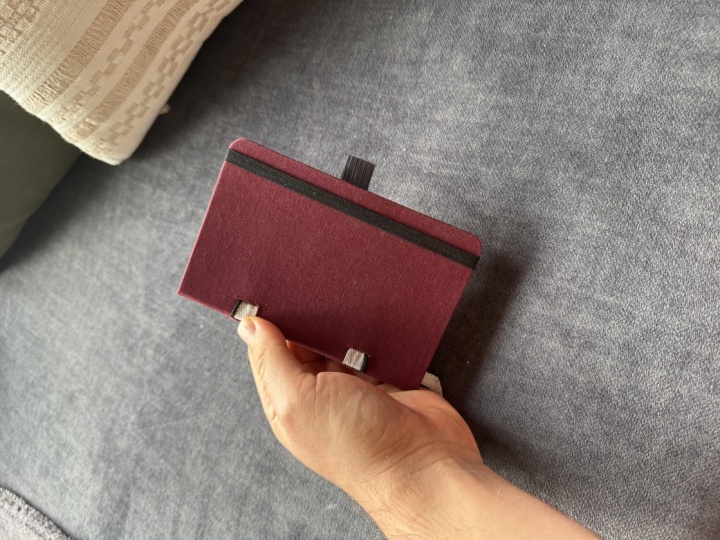
around the house. We will start with the cover, soft rounded corners and
two tapes inserted through it to allow a quick and easy
way to bind your papers. This would be the home
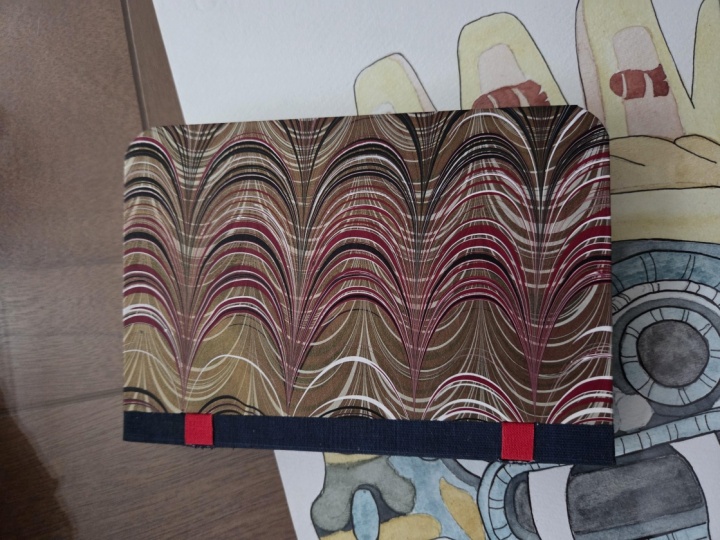
for your thoughts, and you will decorate
it as you wish, different color,
different paper, closure, new materials
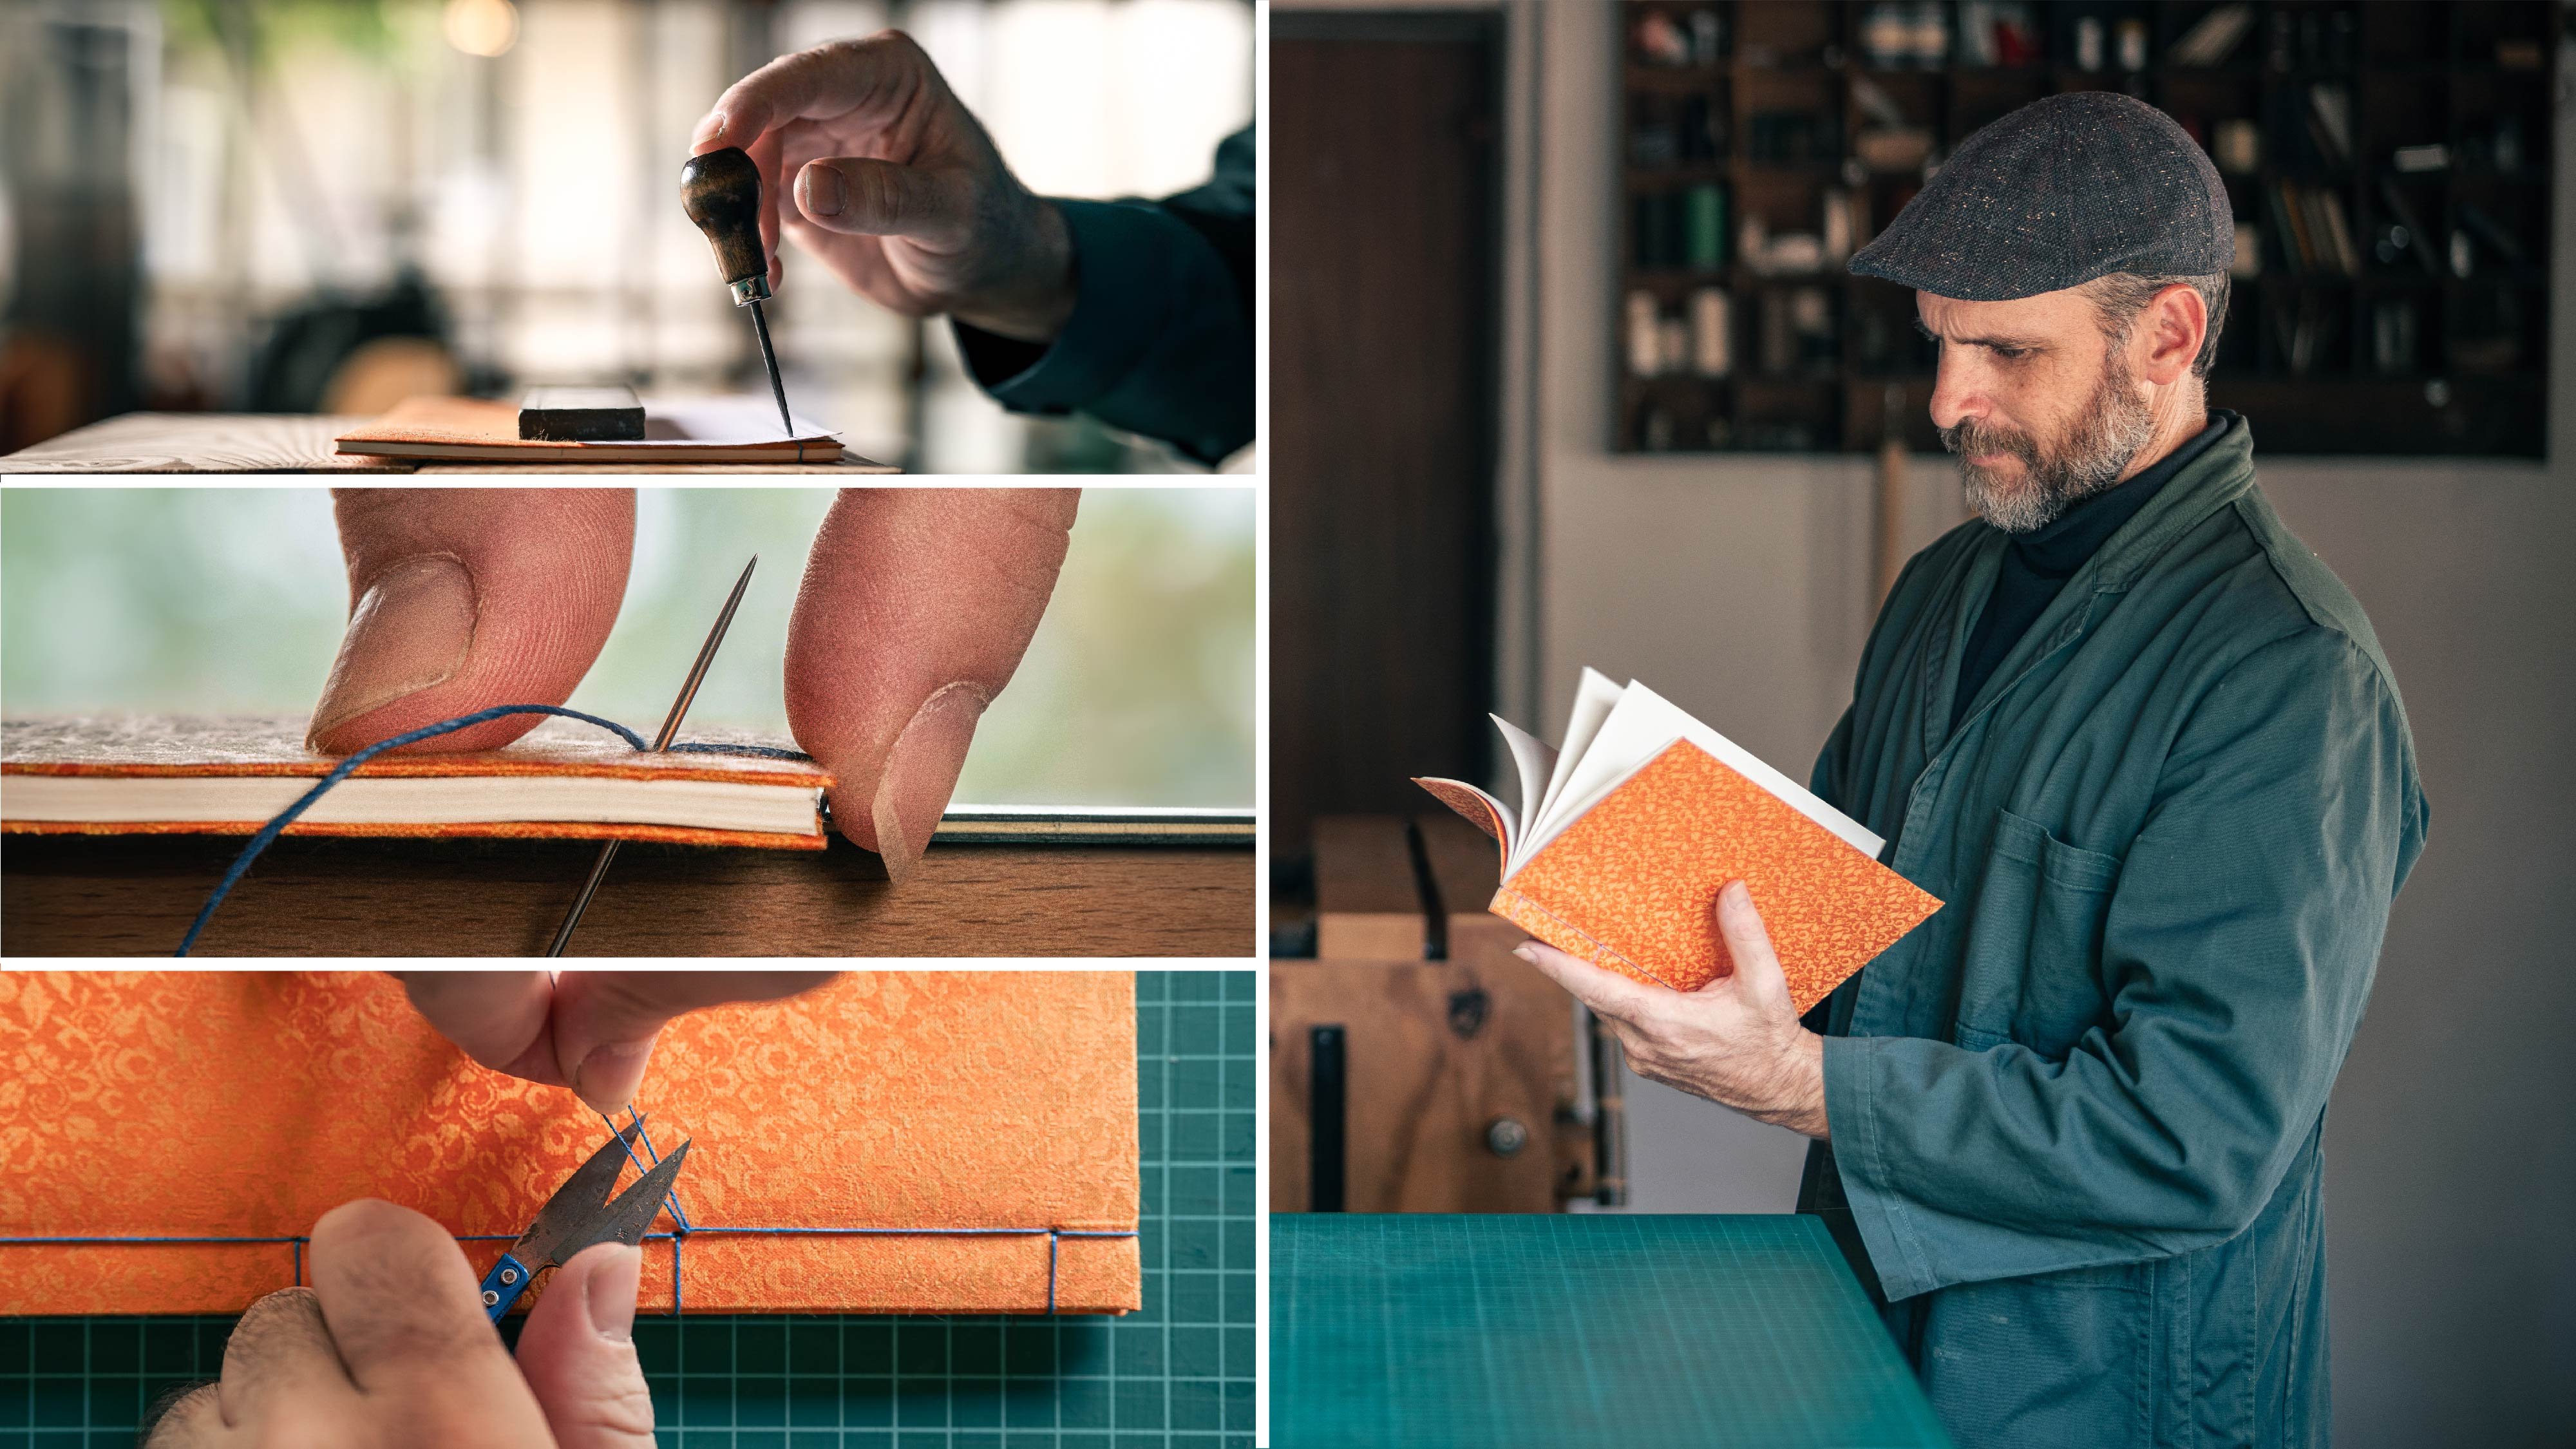
or upcycled. I will take you step by step through the
binding process with clear explanations
and detail shots to help you create your
own handmade binding. So I invite you to join me
in this wonderful journey to make your own
perfect pocket journal. Are you ready? Let's
start working.
2. Tools & Materials: Hello, and thank you
for joining this class. Before we begin, I
would like to go through the tools and
materials that we would need. These are very simple tools and materials that probably
you have around the house. So I'm going to go
through the must have and how to
improvise if you don't have any because there
are a lot of places that you can improvise with
your tools and materials. So let's start by
putting a great board on the table that would give
us a nice background. And I'm going to start
with the cutting mat, which I really
recommend you to use. This is the surface
that you cut on Okay, I'll move on to the small ruler. This is 15 centimeters. You will see me working with
different sizes of rulers, but just one would be enough. Another thing that you would
need is a craft knife. Any craft knife would work. This is with a 30 degree blade. But again, each one that
you would use would work. Moving on to the bone folder. The bone folder is
the bookbinders tool, but you can also improvise
with the back of a spoon or silverware or
just with your fingernails, a piece of anything would work, but this is the bone
folder I recommend. This is 6 ", and I will give a link to
it in the class resources. Another thing that you
would need is an O, but you can also improvise
with a push pin, and it would work great. And you can improvise
with that, a pencil, scissors a needle for sewing, this is number 18, a glue brush around
two centimeter wide. And now for improvising, you can use a nail file just to round the corners
of your work. Also, a washer between the inner circle and the outer circle
around 1 centimeter, I will show you how to improvise with
marking the corners. Because we are going to make this journal with
rounded corners, you can find a corner cutter. This is a very nice tool that cut the corners with an angle. But I'm going to show you how
to improvise with a coin. Another thing that you
would need is a chisel. This is around 0.7, but you can also use
something wider or you can improvise with a flat
headed screwdriver. So now let's talk
about the materials. You would need bookbinding
cloth or decorative paper. The paper size is 18 by 14
centimeters of your choice. You would need around
24 sheets of paper, thick paper or thin board. For the cover, you can also recycle or repurpose
food packaging. The leftover piece
for the spine. Piece of paper for the template. This is 14 on around
7 centimeters. A strip for the inner spine, this is around ten
by four centimeter. You can use original
Bookbinding tape. This is 0.9 centimeters. And you can also use just a ribbon in any
color you'd like. What I'm using in this class is just canvas for oil painting, and I cut a strip
of 1 centimeter. Thread, I recommend 18 or
14 ply PVA or white glue, whatever works for you. Thin double sided tape
could be any brand. About the elastic band. In the class, I'm going
to use two elastic bands, one that is 1 centimeter wide, and that is going to be used for holding the pen or the pencil, and one that is more
proportional to the size, this is 0.7, and
this is going to be attached to
close our journal. I'll move on to the pocket. For the pocket, we
would need paper 27 on 14 centimeters and two strips of cloth four by 8
centimeters for the pocket. So these are actually
all the tools and materials that you
would need for this class. Very simple. I can't
wait to start working, and I'll see you in
the next lesson.
3. Cutting Materials & Rounding Corners: Hello, and thank you
for joining this class. I want to start with cutting the material for the
cover into size. What you can do, you can find in your house food packaging
and just reuse material. This is a very fine thick paper or board that you can use
for the outside cover. I'm going to use
this thick paper or very thin board around
1 millimeter thick, and that's what I'm going
to use in this class. So I'm going to bring
a piece of weight, but you can also just find something that has
90 degree angles in your house that you can bring your board or your
paper to and just mark. Now, you have two options. You can take your ruler and a pencil and mark 14
centimeter, which is here. Oh, what you can do, and that's
what I prefer is to take a needle just connected
to a piece of plastic and mark
with the needle. The reason I like
to use a needle is because the point
is always the same. With a pencil, it can change between the sharpness
of the pencil. And now, what I'm going
to do is take my knife, put it between these
two dots and cut. Now I'm going to
cut 9 centimeters. I'm going to mark with my needle two points and cut. And I'm going to leave
this for the spine. Now, I'm going to
make four of these, okay, two for the outside
and two for the inside. Now I want to cut the corners because I want rounded corners. So one option, this is a very nice tool that
have three diameters. This is ten millimeter, four millimeter and seven. And what you do, you just
insert it inside and press it, and it gives you a
nice rounded corner. This is very satisfying to do. And I will add a link to this tool in our
class resources. But maybe you don't have a corner cutter and I want to show you how you can improvise. What I'm going to do is bring a coin and put it on the edge, see that it is on the edge
of the side and the top, and I'm going to
mark with a pencil. Let's do it to the other side, making sure it is up until the end and mark with a pencil. And now you can either take a knife and cut with
the same angle, or you can take scissors and just cut it
according to your marks. Great. Now, let me
mark the spine. I'm going to take my
ruler and the pin and mark 1 centimeter and
also here 1 centimeter. Of course, you can do it any
thickness you would like. This is for more
or less 80 pages, maybe more, but you can make it thicker if you wish and cut. After you finish all four, what I commend you to
do is take sandpaper. This is just sandpaper connected
to a piece of wood and just send the edges
of all the boards. And that would make
everything even. And after you see everything
is okay and you're content, we are ready to go
to the next stage, so I'll see you in
the next lesson.
4. Covering The Boards: Welcome back. In this lesson, we are going to start
connecting the cover. So I'll bring a piece of cloth. The size of the cloth is 18. We need 24, but I have extra because I want
for the inner spine. What I'm going to do is take a ruler that is two
centimeter wide, and I'm going to
mark with a pencil. A line on the top and a
line on the side here. And that would act as a guide where I want
the board to come to. But what you can
also do is bring something in your house
that is 2 centimeters. I'm going to use my weights, bring one here and one here, and let's start
gluing the board. I'm going to bring my PVA. Okay? This is PVA white glue. And I'm going to glue
from the inside out. I'm gluing from the inside out because if I'm doing
it vice versa, there's going to be glue on
the edge and it can drip on your fingers and it can make
everything a bit messy. So that is why I'm doing it from the inside out up until the end. Not a lot of glue,
just an even amount. Now I'm making sure that the rounded corners are
pointing towards the outside, and I'm bringing
it to my stoppers. I'll move it aside, flip it over and connect. If you wish, you can
take a bone folder and just go all around
the edges here, make sure everything
glues properly. I'll flip it back over. And now I only need the upper line as a
straight line here. Again, you can put
whatever you want or just use the pencil guide. And now I'm going
to bring my spine. This is 1 centimeter spine, and I want a gap. The gap is around
2-3 millimeters. I'm just taking a
leftover board. You can also take your ruler and a pencil and
mark 3 millimeters. I find that if you find
something in your house that is around two
to 3 millimeters, that could work great, I'll bring a weight so it won't fall down like you see here, and it holds it in place, and I'm going to glue the spine Let me
do the other half. And now I'm bringing it to the stopper and to my spacer,
and I'll take it out, put it on the other side, and I'm going to
take my other board, and I'm going to glue it. Up until the end, all
around. Not a lot of glue. When you feel that you
have enough everywhere, again, the rounded
corners towards outside, so I'm going to bring
it to my stopper, to my spacer, making sure it is touching
and not going over. I can slide it a bit. Then I can see it's in
place, take it out. And flip it over. Take my bone folder and
work with my bone folder. Inside the gaps, all around. You can work also
with your fingers. I'm going to flip it over. And now I'm going to cut
two centimeter to the rest. Now I'm going to
save this for later. Now I want to turn
in the corners, and I want to show you a trick. What I'm going to do
is take a washer. Okay? This is around 1
centimeter from the edge. I think between 7 millimeters to 1 centimeter would go nicely. And what I'm going to
do is just go with a washer and mark the
corners all around. So this corner, and I'll
flip it over and over here. It's very satisfying
to do and over here. Okay. Great. Now I'm going to
take my ruler and my knife. And I'm going to cut from
where the corner is starting. This is around here,
you do the other side. Again, I'm reminding you
that everything is going to be concealed afterwards
with the inner part. So if it's not going well on
the first try, don't worry. We are really doing a
simple binding here. So no worries. I'm going to cut on
the short side also. To the other side. Just from where the corner is
starting to get round. Now I'm going to take my
scissors and I'm going to cut just around
the marks I made. Let's do it here also. Just cut more or
less as my marks. And the last one Great. Now I'm going to take my knife, and I'm going to cut
small cuts around three, 4 millimeters
between one another. And that will allow
me to fold it inside and to just copy
the rounded corner. Okay? You don't need
a ruler to mark. You just need one
beside the other leaving around three to
four millimeter gap. I'll do this one also.
Making like a fan. Great. I'll take a piece
of waste paper, and I'm going to glue only the corner here with
the small cuts I made. Not a lot of glue because we don't want to
go to the other side. I'll take my bone folder and
try to lift, first of all, the center piece,
push it towards me, and then bring the other pieces. It's actually going one on
top of the other molars. I'll bring this side also. And then with a bone folder, I'm like squeezing it to make
it flat into the side also. Takeaways paper, a
little bit of glue. Lift the center. When
I see it is attached, then I'm bringing the
rest one on top of the other and foaming my
rounded corner like so. Okay? You can feel that with the bone folder that you have the right angle. I'll
do this one also. Lift it, start with the center, and then bring on it the rest. Again, everything is going
to be concealed afterwards. If it's not going
to first try good, we are going to cover it.
I'll do the last one. Not a lot of glue. Lift it and just bring one on top of the other. Great. Now, what I'm going to do is fold long side and long side, and then short side,
and short side. And I want to make a cut
between the two corners. This is supposed to be
a very shallow cut. I'm bringing it from when you see it attach
one to the other, and I'm going to
make a small cut. And as you can see,
both of them are going to be disconnected.
Let me do it here. Just a shallow cut
because we don't want to go to the other side. If you are alarmed that something
like that could happen, what you can also do you just put one on
top of the other. I'll take my pin and mark one mark here and one mark here, open it, and then you'll
have the marks over here, and you can cut them like so. Okay? I'll show you again. You just put one on
top of the other. Make two marks in the joint
here of the two turn in here, open it, and then cut. Great. Now, I'll bring my waste paper. Start with the alongside.
I'm going to glue. Up until the end, you could put some glue
in the gaps here, take it out, fold it. Take your bone
folder and go inside the gaps here. And connect. I'll do the other side,
wastepaper, holding it, gluing up until the end, taking it out and connecting. Take your bone folder and
go inside the gaps here. Short sides. Up until the end, take the wastepaper
out and connect. You see how it goes exactly
one on top of the other. It looks great. I'll flip it over and
do the last side. Glue it. Don't forget to change the waste papers fold it
inside. It looks great. And now, all I have left to do is connect the inner spine. I'm going to take
my leftover piece. I'll bring it exactly
to the cloth here. I'll take my pen and I'll mark where it is reaching the
cloth on the other side, making sure I'm straight. If you want, you
can cut it extra. I'll bring my knife and
cut according to my marks. Let's see that it fits. It fits nicely. I'll take another
piece of waste paper. I'm going to glue
the entire piece. Look, I'm starting from the
top and making my way down, then holding the middle, up until the end. I'll take the wastepaper out, bring my bone folder, and then I'm going to bring
it up until my cloth, see that it is centered
more or less touching here, and then I'm going inside and connecting one
side and then the other. Now, I would let it dry a bit, and in the next lesson, we are going to
prepare the tapes and insert them inside
the cover so we can stitch the inside signatures to the cover of this
book. I'll see you there.
5. Connecting The Tapes: We come back. In this lesson, we are going to
prepare the tapes and insert them
inside the cover. Now, the traditional book
binding tape look like this. This is more or less
1 centimeter wide. But you don't need to
buy especially this. What I'm going to use is leftover canvas
for oil painting, and I'm going to cut
this into strips. You can also try and use
ribbons like this one. Or I have just a
leftover of this one. You can also try a cloth one, but make sure it's
not very thick, okay? So you can improvise
with other materials, but I'm going to
use this oil canvas because I think it is more sturdy and it would
hold the signatures. Okay. So I'm going
to line it up on my table and cut a
strip of 1 centimeter. If you don't have a
cutting mat like I do, what you can also do
it's just take a ruler, mark with a pencil, 1 centimeter in two points. And then cut the strip. We need a strip
around 7 centimeters, so I'll just put it here and cut it more
or less in the middle. And that's enough
for us to work with. I'll put this aside
and bring a piece of paper that I want to
make my template. I'll bring the cover. Put a stopper here because I want it exactly as the cover, and I'm going to cut a strip. I want to show you how I make
the template. Don't worry. I'm going to add in our
class resources a template, but I want you to understand
how to make it so you can implement that if the tape is wider or you want more
tapes or whatever, so we'll know what's
behind the method. I'm going to bring my
ruler and I'm going to mark 3 centimeters
from the edge. Let me mark on the other side. And now I'm going to
mark 1 centimeter from that line and
on the other side. Of course, if your
tape is wider, then you make a wider gap. Now what I'm going to
do is fold this in half because I want the
measurements on both sides. Now I'm going to take my ruler and measure 1 centimeter
from the edge here. And mark two lines
here and here. Now, what I want you to
do is take your binding. Make sure you locate it
exactly up until the edge. Now I'm going to take my needle. I'm making sure this is straight on the edge
here and I'm going to mark one dot here
and one dot here, and on a spine here and here, and now on the front of the
cover one here and one here, and I'll mark here and here. Now, this is important. I'm going to flip it
over because I want the same location
on the other side. So I'm making sure it is
aligned like I did here, and I have the marks to
go inside one and two. One and two. And then with the mark
that we have already, I'm going to mark, and
then the places would be exactly the same
on both sides. Great. Now I'll take my
ruler and the knife. I'm going to put it
where the marks are, and I'm going to cut
from dot to dot. Here, I think this is the most exact thing that
you need in the whole class. We want it between the dots. If you're not sure you
got up until the end, you can go from this
side to this side. Also here, I can see I
need a little bit more. And also, between the dots here, from one to the other. Here it's much easier
because you don't have a board from one to the other. And let me do the other side. I'm going between the dots
here, up until the end. And here up until the end, and make sure that you
got exactly to your dot. And also between the dots
here from one to the other I think I'm there. Now you can take several tools. You can just start with
your needle or pin. You can take a chisel or
a flat head screwdriver. I also have a micro
spatula that can help. And what we want to
do is flip this over. We want it from
the good side out. I'll take my chisel and
just go inside the gap. Just to form the hole. Let me do one with a flat headed screw
diver so you can see, I just go inside the
hole that we made. Now I'm going to take the
tape and insert it inside. More or less like
this. S it's okay. Flip it over, and now
I'm going to go inside the spine from one side
and from the other side, just insert it and push it. You see you can manage
and play with it a bit. Let's do the other side. I'll flip it again to
see I want it more or less like this. Flip it back. You just take your
needle and use it for help and let's insert
it close to the spine. One side and the other and just pull Looks good. Let's work on the other side. I'll make it wider
with my screw diver. Just shove it inside
and twist it a bit. And again, you can
also use the chisel. And if you want, you can take just the needle Insert it
and just move it inside. We'll do it here
also. Okay, now, I'm going to bring it
from the inside out. And the rest is going here. You see, when it's wide enough, it can go inside easily. Let's do the other side. You still need to
give it a push. I'm just holding it
and inserting it. Now you can
straighten things up. I'll bring my bone folder. See it straight
and looking nice. Great. Now you can either take a little bit
of double sided tape, just cut a strip, put underneath, and glue it Put underneath, peel it, and connect like so. Or, if you wish, you can take some PVA glue it And connect. I'll let it dry for a bit, and I think this is a great place to stop
and have a coffee break. I want to talk to you
about different options and upgrades that you can
add to your Pocket notebook. So make yourself a
cup of coffee or tea, and I'll see you in
our coffee break.
6. Coffee Break: Welcome to our coffee break. I wanted to share some
options and upgrades that you can add to your Pocket
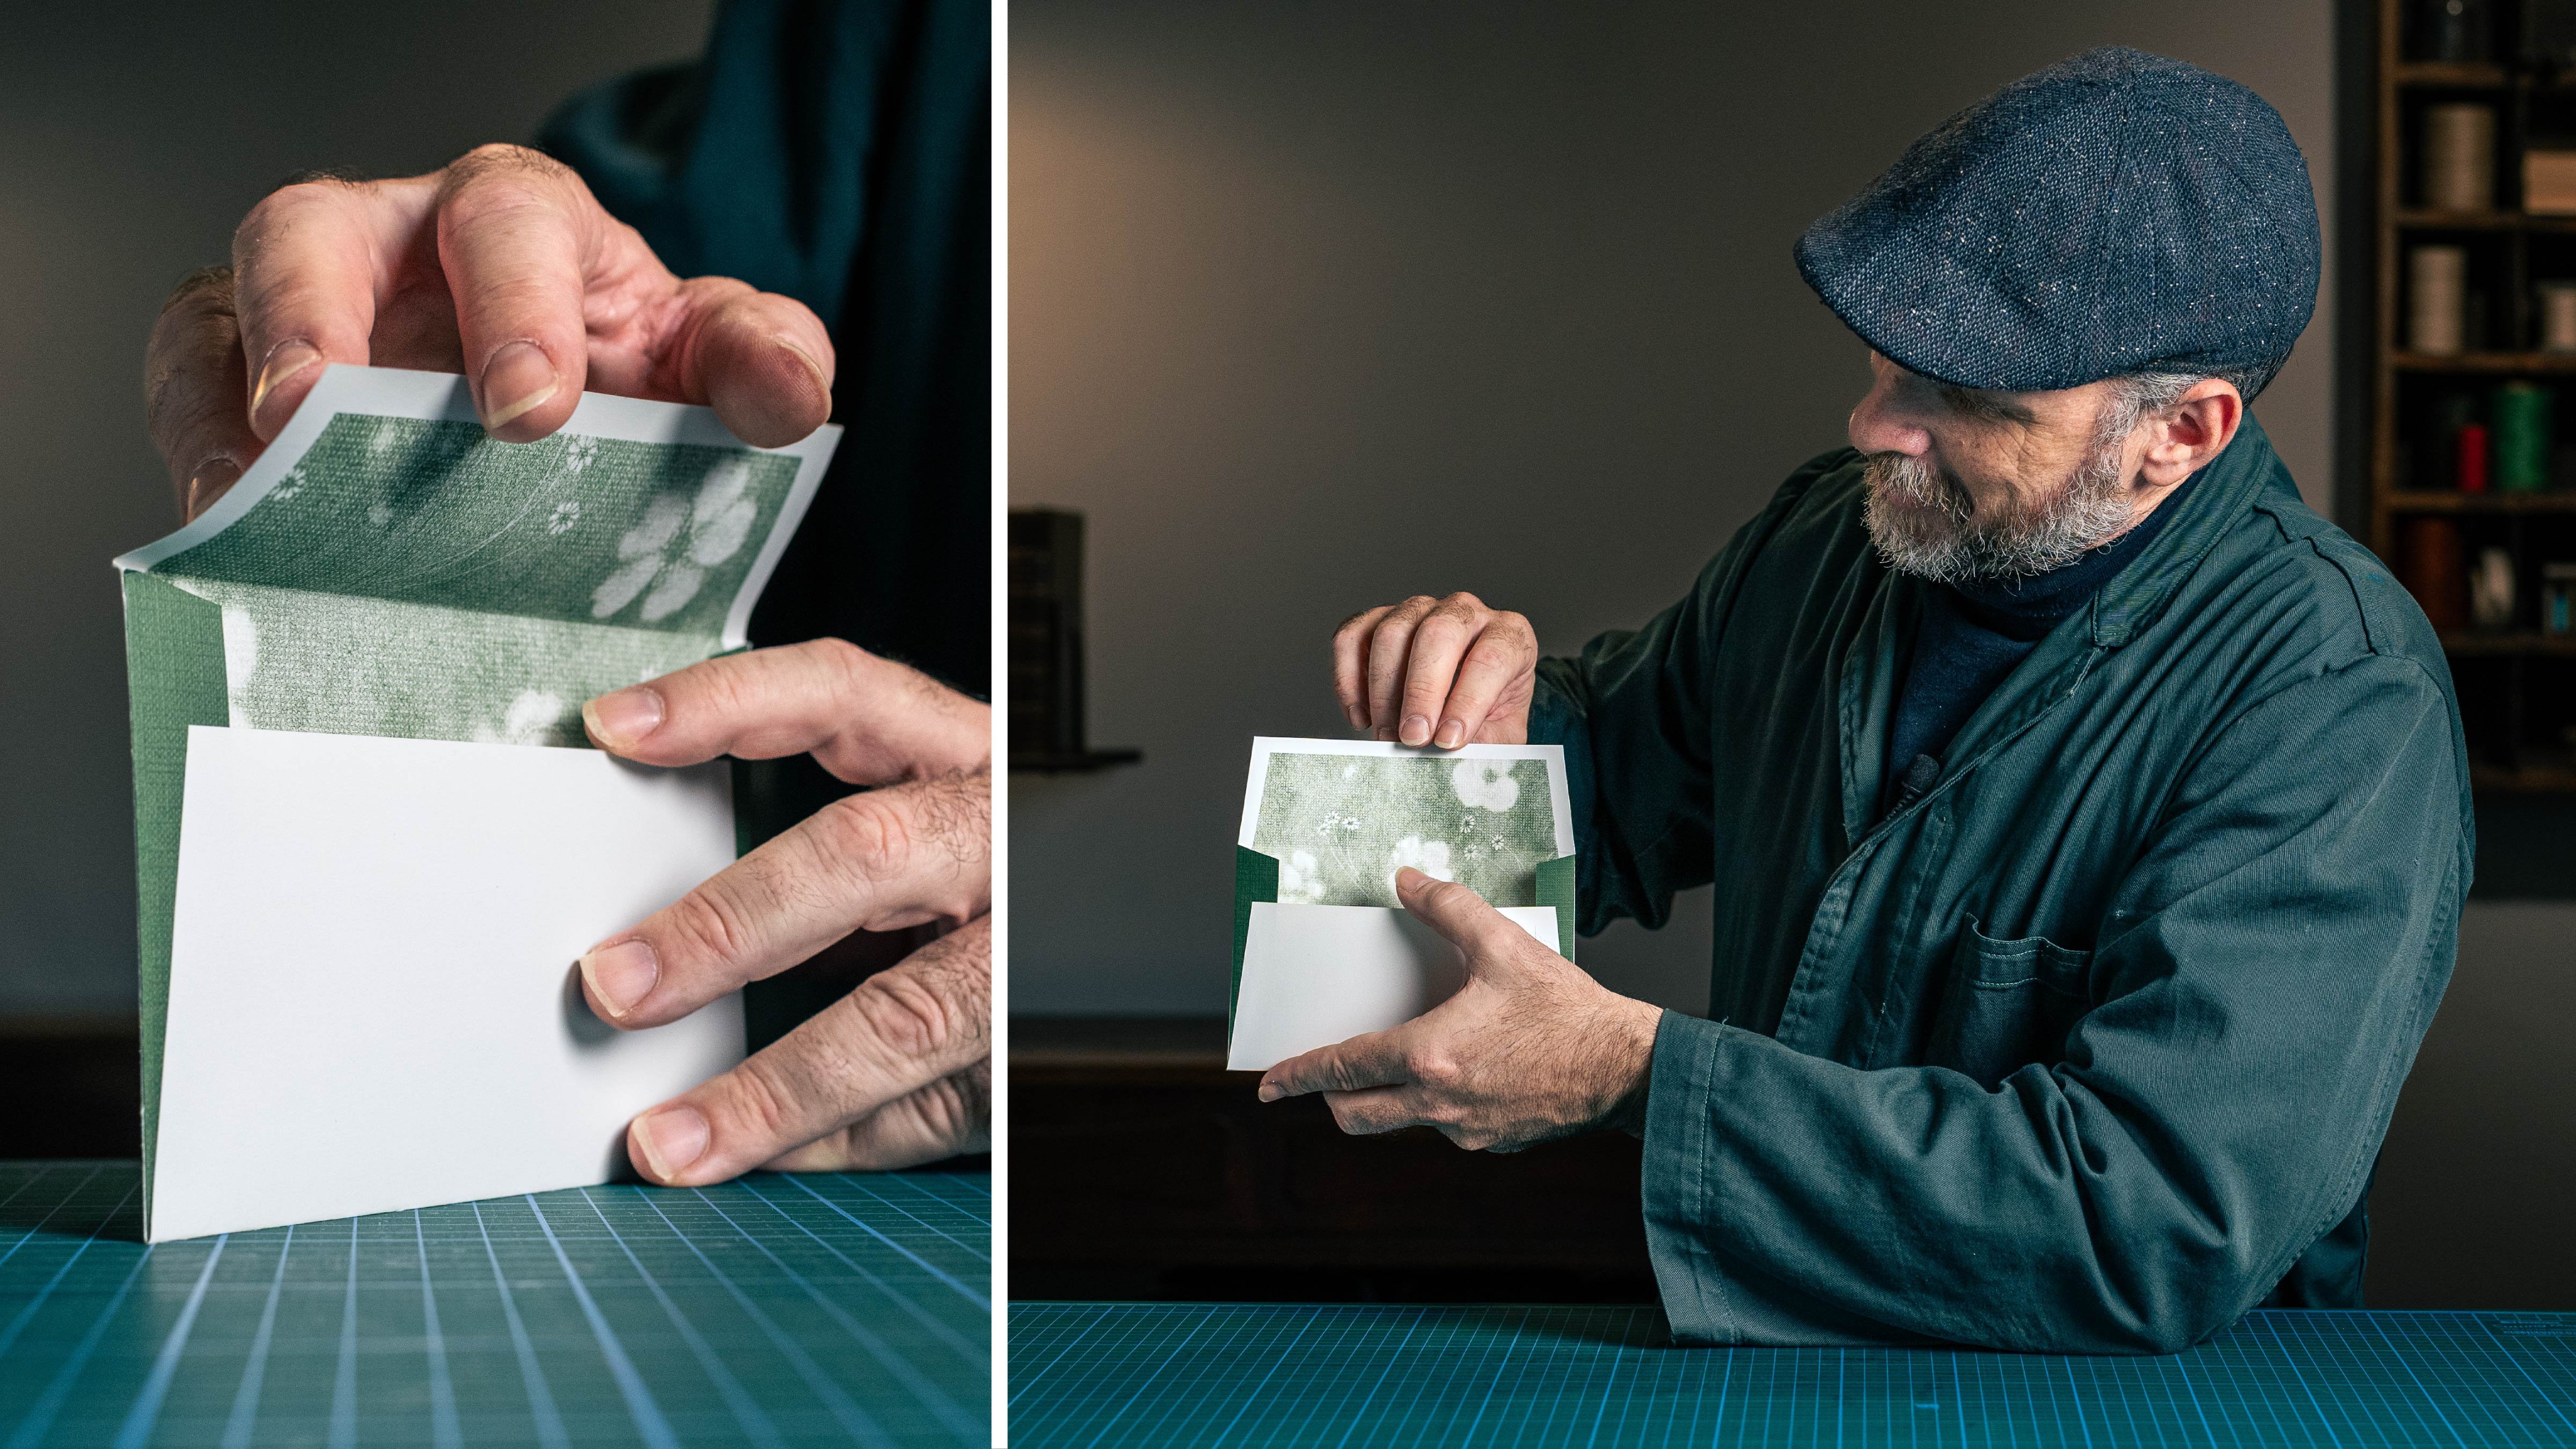
Journal just for inspiration. Let's start with adding an envelope to your
Pocket Journal. This is a very nice solution. You can locate it
wherever you want, and you can add a
couple of them. And I left it open so
you can see that you saw the envelope inside
before connecting it. So what I would do, I made
a class here on Skillshare about an envelope with a twist so you can
watch the class. And to know the
exact measurement, what you can do is take the
board that we already cut, and that would indicate
the size of the envelope. But just don't forget
not to close it up until the end because you need to sew it before and then
close the envelope. Of course, you can close it
here, and it would open. To this side, it depends
on your design choice. Another thing that you
can do is add a bookmark. What you do is you
connect the bookmark with double sided tape before connecting the pocket
or the end paper. That's very easy to do. You just put a piece over here and connect
the pocket on it. And this is a very nice thing to add to your pocket journal. What I want to show you is sometimes the edge
is fraying a bit. So what you can do,
I'll cut it like this. I'm going to take a
transparent nail polish and just put it
on the edge here. And now you'll have no
problem working with it. I'll put it here so it
won't stain my paper. And I'm going to talk about another thing that you can add, and that is transparent paper. That is easily added between
the papers of the signature. So this is a very nice thing to have in your pocket journal. Maybe at the end at the
beginning, depends on you. Another thing that
you can consider is making a label here with
your name, with the date. You can also number the
spine between the notebooks. I know about somebody
that made 12 of these just for each
month of the year, so you can number it
or put a title on it. So that's also something
that you can do. Another upgrade for your
pocket journal is you can make a line paper and then you can just put
it between the papers, and it will help you
write in straight lines. This is a very useful
thing to have, and you can put it back
in the back pocket. So in the class resources, I will add a PDF file with this line paper so you can print it and then put it
inside the pocket. Another thing I thought
of while playing with making this design is
one of the signatures, I added another piece of
paper three times the size. So I folded it.
And the last fold, I cut it shorter and with an angle and just
glue the edge here. And then it acts as a nice small pocket that you
can add something in it, if it's a bookmark or a business card or whatever
you want to put inside. So as you can see, there's
so many options you can work with according to what
you need and what you want. So play around with it. This is actually a part I
didn't think I'm going to film, but I want to show
you about the design, how I played with as
you can see here, I'm checking that the ribbons, I recommend you to
improvise if you don't have bookbinding tape that it
holds firmly and nicely. I also thought about a pocket for the cover of a signature. Also, the option of make be sewing the tapes
to the outside. But then I thought maybe that
would be too complicated. It's a very nice
design could be. And as you can see,
there's a nice face with eyes and something an element
to close it with a smile, but I decided just to insert
it inside and glue it. That would be much easier, at least for the first time. But just to show you, you can play with it in different directions and
do very special things. So you are one of the
first to use this design, and that is why I
would love for you to share your process and
just your experience with and that would be amazing to see people from all
around the world using their own Pocket Journal in different places
and locations. I hope these options give you some inspiration to add elements
to your Pocket Journal. I would love to see
what you have made, and I'm sure it would
inspire others. So please share it with
us in the class projects. I'll finish my coffee, and I'll see you in
our next lesson.
7. Preparing The Paper: Welcome back. This
video is going to be all about papers,
how to fold them, how to cut them in
different methods because I'm not sure if you're going to make it for writing, for sketching, for watercolor, or for whatever reason you
want your journal to be. That is why I want to
give you a variety. I'll move this aside, and we will start folding. So let's start with the obvious. This is just a for paper, and I'm going to take my
weight and fold corner to corner and just fold first with my hand and then
with a boom folder. Of course, you can do it
also. Without a weight. You just bring corner
to corner and fold it. What you can also do is take, let's say, four sheets of paper. Bring it to the
weight. Fold first with your hand and then
with a bone folder. If you are going to
fold it individually, you just insert one paper inside the other to
form your signature. So that's the most simple way just to fold sheets of paper, maybe something that you have in your printer or
just laying around. This is the A four size. Now let's take a strip of paper. And what I'm going to do
here is fold it in half. I'll take my bone
folder and fold it. And then I'm going to
fold it in half, again. I'll bring another
paper, fold it in half. And again, and now I'm going to insert
one inside the other. Okay? This is Sundance
paper by Fox River, and it is 118 gram. It is great for writing
and also for sketching. And you actually can do also watercolor on it because
it's quite thick. Let's take a thin
piece of paper. This is by Zandas. It is called Zeta,
and this is 90 grams, so I can fold it in half, and fold it in half again. This is a great writing paper. Let me add another one. Folding in half and
then folding it again. And then I can insert
one inside the other, and I have a signature
that is great for writing. Now I want to show you
how to cut the paper. I'll bring my weight and I'm going to bring a
ruler and a needle. You can also use your pencil. I prefer to work with
a needle because every time I mark it is exactly
in the same place. So I'm going to mark
8.9 or 9 centimeters. I prefer to do it 1
millimeter less, so 8.9. Now, how do you cut
a pile of papers? What I do is put the
weight on it, okay? Or you can put something in your house just for
it not to move. I'll put the ruler
between my two dots. I'm going to take my
craft knife, open it. Not a lot, just a bit and lock it if you have a
locking mechanism. And now I'm going to go
through a couple of times. Don't try to do it once. So I'm going once. And you see I have like
two or three layers, and I'm going again, and this is already
disconnected, and I'll go again. And I'm not letting
go of the ruler until I finished
cutting everything. And when I see, I cut everything
and everything moved, then I let go of the ruler. It sometimes take time, so be patient and just go
once, twice, five times. But don't let the
ruler go before you finish and you have
your straight line. I'll move this aside and
now let's do the long side. I'm making sure everything
is straight on one side. I'll put it to my weights
or some kind of a stopper. You can also line it
up on your table. And I'm going to
mark 14 centimeters. So this is one mark
and the second mark. Now, again, a weight or something on the paper
so it won't move. I'm going to put my ruler
between the two dots, hold it, and then I'm
going a couple of times. So once, twice, you see that
it's starting to disconnect. And again, up until
I finish everything, then I move the ruler. So this is for 90 gram paper, but let's do it for
the thicker paper. I'm going to measure
8.9 and 8.9. I see between the two dots, we have a straight line, and then I'm going to cut. Once twice, move it aside. Up until I see everything
is disconnected. It's not that complicated. You just need not
to move the ruler, and now I'm going to
see this is straight, and I'm going to
mark 14 once and twice put my weight
between the dots and cut. Now, about cutting
the corners, again, you can take your
rounded cutter, put it inside, and
just cut your corners. But you can also, like we did with the cover, take a coin, the same coin, take your pencil, mark the corners on both sides. Then take your knife and cut several times until you
have your rounded corner. And again, you can
take your scissors and just cut it
according to your marks. Now you can send it a bit or
take just a fingernail file and just round the corners
a bit if you wish, just a small amount,
so it would be nice. I Great. I'll clear this. Now I want to show you how to
work with watercolor paper. If you don't want to cut it with your knife like I
showed you earlier, but you want to keep
the decal edge. What I'm going to do is take
my weight and the ruler, and I'm going to mark 13.9, just 1 millimeter less than the 14 millimeter that
we have for the cover. What I'm going to do is
hold the ruler firmly, hold the paper, and bring the paper to the
ruler like this. I'm pulling. And this is helping to
achieve a decal edge. And now I'm going to
fold it completely. Measure 8.98 0.9, hold it and cut. I just bring it to the ruler, one layer, and a second layer. If I see I have something
like that left, I can just take and just pull it out and it would look better. Now I want to show you
what happens if you want to make a signature
of watercolor paper. And because this
paper is sometimes 250 gram or 300 gram,
it's quite thick. So I think more
than three papers, one inside other would be
too thick, but you can try. So I'm going to
fold three of them, insert them one
inside the other. And because the paper is thick, the outside one is pointing out much more than
the inner one. So what I'm going to
do is take my weight, mark 8.9 and mark here 8.9, put my weight on it
or something heavy. Put the ruler between the
dots and then hold the paper, the first one, and
just bring it to the ruler slowly without
the ruler moving. I'll take another
paper and do it again. Each time one single paper. You see how I'm bringing
it to the ruler. And layer by layer, it is being cut. And now, I'm going to
straighten it up and you have a signature of watercolor
paper with a decal edge. Of course, you can also cut it with a knife like
I showed earlier. I'll move this aside, and in the next lesson, we're going to start sewing the papers that you
chose for the inside.
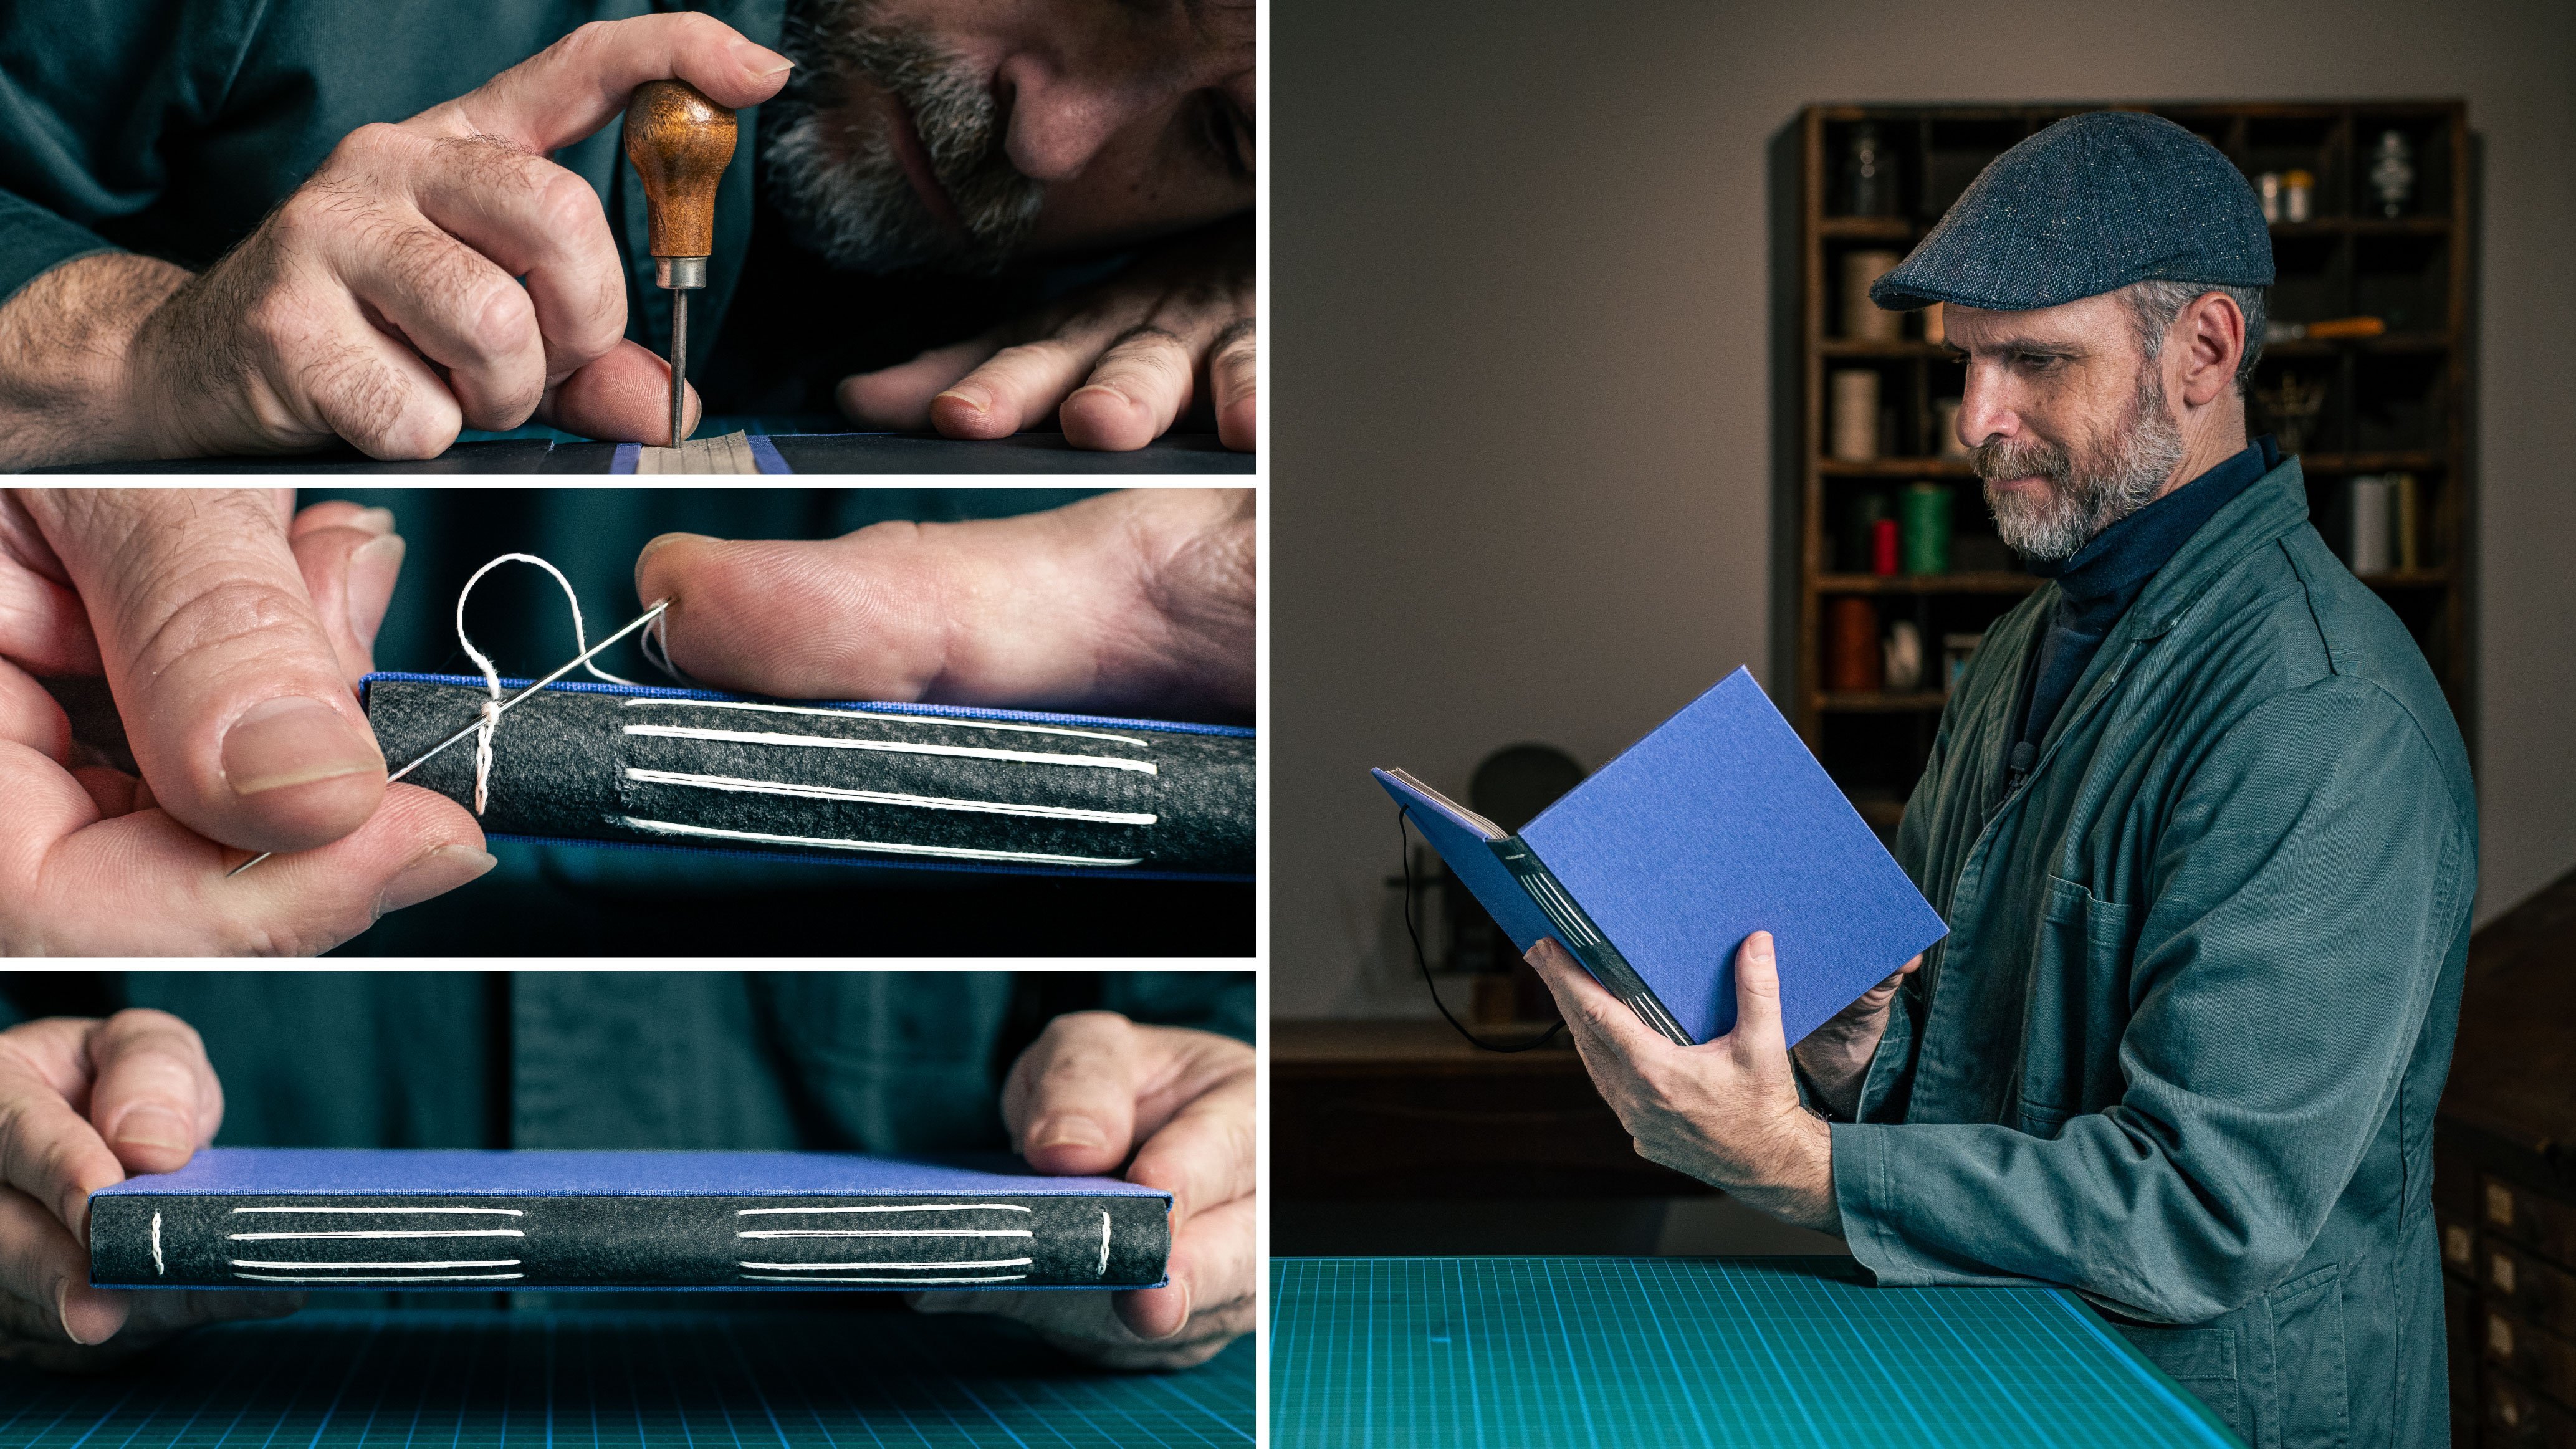
8. Sewing The Signiaturs: Welcome back. Are you ready to start sewing the signatures? I'm going to bring my template for the outside that
we made earlier. And what I'm going to
do is fold it inside, and now I have the
marks where to make the holes inside
the signatures. I'm going to take a paper clip and connect it to my template. Now I like to make
the holes on a piece of chipboard and not
directly on the cutting mat. So I'm going to make the
holes on this board, and I'm going to bring
my first signature. And in my pocket journal, I'm going to make
different kind of papers, so I will have a variety. Of course, you can make
everything the same paper for writing or the same paper for watercolor, whatever you choose. So I'm going to
take the template and connect it to my signature. I'm making sure it is
straight. On the edge here. I'm going to take myo, and I'm going to make the hole
before and after the line. So think of it as you
have the tape over here, and we want it wider. So I'm going to
make one hole here. I'm locating myo,
closing the signature, and then pushing it inside, and I'm going to make
one after the line. I'll move on to the next
pair before and after. Okay, I'm going to
take the template out and put it aside. Let me take the
second signature. Again, I'm going to put it
up until the edge here, see that it's straight,
and I'm going to take my ole and put
it in the first hole. By the way, if you
don't have an ole yet, which I recommend you to buy, you can also try and
work with a push pin. You just put it in the
hole and push it inside. I would make the same hole. So if you don't have
the right tools yet, you can improvise with that. I'm going to put it
inside the next one. And because I'm closing the signature and
then making the hole, then I have the hole
exactly in the fold. Let me do it again. Great. Taking it out, and I'll put it aside. And I'm going to bring
my watercolor paper. This is much thicker. I'm going to insert inside, make sure it is straight, and I'm going to
make the holes, one, two, one and two. If for some reason, you
want to connect it to a field notebook or something
that is already made, you just take the template, straighten it up, and just make the holes according
to this template, and you can just sew something
that is already made. If it's something with dates or something that you
like to write on, you can just buy
something and connect it to your own handmade cover. Okay. I'll move this aside, and I'm going to bring the
cover and to bring the thread. This is linen thread number 40. This is quite thin. Of course, you can use any thread
you would like. What I want is twice
the length of my cover, and let's do a bit of an extra. I'm going to cut it. And now I want to
show you a trick. I'm going to take my needle, insert the thread inside the needle around 3
centimeters from the edge. I'm going to take the needle and insert it inside the
thread like this. Hold the needle and
pull back the thread, and now it is connected. I won't get loose
and you don't have a knot here to interfere
with your sewing. So I'm going to take
my first signature. And this is very
easy to do because we are going to sew
each one individually. Okay? So I'm going to
insert from the inside out. The thread. I can
work not just inside. I can take it away
and then easily go underneath the tape and
then go back inside. Okay, you just need to make sure that the end won't
get loose now. I'm going to the next
station, pulling my thread. Again, I can take it
back and just insert underneath the tape
and back inside. Now, I'm going to pull it, and now it would
bring it to place. You can just play
with it and take it backward because we
want to add some more. So I'll pull it like
this to both sides. And now I'm just going
to go backwards. So I'm going to insert
inside the hole here. And pull, go inside this hole on the
second pair and pull. And now I need to make a
simple knot but a double knot. So I'm going to pull to
the direction of sewing. I'm going to pull
this and pull this. And now I'm going
to make a knot, sew one thread over the other, and inside Pull it, hold it, and do it again
one on top and inside. And close it. Quite
simple, right? Now, the edge, you
can just trim it, leave a little bit
like half a centimeter and just trim it. And we have ourselves
the first signature. I'm moving on to the
second signature, and now I'm going to
take a thicker thread. Okay? This is number 18. Let me do it two and a bit. I'm going to cut it and
do my needle trick. 3 centimeters from the edge. I'm going to connect
it. Take it back. And again, I'm going
from the inside out, put it aside like this, go underneath the first
tape and back inside. To the second station. So from the inside
out underneath my tape and back inside. Now I'm going to pull it a bit, taking it back so it would be in the place I wanted to be, and now I'm going back,
so I'm going inside. Now you can lift it
a bit and just get the needle when it's going
out. Let's do the other one. I'm going inside the signature, and at the end, I'm going
to pull this, pull this. When I see it is tight, I'm going to make a double knot. So one, hold it and two. Again, this is a simple
knot, overhand knot, and at the edge, I'm going to cut around half a centimeter to a centimeter from the edge. So now I have two
signatures inside. Let's go on and make
the watercolor one. I'll bring it. I'll
bring the thread. Of course, a pro
tip is you can make the thread longer and use
it for all the signatures. You don't need each time
to put the needle inside. I just wanted to
show you a variety of different
thicknesses of thread. So this is longer, and I'll show you how you cut it without cutting both sides. So I'm going to go
from the inside out. By the way, if you are working
with watercolor paper, I recommend the
thicker thread because the watercolor is thicker
the signature itself. I'm going to go back
inside, pull it, but I'm leaving it away
so it would be easy to sew it underneath my tape and back
inside the signature. I'll make the tail
shorter because, again, I want to show you
how you can use the same thread for more
than one signature. I think this would be enough
for the knot, pulling it. And now I'm going back, so I'm going inside. I like to lift it so
I can find my needle going out. Back inside. Now I'm going to pull it to
the direction of sewing, pull one, pull the other one, and make a double knot, sew one. And two. I'm going to take
my scissors and cut around half a
centimeter from the edge. And as you can see, I have it
left for other signatures. I'm going to stop
here and I have three signatures inside
my pocket journal. And of course, I
have place for more, but I'm not sure yet what I'm going to do on the next one. So I can each time
add another one and another one up until
when you can't fit them. And as you can see,
what I love about this technique is you can move
something from the middle. Move it like this, and you have a place to add something more. Or if you want to work with some more writing paper or you want something
in the beginning, you can change it
wherever you want. And that's a great advantage. So in the next lesson, I want to start adding
things to your cover, and we will start
with connecting an elastic band so you can
close your pocket journal. I'll see you in the next lesson.
9. Connecting An Elastic Band: Welcome back. In this lesson. I want to show you how to
connect an elastic band. Don't worry. I
made a PDF file in our class resources and
you have a template there. But I want to show you
how to make the template. I'm going to take my ruler, and I'm going to
mark a straight line 1 centimeter from the
edge of a piece of paper. And now I want to mark 1.5
centimeter from the edge here. Now, I'm showing you how to make the template
because maybe you want to use it in a different
size or different location. I have two elastic bands, one that is 1 centimeter wide, and the second one is
around 7 millimeters. I think for this size
of a pocket journal, the smaller one would be much
proportional to the size. So what I'm going to do is
located here where my mark is, and I'm going to mark with a pencil on the
other side of it. And of course, according to what elastic band you are
going to use, make the mark. Now I'll bring a piece of board or something so it would be
easier to make the holes. I'll bring my cover, and I'm going to locate the
paper on the edge here, make sure it is
straight here and here, I'm going to take a
needle or you can take your whole and I'm
going to mark one mark here at the joint of the
two lines and one on the upper line just to make sure that my elastic band
will go inside. Now I'm going to flip
it over to the side. Make sure it is straight, and I'm going to mark
the same holes because then they are going to
be in the same location. Now, you have the option
of taking your chisel, putting it on the marks, and just pushing it
down inside, okay? If it's not wide enough, you can go twice and just
make the hole wider. And of course, you can
also take your knife and go from mark to mark like this. I'll make it wider
with my screw diver. Just shove it inside
and twist it a bit. Great. I'll move this aside. And now I'm going to
take my elastic band. We want more or less two
centimeter more on both sides. I'll bring my scissors
and just cut it. Here. Now I'm going to take a needle and I'm
going to push it inside. Like so, I feel it's inside. I can catch it from the
inside out and just pull it. And let's do the other side. Make sure it is straight
and not twisting. I'm going to hold it and
just push it inside. And now I'm going
to flip it over. And I'm going to take a
piece of double sided tape. I'll cut a small strip. I prefer to connect a double sided tape here
because sometimes the PVA takes time to hold
the elastic band, and I'm going to take
it down and connect. Now I'm going to
close it and see. This is quite loose. I think I can make it shorter, so I'll pull it a bit. Let me feel again. Now it feels okay, so I'm going to open it. Cut another piece of
double sided tape, and I'm going to locate it from the exit point towards the
middle of our journal. Let me see I can
trim it around here. Take off a double sided
tape and then connect. Let's close it and
see the result. So this was quite simple. In the next lesson,
we are going to make a special pocket because
this is going to be a pocket with an element that would hold your
pen or your pencil. This is a new design
I thought of, and I think this is
a great solution, so I'll see you in
the next lesson.
10. Pocket & Pen Holder: Welcome back. In this lesson, we are going to
make a pocket and also an element to hold
your pen or your pencil. I'm going to start by
bringing a piece of paper. This paper is cut to
13.9 from top to bottom, and 27 centimeters, which is three times 9 centimeters
the width of our journal. I'm going to start
by marking 8.9 in two points I'll put my ruler
between the two marks, take a bone folder
and make crease, just running my
bone folder between the lines and going
to lift the paper. I'll fold it completely. And now I'm going to
mark 1 centimeter less. So if this was 8.9, I'm going to do it
7.9 and 7.9 here. Put my ruler between the dots, take my bone folder and run
it beside the ruler and then fold it and
fold it completely. And now I'm going
to mark two points here because I want
to trim the rest. So what I actually did is, this is going to be
folded like this, and this is going to
be folded like this, and it's going to
act as a pocket. But because we are going
to have rounded corners, I'll bring my coin again, put it on the edge, mark like we did earlier, two sides, bring my scissors and cut it according
to my marks. Okay. Again, you can take
your file nail file and just round it a bit. So this is my first stage. I'm going to open it. And now I'm going to take
a leftover strip of cloth. I want it as the
width of my sides. I'm going to take my
ruler. I can cut it. Let's cut it a little bit more so you can see how to
trim it at the end. I'm going to cut it like this. And now I'm going to cut it
4 centimeters here and one, two, three, four, and
cut it like this. Okay, up until now, now I'm going to
fold it good side to good side, fold it in half. I'll do the other
one, fold it in half. And now I'm going
to fold half of it. So if I have 4 centimeters, it's actually going to be
1 centimeter each fold. I'll do the other one, fold
it up until the end here, and the other side. Great. Now, I'm making sure
this is the short side. I'm going to glue one fold
of the cloth like so, and I'm going to connect it from the fold up until
the other side. Making sure it is exactly
in the fold. It is. Let's do the other side. I'm going to glue
one of the folds. It doesn't matter which one, but up until the fold, and I'm going to connect
it from the fold here. I like to flip it over and
see that it works nicely. It does. And I'm going to work with the
pump folder a bit. And now I'm going
to take my ruler. And because we got
a rounded edge, I'm going to put my ruler up until where it
is starting to be rounded. I'll bring my knife, and I'm going to
trim all the way. Let's do it again all the way. Great. Now what is going to happen is this is going
to be folded like this. This is going to be
folded like this. And then we are going to connect this trips
to the backside, and we will have a
very nice pocket. And what I want to
do now is connect a pen or a pencil holder
at the edge here. So not to get confused. I'm going to open it like this. This is the long side. I'll take my ruler and a pencil. And because this is 13.9, nearly 14, the center
would be 7 centimeters. So I'm going to mark here seven. And now I have an
option to decide between these two elastic bands. I think because I'm
going to hold a pen, I think I'll go
with a wider one. So I'm going to cut it around 7 centimeters
from the edge. That's about here. And
I'm going to put it with the center
here and I'm going to mark from both sides. So one mark here
and one mark here. I'll take my knife, and I'm going to cut between these two lines
exactly in the fold. Great. Now, I'll take
the elastic band, and I'm going to insert it with my needle once inside like this, hold it and pull it and now
let's insert the other side, just holding it and
shoving it inside. And how much of
the loop we want, that depends on what you are
going to connect inside. I'm going to leave it around
1 centimeter outside because if you want to make
it for a marker or for two pencils or for a brush, I don't know, so you will
decide what you want. The importance is
to glue one side. Here and one side here. I'm going to bring my
double sided tape, cut two pieces, one and two. I'll glue one from this
point to the right, and one from this
point to the left. Making sure it is straight. I'll peel this off
and connect one side, and I'm going to peel this off and connect the other side. Great. Now I'm going
to take my brush. I'm going to fold this inside, and I'm going to glue
just the good cloth here and the good cloth here, I'm calling it the good cloth. This is the side, the inner
side of the short one. And I'm going to close it. Like this, I'll take my
bone folder and connect it. Both sides. It feels okay. I'm going to flip it over. And now I'm going
to fold this and fold this and close my pocket. This is the backside, okay? I'm going to bring a
piece of waste paper. Glue the edge here,
tap it a bit. Take the wastepaper
out and connect. Work with a p folder, flip it over, take another
piece of wastepaper. Glue the edge here, tap it. Take the waste paper out
and connect this side. Also, work with the pow folder. And look, we have
ourselves a pocket. It could be open to put
things inside and also a pen or a pencil holder that is going to point outside
of our journal. So in the next lesson, what we are going to do
is connect the pocket to the back side and connect
something to the front side. I'll see you in the next lesson.
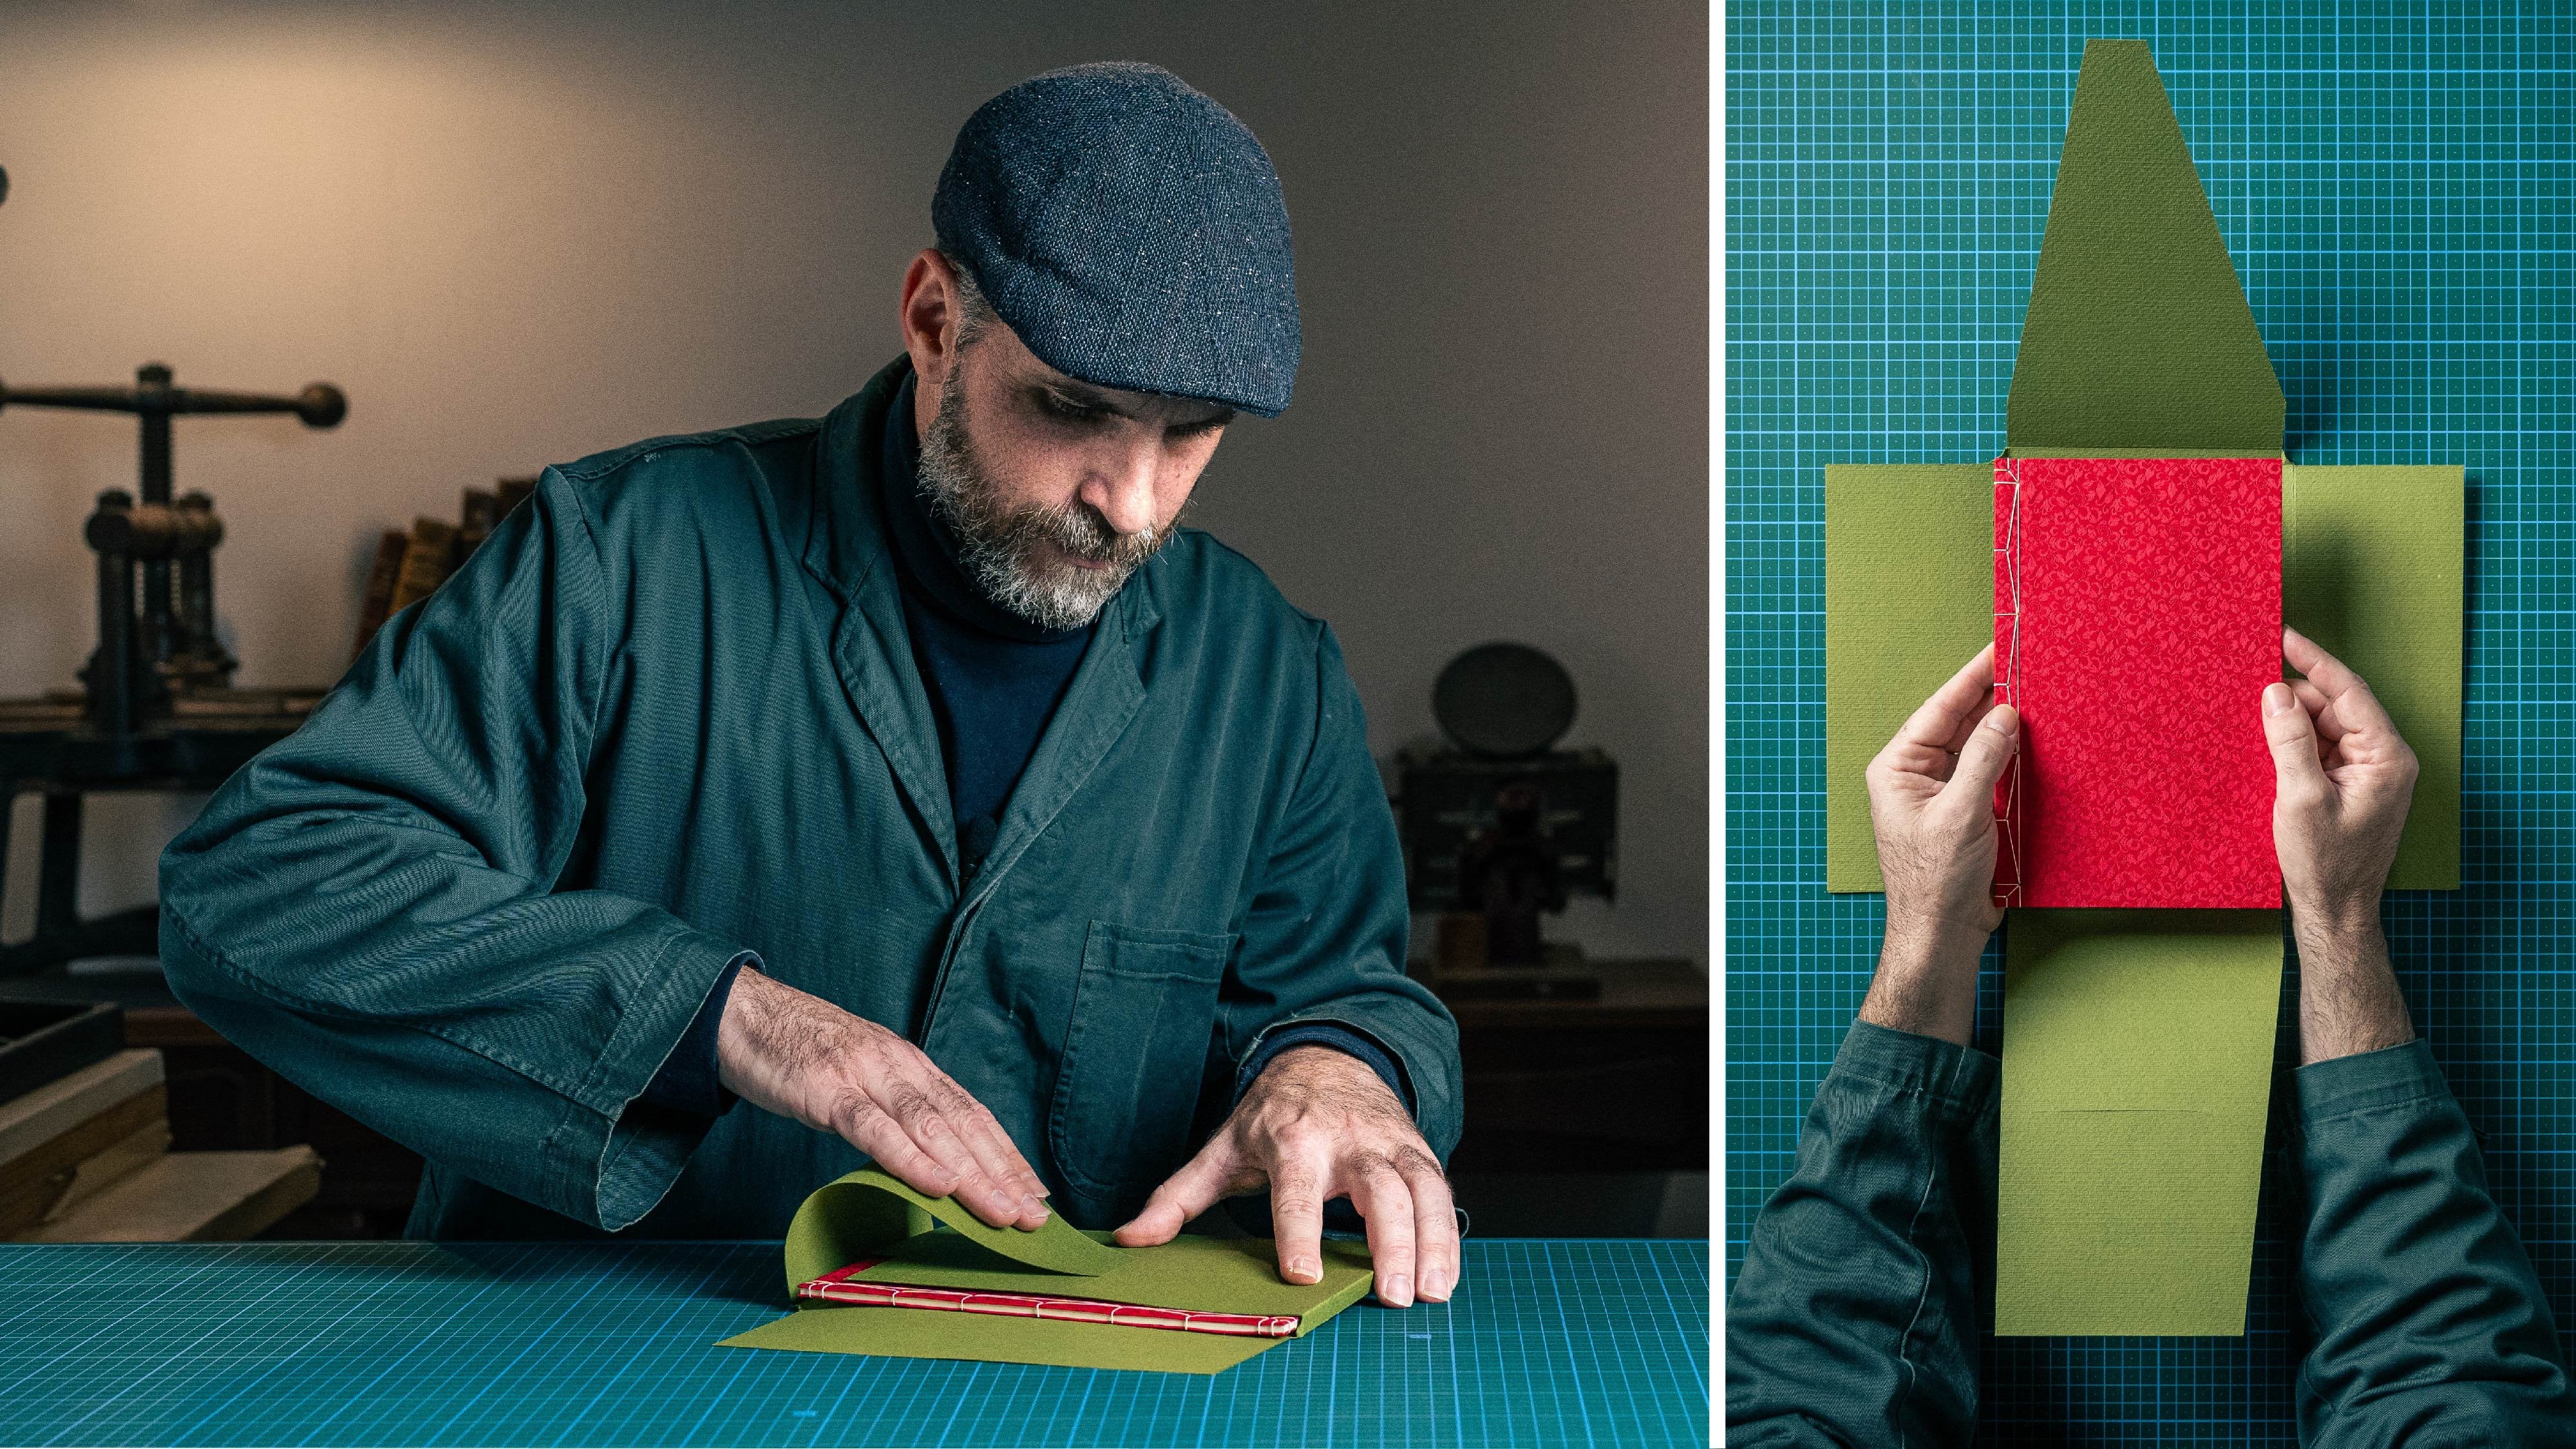
11. Connecting Endpapers: Welcome back. In this lesson, we are going to
connect the pocket or end paper depending on
your design choice. I want to show you two methods. One to use double sided tape. I'm going to use
that for the pocket. And for the end paper
for the beginning, I'm going to use PVA, so you will learn both methods. I will start with
the back pocket. I'm going to bring my
double sided tape, and what I'm going to do
is connect it to one side. Just that it would be flush
up until the beginning, I'm bringing my
scissors and cutting it before the edge so
it won't point out. So this is one side. Now let's do the other side. I'm going to bring it
from the rounded corners, up until the other
side, and cut it. I'm going with a bit of
an angle, but we want it. Even if it's not up until
the end, it's okay. And now I'm going to connect
the top and bottom side, bringing the double sided tape, and then cutting it
up until the end. Let's do the other side. Lift it a bit and make a cut. And I want also one line here
in the middle so it hold firmly and then cut. Now, the advantages of a double sided tape,
I'm going to peel it, and then I'll have a
little bit of time to connect it and the middle one. Great. I'm going
to bring my cover, open it in the backside, and I'm going to line
it up all around. I want to flush here. I like a 1 millimeter gap here, all around, see that everything is okay with
double sided tape. You don't glue it
up until the end, and then you can lift
it if you are not sure, and you can just work with it. You see I'm not letting
it touch completely, just making sure everything
is like I want it to be. And then I'm connecting it. I can work with my bone folder. Glue everything, I can open the pocket and work
inside the pocket. So this is one side
that is connected. Let me see. Very nice. And now I'm going
to work on the other side, and here you have a
couple of options. One option is to just cut a piece of paper
with rounded corners, the same rounded coroner
that you did to the outside, and just connect it like this. So this is a great option. You need a paper around
200 gram or more, so you won't see
the tape so much, and it would be easy
to glue it to decide. The other option,
if you remember, in the beginning of the class, we cut two sides
the same exactly. And I want to show you how to cover this board with cloth. So I made the corners like we did when we
made the covers. That's exactly the same with
the angles and everything. And I want to show you
just this part how to cut. So I'm going to bring my
small ruler and a pencil, and I'm going to mark
around half a centimeter, from corner to
corner of the ruler and mark around
half a centimeter. Let's do it to the other
side from corner to corner, and I'm going to mark
half a centimeter. And now because I want to
give it a 45 degree angle, I'm going to bring
a triangular ruler. When the base is touching the
straight line of the paper, then I have 45
degrees at the end, so I'm going to line it up
and then mark with a pencil here and I'm going
to mark also here. So I'm going to bring
my ruler and knife, and I'm going to cut
according to my marks. And now all I have left to do is just glue the short sides, and then the long sides. I'll bring a piece of
wastepaper, put underneath. I'll bring my glue, and I'm going to glue
up until the end, take out the wastepaper
and fold it inside, take my bone folder and
work here on the corner. And on all of the rest here, let's do the other side. Wastepaper glue
up until the end. Take out wastepaper and connect And then the long sides, I'll bring a piece of wastepaper up until my corners, taking the wastepaper out,
lifting and connecting. So this is the straight side that is going to be
close to the spine. And the last one The front side. Take the waste paper out, lift it, and connect it nicely. So again, the corners is like the class when we are
making the covers, but I wanted to show you
how to connect this side. So I think this is a beautiful
option that you have the same material for the
outside and for the inside. But again, you can also
just take a piece of paper, or you can also just glue it blank as it is a design choice, and I want to show you
how to connect it. This is quite simple. I'm
going to take a piece of waste paper and now I'm going to actually glue everything
here up until the edge the complete piece because the outside and the
inside is exactly the same. And if it's not the same and
the inner piece is shorter, that is why I prefer to glue the inside rather
than the outside. Makes sense, right? I'm going
to take the wastepaper out. Now you have time.
Don't be alarmed. I'm going to bring a weight for the side and one weight here, and I'm going to bring
the inner piece, and I'm going to
see it is aligned. I'll move my weights. But
you can also with your eye, make sure it is straight. You can lift it and see that
everything is straight. And when it is, you
are going to take your bone folder and work all around after you made sure
it is glued properly, I'll bring my weights. But you can also find in your
house something heavy like a pile of books or something
that it would glue properly. I'll give it a
couple of minutes. I'll clear out everything, and I'll see you in
our final lesson.
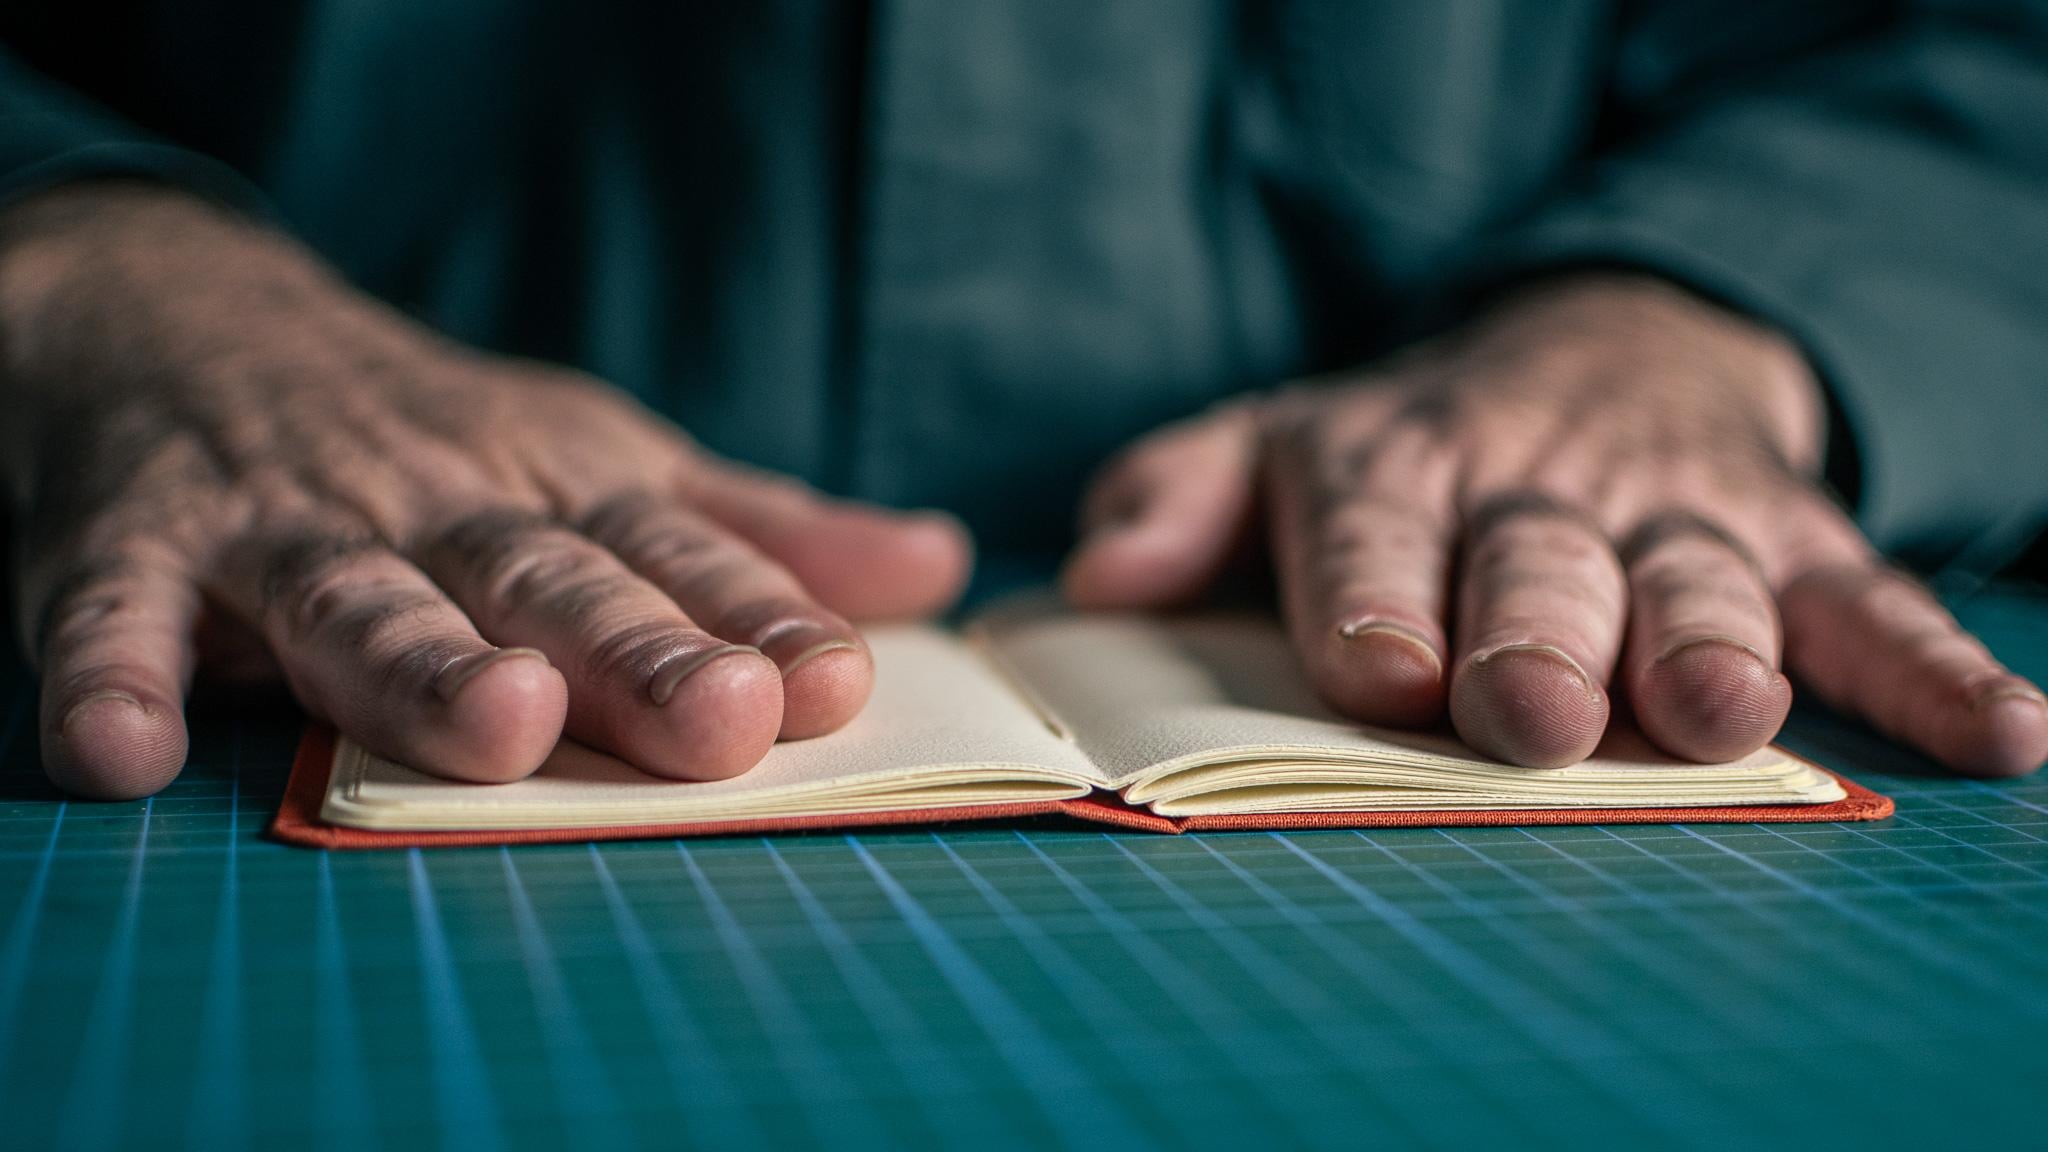
12. Final Lesson: So here we are with
a final result. Let's take a minute
and appreciate what we have made this is the version with a cloth inside and various
kinds of paper, and we have ourselves
the pocket. And I would love to see
what you have made. So please share it with
us in our class projects. I promise to see each and every submitted work and also answer questions
if you have any. Also, I would really appreciate it if you can leave a review. It takes just a minute, and it helps tremendously, helps me and also help
others find this class. So again, thank you
for joining me, and I'll see you
in my next class.
 Ido Agassi, Book Artist