Transcripts
1. Introduction : As Edward Hopper sees, if I could say it in words, there would be no
reason to paint. Let us take small steps and exploring wash medium
and having fun with it. Hello there. This is RBS, a self-taught
artist and an art instructor based out
of Bangalore, India. I usually don't like to restrict myself to one single meeting. Here I am with gouache. Since the time I have
started to paint, painting has become
a meditation to me. Getting to know each and
every medium in detail. Today, I'll be sharing
with you my style, galaxy painting
with easy technique and by using gouache painting, galaxy is a very interesting
topic because one can just flow along with the colors and
textures on the paper, as there are no limits or
boundaries when it comes to it. Pigments are free to merge
it super fast to create. Color combination can be a
bizarre and yet beautiful. Things definitely
come out of it. Any mistake which happens
will be in fever. And all you have
to do is have lots of fun while painting
and exploring it. Beat a beginner or an
intermediate artists. This class will
definitely help you understand the theme and
the medium in depth. And this would help you
enhance your skills. By the end of this class, I'm sure you'll
be able to master galaxy painting with
just your reference without any further ado. Let's get started.
2. All about the class: Let's get through
the class and brief. We will start off with
the materials required. Explore basic techniques. Color selection, which is best
suited for your paintings. This class, you will be painting two gorgeous galaxy paintings
using this technique, which I'll teach you, the cumulative palette approach. All the colors we'll be off your selection like
any other class. Along with the Galaxy paintings. We'll also be
learning how to make silhouette and add those
elements into the painting. At the end of this class, make sure to share your work in the project section so that it becomes easy for others to admire or what I'm
take up the class. Also, if you have any
doubts regarding the class, you can ask me in the
discussion box below, I'll be free to answer your questions and
clear your doubts. So let's dive into the
class and get started.
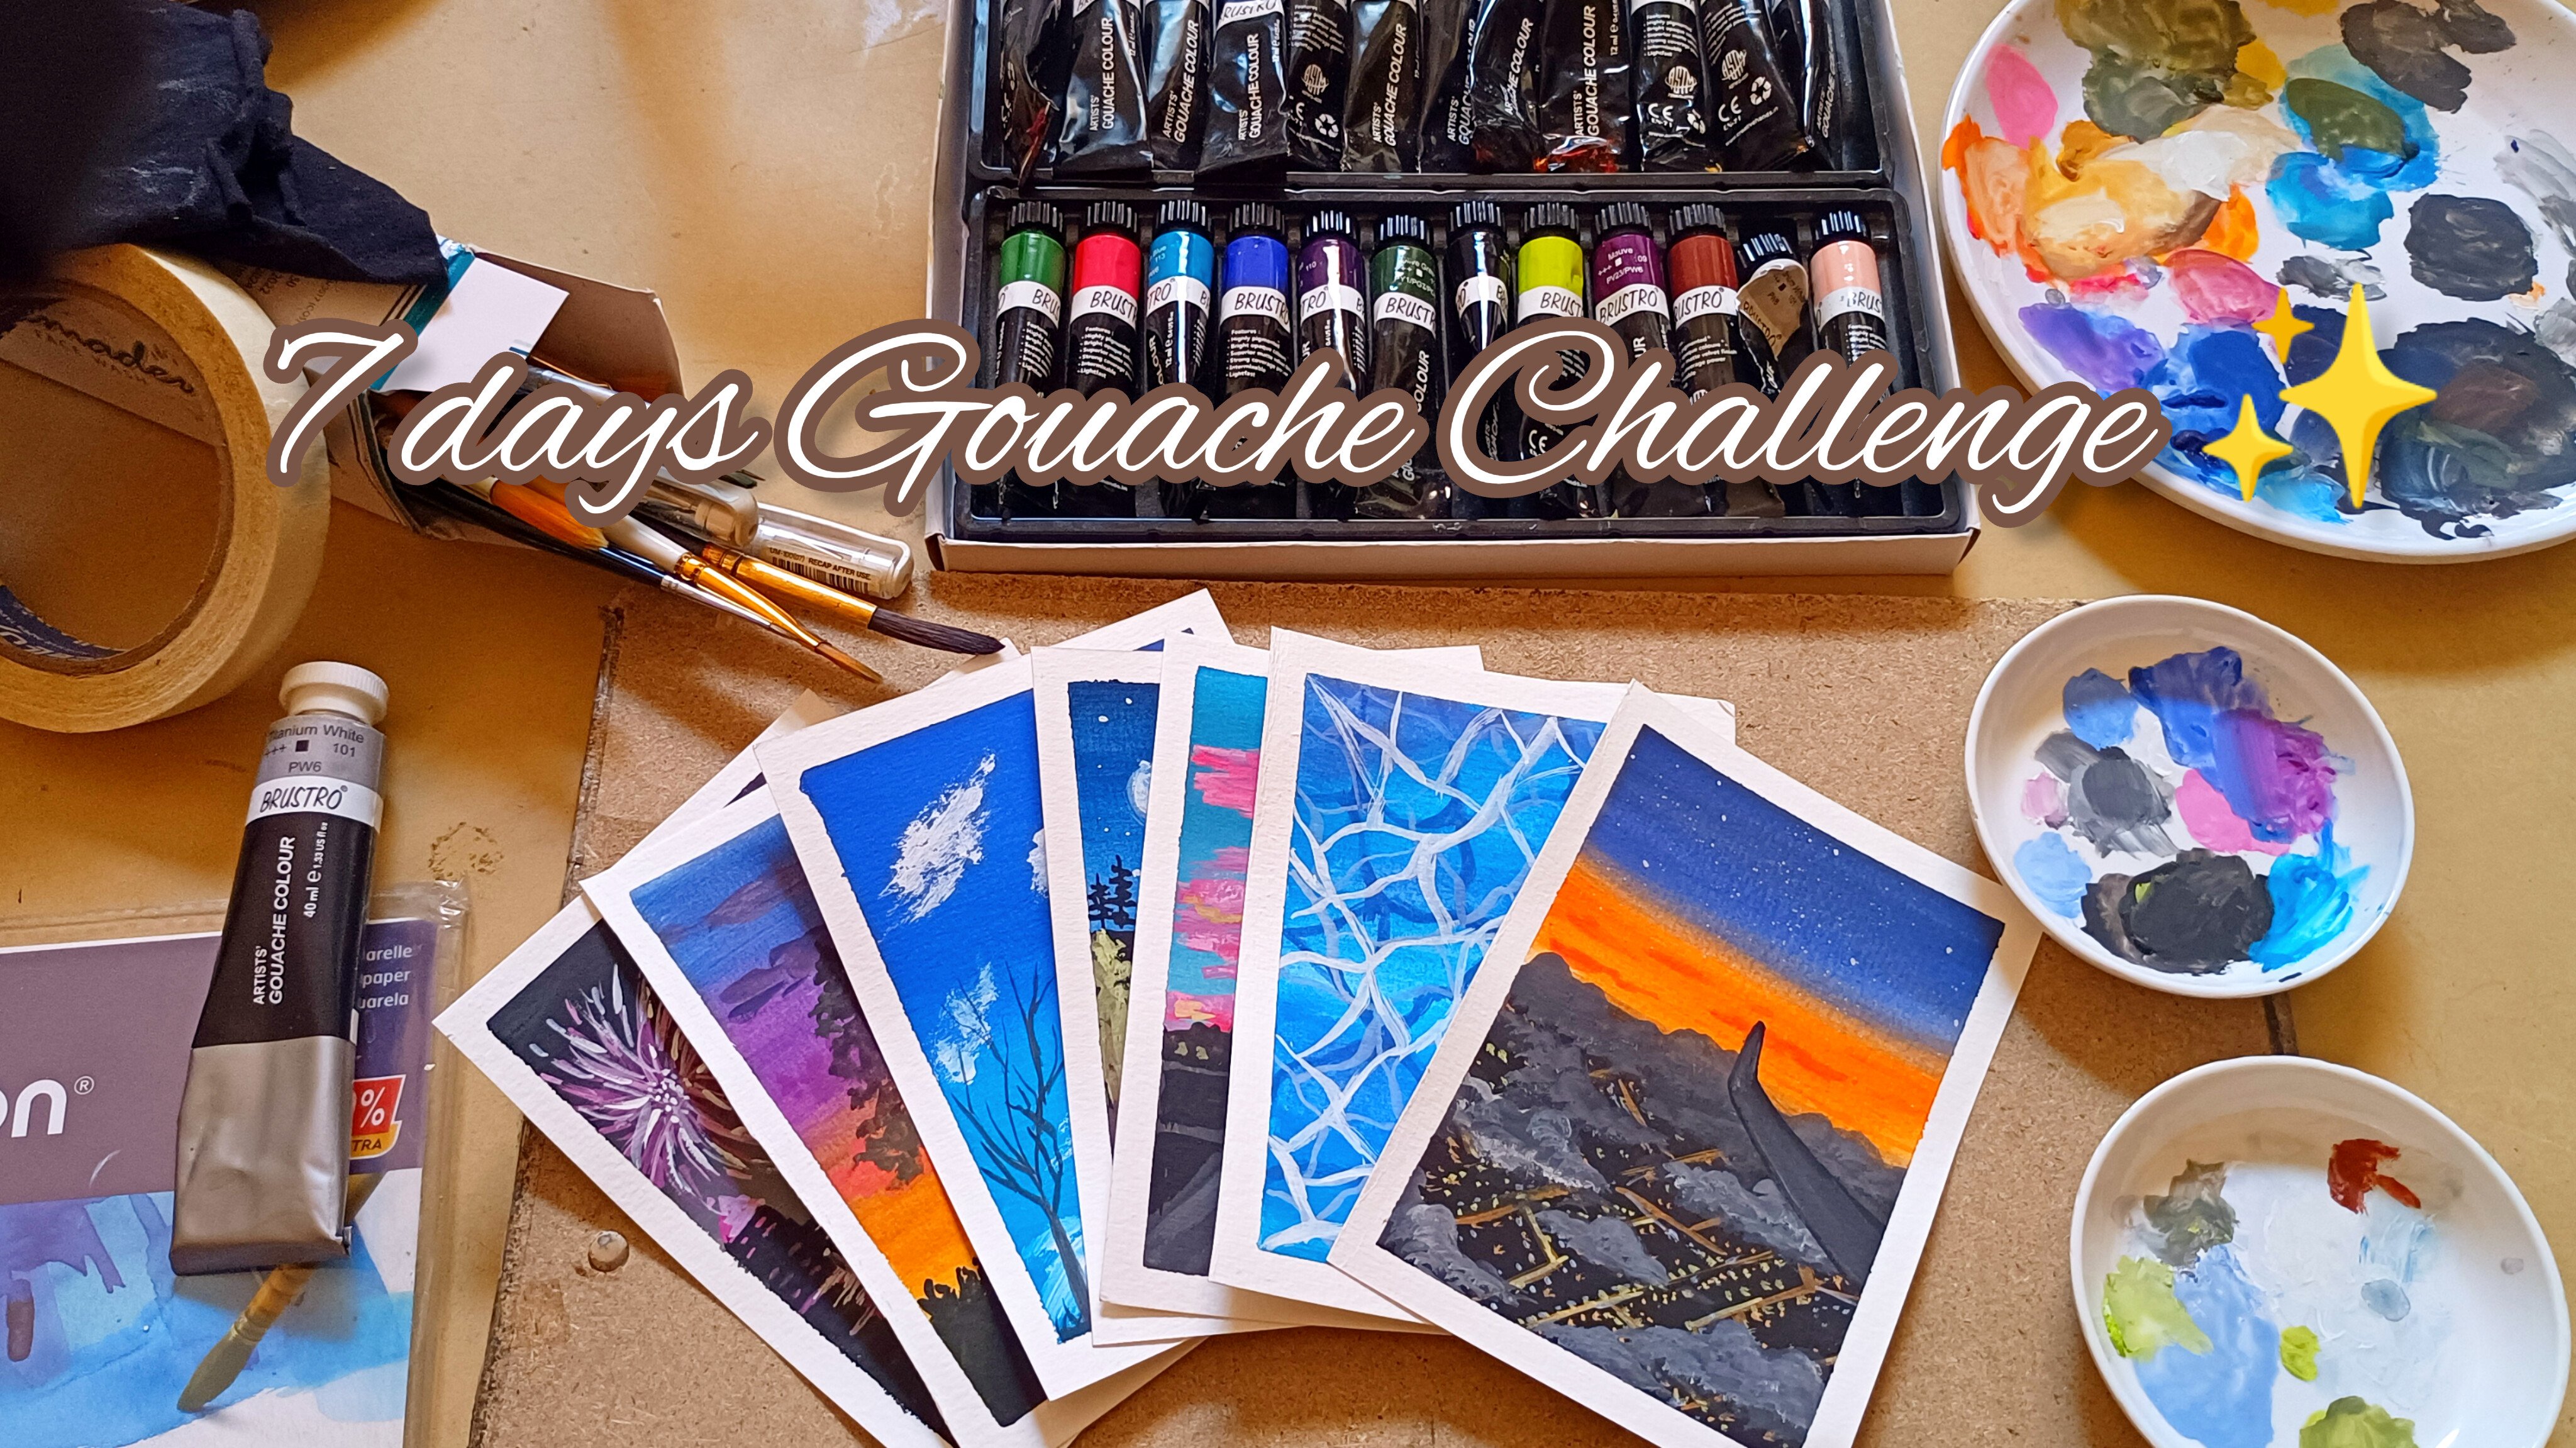
3. Materials Required : Running through
the material list, your 300 GSM cold press
watercolor paper is required. You can use more than 300 GSM cold press watercolor
paper as well. Coming to the brushes
are flatten brush, round brush and a liner brush. The flatten brush as offsites then round brush
is of size eight. You can use whatever
brushes you have, but make sure it is flattened, round-trip and line though. Coming to the Carlos, use your I'm using Bruce true
artist grade gouache paint. The shades are rows, more ivory black
and Titanium White. Rose of pink Carlo, more purple color, and
the rest black and white. Here, I'm using a spray bottle. This is optional. This is to spray
water onto the paper. A jar of water is required, masking tape to mask the
tape around the edges. Cotton cloth. From mixing palette
and white gel pen. This is again optional. Grab your mat and
let's get started.
4. Techniques section : Coming to the techniques, you must meet all aware of this technique as a beginning
or an intermediate artists. I'm pretty sure you
have used it before. Guess what it is. Okay. Let me tell you. It is wet on dry and wet on wet technique for the ones
who don't know what it is. Let me explain. Before I go further. I am using a thicker
paper sketchbook. Water wet on dry. But just basically brush being
wet and people being dry. So this is wet on dry technique. You're the pain doesn't blend smoothly as
wet-on-wet technique plus the edges of it
as rough or sharp. Or making the difference. In the painting. As you
can see in the left, it is not a flat wash, it has some depth
in the painting. So what are we going to do? As you can see, we're dabbing. This is how we'll be
creating layers of painting. Make sure you don't drag it. Just dabbing. As you can see, there are two layers
form in-between. There is some
lighter color shade. So coming too wet
on wet technique. The wet, wet, the
brush as well as the paper will be going and
reading the paper evenly. Make sure the water
is not forming blooms at tender or the corners. You can also use
spray bottle to avoid such mistakes or
any complications. Like back. You're the
paint when applying, blend smoothly and
flows together. As you can see, there is no additional
requirement of blending two colors together. The edges will be smooth hill, unlike the wet-on-dry technique. Along with this, I'll be
using dry brush technique, which I'll show you
in few minutes. Let us paint a pine tree. Watch me and follow along. You can also pause and loan for making this paint straight line. Make sure the tenor
part is at the top and take apart
is at the bottom. This branches is going to
form a triangle shape, starting on the top part and brought apart
and the bottom. I'll just go from left to right. And also, if you notice, I'm dragging, handsome, but
I'm drawing lines as well. To each branch. There are multiple
other techniques of drawing, painting. Pine tree. You can check that out in
my element off landscape, winter landscape
class on Skillshare. Just draw a line and
then another small line. Add some more small lines which are facing towards the bottom. You can do the same
towards the top as well, but there'll be all different
in the shape of it. We will be drawing or painting the pine tree in
both the paintings. So make sure you
practice well and the people and then try it
out on the painting. Next morning to mountains. You're, again, I'm
going to draw or paint and I'm drowning
love fashion. Once the mountains are done, I'll go ahead and use
a fine liner brush. And directly I'm
white paint over it. But before that though, brush should be completely dry. Make sure you check
it behind your hand. When you rub onto your
back of your hand, it should be completely dry. They should not be
any shining on it. Shouldn't be any
shine on the hand. There is removed that
quarter as well. And now I'm going
to directly add white wash onto the brush. And from down, I'm going to
drag it towards the top. This will create the texture and the cold press paper will give
you an additional texture, which is an advantage. For using this technique. You can use this technique
for paintings know, as well. As you can see, it's
creating beautiful texture and giving that to the painting. You can try from top
to bottom as well. I would like to use it
from bottom to top. I'll show it to you on
the purple one has less. From bottom to top. As you can see, I haven't
done a whole the brush tip. I hope hold it and
then you can hold it at the middle or
adult end of the brush. This will give off
free, lose hand.
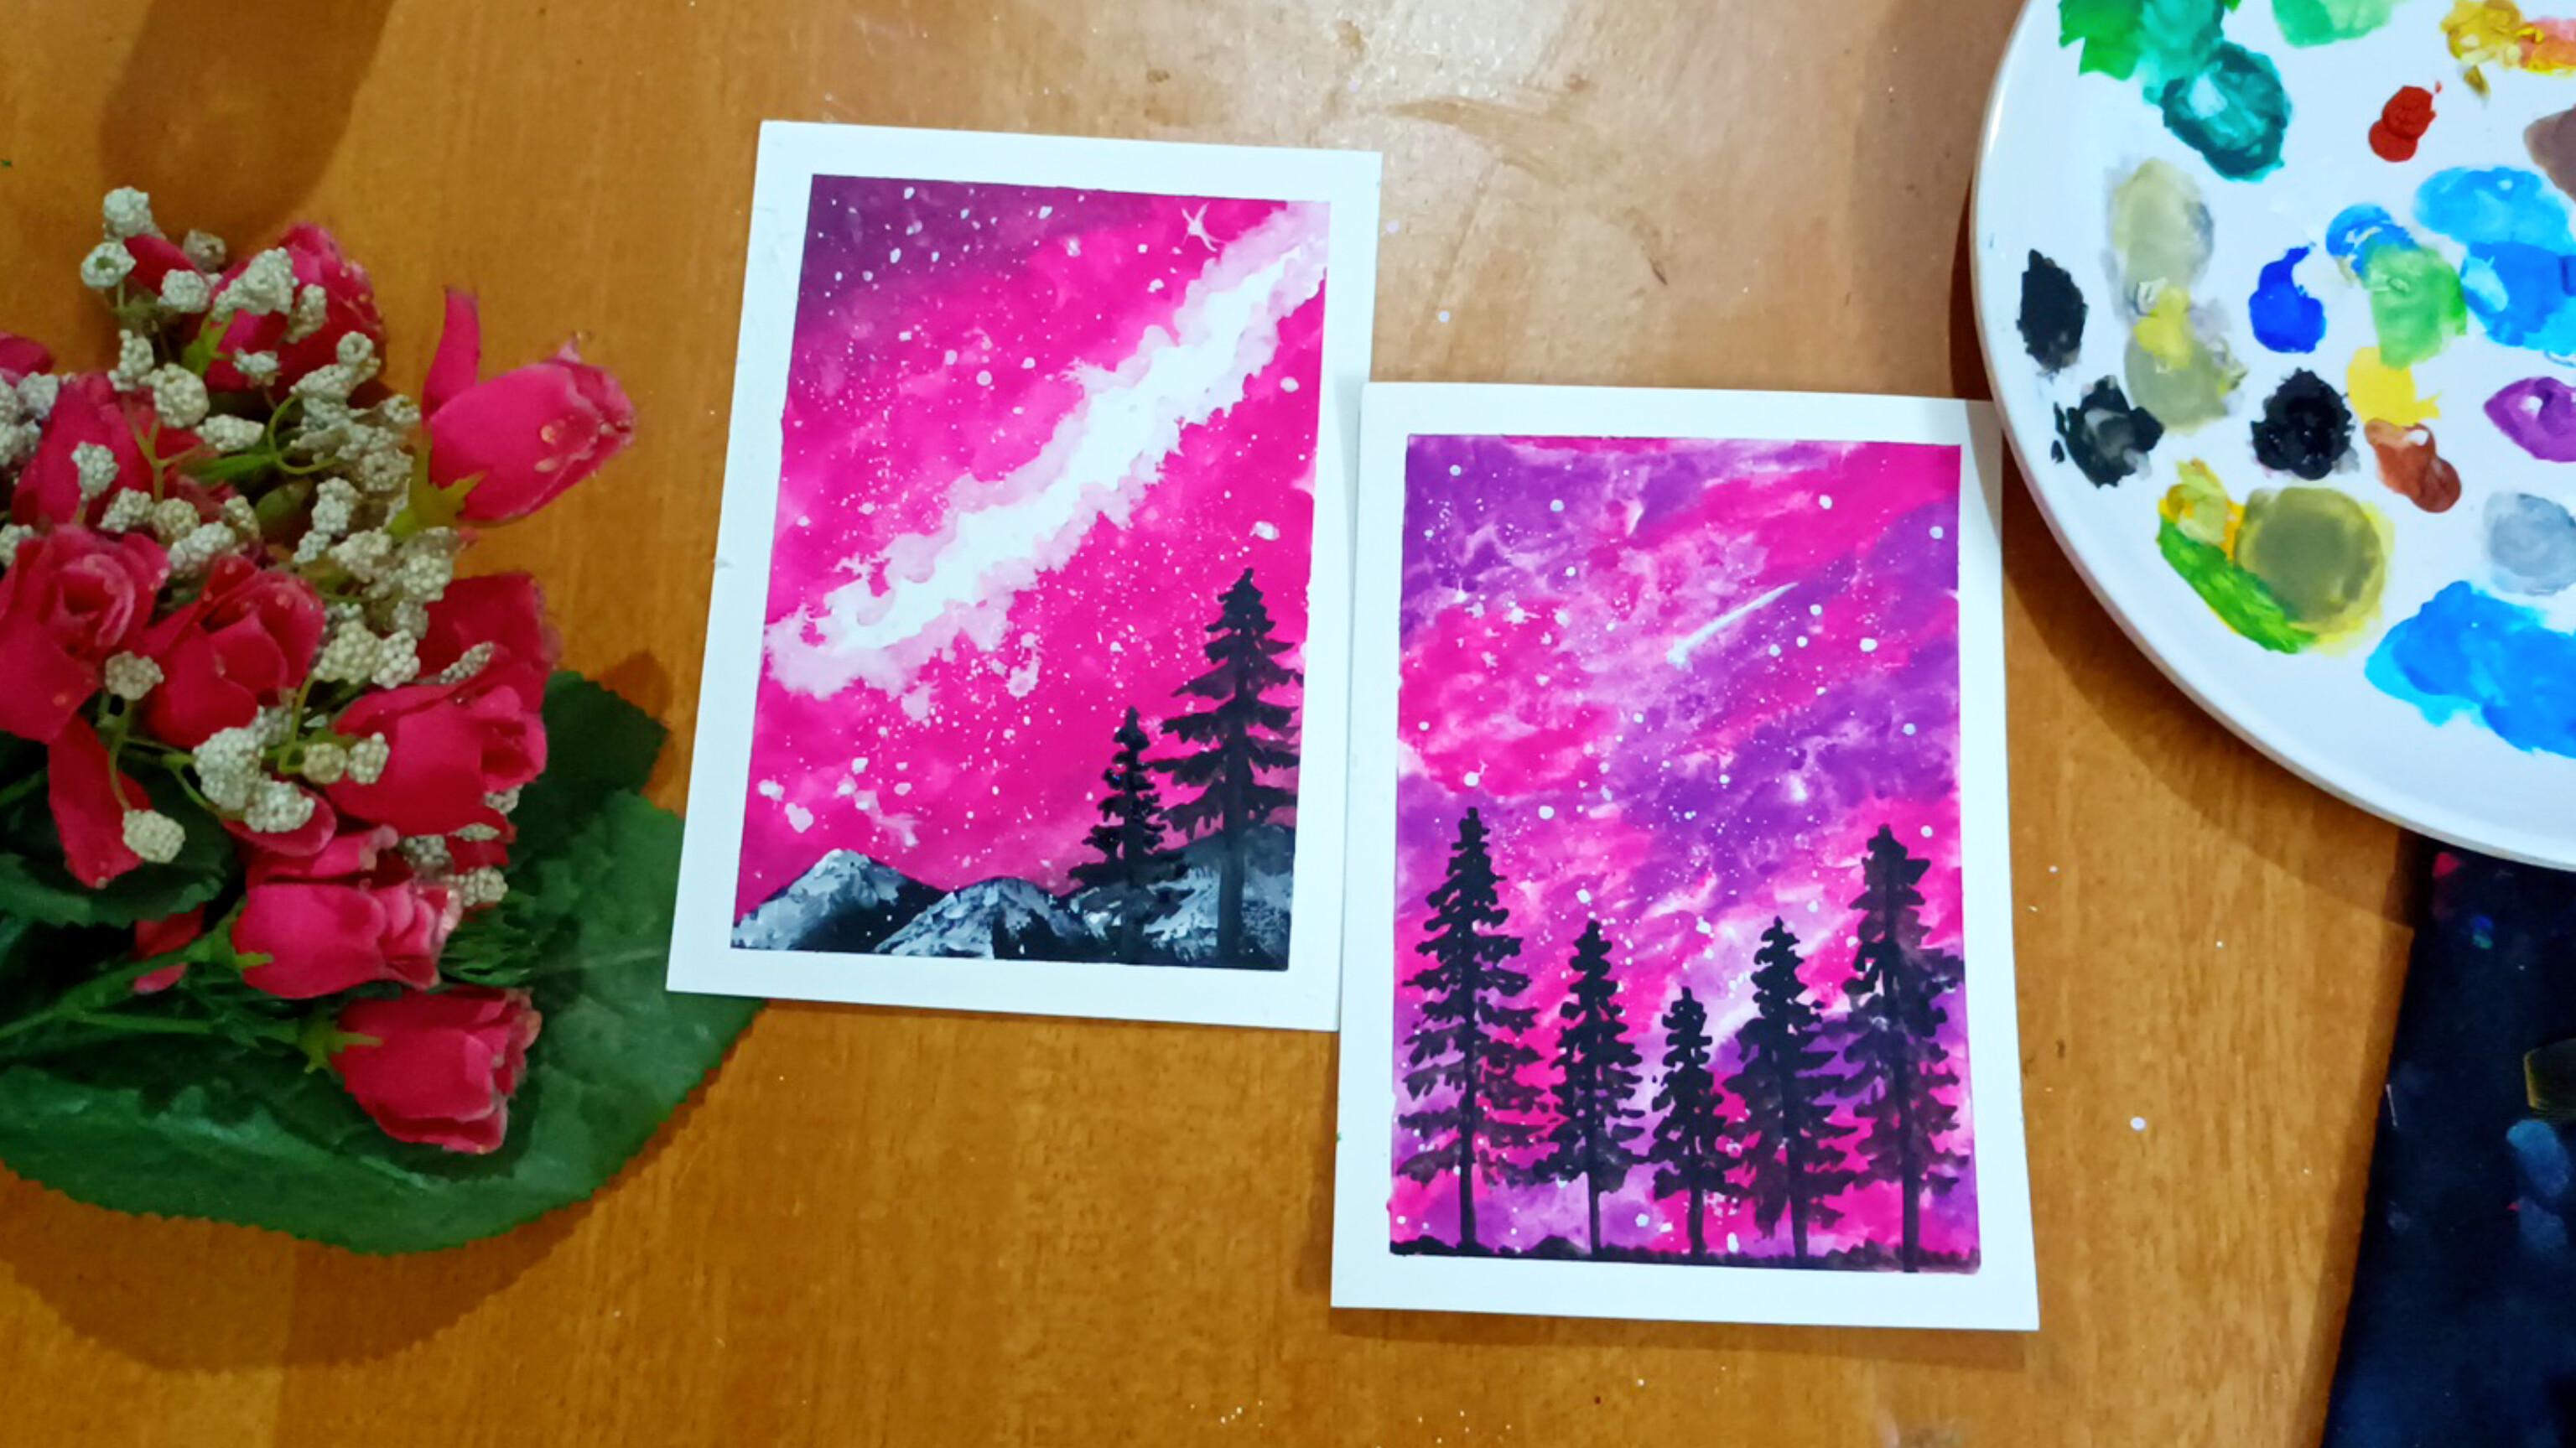
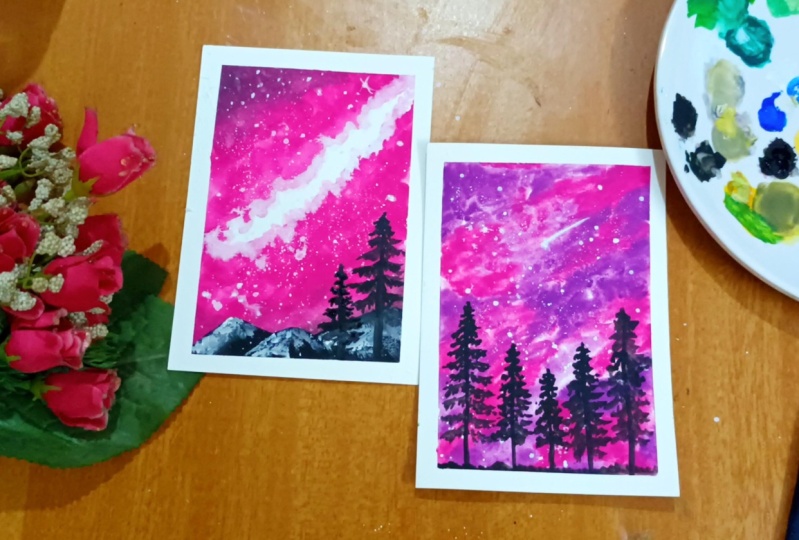
5. Galaxy painting 1: Thank you for
choosing this class. As you must all be aware, galaxies are spectacular and complex so much that
one can't help. But marvel at the wonders. Recreating such a
mesmerizing mixture of Carlos can seem like
a difficult task. Using watercolors. Super easy. But with the ticker medium, it's a bit difficult due to the fact that it dries quickly. The pigments of the
ticker medium cannot blend properly as it
leaves a solid edge, which is super prominent heel, I am using an A6 size
watercolor paper and applying masking
tape around. Make sure 12 are done. Applying your tape. You must set yard the tape
tightly with the fingers. As you can see. Here, I'll be using wet on wet technique for
making the background. I'll be using rows
and more Carlo. As said before, you can choose your favorite
combination of Carlos. It's your freedom to choose. Just make sure they together doesn't
create a Monte Carlo. Before you actually
start painting. Do a swatch of colors, blend those two
together, and check it. This is what you
were looking for. Also, you can use reference picture and
paint the painting, but just make sure it doesn't
produce a Monte Carlo. Okay, Let's start now. I will evenly distribute
the water onto the paper. You can run your brush from left to right or right to left, and top to bottom
or bottom to top. Just make sure there is no blobs of water
standing at a place. You don't have to overdo this step because it
might damage the paper. When will you get to
know when to stop if the water has
distributed evenly or not. The first thing is there
should not be any water standing at one place
and the other being dry. The second thing
is you will get to know by looking at the paper. There will be a shine evenly
distributed on the paper. If you're using a board
behind the people, you can take it to your
eye level and check. It will be equally spread. It. Moving on to our next steps, you can drop in colors
wherever you like. Since we are using two colors, I would recommend you
to use first color completely and then move
on to the next one. But before that, the pigments
should not be made to work. Three, it should be thick, but then a flowable consistency. It is completely okay to
use it like a watercolor, but to get the vibrancy
you have to add more color on top of
and before it dries. As you may notice, I'm just dropping
the color of using flatten brush and not
blending it with brush. The water below that is
on the baseball will be sufficient enough to blend
both the colors together. Suppose if your paper has dried in the middle
of the painting, you can let the
painting dry completely and then taper clear
water using flatten brush and gently applied throughout
the pay for one thing to keep in mind as do not
press the brush completely. The water again, has to
be distributed evenly. As you might notice, there is still
shine on my paper. It should be like
that, not watery. Basically this means the paper is wet and not holding water. Being gentle and
apply the paint, do it as fast as possible as you know, wash dries quickly. You can leave certain blank
spaces in between two colors. It actually depends
on your creativity, if you want it or not. As you can see in my lower half, I have left few white
spaces as well. Since the pink color of mine. To what tree, I'll
go ahead and add a thicker consistency of pink beans over and
before it dries. You don't have to
drag the colors, you just have to dab
by adding Carlo. This will give depth and the
painting cover up the edges. Let's go ahead towards
our next step. I'll be using titanium
white for making stars. You're, I'll be using two
brushes on size eight, round brush and a liner brush. This gives us depth
in the painting. What should be the
consistency of white friend? Firstly, wash your
brush thoroughly, dab it on the Cloud to remove excess water
from the brush. And then take a few amount of
tickle paint from the tube and add a few drops of
water into the paint. It should be thicker
and not to flow. You can add pain into the background when the
paint has completely dried. If you add before it dries, then you can add white dots
directly from the tube. All the stars. As you can see. I'll be using up paper. I'll be using a pencil
to splatter the stars. You can directly go ahead and splatter the
stars using finger. But I'll be using
this technique. Though. More water
in the white pain, the more broader
than stars will be. You can use white gel pen. To paint the stars. I'll be using a liner
brush for, again, splattering the stars
because I want somewhere or bigger star and somewhere smallest on this,
again, Gibson's debt. Let's move on and paint
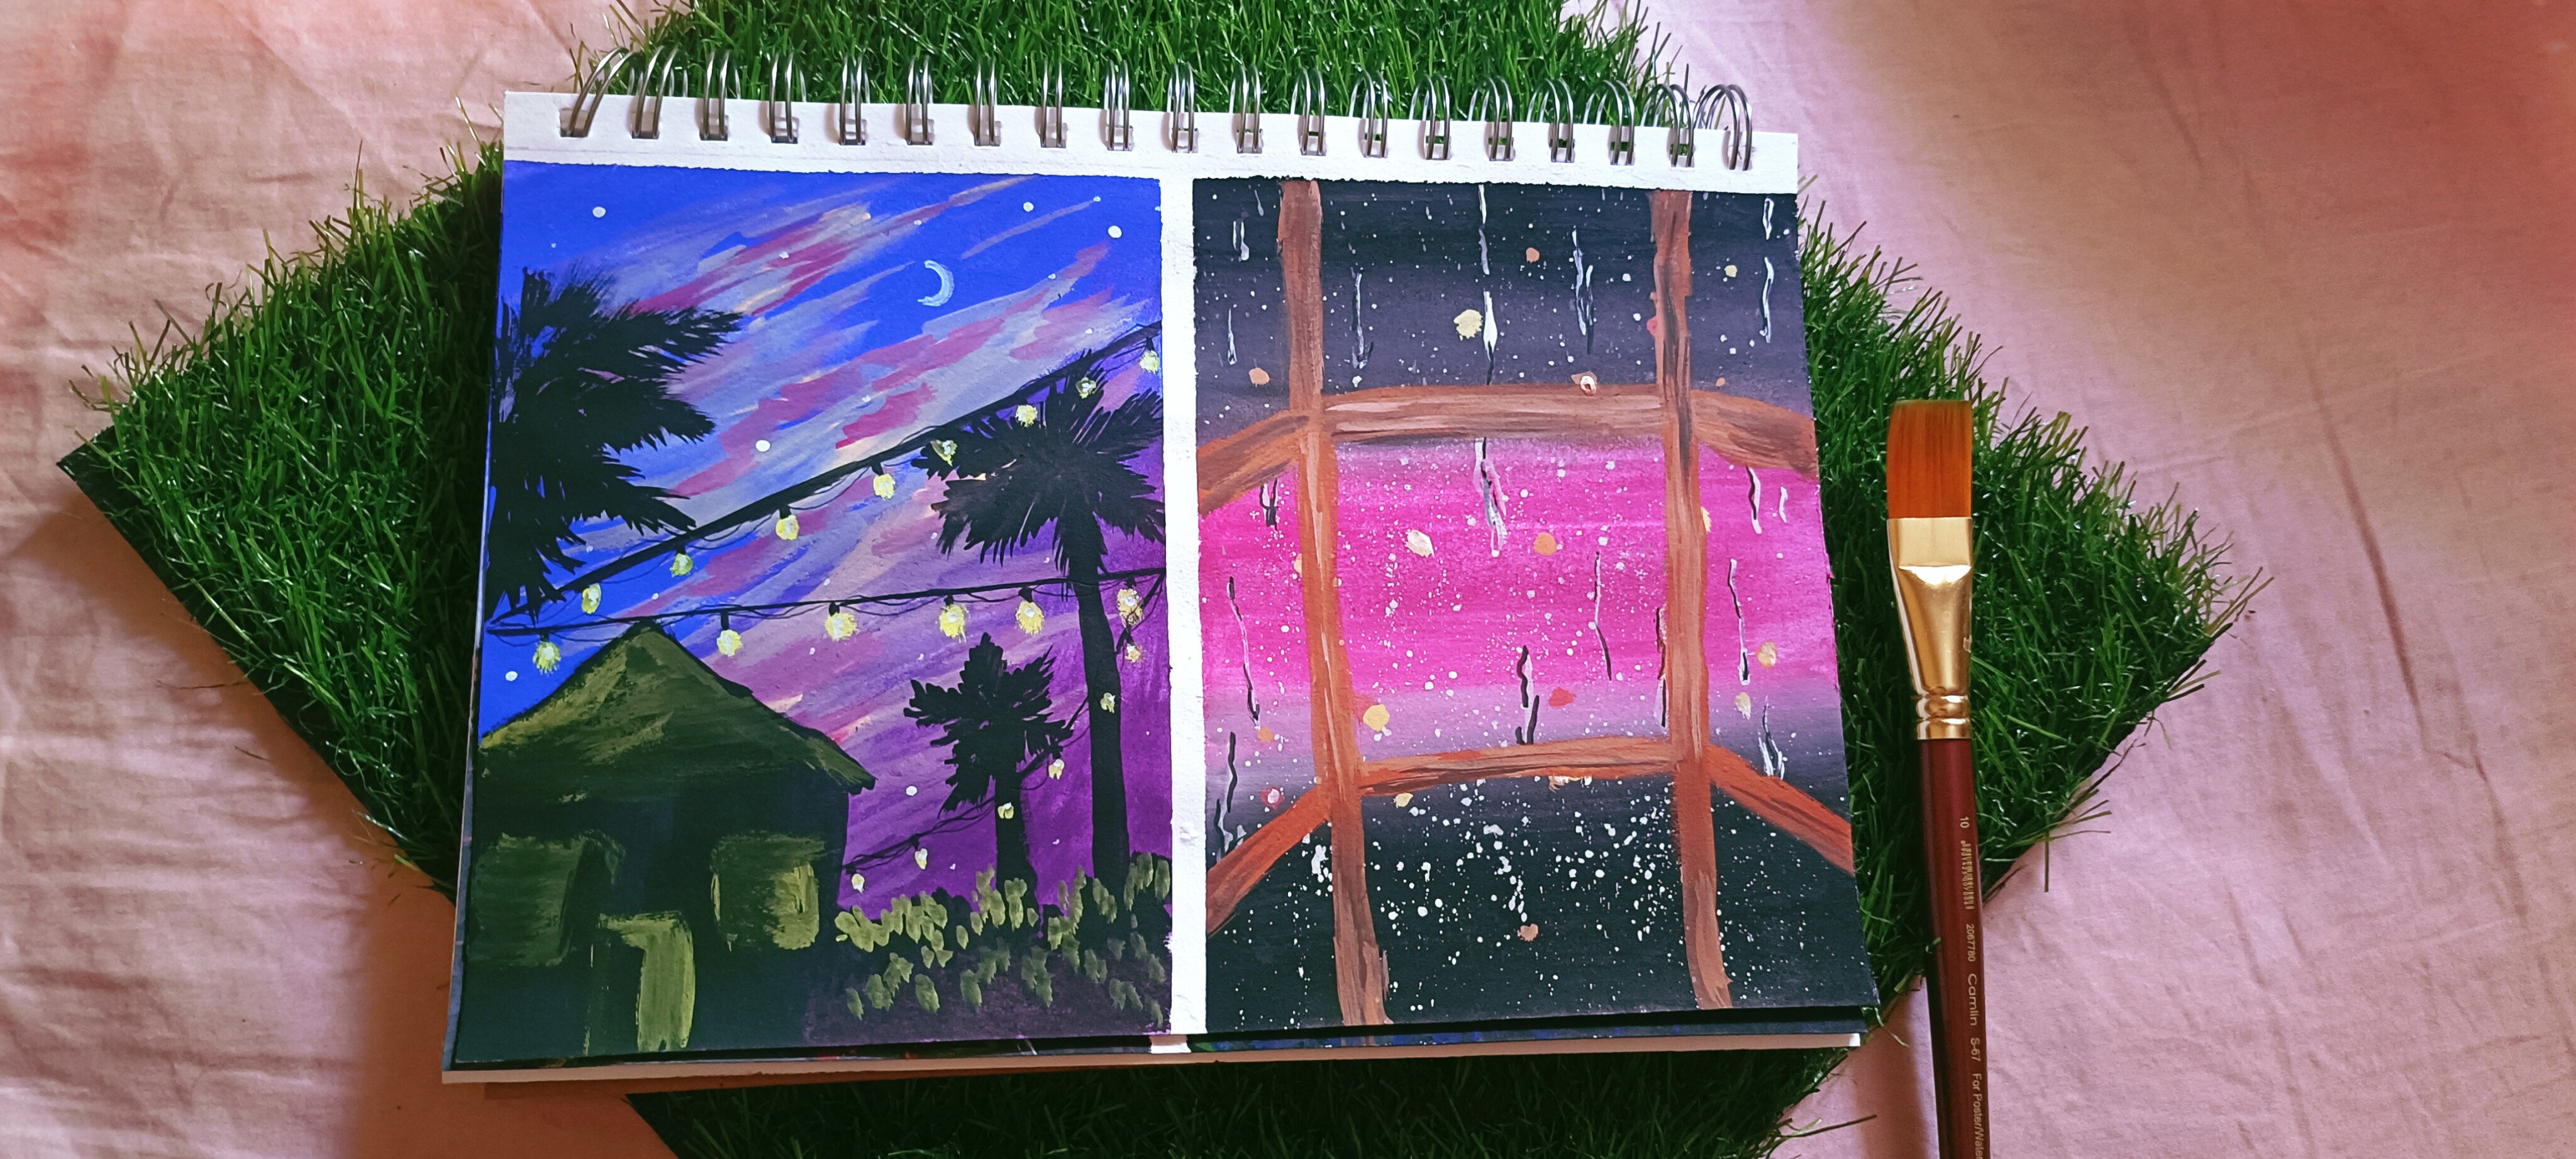
pine tree silhouettes. I usually like to pin the
line first so I would know how many trees are getting occupied in the painting
and how wide the branches. As you might notice, the corners are longer
compared to the center one. This is again given depth
to the why is so important. I have given depth in the
background in this task, as well as in the pine tree. Why is it so important? It depicts some realism
in the painting. That's why depth
is so important. Carefully, go ahead and
paint the pine tree, and that's completely
okay to do it slowly. Every detail is important
on the pine tree, especially in this painting, because they are
prominently seen. In this painting. The cidal ones will be broader since they
are longer as well, and the middle one
will be small. The width will also be less
compared to the cidal ones. In the video and paint
the pine trees slowly. I said, before, every
detail matters. I will go ahead and
add some foreground. Then uneven my unknown. As you can see, it's not too broad. Just a little bit. Some grass type or some
triangular type, anything. But just a little bit. You can add some shooting stars or more stars using why gelatin. A galaxy without a
shooting star as a galaxy. I love putting shooting stars. If you have seen in my
Instagram paintings, every galaxy painting
has a shooting star. It completely depends on your
choice if you want or not. Isn't this painting
looking gorgeous? Now we are completely
done with the painting. Let's remove the masking. Tape is too sticky. Use a hairdryer or
will the tape and then gently removed so that
the paper doesn't there. As you can see, I'm removing the tape and
then diagonal manner. Be slow and gentle. That's it for this painting. See you in the next one.
6. Galaxy painting 2: Welcome to the next painting. We will be painting
using wet-on-dry technique for making
the background. By now, you know how to
paint with wet on wet. We will go ahead and paint. For this. We have
to be a bit fast. And I'll be using a round brush. You can use a small
brush as well. I'm using this. So it carries a
lot of pigment and water and its belly
for making this. Again, either be dabbing
the brush and not dragging. By dabbing, I mean pressing
the brush onto the paper. So the bristles are all
touching the people. We will be building
up the paint from a lighter shade to
the darkest one. Let us taped down the people. Make sure you are taping
it parallel to each other and securing it
tightly with fingers. Here. For making the background, I'll be using rules Carlo
and a bit of ivory black. You can use your own Carlo. Go ahead with the lightest tone of the machine and
make a diagonal, leaving some white space. But before that, makes sure that the paper is completely dry. Once I have completed around, around the diagonal whitespace, I will be building
up layers with a darker tone for making
the different dawn. You have to use water or even
with white gouache paint. I would recommend
you to use water because it won't change the
actual color of the pigment. And also it helps
foster blending, as you can see. So how does this blending
work in wet on dry technique? As I have mentioned it before, the belly of the brush is
already filled with loads of water and paint coming
towards the people. Once you are done with the
lighter shade application, we'll go ahead and add
color on top of it, leaving 25% or
even less to show. To make it simpler, we will be building up Carlos
one on top of the other, leaving behind some
amount of previous paint. This will lead to blending, which doesn't even
leave a sharp edge. And also there will be
a dip in the color of the first round will be of the most flowable
consistency of paint. But as you move away
from the whitespace, you will be building
up the color, which means you will be adding
color more and less water. The lightest tone will be near the whitespace
and far away. It will be the
darkest or brightest. To add some depth
in the painting, I'll be using black color mixed with rows at the
corner of the paper. To blend black and rose, you can use more color or even water and blend with brush. But make sure there's no
blooming effect happening, which happens due
to excess water. To make it more realistic, I'll be using titanium white and adding
towards the central, which I'll do it after this. Adding titanium white towards the edge of whitespace
and light rose Carlo, you might create an depth in it. I'll be adding white paint
using dabbing method. And at some place I'll
be blending as well, which creates a rough edge
and not a straight line, as you can see. Now, similar to last painting. Once we are done with this, we will go ahead and paint
stars like the other painting. Do it gently and slowly. Take your own time. With both the brushes. I'll go ahead and add stars. That is Roundup size eight
brush and a liner brush, which will again create some
depth into the painting. Galaxy without a star
is not a galaxy. So put as much as
stars as you want, but make sure you
don't overdo it. Although it's so
satisfying to do it. Blending the black with trolls. You can also use white
gel pen to add stars, but make sure it doesn't dry. Only then you go
ahead and do it. Moving on to our final step, that is painting silhouette. This can be, again, your choice, what you want to add your, I'm painting mountains and
also pine, pine trees. As you have learned in
the technique section, how I made the mountain and pine trees follow
along and paint. You can paint at your own pace. One, the mountain is done. I'll go ahead and use a dry brush technique and
go over the black paint. I just feel there's less stars, so alarmed more and
simultaneously. Go ahead and paint
over the mountains. The little black color dries and some pigment
onto those stars. How do you know the brushes
dry so that we can add on dry brush technique or the mountains towards
the brush thoroughly, removing all the pigments, and then remove excess water. In fact, remove all the
water from the brush. How do you check if the
brushes having water, not just turnover your hand
and apply it onto your skin. Just go through your
brush onto the hand. If there is any shine on it, there is water removed
until there is no shine. And then directly from the tomb, take out the white color and then apply it onto the painting. You can add more depth by going through over and over
again over the mountain, but makes sure the previous
layer has completely dried. You can just drag
from below to top. Or you can just add like how, how I have done like that. Since the brushes dry, it will create
texture on its own. On being positive. The paper is again textured,
sensitize, cold pressed. One thing is for sure
about galaxy painting. It is that you don't know how much stars or
two months stars. So add until you're satisfied. Just make sure whatever you have painted in the background
doesn't go in vain. Now finally, we'll go ahead and paint the last element
in this painting. That is pine trees. Wherever you like. You can go ahead and paint. I'll be painting two pine
trees at the right corner. Since it looks so empty. Follow along just like previous painting and do it
slowly at your own pace. And you can stop and watch
me paint and four loop. Draw a line top to bottom. Top being tennis and
bottom being tickets. And then just go
from left to right. And then just go by
dabbing or dragging. And then as you come down, make sure each
line is giving out some more lines
towards the bottom. I said before those lines can
go towards the top as well, but that creates a different
type of pine tree. Make sure though garage
doesn't carry a lot of water, that might ruin the
detailing part. And do it with the liner brush. I will just paint the top
part of the pine tree, bottom, leaving it as it is. I'll do those two pine trees. Remove the masking,
tape, the paper tears. Go ahead and remove it from
the opposite end of the day. Just be gentle and slow. That's it for this class. I hope you all enjoyed. See you in the class
project section.
7. Class project : The class project for this
class as domain galaxy painting asset before
from the start. The color selection
is of your choice. And also the elements which have to be added
as a silhouette. If you wish to add
some more elements other than this and don't
know what to paint. I have a class on Skillshare that has elements of
winter landscape, which you can check it out. Before I say goodbye. I want you all to
share your work in the project section and
leave a review to the class. So I'll be inspired to make some more amazing classes and other artists might
follow up the class. If you have any questions, feel free to drop in the
discussion box below. I would be so grateful
enough to answer your questions and
clear your doubts. You can check my other paintings on Instagram and YouTube. You can tag me that as well. Thank you for joining and
hope you had loads of fun and have carried enough information
about galaxy painting. And also those tips and tricks
might have been useful. I'm pretty sure you might
carry this information and gain more galaxy
paintings with confidence. Thank you. See you again
in the next class.
 Arbia Sultana, Art Educator