Transcripts
1. Intro: Welcome to another water color class. For this class, I'm going to be showing you how you can animate any picture using a reference image. I'm going to show you how to sketch the face, the body, which features you should focus on, and how to paint the overall picture. I'm going to share with you some different brushstrokes and techniques and, and maintaining the facial expressions, painting behavior, and how to paint different types of textures such as feathery fabric. So what you're going to need as a watercolor sets some clean water, a pencil eraser and what a colored paper. And let's get started.
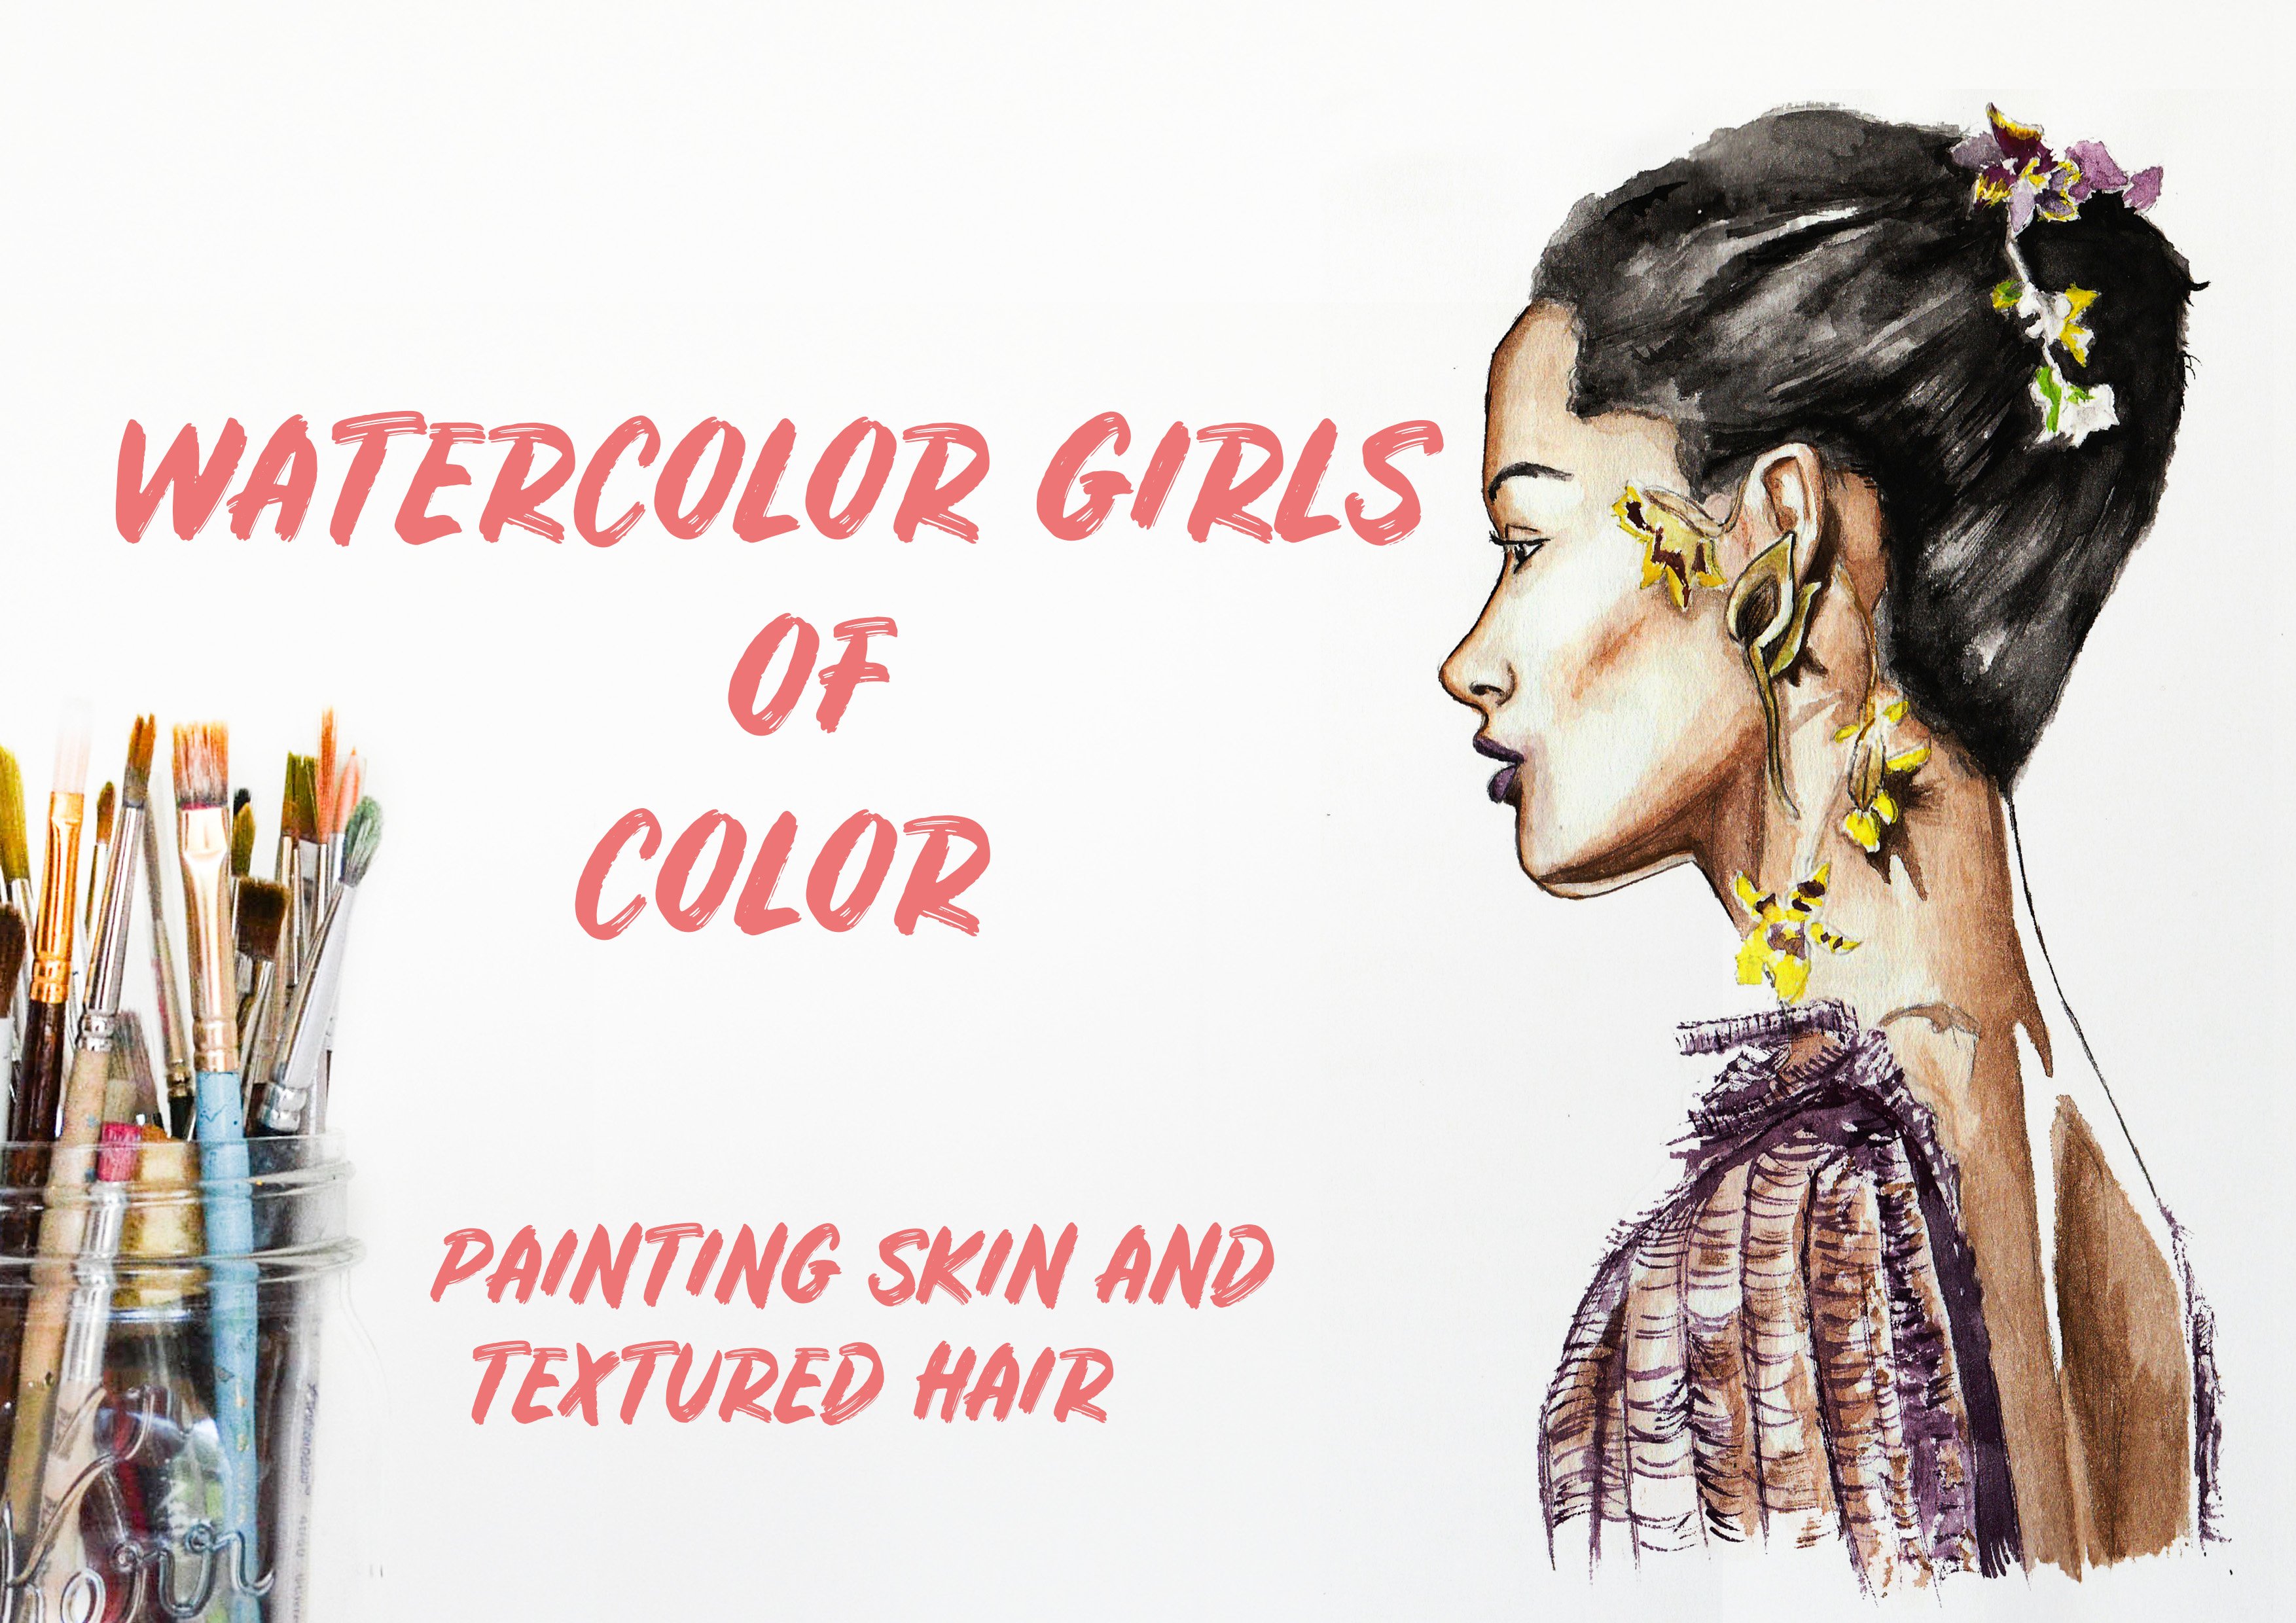
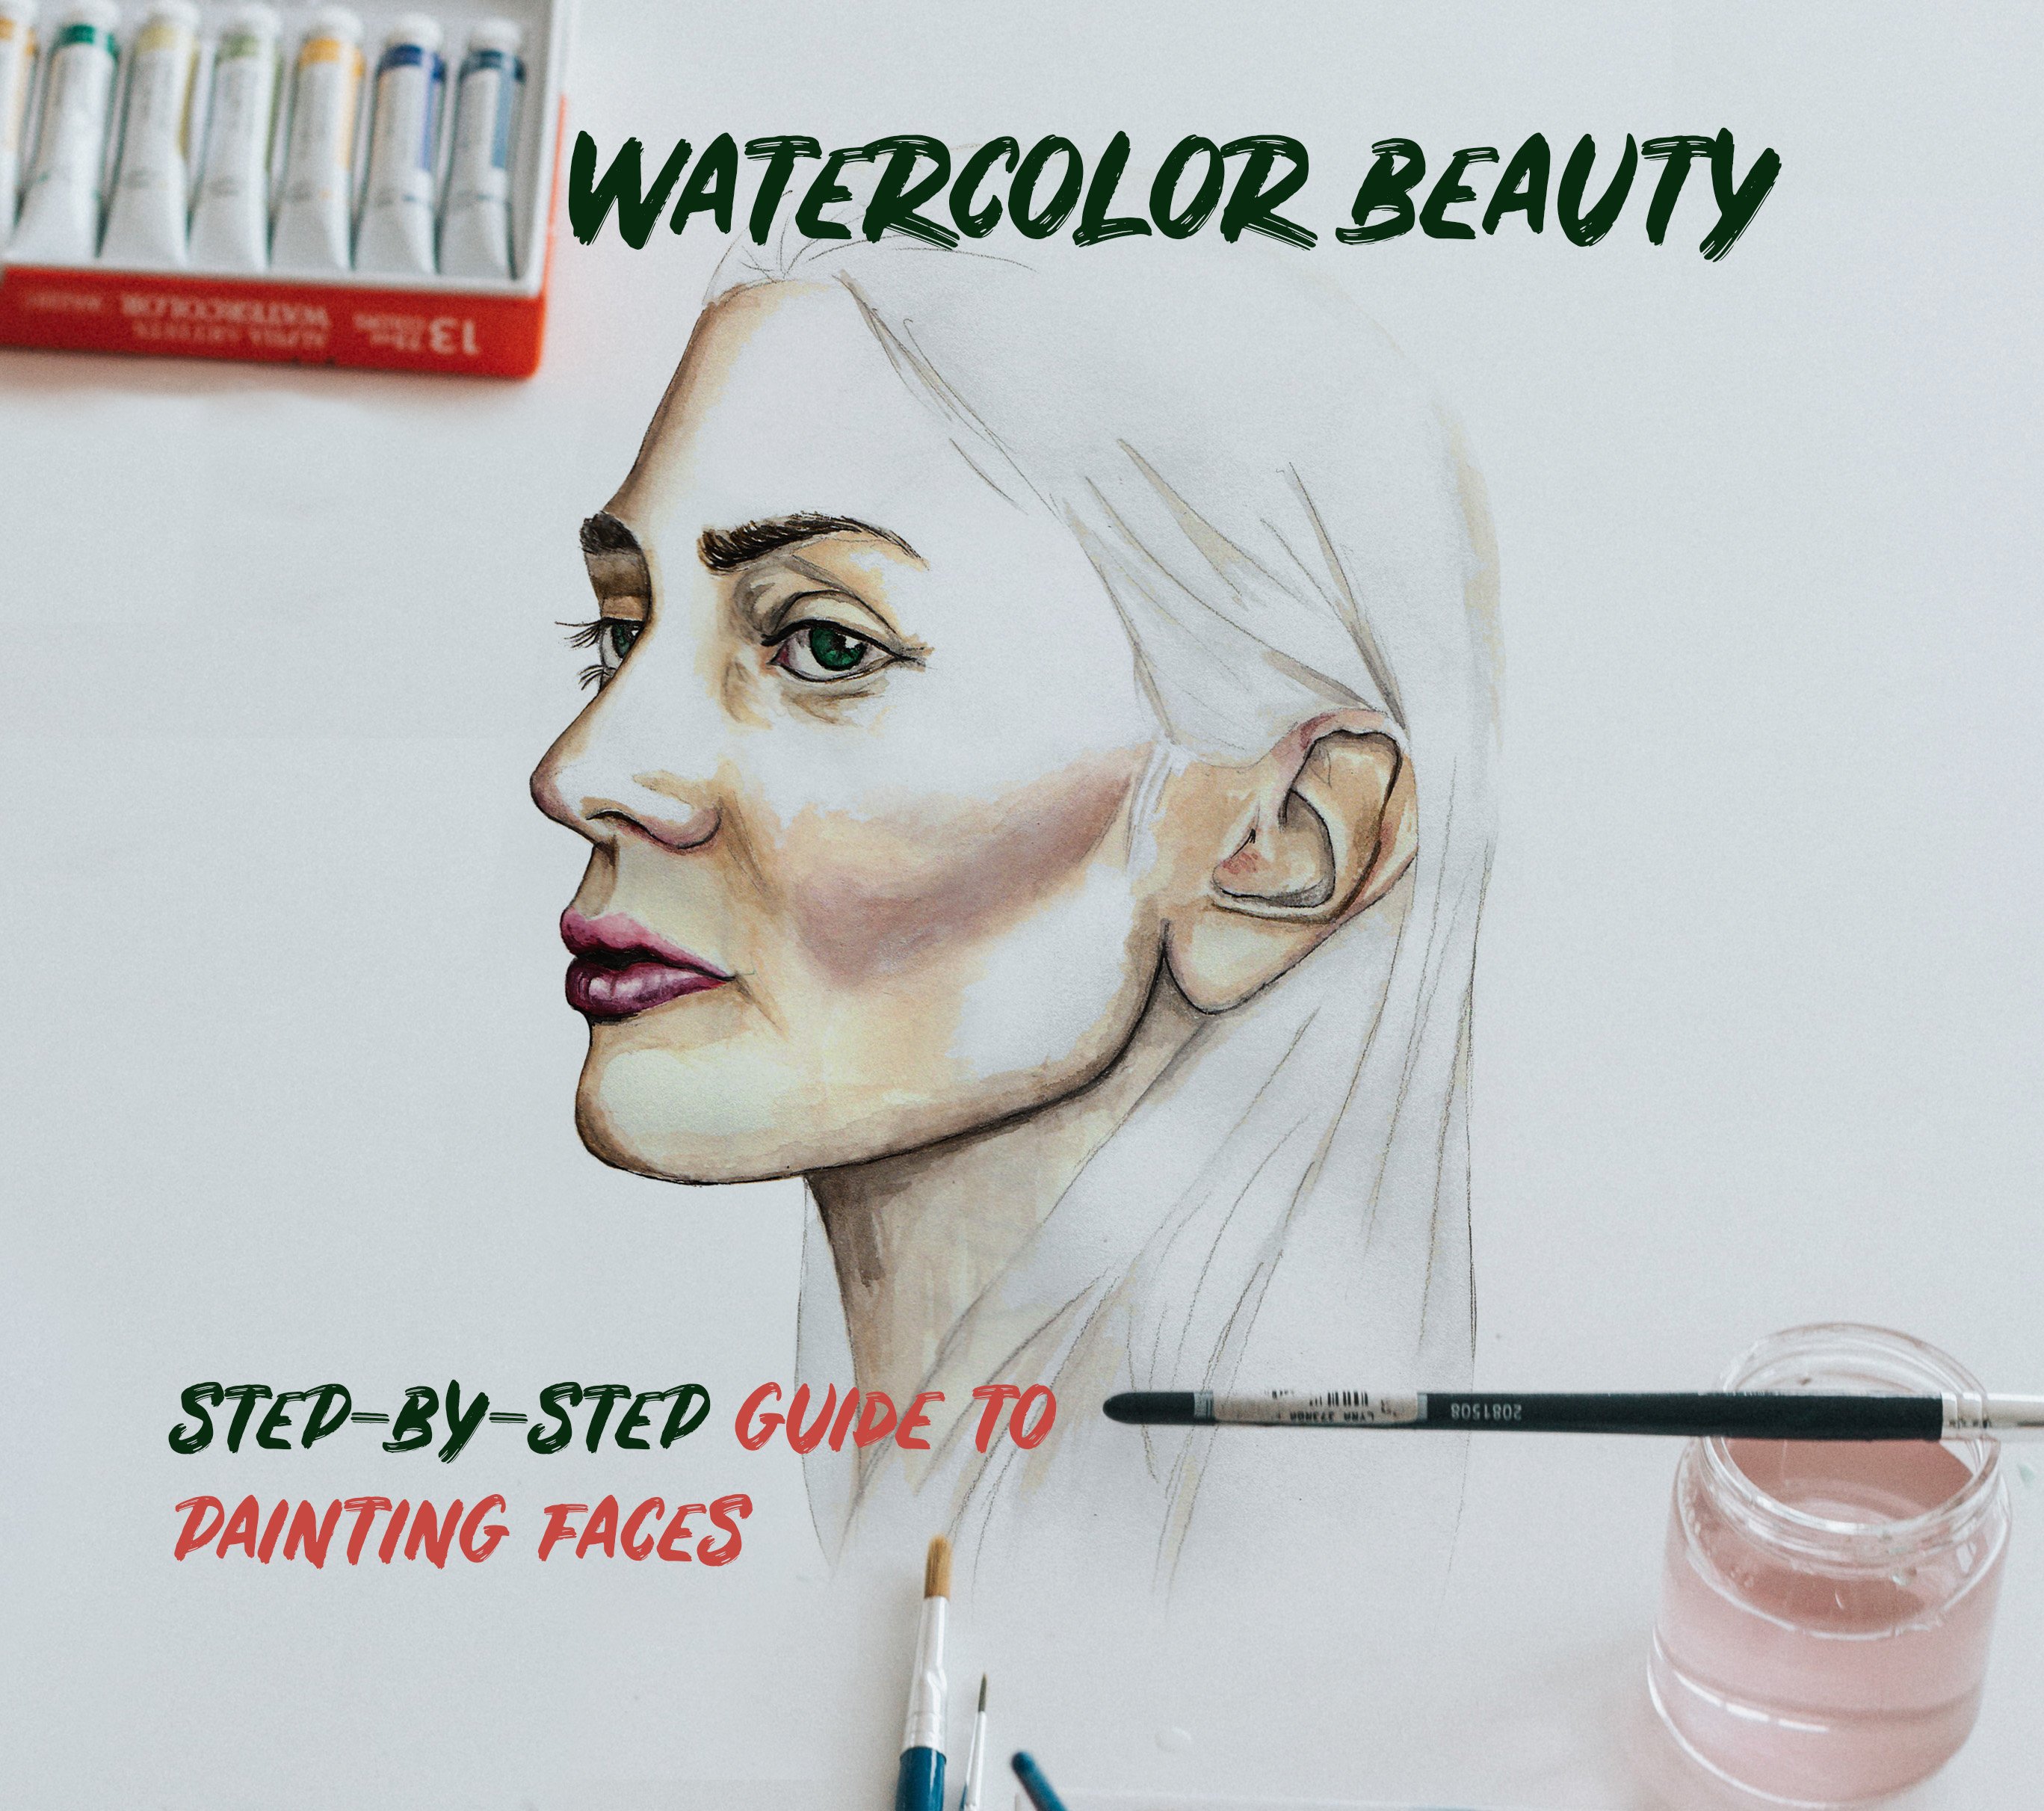
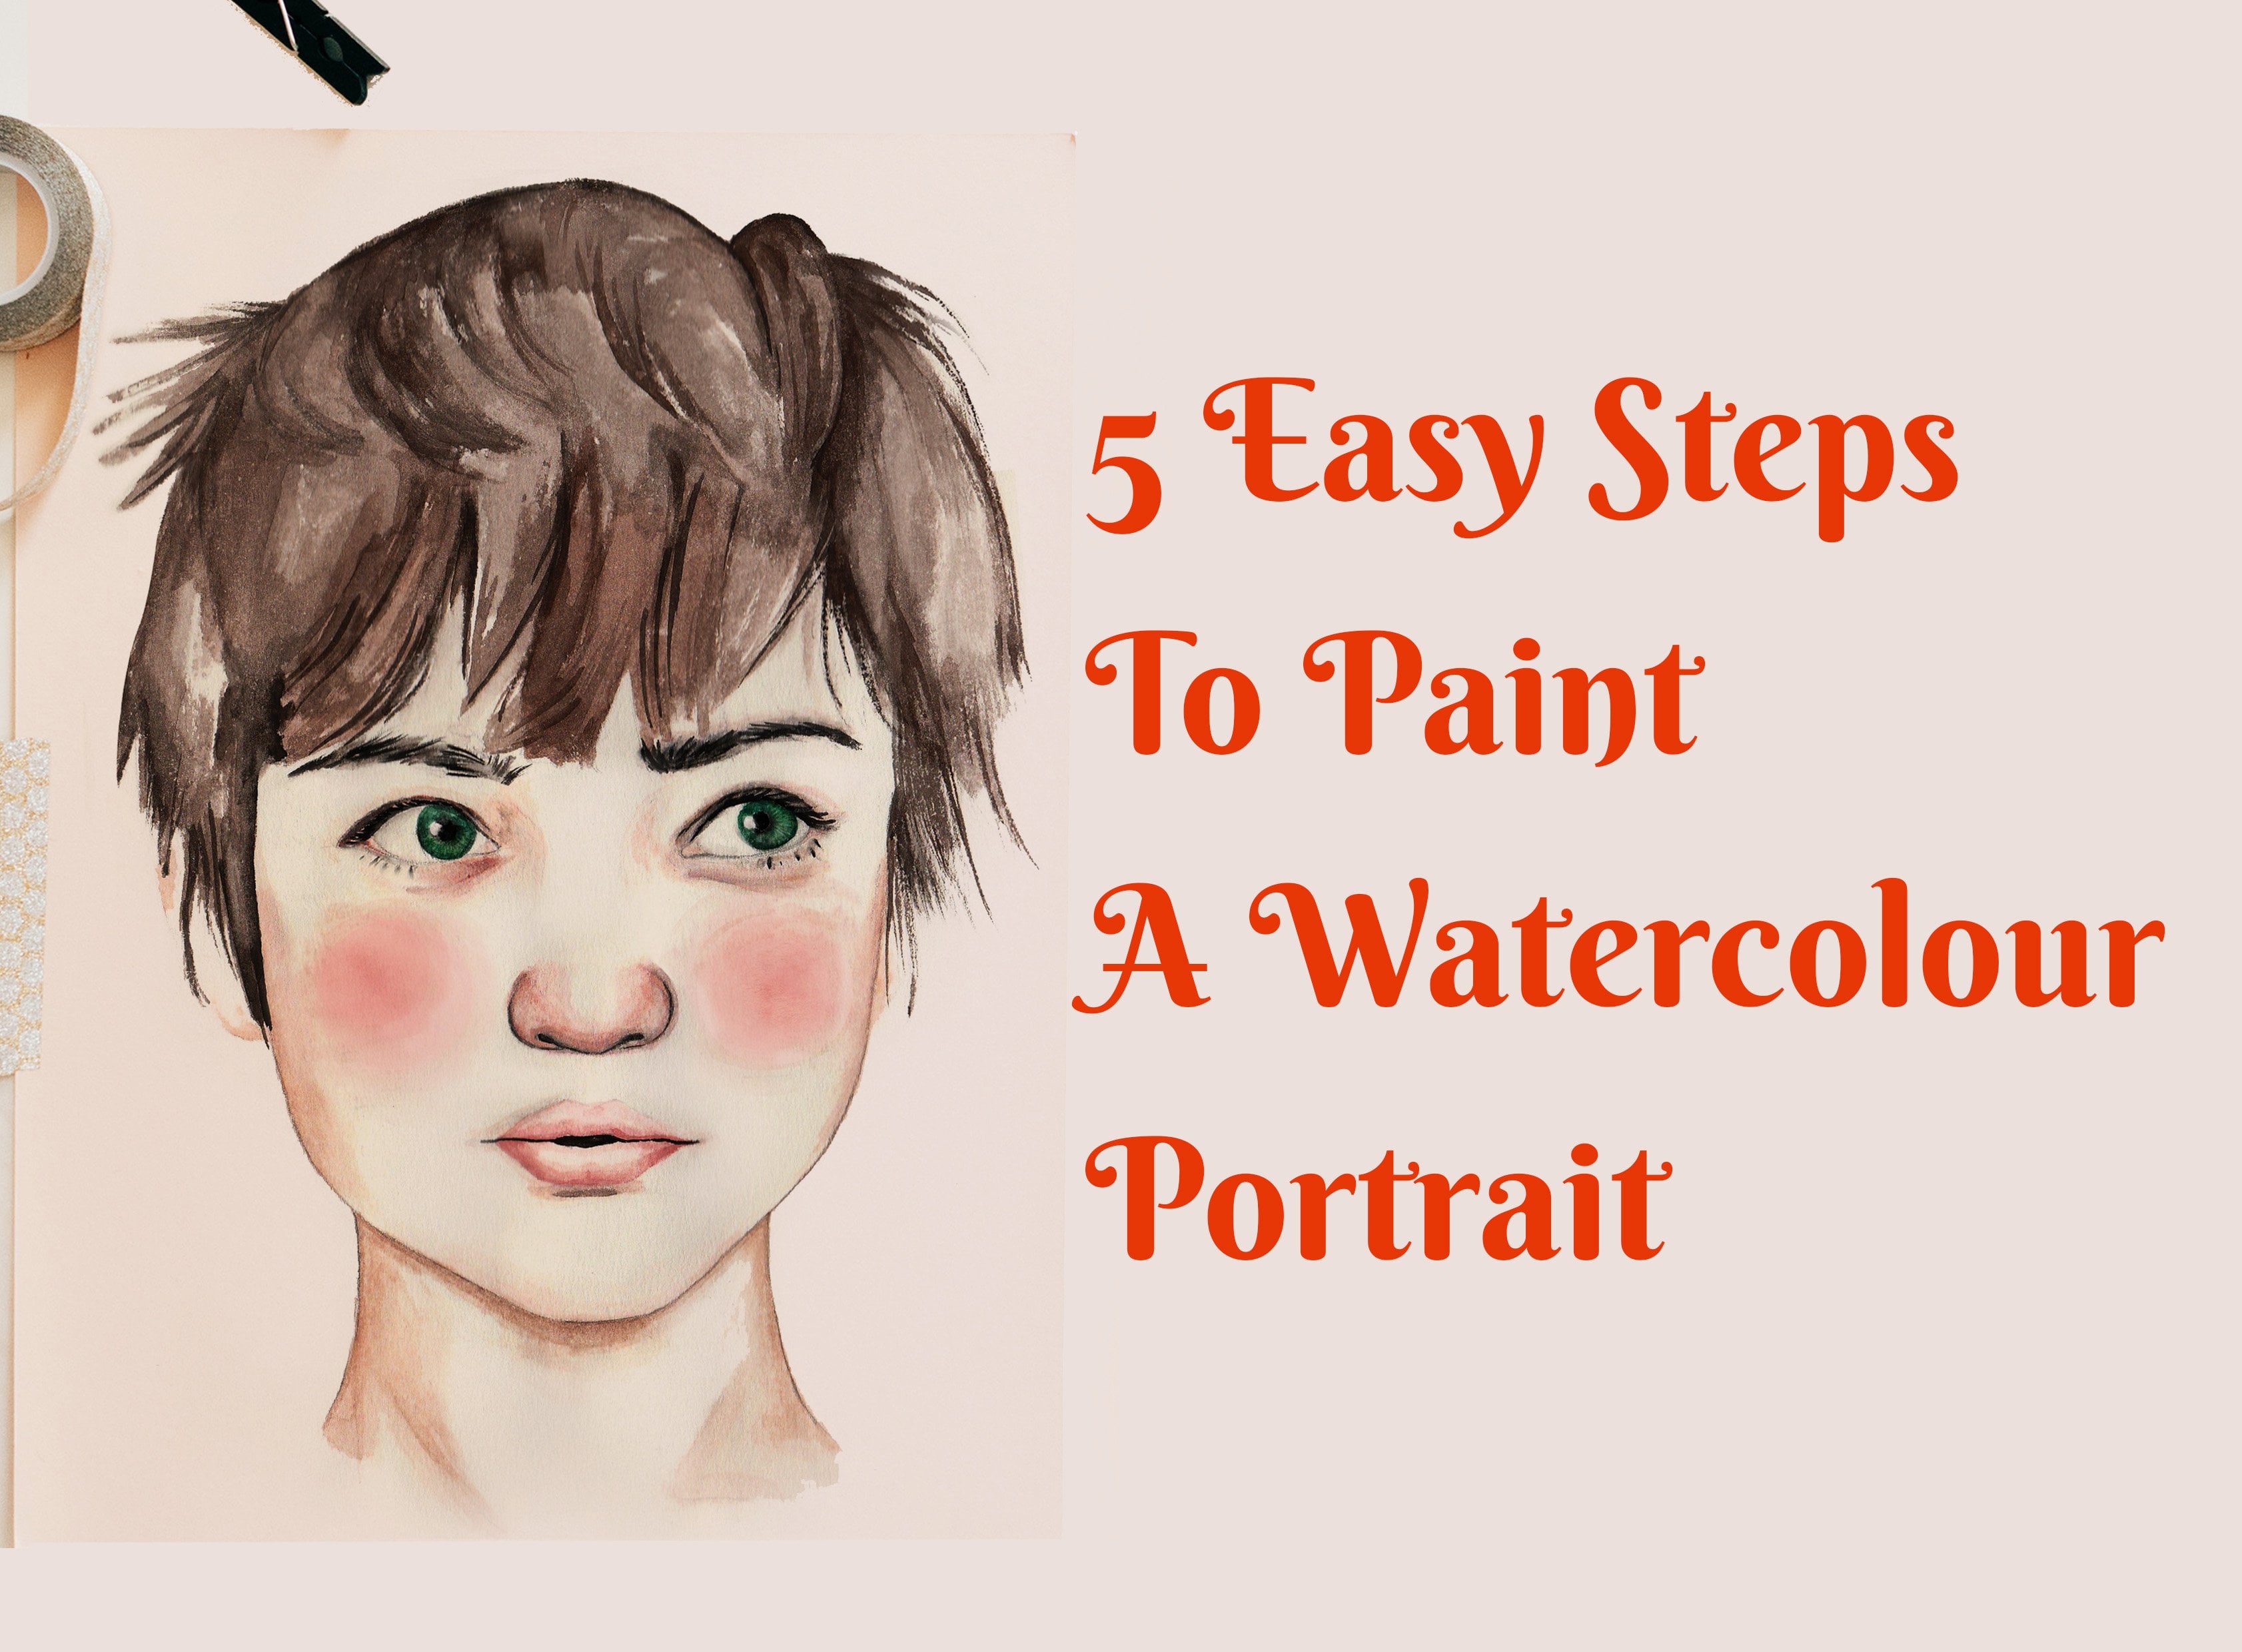
2. Sketching The Reference Image : The secret to animate any face is to make the eyes larger. My eyes are an exaggerated size. There are about a fifth of the whole face. So you want to make the eyes large. And just like in my portraits, in the picture that I am using as a reference image. Her on her eyes, she has a wing tip eyeliner, So I'm also going to add that tip to my eyes. And if you look at the iris inside of left, three spaces blank, and that will add to them. And the mission of the overall facial expression. See you if you want to fill a face with a lot of emotion, focus on the eyes. The more white areas you have, the satyr shoe looks, the bigger the eyes are, would like less whitespaces, the happier she will, almost surprised she will seem. So you have to just focus on the expressions that you're creating when you're drawing your eyes. I have tried to replicate her nose and her lips. Her lips parted, and I have changed her jaw line, though. I have made it much more rounder and more pear shaped to ban in the reference image, in the reference image have faces more rectangular. But for our animation, we just want to make her look more softer and cuter and animated basically. And giving her the same hairstyle, which has a Bob with bangs. And I'm also going to copy her outfits too. So you just want to try and replicate the mouth. The lips have the same nose if possible. If you can get that right. And then when it comes to the eyes, just make them really big. I changed my eyebrows slightly and make them more arched. And what that does is it's just gives a much more feminine or softer to walk to the overall picture. Okay.
3. Painting the Skin: I'm going to paint the face and body. And as an ally reference image her skin as Martin and some going to go for that shade. And I'm gonna paint all over the face and the body. And for our drawing, you can make it as big or as small as you would like. I ended up making mind small. I think I'm just going through a phase of painting things, miniature style, but definitely if you feel more comfortable, larger than paint larger. And as you can see, I switch my paint brushes from small to just slightly bigger for the face and using my smallest brush, size, one brush just to get into those tiny areas around the eyes and the nose so I can get that ride for the nose. You want to leave the center lights or you want to just put the paint around to the sides and then leave the center just much lighter. That gives overall cute to look to the face. And then you paint your shadows on the side of the nose. And I also placed below the eyes and below the head, of course with the shadow is for the neck. So just make sure that she place paint where you would normally have shadows. And on the collarbone ALL surround there. I'll add more paint. And feel free to change your paint brushes whenever you want to, just to make it easy for you to paint certain areas and don't forget below the hair, there's always a little bit of shadow that's cast by the bangs. And lying your face. And also the body and the shoulders. Just add a little bit of lines, beer. And now we're going to add detail to the eyes.
4. Adding Colour: I want to add some red to the eyes and then align the bottom and the top with a red. When you look at the reference image, it will give you a sort of vibe to it. And a reference image gives us the sort of thumb, slight, the Gothic kind of vibes I want to display on those dark colors that are coming from the image by lining her eyes with the red. And I'm also going to add some read to her hair. So we'd line the top of the eyes with your smallest brush. And then on the bottom here just the corner. Don't line the eyes completely like all the way round to what the Black you want to leave, the middle of the lower part of the eyes, not lying, if that makes sense. You just lying on the top and on the corner and the sides. And then I'm filling in my eyes, you have your black, your pupil, then you have your colored iris, and then you have those white areas. And I'm going to go back and add more color to certain parts such as the loves and the nose for now is just for me too. Have a base so I can see how I went to everything to come up working. Because at the end, I do want those lips to be a deep red. Red and black are my main colors for this picture. When you look at the reference image, it's mostly black, so I just wanted to add a little bit of color just to make it more softer, more animated or not so dark. And you can achieve that by just adding a deeper colors such as red. And one way of making your face look cuter is to add read on the nose like on the sides of the nose and the bottom. And then you leave the center clear and that just makes it more acute. Are ready, we can start to see an expression forming. And on the cheeks, I want to add just a little bit of blush. I'm going to build on that. See you have later on I'll add even more. I just wanted to be more clear that there is blush. But for now, like I said, I just want to do like a base of everything, so make sure that I have an idea of how it's going to look overall. Filling in the skin areas just to make sure everything is smooth. And also for the body. And like I added, for the blush at more red. If you look at the right side, it literally looks like a perfect tarts for me. I'd left that. I didn't realize that until I was editing. And then I went to add white on the nose and the chin. And of course, the eyes. You want to have those white areas. And then just blend that out. And already a face is formed. Here. You have pretty much petered a pretty animated face. I'm just adding whites just in an ellipse and inside of the fees just to add a bit of character to it all. And below the eyebrow.
5. Painting Hair: I'm painting or hair black like the picture that the reference image. And then the bottom ends off the hair. I'm gonna paint them red because I want to add color to the overall picture. So for the hair, I start off with a light wash, but I'm just gonna keep on painting over and over, over time they call, wait for wash to dry and then apply another one and so forth. Because I want it to be pretty dark. But for the purpose of time and for those tutorial, I'm just going to paint up to here. And then I will add more layers afterwards. So and to add to this read is it has a slight orange undertone. And we're going to also do the same thing, repeats and paints a few layers just to make a Docker and deeper. So when they leave the hair to try and then I'll go back later and add more layers. And now we are going to paint her outfits. And in the reference image, she is wearing something that looks very feathery. So going into the exact same thing and how you achieve that is, for me I'm using my smallest brush. So whichever size you want to use, I think even if your picture is quite large, tried to use a brush that is either small or medium size 123. And then you dip it in water and you shake the water out of the, out of the brush. And then when you do that, the hairs are gonna splits and be separate. Then you place that in paint and you just brush and you'll end up looking like hairs afer. And then to add that depth and that detail, you take a slightly larger brushes. I have, I have non medium-sized brush. And then you dab. So you end up creating this fuzziness dabbing motion. Remember that with the first one we were like sweeping was a sweeping brush strokes. And then to add that depth and detail, you dab. And it is important or it helps if the paint is what's URI as you do this, because then it will flow into the page and then it creates this effects that will help given overall for, overall for a texture to them, to the top that she's wearing. And then to just adenoids up, you just add more paints with more saturation but still keeping it what surgery. And that's the easiest way to achieve far. If you have any problems with this, just let me know and then I'll try to give more explanations. And then she has the color band that I'm going to fill it with, black. So I went back to the hair. And this is the final little portraits. And this is such a simple, easy thing that you can literally do on your lunch break. Literally this one's even take you more than 30 minutes. And it's a great way to practice your skills when it comes to drawing and painting portraits. It's a bit tricky for a few people. I totally get there. So I thought, why not simplify it? And the way to simplify it is to animate the faces. So if you can get this, then you will have a much easier time in painting realistic portraits, which I showed in previous lessons. So this is for people who are just trying to get into portrait, drawing and painting if you try this classrooms, so please share it. I love seeing how your work comes out. Thank you for taking part to the class skies and take care.
 Sharon Mapuvire, Anything Is Possible