Transcripts
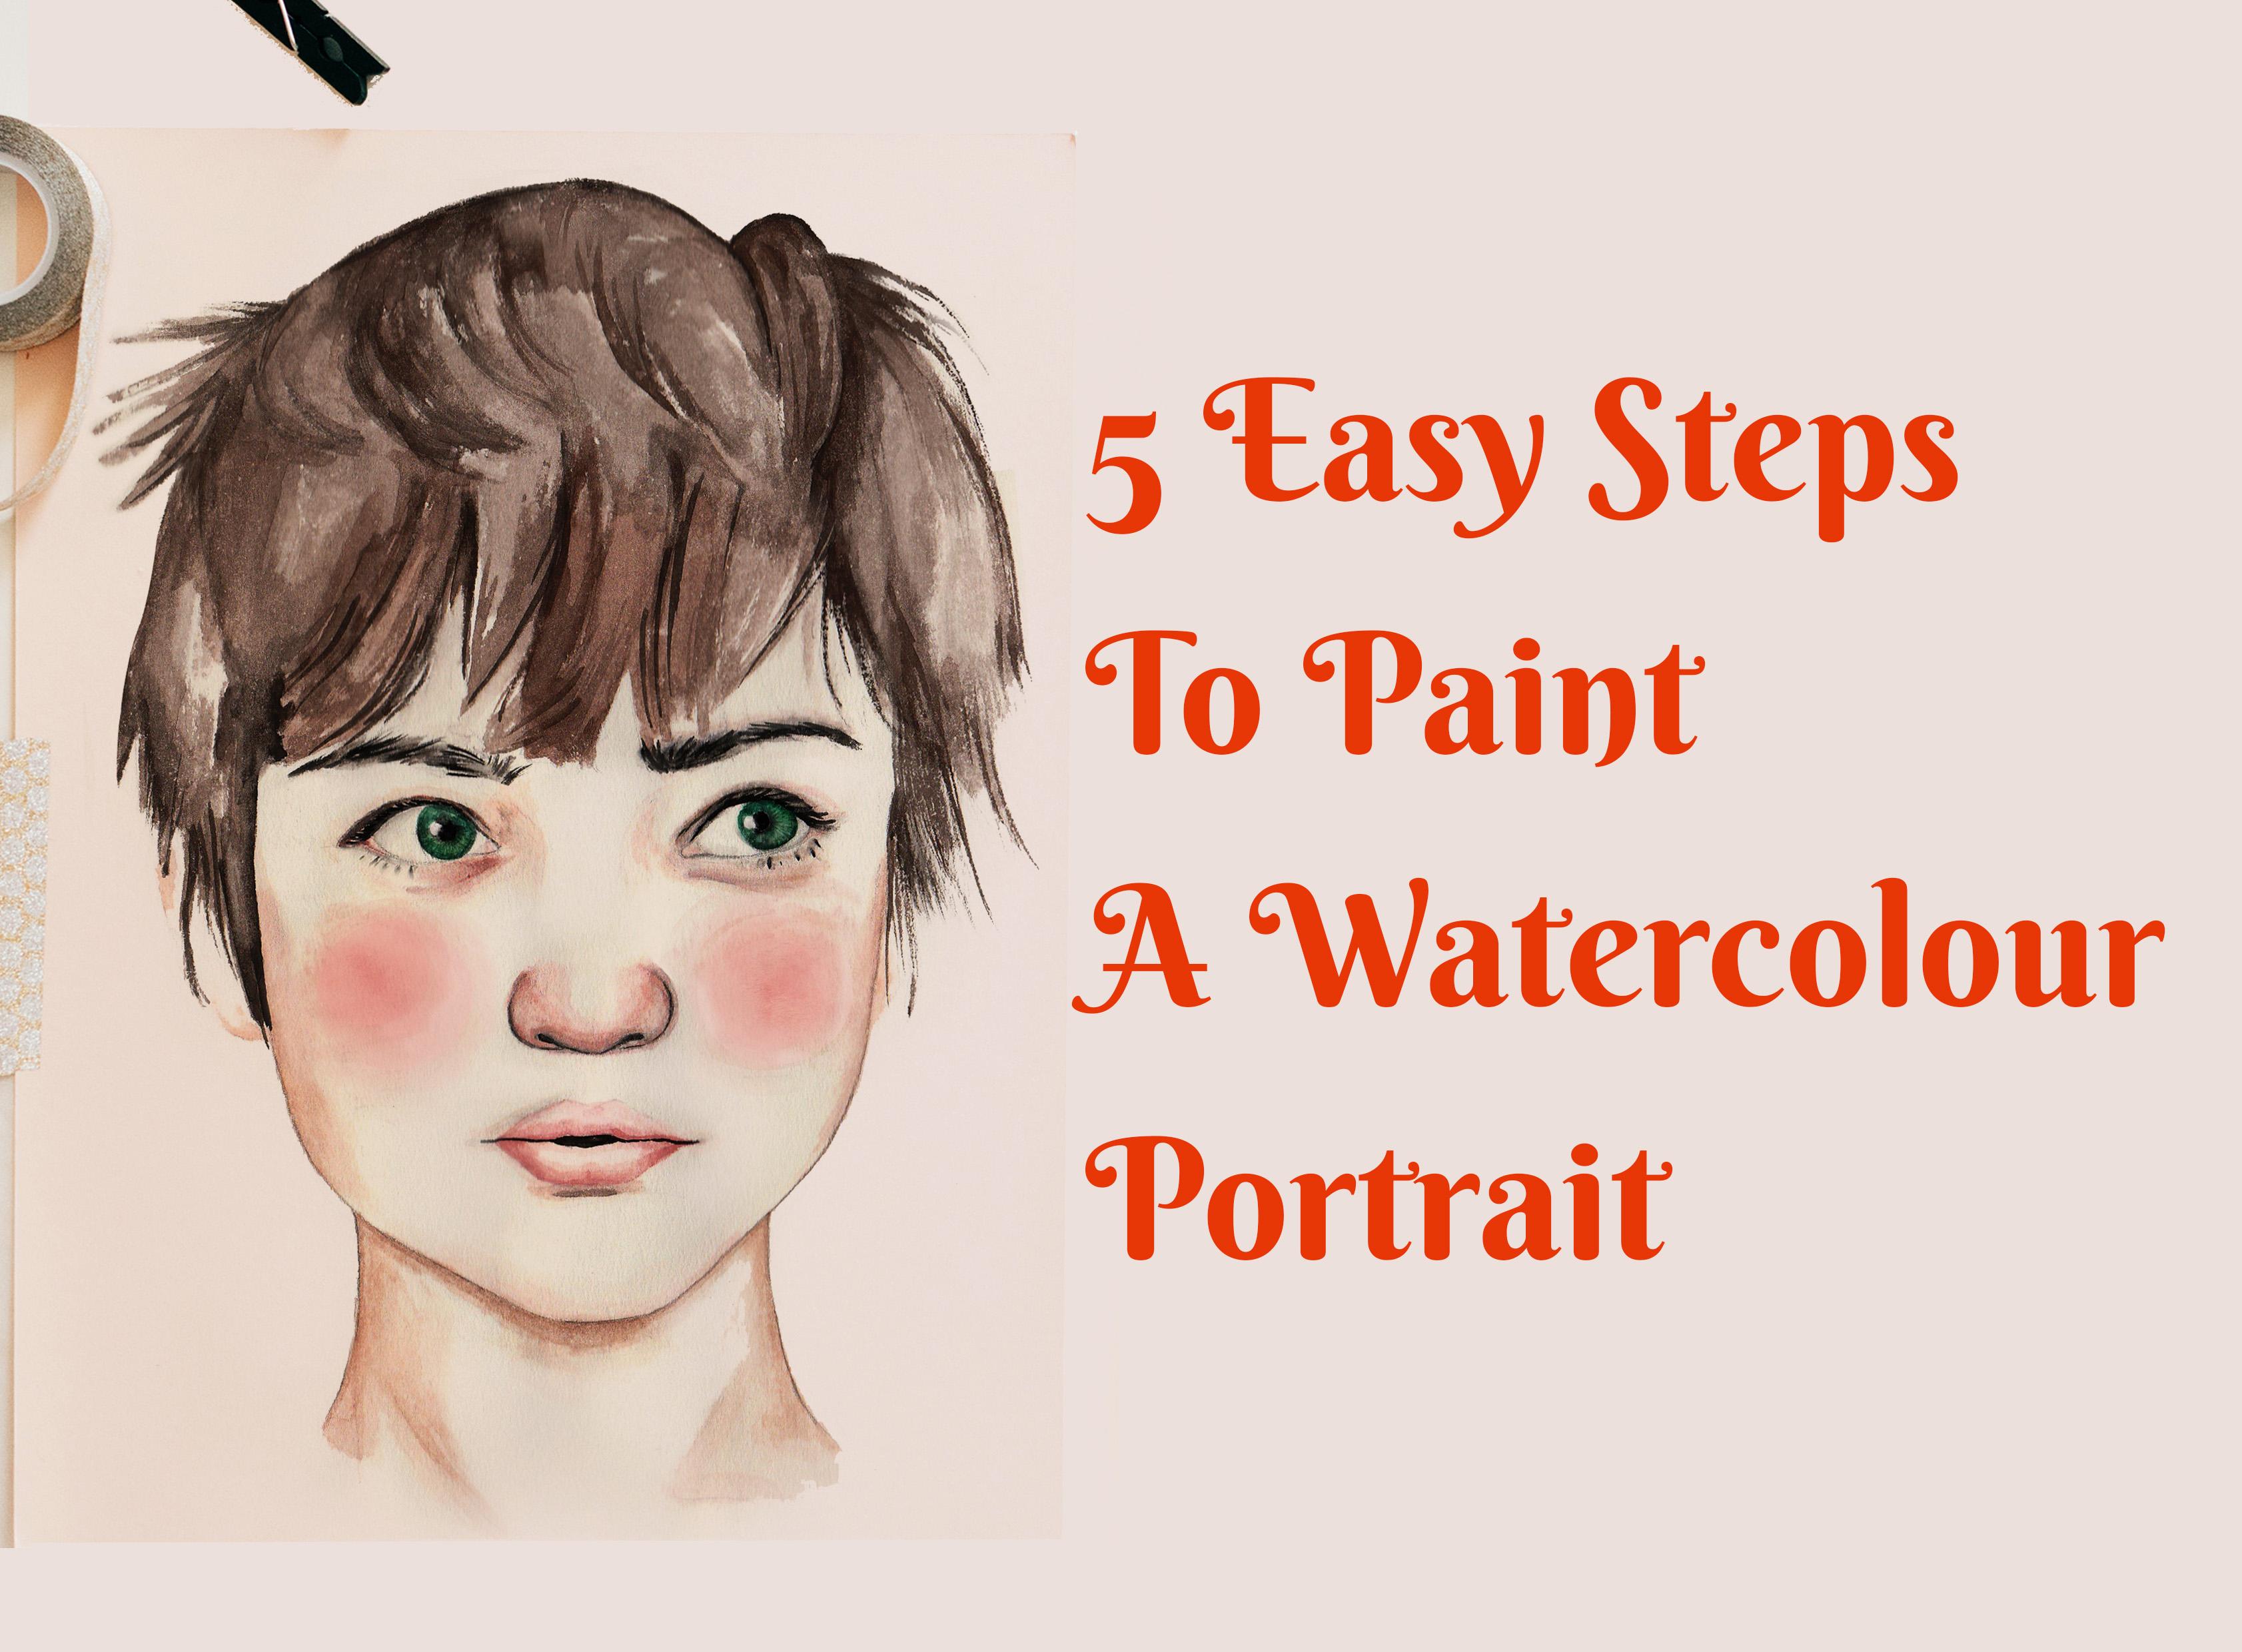
1. Intro: welcome to five easy steps to paint a watercolor portrait. It's my Name is Sharon, and I am going to demonstrate how to hit five specific points on the face in order to create a beautiful, easy animated portrait. From the eyes to the eyebrows. Nose had a paint plump, beautiful lips to painting the sides of the face and the chin. So the five targets you want to hit the 1st 1 of the eyes and the eyebrows. Their target is the nose. Your foot target is gonna be the lips and and assist is the size of the face and the chin. She hit these targets. You will be able to create and paint easy portrait whenever you want. Celeste gets started.
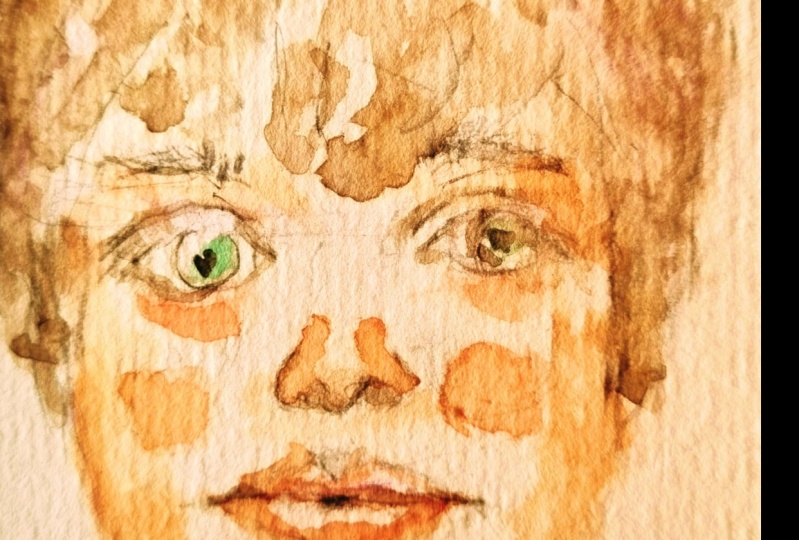
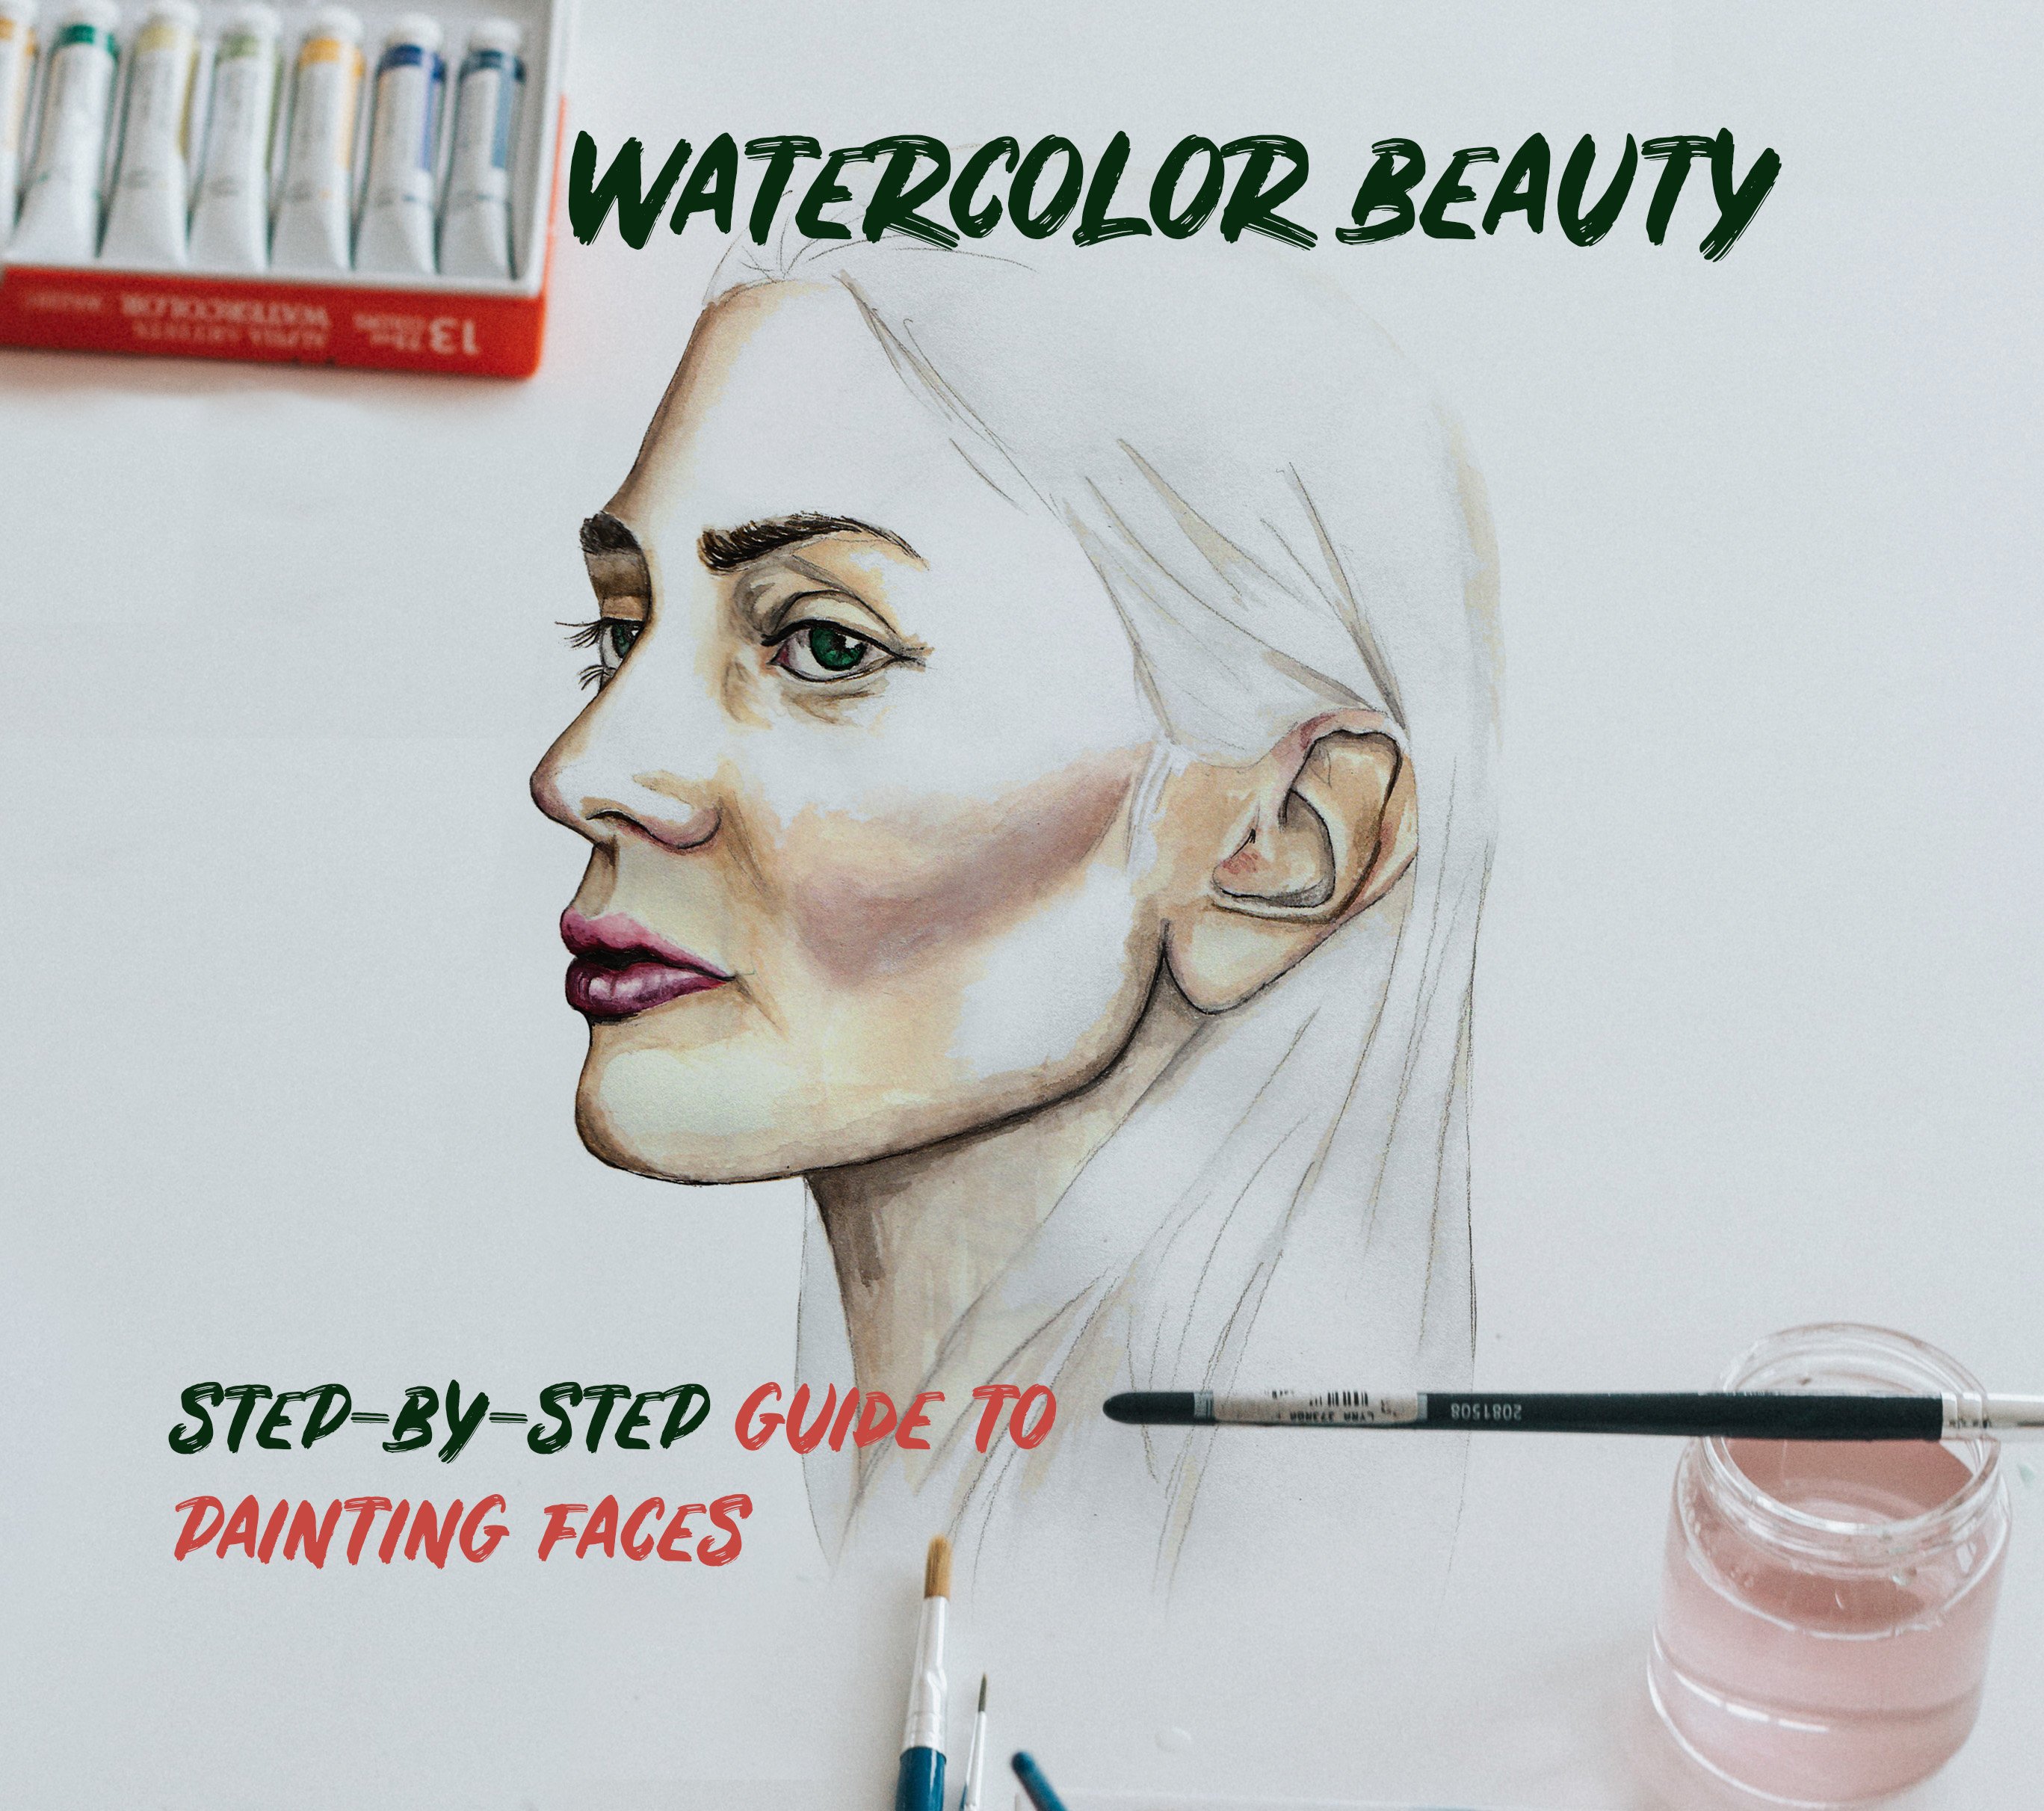
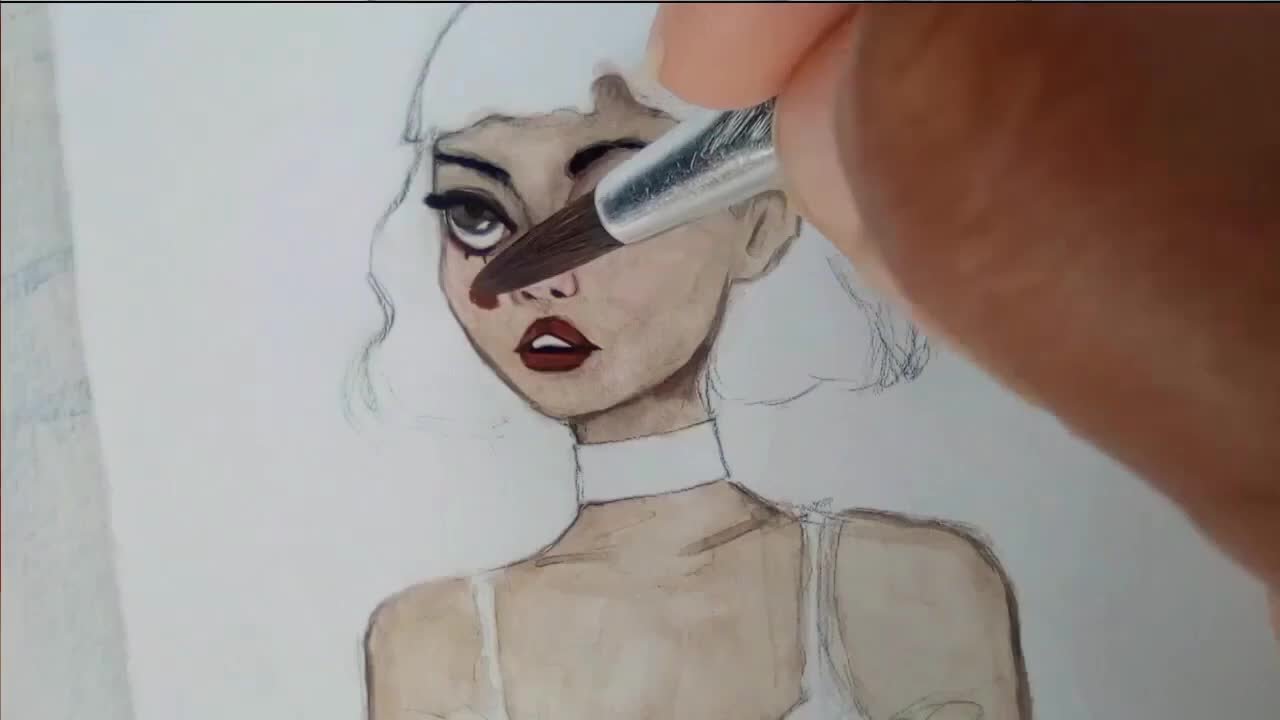
2. The Eyes: These are the colors that I'm going to be using. And the 1st 1 is a peachy nude. And then I have the nude and then a blush pink. That's what I'm gonna be using and have the eyes, the nose, the lips, the cheeks and the chin. These are the targets were going to hit. And I'm going to start by first you raising around the eye because I want to start by painting in the under eye, and I start painting with the peachy nude right below your eye. It will be slightly darker in a lying that is shaped area that is shaped like a boat, the bottom off boats. And then I'm painting over with a nude and I'm blending these two colors, and I'm not adding a lot of detail, just general, so that you have the under I painted before I continue on to the rest of the I. Now I'm going to paint along the crease with my peach nude shade, and then I'm not gonna paint the crease itself using a Doc Brown paint rights around. And then I blend. It's now I'm gonna add some color to my eye. My eyes green and I blend. That's insides And I leave the centre clear. And then I paint around with a docker green because if you look around, I was always like a rim off a darker shade. So it goes around and then right below the lashes be darker. And then I paying to the pupil with the black and right beside the pupil. I'm gonna leave that area clear later on, you'll see that will look like lights is hitting the I and I'm gonna paint the lashes and we're keeping it really simple. Don't go into too much detail and into the lashes and paint them pretty quickly so that you get that with Penis off the lash and then below just a little lines again, It's not realistic. I want my overall picture to look pretty animated, So I'm not going into too much detail and right above with the nudes and painting with the nudes right above and around. And this is the I
3. Eyebrows: for the eyebrow. I first start by painting a wash if nude. And then I starts to paint my little hairs for the eyebrow in the curved, curved or slanted. So a bit more filler towards knows get thinner as you move away. And then I dip my brush in water, go back in and I boland in between the little hairs that the eyebrow looks more fuller and thicker. And then I'm going to paint over with a nude so that it looks more blended into the skin. Just right around the edge was a nude. And then now I'm going Teoh, finish off the area by painting in the corner, off the nose and the I gonna blend that and you see by just hitting those 1st 2 targets You already 1/4 through painting a portrait. They just blended out so it looks more shaded
4. The Nose: Okay, So for my nose, I've already painted with my peachy nude and I'm just painting around the sides with a Dr Brown and all I have done is a painted with the peachy nude on the sides and on the bottom of the nose all the way around. And I've left the center off the nose. Clear. So you see, I'm just painting around right now. I'm blending with the doc brown on the sides and on the bottom, but followed this direction fights around and leave the center clear. You leave the center clear if you are trying. If your aim is to paint an animated knows animated face when I mean by animated, um, concerning the nose I mean cute. You'll see the overall picture. It will acute. But if you wanted it to look more realistic, of course than you would add more color, more paint and more detail. But I want us to keep it pretty General. And I wanted to just look cute and animated and visually pleasant. And now I have added some black to the nostril and I'm blending of the bottom. So you you so that it shows a shadow moving from the bottom off the nose, moving up up the nose because your shadow will be at the bottom of your nose and your tip and on the sides of the nose. That's what you want to place most of your shadow. Do not place anywhere else else. It's, well, you easily get confused because the nose, honestly for me can be pretty tricky. Subject painted on to the size and have let the center clear. Just paint around and you will be fine. That is all you are trying to do, and this is gonna add a little bit more shadow. And as I was saying for me, I honestly feel like the nose is the most difficult feature, because when it comes to the knows, we all have the same kind of eyes will have the same kind of lips, but the nose the nose is different. Depending on who you're painting said. That's Wei can become difficult. And then I'm starting to place a little bit of more paint around the nose because they'll be like a little shadow if you look people's noses around. So I start by painting with the peachy nude just around the sites
5. Lips: for the lips. I'm going to start by painting with a blend off the peachy nude and the blush pink. This is my first code to my first base, and I start by painting the bottom lip and I'm painting around and I'm going to leave the center clear or unpainted, and a rule or trick to remember is if you want to make something look rounded paint around it. If you keep that in mind, you never get lost when trying to create shape. This helps the lower lip look more fuller. If you paint around and you leave the center clear flora lighter colors, so to speak. And I'm going to add some color to the top lip, and I start by painting of the bottom and move up to the top lip. I'm painting from the bottom going up because if you look at the lips, the deepest, darkest colors will be with the lips meet, and I want my lips to look pretty plump and full, so to do so for the top lip, you want to have the the color to move up, so it's dark at the bottom and then it goes lighter, lighter lighter and that will make the top lips look fuller. Then I blend that out with my paintbrush at a little bit of Fort, and I just blended out with lips. He can use a variation off shades and tones like You can use different pinks, different reds. You can mix them all up together, and it'll still look great. You can't do something like that with your eyes, but with your lips, you definitely can. Adding more color on the bottom Here, I want to define the shape more. Like I said, I want my overall picture to look cute and animated. Side wants those lips to be quite, um, full. And then I just blend on the sides and on the bottom, adding a lying for the top lip, and it really is sort off like sculpting. And I'm gonna add that sensor lying and the dark paint in the middle to show that the lips apart just paint here with the black for solid black. Those of the lips
6. Sides and Chin: now for our last step, which is painting the the cheeks of the side of the face and the chimp. And I starts with a darker skin tone, and I just paint lightly undersides off the face. And then I blend. So you want to hit the sides of the face so that the shape of the face is more solid and more defined rather than painting all across the face and you paint what they dark color to create shading right around the sides So you don't want to use the same, um, tone that you used for you eyes. You want to make a darker around the sides off the face to really sculpt the face. And to get those angles and looking at the face, you can see where the expression is coming from. And it's mostly coming from her eyes and her lips, and right below the lips, paint with skin tone color and around with the nude paint color. And below these lips is where I'm going to be placing my shadow because you have a little bit of shadow below your your bottom lip right before your chin, and I'm using a dark brown I just paint a lion underneath and a blend, and I painted slightly curved or rounded. If you look, it's not just a straight line painted kind of Kurds to slightly outlying the the chin to mark with the chin begins to start a little duck line, and I'm painting at the bottom of the chin and lining around and I leave. I do not paint in the centre. Vision is just around the chin and below my bottom lip. Those of the points that she wants to paint right on here and I do it pretty lightly. I don't want to do it very strong right around like this. And I'm just going to still in with Liberace nude just below the eyebrow and that sits. These are the monks you want to hit. Do your eyebrows, your eyes, the nose, the lips, the size of your face and your tune, and that's it.
7. Neck and Hair: I'm gonna finish off my portrait by painting the neck, and I'm gonna place, um, the same color that I used to the sides of my face on the side of the neck and below the heads going around. And then I blend into the center off the neck. Just add a little bit more detail. So the overall portrait, it's more fuller. But it's very, very simple That paints my years at a little bit more, paints around the nose, and I'm gonna add my hair dark brown, and I'm going to painted pretty generalise. Not gonna have too much detail, and it's gonna be pretty blended. I'm gonna at a lot of water, too. The hair just painting this sweeping strokes across. And now I'm gonna add a little bit of pink to my cheeks so she looks even more animated and adorable. Just painting with a pink lee blush pink mixed with a little bit of whites. And that's it, guys. Five easy steps to painting a watercolor portrait. I hope you enjoy the class. If you did, please share its and, like, IDs. Thank you so much. And take care. Guys.
 Sharon Mapuvire, Anything Is Possible