Transcripts
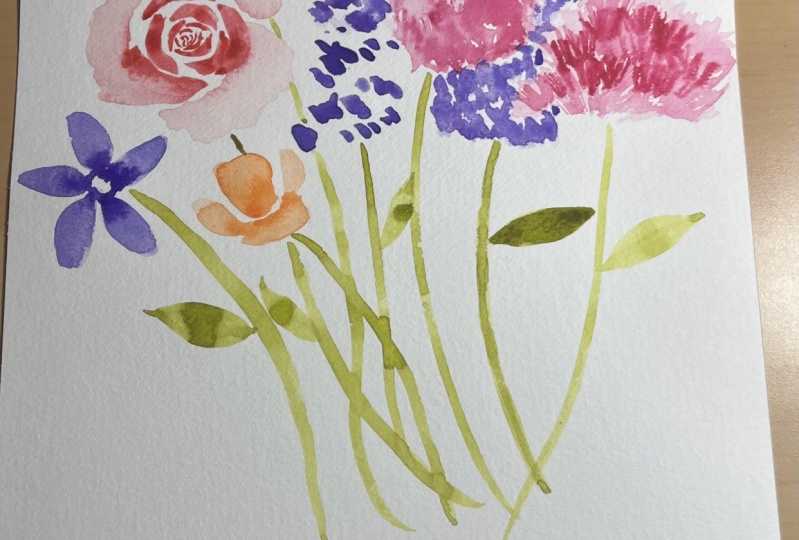
1. Introduction: One of us focuses on the key flowers like
roses and peonies and hydranas but no one ever thinks about the fill of florals when you're painting
loosely in watercolor. If you're completely new here, my name is Claris
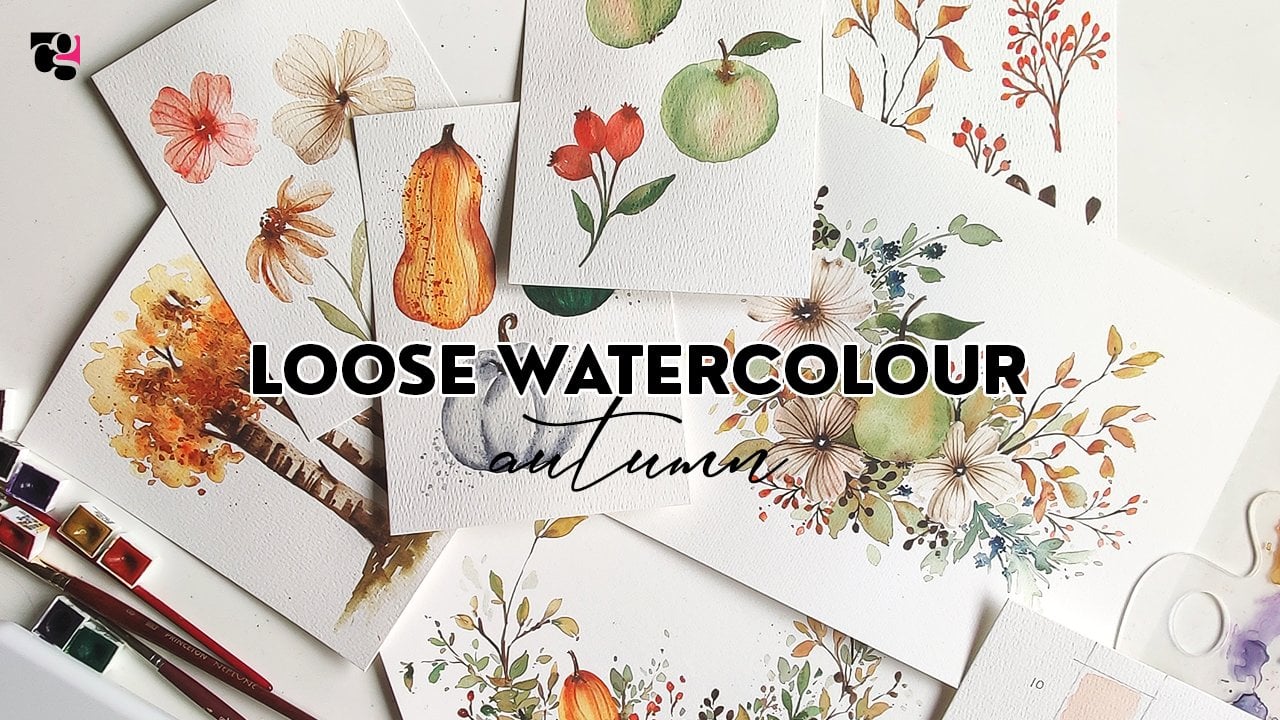
and I teach you how to go with the flow and
paint loosely in watercolor. So a little bit about me, I first started teaching
watercolor over on YouTube. I have since then expanded onto Skillshare and I even have my own watercolor
monthly membership, where we all learn to find our moments of calm by
just letting loose and painting loose florals and sometimes some other elements
too, all in watercolor. You've probably taken some of my previous
Skillshare classes, the beginner friendly
loose watercolor florals, learn how to compose
and paint four flowers, or maybe you've even
done my how to paint loose watercolor roses
composition class. On that note, while we
focused on the main flowers, I have decided to create
this class here where I'm going to show you how to
paint the filler florals, a few different varieties, including berries, just
so you can add them in your beautiful compositions
to your roses or your ponies, or your hydraners or whatever other big
flowers you paint. I'm also an ambassador
for Princeton brushes. I absolutely love their brushes. I love the Princeton family, you'll always see me using Princeton brushes and
majority of my videos. Especially in my book, which is Paint 50
watercolor Nature, where I teach you how to learn and paint 50 elements
of my choosing, nature Related in watercolor. We're just pretty much using two Princeton brushes
in this whole book. I've listed the links
to where you can get this book in the description of this video, so check it out.
2. What this Lesson is About: Probably taken some of my
previous Skillshare classes, the beginner friendly
loose watercolor florals, learn how to compose
and paint four flowers, or maybe you've even
done my how to paint loose watercolor roses
composition class. On that note, while we
focused on the main flowers, I have decided to create
this class here where I'm going to show you how to
paint the filler florals, a few different varieties, including berries, just
so you can add them in your beautiful compositions
to your roses or your ponies or your hydraners or whatever other big
flowers you paint. So in this lesson or class, I'm going to take you step
by step on how to paint some key filler
florals to brighten up and enhance your main
florals in your compositions. We are going to be going loose. We are going to be going with the flow and learning how to just add that extra
little loose detail around your main composition.
3. Class Project: For this class project, I
think it would be fun if you head on over back to any
of my previous classes, either the big and our friendly
loose watercolor florals or the how to paint
loose watercolor roses, learn how to paint
those key flowers and then hop back on here, learn how to paint
your filler florals, pick your absolute favorites, maybe even throw in
some of those berries because I love adding berries. They have such a
cute little touch to every composition
that you add. Make it your own composition and that's going to be
our class project. Now, if you're someone who is
worried about composition, and this is literally
your first time even coming across me or
any of my lessons, I encourage you to check out
the other two lessons that I mentioned because
in those lessons, I also talk to you
about composition. Feel free to pick up
the tips from there and really put all of this together
and do something for you. Once you're done, add your
beautiful expressions of art over in the
gallery so we can all take a look and and at them.
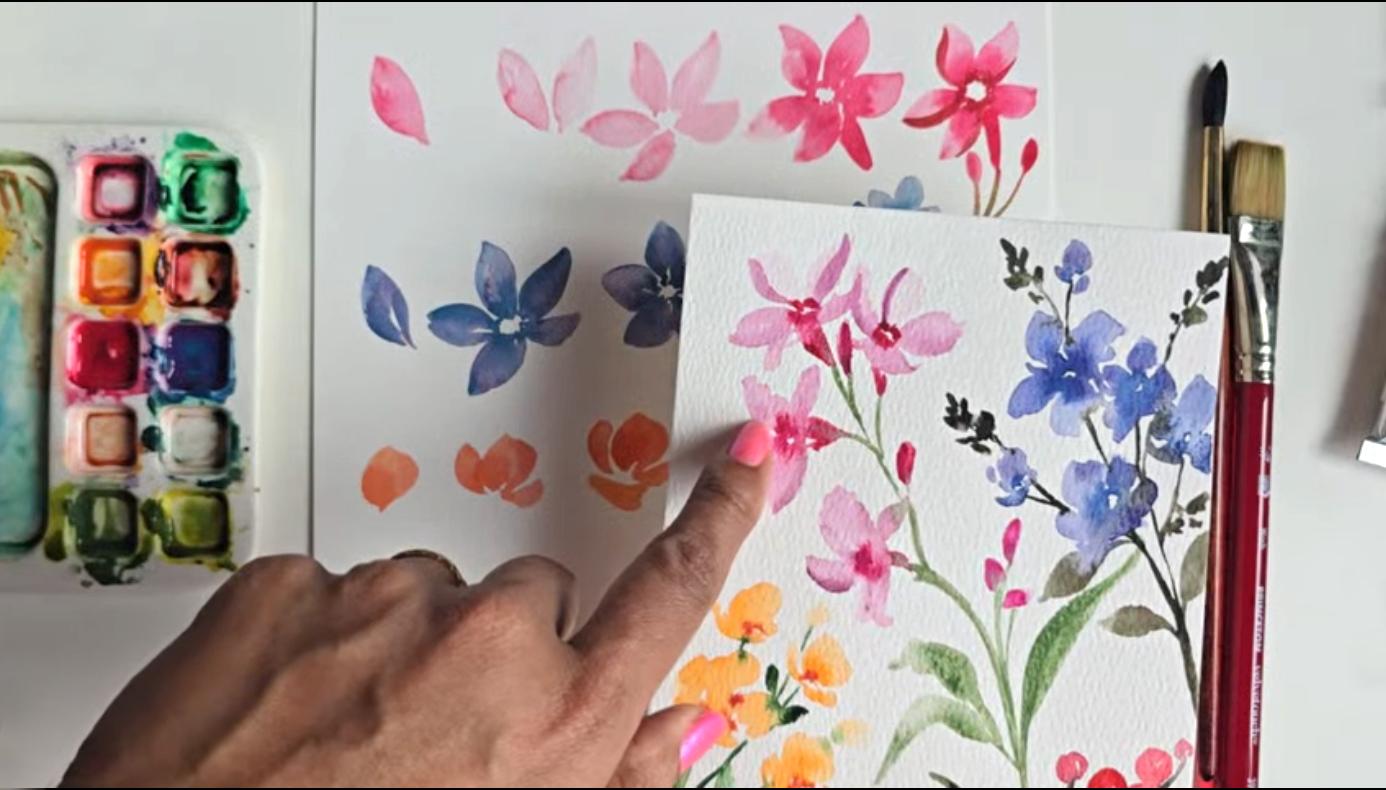
4. Part 1 - Easy Pink Flowers: I'm going to be using my number four Princeton
velvet touch and some of the
primary red magenta. I'm starting to activate
that color in here and I want a very muted
version of this color. I'm going to make sure my
brush has a ton of water. This area seems to be a little
bit dirty for me to mix, but the mixture I'm aiming
for is 30% color, 70% water. That is my go to mixture. Getting some of
that on my brush, we're going to start off. The petals are
going to be more of the pointed petals and I'm
going to walk you through what that shape would look like first and then we'll enhance on it and create more petals and then I'll show you what
the full flower looks like. Here we go, starting off
with that light color, using my number four brush, I'm going to use
the tip of my brush to press down and drag, very much similar to a leaf. Then dipping the tip
of my brush in water, I'm immediately going to
go back in, press down, drag to create another
enhancement to the petals. This just makes it thicker. This is also the same technique
for my two stroke leaves, and those are essentially leaves that I want to be rounder, fuller looking or
thicker with wise. We're doing this
that I just that I just demonstrated
and we're going to enhance by repeating
this five times. Here we go. Getting more water because I'd like it
to be even lighter. We're going to enhance this. Starting with that first petal, getting water, doing
that second side. I'm going to get a little
bit of the color this time. I'm going to start from out
here. And close that up. Now, if you find it hard to keep track of the white space
to keep in the middle, what I would suggest doing is, I'm going to show it to you in this third step is add a
couple of strokes around, not strokes, dots
to create a circle. Then start your petals. Here's one. Here's another and we're touching
the little dots. Then I'm going to do
another one here. Feel free to turn
your sheet around if that's easier. We've got three. We need one more. I'm almost making this a little
bit shorter because this last one we're going to
make shorter as well. It's to show that the
flour is slightly tilted. I'm going to start off
with the dotted circle and then getting some water
down paint on my brush. I'm going to start
painting in my petals. We're taking all these
steps and joining them to create our finale
or our end result. I'm going slow, but once
you get the hang of it and you know what you're
doing, you know the strokes, you'll find yourself going
faster or maybe even slower, but you'll be timing
yourself because by then you'll know how fast things dry and
all that good stuff. Here we go that's
the full flower. Then once it's done, the center should still be damp. That's how fast we need to go and then we're just
dropping in more of that color to give us that
nice dark to light effect. I love my dark light
effects within my flowers. It's because the painting
style is so loose, it's the color
variations that really emphasize and build up with showing the viewer
exactly what's happening. Now, we're adding
a base to this. I'm taking as much
color as I can. I'm painting this in. It's this longer portion to the flower at
the bottom here. Now I'm not quite sure what
this flower would be called, but I've seen a version of this, and I ended up painting it. I loved it and I said, I
have to have this as part of the Tuscany watercolor retreat
florals that we paint. This is the entire flower. Now I'm going to do one last
finished version of it. I'm going to do that
over here and I'll have the green extensions
to it as well. Let's go. Dots to form our circle, watered down version
of our color. If you can go lighter
than this power to you, I always say go light
because then you can always build up on the dark. But once you go dark,
you can't quite reverse that. That's
my thinking there. I'm almost going sideways to create these last
two petals here. Then I'm getting more color, less water because when you add more color to this area that
is already damp with water, you get a darker result. If you add more of a water down color or mixture of this color
on a water base, it'll be something
more transparent. This submerged into the
background and blended. You can always go back in and add darker color to enhance. Similar thing is happening here. Again, you can wait
for it to dry up completely and add
it or add it now. It's just one of the
things you learn to do as you go along in
your watercolor journey. Last thing I'm going to
do is add the last sorry, not last second
last thing is add the little triangle portion to the flower at
the bottom here. Then washing of my
brush, take a green. I'm going to take I'm taking
a mixture of the sap green and the green gold because
I love that color. Then I'm going to extend
this while it is damp, notice how that red or the magenta immediately
goes into it. It's such a pretty effect. It's one of those
loose floral effects. Then I'm going to just add a couple of strokes
like this here. I'm going to show you
how you can create this flower or an idea of how you can paint them along with little
buds like this. That's all I'm doing is
adding two little buds, you can go light or dark, it's entirely up to you. But this is essentially what this whole flower will look
like from start to finish. I hope this was helpful. I would recommend to
practice this quite a bit. Once you get the hang of it, then you're able
to progress and do more once you are able to
get this portion down. Here's two things I
want to add that will help you enhance the
florals even more. This is damp right now. It's not wet because
we've waited for a while. I've been chit chatting
and all that good stuff. If you ever wanted to add little embellishments
to the flowers, by embellishments, I mean more
of a light shadow effect. Take some of the dragon's blood, mix it in with some
of the magenta, so you get a darker
version of it. Then using that mixture just
on the tip of your brush, taking a whole bunch,
just a little bit of it. You can just add little
strokes like this within your petals at the side
of your petals rather. This is to show a little bit of a fold
maybe in your petal. It doesn't have to be
in all of the petals. I can just be in some. This is probably folding
a little bit upward. Then if you wanted
to drop in some more of that darker tone because now you're building up on what we've already learned layering, which really enhances and adds some beautiful depth
to your flowers. Here we go. Just
another little tip if you ever wanted to
take it that extra step further and make it
a little bit nicer.
5. Part 2 - Easy Blue Flowers: For our second flower, we're going to mix
some of the blue, which is the cobalt green blue, and we're mixing it in
with some of the magenta. Let's get a purply indigo color. I'm getting some of
that color here. I'm going to mix it here because this is
exactly what I had in this spot a while back. Then just roughly
washing off my brush because I don't want to
contaminate the magenta. I'm going to get some of
that and blend it in here. And then obviously we
don't want a lot of color. We want to blend this
in so that we get a nice watered down
base because we're doing loose romantic
looking watercolor flowers. This is a lot of
color right now. This is going to last me
for quite a bit beyond this demonstration and
lesson. So here we go. Using my number four again, we're essentially
going to be painting the flower just like
this and without the base just in a different
color and then we'll be adding little buds to it. Here we go. You guys know exactly how to do
these flowers already. Let's zoom by these
first few steps. Pressing down, trailing off, pressing down, trailing off. You can leave a little bit
of white space like this. I always if I'm able to, I don't try and fill it in. I leave it as this because I think it's such
a pretty effect. You can take that
a step further. Let's start doing our
little dots all around. To start from out. Now I know my brush doesn't
have enough water, so I'm going back
in to get more, getting more water,
getting some color. I'm going to go ahead
and add more petals. Now look what happened here. There's a nice blue line. What happened there is I dipped the tip of my brush in water
and I got a little bit of that blue while the rest of my brush has the
mixed purple in it. That's what's given
me that effect. If you're looking for
something like that, that's how you do this
or that, however. What I mean? Then
one last petal here. Again, leaving it
simple, loose and fun. I'm dropping in some of that unmixed blue
into the center, just so it gives me that
soft bloom and there we go. Let's just do it again and this time, let's do it quicker. I'm taking the water. I'm really watering down
most of what I have. I'm going to do my
rough little center, and now I'm going fast. I notice doing my last step of dropping the little
color in the center. If you notice, I
didn't drag my petals as long and so I got a slightly different
effect, which again, I want you guys to get
used to the idea to pick up on these little nuances
and these little things that are slightly
different but can give you some really great results or results that look
entirely different. So if you don't drag as
much, you get shorter, stockier looking petals, which could be a completely
different flower. So really depends
on your preference. Run with that. Now, let's do this one more
time, and this time, I'm going to add
those little buds or flower baby flowers that I was
talking about. Here we go. Pressing down, trailing off, trying to leave
some white space, trying to add some nice
contrasts in there. Really watering down my color as well just to get
those nice effects, trying to leave
some white space in between and then getting some
dark color by dark color, I mean more color, less water and just dropping
that into my flower. We've got that flower
now say I wanted to embellish and enhance
this even more. Let me get a little
bit of green. Let's just create a stem. Let's just say our baby flowers
are coming out from here. Let's say we've got about
three flowers for the leaves, just because we've
got some green here, let's do a couple of leaves doesn't have to be
super complicated. It can just be you repeating the same steps that you
did for your petals. You're just adding that to
add a little bit of greenery, some nice fun embellishments
to your flower. Something like that,
super simple, super easy, then you're creating your
baby flowers exactly like this on a smaller scale
on a looser scale. I like to do one
stroke, two strokes, dot around, and then just add little strokes
like this all around. Then just like we add that added darker
tone to the center, I drop that in like this.
Again, one more time. Let's do it again. One, two, and I covered
up that area here. Then dropping in some of
that color right there. So Perfect. Now, in times where
it looks like this, it's not quite blooming in, just wash off your brush, dab it on paper towel so
it's damp and not wet. It doesn't need to have
tons of water on it. If it has a lot of
water on it and you're trying to sweep swipe, lift color off, then
you're just going to be adding more water on an area
that has a ton of water. Make sure it's damp and not wet and then you're lightly just either blending the color in or lifting the color off and
dabbing onto paper towel. Whatever suits your
fancy, do that. I've just given you a
very important tip on how to successfully do that so make sure you
keep that in mind. Then for this one, because
it's covered up over here, I'll just do a light
little bud like that. It can have little
buds exactly like the pink flower and you are on your way to creating these cute little sprigs
of pretty loose flowers.
6. Part 3 - Easy Orange Flowers: So the next flour we're
going to use is going to have some of the Indian
yellow mixed with magenta. I have some magenta here, I have some Indian yellow there. I'm just going to take some of the magenta and mix it in
here with the Indian yellow. It gives me this
beautiful orange. Control how much mixing
you do because if you want it to be more
orange or, um, what's the other More
orange or yellow, more yellow or more
of a peachy tone, then you need to
make sure you're controlling the mixture. Again, I'm watering
it down a lot. These next flowers are going
to be less work, I think. I think so. I really like them. They're always my go to flowers, very watered down and you're holding your
brush sideways and the first petal starts
off by pressing down like this and then turning
curving like this. Holding your brush this way, first you're let's do it again. Pressing down and then
curving to close it off. Then I'm dipping the tip
of my brush in water. I'm going to add one stroke
here, another stroke here. Let's do it one more time. Holding your brush
leg so pressing down. Curving to close that up. I want that nice
beautiful shape. Dipping the tip of
my brush in water, I'm going to lightly press down for a thin petal here
and another one here. Then getting a little bit more color
on the tip of my brush, I'm going to close this off
by doing a curve like this. That's our loose flower. Let's do it one
more time. I keep getting lots of water
in here because I really like these
flowers to be light. Here we go. Pressing
down. Closing off. Let me get a bit more
one to the side, another here, and
then closing it off. Feel free to really get this nice frilly
edge if you need to. Then getting some of
that darker color, dropping that in the center. Well, I always do this, just to get that dark
to light effect. That's how I love
my florals to be. Especially if I'm aiming
for light versions of it. So that's how we get those nice rounded
shapes because we're using the fold span of our brush and we're really
curving things around. Over here, we got some
nice pointed tips because we ended on the tip. Over here, we're ending more at a slant. Let's do it again. This time, I'll do a couple of different flowers in a branch so you can see what
that looks like. Here we go. Let's start
off with the first one. Dropping that color
in the center, dipping to get more water.
Let's create another one. I'm really painting just
from the side of my brush to give me those
beautiful rounded curves. That's how I'm getting more rounded curves than
anything else. Even over here, I
let that one go, but you can get rounded
curves pretty much all over if you just swipe
your brush from the side. Let's do little bit up
here, another one up here. The buds will be your friends, so just add them
everywhere you can. Adding another flower here. Feel free to add five
petals if you want. In which case, I'm just adding two little swoops at the bottom. And then just
enhancing the center. Or you can do this once
things have dried up as well. That would be more of a wet
on dry situation happening. Then once that's done,
washing off our brush, getting some of our green, let's attach these guys. Again, you need to make sure your brush has a nice
fine pointed tip. You're not touching too
much of the orange areas. I love what's happening there, but it doesn't have to
be intense or crazy. Oh. And see how these are seeping
in, that's okay by me. It's not anything
crazy or intense. This I'll probably take another brush since
this one's still being used and just lightly take away or move
away the color. Same thing here. This is where
you dab onto paper towel. I like what's happening there. Again, I'm going
to leave elements like that exactly as they are. It's pretty. Then
like I mentioned, for your leafy action, just do little sprigs like
this and add little leaves. Drop in that second leafy color if you want to just to get
a nice variation of tone. I always suggest that. This is why I like to
have two different kinds of greens available
when I'm painting. There we go. We have our
little sprig of flowers.
7. Part 4 - Easy Berries: Last thing we're going to do is doing elements that
look like berries. Now for these berries, we're going to use the Indian yellow. Feel free to use throughout
all these flowers, actually, feel free
to use whatever color suits your fancy. I'm just using the ones
that I had planned specifically with pink leading the way because you all
know I love my pink. Again, with the berries, we're just going to be
doing a bunch of little circles clumped together in different varying
color mixes. By color mixes, I mean, using the one color but
different variations of color to water mixture. Here we go. I've got a water
down version of that yellow. I'm starting off. Now, this to me is a little bit too dark, so I'm going to get
more water on my brush. I'm going to create a
little circle like that. What I want happening is getting as light
color as possible, more water, less color
and closely creating these little circles to one another so that the
colors seep in. Now, in the past, what I also like to do and feel free if it's
too complicated, do not try it, but if you
feel like you want to, I like adding a little
bit of a darker color. For instance,
dropping in some of that orange in between
over here just to give me little shadow effects
between the berries. Now, over here,
it's not moving as much because there's
a lot of water there. But essentially,
if there wasn't, it would bloom in really
nicely giving you that nice little glow
to your berries. Something like that. Now at this point, what I can do is washing off
most of the color. You can use whatever color
is left in these guys to pull by creating more
little berries below. It just trickles down from the top all the way to the
bottom, which is beautiful. This is what you want, really. Let's do this again. Water down version of yellow. I'm going to do my
first little berry. Then just to keep
things interesting, I'm going to get a little
bit of that second orange. I'm going to create my next
one or the mixture that we created for this here and I'm going to place
that one right here. You can see a little bit
of blending happening, not overly too much, and then I'm going to place
another one at the top here. Now, I love doing
these when it is damp because it gives me such a nice translucent
effect like this. I'm going to get some of that
orange, drop that in here, drop it in here, drop
it at the base here, maybe dab a little
bit more in it. You get some nice little
variations going on. This is how you can
essentially get that nice trickle within. Then obviously, I said, take your damp clean brush and blend it in if you get
those little rivers happening. Now, from here, you can
either choose to create more or just get
some of the green. I like to join it like this. And you have a beautiful
little loose sprig of berries. That's one way to do it. Another way to do it is, I don't know why I
washed my brush, I should have just left it. You can create your stem first. And this way you know where
to place your berries. I know in the beginning for me, I found it very hard
to figure out where the berries would go to
really give it nice flow. I would create my stem first and then go in and place
my berries like so. These can touch a little bit because they are two
different colors. Look at that, look
how pretty that is. Get another one down here. You can drop some of
that orange right there, right at the base, and then I'll do another one
smaller, doesn't have to touch. You can do some in
between that don't have anything to attach to. That's also fine. Then let's one more here. Now as these are drying, you can see how
that's seeping in. I'm going to get
some of that orange, but not very water down
and just drop that in. Or move the color around. Then this way, when it dries up, you'll get a prettier effect. We're going to allow this to dry and I'm going to come back and give you one more variation. Actually, while it's drying up, let's just paint the variation because I don't
think we need to. Say we do our berries. I'm just going to do a sprig
of three and taking some off the green Okay. Now, we wait for it to
dry just a tad bit. But what you can do is you
can wash off your brush, get some of that dragon's
blood because it's a beautiful brownie red. I'm just taking a ton of
that color, not a ton, most of the color on
the tip of my brush, and it's more color, less water. And this area I
know is still damp, so I'm just going to drop a
little tiny dot at the top. So you can either leave
space in between the dot and the berry or here's the
space, here's no space. If this happens, clean damp brush and sweep
off the color, dab it onto your paper towel, clean this off as well,
and there you go. You've got berries.
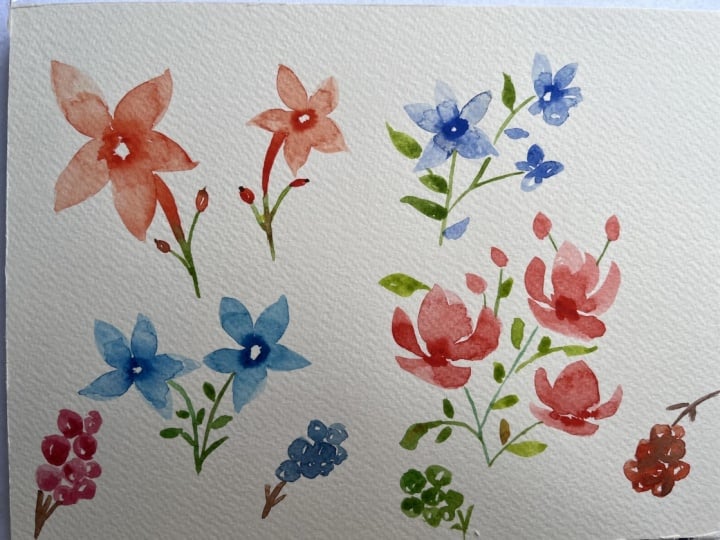
8. Part 5 Easy Florals: So here's all the flowers. I wanted to show you,
three different flowers and the berries, which would be helpful
when you want to just sit down and paint,
maybe create a wreath, maybe create a bunch of flowers or maybe even use these to be your embellishments
or your fill of florals to your roses or ponies. Now, another variation or an example that I can show
you is something like this. This is something you can do with just the
plain one flower, just like a long sprig and we've already done leaves,
so you know how to do those. And get these beautiful
results like this. Same. You can see why this was a completely
different color, it's different brand as
well to the magenta. But you can get the magenta
like that and do it that way, or you can get it darker
if you prefer darker. Now with the blue ones, this is what mine looked
like when I did that there. This is what mine
looks like when I'm instructing you and telling
you how to do things. You can really go loose. Look at these ones here too. These look more intentional, these are a lot looser. Sit down, take your time,
look at the berries here. I went with small or a
small number of berries, but you can go longer
with more berries. I hope this is inspirational. I hope you can take
inspiration from this, learn from this, and
then paint your own.
9. Conclusion: All right. If you're
watching this video, that means you have come
to the end of this lesson. I hope you had a lot of fun and I'm so glad you
took this time for yourself to sit
down and just let loose and paint
loosely in watercolor. If you're not pleased with
your results, don't worry. What I always like to
say is take a step back, go away, do something else, come back, maybe
even sleep on it. Come back, look at it with
a fresh pair of eyes, and I promise you, you will see it very differently
from the first time. You might even learn
to like what you see. You're even going to pick on what you could do
better the next time. I encourage you if your first
time wasn't that great, do it again because Rome was
not built in a day. Forget. Lastly, post your
work in the gallery so we can all see
your beautiful work. I would love to
hear or read from you what you learned
about compositions, what you learned
about filler florals. Be filler florals, ultimately, I do feel are such an
underrated element to each composition, but they really do make
your main florals shine. Don't sleep on this one. I hope you had a lot of fun
with this exercise. Thank you so much for
spending time with me. If you're looking for
more watercolor fun, don't forget to join me over on my YouTube channel and
follow me on Instagram. Thanks, guys, and I'll see
you in the next lesson. Bye.
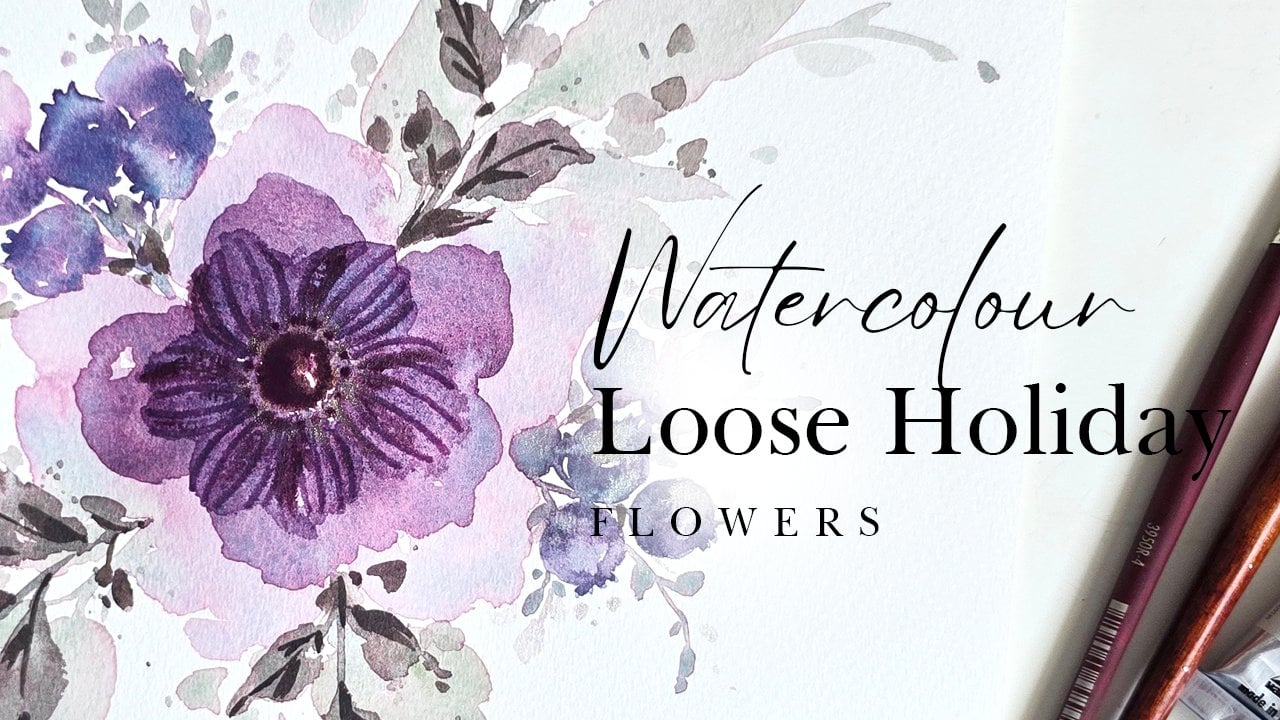
 Clarice Gomes, Go with the Flow in Watercolour