Transcripts
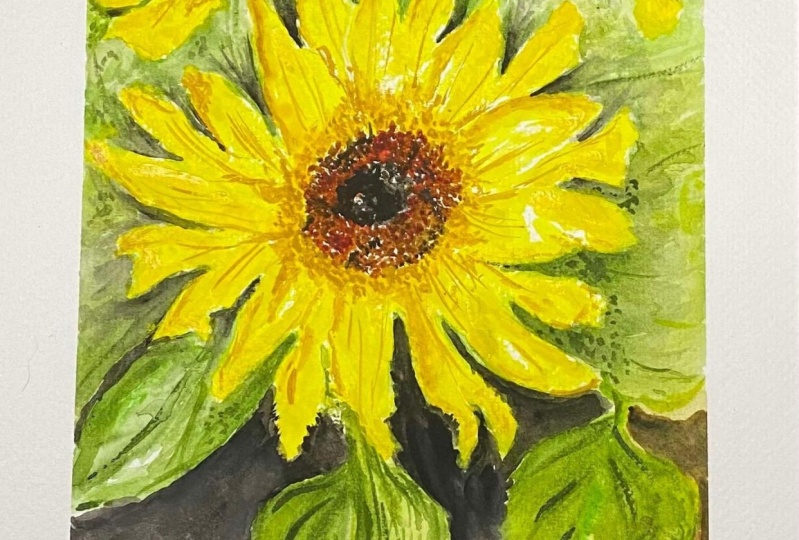
1. Intro: Do you love sunflowers? I have tried painting it as a simple illustration. Different watercolor doodles. A single flower that requires masking, and even a whole sunflower field. But the style that captivated me the most is painting it loosely. Hi, beautiful people. This is Bianca, an aspiring watercolor artist from the Philippines who loves to teach. And I've been painting with watercolors every single day for two years now. In this Skillshare class, I'm happy to share with you a simple color palette to create this painting. Different watercolor techniques. For the smooth back ground. Creating textures, adding complexity on your artwork. And a simple composition technique to help you decide with your hard and soft edges. So let's grab our materials and start creating a wonderful art. See yah.
2. Palette: Yellow, green, blue, and brown. These are the colors that we'll use to work on our loose sunflower watercolor painting. Yellow for the base color of my petals. And I'll mix burnt sienna or orange to add variation. Burnt umber for the center of the flower. And to make that even darker, add Ultramarine blue or any blue that you have on your palette. You don't need the exact colors that I'm showing you here. But what you'll need is to swatch and decide on the palette that you will use. Especially for green. I'm using a mixture of Viridian hue and permanent yellow for that lively in green. Then add Prussian blue for the darker shades. I forgot to include it here, but cobalt green will be used for the background color. Here are the colors that I have prepared.
3. Watercolor Techniques: Next, let's review some watercolor techniques that we'll be using for our painting. First, softening and edge. Directly paint a shape on your paper, rinse your brush and soften an edge. In other words, hard edges are defined. And soft edges are kind of blurred. If this is the first time you're doing this, try out different brushes and see which one works best for this technique. In our painting, we'll use both hard and soft edges to add interest and balance to the composition. Splattering. A small brush is ideal for this. I am covering the area. I don't want to get splattered and tap my brush to produce this splatter marks. The effect is subtle, but it's a useful technique and adding texture. Wet on wet. The most important technique for this painting. Wet your paper first with clean water. Drop the colors - base colors for the petals and the background. And the key thing here is timing. If you don't want the paint to spread too far, then the paper should not be too wet. This technique heavily depends on your paper. So if you're using a student grade paper that is not 100% cotton, like Canson and Fabriano. They dry pretty quickly. So make sure that your color mixtures are ready after wetting the paper. The first layer of this painting is done with wet on wet technique. Thin lines. If you are one of my frequent students, I always advice practicing painting thin lines. Even if you're using a small brush, you should know how much pressure to use in painting thin lines. We'll use this technique for the flowers and the leaves. Leave out, or negative painting. I'm trying to leave out the veins in my leaf here. And this adds interest and a bit of complexity in our artwork. You may use a smaller brush if you're more confident in using it. I was able to do this technique in this leaf of my sunflower. When all set, let's start our painting.
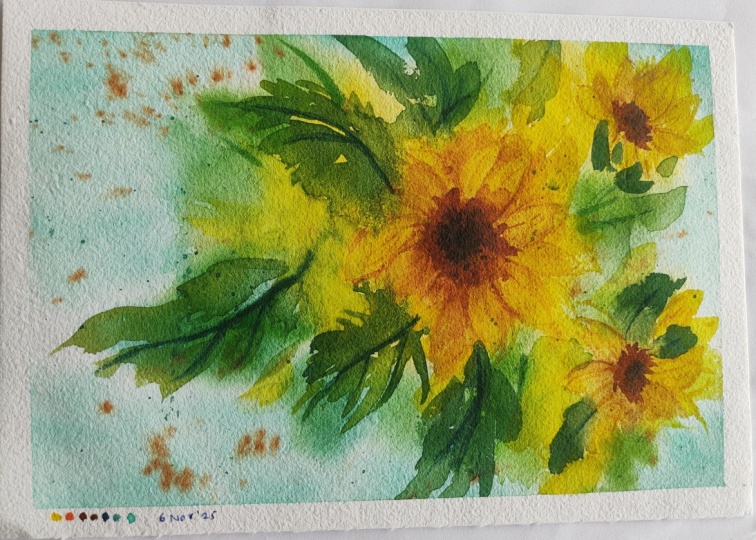
4. Background: I'll start with a super rough sketch for my flowers. One small circle for the center of the flower, and a bigger line as my guide for the petals. This will help me decide where to drop my colors later. For the other two sunflowers, I'll just mark them with distorted ellipses. Like what I mentioned earlier. We'll use the wet on wet technique for the first layer. Start by wetting your paper with clean water and follow the guidelines. Not too strictly - just to help you decide where to drop those colors. We're aiming for this look. But since this is wet on wet and the movement of the pigments on what paper can be unpredictable. It's okay if you achieve a different look. On my end, that color at the center of the flower spread farther than I expected. But I'll leave that be. If you'll notice. I'm also dropping my colors by painting the rough shapes of the petals and the leaves. I'm using the same colors I have chosen when we were just preparing for this painting. If I haven't done that, I would have picked colors that I am not confident if they will work together so well.
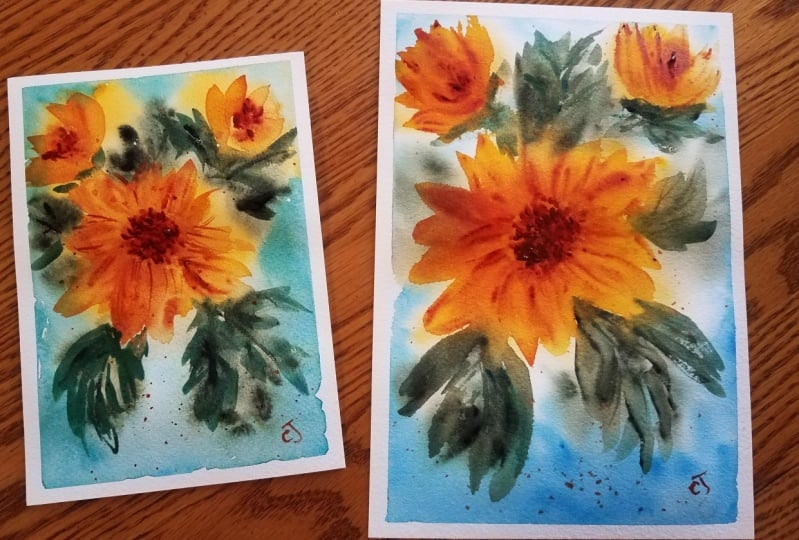
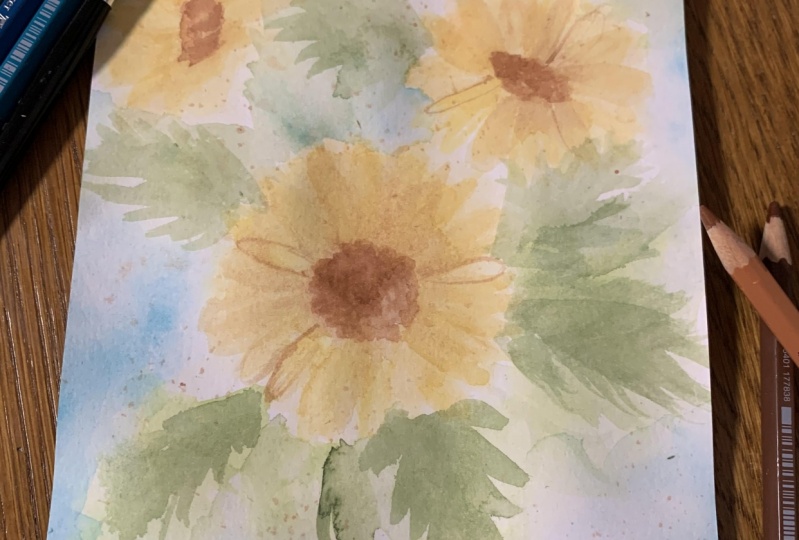
5. Defining the Flowers: Once the first layer is dry, I'll sketch the outline of my flowers. Don't worry about those pencil marks. Let's leave them to become a part of the final painting. This is just a rough sketch. And though I am looking at my reference photo, I'm just using that as a guide for placing my petals. Remember, this is a loose painting, so no need to get yourself too worked out on copying the reference photo 100%. Once I'm satisfied with the outline, I will now decide which edges or which parts would be hard or a defined by following a simple pattern - zigzag. Notice how our painting have defined petal shapes and some are left to blend with the background. I'm just following the zigzag pattern. Go ahead and use the hard and soft edges or defined and blurred edges. to paint the sunflower petals. I'm using the same color, permanent yellow, and mixing burnt sienna from time to time for color variation. I'm checking my reference photo to help me decide which petals to paint and which ones to leave out. That zigzag pattern is a simple way to make sure that you have soft and hard edges placed alternately. But feel free to define more petals as you see fit. You'll notice that I'll define other petals that are not following that pattern simply because I want to define them. Since this huge flower in the middle is our main actor, no need to use the zigzag pattern on the other smaller sunflowers. But I'm not copying those two exactly as how the reference photo looks either. I'm using burnt sienna and burnt umber for the center of the sunflowers. Remember to keep this center darker than the petals as they will help make our florals look like sunflowers. I'll continue working on the petals until I'm satisfied. I won't worry if they don't look complete right now. Since we will still add leaves and they will help define the shape of the sunflowers.
6. Painting the Leaves: Just like how we practiced, I'll paint and the leaves and use them to define the flower shape further. This is my permanent yellow plus viridian hue color. I'm not even copying the leaves from the reference photo. But I did observe their shapes and leave out the shapes of the veins for added complexity. Don't worry if you're not able to negatively paint the veins, you can do that with the other leaves. Remember to mix in dark blue colors for variation. To avoid a monotonous look on the leaves, I'm using Prussian blue for that purpose. Just like how I did the petals. I will soften some edges and let them mix with the background. Don't forget to add smaller leaves for the other sunflowers. I am painting them with one or two strokes for a fresh and dynamic look. You may choose to follow the reference photo if you want. As you do your leaves or paint some more, and use your artistic license and creativity. I'll continue adding more leaves and negatively painting them are avoiding the petal shapes to make the sunflower pop out even more.
7. Adding the Details: We're now on the last stage of our painting. To balance this composition, Let's add details. With quick dabbing motion. I'll add texture at the center of my sunflowers. This is again my burnt sienna, and to make it darker, I'll drop burnt umber plus, ultramarine blue. I'll do the same for the smaller ones. Details for the petals with thin lines and yellow, orange color. Let's make them look more complicated with these details. Using yellow and yellow orange alternately, depending on the layer that I'm painting on. I painted outlines for some of those petals because I felt like adding them. Generally, you would want these lines to be darker. I am also following the curve as I do this lines, it will help define the shape of the flowers more and add volume to them. Painting thin lines for the veins of the leaves. I'm just doing half of each for variety splattering, but this time on a dry paper. Splattering while the paper is wet and while the paper is dry have different results. And more details at the center. To finish this painting off.
8. Final Words: Here's our sunflower painting. I hope you enjoyed this class as much as I enjoyed making this for you. I would really appreciate if you guys give me a feedback for this class. Just go to the Reviews tab for that purpose. I'm also looking forward to see your version of this painting. I encourage you to share it in the projects and resources tab. And this time, I will give my feedback. For comments or questions. Feel free to start conversations in the discussion tab. You can also check my other Skillshare classes, and I'll see you on the next one. Happy painting.
 Bianca Luztre, Watercolor, Productivity, Color Mixing