Transcripts
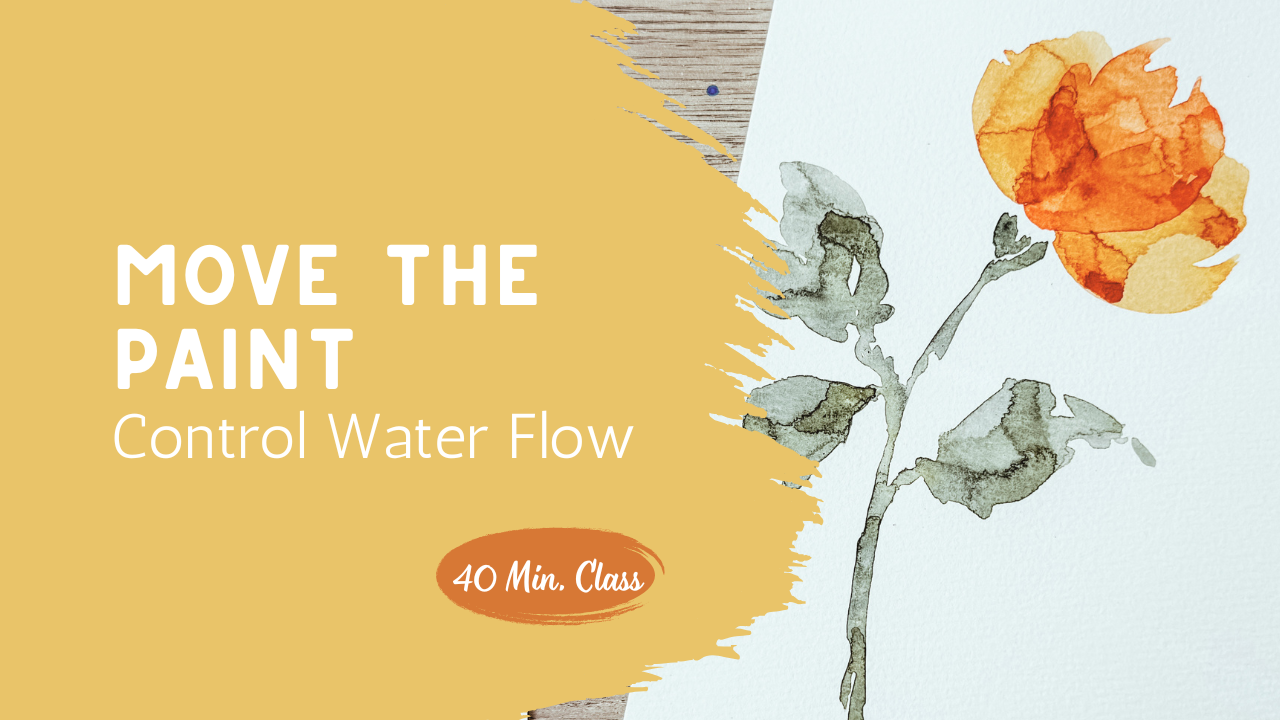
1. Move the Paint: Loose Watercolor Flower Introduction: In this class, we're
going to create a loose watercolor
flower by learning how to move and shape very wet paint in a
simple hands on way. As you're watching
this introduction, you can see how the paint flows and shifts
across the paper. That movement is exactly what we're going to be
exploring together. Instead of trying to
control every brushstroke, we're going to place
a generous amount of water and pigment into H petal and then
guide it using airflow. I'll be using a heat gun
to gently push the paint, dry certain areas, and create soft edges and natural texture. You'll see how
drying one section, while leaving others
wet allows you to shape the paint and build
depth without overworking it. Before we move on
to the final piece, you'll take some time
to experiment so that you can really understand
how the paint behaves. Then we'll create a simple practice flower and from there, you'll move on to
your full class. Step by step will all be taught. This is a really
approachable way to learn watercolor because it gives
you a different control. You're not fighting the paint, you're working with
it, guiding it, and letting it do
the work for you. It's all about experimenting
and having fun. By the end of this class, you'll have finished
a floral piece and have a much better
understanding of how to move paint and create soft natural
effects on your paper. Let's get started and
enjoy this process and find out what it's like to
move paint around on paper.
2. Understanding Water on Dry Paper: Going to be learning
about watercolor and how it moves on paper. This is one of those
experiment classes where I want you to
just experiment with water and pigment
from your paint and your paper and your brush
and just play with it. See what happens
because there are so many different things that
can happen with watercolor, that if you are not
actually aware of all the different
techniques of watercolor, you might be missing out
on some opportunities. So here I want you to see how very loose I
have my watercolor. I'm just using this
little sauce dish just so that I could
show it to you, where I put a lot of water and just a little bit
of paint in here. So it's really drippy because what we're going to
be doing to start is experimenting on this
little scrap piece of paper to show that watercolor goes down and it's
going to stay in that spot. Watercolor attaches itself to the paper and only moves
where the paper is wet. So now that it's there, I can pick it up and you
can see that I'm tilting my paper sideways and it's
all run down to this side, but it's not continuing. I can run it that direction and you can see that it's all
going to run to that side, but it's not going to
continue to roll down. See how it moves around, but it never leaves
the wet spot. Now, if I were to put this
straight up and down, it might roll just
because of gravity, but pretty much I have this almost sideways and it
is not moving at all. So that's the first thing
I want you to play around with is putting
down enough water with paint in it and rolling
it around so that you can see that it is going to
stay exactly in that spot. Now, the next thing
that we're going to do after you've
played around with that we're going to talk
about how this dries. Now, because this has
so much water in here, that might dry in an unusual way where it
might create some blooms, it might dry uneven. So if you're not looking for
that style or that look, then this might be something
you would want to avoid, which is important
to know because then you might want to make sure that when
you are painting, you are spreading it out
and making it thinner. So that it is not as wet. And when you lay it on its side, it's not going to
roll around at all. So this has much
less water in there. It's the same amount of pigment. It's just that I didn't have as much water on my brush when I painted it down here and you can see that
it's not rolling around. So if you just let this dry, you might get a heavier
edge over here. And if you dried this with a tool like this is a
heat gun that I have, this is going to
dry much smoother, and this will dry with
some lines in it. But we are going to use
that technique of drying it with lines to our favor
and our benefit today, and it's actually
going to be used to create our final artwork. So I want to show you
what I mean by that. It's going to be a little
loud, so I apologize. I'll try to speak over it, but I want you to
see what happens when I use a hair dryer. Well, specifically this
heat gun because it has such a more force because the air is really concentrated
coming out of here. So as I dry, I'm going to be pushing that
paint over to one side, but you're going to
notice that it's not going all over because
I'm going to keep this hair dryer up high enough that I'm not spraying
the paint all over. So this is going to come down to you're going to need
to really practice with how close you can put it and how far
away it needs to be, depending on the technique that you are trying to achieve. So if you're looking for
it to spray all over, then you're gonna want to put your paint this
tool down closer. So I think it's easier
if I just show you. So I can move this paint around and I can dry
this spot right here, and then I can come to this
side and I can move it back. But do you see how
it stopped and it didn't come down
into the dry area? Because it only goes into the
spots that are already wet. Just like when we
were practicing it earlier and I
could pick it up. I only wants to go where
the paper is already wet. If you get it too close, it will move around
just like you just saw. So you have to be
careful with it. I really just takes a really gentle touch where
you can move that around. And then if you feel
like you have too much, you could always pick up
some of it with a dry rush. I'm going to dry that again. So now I have that area completely dry and
this one is dry. And you can see how
that one created this texture where
this one did not. This one just dried naturally. And this one created. Okay, so now it's up next to
the camera so you can see it really created all these
little textures and ridges, which is really interesting. And when I had done
this for, like, a practice and I was just
playing around with it, I noticed these textures that it was creating,
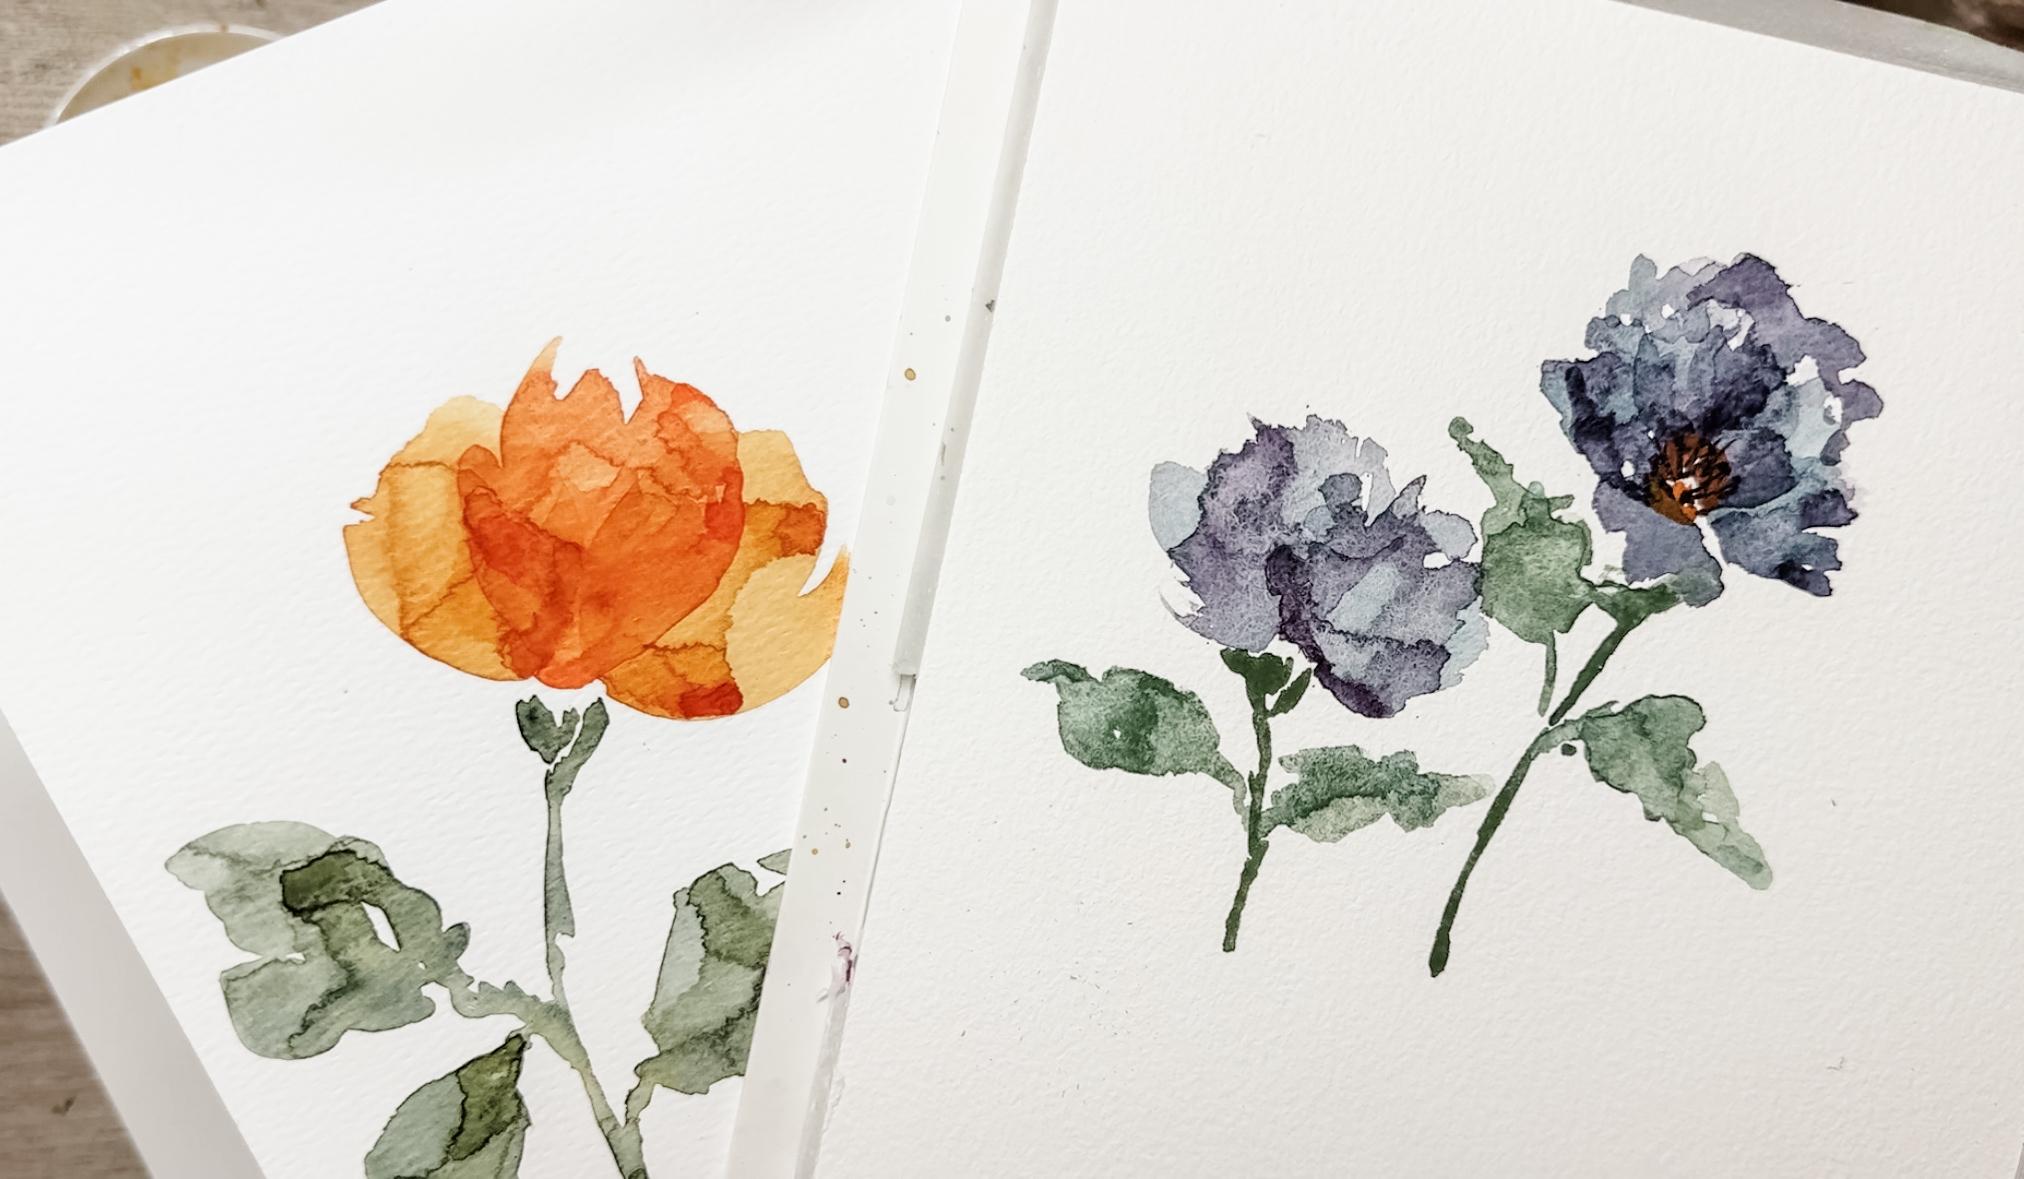
and I thought, Wow, that could really make a beautiful flower arrangement. And that could make a beautiful like almost petals of a flower. Here's another one that I
did that I actually have framed and hanging on my wall. This is just so
beautiful and I love it. It is framed and matted. And I really just use two or three different
colors to make this effect using that same hair dryer technique
that I just showed you. So this is what our class
project is going to be by using a heat tool and our very wet paint and creating this beautiful
flower arrangement, and you can choose whatever
color you want to do. So after you have
practiced that technique, and I really recommend
that you do this a couple of times on
a piece of paper, after you have figured
out how close to hold your heat gun and
have practiced that, then come on over to
the next lesson where we're going to paint
something right on here, using our heat gun and making a really pretty picture as a sample before we get
started into our final class.
3. Practice Flower: Moving Very Wet Paint: Come back. I'm so
glad you're here. We are going to
practice this next one, and we're going to
put it into a flower just so that you can really see how this is going to come together and give you
a chance to practice. Move these here so that
you can see all my colors. You can see that these are
really loose lots of water, just a little bit of pigment. Okay. Okay. I do have a rag near me so I can
dry that off if I need to. I'm going to be making one. I'm going to put we're going to do each petal individually. So I'm going to fill
my paint brush up. Now, this is a quill brush. This is a size five, I think, something that's a
nice big size brush that holds a lot of the
liquid and water in here. All I'm going to
do is make kind of like a petal shape.
Just make one. You can see that that's
a lot of water on that, that's moving around a lot. I do have it taped down, um and I would recommend that you tape it down just so your paint your paper
isn't blowing all over. And then I'm going to
using my heat gun. I'm going to move that petal around starting up high so that you don't
splatter it all over. And you're going to
make dried spots. So I go just move my tool closer and then further away until that's completely
dry in that spot. And I'm gonna choose
another spot to get dry. And as soon as that spot's dry, the paint will not go
back over into that area. So I'm gonna come
over here and make a dry spot and move it around. This is where your
artistic fun creativity can come in because each one is going to be
completely different, and there's very little you don't have a
whole lot of choices. It is just gonna be
what it's gonna be, and they're always
gonna look different. You're never going to duplicate it again to be exactly the same. So you can see that I'm kind of chasing that paint around with my tool and directing
the the air. I'm just kind of drying
it off a little bit. You see how that's happening, and I'm creating all these
different fun variations. Now, if I get to a point where I feel like there's
enough paint on there, I can always lift it up
with my paint brush. I'm careful very
careful that I am not blowing the paint all
over the entire page. But I am very
intentionally moving it. I feel like I have enough. I take my paint brush. I'm just gonna lift up
some of that paint. And finish drying that off. So now that that is dry, I'm going to come
in with a second petal using that
exact same color, and I'm just going to put
another one over here really big and whisky and lots of paint
and water on there. And you can see that
you can see that. There's a lot of paint, and it has to have a lot of water in order to move around. If you didn't put
a lot of water, there'd be nothing to move. So make sure that when you
are doing this technique, there's actually water
puddled on your paper. So I'm going to
start a pie again. I'm gonna come in just slowly and make my first
little dry area. Once that's dry, you can see
that that is not gonna go, that water is not gonna go over there 'cause
that's now dry. I have to be careful.
I'm gonna raise my heat done up so that
I'm not getting too close. If I get too close, that's gonna splatter all
over the place. Almost gives it like
a leather appearance. Every time something area dries, it creates another layer. I'm going to get closer
now that it's thicker. So now that's dry. And then I'm going to come in and
use this other color, another orange, but
maybe a little brighter. I'm just going to put another one right here in the middle. Really whisky. Add more right on top
of those other two. Do the same thing
starting up high, pushing that pain around. This will be my top
layer, my top petal. Because it's so thin, you're going to be
able to see the other layers underneath it. If I want to add more in, I can. Put another layer in
there, add more water. Okay, so that's
dry or dry enough. And so now I'm going to use
my green and create a stem. So I like my flour bases to
have a little wider area. Again, if you don't use
enough water in here, you're not going to be able
to get that technique. So make sure you
have lots of water. It's almost dripping
off my paintbrush. I want to have it
really a lot of water. And I can move and
add in a leaf there. And obviously, since
I dropped it there, I will create a leaf
all the way up in there. Maybe another one. Lots of water. Do you
how it's pooling? It's very intentional. So that I'm going to be able to move it around
with the hair dryer. I'm not sure if it'll
work with a hair dryer. You'd have to try that. I
like the heat tool, heat gun. So starting up high, finding a spot to
dry off completely. Moving that water around. You really have to
play around with it. You have to keep
putting your heat done closer and further away. If you think that it's
gonna start splattering, you lift your brush
away, heat pool away. If you didn't use enough water, these others are
going to dry quicker, and you might need
to rewet them. Gonna let that one go
and move over here. Buying one spot. Okay. So there you have it. That is my sample. And I actually did this on
paper that's not cotton. I typically would
use 100% cotton, but for my sample, I decided to just use some
of my cheaper paper. So I'm going to
move over and go to the next lesson
where I'm going to make this as my class project. I highly, highly,
highly recommend that you practice it first on
just a scrap piece of paper, where you manipulate it
and move it around and see how close can you
get your heat gun to the paper without
it moving all over and how you can move it around and how much water
you need to have down. Once you've practiced that, then come over and practice it again in making a real
flour or something. This flower shape seems to be one of the easier
shapes to make, so I would recommend that
you start with that. And I really like doing
these kinds of leaves. It really helps in
manipulating the water around. So once you have achieved those things and you want to
move on to a bigger project, then come on back over
to the next lesson and we're going to dive in and create a whole arrangement. Can't wait to see what you have achieved and make sure that
you post what you've made, whether it's this or this one or all of it,
your class project, whatever it is you want to post, I can't wait to see what you've made out of this technique. O
4. Class Project Part 1: Shaping the Flower with Airflow: So for your class project, I want you to make one. If you have cotton paper, you'll probably be a
little bit more successful just because of
the way the cotton paper works with water. I highly recommend
that you do that and then make whatever
flower shape you want. I do recommend this
shape to begin with, just because it is a little bit easier of a shape to work with. Choose any colors you want. I recommend that you choose two colors that are
maybe coordinating, like I did here with two
different shades on orange, just because it helps
with the general look. I think I'm going to be
using a purple color, two different purple colors to blend together for
my final project. I'm going to actually
make two different heads. I'm going to put a
flower up here and a flower down there with some stems and leaves and
such on this paper here. But I think so that's my plan, but I think what I want to do is actually make it square
just because of, um, the frame that I have. I'm going to use this my mat and I'm just going to put
it down on my piece of paper and mark out the
corners just so that I have a clue as to where the
corners of my frame will be. You don't have to do that, but that's what I'm going
to do so that I can keep my contained flower arrangement inside
of this space. Um, I could also
use tape to tape in that area just so that I know exactly where I'm
going to stay within, um, but you do it however
you would like to do it. I'm just going to keep this
here as a visualization, so I remember not to
paint below that. So because I'm going to be
painting a little bit smaller, I just have to make
sure that I don't paint my flower
arrangements too large. But you make yours however
you'd like to make them. So I'm going to be using
this purply color. It's kind of like a purple gray. And I'm going to start
with one petal up here, adding in lots of water. You can see that
mine's going to be smaller because I'm
just going to be putting it here in
this smaller section. So it will dry a lot quicker, and I'm going to
have to be careful. So I might recommend that you do it a little bit larger
for your first one. I test it by pulling it away to see if the water's running
back into that area or not. I look at the other side. Remembering that this
is just my first petal. I'll be adding several
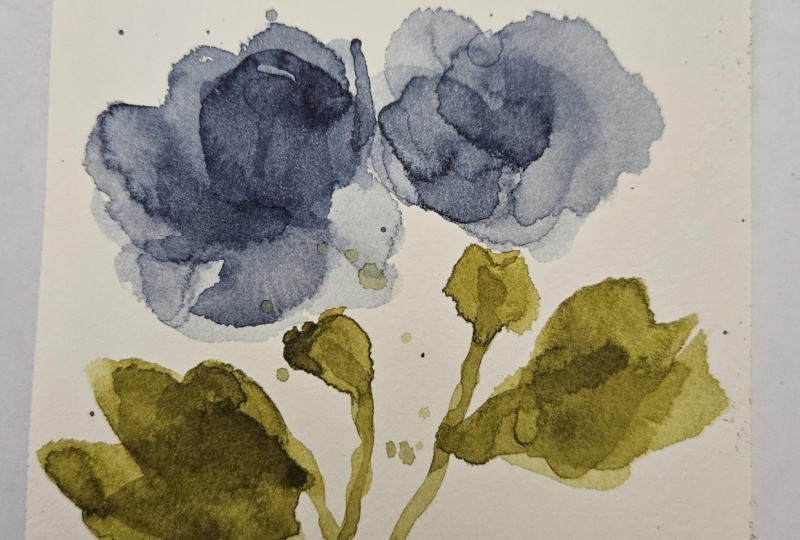
different petals in here. So I think this purple that I'm using is called moon glow, and so it is a
granulating paint. So it has several
different shades of purple within it and even has some blue and green in
it, which is interesting. So I'm just going to make
sure that it's nice and wet. See how I'm leaving
that separation there and how I'm
making it all jagged. I'm not trying to put them right on top
of each other yet. That's going to come later, but making sure there's
lots of water in there. Moving my heat tool in and out. I I get too close and
it looks like it's going to slide all
over the paper, then I pull my heat gun away. Once I think I get it dry enough then I can come in close. Put another one in here. Lots of water. Put
another one over here. I'll be coming back through
and joining these up. I just wanted to make this
one a little bit fuller. Y. Okay. Now I'm going to start filling them in. And get lots of
paint, lots of water. Just put another one
right up on top. Mayen put a second
one over here. Maybe even add another
little petal down there. You see how we made
that mistake here, and I'm just gonna go
with it and just make it a little bit
larger. It's okay. Let's make it a
little bit larger of a flower than I had
originally intended. That's why it's so easy to get my brush my get my
heat del too close. And it moves it out where I
don't want it to go. Alright. I'm not worried about it. So that's going
to be the center. I'll do something different
with that in the center. And then over here, I'm just gonna make a
much smaller one. As long as there's lots of water on there that can move around. All right. One more time. Make another one over here. Other layer. Lots of water. You know, I just can move it's gonna move all over the place. Lots of water. Okay. All these fun little
layers and textures. What a fun project. Great way to experiment
with watercolor, to experiment with how that moves and only lands
where the taper is wet. I love this technique. Love, love, love it. So fun. You never really know what it's gonna end up looking like
when you're done.
5. Class Project Part 2: Stems and Finishing Details: Okay. I'm going to use some of this orange color for
the center of this one. I'm just going to let that
dry naturally instead of using the heat gun because I would like to keep it
right there in the center. Now I'm going to
add in some stems. To make some kind of a little
triangle shaped thing here just to show that it's
attached to the flower head. Using lots of water. Just a nice jagged leaf. I think I'll only do
these two at a time. Gets a little tricky if you're doing too many leaves at once. Make sure it gets lots of water. This one's dry, so I need to
add more water onto that. Okay. Careful not
to blow that away. I'm kind of keeping my eye on several
different things here. Hmm? Do you see how that one got a little
carried away and started to, um, started to go out. That's okay. I just made
my leaf a little longer. That's all. Not a big deal. Don't stress over these things. This is a very whatever
happens kind of a project. Hopefully you can fix
it like I just did. Probably easier if you just
did one leaf at a time. Okay. Now, I think
what I want to do use some of that same
purple and just make some little lines in here to indicate the
center of my flower. You don't have to do
that. Maybe yours is a different shape flower. I'm just going to be adding just a little bit of dots and
lines into the center here. Okay, now that that is done,
let's take a look at it. Go. So there you go. Like cute little painting. Can't wait to see what
yours looks like. Did you paint yours
more like this or are you going to
paint jurors like that? You decide I'm telling you I think you're going
to need to practice it a couple times before you come over and do it for your
final class project. It is a little tricky
to know how close to hold your heat gun so that it doesn't blow
all over the page. If it does blow
all over the page. Roll with it, just decide that that's what it
was supposed to look like. Maybe you go and
you add splatter to your painting that
instead because you're like, Okay, well, now it's
all over the place, so now I'm going to add
splatter. This is for fun. This is for experiment. I don't want you to
get upset because it didn't quite work out
the way you wanted it to. This might take you several different
practices until you get to have something that you feel really good about. Maybe you don't
care for the shade of color that you used and you want to try it again
with a different color. Watch the video over
and over again. Try to take some cues
from how I am moving my heat gun in and out and over this striction
in that direction. I really tried to show you how you can manipulate
it and move them around. And also using your
paintbrush at the end and just finishing it up and moving that paint a little
bit with your paintbrush. Just have fun and experiment. You're going to do
great. You're actually going to get very
addicted to this, and you're going to find out that you're going to
be making these all over the place because this
is actually so much fun. Then when you go to make
your other projects in any of my other classes
or anybody's classes, you're going to realize
that when you get out your heat tool that you can create this effect
or you can start realizing that you are creating this effect and maybe
that's not what you want. Then you're going
to realize that you need to hold your heat tool up much higher so that
this doesn't happen. It's really one of
those classes here. The reason I wanted you
to do it is that you could see that there's a
technique for doing this, which creates a really fun
effect and also really helps you understand control of water in watercolor painting. I hope you had fun with this come on back to the next lesson and we're
going to wrap this all up.
6. Wrapping Up and Seeing Your Finished Flower: I can't wait for you to show me. Did you paint a single
flower like this? Did you make something
smaller like this one? What did you end up doing
for your class project? Did you do lots and lots of different
little layers in there, like I did for my class project, or like this one, where it was just three petals
with lots of texture. I can't wait to see it, so make sure that you post
your picture of your artwork. And if you've done
several different ones, I'd love to see all of them. You can line them all up
and take a picture of it. You can even show
me your practice work just so that we
can take a look at it. If you have questions, if this is not
working out for you, please create a little
there's an area in Skillshare here where you can actually start a little
conversation with me, and I would be happy to
discuss it with you. Tell me what you struggled with. Tell me how surprised you
were at how easy it was. You know, I can't
wait for you to, you know, chat with
me. I'm available. I check my Skillshare
every single day, and I would love
to hear from you. So give me a review
while you're here and let me know what you
thought about the class. That helps all the other students when they
come and they can look at the reviews
and see if it was something that they
want to also take. Give me a follow so that
you're the first one to find out about the next
time that I oppose something. I am sure that I'm
going to be doing another class similar
to this in the future, just because it is so much fun and it is something that
I do quite frequently. Make sure you cut yours
out and get it framed. Sign your artwork. Every piece you make
should get signed. That way you have it all ready
to go and you never know. Maybe it'll be a gift. Maybe it'll be something
you hang on your wall. What I really recommend is that you make it
so that you can put it into a frame and mat it and
then hang it on your wall, and maybe you rotate through. Maybe this is something that
goes into your powder room, and you just have one
frame on your wall. And every time you do a piece of art, you
rotate it through. And then you put in
this week's art. And then next week when
you've done something new, you put in next week's art. And it's something that
is just constantly changing where you can
sit there and enjoy it. You will be amazed once you have hung up
something in a frame, how that changes your artwork. It really elevates everything. So I'm hoping that you do that. And if you do, please let me
know. I'd love to see that. I'd love to see it
hanging in your wall. Thank you so much for joining. I can't wait to see
you in the next class, and we're going to
continue to talk about watercolor and how
it moves on paper.
 Brenda Jones, Watercolor Artist & Teacher