Transcripts
1. Paint a Soft Loose Watercolor Flower: In this class, we're
going to create a soft loose watercolor
flower using a simple outline and a wet
on wet painting technique. If you've ever felt
like watercolor is unpredictable or
hard to control, this is a really
gentle place to start. Instead of trying to draw
anything from scratch, I'll be providing you with a light outline that you can focus on what
really matters, understanding how water and pigment move together
on the paper. We'll begin by exploring how different levels of
water affect your paint, and then we'll be
practicing a single flower before moving on to the finished
pro class project piece. You'll learn how to
add color variation, how to let your paint
blend naturally, and how to know when
to stop so that your painting always
stays soft and fresh. This class is designed to
feel calm and approachable. You don't need to be perfect and you don't need a
lot of experience. If you can place paint on
a paper, you can do this. By the end of the
class, you'll have a beautiful finished
floral piece and a much better
understanding of how to work with watercolor
instead of fighting it. Let's get started and
enjoy the process. We're going to
have a lot of fun.
2. Simple Supplies to Get Started: I'm so excited about this class. I can't wait to get into it. But I first want to
show you some of the supplies that
I'm going to use. I don't always make
a supply video, but I thought in this case, it might be really
helpful if I did a little quick little
supply video for you. And you're going to
find this printout. There's actually going to
be two different printouts, this one, and then
just a single flower. And we're going to use both of those printouts which I
don't usually provide for you because I'm
usually working in a really loose style where we're not copying
the exact painting. But in this particular class, this is kind of the
direction I want to go. If you don't want to use
the printout, that's fine. What I do want you to do is
actually draw out something. So if you want to use
this as a sample or as to get your inspiration
from, that's fine. You can hand draw this
if you'd prefer to. So if you're going to be using the printouts that
I provided for you, you print it out on
your piece of paper. It should fit like this. If when you're printing it,
it looks like it's too large, just change that one setting in your printer on the screen where it says to shrink to fit. And then it should
print like this. This is just a standard
sheet of copy paper. And I have carbon
copy paper here, and I'm going to
be using that to transfer this onto
my watercolor paper. And if you haven't used this before, it's
really inexpensive. You can pick this up at like
Staples or even on Amazon. But you put the shines part down towards your watercolor paper that you're trying
to transfer it onto, and then you lay
your drawing on top of and then you're going to
use a pencil and loosely, very, very lightly transfer and draw over top of
all these little lines. But I have to stress, do it very, very lightly. Otherwise, you're
going to get a really, really dark transfer on here, and we're not really
going for that look. Have this design
drawn out so that it'll fit on several
different sizes of paper. This one is a ten by seven
I really like this paper, and then you can see that
that will fit on here. It'll fit just within the edges. So if that's a little too small of a piece
of paper for you, you can also use a standard
like a nine by 12, and then that is
going to fit on here. It doesn't have to be arches.
You can use whatever. I do recommend because we're
going to be using, like, a really wet on wet technique that if you have a cotton paper, this would be the time
to pull that out. Doing wet on wet
techniques on cotton is probably going to give you
the better finished product. So that might be what
I'm going to use, but I also realized
that this will fit onto a square
piece of paper. So I have this paper, which is a ten by ten, and this is probably one of my favorite companies to
use because it's more inexpensive and I just like the way the tooth is
on here, the texture. So I will transfer
that by laying my carbon pop copy paper on it and putting that down on top
and then tracing this out. Also going to want to have
some scrap pieces of paper. So this is just scraps
that I've been using, and then I cut up and I save. I hardly ever throw
out my paper. So if I've done something that I didn't like or I used
a section of it, just flip it over and
use the other side. So you'll definitely
need a little bit of scrap paper because we're
going to be practicing some of our techniques for this wet on wet technique that we're
going to be doing. And grab yourself a couple
brushes of different sizes. Here I have a size
six and a size eight. And these are my
Princeton heritage. I really like those a lot. These are probably my
favorite round brushes. And then I have a set of medium. These are like the
quill brush or a squirrel brush comes
in a whole big set, and you can have all
different sizes. So I'm just using a size five, which is kind of on
the medium size. Make sure you have a
rag that's nearby. Your water, I probably have two or three water containers
that are right nearby, so I always have
some fresh water. If you want tape to tape off your edges or to tape it
down, you can use that. I'm going to recommend
that you have a spray bottle because we might be needing a
spray bottle for this. And then, of course, your paint. So your paint, you
could be using anything from a paint
palette that comes in a tin, or you can use like
what I have here, which I have already wet down. I sprayed it with
my spray bottle, and I have all my
paints activated. These paints are from
tubes that I have into this nice ceramic palett
but if what you have is, like, a watercolor
set like this, this will work perfectly. Nothing wrong with
that whatsoever. I would just recommend that you have somewhere where
you can mix some of your colors instead of taking these colors
straight out of the pan, have, like, a plate or some other kind of
a ceramic piece. Like, I have something
like this that I can use. It's just, you know,
something from my kitchen. I just prefer when I've been able to make up a
little puddle of paint. It keeps it a little bit looser and a little you can add
more water that way. So whichever
technique you use or whatever kind of paint you
have is going to work, I will be working in this style. I will be working with this
paint palette right here. And like I said, this
was all dry because, you know, I keep it on
my counter all the time. And then at the end of the day, it just dries and I don't
have to worry about it. And then when I'm ready
to start painting again, I just spray this down with my spray bottle and
it reactivates. So I'm ready to get started. Go ahead and gather
all your supplies. So meet me back here
at the next lesson, and we're gonna jump
right in with practicing.
3. Understanding Wet-on-Wet Watercolor: So I wanted to start
this class by really practicing on the wet
on wet technique. Sometimes I tend to lean more towards the wet
on dry technique, and I really feel like
that's something that I skip over in teaching, and so I wanted
to make sure that I took a moment to
talk about this. What I want you to do is put some water down on
your paper like this, and then you can see
that it is puddling and pulling there
and flowing around. Then I want you to come over
here and make another one, but use less water. And we're going to
just play around with this and see what
happens so that you can start to get used to how wet something needs to be for it to work the way you
wanted it to work. So I'm just using the
same paint brush with less and less and less water because I've been using it up, and I'm going to be
letting that dry slightly. So if you can see
that on this camera, you can see that down
here, this is almost, you know, just damp and wet little wetter,
a little wetter. And then this one, you
can see how it's pooling. It's so wet that it's
actually running. So then if I come over to my paint and I'm going to use this red so
that it shows up nice, um, just make a little
puddle of my red paint. Then if I come over here, I can drop it into this really wet paint and
watch how that moves around. Then I can come over
here where it's just a little bit dryer and
you can watch how that moves, and then in this one, you can watch and
see and play around with how much paint
moves on that one. Then this one that's
almost completely dry now. Because it's just damp. You can see how that one
plays and moves around. What I want you to do
is play like that. I want you to make
see that puddle is just moving around
because it's so wet, where this one is just flowing, but this one is just moving all over the
place because it's so wet that one's just flowing down and this one's
just slightly spreading out. But this one hardly
even spreads at all. But if I go and put
it on a dry spot, this is dry down here. You can see that it
doesn't flow at all. What I want you to do for this first practice is
just go ahead and do that exact thing where you are practicing
it in a very wet, modestly wet, just damp and
then a very lightly damp, and then a dry setting, and let that dry completely, and we're going to
come back here and talk about what those
effects are like. Okay, so now let's talk about
these now that this is dry. This one that was
really, really wet and almost had puddles
around the outside edge, you can see that I
got some blooms and I got some different
unusual marks on here. And then this one
that just kind of flowed and because it
didn't have puddles, it just kind of flowed
across the page. And this one starts to spread, but it also kind of wanted
to stay in position. This one that was just very lightly damp almost
to the dry position. You can even see the
difference between these two where this one really
stayed where it was put, but it still spread out some. Then this one, of
course, it was my dry. There was no water
down on my paper, this was a wet on dry. It was wet paint on dry paper where all
four of these were wet on wet wet
paint on wet paper. I hope that you took the time
to experiment with this. Maybe you made several
pages of this. That would be something
that would be really good for you to do is play around and understand how much water do you
need in your paint, how much water is on your
paper, how they flow. I want to make sure that I do mention that none
of these are wrong. There is nothing wrong
with doing any of these five different
styles for watercolor. Each one just creates
its own style and its own technique, and I have been known
to use all five of these and then some in
a combination thereof. So when you are practicing, know that what you are
doing is a mistake. It's just that you
need to know what the effect is that you're
going to be getting. So if you're looking
for something that has just a whole lot of texture
and usual movement, go ahead and use extra water. But, you know, if you
just want something that's just going
to show a flow, then maybe just, you know, back down the water a
little bit or wait for the paper to dry just a
little bit and so forth. So I hope you took
some time to do this. And if not, I really encourage you to fill an entire page or several pages of
playing around with how much water is in your paint and how much water
is on your paper. Come on back to the next lesson, and we're gonna jump right in to painting something
on your paper.
4. Practice Flower: Letting the Paint Move: Okay, so here we go. We are ready to get started. And I had told you from the
lesson where I talked about the different supplies that I have some printouts for you. I also wanted to show
you this printout, which is a single flower. So the one that we're
going to do for a class project has three
different flowers on it. This is just a
single because we're going to be practicing
on a single. If you print it out on
a full sheet of paper, it's going to be on the
large size. That's fine. But also, remember when you are printing in your settings, you can choose to shrink it down and choose to print
it in a smaller size. So I think this was, like, a five by seven or something. So it's just a smaller flower. And that's what I'm choosing
to use for this practice. I didn't want to do a
full one since I'll be doing a full size
for the class project. So we're going to get
started on doing that, and we'll be using something
probably in this amount of water or this amount of water when we start to work
on the project itself. But first, we have
to transfer it. So again, I'm just going to use this scrap piece of paper
because this is just my sample, and I'm going to line
it up here and get that transferred using
my carbon paper. So using just a standard pencil, it doesn't matter because
you're just going to be drawing right on top
of your copy paper. I'm going to put
this up here near the top so that I
know where I'm at. And then I'm going to line
this paper underneath it. Get that somewhat centered. Doesn't have to be exact because it's just a sample. This
is just for practice. But I'm feeling around
the edges and I can feel where my paper
is underneath here, so that's going to be just fine. With the shiny side of
my black paper down, so that's the part that's
going to transfer onto my watercolor paper
using a pencil, I'm just going to very, very lightly outline the outside of all these little lines. Um, you don't have to
do all the inside, there's some extra
little lines in there. You can just do
the outside edge. That's fine. That was
just from me drawing. So we're just going
to come out here, just draw very,
very, very lightly. Try not to get lost, try to do it in some kind of a system so that you know that you're not missing
any of the spots, the very light pressure. And if you want to, you
can hold onto it with one hand and then pull
back on the other side, just check to see
how it's going here, you can see that
it's transferred. Okay. I can put in
some of my lines. I don't have to. I can just put in a couple of them just so that I know that that's kind
of the concept there. And then I'll put a stem down and then maybe
put in a leaf. Or maybe I decide you want to
just free hand the leaves. That's also fine.
Whatever you want to do. But holding my paper down
so I don't lose my spot, I can just lift it up
and verify that what I put down is what
I needed to do. So I'm gonna say
that's good enough. I'm gonna set that aside. So
now I have it transferred. There are other ways
of transferring it. You might have a transfer light
that you can shine on it. You can also take this
up to a window and put your paper in front of it like this and look through
the window light. The light shines
through here and then you can draw it
right on to this. If you don't have
copy paper like this, there are other ways of
transferring it onto it. I find the window method
is actually the easiest. Again, I just take this sketched piece that
you would print out, put that against the window, line this up on top of and then take your pencil
and you can actually see through it and add the painting or add the
lines right to here. So we're going to
get started on this. And what we're doing is
this really loose effect, and we're going to layer it
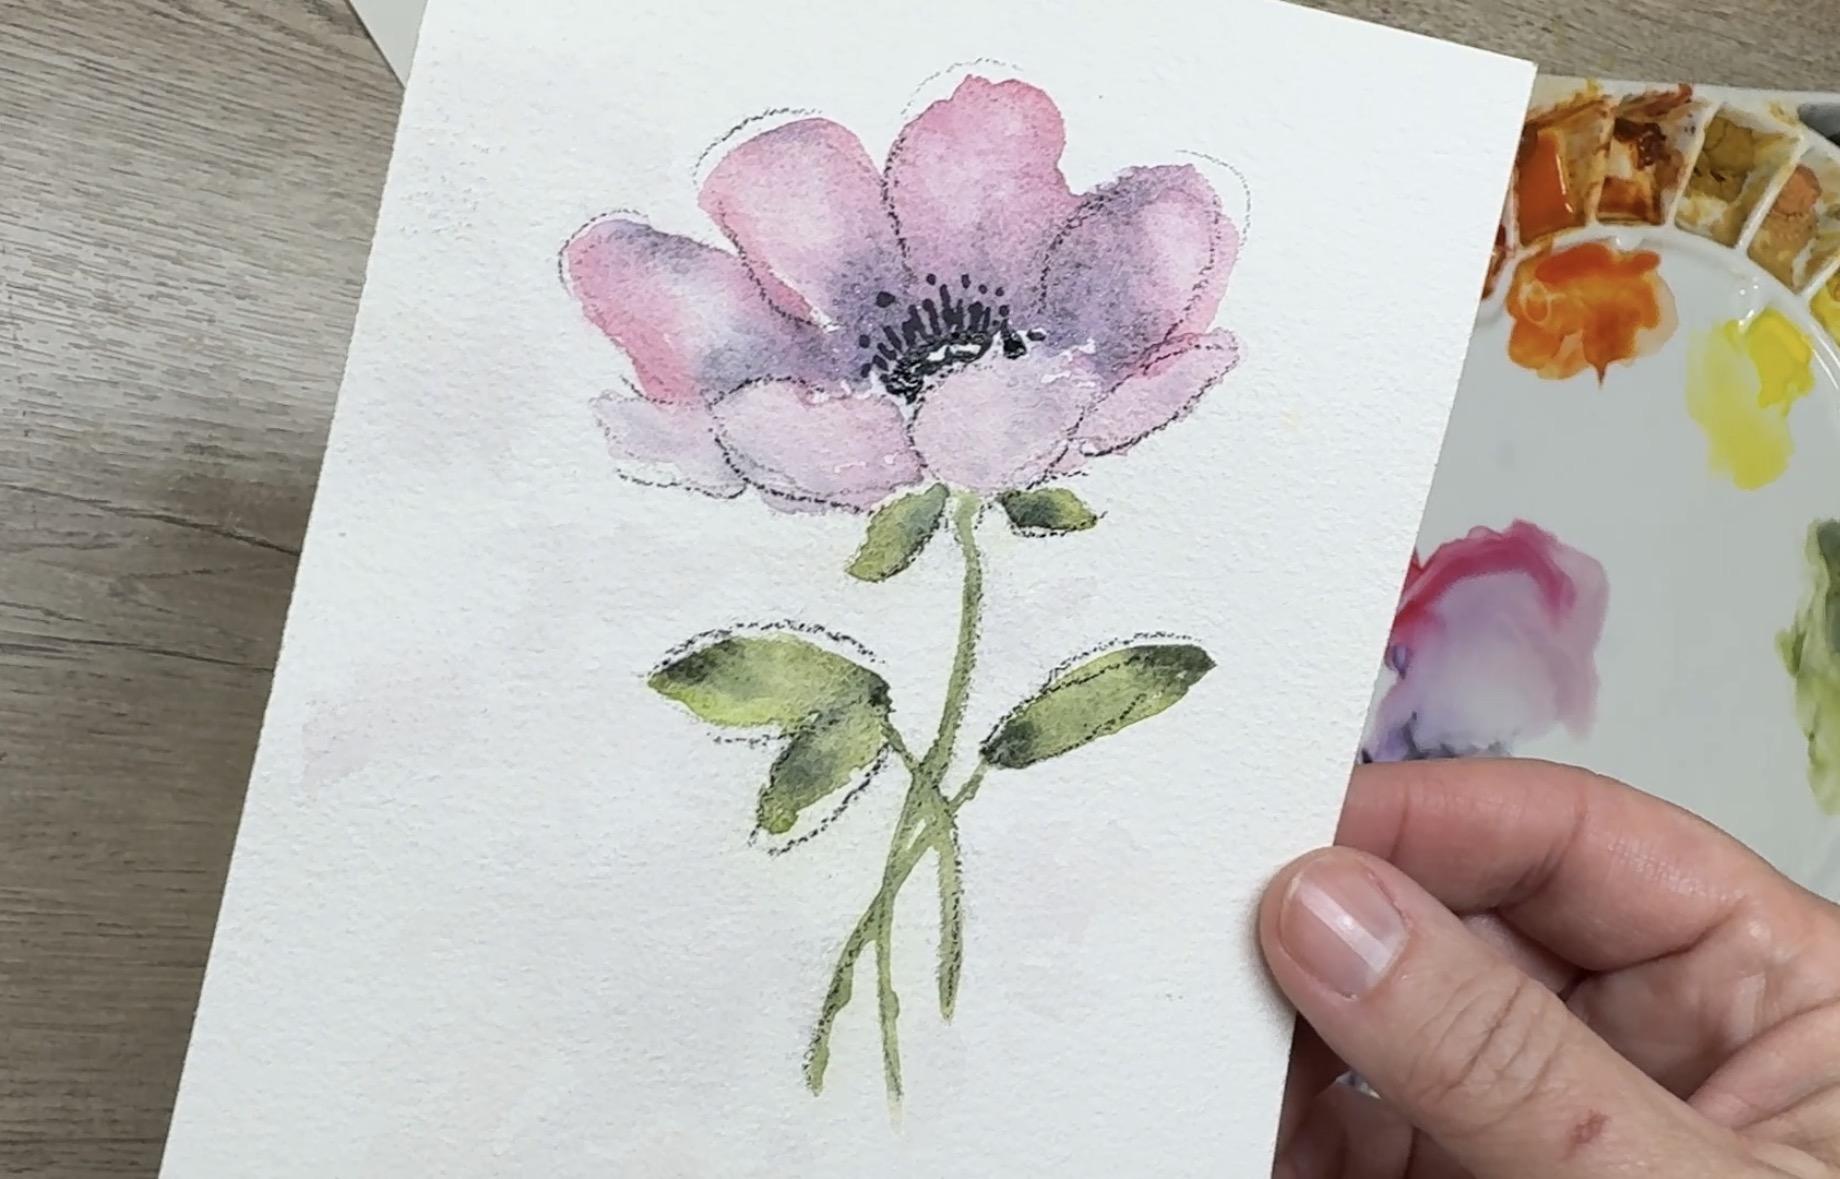
with two different colors. I'm going to be using a purple
and a pink for this one, but you can use it
however you want to. So what I'm going
to do is actually paint different
sections at a time. I'm going to paint
these back ones, one, two, three, four, I'm going to paint those
all at the same time. I'm just going to
add some wet water, some just a little
bit here and there. You don't have to stay
within the lines. This is totally fine for you
to go outside the lines. I just wouldn't wet
the entire thing down. Just got the general
sense of that down there. We're going to let
that dry for just a second while I come over here, I'm going to switch my
brush to a smaller brush. I'm going to grab some of
this paint, pull it out. And let's see. Definitely, you can see that and I want it to
be thick enough, but not too thin, not too thick, but with
enough pigment in there. Then I think I'm also
going to use a purple. I think I'm going to use
this beautiful purple here. A nice and dark,
but not too much. Rinsing off my brush so that
I have a nice clean brush, bring my cloth here
in case I need that. Now I'm seeing here that the
water is still running some. Because I got it really wet, I might just pick up
some of that water. All I'm doing is
coming along with my almost dry brush
and just lifting up some of that water
just because it was maybe just a
little bit too much. Yeah, that's better. It's still very wet, but it's not pooling. Now I'm going to
fill my paintbrush up with the pink paint, and I'm going to
just drop it in here and there, wherever
I want to put it. It doesn't really
matter. You put it wherever you want to because it's just going to flow around. Just put it in here and there, and then I'm going to do the same thing semi drying
off my brush just so I don't have too much water
on that and picking up some purple and going ahead and dropping some
purple in there too. But I'm going to focus that
purple mainly down here to the bottom with just a
little bit up at the top. You can see that it flows around a little bit
and that's okay. You can even manipulate that
a little bit if you want to. You can move that around by just bending your
paper back and forth. Totally okay for it
to flow together. You'll also notice that it only flows where
the paper is wet. Even though I'm holding
it upside down like that, it's not going to
continue to run all over the page because
it's not wet out here. It's only going to flow
where the paper is wet. Now if I want to, I can lift up some of that and
get rid of some of it. I'm okay with having some
white spots in there, so I'm going to
leave some of that white where it's not painted. Now I'm going to let that dry. You have a choice. You
can either just let it dry naturally or you
can use a heat gun. If you use a heat gun, just make sure that you hold
it up high enough so that you're not splattering the
paint all over the place. Okay, so I allowed that to
get a little bit darker on the backside because that's
going to be the main part. Then this flower part up here, that front area, this is let me move this over
here so you can see it. This is going to be where I going to have some
more highlights. I want to make sure
that I leave some of it. It can be wet. I just don't want to
have all the paint going into those areas. So I'm going to go ahead and
wet this area down again. Probably just,
again, it's okay if my water goes outside
of the lines, doesn't make any difference. I'm just going to
paint all those, get some water in
there for all of that. Maybe just leaving this
highlighted area a little drier. Then maybe I'm going to
dilute this a little bit more and have more water and less pigment from the
paint and just add in some more pink paint in here. Then again, dilute this paint, this purple and add in just a
tiny amount of this purple. This is really wet. I
hope you can see that. That is flowing around. I'm going to need
to let that dry. But I want to add I had
left this spot right here dry so you can see my paint isn't going up
into it because it's dry. I'm just going to now wet it and allow some of that
paint to flow up in there, but it's such a
small amount that it'll leave a nice
highlighted area. Any of those spots, I can just let that
flow in there. Okay. So now I'm going
to let that dry. I'll probably let that dry
naturally for a little bit, and then I'll finish it
off with the hair dryer. You can start to see that this is starting to come together. I'm not going to do anything
with the center yet because I want to make sure that this gets a little drier. I'm going to start moving on. These little two little
things down here, I was intending that to be a green kind of showing that it's your part
of your leaves. I'm just going to spin my palate around so you can see it better. I'm going to just
create a little green a little green thing going on here just a
little depth of that. Okay. So I'm going to go ahead and get that spot wet with just some plain water, and then just dropping in
some pigment for that. Even drop in a
little darker color. I'll do the same thing
down here on these leaves. Totally okay for it to
go outside the lines. You don't have to
worry about that. It's part of the look. It's okay if it goes outside
the line and you can even go ahead and just paint this with water
if you want to. Paint those little stems. Just a little bead of water. Then if I drop my
paint down on here, you can see how that flows. Isn't that cool? Because it's only going to go where the water
is on your paper. Drop some in for the leaves. Pick up some of that green, put some brighter
green in there, just for a little contrast. You do yours however
you want to. You can make your leaves
blue if you want to. I think I'm going
to just drop in a little darker value,
little darker color. Now, while that's drying, I'm going to start coming
back up here into the center. My center, I'm going
to make much darker. I'm going to spin
this back around to the purple so
you can see that. I'm going to go in here with
my purple and just actually, I'm going to do a
dry on web here. Okay, so now this
is completely dry. So now I have a couple options. I really would like to add
in the little centers, these little spiky
things with the tips, you know, there's
anything that's only inside of a flower. So I'd like to add those in, and I also wouldn't mind adding in some
of the other details, maybe even having some
lighter lines around it, just to add a little
extra detail. So what I will probably do is using my smaller paintbrush. This is the size six and
just a little bit of, like, a brown or I could even use this purple
that I've been using, something that's soft, you know, not a harsh dark
color, but, you know, something that's just a
little bit softer and add in some of those extra little
details onto the flour. I think what I'm going
to do is go ahead. You always wet my paint brush down first, that's nice and wet. I'm going to go
ahead and just use that purple just because it's been the color
that I've been using. It's just on the tip
of my brush here and I'm just going
to make some very, very small and
I'll see if I like this or not until I go and do it on my second project might change my mind and
do it a different way. Sure. Just a couple
rows on upper row, a lower row, different heights. You can make some longer and
some shorter, little spikes. Coming maybe even a couple dots. You can even come
up into the flower itself and add some little dots. A different spots along that. Add in those little dots. Then I think I'm going
to I'm just not sure if I want to do that or not
add in the lines in here. I guess that's going to
be up to you if you want to experiment with that,
play around with it. I also have this
charcoal pencil.
5. Practice Flower: Adding Light Structure: So I guess that's going
to be up to you if you want to experiment with
that, play around with it. I also have this
charcoal pencil. So, it's all about
an experiment. So I can just come in here and experiment with that and see if I use a really light hand, can I just add just a little
bit of charcoal color? That might be pretty.
Let's give it a try. Just to give a little separation
of some of these petals. If you don't have
a charcoal pencil, maybe you have just a marker, maybe you have one
of those fine, um, like a micron brush pen, I mean, you know, something
that's really, really thin. So if you have a micron,
that would work as well. You can try it
with a paintbrush. You might want to try
a smaller paintbrush, more of a detail paintbrush. But I think because
I'm started it with this really fun charcoal pencil, I think I'll give that a try. I'm not outlining it per se. I'm just kind of adding
some little lines. In fact, I'm even going
outside the flour itself just to show
some definition there. Um, I think I'll do the same thing down
in here for the leaves. And my pencil is not even
very sharp, and that's okay. So sometimes I'll go inside and sometimes I'll go outside. Sometimes I'll only put it
on the top or the bottom. I just want to be
really loose about it. And then just a little
line for those stems. There we go. Really fun. Beautiful. Love it. Okay. This, of course, was just made on my
scrap piece of paper, but it's so beautiful. And if I had shrunk it down, like I told you,
when I printed it, I would suggest that
you practice it first on a scrap piece
of paper and then move over to your bigger
piece of paper and print out this one
and then come on back into the next lesson and we're going to go
ahead and print it paper copy it over here onto this paper and go ahead and start our
class project together.
6. Painting Your Main Flower Step by Step: Welcome back to
the class project. I hope that you took your time and did the practice
lessons where we practiced the different
techniques of a wet on wet. And then we went ahead and made a practice sample of what that might look
like in a flower. And we even added in two
different colors into the petals and two
different colors of greens into the leaves. But it was just a
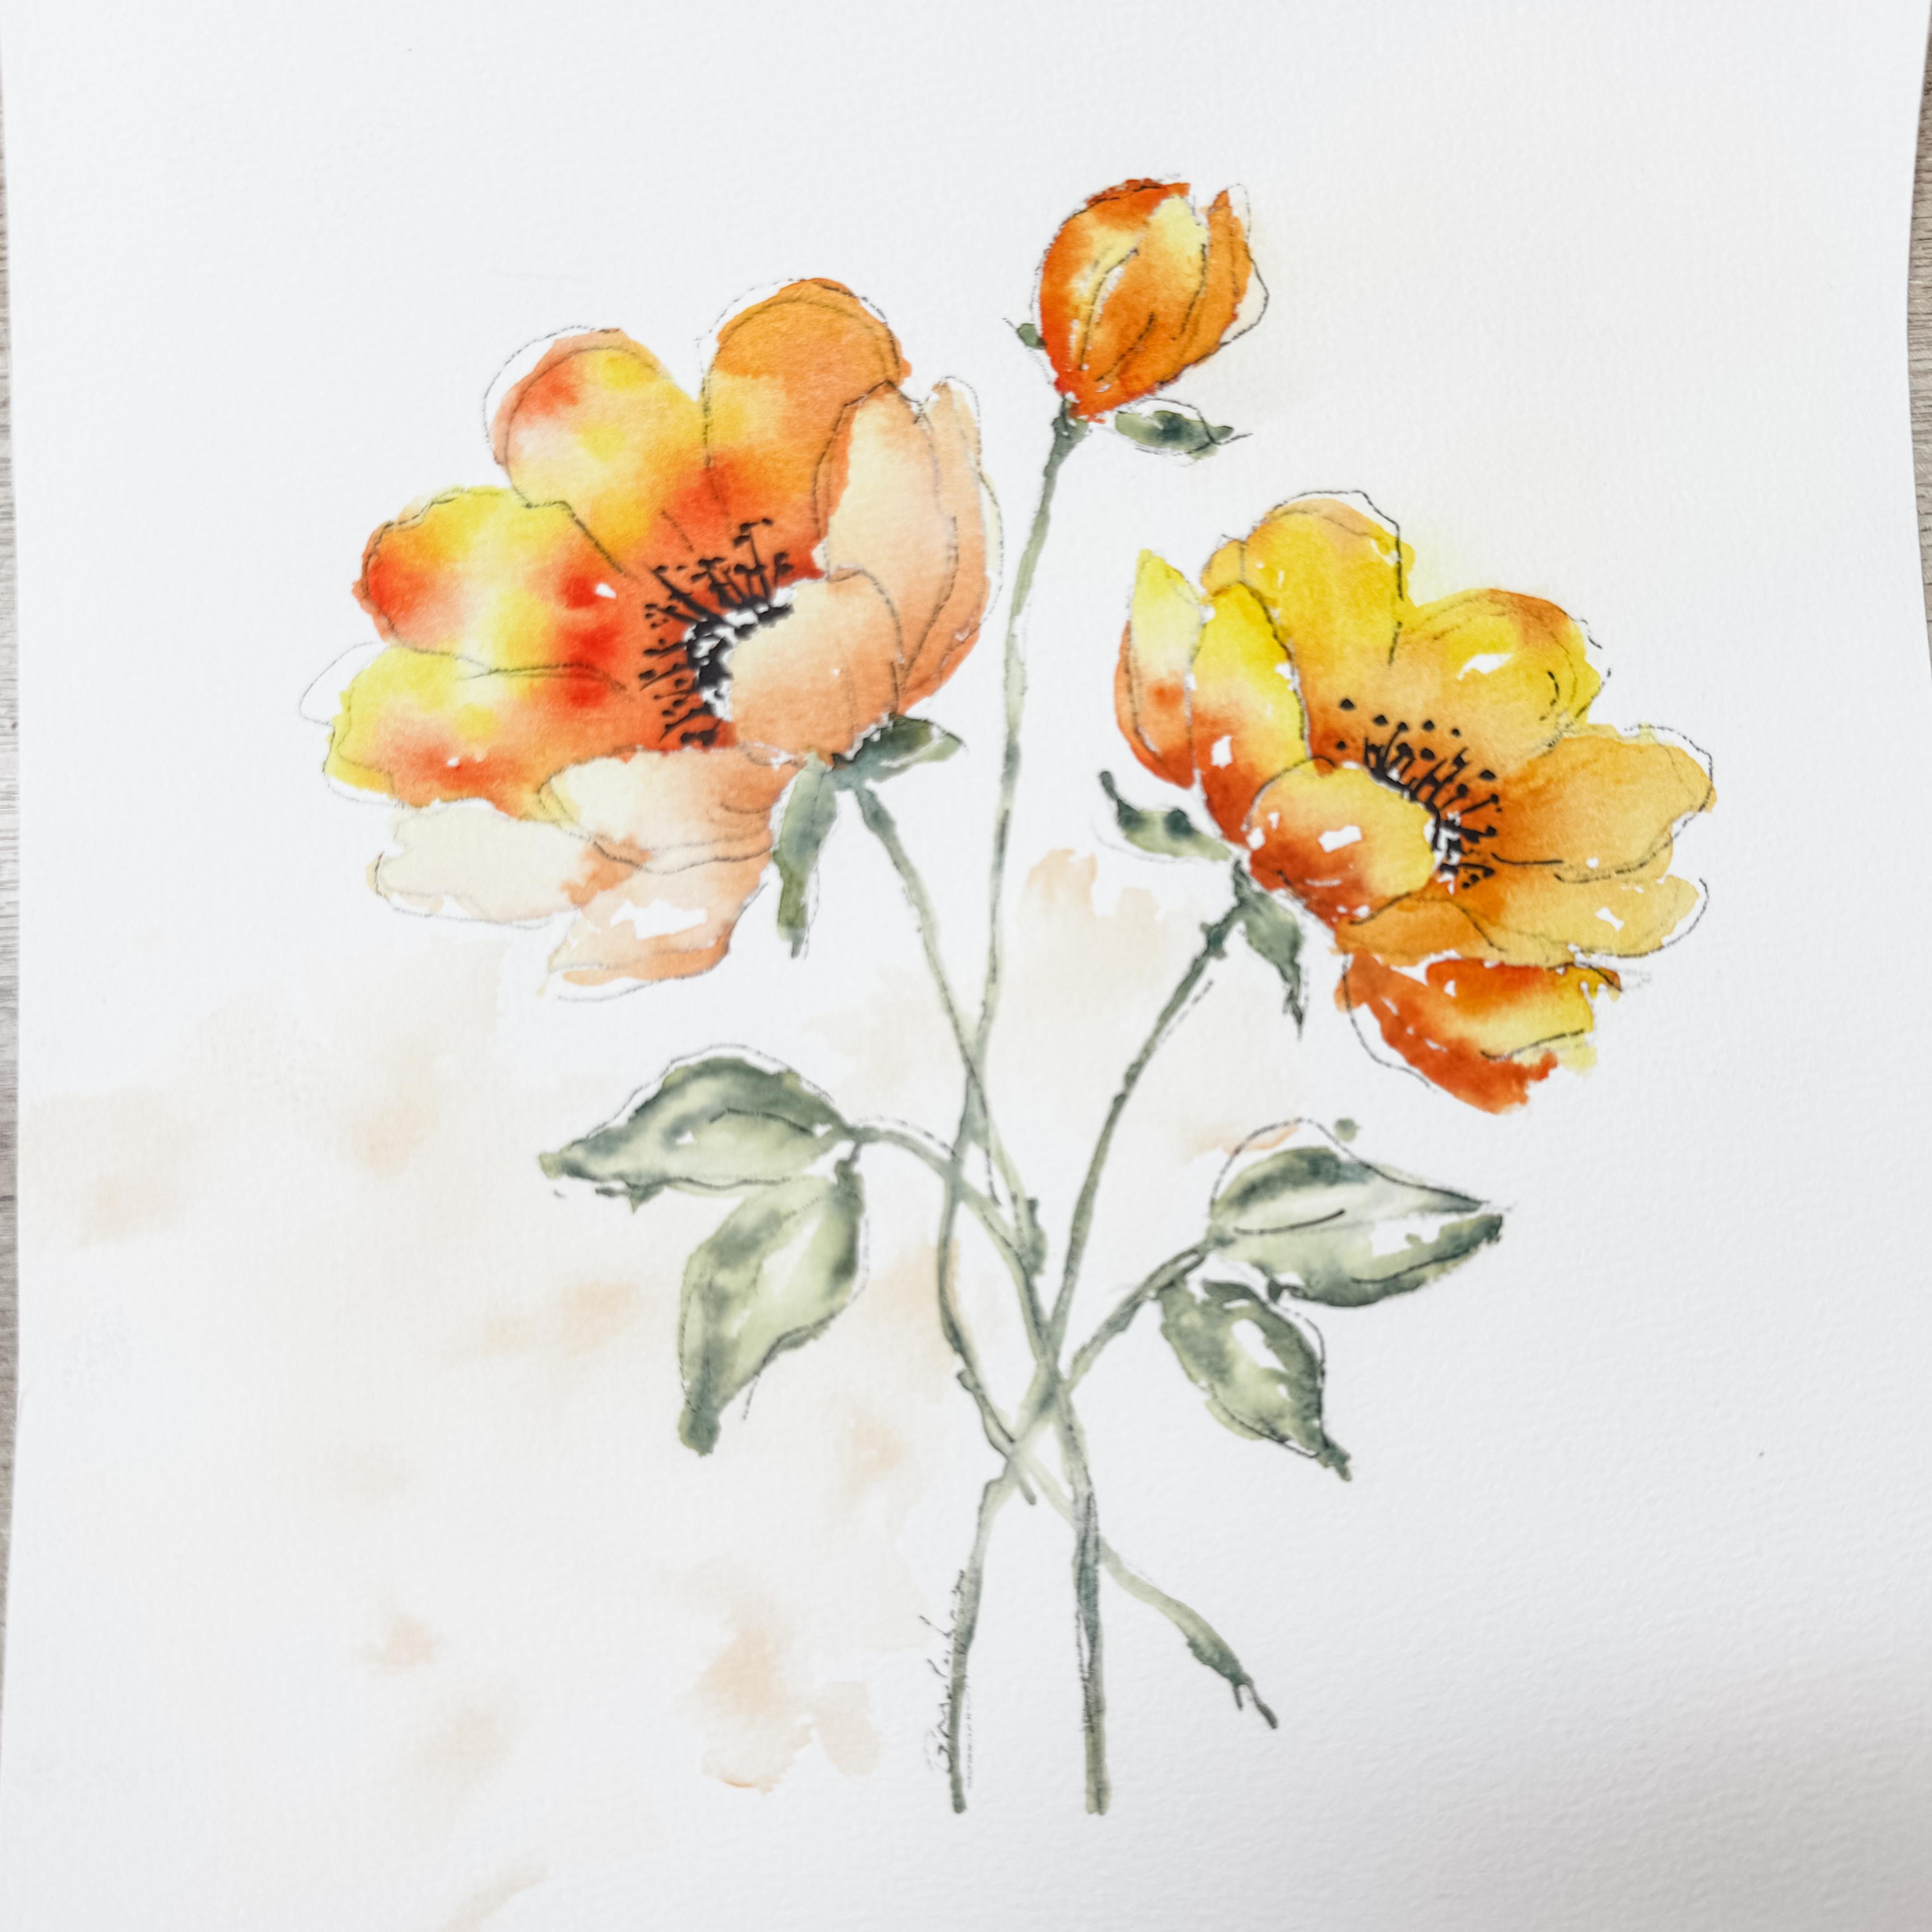
simple one flower. So now we're going to move on to the larger bouquet of having
three different flowers facing different directions with a bud and just a couple little leaves down
here at the bottom. If you missed those and
the instructions on how to transfer this onto your
good watercolor paper, go ahead and go back and watch some of those
other classes. I went ahead and
did that ahead of time since I showed that
in the other class. So now that I have
that done and I know the way I want to
make my flowers on here. So I'm going to get started with painting this
flower arrangement. And again, this is on my
cotton paper, 100% cotton, which I really like because when we're doing a wet on wet, it's really good to
have that cotton paper. I did switch over and got a new clean container of water so that I wasn't
using my dirty wt. Maybe just for fun, we will change it up a
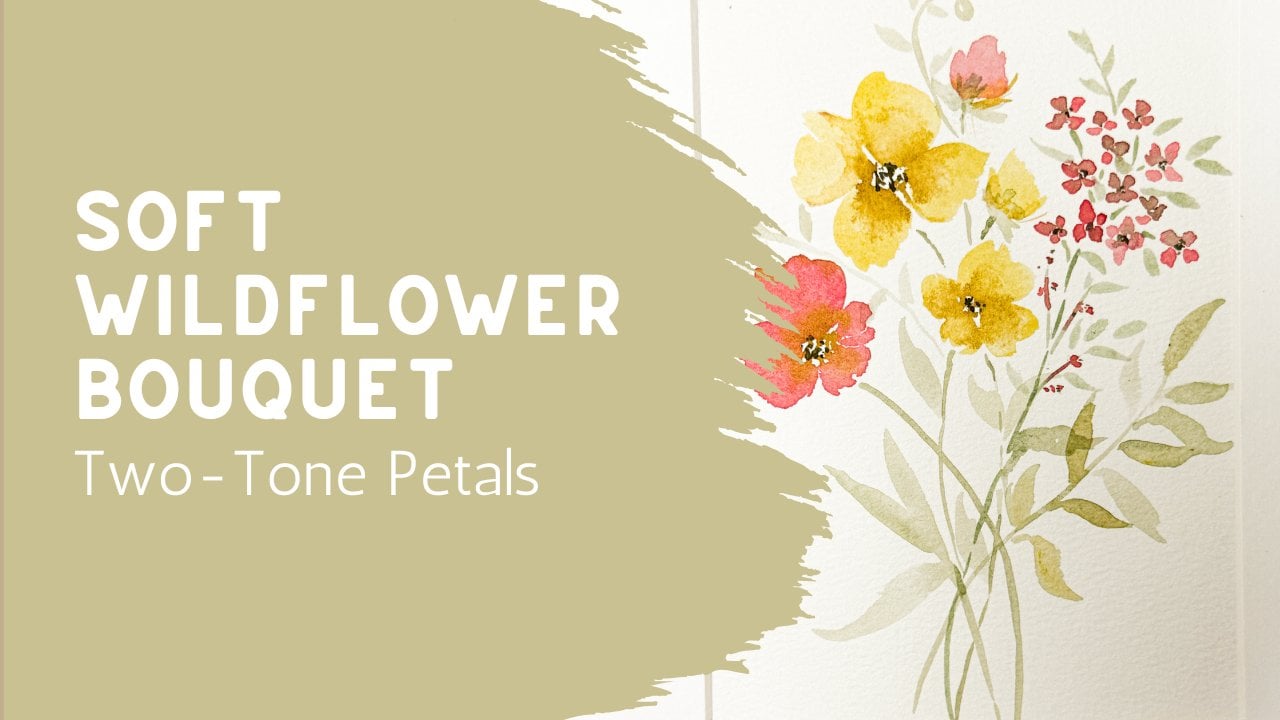
little bit and I will use some oranges and yellows.
That would be pretty. I'm want to spin my
palette around so you can see my oranges and
yellows a little bit better. I think that'll be really nice. Using a wet paintbrush, I'm going to start
over here and work my way to the right
because I am right handed. If I was left handed, I would start over here
and work my way across. That way, I'm not putting my pand down because
sometimes I have to rest my hand on something
and I wouldn't want to paint on top of where
I've already painted. I always work left to right. Again, I'm going to
do the background first of this flour, and then I will come
in and do the front. I can just wet this down with my wet water on
this quill brush. If you don't have a quill brush, you can use any
brush that you have. I just find it easier when you're trying
to put down a lot of water to use a really
thirsty brush like this. I'm really going
to do these really far back, petals first. It's okay if you go
outside of the line. In fact, I encourage
you to do that. Just go outside that
line a little bit. I think in this one, when
we get done with this, we might even do
something really fun with a spray bottle and wet it down and create a
really fun little background. Hopefully I get a
chance to do that. I'm going to go ahead
and add in a background. I'm going to be putting
my darker color in towards the center. And then we'll allow
that to flow out. Then I'm going to
be putting in might switch brushes and add in some yellow out here at the tips and let that
move towards the center. Again, it's okay if you
don't fill the whole thing. It's going to flow around it's also nice to have
some white spots. That's okay. I might even
come in with another color. You just do you however
you want to do it. Whatever colors are speaking
to you would be beautiful. I would love to see something
that's different from mine. Go ahead and experiment. I am going to leave
that center because I do want to be able
to do that center area again so I am not putting in any paint into that
very, very center. Even add some out
here at the edges. Let that flow around. But you can see how that's
flowing because the paper is already wet and so it is flowing just
like in our practice. It's going to be
flowing like this one. If you want to, you can
pick up your paper and tilt it a little bit and
let it flow together. You don't have to, but you can. Can even manipulate it a little bit and encourage
it to move around. Okay. I'm going to let that go. Kind of wanted to go
outside the lines a little bit. Alright. So I do want to draw
attention to the fact that my lines are
still showing through. So when I had used this carbon paper and
I traced it on here, my lines are still
showing through, especially because I am using a lighter color like this
orange and this yellow. But I don't mind because
as we practiced over here, I did end up coming through with that charcoal pencil
and added lines on top. So I'm not concerned about those lines because
they're just going to be added in
anyway at the end. I just wanted to highlight that. So if that was going to
be a concern for you, you might want to use a eras and erase some of these lines
first before you go and paint. It is very hard to erase anything after it
has been painted on. If those lines are
going to bother you, I would recommend that you
lighten them up first. Now I'm going to come in and do some of
these front petals. I'm just going to go ahead and grab all of those on that side. Again, I'm okay with going
outside that line. Go ahead. I'm going to leave these
two alone and let them be dry because those are
going to end up being green. I'm going to just add
some water over here. The reason I don't do all of these petals at the same time is partly because I might want to make these a little
bit different color. I want to show some definition between the back and the front, just like we did on this one. So now I'm going to switch
to my size eight brush, add a little bit more water to my orange and drop in some of that orange
again to the base. These are the bases of
the flour down in here. But because I'm using
more water with my paint, my pigment, it's going to
show up being lighter. Remember that an easy way to make it just lighter is
to just add more water. Do you want to get
some out on the edges. And then I'll add
in some yellow, again, adding more water. Just putting it up
here towards the top. Totally okay, and I
encourage you to leave white spaces so you can see
that I am not filling it in. I'm coming on to the outside. There is no wrong. You
didn't make a mistake. You made it different,
and that is great. I'm proud of you for
making it different. Okay, so my front flowers are lighter than my inside
flowers or my back flowers. I'm going to go ahead
and dry that off. All right. I'm going to
move on to this little bud. I'll just do the whole
bud all at once. But remembering to leave these little lines
out because those are going to be where the green is. I'm going to drop in some darker color
because this is the bud, so it's showing that
it's all closed up. I'm going to let
that one just be a little bit on the darker
side where you're not getting quite as much chance to see
that variation in color. Of course, I'll add
in some yellow. I'll just let that dry and I'll move over
here to this one. Again, I'm going to
do the back petals. Leaving some white space, not filling the whole thing with paint going
outside the lines. Go ahead, be adventuresome. Then I'm going to add in some of this maybe even make it a
little bit more brown. This Let's see what happens here. Just because they're
all on the same page doesn't mean they have to
be the exact same color. As long as they're in the
same family of color, totally fine to switch it
up and make it different. I'm grabbing some yellow. Yellow is such a pretty color. If you missed my other class where we talked about
yellow and the difference between warm yellow
and cool yellow, you might want to
go check that out because that was
a fun one to do. I'm definitely using a cool
yellow in this. All right. To move around a little bit. I'm going to dry
that off. All right. Now, if you can imagine, this is where the get
that picture back out. So on this one, these are the flower petals
that are closest to you, and then these little
damons are inside here. I'm going to leave a little
bit of space for that. But not as much as I did
over here on this one. I left a big space for that.
We'll come back to that. But this is my big flower
petal for the front, and then this is down
here at the bottom. That one, I want to have just a little bit
different color just to show some definition, and then these up here. Will also be a little different. Now that this is mostly dry, I can come in here and
wet that area down. I'll go ahead and get these wet so they have a chance
to start soaking in, leaving some white spaces, leaving these two alone because those are going to
turn into being green. I will go ahead and add
in some of this orange. You can see how that
really just flows out when it touches
where the water is. Flows I think I want
to add a little depth. I'll add this little bit
of a brownish orange. Put some of that down in there. And then a little yellow. You don't have to go real
heavy on your yellow. The yellow goes a long way. Just a little bit
goes a long way. I really want to see
that definition between that petal and the
one behind it, so I'm just going to add a
little bit more yellow there. Okay. Now I'm going to
allow that to start drying and I'll move on
to these little leaves.
7. Adding Greens and Stems: Okay. So now I'm going
to add in the leaves. So I'll spin this so you
can see my greens better. Going to wet this down
with that one, with that. Put a little spot there. See, I'm not being
overly particular. I'm not trying to go, make sure I get right
inside the line. I'm just pushing my
paintbrush around. It's okay if you leave some
spots that aren't wet, leave those white spaces like
how we have it here where you can see some white spaces
that don't get the paint. That really is great
for water color. Then I'm going to go
ahead and just make this little line
with some water. Because I am using
a cotton paper, this is going to stay nice and wet for me for
a little bit of time, give me a chance to work with
it, manipulate it around. I'm just going to add that in. Add in If it dries too quickly, you can always come back in and just add a little bit
more water to it. That's fine. Nothing wrong
with just re wetting it. Okay. Now I'm going to go
ahead and add in my green. Because it's already wet, I can just dab it. I'm just putting it around
because I'm going to come back through and add in a
darker green as well. But to get it started, I'll just add in this light
green here and there. Remember, there's
no mistakes here. If yours is looking different
than mine, that is great. I love that. I want
yours to look different. If yours looks
exactly like mine, then I would love for
you to branch out the next time you paint
it. Totally fine for it. It looked more like
mine this first time, and then maybe the
next time you choose different colors or maybe next time you go
outside the line a little bit more and
just experiment. So there I put in my
really light color, and now I'm going to go
ahead and grab some of this darker green and just drop in little dabs of darker green here and there
and let that flow around. Because remember, this
is all still very wet, so I can just drop it in. Even drop it in on the stems. I'm not going to follow
it the whole way, but I'm just going to add it in little spots here and there. Where you get the
base of the flower. The leaves a little darker. Some of the stems
a little darker. Some of them a little lighter. You'll know when you're done. Just keep playing around with it until you
feel good with it. I don't know if you
noticed, but I had dropped a little bit of clean
water right there, and then I actually
went in with a green, almost even make it darker. I went ahead in and just added a little bit of color
right to that little dot. Even though it was a
mistake on the paper, I went with it and I'm
like, No, that's great. I love it. I'm just
going to let that go. I'm going to let
that flow around a little bit and I'm
going to come back up pin here and start adding
in some colors up in that. In this one, I think I'm
going to use my smaller size six and I'm going to
use this brown color. This is a sepia. I don't remember
what the brand was, but I really like it. It's almost like just a brown, I'm just going to
add in the center, not a full solid center, little lines and dots to show that that's the
center of the flower. Then I think I'll just draw out some lines using that
same paint brush, making some longer
and some shorter, and then adding in
some little dots just to create this effect. Even put some down
at the bottom, and even up into the flower
head itself into the petals. This is a wet on dry
effect because this is wet paint on top of dry paper. If it was still wet, you would create quite
a blurred effect. Probably not what
you're going for. So you want to make
sure that your paper is dry before you go and
add in these details. Okay, I'm gonna dry that. Okay. So now that is dry
and looking really great. Here is something that
we're going to practice. So if you go back to your other one where you just did something on the
back of, you know, your scrap paper, we're
going to practice something and see if we like it and if it's going
to work out for us. I'm trying to create a little
background effect for it, but something really, really
light and loose and airy. So because that one's done
in purple and pink colors, I'm gonna spin my palette back
around over here of water. On here and very little paint. Do you see how almost
transparent that is where it's so,
so, so, so wet? Even in the purple, I'm
just going to make it with lots of water where
it's just so subtle. And now I'm going to
take my spray bottle, and I'm just going to
spray it one time. Do you see that? Very
lightly sprayed all over it. Okay. So what I'm going to do using a very big
paint brush with just the smallest amount of
paint in there is just dab it into here where I sprayed it and let that
flow around a little bit. I'm not really painting. I'm just kind of
allowing some color to just kind of experiment
and flow out from there. It's a wet on wet
technique where the where my paper is just sprayed and letting that really
faint paint move around. I'm gonna dry that and see what we're going to
see if we like that. Okay, so I know here on camera, this is kind of hard to see, but it just creates just this little tiny
wash on the back in almost like a um like a cloud effect
in the background. So I know that that's
kind of hard to see here on this camera. But I kind of like it. I think I'm going to go ahead
and try that on this one. So I'm going to go
ahead and switch the suburgin come over here to my yellow and my oranges and I'm just going
to spray this, but I don't want to
spray the whole thing. I think I might even
just hold my hand over it and just put a
little water there, little water there, maybe a little bit of
water up on there. You can see how it just has
some sprayed effect in there. I think you can catch that
with the light reflection. And then coming in, might even just dab
off some of that. So it's not quite as wet. Coming in with a lot of water
and just a little bit of pigment and just dropping
some of this in here. And letting that flow around moving it about a
little just a little bit. Just giving that
little cloud effect. Maybe even getting some yellow, giving a little bit of
highlight up here at the top. Really a fun look. Ating a little
yellow down in here. If you want, you could even
spray this again and push it push the water around. Of course, if you
don't want to do that, if you don't want to experiment, if you're really
happy with it the way it is, then don't do it. That's totally fine.
This is your art piece. I like to experiment. I like to find out what happens. I like to try things and then
decide if I want to do it again another time or if that was not the look
that I was going for. So I don't mind the experiment, but if you were content
with yours the way it was, then please don't do it because it is a little
on the risky side, but I like it. I like it. Might even make some little spots
that are a little bit darker. Little lines. You know, little outlines. Almost putting it on
the outside edges. I'm not going to do it up
there. I don't like that. Letting it just kind of flow. You can move it around
this is wet on wet. I'm just going to let that flow. I can move it around
a little bit. Okay. I'm going to
let that sit for a little for a couple
seconds and let that dry and move naturally
before I try to dry it off with a heat tool
because I don't want to move the paint too much. Okay. So as you can see here, I went ahead and added that
little light background. Up in here, it's really
faint with just a very light yellow that you can
barely even see on camera, which was really intentional. I didn't want to draw
attention to it. I just wanted to create a
little lightness to go along with this yellow over here and just to draw your eye upwards. And then down in
here, it just has that little tiny variation in that cloud effect
for the orange. So, so faint. Mostly water with just a tiny amount
of pigment in there. I left lots of little white
spaces as we painted. When I was putting in
painting with water, I did not fill in all the gaps. I made sure that I left
some white spaces, which is really nice
for in watercolor. So now you can see that my
lines from where I traced, where I did my carbon copy,
you can still see those. I'm going to go ahead and
exaggerate that a little bit by adding a
little micron pen. So I'll just use this size
eight, this micron pen.
8. Finishing with Light Linework: Just use this size
eight, this micron pen. On this one, I had used the charcoal pencil,
which I also like. But I think just so that you
can see if you have a pen, what it'll look like
if you use a pen. I'm not going to
trace over the lines. This is not something that I'm trying to hide those lines. I'm just going to use those
as some of my guidelines. Holding my pen on
the upper half, I'm going to just very
sketchy draw that out. I'm not trying to make
exact lines or solid lines. I don't think that
would look really great if you actually traced it. I'm just adding in some
loose little outside lines. Sometimes they're going
to go on the inside, sometimes they will
go on the outside. Of the petals, but it just
helps to find some of them. See how I don't even go
around the whole thing. I just put a little
quick little line here. Because I'm holding it up here, you're going to be
getting a lot of skips. I'm not trying to make it
a perfect little outline, just adding little
bits here and there. I'll come back in and do
the stems in a minute. Helps to define
this a little bit. You certainly do
not need to cover and paint draw in everything. In fact, I'm not even sure if
I want to do all the stems, maybe some lines here like that. Just to kind of give the
illusion that I had done it. You can go back in and look
and decide if you need more. I kind of like that. All right. I'm going to go
ahead and sign mine. Okay. So here we go. Two different color
ways, one that's larger, with three, one that's simpler, with just one, adding in the background if
you wanted to do that. Just such a beautiful
fun flower arrangement and so ready for spring. I really love these leaves. I love the way that
turned out where I started with the
lighter yellow green, that greenish yellow color, and then just dropped in
some of that darker color, making sure to leave
some white spaces. It's a beautiful wet
on wet technique. I hope you enjoyed that.
I hope you did it. If you have finished your project or if you
only did your sample, please take a photo of it
and upload it to the class. Everyone is going to want
to see what you did. We're going to want
to see your artwork. Maybe you chose really
unusual colors. Maybe you didn't trace it, and you made your own. You drew your own picture. Maybe you just did two and
you decided not to paint that third flower or however you decided to do
it to make it your own, please take a photo of
it and upload it to the class so that we can all celebrate your artwork with you. Come on back to the next class. I'll take this off
of the board and show it to you in a frame or in a mat and show you what this is going to look like
is a finished project.
9. Final Review and Framing Your Piece: Okay. All right. Thanks
for coming back. We are going to remove
this from the board. So sometimes you get
watercolor paper that is attached on the different sides
on all four sides. You can use a butter knife or, like, a knife for
like a palette knife. Or if you happen to curve. One of these boning knives,
this is what I prefer. You always find the spot. Sometimes it's on the center, sometimes it's on the edge,
depends on the brand. And you just slide it into wherever there's
a little hole. There's always a little gap, and then you just very carefully work your way around
the outside edge. Now, I think this is
actually the last piece of paper in this,
board that I have. So it just has a little bit more glue around the edges than some
of the other ones. You get stuck going
that direction, then just turn around and
come back around this way. Just go slowly. And then if yours comes off
with a lot of glue like mine just did,
that just peels off. You can just remove
that. So that is ready, and I have a frame here. I do need to cut
it down to size, so I'll trim this down and
put it in the frame for you. So I went ahead and put it into a frame for you so that
you could see it finished. And I'm just so excited
about this piece. It looks so beautiful
and so ready for spring. I think I'm going to
put this in my kitchen. I think that is going
to look so great. So I hope you enjoyed this class we learned so many different
things about water, wet on wet technique. We practice the different styles of wet on wet, some very, very wet to actually
a wet on dry paper. And I hope that
you practice that a lot and learn some
things about that. If you didn't do this
part of the exercise, I really encourage you
to go back and do that. And then we went ahead and made one small flour just so we could sample it and we could play around with it and
see how it went. So it's always good
to practice something first before you go and
make your finished project. Way that you have
tried the techniques, you have a chance to learn. You have a chance to
make some things done that maybe you're
just not really as excited about and you
want to adjust that. We're certainly
not going to call them mistakes because I don't believe that there
are any mistakes in watercolor or in art. I believe that each
person is going to create their own art
in their own way. So I hope that you chose
colors that make you happy that you are going
to be able to use in your bedroom or bathroom
or laundry room. And maybe you made it into something that's smaller
that you can use as a card and you can
give it out for Easter or Mother's Day
or a graduation gift. I really enjoyed this class. Please make sure that you take a photo of this
and upload it to the class so that everybody can enjoy your work
together with us. We really want to be able
to celebrate your work, and it really helps others to see what other
people are making, gives other people some ideas. Go ahead and follow
me here so that you are notified for the
next class that we take. Thank you so much
for joining me. If you enjoyed this class, make sure you go back and take a look at some of
my other classes where we go into some of the
more basics of watercolor. We talk about all
different things and there's so many different classes that you might enjoy. If you found that
this class was maybe a little bit more on
the difficult side, I have so many other classes that are more in
the beginner style, feel free to go and
explore those and send me a message if you have
any questions or concerns, you're not sure how
to do something. I would love for you to
send me a little message, start a little
discussion because then I will know what
direction to go for my next classes so
that I make sure that I am helping you learn
where you are at. So again, thanks for joining me, and I can't wait to see
you in the next class.
 Brenda Jones, Watercolor Artist & Teacher