Transcripts
1. Lesson 1: Intro Welcome to Your Monochrome Floral Mini Class: Thanks for joining
me in my next class. This is going to be
a really fun one. We're just going to
do some really fun new flour for you possibly. I'm going to break
this down so that you can see exactly
how to make this. We're going to run a couple
of different practices like I did here to show you how to
make different directions. I always reuse my papers, so you'll often see me using scrap paper because I never
like to waste my materials. If you've joined me
in other classes, you probably recognize
this from the last class. But today, we're going to
be working on these flowers right here and how to
do that. Don't worry. I'm going to break it
down step by step to make it super easy for you
to follow right along. You're going to practice it, and then you're even going to go ahead and make something that you're going to be able to frame just like I did with this one. This is going to be
a really fast class, a couple minutes of practicing and then making
your class project. Make sure you post a photo of your project because
everyone wants to be able to celebrate you and your achievements and how
far you've come along. So make sure you get that done, and I am looking
for as many reviews as I can possibly
get on this class. So if you could do me a
favor and give a review, even if it's just a few words, it would really help me
out so that other students can also find out if this is a class
that's good for them. Thanks and I'll see you
in the next lesson.
2. Lesson 2: Practice Strokes Soft Strokes and Petal Practice: Okay. In my intro, I told you that we were
going to be working on this little flower and I'm going to be working in
literally two colors. We are going to paint the
whole flower one color, and then we're going
to use a second color for the center of the flower. I'm doing that because I
want you to feel like you don't have to have tons and
tons and tons of paint. You do not have to have
something like this. This is what I work off of. But if you are just beginning or you don't have room
for something like that, I don't want you to feel
limited in any way. We are going to use one main
color plus a second color. Your second color, I'm
going to recommend for this class that's
probably going to be a brown or black or a yellow or a mustard color or
something like that, that's going to be for
the center of the flower. The color that
you're going to make your petals is
anything you want. Any color at all, even if it's not a color for a flower that
you would typically have. What I did for this picture is I actually used a
granulating paint. If you don't know anything
about granulating paint, the paint itself has multiple
colors within the tube, and so I could squeeze
it out and see how it has this almost like a green and a reddish
color added to it. That is just out of one tube, and it was a really
special paint. But if you don't have
something like that, I'm just going to show
you with a single color. That is what we're
going to work on. But if you happen to have
a granulating paint, you might want to give that one a try because that's really fun. We're going to get
started right away where I'm going to break
down a flower like this and show you
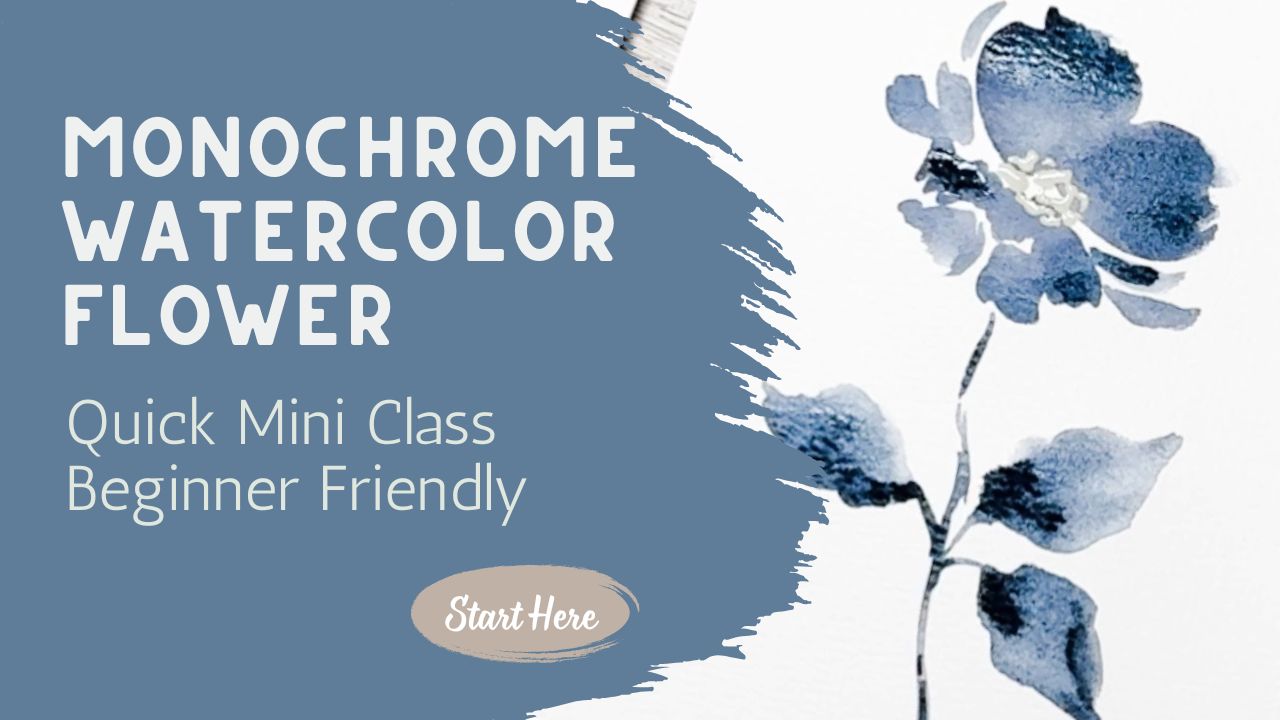
exactly how to make it. When you look at this flower, I want you to see it
in pieces, in parts. First, I want you to see that it has almost this heart
shape here at the top. Then I want you to see this
little area right here that I'm outlining
with my brush. I'm going to call that an island or a squiggly or a continent, whatever you want
to call that, this little line right here. Then there's these
little extra petals that come off the side. Then you have the center area
where all the pollen is, and then of course, you have
your stem and some leaves. Depending on where you
put this first piece, this heart shape will depend at which direction the
flower is facing. Whether it's facing up or
to the left or upside down. Here you can see that
the heart is at the top. Here I tilted the heart
over to the left. Here I actually made the heart going upside down
so that it looks like it's actually
almost bending over, which is really great. If you're making a bouquet and you want to have some
movement and show that the flower is maybe
listing over to the side or wilting or just on
an angled branch stem, you need to be able
to make that as well. We're going to practice all
three of those on a piece of practice paper before we go
and make our actual project. I'm going to leave this here so that you can still see it, but we're going to practice
it here again for you. I'm just going to use a teal. My brush that I'm going
to use is a size eight. I really like this brush, but you use whatever
size brush you happen to have the size is not going
to make a big difference. It might just make
a difference as to what size your flour is. I do want to move that out of my way a little bit so I have more room for my hand. I do want to be always
comfortable when I'm painting. I don't like to feel like
I'm straining in any way. We're going to paint
this one first. And like I said, I like
to paint this top piece, which I'm going to call a heart. The way I do that
is I will paint in a stroke like that where
it's almost like a petal, so one and then I'm going
to make a second 12. Then sometimes I even just round it out a little bit if I want to make it
more exaggerated. But that is it and
you're leaving this open space underneath here. Then we're going to move on to that little island
area or continent. I want to leave this open area for my yellow to come in later. Laying my paintbrush
down on the paper, I'm just make some
little squigglies and it's come up and
it's going to go over. There's nothing right
or wrong about this. There's no magic to making sure that it's the right shape, make something similar to that. Then we're going to add in
the extra little petals. On this one, it depends. If you feel like you need to
make more petals, go for it. If you got really far apart and you feel like you
need to fill it in with extras, that's fine. If it's a little tighter
and you don't need as many, then don't try to
squeeze in extras. I'm just going to put one here. And then maybe I'll
put another one down here just to make
another little petal. Don't want to make it too sharp. Dip back into my paint
so that my paintbrush is always full of paint
but not dripping off. If it is dripping off, either I have too much water or I just picked up too much, you can also always
brush it off on the side or have
a rag nearby and you can just dab off a little
bit because you don't want it dripping when
you're painting. And then I'm going
to add another one over here on this side. I can turn my paper a little
bit so that I'm comfortable. I'm making a little
petal that goes up that direction.
And I don't know. Maybe I'm going to
just leave that maybe add another little
small one that's up in here. And maybe I'll add one more kind of coming down this
direction so that it looks like it's
like it's opened up already so that my flower looks like it's really
blooming and opening. Maybe one more over that way. So rinsing off my paint brush, I'm going to use
a smaller brush. This one's a liner brush
or a script brush. Sometimes it's also
called a detail brush. It's longer and a
little floppier. You can get them in
all different lengths. This is one size that I prefer. I feel like I have a lot
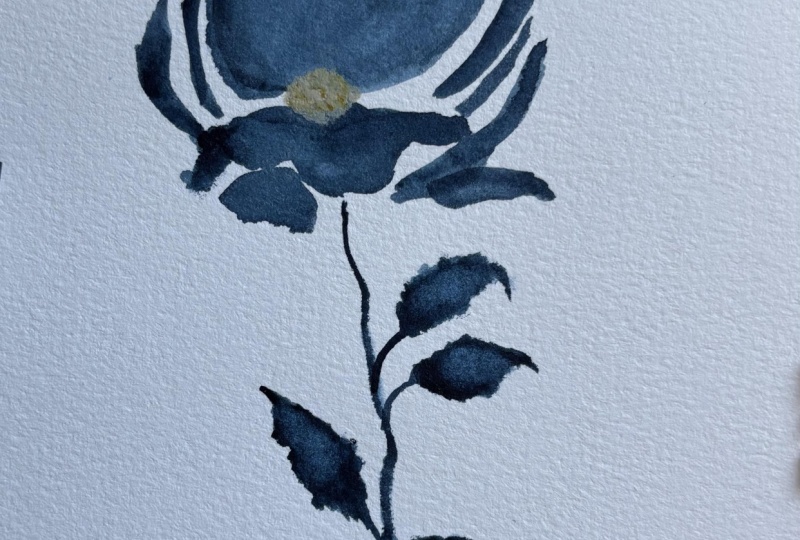
more control with this one. Maybe I'll use a brown for
the center of this one. Just putting a little
bit of paint on here, and I can just put little dots. Now, if my teal was really, really wet, that would bleed and so you just
want to be careful. I don't have a problem with
it bleeding into the teal, but if the teal was too wet, it might bleed more
than I wanted it to. So you want to time it when
it's wet but not too wet. Because I was showing
you the paint brushes, it did maybe dry a little
bit more than I had wanted, but that's okay. I don't mind. Then I can add a stem, and I'm just going to
use the same teal color. I'm just bring a stem down. My stems don't always touch. Sometimes I just leave
a little extra space there and my stems
are often jagged. I'm not looking for
a straight stem. I don't need a lollipop. I'm just making it jagged. Then I'm going to
put a little stem off to the side for the leaf, laying my paint brush
down and letting that belly of the brush really lay down flat
against the paper. I'm going to wiggle it. And
draw it back up slowly. And there I have a leaf
dipping back into my paint. I'll add a second one. Tilt my paper a little
bit so that again, I'm comfortable and just kind
of wiggle. There you go. That's the beginning
of a flower. I can come up here
and add a little bit more if I feel like it
needs a little bit more. Let's go ahead and
make another one. This is something
that definitely needs a little bit of practice. I'm going to make my heart shape over to a side instead
of straight up and down, just over to the
side a little bit. Make a little island. That's just to represent that lower flour that as
you're looking at it, it's opened up and
laying out flat. Then I'll add in a couple
extra flower petals and see how sometimes I put more and sometimes I put less. Maybe I'll put one
more down in here, and then I'm going to give
it a stem and a leaf, maybe a second leaf. Maybe add one
that's coming down. Then for this one, let's
go and find some yellow. Drop a little yellow in there. Now, this is still very wet. So when I touch that teal,
it's going to bleed. I turned it into a green, yellow and blue makes green, which makes sense
because this is teal. That's fine. I like that. We'll do one more. Really a good thing for you to practice over and
over and over again. Let's make it facing down. One, two, making
that heart shape, adding in a little island. Not really sure why
I call it that, but it's just kind of helps me identify where this
is on the page, adding in some little
petals, opening that up. Maybe adding one more
down that direction. Sometimes I even like to add a little just a little
bit of motion. And maybe the stem is
just going to kind of come over with a leaf. Another little leaf.
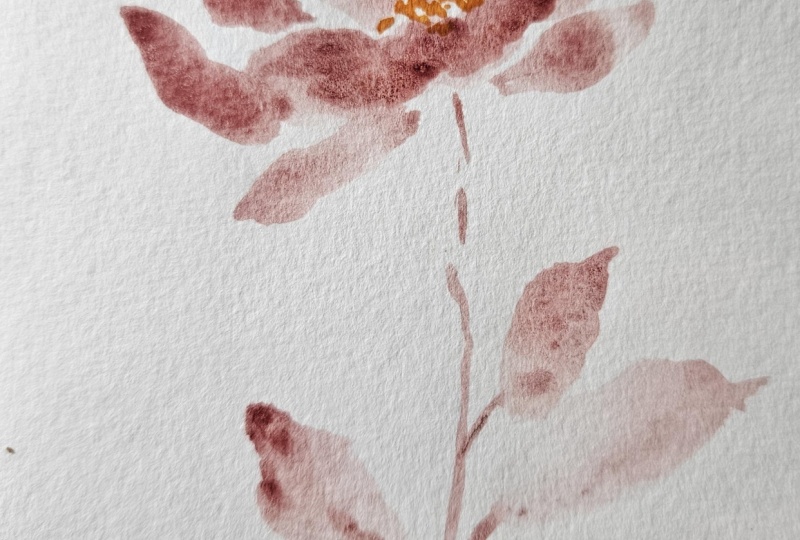
And this time, maybe we will use a orange
mustardy kind of color. Okay. So practice these leaves and flowers as many
times as you need to, and then come back
and join me in the next lesson
where we put this together and make it into something that you're going to be able to
hang on the wall. Or you could make it smaller and use it as a greeting card. It's so many opportunities
and options for you. I can't wait to meet
you in the next class.
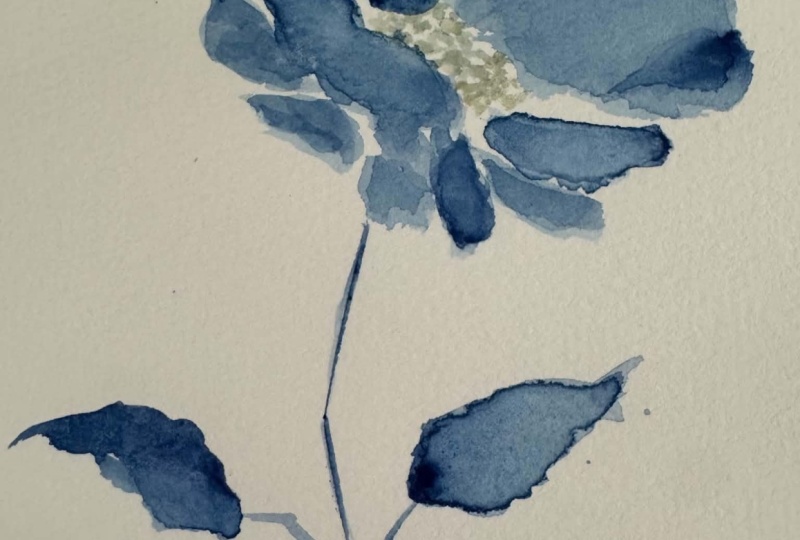
3. Lesson 3: Main Class Project Paint a Calm Monochrome Watercolor Flower: I am hoping that you
took lots of time to practice this flower
and to come up with a design that you
really like because I know that this does take
a little bit of practice. It's not something
that you might be able to just pick up and do unless you've been
watercoloring for a long time. But if you're a beginner,
you may want to practice this a little bit more until you've
figured this out. Use the front and the
back of the page. Use several different
pages. Use your notebook. I hope you've bought
the notebook that I've been telling you
about where it's a spiral bound and you can keep
all of your little flowers together where you can always reference them and
say, Oh, that's right. I used to make that flower. That was so much fun. So
go ahead and practices. If you need more practice, go ahead and take as
much time as you need. We're going to go ahead and
make the class project. In this one, I had this
picture frame that is matted, and I have this
picture frame opening, and I want to measure
that so that I can make sure that I paint within the guidelines of this page so that
when I frame it, it's going to fit inside. So what we're going
to do is grab a ruler that I have here, and we're just going to measure that, measure the opening. And so this is a five by seven. So I want to make something
that's about a five by seven so I'm going
to use a pencil. I want to mark in
here a five by seven, I like to go just a little
bit on the wider side. It doesn't have to
be centered because, of course, once you go to
put it inside the frame, as long as you're not
up against the edge, there's definitely
wiggle room in there, so it doesn't matter if you're
really on track or not. And by 7 ". So let's see. I might go down to
here and up to here. And then that way I know
where my parameters are and as long as I
paint something in the middle of these four dots, I know that it'll
fit inside of here. I can always cut this down to size afterwards after
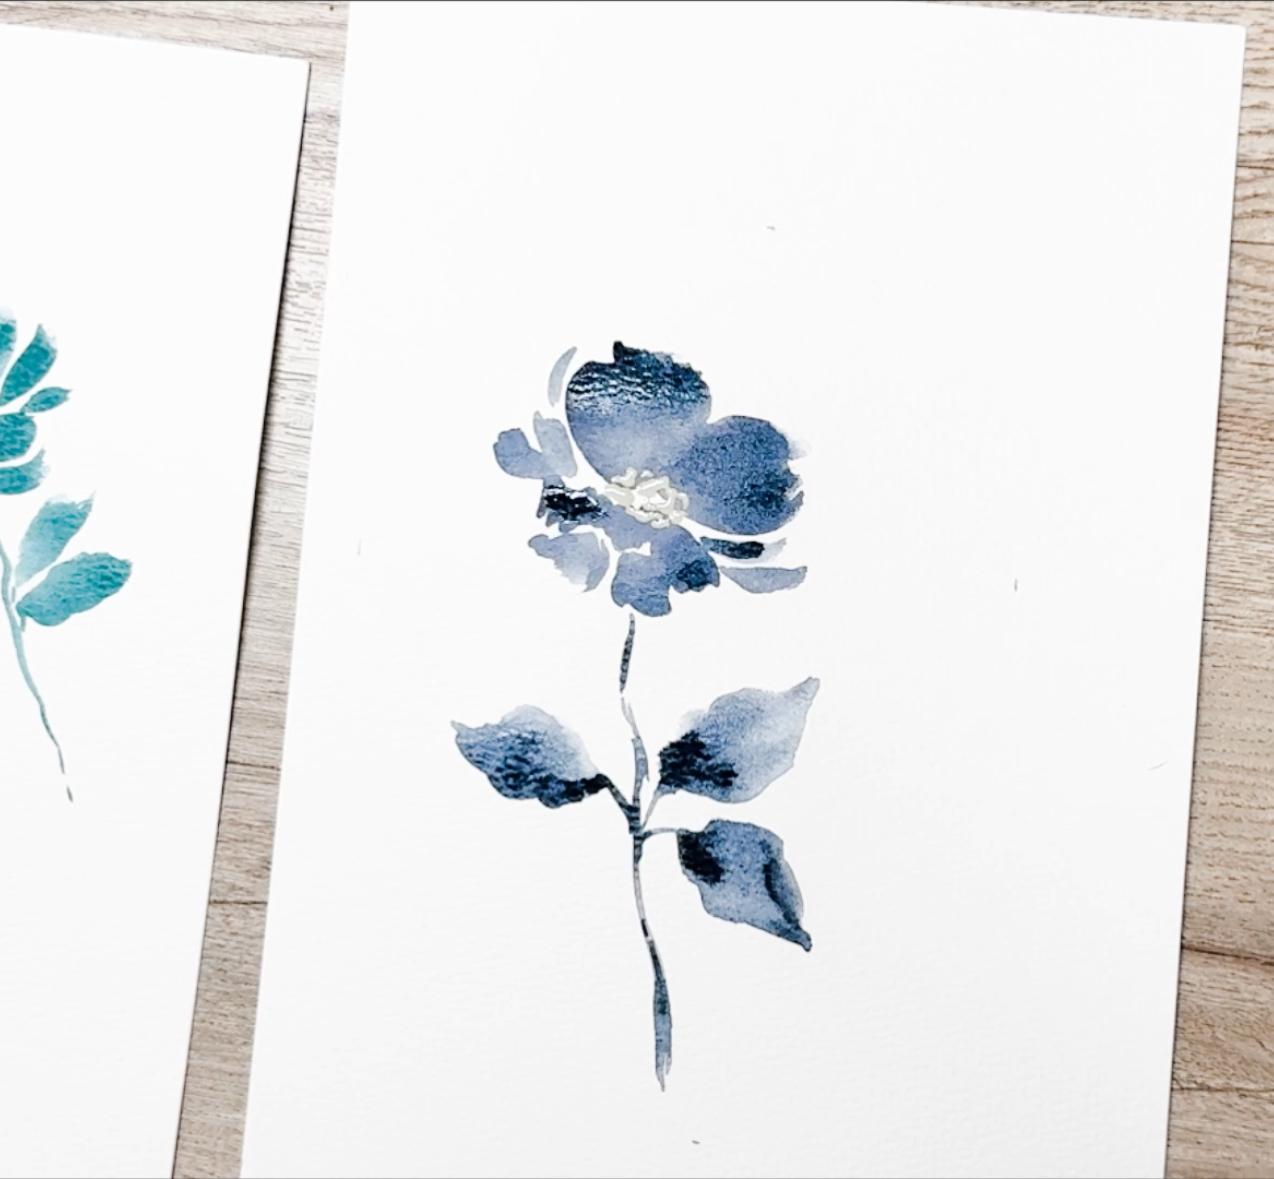
it's been painted. For this particular project, I'm going to use the
Daniel Smith indigo color. So it's going to
be a blue color, it's really dark blue. You don't need much. I'm just going to put a
little bit here on the side and have that a little tiny bit
will go a long way, which is one of the great
things about buying it in the tubes is it
stays nice and fresh. It will be creamy when
you get them out, so it doesn't take
long until you can add a little bit of
water to liquefy it. So to test that out, I want to show you here
using my project paper here, add a little bit of water
and I'm going to be able to make a really pretty
color there with this blue. Adding just a little bit
of water to this area. I'm going to go ahead and make my single flower within
this area that I've already marked out so
that I make sure that I stay where I can frame it. I'm going to make this fairly large making that
heart shape pedal. You can even see that I'm making a little
jag it at the top. I'm not even trying
to make it perfect. That's the way I
like to paint where things are just a
little bit more loose. Then I'm going to add in this little islandi thing
down here at the bottom, show indicating that
petal that's open. Something random. I'm not being particular about
what this looks like. Then I want to add
in a couple extra little petals coming up, dipping back in when I need to. Maybe have another
petal coming down. One coming up that way. Maybe another petal coming out. Okay. And then, let's see. I should have done the stem. I'll do my stem here. Again, not straight. I'm just kind of making them
kind of jagged. Let's see. I want to have a pretty leaf. Maybe dip a little
bit extra in there. There we go. A little
bit more concentrate. Make it just a little darker. Let that bleed in. I really love the Daniel Smith paints. If you haven't
painted with those, I would recommend that
you give a couple tries. They are more expensive
to buy the tubes, but they last a really long time and they're so good quality. I really like them a lot. So using my little script
brush, um let's see, because I use this dark indigo, um, maybe. Sometimes I like to test it out. I have this it's
called titanium buff. You're just going to
try it over here. See if I like. Yeah,
I do like that. This is if you can
see this here, this is just my titanium
buff that I like, add a little bit
more water onto it. It's a very neutral color. I can just drop some of that on here for the center
of the flower. Because this blue has
dried completely, it's not going to bleed.
You know, it's pretty. Okay, so there's
my single flower. I'm going to go
ahead and dry it, and then I'm going to show you how we're going to frame it. Come back to the next class where I show you
all those details.
4. Lesson 4: Details and Finishing Touches Refining Petals and Adding Gentle Details: Is dry now and it is ready to be cut and
put into my frame. As you can see, where I added in a little bit of the
darker concentrate, I did add a little bit of a different contrast there,
which I really like. I often will make sure that
I have the highlights and the low lights by
putting in some of the paint that's a
little bit more water down, and then in other
places where it's gotten a little depth of
color where the paint, there's more paint
than less water, which is what happened
in these spots. I wanted to highlight
that for you. So I'm going to go ahead and
cut this down and show you how we're going to be
putting it into the frame. But I also wanted to just
show you something else, which is to show
you how each one of these flowers that I painted
look completely different, which is what I
would be expecting if you painted this as well. Your flower is going to look very different from my flower. So whether even it's from my original to this one
to these over here, they all have a slightly
different look and feel. And that is perfectly natural because art is
just kind of like that. As you're painting, your brush is going to do
something different, maybe you had a little
bit more water, maybe you had a little
bit more paint. And so they're always going
to be looking different. But that's just the
nature of nature, right? You look at a flower and every single flower you look at is going to look different. They're never going
to be cookie cutter. So that is what is just
so beautiful about making your own art is it
is making your art. Whatever art you made is perfect and exactly
the way it should be. I want you to be very
proud of what you've done. I want you to be very
excited that you've made an achievement and that you've
accomplished something. If it's not exactly the
way you wanted it to be, then it means that you just
need to practice more. I've tried to practice
ten to 15 minutes almost every single day. There are days that go by where I can't do that,
I don't have time. But when I was in the
beginning phase of learning, I literally would just leave my art station set up in a corner of my house
where I could say, I'm just leaving
it here because I want to practice ten or
15 minutes every day, and often it was
something like this. One color, one brush, one piece of paper,
paint something, clean it up, and go on. I really want to encourage you
to do that so that you can get better and better and better by leaving
some paint out. You can pick up these frames anywhere. I happen
to have bought this. I think it was at Ikea, but I know that Amazon
has these frames as well. These are really nice
they're kind of like a shadow box, which
I really like. The little depth in here, gives it a deeper
edge to the frame. So here's a frame. This is a picture that
I did back in 2024, actually, and I think this is going to be fitting
in here very nicely. So I can take my mat and hold it over it and show you what
that's going to look like. So something like that.
Isn't it amazing. As soon as you put a mat on it, it just changes everything. I want to really encourage you to frame your pieces of art. It is absolutely
amazing once you've put a frame and a mat
around a piece of art, how much it elevates it from just being on this
random piece of paper to actually looking
like something that you should be really proud of
and that you could hang. I could totally see
putting this into a powder room or into a library or something because this is just such a beautiful piece of art that you should be hanging
in your house, as well. I realize that I
forgot to sign this. I want you to remember to
always sign your artwork. Even if it is just
like you can see here, I just put my initials
and a year on it or if you want to sign
it with your full name, whatever you need to do,
make sure you get it signed. Getting ready to cut this down, I do have one of these, which is really great for
cutting so that I can get some straight lines and my edges can be
nice and straight. It doesn't have to be perfect because it's just going
to go inside my frame, but I cut it down a little bit. And I know it's going
to fit in here. I'm going to put my mat down and make sure that when
you put your mat down that the bevel is facing the glass or the plexiglass so that
you can see that bevel. Then you're going to put
the painting inside. I like to turn it over and take a look at it and see
if it's centered, see if it's where
I wanted it to be. Then I have artist tape, which is like a masking tape. I like to just tape
down the edges a little bit and make sure that they get taped down so that they
don't move around later. I added the back, and now it is ready to hang onto my wall. I'm really glad that I
chose this indigo blue. I think that's really
pretty for this. So go ahead and take
a photo of yours, upload it to the class
so that others can enjoy it and celebrate
your work with you. And if you would be so kind to please do a
review on this class. Let me know how I
did so that I can improve and so that
other members of the Skillshare community can know whether this was a good class for them to take as well. Any reviews are really helpful for myself and for
other classmates. I really appreciate you taking
just a couple of minutes. It doesn't have to be long, even if it's just a word or two, a review is very helpful. Thank you and I will see
you in the next lesson.
5. Lesson 5: Outro Final Thoughts and Your Framed Floral- Please Follow Me: Wanted to show you what it
looked like hanging here. It's just right outside
of our powder room. And I just wanted to show you
how nice it looks to have something hanging in your
frame, in your house. You know, having
your own artwork is something just
so fun to have. I really want to
encourage you to do that. A simple one flower in
one color really can make such a difference in your house and can be something
that's really achievable. I know you're going to
love it. Thanks for joining me for this
nice fun project. I hope that you had a
lot of fun doing it and that you went ahead and
just did one single color. It looks so nice to have
just one single color. It's always a fun thing for
me to practice and play with. Did you take a couple minutes
and write a review for me and make sure that you upload
that picture of yours? I would love to see it. I truly want to celebrate your
accomplishments with you. Have a wonderful
day, and I can't wait to see you for
the next mini class.
 Brenda Jones, Watercolor Artist & Teacher