Transcripts
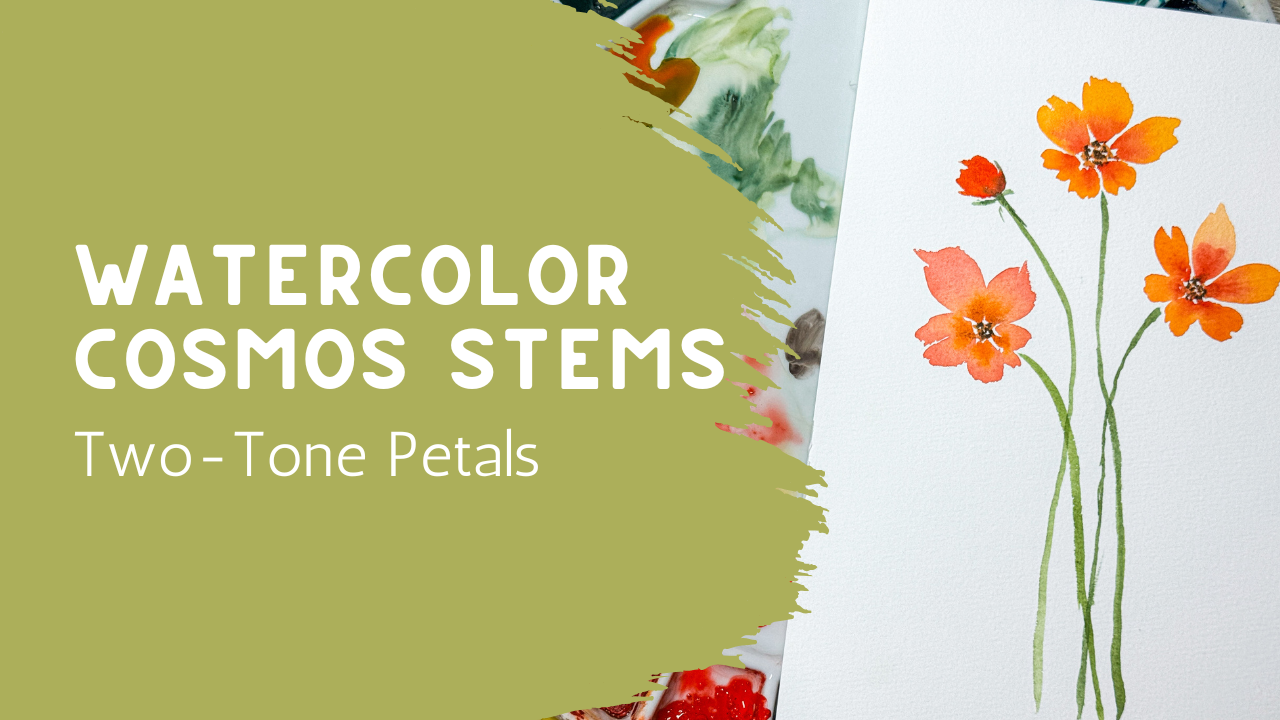
1. Welcome to Class: Welcome back to class. Today we're going to be
painting this beautiful, simple trio of loose
watercolor cosmos flowers, and I promise this is something
you can absolutely do, even if you're fairly
new to watercolor. One of my favorite things about simple flowers like this
is that they remind us that we don't need a
complicated composition or lots of tiny details to
create something beautiful. Sometimes just a few
blooms and plenty of white space can feel elegant and peaceful
and intentional. In today's class,
we're going to keep things focused on being relaxed. We'll paint three flowers and a small bud and we'll pay attention to the
simple petal shapes, soft color transitions,
and graceful stems. There's no sketching required, and there's definitely
no pressure to make everything perfect. I created this class to feel
approachable and enjoyable. And if your petals
turn out a little different from mine,
that's perfectly fine. In fact, that's one of the things I love most
about watercolor. Every painting develops
its own personality. As we paint together,
I'll walk you through each step slowly so that you
can simply follow along. Feel free to pause the
video whenever you need to. Even a very basic simple version is absolutely worth
finishing and sharing. So gather your supplies,
take a deep breath, and let's enjoy some relaxing
painting time together. I can't wait to see what
you create. Come join me.
2. Supplies and Why Practice Is the Magic: We're ready to get started
on today's lesson, and what we're going to
be doing is painting a little tiny bouquet of
just some simple flowers, little heads at the top, and then some simple stems, no leaves, no stress. I have my watercolor
palette here. It's ready. I have activated it. It was all dry, and
then I just sprayed it down with my water
bottle. It's ready. I have my clean water
in a little mason jar. I have a variety of
different brushes. I'm often asked what is
my favorite brush style. I like just the Princeton round. These are the heritage
collection, I believe. Yeah, they're the
Princeton Heritage. I have a variety of
different sizes going from just a little tiny detail
brush that I hardly ever use, but I like to have it in case. All the way up to a size 12, which is the largest. Probably my favorite
brush is the size eight, but these would be my
favorites that I have. Any brushes that you
have are going to work. If you don't have
this style brush, the brush is not the magic. The magic comes from practice. Cannot stress that enough. It's not about the paper. It's not about the paint. It's not about the style
brush that you have. It's about how
often you practice. If you want to get better at watercolor and you're
struggling with the balance between water and paint and getting it
to work on your paper, it all comes down to practice. The more you practice,
the better you will get. Use the supplies you already have and just keep practicing over and
over and over again. I actually recommend
ten or 15 minutes as often as you can. If it's like three times a week, that would be fantastic. If you could practice
every day for 10 minutes, you will see huge
changes in your ability to do watercolor if you allow yourself that ten or 15
minutes every single day. But if you can only find ten or 15 minutes for
three times a week, you will still see an
enormous change in how you work with your watercolor and your paper and the
supplies that you have. If at that point, you're
feeling like you're ready to move on and
get different supplies, then we can start talking about different supplies that might
be a little bit better, might work a little
bit nicer for you, but it's not about the supplies. It's about the practice.
Okay. Enough of the lecture, let's
get right into it. What today we're going
to be doing is we're going to create a
little tiny bouquet of just flowers and stems and make this as
simple as possible. So for today, we're
going to be making three little flower heads
that are facing up. But what we don't
want to do is have all three of them
facing just like this where they're just being a little sunshine facing
straight up at you. Some of them we might
want to have angled, some we might want
to have facing this direction or going upwards. Maybe we want to even have a little bud where it's
closed up a little bit. So as we paint, we will be discussing
trying to make our flower heads facing in
different directions so that it doesn't look like three flowers just looking
straight up at you.
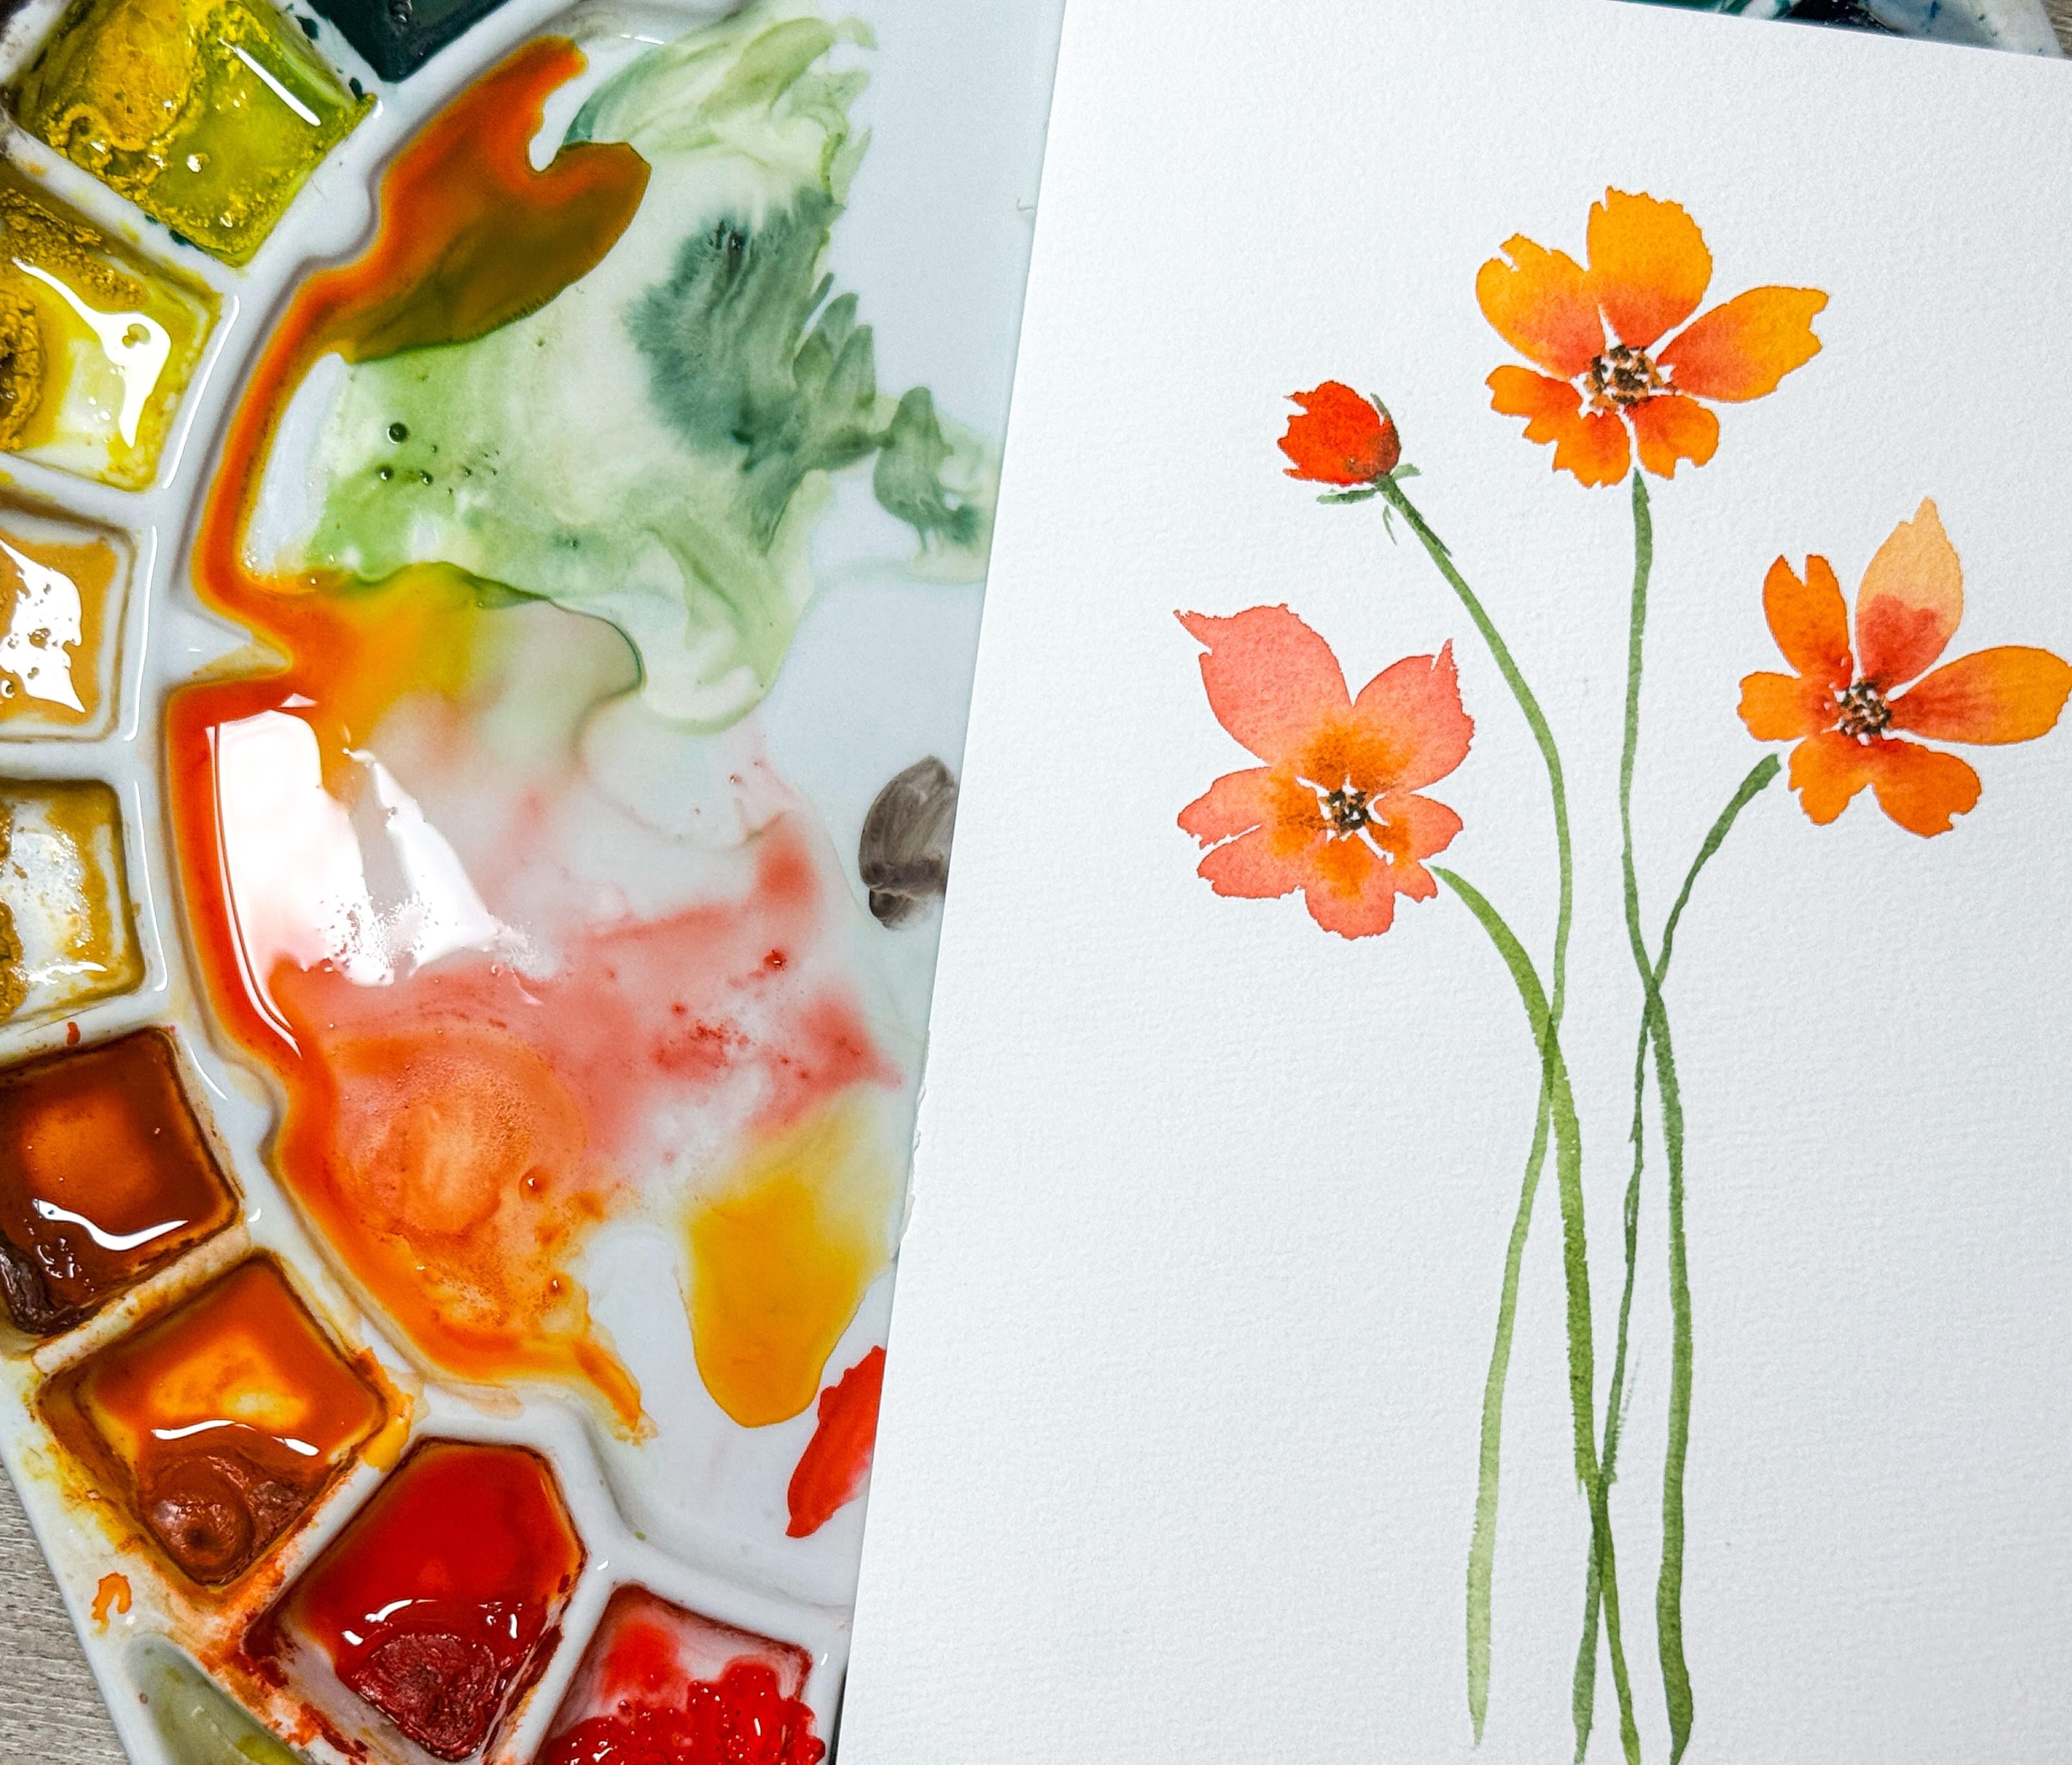
3. Creating Two-Tone Petals with Wet-on-Wet Color: Thing today, just to get this started because what
we want to be able to do in our class project is allow our paint colors
to bleed together. I want to be able to put
down a orange color and then put in a pink color on top of it and let them
blend together. Or over here, we're going
to be putting in a pink and then adding in an orange and
letting that blend together. And there's a little
bit of a balance here where you don't
want your paint colors, your paint to be too wet, and you don't want
it to be too dry. That really comes from practice. What we're going to do
is I'm going to show you a little bit of a practice
thing that we can do here. So when you are using
your paint brush, always start with a wet brush. You don't want your
brush to be dry. And then I'm going to start with this paint color here,
which is an orange. And if I just dip my
clean paint brush into some of that paint and
just get it on the tip, I want you to see what happens. When I am just painting
with it with just the tip, it is nice and dark, so that's a good thing. And sometimes that's
exactly what I need. And so when I am painting
and I do like a center, and I want some darker paint right into the
center and I'm making some little dots into
the middle of my flower, I might use just the tip
of my paint brush with just a little bit of paint on the end so that it's
nice and concentrated. But you can also see here that this one is
almost completely dry because when we started painting and I was just using
the tip of the paint brush, it made it really,
really nice and thick and dark, which was great. But you can see that it almost has no shimmer in there at all. And so that means that
when I go to add in a second color like that pink that we're
going to be using, that's not going to want to blend because that's going to be looking at
that and saying, Oh, that's already dry. Now if I go and I add in some of that pink right here,
watch what happens. I just sits right there. It's not blending, it's not
moving across my petals, it's just getting a center. So it's too dry. If I have my paint
brush full of water, and then I come in here and
I get it full of paint, and I add in, let's just
make another one here, and I put another one here. Now, it's not so full that the
water is pooling you know, I don't want it to be coated and a big bubble of
water over the top. But you can also
see that that is so much more water on there. Now we're going to let
that dry for just a second just like we did
with this one because sometimes you have to
mix up other pink colors or something else is going on and maybe you're
painting further. Maybe you're
painting another one over here with a darker color, and you want to be able
to come back to this, and it's not quite ready. You want it to be wet
enough so that when you look at it later,
it's still wet. And that is just going to
come from practice because if you've used too much paint
and not enough water, it's going to dry way too quickly, just
like this one did. But here you can see
that it's still wet. You can still see that
wetness, that shine to it. And so now I'm going
to add in that pink. I'm going to come back
over here and grab that pink color and you can see with my paint
brush that I am laying it right down
into that paint and filling that paint brush up. This is not the time to
be stingy or careful. You're not using that much
paint. You're not wasting it. You're painting with watercolor, and so it's important that
you fill the whole thing up. Now, even though we've
been talking for quite a while and I haven't painted anything
for a little bit, you can see that
both of these are still really nice and shiny. And so when I come back over
here to add in my pink, look at how that
is flowing across, unlike how this one,
it just stopped. Wherever I painted
it, it stopped. But here you can see that I can put my paint in here
and it's still going to just flow across because these are still wet and I can
add in that second color. And that is how we're
going to work and create this color
effect where it's pink with an orange center or orange with a pink
center because we are doing it at just the right timing when
the petals are still wet, they haven't dried
because if you go to add in this pink now, look, it doesn't go anywhere. It's already dry. You need it to be still wet
so that it flows. You can even come back in
and you can add in more. You can say, Oh,
I want it darker, so you can add in more and
make it a bigger contrast. Hope that helps, hope
that makes sense. This really comes
down to practice. You have to practice this. I would grab a sheet of paper and practice this over
and over and over again, making little puddles
coming in and making different amounts
of paint versus how much water is on it and
trying it different ways. Here you can see, I made it with lots of water and
it's almost you can see that L it's running as I tiled that paint is running because I had the
most amount of water there, and then less water, more paint, and then look at how
much paint is on this one and very
small amount of water. This one is the one
I painted last, but look, it's already
starting to dry, where these are still
nice and wet because my paint brush is nice
and wet when I started. So now for all three of those, I'm just going to
come in and using the same pink that
we've been using. I'm just going to
add in a little bit of pink right into the center. Like it was a petal, adding some pink right
into the center. Look at how that flows across. This one flowed really far
because this was the wettest. This one is a little bit less. But now let's try this one. Let's try to make this one flow. See how little that one
flows, hardly at all. Where this one has almost
gone across the pol page, I can see that it's come
all the way over here. Even though I only
added the paint here, it is traveling across my whole petal and this one
has only gone about this far. But this one isn't going
across hardly at all. So go ahead and
practice this until you have figured out how wet
your paintbrush has to be, how wet your paper has to be when you
are putting this on. Now, remember, this
paper is completely dry. So my paper is 100% dry. I am just adding on
wet paint brush. Onto my dry paper. And the wetter your
paint brushes, the longer it will stay dry. So we're just going to make
a quick little flour here. And you can see here
that these over here are starting to dry
already because I had run out of water
on my paintbrush, where these are still very, very wet because they were the first ones that
had lots of water. So when I go to add in my pink, I'm going to come over here to these ones that are
starting to dry, and I'm going to add it in here first because these are the
ones that are still wet. I'm gonna find those wet spots. I'm gonna put it in there
and let those flow across. Mm. But if you waited too long, these would have been dry and then they wouldn't
have flowed at all. So go ahead and practice, get out a sheet of paper, try this several
different times in different ways with
different amounts of water. If you're starting
with watercolor, this is the hardest part. This is literally the
hardest part of watercolor, which is understanding
how much water and how much paint and
when to add layers and what your watercolor should look like when you go to add
color, another layer. I hope this was helpful. Let me know in the discussion if you want a bigger
lesson on this because I would be happy to
make a whole class about this if you're needing
more help with this. So let me know if you
need more assistance, but I thought maybe a little quick lesson would be helpful. So come on back to
the next lesson where we go to make
this little beauty.
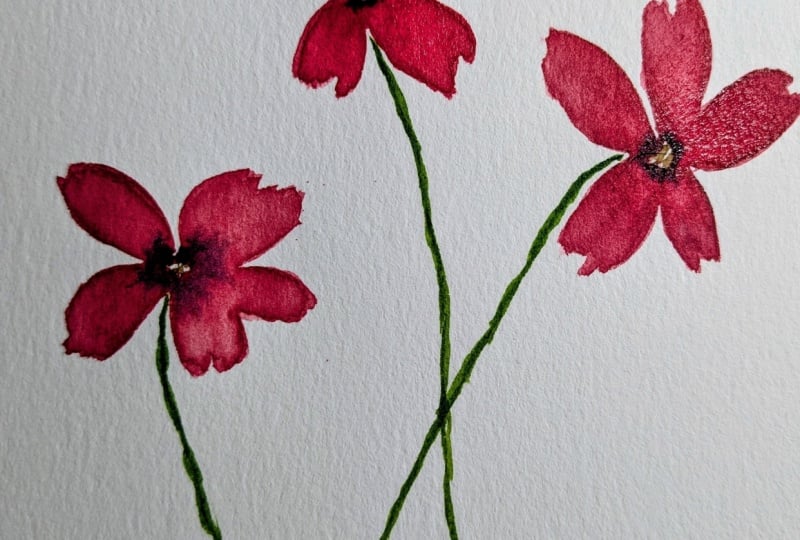
4. Painting the Cosmos Trio Project: I am ready to get started on these three flowers like we talked about in
the last lesson. I'm going to be making sure that my three flower heads are facing different directions instead
straight up and down. I'm going to start with this
really pretty orange color. And to make that happen, when I'm trying to make a
flower head go this direction, you can either make it
so that these petals are longer or you can
make it so that they're shorter and these
are the longer ones. As long as one side
is shorter and the other side is longer,
it's going to look great. Let's give this a try. I'm going to put it
over here to the side. I'm going to be holding my
paintbrush at an angle, moving this back a little bit so that my hand has a spot to sit. I'm go put this one over here. I'm just going to
make a little petal. This is going to be
a two stroke petal, something like that. Okay. And I'm dipping my
paintbrush all the way in and making
it completely wet. And then I'm going to add
another one right here. Okay. And then I'm going to come
back in and I'm just going to add a third petal like this. It's okay that it doesn't meet. We like the m to be a little
bit jagged, totally fine. And then I'm going to be
adding another one over here, and you can see that
I'm starting to make them smaller as I
work my way around. So I'm going to before
these dry completely, you can see that
they're still shimmery. I'm going to add in
just a little bit of a pink color hue to this. I don't want a lot,
but I want them to just get a little
bit of color, so I'm just going
to add a little bit of extra pink color
to that base. Then I'm gonna come back in with my orange and just
kind of come around. You can always move your paper if you want to move
your paper around. There I've got my
little petals going. So now you can kind of see that it is facing the one direction. And before these dry completely, I'm going to wait for
them to dry a little bit because they're still
a little too liquidy. I'll wait for just a second and then I'll come back in with that red and put in some of
that pink color that I like. Then I'm going to do another
one where it's going to be a little lighter
in color, I think. We're going to put
this one up higher. I'm going to make them
at different heights. I'll have the center
one is going to be a little taller
and then this one, and then I think the third one's going to be a little bit lower. I'm going to start
this one and maybe make a petal right at the top. And then another
one. Another one. Yeah, they're just very,
very simple petals. Um, I think I'm just going to start
making some of these a little bit smaller. Because the smaller the petal, it just gives it a little bit of shape and direction so that leaves all your
petals and flowers don't look like
they're all facing the exact same direction. I come back in with a
little bit of this pink. I'm just going to add a
little bit to the base. Let that bleed. Fills
it up, runs up through. It's a really nice just add a little bit
more depth in there. Now, you could be making
these any colors. You could be making them yellow and orange or maybe
pink and purple. Whatever colors you
would like to make them, or maybe they're
different colors. Maybe some of them
have a paler color. Whatever way you
want them to be, that would be a great
idea, and I would love it. So I think on this next one, I'm going to just switch
it up and make my petals actually more on the pink side and then put in orange
into the center. So we're going to
make these larger. I'm going to just
come around and make these over here a little
bit on the smaller side. Just so that it has a nice
different directions, and the petals and the flowers
are facing different ways. And now I wait for that
to be just the right. That comes from practice. You just have to
look at that shimmer and if it's too much, it's not going to flow nicely. And if it's too dry,
you're going to get the opposite effect where
it's going to dry too quickly and you're
going to get the paint is not going to flow
like you wanted it to. I'm just going to
use a little bit of that orange and just
put it into the center, so it's almost the
reverse of this. Just a little thicker paint. There we go. Perfect.
Looks like sunshine. Now I'm going to
add in some stems. We're going to come back
and do the centers, and I'm probably also going
to add in a little bud. But at first I want to
add in some little stems. Mix up some green over here. Now, I am using my size
three. This is much smaller. I'm making sure that it has
lots of paint in there. I don't want it dripping,
but I want lots of paint. I'm going to come from
behind that leaf, that petal and just bring
it all the way down. Maybe I want it just a little
bit thicker up here at the top and then have it come
down a little bit thinner. I like them when they're wavy when the stems aren't perfect. We also like to have my base
just a little bit thicker. Then I'm going to
come from here. I'm trying to make it look like the stem is coming
from behind there. So I'm going to
choose right in here. I'm not going to take it all the way up to the top because we're pretending like you
can't see behind that petal. I'm just going to
take it up close and lay my paintbrush down, and then I'm just going
to bring it down. Maybe it crosses over. Maybe it comes over
this direction, maybe it goes the other way. It's up to you wherever
you want it to go. I can make the base a little bit thicker as we travel back up. You see how it has a
little bend to it. Most stems are going to have
some form of a bend in them. They don't usually draw grow
straight up like popsicles. I'm going to bring this one over and have it come this way. Again, I like my stems to cross. They don't have to, but I like mine to
cross every once in a while. There we go. Now I'm going to lay that one down and pick up my size six, and I'm going to be
putting in some centers. And my centers, I
want them to be in the same family of that orange, but maybe a little bit
more onto the brown side. So I'm going to come
in here and just add a little bit darker color. Kind of dots coming
around the outside edge. It's okay if they bleed. If your petals are still wet and it starts to bleed into
those, that would be okay. Nothing we have to worry about. Leaving little white spaces. We don't need to
fill it completely. Well, this one's
pretty wet still, so I kind of want to be careful that I don't
get it too much. Or I'm gonna lose that effect. I want to add a little bit in. And as this dries, we'll go back in
and probably add a little bit more
detail as well. Now, I said that I might
add in a little bud, and I think I would like to. I think I want to
add in a little bud. I think I'm going to go back
to my smaller paint brush. I think I'm going to
choose this color here. So now I'm just looking
at this and going, where would I like
to have my butt? Do I want to have
my bud down lower? Do I want to have it up
higher? Where on here? Would I like to have it?
There's no right or wrong. It's not like, Oh, I chose the wrong spot. So just choose your spot
that you want to have it. I think I'm going
to put it over here almost like it's just
about ready to open. I just feel like maybe there's a space in here that's
missing something. I'm going to turn
my paper just so I have my hand is
more comfortable, and I'm going to create a bud. Now my bud is pretty much just what you would expect
one of these petals to be, I'm just making them smaller. Something like
that. A little bit darker to indicate that
it's all closed up. I might even come in after that dries just to
touch and add in some of that other color just to pull those two colors
two tones together. I'll wait for that for a second. Check on these other ones. Waiting, I want to add that
darker color into the center. I don't think I'm going
to add any leaves, but if you feel like
yours needs leaves, go right ahead and
add your leaves in. I'm going to grab some
of this darker pink. I'm just going to
touch it in here. Add a little bit more
water so it bleeds. There we go. Okay. And then I think I will switch
back over to my size six, grab some more of that green. Again, I'm not going to
touch that bud right now. But I probably will in a second. After it dries a little bit, I'll be adding in a little bit more to make it look
like it's a bud. Now, if having four is disturbing to you if you
like to have your things being off balance and just
having your odd numbers, then you could always add
another flower or another bud. So if you want to put another
bud up here or a smaller bud down here so that you
have five, that's fine. I like it like this because I
feel like I have my balance of my three larger flowers with just a little
bud over there. But you make yours,
however you would like to. I'm going to go ahead and now I'm just starting
to dry a little bit. I'm just going to add in these little wispy greens
up at the top just to indicate that this is a little bud that's
starting to grow. Not much, a little kind of
enclosing it a little bit. Might even draw one up
into it a little bit. The drier that is,
the easier it'll be, but I'm not too
worried about it. I don't even mind if it bleeds. There we go. Good. This
is so pretty. I love it. I'm going to go back with
my smaller paintbrush, my little detail brush. I'm gonna grab a
little bit of brown. Just this little a true brown or a sepia and just add in some little dots
into the center here, just to add a little bit more
definition into the center. Not putting them in a circle, just kind of dots
here and there. See how much your
eye goes to that, and so that really adds a lot of definition
for your flowers. Okay. I love that that
really looks like a sunshiny a flower bouquet. I love these colors. Looks like it could be
a sunrise or sunset. Love that combination. I also love the
fact that some of my petals are lighter and
then some of them are darker. I also love that
I did the reverse where over here it
was with a pink petal and the orange
center where over here was the orange
petal and a pink center. That was really fun. Love this. Come on back to the next lesson
after this is all dry and we're going to wrap up
this whole class for you.
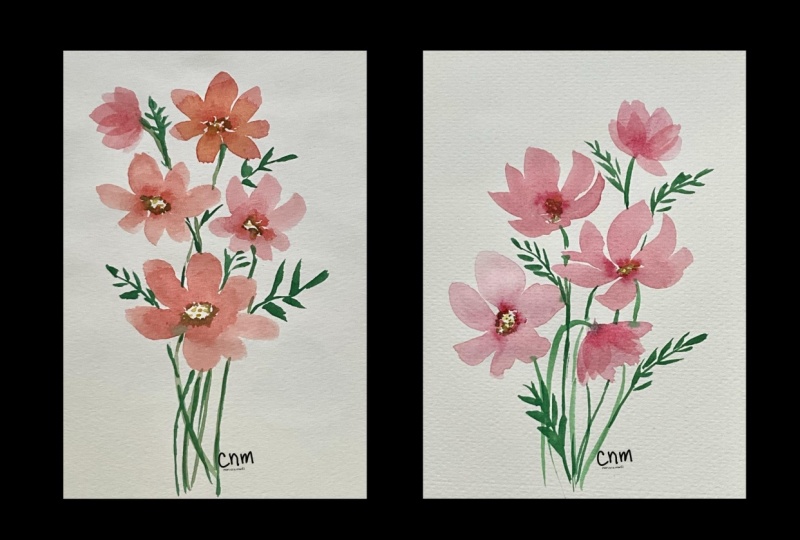
5. Final Thoughts and Encouragement: Congratulations on finishing your loose watercolor
cosmo flowers. I hope this class showed
you that you can create something beautiful and it doesn't have to be complicated. One of the things
I love most about these simple floral studies is that they help us
build confidence. Every flower doesn't
have to match perfectly, and every petal doesn't
have to be identical. Those little variations
are part of what makes watercolor feel so
natural and expressive. If your finished painting
looks different from mine, I hope you'll celebrate that
rather than worry about it. Watercolor has a wonderful
way of surprising us and sometimes those
unexpected moments become our favorite part. I would really like to
see your finished piece. So please consider uploading your project into
the class gallery. Whether you've
painted one flower or completed the
entire composition, I know other students would like to see
your work as well, and I'll be stopping
in to cheer you on. If you'd like to
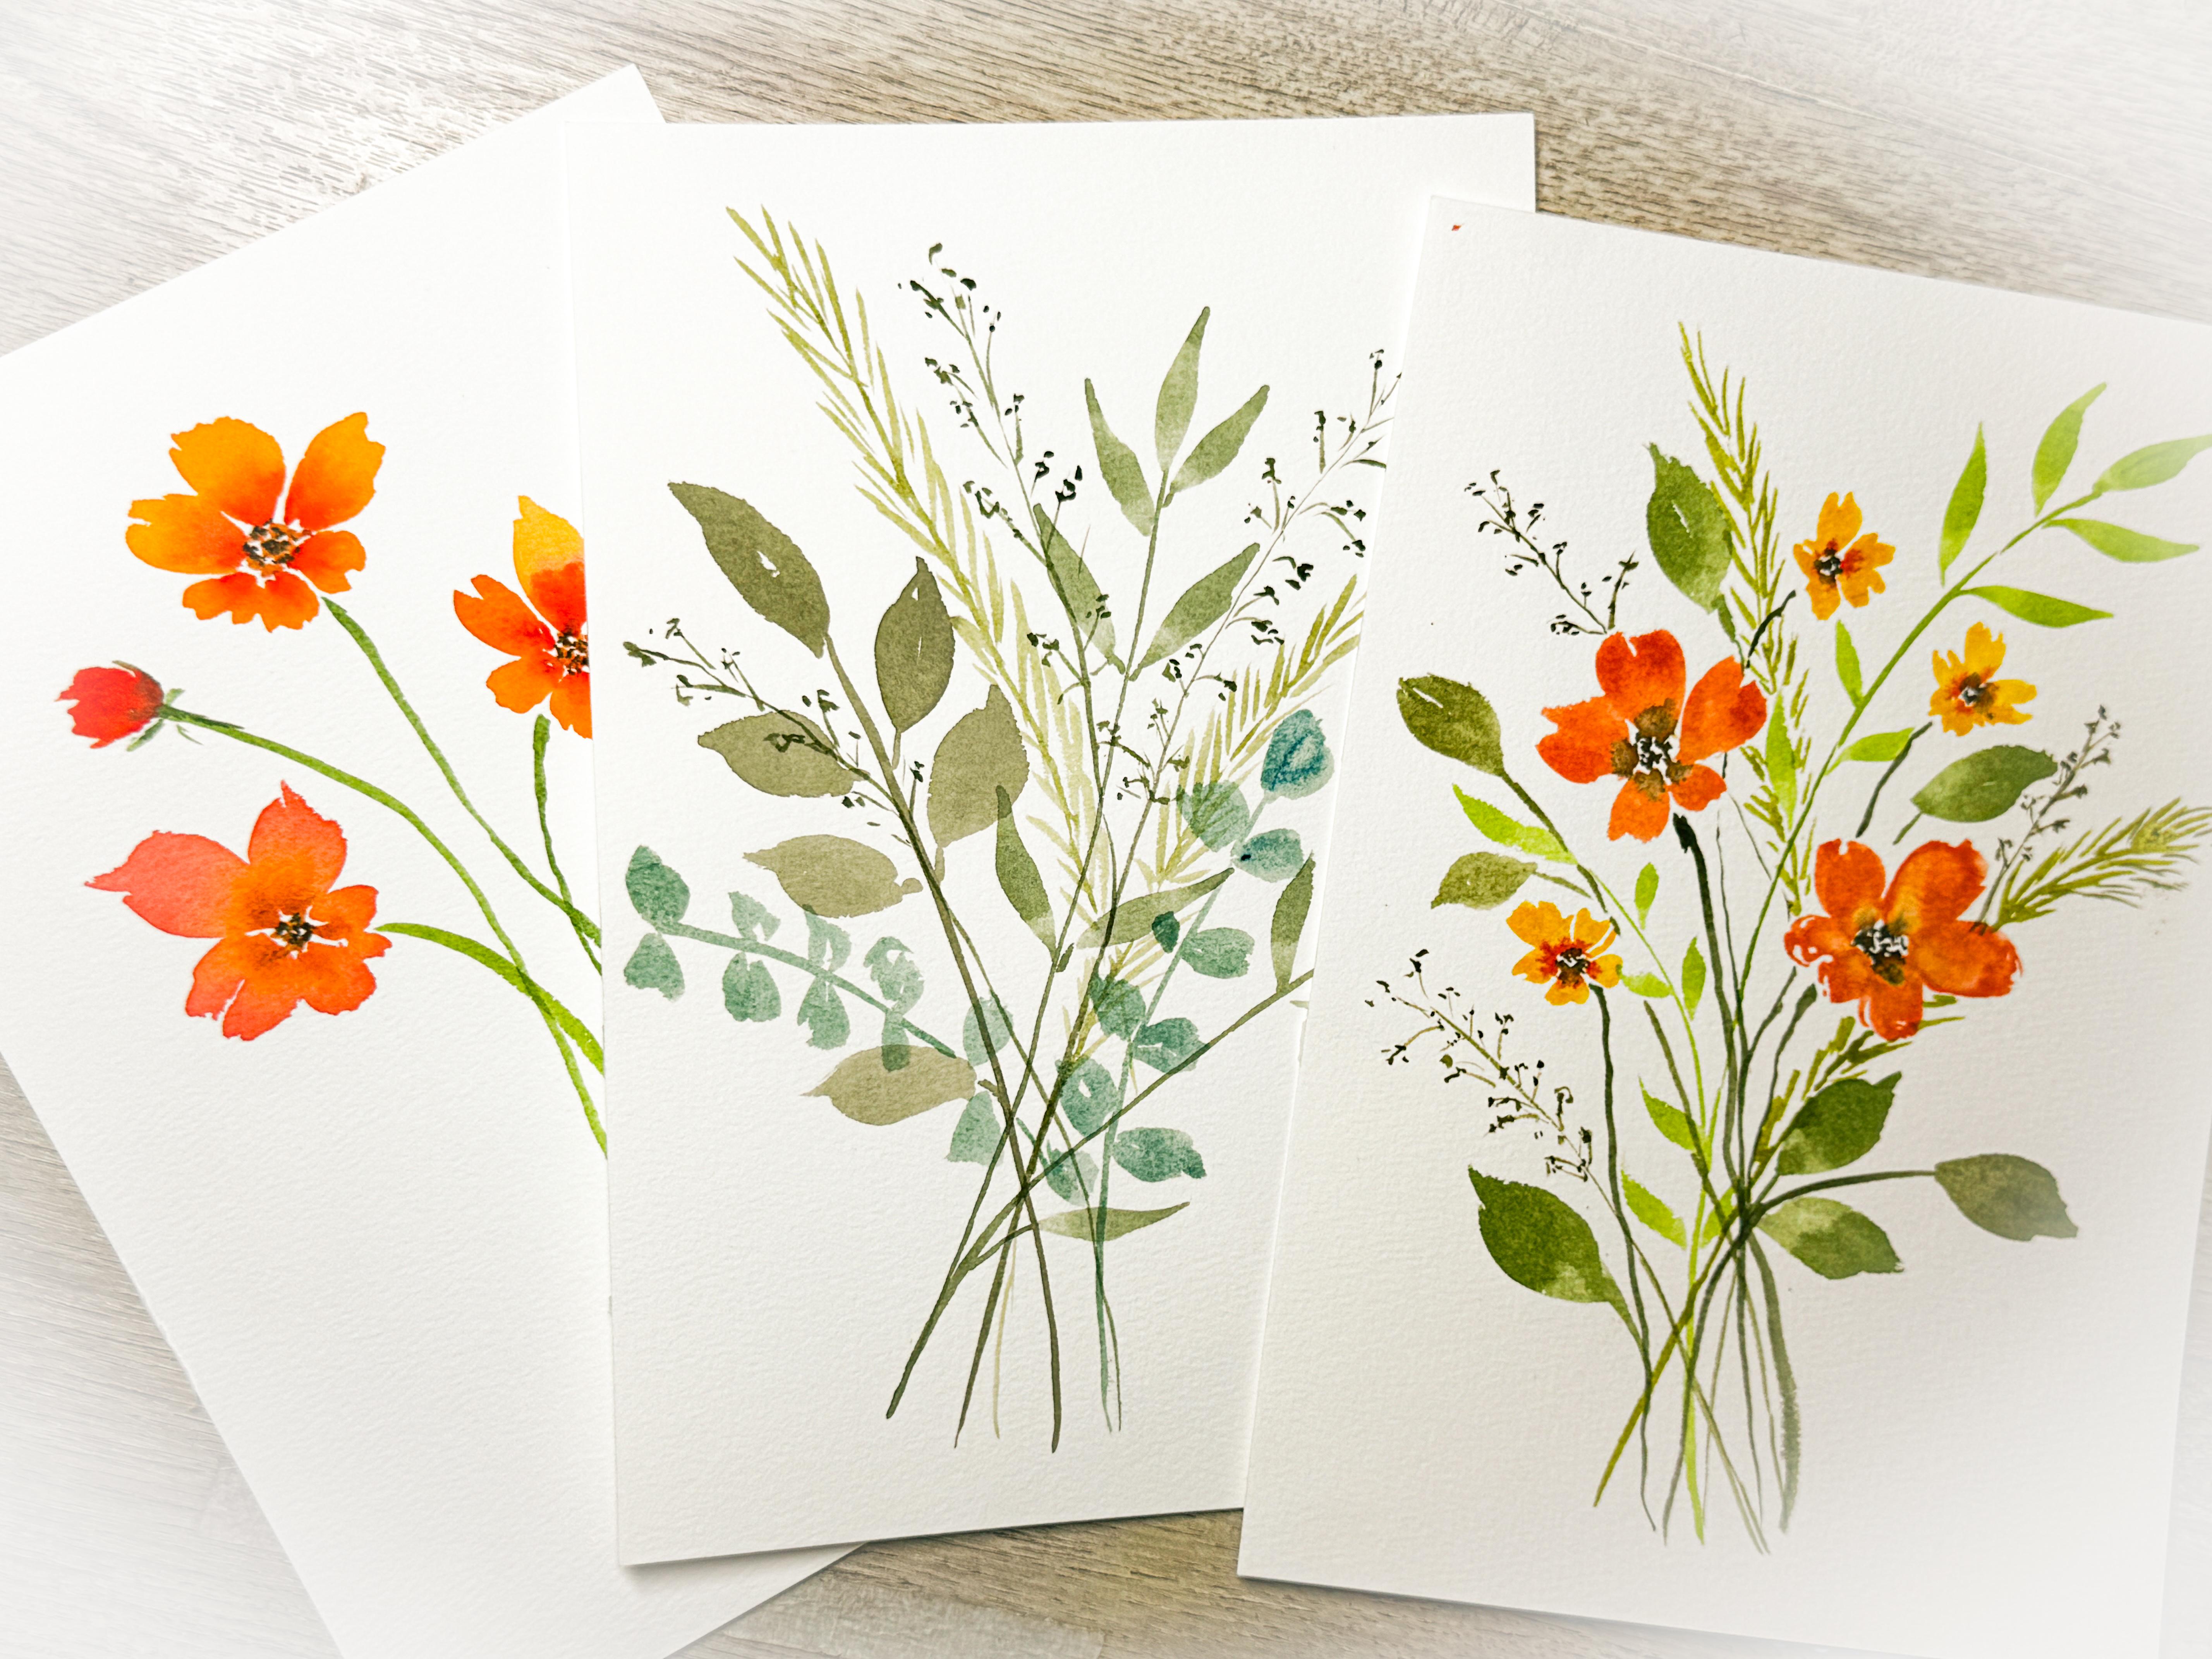
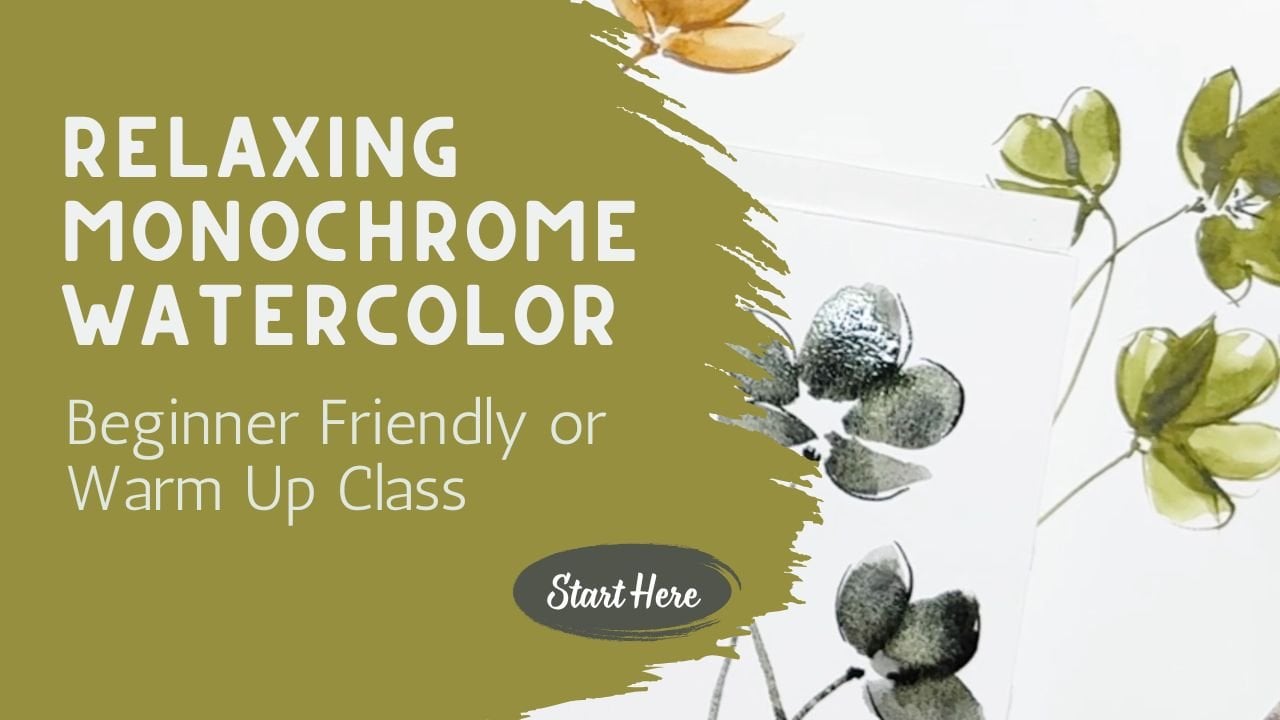
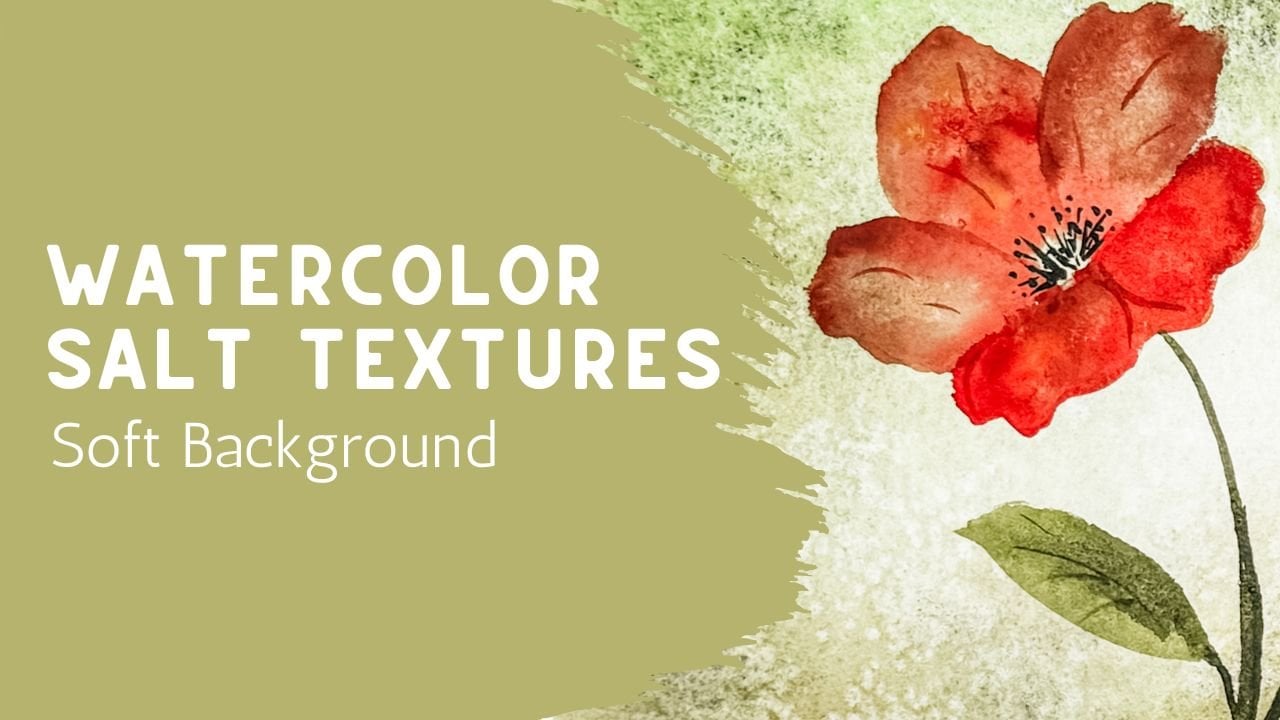
continue practicing, I have more classes
that build on the same loose approach
with different flowers, adding greenery and
lots of composition. The more you paint, the more comfortable and confident you'll become each little study adds those simple
skills over time. But most of all, I hope this class gave you a
chance to slow down, enjoy the process, and simply let the paint do some
of the work for you. Thank you so much for spending your time painting
with me today. If you're not already
following me, please hit that follow
button so that you're first to know when I've
uploaded the next class. A review of this
class always helps me and fellow students
find my other classes. Until next time, happy painting.
 Brenda Jones, Watercolor Artist & Teacher