Transcripts
1. Introduction: Hello, everyone. I'm
Uni, and in this class, we are going to
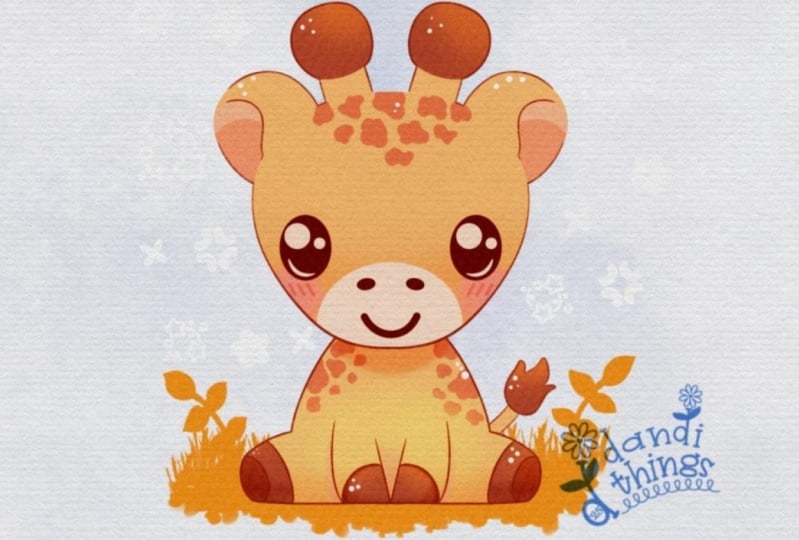
draw this cute away illustration of an adorable
giraffe in Procreate. During this class,
you'll get familiar with a lot of useful features
like quick shape tool, symmetry tool, liquefied
tool, clipping masks, and blending modes, and learn the basics of drawing intracrt. By the end, you'll not only draw an adorable illustration
you'll be proud of, but also feel super
confident using procreate. And now let's spend
some time drawing.
2. Base Scheme: Begin by deciding what kind of canvas we are going to be using. Today we are using a standard square canvas from
Procreate with Pixel Weed and Pixel
huts the 2048 pixels. DPI at 300 and our color profile is set as
SRGB with this low number. When it's all done,
heating done, go into our new Canvas, and then let's continue our preparational
part by going under the project reso
Stop and downloading all the materials
mentioned for this class. It it, let's go to
our layers, firstly, we'll go to the
background color, and we'll go to the color
palette that you downloaded. Going under palette on the
bottom and undercards on the top and selecting the color with the title background
for our background. When we down with it, let's go to our
actual color palette. Again, going under
palette on the bottom, under cards on the top, and let's select
some darkish color. For example, let's go with
this deep brown color. When we are done with this, let's go to our brush library. We'll go to this brush
that you download it with the title Doll flat pencil and we will use it for
our preparation part. When we are done with
this, the last thing for our preparations will be to go to our Ring icon
over the top lat. We'll go anti Canvas and we will toggle drawing
guide right here. To start from the
same spot, everyone, let's go under Ed
drawing guides and we will set the grid
size to 65 pixels. When it's all done,
let's hit done, and let's begin working
on some scheme. Firstly, we will define where we are going to put
our illustration. We are not going to touch the top or the
bottom or anywhere, so let's go and create one line on the top that will
go horizontally like that. Let's go two cells down and
create a straight line. Hold your Apple pencil
and hold one of your fingers on the
screen to make sure that the line is straight
and then we'll go to the bottom and here we will
have a bit more space, so let's go three cells again, holding everything
that we need to hold, and when we have the
result like that, let's define the center. We will go to our layers. We'll create one
more layer on top, and we will go
with one line that will go from top to the
bottom through the center. Again, holding our Apple pencil, holding one of our
fingers on the screen, and let's make sure
that this line is actually in the center. So we will go to the A
key on the top left. We will go on the
uniform method, and we will toggle
snapping right here. So tap on the snapping and toggle snapping in
the settings too. When we are done
with it, let's hold our Apple pencil at
some link space, and let's go and find one orange line that is going
from top to the bottom. That way we will know that
we are right at the center. Now, when we are done with it, let's go back to our layers and we will merge these
two layers together. We are putting one of our
fingers on the layer on the top and another on the layer on the bottom and making a
pinch movement like that. Straightaway let's
tap onto the icon and reduce the opacity slightly by moving the slider
more toward the left. When it's all done,
let's start by tapping one layer
and we will create one more layer to start with the actual scheme that will help us to build up our illustration. What we're going to be
doing is firstly going towards the canvas that we
have and with one line, we will create a
shape of the circle. Hold your line in the
end while creating the shape and hold one of
your fingers on the screen, and let's go and adjust it
position wise and size wise. So we are going to our
Aoki one more time. We will go again to
the uniform method. Let's move these things
slightly down and we are going along this orange line
that we have in a center. We'll need to have
some kind of six cells on the top and around
ten cells on the bottom. Let's find out
whether we are okay with the position or we need to make it smaller or bigger. So two, four, six, eight, ten, I will make it
slightly bigger like that. And when we have the
result like that, let's go again to our k on the top left to tap on
it and deselect it. Now one more time, let's go toward the top and
we will create another straight line
going through the top and this line will touch our
top part of the ellipse. We will create
something in that way. And then we will go toward our shape that we've
created for our head. This is our circle shape, and we will go toward the
middle part and we will create a straight line
going through the center. So again, when we have done
everything in that way, let's continue by going
toward the bottom and we will create the shape
that we'll use for the body. Firstly, let's go
from the center towards the 3.5
point right here. You can make a little
markdown and on the bottom, we will use eight
cells from the edge. So two, four, six, eight, and we will connect these two little dots with
a line like that. We can go toward
the opposite side and create the same
line here too, but we will use the
symmetry tool later on so we don't need to pay too much attention to the opposite side. So we can create the
details only on this side. Now also let's go toward
the middle line that we have right here
and make a couple more markdowns right here. Firstly, we'll go two
cells up and create a little markdown here and we'll do the
same on the bottom, two cells down on the bottom. Now when we have the
scheme like that, let's go back to our layers. Again will go to the
N icon right here and reduce the opacity
of this layer, and then we'll create
one more layer on top. Now onto this layer, let's finally start
creating our sketch.
3. Sketch: Begin by going towards the
bottom part of our head. We will step a bit
from the bottom part. So one or 1.5 cells
from the bottom, and we will go
towards the right, and we will start
to reduce the shape right here and create some
kind of squeeze ship. So going like that, creating a little line,
going in that way. Again, we will add this
sketch only on one side, so later on, it will be on the opposite side too when we are going to be
using the colors. So for now, let's finish up working on our sketch
only on one side. Now when we hand the
result like that, let's go toward the top. We'll go to this
little mark down that we've created onto the side, 2.5 cells up from the center, and we will go and start from here to create a
shape of the circle. Again, holding our Apple
pencil at the end of the line, and with this shape, we are touching our line that
we have on the top. If you need to adjust it, go to the 18 mode over the
top top on this option. You will have the options
ellipse and circle. If you want to use this circle, we can go and use it and
create a nicer shape. You can adjust the size by
going to the nodes right here, for example, make it a little bit bigger, a
little bit smaller. It's up to when you have
the result like that, when you are satisfied
with the shape, let's tap on our screen
to accept the changes. Straightaway, let's go toward this ear that we've created. We will go to half of it and
we will create a langon like that that will divide the top part of the ear
from the bottom part. When we have the
result like that, let's go toward the top and
we will create a little horn. Firstly, going from the center, starting to create
two lines like that. We will go a little bit higher with these lines and
then we will finish up this little horn with a little circular
shape on the top. You can decide on
the size of it. You can go a little
bit more rounded, you can go a little bit less
rounded, it's up to you. When we have the
shape like that, we will go and continue working onto the
shape on the bottom. Firstly, let's go
toward the middle. We'll go to this little
markdown that we've created two cells
down from the center, and we will go right here toward the middle part and we will
create the muzzle part. We will go with half
of the circle like that or half of the ellipse, and you can decide whether you maybe want to go toward
the opposite side and continue creating
this line to make sure that you
like how it looks. You can go with more
rounded shape or it looks a bit more
elliptical. It's up to you. When we have the
shape like that, we can go towards the right part and we can
create an eye right here. Let's go slightly lower than this line that we have right
here, the little mark down, and we will go three
cells from the center and two cells or 1.5 cells
from the right part, and we will start to create
a line going like that. Can experiment a little bit with the shapes that you are creating
for the facial features, and for everything that
you have right here, you can create something
different from what I'm doing. If you want to, you are
welcome to go and do that. So when we have the
shape for the eye, it's a little bit of
an elongated ben shap. Let's go toward the top part of our muzzle and let's create
a little nostril right here. So we will go and create a
very simple shape like that. If you want to create
some extra details, maybe some eye lashes
or something else, you are again welcome
to go and do that. Now, when we have the
result like that, let's go toward the bottom and let's start working
onto our body. Firstly, let's go from the very, very bottom from this
line that we have. We will go three cells up and we will make a little
markdown right here. So we will go toward this area and we will
start to create a body. We will go with a rounded chip like that and we
will need to add a bit more weight and a little bit more curves
toward the bottom part. So going like that and starting to create something in that way. Now when we have the
result like that, let's go towards, again,
the very bottom part. We will go slightly towards the side from this line
that we have right here, and we will go and create
a little line like that. Half of the circle or actually
an ellipse like that. When we have it, we will go and continue creating the line
by going and creating another curve right
here and connecting this bottom part of the
leg with the top part. Again, you can play a little
bit around right here with the sheep and create something
that will work for you. Now to continue with
our hoof right here, let's go slightly toward
the side and we will create another parallel curve to what we have right
here onto the right. When we have this, let's
go toward the bottom, we will continue creating
the line right here. And then when we have
the result like that, let's create the front legs. For the front legs,
let's go toward the middle part and we will start by creating a
line going like that. When we have this line, we will go towards the right, and we will create a little bit more curvier line right here. So creating something like that, and when we have it, let's finish up by creating
a little hoof. So going from the bottom
and creating a bit of a crooked little hoof like that. Now when we have the
result like that, let's also go towards this area where we have
the intersection between the legs and we will go and create a little
tail right here. For the tail, we will create two little lines
going in that way, you can go with straight
lines or you can go with a little bit
of a curve right here. And then on the top, we will create an elliptical
shape like that. You can go, again, a little
bit rounder or less rounder, it's up to you,
and we will finish up with creating a
little part like that. Now when we have the
results like that, we are done with our sketch. If you want to have it on
the opposite side too, we can go to our list and we can make a copy of this layer. Swiping the layer
from right to left and choosing the
option duplicate. Now when we have
the second copy, let's go toward our A
key on the top left, uniform method, and we will use the option
flip horizontal. Now, with this flipped copy, let's go toward the right, and we will connect everything
that we have right here and we will have the
second copy onto our left. So now when we have
the result like that, let's tap onto our oke. Let's go back to our layers, and we will merge these two
layers together on the top. So again, pinch
movement like that, and let's go again to
the adjust the opacity. Now, when we are done
with this thing, when we merge the layers, we are done with our sketch, so let's move on
to our next part where we'll create the colors.
4. Color Base: Begin our coloring part
firstly by going to our lays and we'll create one more layer by tapping
on the plus icon. We will grab this layer
and we will put it underneath our layer with our little scheme and
our little sketch, holding our layer and
dragging it down. And when we have the
result like that, decide whether the lines
that you have right now are too strong and too visible and maybe you want
to go to the icon and adjust the opacity so it will
be easier for you to see what you are
creating with your lines. So let's go to both of these
layers with the scheme and with our sketch and
reduce the opacity slightly. Now onto this new layer,
let's do the volume. We will go toward our Rnch
icon over the top left. We will again use drawing guide, but we will switch
the mode right here. We will go to ED drawing
guide and on the bottom, we will use the option symmetry. We are not touching
anything here. We are tapping down
on our top right, and now let's make sure
that our layer is assisted. We are going to the list
and this lay that we are supposed to create our
colors on is assisted. You have this little
title right here. When you have it, let's go
toward our color palette, and let's switch the
color to yellow Bs. When we have it, let's go
and create a circular shape, but before doing that,
let's switch our brush. We will go to the brush
library and we will use the studio pan brush
from the inking folder. When you've selected the brush, let's go toward our canvas and let's create
a circular shape. Again, with one line,
we will create a shape. We will hold our Apple pencil at the end of the line
and we will try to match it with the shape that we have onto our screen already. Trying to make a
nice connection, we accurate only half of that, but we need to make sure that we don't have any gaps
into our line. When we are done with
it, let's drag the color inside and let's adjust
the shape slightly. If you've created a full circle that is going toward
the bottom right here, you are welcome to
go to the magic one, two and go under liquefy. We'll use the option push and we will use the size slider. You can adjust the
size by moving the slider toward the
right or toward the left, deciding whether you need to go smaller with the size or
bigger with the size. And with this brush, we will go and move the shape so it will match what
we have on R sketch. Also, let's make it a little
bit more open ons side, we will drag the shape
slightly toward the right, and we'll create this
squished little finger. If you want, we also
can go slightly from the top and adjust
the shape here too. Follow the directions that
you have onto your sketch, and when you are done,
let's get back to our canvas by tapping onto
our Magic Q tool twice. Now, when we have the
result like that, let's continue recoloring
other elements. So getting back to our brush
in the same way as before, we are going toward these
elements that we've created. We are holding our
Apple pencil there. If we need to adjust something, we are going to this option
on the top, our editing mode, when we have a solid shape
and when we like it, we'll drag and drop
the color inside, and we'll go through
all of the elements that we have right here
and we will color Blokdo. Let's go toward our
little horns right here. You actually don't need
to repeat everything with 100% of similarity to what
you have inside your sketch. If you want to
experiment a little bit, you are welcome to
go and do that. You can go and create the
different shapes right here or different rotations
of the shapes. Just make sure that
everything is closed, and you are able to add the color inside when
you've created the shape. Now when we're done
with the top part, let's go and recreate the sheet that we
have for the body. Again, we are going either with holding our line at
the end or minial. We can go to the
editinT right here and adjust the overall curature of this element if we need to. Again, we are trying to create a bit more volume
onto the bottom, and of course, if you
want to experiment maybe with the position
of the line on the top, you are welcome to
go and do that too. When we have this shape, let's tap on the
screen and let's go towards our little
leg and again, recreate the shape here. Let's go to the hoof. We will create everything with yellow color
just for now and then we'll recolor some elements if we need to and we
will need to do that. Now, let's go toward
the bottom and we will create a straight
line right here, going toward the end, and then we will go to
this area where we have the front little hoofs and we will go slightly towards
the bottom part, so a little bit of
protruding part. Now when we have the
result like that, let's drag the color inside, and then we will need
to go and recreate the little till right
here. We have two copies. We will go and recreate
only one of them. First, we will need to
go to our list and we will need to turn off
our assisted drones. Let's tap once this
layer and let's turn it off from the list by tapping on drawing assist right
here in the list. Now going towards
this little till and recreating it the
same way as before. So going like that, starting
to create our shapes. Again, if you want to experiment a little bit maybe with
the shape or something, go and do what you want to do and then end
the color inside. Now let's go and take a look at everything without the
lines of the sketch. We are going to our layers, and we will go to
these two layers that we have on the top
and we will hide them. We will need to have
a very clean shoette. So if you have some elements that you need to
go on and adjust maybe the curvature
of the lines or maybe some of the lines
look a little bit jagged, go to these places
and adjust them. When everything is
smooth and nice, let's get back to our lays and let's get these
two layers back. Tapping onto our chip marks. Now when we have the
result like that, when we have the solid chip, let's go and tap on the
plus icon to create a. Now onto this layer,
let's tap on it, and let's use the
option clipping mask. We also will tap onto this
lay and use the option drawn as this so we will be
able to use the symmetry to. Now, going back to
our color palettes and let's go and select
this ears color. With the ears color,
we will go toward the bottom part of the ear and we will go and
create this element. Going like that, taking a look at it on the opposite side too, whether we like it or not, and go to the little
part and starting to recreate the shape by
adding the color in lines. Now, when we have the
closed line like that, let's drag and drop the color. Let's take a look at
the opposite side, whether it looks fine or not. If it's okay, we will go and add another color right
here on the bottom, to make sure that we are staying inside this here, let's
do the following. We will go to our layers. We will tap onto the
layer where we've created these inner parts and we will
use the option Alpha lo. You will see we have
this checkerboard, that's exactly what we need. Then we will go to
our color palette and we will switch the
color to hers too, and then we will go very boldly like that to the bottom part. Maybe if you need
a couple of atoms, go and have as many
attempts as you need. Let's create a rounded shape right here, and then manually, we will go toward
the bottom and we will add the second
color right here too. Just like that, let's go and figure out
whether we need to fix the part on the bottom where we have the
connection with the heat. So to do that, we will need to go again to
these two layers that we have and adjust everything if we
need to adjust something. We will go back to our
erasa and we will try to make a very nice connection between the shape of the heat. So we will need to elongate it. Then if you need to work more on the oral shape right here
of the ear or something, go and work with your eraser to achieve what you want
to achieve right here. Now when we have the
result like that, we also can go and maybe adjust this little part so
everything looks smooth. When we are done with the ear, let's get back to our list. Let's get back these two
layers that we have. Let's again go to this layer where we have this checkerboard. We'll tap on it and we will use the option alpha
log to turn it off. Now when we did it, let's go to our color palettes and switch the color to hoofs and horns, and we will start
from the horns, and we will recolor
the top parts of them with this
brownish color. So you can first go and
create a line like that, then create the full
line that is closed, and then drag and drop
the color inside. When we are done with it, let's go toward the hoofs, and let's create
them to go in like that and starting to create
a line going in that way. And then we will go
and fill up the area with the closed sheep and then drag and drop
the color inside. When we have it, going toward the tip right here,
recoloring it too. So again, starting
with the line, going around like that and
adding the color inside. When we have it going toward
the top hoofs and starting to recreate them to very accurately right
here onto the side, starting to go around the shape and finishing up by
creating the closed line. And the color inside, take a look at everything, whether you need to go and
maybe adjust some parts, grab erasa and we will go and
erase the parts right here, maybe soften up the line
to make everything very, very smooth and nicely looking. With your erasa you can use all the options that you
are using with your brush, so you can hold your
line at the end. You can go to the editing
mode if you need to. And when we have the
results like that, let's go and switch
the color to white. With the white color,
we'll go toward the muzzle element and we
will go and recreate it. Again, with our brush, we will try to create a nicely looking sheet that will be quite rounded and quite cute. Again, you can hold
your line at the end. You can go to the editing mode
if you need to adjust it. Let's go and make it
slightly more rounded, so we will create a
nicer shape right here. Adjust it by going to this little nose that you
have in the editing mode, go maybe a little bit bigger with the shape or a
little bit smaller. Take a look at it
from the distance. If you are satisfied with it, tap on the screen and let's
go toward the bottom part and we will create a line that will finish up
this muzzle part. Now, when we have it,
let's dragon drop the color inside and
then one more time, let's go and hide
these two layers with our scheme and everything, and we will go to
these areas that we need to adjust and we
will go and adjust them. Try to make this thing very,
very rounded and very, very smooth and try to avoid creating some gaps with
a different color. Overdid it, grab your eraser and erase the parts
that you don't need. Now when we have the
result like that, let's get back to our lease. We will unhide these two
leaves that we have hidden, and then we will get back
to our color palettes and we will select the
deep brown color. Let's adjust the
size of the brush to something around maybe 35% or so we'll try it out right
here onto our canvas and we will go and create
the shape of the eye. For example, for now, let's go with something else
a bit more flat. Again, if you need a couple
attempts to create the shape, you are welcome to
go and do that. When we have the
result like that, let's go and adjust it slightly by again using our liquefy too. Go on to our magic one, two, liquefy and we will use
the option push and we will go and adjust the elements
that we have right here. As we have multiple
elements onto this layer, try to go only on the areas with the
eyes and adjust them. What we want to achieve is a little bit of a different
look for our eyes, and that means that we
will need to have a bit like tip right
here onto the ice. We will go with our little
push option and we will try to adjust this part to
create a nicer looking line. Very easily, let's go
and start to do this. You also can try to
use the option pinch. Let's select it firstly
and then we can go toward this tip
and we can go and very softly start to create the pinch
movements right here. And when we have the
results like that, take a look at everything, decide whether you like
everything or not. If you want to get back
to the push option and maybe adjust something
else right here, maybe the size, the overall look of the eye, maybe
something else. You are welcome to
spend some time here and adjust it to your like. When you are done adjusting it, let's tap one adjustments twice. And if you see that
you can go and maybe adjust something
with just the brush, you are welcome to
go and do that too. For example, with the
small size of the brush, let's go and make this line
a little bit more smooth, and we will do it on both sides
on top and on the bottom. Again, if you have some
additional elements, if you have maybe the
eyelashes or something, go and recreate them too. And when we have the
result like that, let's change the color of
a brush to brown lines, and we will go toward these
little nostrils that we have, and we will create
them with this brush. Now, when we have the
result like that, we are done with
our basic colors, so let's move on
to our next part where we will start
to add the details.
5. Final Touches: Let's begin this part firstly by going to our list
and we will hide these two layers that we
have on top our scheme and our layer with the sketch. And when we have the
results like that, let's go and create
one more layer on top, and again, we'll
tap on the layer and use the option
clipping mask. Then we will go to our brush library and we
will select the brush, the well behaved liner. Again, the brush that
you can download from the Project and resort. When we have it, we will go to the color palettes and we will
use the brown lines color. And now with this brush, we will go toward the
edges that we have and we will start to create
some lines right here. We are going closer
to the elements that we have and we are starting
to add some linework. We are not going to be
creating it everywhere. We will go towards some
of the places and we will start to add the definition
inside this part. If you want, you cannot
go only to one side, you can go to both sides evenly. You can go toward the lays, you can tap on the lay
and use the option, drawing assist and create these lines on both
sides at the same time. I will go along these two lines or three lines that
I've already created, so they will appear on
the opposite side too. We will go along everything that we have right here and we will try as to create
nicely looking lights. Let's go toward the
bottom here too. We will make some
definition right here. To go on like that, you can vary the amount of pressure
that you are using and you can define the line weight right here while you
are using the pressure. Let's go toward this
little part and let's create the continuation, the definition right here. Let's go right here and add a little dots like
that or a little line. You can go and add
a bit more of color right here inside
the connections between the lines
into the corners. Then let's go towards
the face and let's go from the middle part and create a little line
right here too. Again, try to make nice
connections right here. You can see this brush is
a little bit textured, so we are adding a bit of
a nice effect right here. When we have it, let's
finish up with the horns. Going like that, starting to add our additional little lines, going toward the actual horns and starting to add
the color here too. Try to make nice connections between the lines right here. Again, going like that,
starting to add the definition, going toward the top. If you want to go toward the opposite side and starting to add the details here too. For example, let's
go with something in that way and when we have
the result that we like, let's continue by going
toward the bottom part. So let's go and finish
up with our face. We will go closer to the end of our face and we will start to add
the line right here. Again, if you need to
create a couple of lines, go and do that, try to make a very nice kind of
connection right here, we'll have a bit of
a gap right here, but it should look like we just lost a little bit
of pressure right here, not only the line right here. When we have the
result like that, let's continue by going
and defining these lines that we have for our middle
parts going like that, starting to add a bit of color right here
between the connection. So we have some kind of the
shadowy part or some when we have it going toward the leg and starting to define them
too with our lines. Let's work on this
connection here, go along these parts
and starting to add nicely looking
lines right here. When we have it, let's go
toward the bottom, actually, let's go toward this
hoof right here firstly, we will create the
line right here. We also had some line right here as the bottom
part of the hoof. If you need to get
back to your layer where you have the schedule
to recreate this line, you are welcome to
go back to your last and find the layer and hide it. If you don't need it,
create the hoof like that and then continue ding
the line on the bottom, go on full size right here, full line, and then creating the little
line right here too. Now let's define the leg. Again, if you need to,
you can go to the layers, find where you have
these little lines for the leg and recreate them
here onside your clean lines. Doing the same onto
the opposite side, creating the line right here. Again, if we need a
couple attempts going and having as many
attempts as we need, getting back to our layers, hiding the layer where we have our lines, the sketch lines. If we need to erase some parts right here or maybe create
something different, we will go and do that
and also let's go toward this little part
and recreate it too. Now, let's take whether we need to go and adjust
something else. Let's go toward this
little part and we will again create a line right
here to create ice effect. When we have it, let's again
take a look at everything. If you want to go and maybe
make some of the lines a little bit thicker or so you are welcome to
go and do that. When we are done with
the mean element, let's go back to our list and we will go to the layer where
we have these lines. We will tap on it,
and we will use the option drawing
assist to turn it off. So we will be able to
go to the tail and we will be able to create
the lines right here. Let's go along these parts and let's create the lines
going everywhere. If you want to go to some of
the places and maybe create the thicker lines
or some difference in the lines from what you
have on the opposite side, you are welcome to
go and do that. Spend some time here and adjust
the lines to your liking. Now when we have the
result like that, let's continue by going
and adding more details. Firstly, go into our layers and we will create
one more layer, but we will firstly go toward this layer where we
have the mean color, and we will create one
more layer from here. Now, go into our brush
library and we will go to the airbrush and
folder to select either medium blend brush
or soft blend brush. Select one of these brushes, set the opacity to
something around 20%, and we will go to
our color palettes and select the
secondary yellow color. Now let's make the size of the brush quite big
and we will go toward the bottom part of
the face and we will try to add a bit of the
gradient right here. Very, very softly going and adding the secondary
color right here, trying to create a very smooth transition between the colors. If you want to go to the
bottom right here to the body, you can go there and you can
add the colors here too. When we are done with it,
let's go and add a bit of blush and our details on the top in the
shape of the spots. Firstly, we will go
toward our layers. We will go and create
one more layer from where we are
right now at and we will grab the lay
and we will drag it above our layer with these
additional elements. Onto the layer, let's tap on it, and let's use the
option drone assist firstly and then we'll go toward our color palette and select the color with
the title shadows. With this color and with the same brush that we
are using right now, our soft blend or
medium blend brush, we will go underneath our little ice right here and we will add some of the
checks right here. Try not to overdo it just a touch of the color right
here and when we have it, let's go to our brush library to select a different brush. Let's get back to our studio pan brush from
the ink and folder. This brush and with
a different color. Let's go with the brown lines, for example, or you can
go with hoofs and horns. Let's go to hoofs and horns and let's add the shadows
right here too. You can try to add the color
right here onto these parts, but probably nothing good will happen because we will
need to go to our last and tap onto this icon to adjust the blending
mode to multiply. Also go and adjust the apaste, you can see that we've
changed the color right here too. That's
exactly what we need. Then we will go toward
our hoofs and we will start to add the color right
here to these bottom parts. Let's go like that. Let's
start to add the color. And if you want, you can go
toward these little parts right here and maybe add a bit of the shadows right here too. For example, we can go toward these bottom parts and
add a bit of the shadow. Decide ta the opacity if you feel that
maybe it's too much, you are welcome to go and
reduce it if you want to. And when we have the
result like that, let's go and add a bit
of the Tammy right here. We can go and create another
layer by going underneath this layer that we were on right now and creating
the layer here, it will be
automatically clipped. We can go toward our color
palette and let's select the color either with the
color ears or ears to. And with either of these
colors onto this layer, we also will tap on it
and use the option draw as this will be able to add
it on both sides evenly. We'll go right here to
where these little parts, and we will add a bit of
the color for the timing. And also, let's go
right here between these front little legs and
add the color right here too. Now when we are done with it, let's continue by
going to our list. We will get back to this layer where we have our shadows with the multiplier blending
mode and we will go and select the
color with shadows. With this color, we will
go underneath the hat, so you can rotate your canvas, so it will be easier for
you to create the shadow. We will go right here
underneath the hat and we will create a rounded
shadow like that. Let's go and end
the color toward this little parts and create
something goon in that way. If you want you can make
it a little bit more rounded toward the center and create some of
the line like that. Now, when we have the
results like that, decide whether the shadow
size is right for you. If you want to adjust it, you are welcome to go and
maybe make it a little bit thicker or a little bit
thinner. It's up to you. Take a look at it
from the distance to decide whether
you like it or not. If you are okay with everything, let's go and add the spots. For the spots, let's
go toward our layers, and we will need to go
underneath the layer where we have our
shadows and from here, we'll create one more lay. Let's get back to our
color palettes and switch the color to spots
or red orange. You can decide
whether you want to use the darker ones
or the lighter ones. And with this color, let's
go toward the top first, and let's start adding the
peculiar little details. You can go with some
peculiar shapes, start to add the lines, add the color inside when you already work
with your brush and work with your erasa.
So let's go like that. Let's go a little bit
lower and let's start to create some wobbly
shapes, adding the color, go with different sizes
and different shapes, trying to add a couple of
details with this little spot. Let's go through the whole
shape of the hat right here, through the whole
top part of the hat, and let's add a couple more
of these details right here. For example, let's go and
add two more onto this side. Create some pattern with it
or go a little bit randomly, it's up to you, create
something that will look nice. You need to zoom in
and maybe adjust the softness of the lines where the connections go and
do what you need to do. Try to create the spots in a solid way so you don't have
any blank spaces inside. When you are done, let's
go toward the body, and let's create
some spots here too. So let's go more
toward the sides, and let's start to
add the details here. So let's go with a little bit of bigger shapes right here, start to add the lines and
then add the color inside. Again, try to create
some pattern or go a little bit randomly
with the spots. So, for example, let's go a little bit down
with our shape. Let's create smaller
element right here. Let's go and create a couple more right here onto this side. You can go maybe with
some peculiar shapes with some triangles or maybe with some hard shapes.
It's again up to you. When you're done
with the first side, let's go to the opposite side and create something
similar here too. You can create the
exact same thing that you have on
the opposite side, or you can create something
different right here and add some different insights.
So let's go like that. Let's continue
adding our details. So for example,
going right here, starting to add a little
dots right here or so, starting to add some
pattern, adding the details, and let's finish up by creating one more
little dote like that. Take a look at everything
from the distance, decide whether the spots
are enough right here. If you are satisfied
with everything, let's continue by going and adding some
little highlights. Firstly, let's go and use
the same color that we are using right now and we will go toward the checks that
we have right here. We will finish up
with our checks by creating some blushing
effect like that, go to both of the sides and create some lines
for the blushing. Try to make them
similar on both sides. Again, if you need to create
it a couple of times, you are welcome to
go and do that. Then when we are done
with this blushing, let's go and change the color to white and let's
go toward the top and all of the
elements that we have right here and let's start
adding the details like that. Again, try not to overdo
it or if you want, you are welcome to do what
you want to do right here. Let's also go toward the eyes and let's add some
sparkles here too. For example, some
dots like that, going to both sides evenly, going towards some
other elements, some other areas
and starting to add a couple of these sparkles
all over the places. Also to make it
more interesting, we can go to the top part
and add a bit of light. So let's get back to
our brush library. We'll go to this brush
that we used before, medium blend or soft blend
from the airbrush folder, and we will go and create one more layer above the
layer with our shadows. So creating the layer, going to the icon and adjusting the blending
mode to overlay, changing the color
to yellow base, and let's go with
the bigger size of the brush to some
of the elements, and we will go and adjust them. So for example, we
can go and add a bit of light on the brown elements, going like that to the top of them and adding a bit
of lighting like that. And now when we have
the result like that, let's go and work a little
bit onto the background. So we will get back to
our brush library and we will go and select our
Del flat pencil brush. We will change the color to background elements
and we will go to our layers to create a new layer underneath everything that we
have right here. So go into this layer
on the bottom right underneath the layer with the
whole shape that we have, creating one more layer here, and let's go to the
bottom and we will create a little bit of
a grass patren here. So go like that with our pencil probably
with a bigger shape of it and starting to create some additional little
elements like that. So going like that
a little bit behind our little giraffe and then go and creating some kind
of the pattern right here. If these lines are
bothering you, you can go and hide them
by going to the lays and finding the layer where
we have them and hiding it. And then let's go toward the top parts and create some
strengths of grass here. Let's go to the
opposite side too and add a bit of the
color right here too. If you want to work
more onto this element, you are welcome to
go and do that. Try to create this very nicely looking pencil
effect right here. And when you have the
result like that, let's go and maybe
create a couple of more strands of grass right here onto the sides
and then let's go and create some
additional elements. For example, let's go and
create some little flowers or some of the differently
shaded grass right here. To go on like that, go into the opposite side
to balance it out, trying to create a couple of peculiar little
details right here. When we have it, let's go toward the top and let's start
adding the details here too. For example, let's go
with the same brush and create a couple of maybe
hearts or something, starting to shade them
too, going like that, and adding a couple of elements to finish up
with our illustration. Let's go toward
the opposite side too and add another
little heart here. For example, right here,
let's go and edit. Let's go and shade it too, and then we will continue by going and adding
more elements. For example, let's go
again toward this. Right part, let's
finish up with it. Let's go and create some
of the flower or so. Go into these elements
and shade it manually. When we have it, let's go with
slightly smaller elements, so we can go and adjust
the size of Abrash. We can go with some sparkles, we can go with some dots. Let's fill the areas, the blank ones outside
our giraffe to add some additional little
nice effect right here. You can go with some dots, you can go with some sparkles. You can go maybe
with some pattern right here with the
sparkles that you are creating and let's go and add a couple of
the details outside. And now when we have
the result like that, let's get back to our range
icon or the top left. Let's toggle our drawing guide. And when we have the
results like that, we are done with
our illustration. Thank you for
watching this class. Le review if you like this and contin subscribing for Mr
kai videos in the future. Looking forward to
see your project.
 Uni Corn, ⭐Kawaii Art Enthusiast⭐