Transcripts
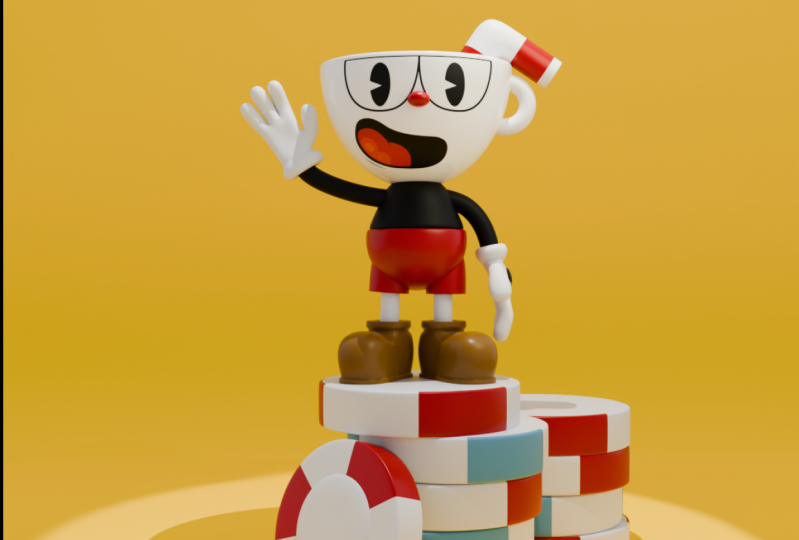
1. Class Introduction: Hello, everybody, and welcome to another blunder course. My name is Gena, and in this course we're going to model Cup it game character. In this course, we will learn a lot from basic modeling techniques to more complex such a UV texture off the face. We will start by important reference images that you can get from the description of discourse. Later, we will start muddling the whole model from the beginning until the end. After that, we will apply materials and make interesting polls, and I will show you how you can improve your enduring skills for the light we will use ate the right texture, which you can get from the agent here I haven't got. At the end of this course, you will have your favorite through the game character that you can rig. Use it for your own animation or even game, or show it to your friend and place your first Redick after in your portfolio. So let's begin And don't forget done to deal with the devil
2. Modeling The Cup: hello, but the end of the first in the video in discourse. So before we start working with wonder entered the environmental should go and get in your folder And right here on my best to help you see the cup holder with all images that I got . So all these images you can get from the link in the description of this course and here you can see that we have reference images and also we have this texture that they are going to apply on our Okay, So right now I'm going to close this folder and I will open our blender. And he considered I'm working in the blander version 2.80 and now I will be able to get in your file under general. So here we have our default cube, different light and default camera. So this is a different scene which comes in a blender. And now I'm going to get treated my default Gilbert dressing X and deleted. But before that, actually, the first thing I should turn on my screen cast. So right here you can see all the short cousin that I'm going to use. So next step that I would do is goingto be important reference image. So with a shift in a confined image reference and now you can go and start importing cold days images. So we have this image here to decide we have another run. So this is going to be idle. You have reference for running, and last one is going to be this front. And I think I'm going to give this front as this right here in the middle. So here we have older images that we need for modelling our cup. So first thing that I'm going to do because I will use this reference image as a starting point off my model Inc. I want to disable over days from being selected. So I'm going to select all of these and here under image on under image I brought this. You will be ableto select transparency and here you can go and decreased of transparency. So actually concede that you can go on Lee for each one to do that. You cannot select all. Actually we don't need transparency on those, so to grab them and that side. But this one here Antal others I'm going to turn on filter for four selection. And here we have those arrows. So here I'm going to disable all this from being selected. But I will just go real quick toe enable all this because I want to do one more change. So here on this one here, I want this only to be view in autograph. If you so I will disable. I will disabled this picture from being seen in perspective. You so you can see that anywhere. If I moved perspective, you lose image. I also want to duplicate this image here with shifting day right to cancel a changing location and breast jersey and 90. So I want this picture to be also in right or the definite you. Now we can go and look. Hold this so we cannot select them anymore. And now we can go and actually get treated those. So right now I'm going to select all these are best first time and enable it. And I want to change that those images to new collection. So I test em new collection. And here, right down reference. And now they're all in the new you collection. So right now I can go and disable it And now I need to select back my collection first because I want all new every stop here in the new collection. So now we can go and start modeling. So first thing that you're going to model is going to be head of the carpet. So with shifting a I'm going to create a new UBC us fear toe are seen and now I'm going toe breast three and up. Now I could go into edit mode and here I will just go and turn on transparency view and I will also get off the half. So I was like this inner this'll up here and now I can go and select all of these breast x and elite. So now I'm going to scale this up. So let's see here because he's from game. So I'm just adjusting the size fit so something like this See, here now this would be perfect. Now let's turn it toe original position. And now I will need toe return my greedy or bring to soil past Rightly and I was came in your brain. So now I can go and scale this up because you can see here because this is not front you 100%. This is a little bit for working from under. We need to change a little bit shape of it. Now I can go in turn off X remote. And here I will go and change shading toe from shades small deflect. And also I need to apply nearer modifier actually subdivision surface with the number of subdivision toe. Now I need to feel this insight here so I can go in top. Photographic. You Breschi to extrude it canceled the location by breast flatbread Click and I need to turn off my proportional everything. Now I'm going to scale down. So let's see. Are you looking so far now? Thats a kay size for that. And now I can go and extruded invert skillet as well. And now I will not go all the way down because I want the press f to feel those inside. Now we need some of the support looks. So first we need to go. That photograph you entry control and their way will be ableto add vaginal Pierre Now, if you want, you can go and breast control be toe travel those out. So something like this is going to be fine. And now also here and here. Now we will need toe pick this issue that we have on the bottom because you concede here have broken the shading. So the very can fix it is going to be in face election. We can select that face here, remove the face And now we can go and select this edge. Look here and we can go and skill all the way down. And now if you go on the face, just best great field and now everything should be fine. Way can also pull this down. No, and we can add bond markets. So here we have our basic cup and now we need cap holder. So we needed despite this year. And this is going to be very easy to get in the three todo with the shift in a we are just going toe ring no doors to our scene and now, with air next year being directed for 90 degrees. So it's best accent right down 90 Now we can go and scale down and here I'm going to go also to change shading small. And let's add one subdivision off our X ray and here with this after selection, I'm going to get the great off those edges, so I can't believe those witnesses. Now I will be able to press l to select linked extra delete that half. And now I need to fill these holes by pressing F. Now we can go and turn off power. Wait. Did that older as well. So you can see that it's not going all the way on the ghost do about here. I think is going to be fine with this character. So that's it about the video. Stay tuned. Because the next video we're going toe add face details, so see you there.
3. Adding Face Details: everybody and welcome back to our second video discourse. So here you can see that we're done with modern car cup and now we should focus on those face details, knows throws and the other stuff says so. First thing that I'm going to go, I will go into shading. And for this one, I'm going to creating material. And I want to use image picture for for this face off the cup. So here I'm going to search under image texture. And here I was, walking it to base color so you could see that suddenly became black. And just because we don't have any texture, open it here so you can go and try search. You can for now on this J pic is it this And now I press controlled anti to bring texture coordinates and mapping together. So if you cannot do it taking go and manually do it extra coordinate and like in UV toe factor and this mapping director here. And if you want to do it, you will need to turn on this note Wrangler, Adam. So I could just go under edit reference. And here is Adam's no rancor. Just turn it on and it'll work. So basically, just beat ups your foot. So here you can see that we have a little bit and that's because we need toe. Unwrap it this properly. So now I can go in edit mode and with a I will be able to select everything. And now with you I will be just able it's toe. So now if you go under, you get everything. You see what we have here and that's not what we want. I want only this toe be projected in this front, off the traffic you and now we can go and fix it. So first I'm just turn on. You re sync. So now if you select antique here is going to be sister elected ALS on the other side. And now with a I will be able to select everything you and here also you can go and find it here and you can just search for project from you. So right now we cannot see anything. And the reason for that is because we are insulted you. And by the way, I am holding Z short cut and we will need to strange toe material so right Now we can see that our our eyes became over here and now we will need to position it better. So you can go and select everything here today. Scale it up. And now you just need to find a good proportion off promotion for carpet. So something like this Let's see. And this is fine. But we have you on some problem here. And that's because we have on both sides and dolls on the other side face. And now we will need to fix it. So with C, I will be an enter in circle selection in top Photographic you By pressing seven, I'm going to select changed face selection and I will select all faces here. Now I will be ableto exit out out of circle selection. So I'm selected all these parts and now, but I will be able to rest s Z zero. So now all of these became in one dot here and now I will just take it away from our carpet . Faso actually, all these faces here so you could see right now they don't have any value. So they are all here. So now we will need to do the same for the other side. So again, I'm going to use circle selection for faster selecting those. And now I just select all of these rest SZ zero And also I would get away from that. So now it to see that we have this face here and now we can go and still it up a little bit , I think Don't. This one needs to be on the top, but for that you need to go and apply our subject surface. And now we could go and pull it best g five. So also make sure that you are in the middle. So this is our middle and here considered it's a little bit offset. So I'm going toe Breschi x upto position in chemical. So now we have head face created here. So the next thing that I want to drink change is you can see that all of this here I'm going to go so quick with Leyland Motor and here will turn on our rendered you but we don't have any light. So here for now we can go and bring back our point light and increase Barber 21 1000. So here I'm just going to position in front. You can see that it's a little bit boring Kick. The whole cup is just pure white and I want to change it. So I want on the eyes to be pure and cartoonish to have that look So we need to fix it. So under shading, we will need toe add different Medea. So here first thing, I'm going to change my jay picked lectures you can keep It is cities if you want it. But if you want more advanced, you can go and important this PNG Dextre And now we can see that our cup had became black on the ice are the same color So here with the shift in day I'm going to search for mixing shader Note and basically I would need toe makes this note here with the transparency note . So with shifting a I'm going to search for transparent to be as the f And now I will be able to pluck in this one here This one here and no if I'm blocking it toe here now basically is mixing transparency and this texture here But I want my offer to control this . Make shader note so right now everything is black. And that's because this this transparency is just pure transparent color here. So we cannot strange it here. But we can go and duplicate those two notes of this principle be as the f and this mix Shader So like this And now something just to go and like in this McShay Did this one here so first really black it from the material. They are output. Now if I bring it here conceived that way have now different different material for the rest. But but our eyes and our mouthpiece are not visible that much. And that's because we need also this off to control the the mix Shader here. So now it's a little bit tricky. It you just find actually, So that's it. You just We just needed to change the position off those. And now, as you can see for exactly, just change the color if you want off the carpet. But for now, I'm going t to keep it as it is. So not it's looking. It's looking much better than biggest. So no, I'm going to go under layout and now we can go and doubt this nose for example. So with shifting day, we're simply going to bring you this year. Now I'm going just to go on and see how it's looking. So it's a little bit. It's not perfectly perfect circle, but it's a little bit like a lips. It's just to live elliptic. So I'm going to rotate it for 90 degrees on the Why actually here, Just take something to get great if it's real quick. So with shit today I will bring new. You receive change, shading to smoke now with G and C up. I don't want to rescue skills all the way down. And as I've already mentioned, it's not perfect sphere. So here I'm going to breast s and by to scale it up on the why. Now I will be able to scale down without out, and also I will just like the graphic because I can see here that it's like they're update on both of these reference images. So the position off this nose is between the ice so you can just go and try to figure out but the best position for it. So there's no strict rules that you need to follow in order to get good result, you can go and, for example, you can just go. And here with the eyedropper toe to be able to discover here, if you want to have the same color as a reference image. So that's it about the video. Stay tuned. Because the next video we are going to motherly out our body and also start modeling this straw up, so see you there.
4. Modeling The Body And The Straw: everybody And welcome back to our third video in discourse. So here conceded you're done with it, adding face details. And now we should get focus on modeling our body. So with shifting, they were going to go and create You receive us fear store seeing now I'm going called skilled down. So now we can go and switch back to solid you. So here are also train shading. And now we could go. And at this I was there on also X rayed. So you see it through and here considered our reference images to offset. So I'm going to go and rest g and X the more so to about here. Now I can go and disable those reckless images from being slapped again. Now I can go and select the stop part. And here I'm going to pull it up a bit now. Just killed this part here and here I would go and add look and found here. So now I was like this absolute here, Dr G. Now this one needs to be a little bit bigger than variously previous one. So here this goal and pull this up here by pressing Class G and now I need toe hold shift. So this is meant to be body. Just give the stone. Now we can go and add subdivision surface to it so the next one is going to be bent. So with shift in A, we are going to make another cube. I'm going to turn off extra now and here we go skilled up. I would get rid off house our US feared and also best lt's like this inside You need to turn off once again X ray mode So see through and now for dispense I'm going to just go a pennant position it just add one more year and now skill this a little bit more off out. So now I'm going to go and like this are slope here press ito extruded scale it down insight And now just press have to fill this hole inside. So if you go in extra eight x ray, you will be able to see it. So now let's go and see it through. I also had subdued surface number of subversion and here I just go and add my sport looks so everything here is done so maybe we can just go and kill this out a bit. So now I'm going to go at arms and like so, the way we are going to do it is going to be with curves. So with shifted A, I'm going to search for busier car. So it now I'm going to move aside so I can see it. And now I'm going to go and at a little bit of geometry. So if you go undercover properties, you will be able to train travel through it. And here you can see the immediate pickup cylinder. Look, it's good. Think about about us on this busy occurs and curse in general is going to be is because they're easy toe be it did so you don't need toe Break out the model if you want toe, render it out for still images, especially mother like this Regis cup cartoonish and not so complicated. So now we can go And as you can see if you go on ahead remote, we can go and rotate and we can go Skill top. I don't so very good trade toe great arms for our character with this berserker. So now now they just left everything and now I can go on positions there should be. Now I'm going to go and scale it down. So something this also here? Let's see. Actually, I'm going to studio one more time here, but I would just go and pull out. So now I can go a plant, have much better control it, and now should be fine. If you go and Delson case number off resolution on your in your babble here and also you, Can it increase number off resolution in render it and user in Newport. And here averages go and told shifts to slightly increase the beveled on it. So here can see it between its toe go and those changes. And actually, I think this one is a little bit too big. So here I will just go and decrease Steptoe it Now it's much better. So here I'm going to change starting point of it because I changes by going united most and moving around. So here have changed or did point by pressing Redlich said origin And here I would change origin to center off the mess. So now with shifting day, I go and duplicated on the x Kanzi Andrade or 180. And here I would just go on, have it on the other side. So also, now we can use those for legs. So shift, indeed. We are going toe duplicate dizzy. And now for each one of this, we can go and actually weaken. We don't need this one here so that you get 816 days there. And now we can go and arrest us and see s X zero to make slept. So now we just go and make our legs dates. Lately, I'm going to get treated 2nd 1 because I lived this one and on the other side, So disrespected Be, actually, let's make let for non because I want to make pence first. So one here and on the other side. So defense is going to be easy. So with shifting a I'm going to bring single cylinder Dorsey. And here I would just go and skilled So like this maybe a little bit more. No, I can go at it and here I will give to press I for in City face Insight have changed smoke and here also I can go on at subdivision surface now I just go on, pull it inside of it. I'm going to turn on real quick. Extra. And here I would just go also here. I don't need to add support. Looks not here, but here and now I need also sport looks inside fit. And now we can go and press right click and return our origin point toe the middle off our duty cursor. By the way, if you want to return your cursor, if it changes any very best shift and see and your three d cursor is going to be a snap back in the middle of our great And now I can go and return my or 2.3 the cursor. And here I would be able to go and at their modifier And immediately I will have the same the same on the other side as well. So let's check our efforts image. So here we are, almost done with metallic our body. So now I want to make this huge strong on top with the shift in a I'm going to bring Cuba toe are seen I was killed it down. Now I think top now I can go in face election and here I will be able to extruded so like this. And now I can go and select one day said and will decide So now I can go and add subdivision surface modifier with number of subdivision door changed waiting to sport and here can see that we need ash loops. So I'm going to add a couple of those. Actually, I'm goingto go and control and be I will build this out also I need here on the bottom. Now I'm going to go and select this face here dressed for insert And now I can go and extruded inside. So now we can go and at one sport group here as well. And now we can go and apply Material Street. So here you can see it that way. Have this, uh, this red red stripes on our stroke. So I will go in face election and like those two faces and I will apply the same Medea as nose so I can just go on press sign. So let's see how it's looking. And here I'm just going to go and one more look, I will also need to go, and at first I need to engage. And here I would just go at another agile insert. You can go and increase number off a subdivision to be four, and here we are done with modeling our straw. So let's eat how it's going to look like I'm just going to go and pull it. I will turn on X ray moat and here the Vertex election. I would just go and select this part here, and I can go on extruded down. So this leaves me needs to change the color here, what the best sign. And now we are done with modeling strong. So now you will need to find a position for it. So something like this is going to be fine. So that's it about the video state you because the next video we're we're going to start modeling shoes, So see you there
5. Creating The Shoes: everybody and welcome back to our for three years. So here you can see that we're done with modeling body pants. And also we have this big strong. So now in this video, we are going toe models, shoes. So, with shifting a I'm going to bring New Cube to our scene. And now our position it toe position Where should should shoes should be So do about here. I was just look that mode so we can see. And now I will go and drink a subdivision surface modifier. No, I'm going to select this face here and go in right of the graph. You and E I will go and extruded out so to about here now with control And there are who pulled this like this. So the next step I want to go and through this here and I wanted one more time as well. So this is going to be our base. So now with control and Eric, I want to pull it. This the word so to about here, So let's see how he's looking so far, we can go on track reference images. So you see day they got like they're looking like this. So we have toe extraordinary sparked out and also those bottom part as well. And also we need to make this huge, huge front part shows, as you can see on a reference image. So now I'm going to go go back in edit mode and here I will select this face here and rest for sitting face. Now I can go and select. Those are just those worthless is here and with GNC, I can pull it down. So now you see the effect but that we got it this thesis face here, the new faces that we'll just create it. So I'm just going toe and skilled down a little bit. I have pulled back those around as well, so thes. And now I'll just like a full deck. Now I will select this top face here and put up a little bit. And here I will add to agile apps by the bacon at more slopes by calling up your mouth feel . And here I was pressed snc to scale it up. So now I can go in this sounds like the Spain Had you look here actually this one here and scale it hold away down. So like this, Now we can go and at another absolute here and pull it all the way down as well. And we are going to do the same with this face here. Actually, we need one more edge on the bottom. And now we can go and select this. And actually, I'm going to go and at one more here. So now we can go on and scale it don't. So we separated this bottom part and the stop part. Now I'm going to zoom in and here in top Photographic, You speech And here I will just go and select this front part because we want to separate it a little bit. So here, I'm going to go and skill out and also pull it as well by pressing G and by people so neat here. So let's see looking so far. And now I'm going to go and press control air and add one more edge loop in the middle. So right now, I believe that this here is we need to scale it down in orderto separate from the rest. So let's see. I was looking so far. Now I'm going to go and select this edge loop here and best advice J, start up on here. I'll just go and scale it out a little bit. So here, I'm going to go and select this fragile appear on extra mode. And now we see I was called up to please the brush, size and school down if you want to scale down. And here I would just go and disliked this part here. And this one here and now I want more this in front by pressing G and why So now it's having much better shape than before. I want to do the same Fortis here. So once again I will turn on X ray and I will select all of these. But this is here. No, I'm going to go and get G and why have all those back? So let's see how it's looking so far now also, one more thing that I want to add is going to be I want to pull this year and as to look undecided as well. So I could go and select this absolute here and this one here and now I can go on and press s and text to skilled decks so now. I got more on shape here, Doc, and we have really cool looking so far. Sure. Now I'm going call Soto more actual up here and now Also, I was killed those out. So now they're looking much better. I will speak Stal worth the selection and a month, this part the more a little bit in front And also actually, we can go and like, the whole days but here. So these practices and I'm just going to pull out up. So let's see what else we have here. So now I can go on for a bit more on this birth, so I'm just going to go and bullet up. Okay, Let's look here also here. So I'm going to scale down now. This part here selected, Just go ahead and well, it also down. So let's see. Now we can go and fix this part here X ray view so we can see it. I'm going to extra rest I for inserting face. I was killed all the way down, and now I could just go and rescue for deserting faces in sight. Up. Here we go. Here. Now I'm going to turn on X ray you. And here I just go and kill this a little bit down because they're still big. So now I will be able to change shading too smart. And here we are done with our shoes. Go. Maybe at one more support. So we have this school in effect here. So now we need to duplicate on the other side. And we can do it, but mere modifier, so you can see that our order point is in the middle of our shoes. And here is steady cursor. I'm going to change Sergeant Treaty cursor. And here I was just apply me modifier, and immediately we will have the same shoe on the other side. So that's it about this video state, June, because the next video, we're going to make those blows as well. So see you there
6. Modeling The Hands: everybody and welcome back to our 60 day in the schools. So here you see that you're done with modeling shows for our character, and now we are going to make those lows. So with shifting a we are going to bring a new puked are seen and let's move to the side. So we are going toe moderate, separate from reference image. So with S and Z, I'm going to scale it down like this. And also I don't need skilled up a little bit on decks, so simply dissident to be fine. So it controlling their at one end, look here and actually ever needs toe loops on the side like this. So now I'm going to grab this this face here in the middle and just likely move it in front . And now I will also select those three faces as well those trees, front faces. And I was getting out. So now I'm going to like that. This backside and I was just likely back. And now I'm going to go and select this site face and I will extruded out. So now I can go and rotate it So like this. And now I was treated one more time and now I can go and protect it as well. Soling this So now I'm going to use worth the selection. And here I will go and select first this these heretics here and now I'm going to let the other ones. And if I breast em, I will be able to merge those at the first. I will do the same here on the opposite side as well. So now we have this single edge here. So now I can go and select those three faces in front, and those are going to be our fingers. And here, if you go on under, extraordinary will be able to find extort on extra individual. And here you also can see this yellow circle and you can just go and extruded out. So something like this is going to be fine. And now I breast shifted their to repeat last action so we can find the same shortcuts here . Repeat, last, and I will do it three times. Now I'm going to do the same here for this one, and I will do just one more time. So, as you can see here we have this basic shape off our hand. So now we can go and get rid of those faces here by pressing X and lead those faces. And now, if you go on in Vertex election, you can go and just select all of these vortices. And with SNC, just try to make some round shape for our clothes. So now if you go under subdivision surface and at apply subdivision surface, you can see that we have really cool clothes and that we can start with. So now I'm going to go and select this edge. Look here and now. I will also extruded down decks with this so about here now, I will do the same one more time. But I would cancel location by pressing Grant like and I'm going to scale this. No, maybe a little bit more. And now I can go and start extruding more. Now I can go and start extruding this inside as well. So to about here. Now I best s And now we can go and kill all the way down. And here I'm going just ago and best have to feel this whole insight. So now we can go and adjust the size off this so you can also turn on this cage and don't forget their on this X ray mode. So, for example, we can go and select the whole dump and make it bigger. And also, we can go and rotate it as well a little bit. So, like this. Now we can go. And I believe there may be too big. So I'm going to go. And with Beck, also, we can go and for example, Weaken, pull those slightly up and this one here. But, um, we can increase also a little bit size on this middle finger. Make it a little bit longer than those two. The small one, we can select it. And, for example, we can just slightly rotated pulled it down the same for this one here. So let's turn off our X ray. I'm going to pull going through this like those, and I will pull those slow down and here I'll just go and pull those sites as well. Also does. You can also increase a little bit more number of subdivision. I'm going to pull this back here and we can go on skilled up. So here you see that they are done with modeling car. And so now you can also see that we have those trees stripes. So with shift in a I'm going toe, bring another cube toe are seen and now I'm going to go add subdivision surface. Actually, let's move to decide to see if it's possible to make it here. So I believe me, for example Best price. You hear I we are going to be ableto do that like this and for example, we can just go and out but actually wear going toe destroy the whole the whole match so we can do it separately. So here I got this queue up here with subdivision surface and now we can just go and extrude still this down So the position if it is the song going also toe change the train back my treating my origin point I'm going close to the change shading to smote So for example, the Kimpton are extra I'm going to pull this down This can be up So let's see now we can go and rotate it and duplicate also here and also here my hope for all three of juice And here we need toe in sight and it can go breast vice air for rotating. And now I believe everything is done here. So that's it about this video. Stay tuned. Because the next video, we're going to both our character and also great arm hand for the other arm as well. So see you there.
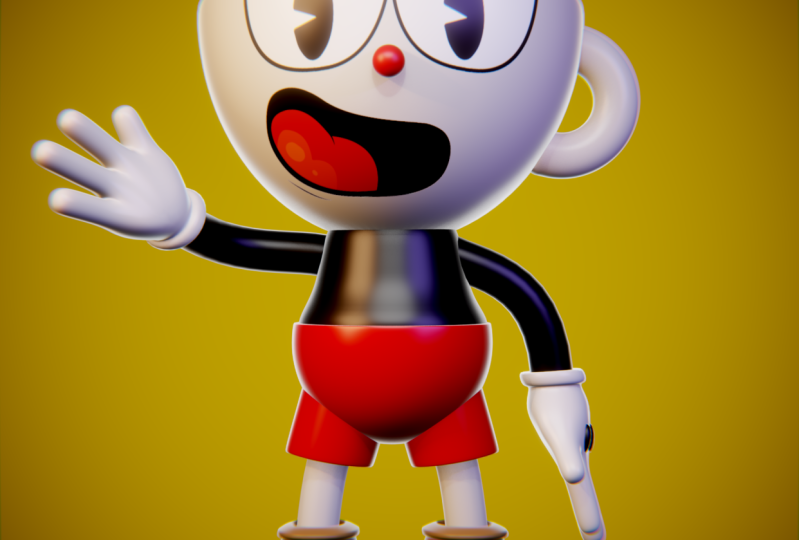
7. Posing The Character: everybody and welcome back toe our course about three D modeling cup it. So here you can see that you're done with modeling our our glows our hands. But we should a just a little bit because I believe there are two long. So here I'm going to go And then on X ray and I was like this top part. So now I can get out X ray. And here breast out s for shrink scaling, and I'm just going to go and slightly scale it up like this. And also, I'm going to go and select this part here and maybe I'm going toe slightly to scale it from the X. So let's see how is looking so far? So now also, we can go and fix the length off fingers so we can just pull pull them a little bit inside . And now, for example, we can go and play with the rotation of them. So maybe, just like the rotate down is going toe look much better than before. So I'm going to go and select this this part here, and I want just light it to rotate. Don't. So as it conceived those three lines are pulled down but we can go and press genes it pull them back up. And by the way, I'm going to join those two together, bypassing command and Jay. So now I'm going as well toe ads, black materials to it and for the close up views just simple wife material. Now I will select this finger and also I will slightly rotated down. And the last one is going to be this one here. So all these vortices don't forget to check. And I would just like you did as like this. So now we can go and waken go And during those two together by pressing command J So now we have only one object and this is actually at the opposite hand. So we're going to move it on the other side and our great to change the treaty on Arjun Point in the middle off our lows So something like this. And now let's turn our checkpoint in the middle by pressing catholic and according to the treaty cursor And now I will be ableto add mirror modifier and we have the same on the other side as you can see here. So we will need to rotate it a little bit And now we can go and apply Mira modifier. Also we can apply subdivision surface. So now I want to separate those stood because I want to post them different both. So I rest be and separated. So first I selected And now they are each object and I lived. They are occupying toe the center of their mess. So now we can go and start posing our characters. So first, let's switch toe Look that note to see if we have all materials. So now we I'm going to go and quickly apply basic material does so here I use the same material black material that I had before and for our events I will do the same as our nose also here I will apply Amirahmadi fire on the fence for legs. I really was just simple white material and for the other one as well. Now, for shoes I'm going to use I dropped to so under base color I can go and just I like that color there and everything should be fine. Only one thing here I will select this handle, handle and breast out and s and I want just a little bit toe scaled up. So now it's looking much better than before. Next I want toe enable selection. And here I pulled back my a reference image. So now I will be more. It will be much easier for me to see. So here I'm going toe scale it down. So something like this and maybe we can go. And for example, we can just go and strategy this or actually came to manually so we can select actually get rid of that. And now we can just go And for example, I want up head to toe wave. So something like this Now I will just go. And actually I have a need to duplicate the other other hand on the other side because I changed the scale. So here I use I will return Or real quick Arjun point in the middle. And now I can apply some mirror modifier and tear this and the other side. Let's see and your brains. So let's right now, for some reason is changing, but it doesn't matter. I'm going toe Just press health and separate it manually. Great. Don't X ray be separate. And now I can go and return Return back my your planes Now I'm just going toe dated So it's fading around. Let's actually more this bit in the front and protect as well. So now I'm going to hold this there. Let's see and just I will just move it slightly down. So this that's it. Now I will supply mirror modifier and subdivision on shoes because I want to separate each by selection. So also I will do the same for defense. Peace selection. So now, for example, we can go and rotated this slightly and for some reason it's leaving. I'm going to go and go back a couple of times because we didn't select the whole shoes. So now we will need to de select everything. Press l two select everything linked and will be. I will be able to separate it. So now I will just go and it's likely rotated. I will also change the brain. Those so something like this with C, I'm going to pull this a little bit there and also we should bend a little bit. Knees and I would look same for the defense must be separate. So now I can slightly just rotated. And, for example, we can go and I wrote it whole head. I'm going to select the whole head and put and also body, so just likely rotate back. And maybe we should. We should go and rotate the whole. I can't pull it down. Likely. Also, we should go and fraternities on the back. Now we can go hand, see if distance correct on. You can say that slightly. Move it now it's much better. And maybe we are going to go and a swell and that's it. We're done with modeling our cup it. So that's it about this video state your because in the next video we are going to prepare our cup to be rendered, so see you there.
8. Final Render Settings: everybody and welcome back to our last city and discourse. So here conceded he are done with modeling, composing our character. And now we're going to do our final under setting. So first, I'm going to get rid of my reference images because you don't need them anymore. So maybe I'm going just to leave this one because I want to have this back around color for my friend as well. So now I'm going to select everything, and I will just pull it up. And now I can get rid of my some limp, actually to find light, but never mind. Also, we have other at the reference image in the other side. So for our lightning, they are going to use if there I So here, on age there, I havent you will be able to find a lot off the rise, which you can get for free. So for you render you should get any of thes and actually issued experiment and try to find the best that you will fit to render. So right now I'm going to go back from blender and here I will go and switch from even to cycle because I want to have a higher quality under then So now I'm going to switch to render it you. And right now you concede that it's very dark so we need to change it. So I'm going to go under shading and its that barbed ripped. I will set the world and with shifting ai research for environment texture And here I'm going just to go and use this to the right I got from it that I haven't that come and I will black in the background. So now issue ch teau sit back toe your do you render it you you will be able to see the life and you can see how you're and there is going to look like the press controls the day to bring texture cordant and my pink. And here, for example, if you want to change the direction of the sun and the light, you can just write it around. I'm going to keep my cities as a default. So now I'm going to add backdrop plane. So here with shifting day, I'm going toe create new plain and I will go in a deep moat and here I will just extrude this face up. I will be able to now select those to work. This is control and be I will be able to travel those out by scrolling up you will be. I think more bell to your Blaine and do about here is going to be fine. I will change the fading and also I will bring a base. Color it. So we have this same color than for So now with shift and day, I'm going toe add a camera toe are seen And if you press zero or tacos here, you will be able to enter in flight Come, can you will be able during camera view. And if you breast shifting crave here which is key above Deb you will be there in camp fly camera mode. So now you can go and fly with your camera and set the the way you like it. So also, if you select camera, you can go on the camera and here you can change and find all different settings that you can change. So, for example, you can turn on bass part out and also if you want to intern, turn on those compositing guys, for example center and thirds and golden ratio you want. So now I'm going toe position my camera for the final render. So I want it's to be about here. I'm going to scale my plane back. Ongoing actually also toe the creates a little bit base part out. Best to here. And I like my rendered. Toby's something like this. Let's eat rules off thirds. Now I'm going to go and also bullet to be his feet. So, like this And here I will search to look them yours. So I'm going to change a little bit settings here. So I'm just going to rotate slightly up. I was like, back my I'm here updated as well. Now I'm being to select the other arm would get rid of this Worthless is here and now I would just try to find good position for I'm so something that is going to be fine on going also to rotate this one slice inside. And this week in full year Antal so irritated it's down slightly So something like this. Now it's looking much better than before. So now we can go and play with all of this material So I will change from voto object in shading and here I will select each this piece so here can see that those are not the same . They have different names. So I'm going toe speeches, toe go to have the same material here. And for example, we can go and decrease roughness, effect and play with Spectacular. Actually, something like this is going to be much better than so for the pence before I'm going toe. Keep everything as it is. Maybe let's start the increasingly beat roughness and that's a mean so we can see it. And here everything should be so. I want just a little bit light here and for shoes, we can increase roughness. Actually, let's make it more blessed Plastic. So something like this is going to be fine. And also I want to add same material for the handle and also you need to rotate it as well . So now I'm going to select my head, and here I will go and decreased roughness year, and maybe we can go and increase it Spectacular. So something very good. So now we can go and send it out. So here, if you go under under settings, you will have different settings to use. So if you go all the way until color management, you can change the look. For example from medium countries toe high contrast and for my render, I want to use this medium high contrast and also, for example, Kinyua's curves and here could take those settings and adjusting how you like it. So I want my just to be able to be darker. So something like this going to be fine. Maybe not that much. Now something like this is much better now if you go under layer properties a d and don't forget to turn on the nursing. And also, let's see, here, under our settings you can select your resolution off the render and also here, select your expectation and file for months. I'm going to use PNG and out file. You can select, for example, up ahead, same folder. So now you're rendering can begin by going here until render and under image and this ghencea rendering is going toe begin. So that's it about this course. I hope you had fun how we learned a lot in this course. So stay tuned. New courses are coming every week and see you in the next one by
 Nodiken 3D, 3D Artist and Animator