Transcripts
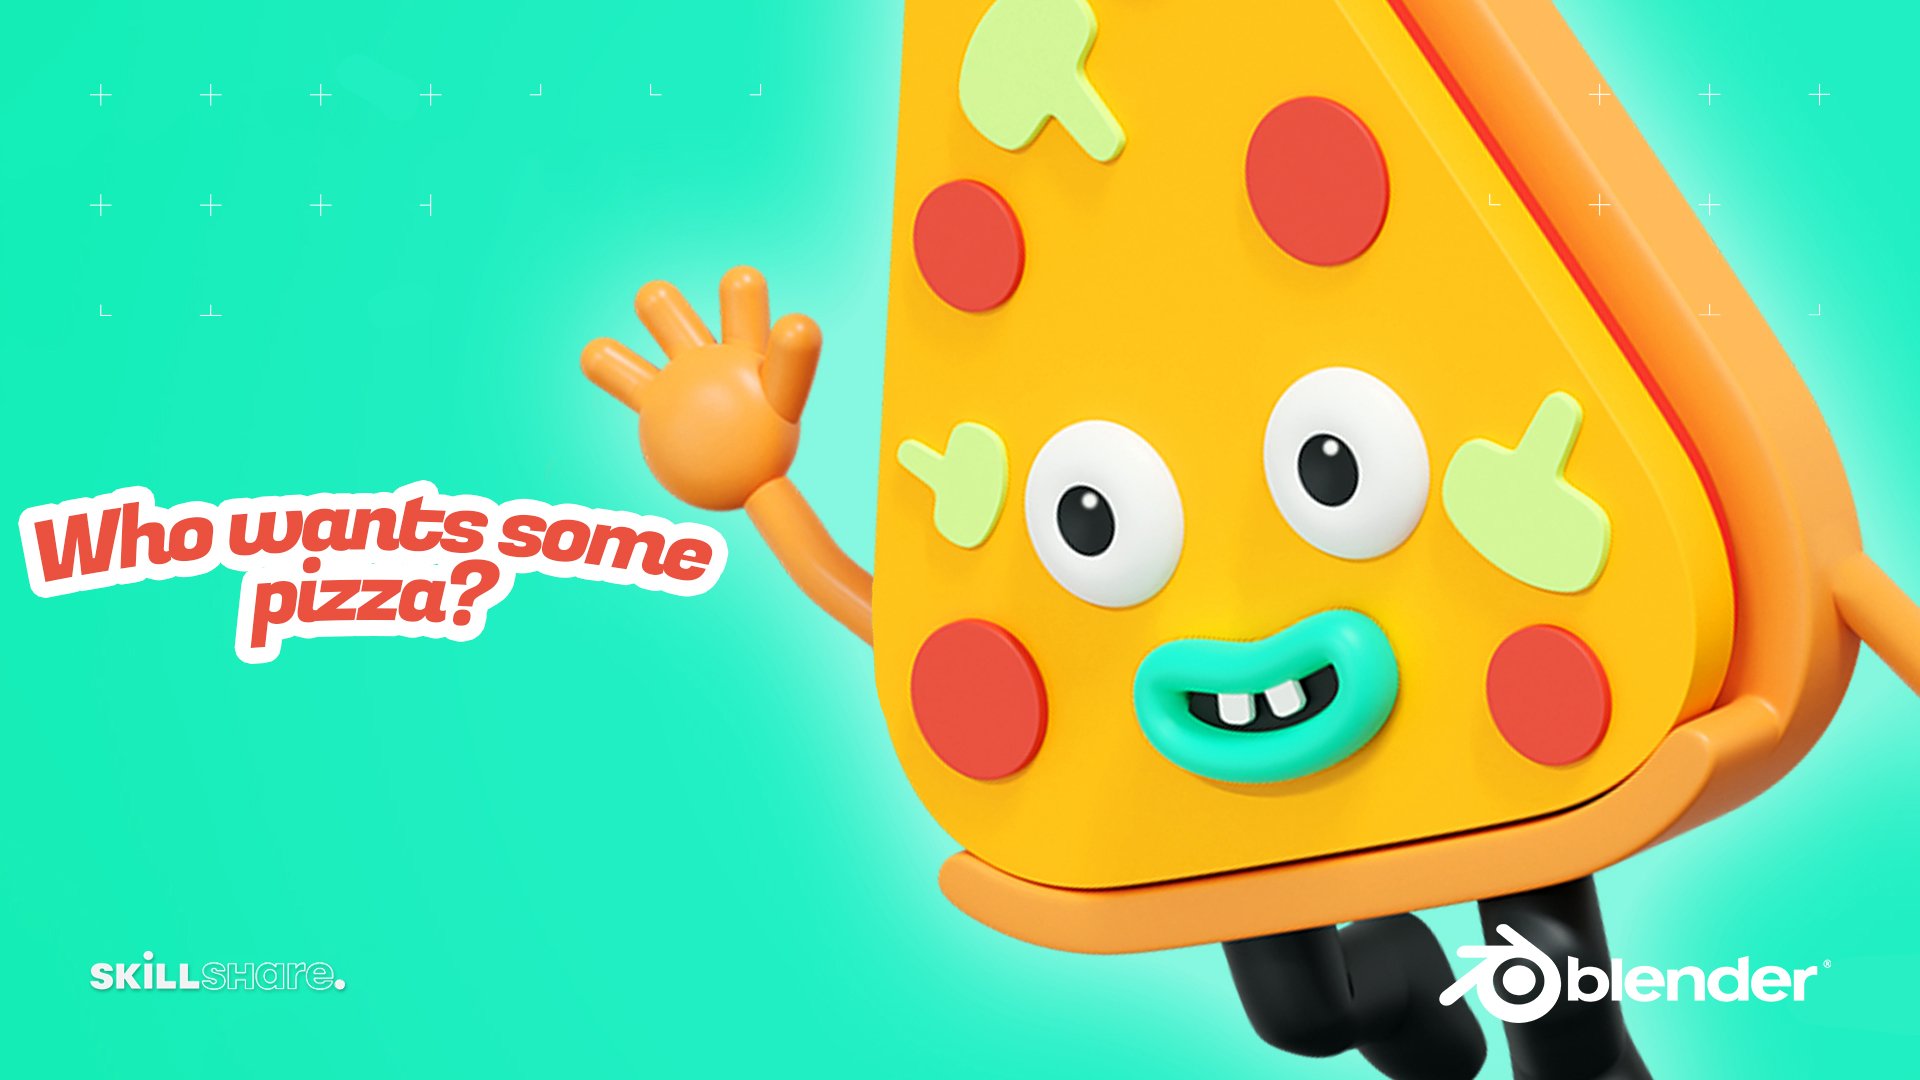
1. Class Introduction: Welcome to another blender course. My name is Dina, and in this course we will create a stylized character with Blender 2.9. In this course, we will discover a lot of new things and I will show you how under one hour you will be able to have a stylus character that you can later duplicate and edit really quickly and immediately you will have another character. First, we will start by modelling the head and glass. With metals, we will be able to have different here on characters, very easy and simple. Later on, we will add a color and buddy. Next, I will show you how we the curve. You will be able to create arms and legs in a few minutes later, at the end of modelling, we will eat hence and shows and add a few small details. At the end of this course, I will show you how you can use HDI for lightening up the scene. Empty will put materials on end, prepare our scene for ending. After the course, you will have knowledge of how to make a simple sellers character and character that you can use for your portfolio. You can show it to your friends and social media and also later you can animate it. So let's begin and be productive and creative.
2. Modeling The Head And Glasses: Welcome to our first video in this course. So first, let's open our blender. And as you can see here, we are right now currently in version 2.9. And if you can get any version above this, you should get it because it's always the best way to work with the latest version because of the new features and also bug fixes. So let's create a new file under General. And here we have our default cube with our default camera and the light. So first I'm going to select my camera and I will press x to delete it. And real quick, I'm going to turn on my screencast add-on. So right here you can see all the shortcuts, the tongue wait to use in this course. So first we are going to start smuggling the face of our character. And we are going to go with a shift and a, and here I'm going to create a new circle. And instead of 32 vertices in these default to a menu, I'm going to change it to 16. And now I can go in front orthographic view by pressing number one on the bed. And now I can start extruding this out. So first I will start I will rescue e for extrude and pull it up on the z-axis. And now I will also, by pressing guess. So here I will just try to make the round, round shape or the head. Make sure that you, that you are lucky all, all the time on the z axis. So it stays in the correct position. I want him to, me to have like here, I'm going to add one edge loop in the middle. As already said, I want team to make this X shaped head. So I'm going to scale it out a little bit. All of this, by the way, could select edge loops by holding cult and left-click. So let's kill this out. And this one here. I'm going to give this money as it is. I will extrude to just one more time psyche scaled down our best effort to fill this hole. Now, I will go back in text mode and press rightly to chain shading to smooth. And also I will add subdivision surface with number of subdivision two. And here I will go and scaled is just a little bit more. Also those two. And this one here. So let's see. Now I can go and scale it on dx because I didn't want the perfect round shape. So to about here. So the next, I want to go and select this middle vertex here. And here is the position where nodes should be. So I will get rid of this vertex here, and I'll select this edge loop here. So the next step, I will go under edit breakfast and you wouldn't get this atom which is slope at them. Very useful when you are modelling tools. So you will need to enable this, add them under prefaces. And if you press right-click here, under Loop tool, all these external, external option that you can use saw, I'm going to change from being this cube here, I will change to circle. And now I can go and scaled all the way down. And here I can go and make position or my nose. Also pressed SYN 0 to make sure that I have perfectly straight and all aligned on the y vertices here. And now I can go and start extruding this out on the Y axis. So let's make some beach knows Vinci nose here for our character. So let's get, let's talk to scaling down. Make sure that you are always lucky on the why. And to compress F tilde hole here. Go ahead and add one edge loop there. And now let's adjust this just a little bit. So it looks more nice certainties right now. Scale this out. And I went, is down a little bit. This one here. And discipline especially. And now we have the spins knows for our character. You can always go and turn on X-ray. And here you can, for example, pull this whole this out if you want to make it bigger. So next, we are going to make ears for our character. So with the shifting a, I'm going to create a new UV seeing sphere to our scene. And also let's apply mirror modifier because we need to do on both side. Now if you go in edit mode and movies with the G and the site, you can see that we have also on the left side. And here you can change the position of your mirroring sore right now for us, it's okay to be on the X. So now let's go and I'm going to rotate this for 90 degrees on the Y. And now I will try to position is where should it be. So to about here, scaled down by two. Now I'm going to press S and y to scale it on the Y. And now you can go and use this proportional editing too. And for example, you can select one of these vertices. And with G a, you can go and move it on the back end. If you want to increase the size of the brush, you can just scroll up and down your mouse wheel. Sought to about here is going to be just fine. Now I'm going to go and let's kill it on z as well. So robot here, just a little bit actually, I'm going to train shading. And now I'm going to go and I will apply this mirror modifier. Or you can press alt and a go apply it. Actually controlling day and to be have our ears. You can also add a little bit more geometry there, just in case that you need more. And we have our ears. So the Next, let's make glasses for our character. So with a shift and a I will bring new doors to our scene. And now I'm going to go and use the same mirror modifier that I had before. And now we can go in edit mode, metalloid the underside, and we didn't need proportional editing now. So now obviously you will need to rotate this for 90 degrees on the x axis. Now, let's go and dump orthographic view. And here I'm going to try to position it where it, where they should be. So till about here. And now I will use Alton S to shrink, to shrink scale. So you can see it. You can drink the scale of your glasses here. And let's move them here. Cobalt here. And that would be fine for now. Let's just scale it down a little bit more. And now I'm going to go and train shading to smoked. Next, I want to connect those tools. So first we can go and actually let's move them a little bit up and in the front so we can see it better. And here I'm going to go and select those two, and I will go and let's see it just on the other side as well. So actually we can go and delete one of these vertices here. And now I will go and select this edge loop here. I'll press S x, S x and N 0 to up to make flat here the position where they should connect. And I'm going to also turn on clipping on mirroring. And now you can go and excluded this out and connect those two parts. As you can see. Also you can go and add subdivision surface magnifier. And also let's increase it to number of subdivision. Actually, we need to move it a little bit more up. So let's go all the way. And this is the vertices that we need dog remote. So once again, I will change to circle this time here. And now I can go and extrude it out. Let's add subdivision surface modifier with number of subdivisions to end here, it can go and add ash slopes, pick up, and for example, it can go in and add one more dare. So we created our glasses here, lets them down. Faraday should be nth. Now we need ice point, our character and B, the simple UV sphere we are going to create ice. Also don't forget to add mirror modifier, scaled down. And now we will need to pull it out. Really small ice per our character. So as you can see, we are starting to getting the shape of get there. And so that's it about this video. Stay tuned because in the next video we are going to create mouth dental. So Haier, and we will continue with the rest of the body. So see you there.
3. Hair With Metaballs: Everybody and welcome back to our second video. So here as you can see, we are done with modelling car base head. And now we should go and finish glasses and also add headers to our character. So first, I will go and select our glasses. And I want them to be a little bit more about the nos because we are creating the style stylized character. And here I'm going to go and I will switch to decide you. And I will select this middle, middle vertex here. And I'm going to delete it. Now I can go and select this edge loop here. And now I want to align all of these on the X. So I'm going to press S, x, and 0. So now all the vertices on the x-axis our position at the same volume. And now I can go and extrude it one more time on the X, so to about here. And now I will press f to fill the hole here. Next, we can go and select those two phases here. And we can just pull it here on the back side all the way. And our best e, once again two edge loop. And here if we the control under our pull another edge loop there. Next I will go and turn on x-ray mode. And here I can go. And for example, we can select this part here. And we can just actually, let's select this part only. And this one, we can just go and to turn a little bit on the back. So let's see what we have here. And you can see that we need to go and pull this out, the Bismol down to about here going to be just fine. And now I will go in edit mode and here I will just go and add support edge loop here. And also I will need one on the front as well. Actually, I will not donated that one there. So I will also go in edit mode once again and turn on x-ray mode. And I believe this is a little bit thick, so I will go and precedent select this partisan politics inside, just, just, so, just a little bit. So now we have this team part of the glasses. So now for the hair, I'm going to use multiples. And multiples are very useful because you will see right now what they're actually doing. So many newer duplicate them, they are going to be merged together. So if you press shift in D, you can see what's going on here. And later on, for example, we can edited one of these. And with those kind of technique, you can make very cool and unique hair for your character. So I will go and now I will just try to duplicate those couple of times. So it shifted D. I scale this down. I'm going to duplicate. Those are all sought with front. It can cover, ears, are going to scale down. And as you can see very quickly, we can create a very cool effect to that map to Bowles. Speak this issue here. So as you can see very quickly and is getting really good results. So we need a little bit more on the back. So let's scale it up. Let's fill this gap here. This we have soluble need. I'll stop there and K, So that's part down there. So let's see what we have here. So you can turn on turn on overlays to hide all the necessary, unnecessary stuff. But the better baby. And now, let's make a little bit more small parts of hair. And here, whereas Appalachian coal, our event, is on the other side as well. So here, actually we need to delete this one here. Small, it'll pull it up as duplicate this on the site. And here I'm going to hold this up and also this one here. Kay, so we are done with muddling our hair far character. So next I'm going to make eyebrows. So for dy browse, I'm going to use current curve. So with a shift and a I will get a new Beziers curve. And now I'm going to move it on the side. So we have this kind of curve. And if you go under properties and these properties menu here, you can go under Jim dram, geometry, and here you can. Depth of it. And the good thing about Curl, Curl is you can go and edit to them as you want. So here I will go and scale it up in, in the battle. In the depth of actually I babbled it, the depth here under geometry because if you hide it, you can see that it's under level here, the depth that we need. So now I will go and pull it all the way here inside the character, and I will go and duplicate it on the other side as well. So for example, now you can go and add the tier, how you like it. So I want to be, let's go and see. Let's make some sad face here. And here. You can go and pull this up a little bit. So I will rotate it here. And also I looked at this end. See, solving needs to pull this out. And now you can go and select one of these vertices here. And if you press alt and S, you are going to scale only this part here. And for example, you can go and press directly to subdivided. And for example, if you want to make this sticker, you can also here and also on the other side. Let's do the same for deciding as well. So I'm going to scale it down. And now we can go and converge to these two meshes. So here I will go and search for a new earth. And we need to convert this mesh from curve. And I'm going to use the same here. So under edit, I'm going to search for the same n. Now if you go in and mode, you can vote, you can see that we can go and now actually we can go and scale it all the way down. And for example, we can just press f two field here. Or actually we are going to press alt F and here outs left grid real. And I will add one more edge loop here. So now let's close this part here. So I'm going to go and I'll press Control and be actually our best first F. And here I will go and beveled these out. And let's add subdivision here. So let's go on the other side. So first I will go and press f to fill this gap here and to control MP. I will double this out. And now on the other side as well, like this punk here, F to fill it and controlled beat to Belle this. So like this. And now I'm going to fix that real quick spark here. So I will deselect those, that gets rid of these parenthesis, press F, and that will doubt. Actually, let's go back and buy more. And here we go. So as you can see, we are done with modelling care or our character and also we created our eyebrows. So that's it about this. You do stay tuned because in the next video we are going to create body or our characters of Sudan.
4. Adding Collar And Body: At the end, Welcome to Authors within discourse. So here as you can see, we are done with muddling had for our character n. Now we should continue with the bonding. So first I'm going to go and select head real quick. And here I will go and scale this part a little bit down. And I will press E for extruding keys neck. And e once again. And now I'll press F2 to fill the hole here. And with edge loop, I will create a loop that will close the button part down. So now I'm going to make color for his shirt. So with a shift and a, I will go and create a new circle. And here instead of 32 vertices are, I'm going to decrease it to 16. And I will turn on x-ray mode. And here I will going in edit mode by pressing Tab. And let's get rid of this half. So now we have this part here. And I'm going to stand to turn on my mirror modifier on, and I will turn on clipping. So now I can go in edit mode and extrude this down. Now, first, let's select everything. And as our set, I'm going to extrude this down. So we are making color for his t-shirt. And now let's go. And here you can see that we need to scale this on the why and also on the x as well. And now I'm going to go and scale this part out. And here I will go and turn off clipping real quick. And I'm going to move this to the side. And now I will return clipping vec. So now I can go and adjust the color for our character. So something like this. Let's see. We can also add subdivision surface number of subdivision to do as change shading to smoke. And here we have color for our character. Actually, I like this detail that's occurring here, this button part. So now lets see on the other side as well, let's turn on X-ray. And here you can see the thing is to scale this part on the x axis, like so. And here we have color for our character. So next I'm going to go and add body. So we just shifted a, I will go and add another sphere. And now let's move this down. And now we can go and scale it up. And here I will go and get rid of this half. So we are going to make this rounded shape for our character. I'm going to go and turn on X-ray. So I will be able to see the whole. And here we have this part created. So as you can see, we made the mistake here on the back. So I'm going to go and real quickly just connect this back part together. Now I'm going to scale this a little bit more on the y. So let's see. I'm going to train shading as well. We can actually scale this up a little bit more down. And I will go, and actually we can go and scale this on the Y and pull it up to about here. See, now we can go and continuous. So we can go and start pulling this out. And now I will start scaling these down. So as you can see, we need to go back because we didn't select the whole loop here. Let me make sure that we select everything. And before that actually I want to go and scale this part out because I don't want this front to be visible. So I will need to go and once again, I will go and select this part x from here, and also this part here. So I'm going to scale it out on divide. And also we need to scale this as well. And actually we can go and delete a desktop. And here it compress F to fill us, pull this all the way up. And now it cannot see this part anymore. But as you can see here, we will need to scale this down. Actually, we need to scale this on the x axis. So now we've heated the neck of this character. And for example, we can go and add in the middle here x, look them. So we can just close this part down. Like so. And actually, I need to go back. Let's fix here. And I'm going to pull it up a little bit. So let's see. Actually I will need to go. I'm going to give as it is for now, like this. So let's see what we have here. Now. We can go and continuous, so I will go back in edit mode. Let's select this button part. And here I will go and start executing these parts down. And now I can go and press E Once again, I will cancel the moment of it and now I can start to creating the fence. So I will scale out this part. And here I can go and extrude it one more time. Like so. So we have Belt and now I can go and press E, tell moment here. And now I'm going to go and starts extruding this part down and scaling as well. So I'm going to press F to fill this hole inside. And here I'm going to add also subdivision surface. And as you can see here, I will need to add edge loops that support the belt. Also on the other side. Actually we don't need the debt one. And maybe we should go and add one here. So we created this basic shape for our buddy. So let's just be sure that everything is a k here. And as you can see here, we need to scale this up a little bit more out, or actually we can go and add edge loop. And I believe that should be fine. So we just need to move this a little bit here in the front.
5. Creating Legs And Arms With Curves: And that's it about this video. Stay tuned because in the next video we are going to add legs and arms for our characters. So see you there. But the envelope convector for 3D and discourse. So here you can see it here done modelling base or a four hour. But so now we are going to add arms and all select. So for this type of jobs left to use Beziers curve, because I will be easily able to modify all, all the necessary stuff. So I edit one simple best year curve and here, and immediately going to add mirror modifier. So now I will go in edit mode and move it to the site. And you can see we'd have also the same effect going on, on the other side as well. So first I will go and increase geometry here. I will double it out so I can see what's going on here. And now I'm going to rotate this for 90 degrees on the Y. And I want to make it flat soil press S, y and 0 to align perfectly. And now you can see that we can go and easily just rotated this, Those handles and easily could create bombs for our character. So let's get a little bit more pebble here. And what I like to do, I'd like to exclude, exclude it one more time. So right now I'm having three, separate the vertices that I can use to place and Kate arm. So this part, I will need to go and rotate it all the way. So I will rotate it and put inside of our character. Now this part, I will move it up and also this part as well. Actually, let's go and MODIS, guilt out. And here I will go and rotate it a little bit more. So cobalt here. Now we can go and exert a little bit more. And here you can see that we need to fix it. So I'm going to go and mow everything insight. Now, I can go and pull this out a little bit on the side. Also this part here. So something like this is going to be just fine for our character. Now, actually we can go and rotate it in the right direction. And here I will go. I will select everything and pull it just down a little bit so it doesn't affect our, our color. And here I'm going to increase the resolution. So I will use 3032 andalso render 32, and here I will do the same. Everywhere. And we have arms for our character. So the good thing is our dimension is you can go very simple and very easy in edit mode and adjusted and prepared for, render it how you like it without need for rigging your character. So for the steel renders, those kinds of techniques are very useful and simple to use. So now I'm going to duplicate this in object mode and I will use the same for the, for the legs. So I'm going to align all of this by passing guess x and 0. And here you can see that we have that we need to change the position of the legs. Song, going to scale it up a little bit. And now here you can go and increase a little bit more because we will need more pebble four legs. So unwilling to see if everything is okay here. I'm going to actually get rid of that and I can just pass it to extrude it up. And now you can go and press out and deaths to shrink scale it. And now you can edit each of these highlight gets. So I want to make this here dicker. And for example, we can go and adjust position here as well. So I'm going to go and for example, bent knees a little bit. And also, let's move this a little bit in the front as well. So let's see our character. And here I'm going to go and actually let's go to this, and I will scale this just a little bit more. And let's put, put up bit. Actually, I'm going to return down and let's scale it up as well. And also, for example, here you can go and scale this part down. And for example, you can go and scale this one as well, just a little bit more. And this one, the last one, like this. So as you can see, we are done with arms and legs and now we can go and edit the dose a little bit more. So here I will go and MOOC legs on the sides. It will separate them. Like so. Maybe we can go and select this part. And let's see, ferritin is a k here. Now, I'm going to convert this here to the mesh. So I will search for Convert and I will need mesh. Now, I will go in edit mode and here I will get rid of actually, let's just see if. So, I will need to get rid of this half here. I'll press X and deleted. And now I can go and simply add mirror modifier. And now I want to and get rid of those here, those vertices. So I will select them, I will get three delta M. And now I want to select this part here. I will press E for Extrude, cancel IT. S for scale. And now I can go and x2 out and hear our plus E Once again. Let's zoom-in. And now I will just go and extrude this inside of it. So let's see what we have here. And I'm going to go and add edge loops. And here as well. Also here. And we are done with modelling that. But so I'm going to do the same for the legs. So here I will do the same. And as you can see here, I will need once again to get rid of the half of this half. And now in object mode, I will add mirror modifier. And for example, we can go and I'm going to just scale this part out a little bit. And I want this one to be closed. So I'll press E for Extrude, right-click to ask for scaling. And e, f to fill the hole inside. And we have close that part down. So that's it about this video. Stay tuned because in the next video we are going to create shoes and tense or our character. So see you there.
6. Modeling Shoes And Hands: But the end. Welcome back. So as you can see here, we are done with modelling character, body and arms and legs. And now we are going to add shoes and also hands for our character. So first let k tent. So with a shift Monday, I'm going to create a new cubed arsine. And immediately because I need that the both side, by default time turning on mirror modifier, and now I'll move it to the side. So here I will go and start modelling can hence. So first I'm going to scale this down and I will create first bomb. And let's see on the top, and I won one to be alphabets. Dinner. And now let's also scale this just a little bit more. And now I will add with controlling their edge loop in the middle. And here I will go and add two edge loops and vice calling up once. And here I have created two edge loops. Next, I want to select this face here. And with the G and Y, I will pull it out of it. Like so. And I want to scale this part here by pressing S, And let's kill it on the x axis like this. Next, I want to select this face here, and I want to extrude it on the side, like so this a little bit and I will rotate it towards this direction here. I will go also N'T. Rotate it just a little bit more. And I will extrude it one more time. And this time I will do the same here. Like so. Next, I want to add subdued surveys with number of subdivisions to and I will change shading to smooth. So here I can go and start editing this mesh. I will go and select this vertex here and here, I will select this quest. The second and the third one is going to be this part v here. And if you press M and you can go and merge them at, at last. And also if you will need to do the same here, m and like this. And here, this part here, I will press X N, delete those phases here. And we have this loop here that I can go and scale it up. Actually it can go and scale it up. Or I'm going to actually just scale those two vertices here by pressing S syntax, some having this round shape for our arms. So now I'm going to go and select those two, those three front fingers. And here I will go and breastfeed to bring back my menu here on the side. And here I will select extrude individual. And now you can go and start extruding this couple of times. Actually do times for the fingers. And now you will need to do the same here for this finger as well, which is stump. So to about here. Now you can go and turn on x-ray mode. And for example, we can go and move this just a little bit on the side. And maybe this one here. Now you will be able to adjust it how you like it. So something like this. And as you can see, we have very quickly shape for our hence. So now I'm going to go and in edit mode, I will go and extrude this part out on the why and when to scale it actually ever modes nouns like thing. And here we've changed back to extrude region. So I'm going just to pull it up like so. So now we have created our hour hand. And for example, if you want, you can go and select all of these phases here. So this face, this face, and this face here. And for example, we can go and rotate them slightly down like so. And for example, if you go and do the same for the dump and you can adjust the title I get. So let's see what else we could do here. So for example, I'm going to go and I will slightly pull this back. This finger here, rotated as well. Now I will do the same for the other one. And here we have our our hand aided. So maybe we can go and just adjust this this part here. See, now we are going to try to position it. And also I'm going to press often desk to skill, just little gifts. So I'm having this kind of tick, tick hands. So now I will go and rotate it for 90 degrees. And also I will rotate it. Let me just go and position is made. It should be. Now I will need to rotate for 180 on the Y. And also now Let's start date it. This. I'm going to scale it down. And here we made a huge mistake because we excluded in the wrong direction. So we are going just to change the position it. Now I will go and scale it down a little bit. And let's rotate slightly. Here. Like so, and for example, what we could do else. So we can turn on this cage here and let's go in like this. And for example, we can just go and grab this and pull it out slightly like so. Now I'm going to select everything and I just scaled down just a little bit. And here we have gated, hence for our character. So now I'm going to create shoes. So once again, QC mirror modifier. And now in edit mode, tearing and pull it all the way down. And here I will go and kill, scale it. And I will add subdivision surface with number of subdivision to end. In object mode, we need to change shading to smart. So here I'm going to create shoes and I will go and select one of these phases here. So first, I will go and extrude this in the front on the Y. And now I will go and extrude this up. So we have our base for our shoes and now we need more controls with edge loops. So first I will press control earth to add Agile UP here. I will not go all the way on the bottom. And here also we will need the same on this part here. So now I will go and add edge loop, go out here. And now we can go and adjust those loops that we created. So here I can go and start, for example, I can press E for extruding gout. And here we can go and press S to scale and we can go and scale those out. So here I will go in x-ray mode now, and I will select this top part. And with S, Z and 0, I'm going to align all of these vertices to be at the same height on the z. So let's see. Now I will go and do the same here on the bottom part. So I will go and select this edge loop here. And our press E for extruding, I will cancel moment, and now I will go and scale it out a little bit. And the same as I did before, I will go and x-ray mode and I will go and adjust all of this to be at the same height by pressing S, Z, and 0. So now they are all sharing the same height. And as you can see here, we will need one more edge slope all the way down. And also for this part here, we will need spot edge loops here. And now I will go and select all of these here. All of these parts at C. And the last one, I believe is this one. And I will go and pull it down just a little bit more. So now I will go in edge selection. I will select one of these edges here. And here I will go and pull it down. And also I will pull, pull down this one here as well. I can go and scale this one. And now I can make the hole for the leg. So I will press E for inserting phase and E for executing this down. And as you can see here, we will need edge lupus. So real quick, we'll turn on gauge. And also, let's switch back. And for example, we can go and see if everything is okay here. So they are way too big, so I'm going to scale it down and everything should be fine. So now, for example, you can go and select this part here and extrude it up. And now you will have your leg also the same here for for your character. Maybe we can go and turn x-ray mode once again. And for example, making all this just a little bit more in the front. And we can select this part here and this one. Those two end scale this distance on the x axis like so. And we are done with motto link our shoes. So that's it about this video. Stay tuned because in the next video we are going to add, We are going to add small details to our character. So see you there.
7. Small Details And Adjusting: Hello everybody and welcome back to another video in this course. So here you can see that in the previous video, we added, we added hands and also shows and now I'm going to adjust shoes just a little bit. So I can go in and edit mode, and I will go in x-ray MLT as well. And we've asked syntax, I will scale those, those parts out. So now it's looking much better than before. And also I will go and select this edge loop here. And our best advice g, to move it to be right here in the middle. So now I'm going to add small details for our character. So first I will start with the color. So here I'm ad also Soviet fire modifier and it will add thickness to it. So maybe to about here, this little bys, so small details. And now I will go also add buttons for shirts. Shirts. So with a shift and a, I will bring another, actually our first cylinder to our scene and I will rotate it for 90 degrees. And now I will go and scale up the down and also skeleton the y. Scale it and make it very small one. And here I will go and select this face here. And I will press I for insects. And I want this one to be extruded just little bit inside. I will change shading to smooth. And let's add some subdivision surface. And I will need one more here. And set. So to about here. Now I want to press I once again, and I will exclude it. So one more time insight. Let's add one more edge loop here. And also on the other side. So here we have our small button and now we can go and position it will do wanted. So let's see, I want one here. That's the duplicate couple of times on here. And maybe one more here. And the last one is going to be this one. We need to move this one just a little bit up. So let's see. So actually, let's make only three for this front part. And I believe they are way too big, so select them and press often.'s. Actually I can go and press S. But I will need to change this estimation pivot bind to individuals. So now I will scale all at once. So maybe we can just pull this one a little bit up. So now I'm going to duplicate this one and I will place it here. Let's make it small, smaller. I will turn on x-ray, rotates, lifting. So we have that one there. And now I want one more on our sleeves. Let's start date it for 90 degrees. Like so. Let's make it small. And API we can go and tractate to slightly spoiled it inside. And now I'm going to duplicate also on the other side. Let's rotate it for 180 degrees. And here we have small details for our character. Maybe we can go even smaller than those here. So now we need shoes tie. So once again, with the shift and a, this is B is going to be with the curve. We're going to add few. And immediately because you have to choose, I will add mirror modifier. Now I can go and for example, I can just first-time Jam and geometry for this one a little bit. And now I will just press S, x and 0 to align those. And also on the Y. Now I will press right-click and subdivided. And now I can go and adjust all of this. So I'm going to go and scale this up. Now. I can go and position it on our shoes. So let's see. Let's make it a little bit thicker. And now we can go and I'm going to just actually, let's get rid of this one on up days. And now I'm going to align them to be perfectly. So let's zoom in so we can see actually we needed to get one. So I'm going to scale this one here. And this one is already rotate. And now I'm going to pull this up a little bit. Now we can go and scale this down a little bit. And now I will say it to those two. And now I can go and position them that they should be. So I will duplicate few times. And we have these small goal detailed for our character. So the last part is going to be mouthpiece and mouthpiece. We are going to do the same with the bass. And this time I'm going to rotate for 90 S breakage in the front. And now you can go and make any expression that you like. So for example, I want to be sad. So let's kill it down. Let's move this. Let's move this part up. And here it can go and increase depth on the geometry. Now I can go and position it where to wanted. So right now I'm going to hide here. And also this part here. And now I can go in x-ray mode. And here, select those two and pull it just slightly inside. So it's following the mesh. Now, I can go and press out NIH to return it. And here you can just go and adjust how you like it. Lets increase resolution here a little bit. Maybe we can go and pull this up a little bit. And let's see if it's so 0.2 is going to be fine. And that's it about this video. Stay tuned because in the next video we are going to prepare it for further final render. And also we will add materials and the lightning. So see you there.
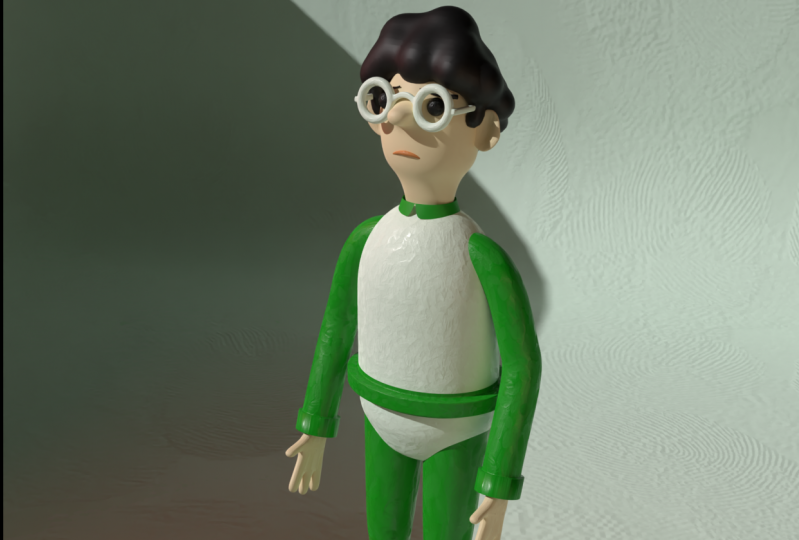
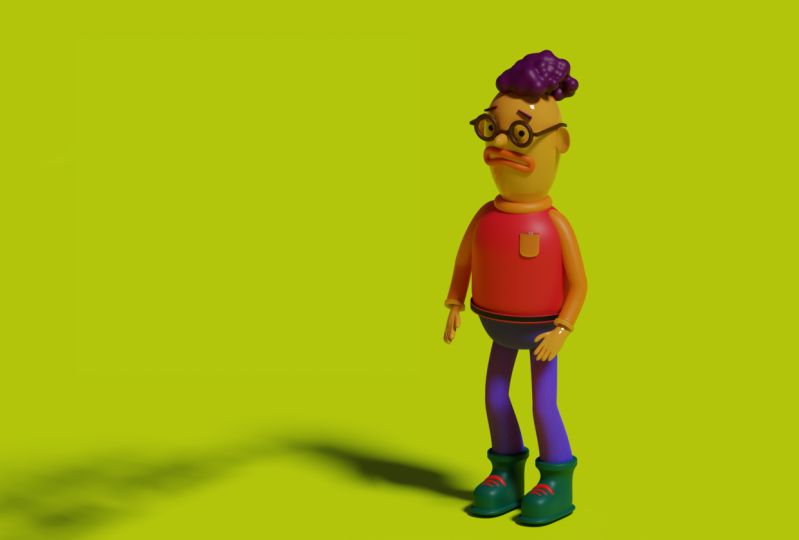
8. Final Render Settings And Materials: But the end, we'll come back to our last video in this course. So here you can see that we did all the modeling stuff and now we should prepare our final scene for final tender. So now you can go and press 0 on your camera so you will enter in camera view. And now you, we are going to first adjust the position of our cameras. So instead of perspective, I would like to use for my final lender orthographic view. Because the style that I'm aiming for is going to be much more, much better with this with this type of camera. So now our press alt and a, and I will also add plane here. So let's see. Actually first, I will need to select all of these and I'll pull it up. And now I will go and pull plane under. So like this. Now I will turn it my camera here. And now if you press shift and k p, you will be able to entering camera view. And now we are having issue because we went too far down. So let's zoom in. And if you press Q and a, you will be able to enter in. You'll be able to move up and down your camera. So I want to be too about here. Now, I will select my camera back. And for example, we can go and increase orthography scale a little bit. So something like this is going to be just fine for our final render, as you can see. Very cool strap. And also if you want, you can go under viewport display and you can turn on these compositing guys and guides. So for example, if you want, if you know how to use golden ratio and also thirds part roles, you can turn it on. But mine, I want to be too about here. So I will turn it off. And also you can increase but based bottles. So now you will be able to see only what's going on in your camera. So now we can go and start applying materials. So first I will seek back to render a view, and for now I will keep it the Navy, but later on because of the hired Paul TO render, I would like to use I would like to use cycle. So first I will go and select my here and here you can see that he has some issue here with the shading. And that's because we need to increase the resolution on here. So 0.2 is going to be fine. And also human needs. It's already set by default here on the, on this one here. So we are going to keep as it is, maybe we should go and select this here and scale it down a little bit so we can see the whole glasses here. So now I think we should go and increased number of Power on these slides we are going to use later on H derived, but for now is going to be just fine to see the preview of our final vendor. Or maybe we can go and place sun here with number of string two. And it's going to be just fine. So now we can go and start applying materials. So first, let's select our head. And here, under materials you can go and present new material. And here you can select a material that you would like to use. So let's make this orange, pinkish color here. So don't forget the same material on all the stuff that are going to share the same materials, arms, hands, and also we have legs here. But as you can see here, we need to go and let's actually apply all of this. So actually we need to apply only this one here. And now you will be able to go and get the new material for the whole truth. But I'll try to assign the same material here only for the legs. So next, we can go and add material for our eyes. Let's make it simple black material. And now you can go and add a new material for the glasses. So also black material. Now for hair you can go and play. And for example, I would like to be some pink color. So something like this. And I want eyebrows to have the same material, so I will select them and I'll put the same material from the material slot here. Also on the other side. And here I will go and you can go and add any colors to, to mount you would like to have. So you don't need to follow any rules. You just can just adjust the way you like it. So maybe to about here is meant to be just fine for now. So now we can go and focus on pants, our press plus. And here it can go and select any color. But for now the most important thing is to put materials on each of this. And also now I will go and select all of these buttons we have also on the other side as well. And now I will press control enter, and now they will be all the same and they will share materials. So now you can go and put any material that you would like. Next is going to be this arms. So for the unknowns, we are going to put, just, just sending type of color for now. Later on we're going to adjust all of these materials to our render. And also for this part here. But as you can see, we need to go and apply different material for the fence. So I will go and select all of these bottom parts. The shift and discipline here. Also this top part. And here I'll press plus and I will find the same material and assign it to two here. And as you can see, we will need to apply the subdivision surface modifier. So now we need to apply it. And now you will be able to select all these pipes. So I will go in x-ray mode. And here we are going to select all this bottom part, some material. And let's see if everything is a k here. And also, you can see that we need to adjust also this top part as well. So I'm going to zoom in and robot here, let's assign it. And here we have this material as ten on X-ray. And also we have this one here. And the discipline and I will just press assigned. Everything should be fine. So maybe this one and I will just go and add. So min. Because those are small details. They're not going to be visible in render, but just in case. If we want close up. And also we can go and adjust on this current here. So now I will go and for now I will share the same material for our column. Here we will need white material and now we can go and change any color that you like. And now I'm going to adjust all this color here also for our button part of the shoes. So we can go in x-ray mode entitled press plus to create a new material. And let's assign this material here to this button part. And also we will need to adjust it also all the way here. And I'm going to go and deselect everything. X-ray and you can see the teeny to fix issue here. So now I will go and do the same here on this top part. Let's select this top part and I will go and the selected this plus sign. And we have this new material for our shoes. We can go actually end. Return this to red color. Like so. Let us see how everything is looking so far. It's looking much better than it looked for. So now I'm going to go and show you how you can use HDI for light in the scene. First thing that we are going to do, we are going to get rid of our default light. And now let's go to our Internet browser. And here on eight data Haven't you can find a lot of free exited identity genius for your scene. All of them are free and feel free to use any of these. You can just go and select one of these and you will be able to go and find these download page. And here you will be able to download any necessary environment. So right now I'm going to switch back to Blender and now we're going to import that, that image that we downloaded previously. So instead of object intriguing point, we will need to switch the world because we will, we are going to affect both with image. So here I will go and search for environment, texture. So don't add image, human-made environment texture. And now you will need to plug-in color to color. And also you can select any of these edge derives from edge data. I'm going to use mine Ottoman parks so you can see how it look invented at you. And if you want to change the position at which you will need to add also texture coordinate and mapping note as well. And now human need to connect mapping two vector and vector to vector. And here, if you change the Z location, you can see that the whole world is rotating around. I'm going to keep mine as it as it is on default. And now I'm going to adjust materials and all this other stuff. So first I'm going to go and for for neck client, I will get rid of this material and I would just I would like to have plain white material there. And now here also on our sleeves. I'm going to deselect everything. Now I will enter in x-ray mode. And here I will select this part here, and it's circle selection. I'm going to print here all others. By the way, you can enter in circle selection by pressing c. Now I'm going to select also this part here. I'll press plus. And here I'm going to find that the same white material that I had before, I will press assign end now is looking much better than before. So next, I'm going to adjust mouth. So instead of this 0.2, I would like to increase the bit depth on geometry because it's going to be much better and more visible on our anderson. So let's see if everything is okay. Next, I'm going to change the color of his face. So instead of using credible or orange human skin tone and can go and play with all of these different colors. And for now, I'm going to keep mine some something like this, some purple blue color. And also I will in just a little bit the subsurface because that's how skin is behaving the best. And now for our shirt, we can go and switch to shirt. And we can go, for example, some, some dark yellow is going to be just fine. C. And for our pens we are going to use, instead of low, B can go and use this dark green color. And now, for shoes, for example, we can go and switch to any color that you would like. I'm going to first to decide to what's going on with the background. So here you can go and switch to BEC. Use different color on our background. And now you can go and also switch from EV to cycle if you want to have higher-quality render. So here you will have the preview of your ending seen how it's going to look like, and it's looking much, much, much better than before. So now you can select these glasses and here you will be able to see all the stuff that you, you will need to fix. So for our glasses I'm going to paste the roughness of it. And here I'm going to decrease specular to be 0. I want just to have heart, heart color on the glasses. Next, I'm going to adjust a little bit. Color on our eyes. I want them to be shining a little bit. Also on the mouse, I will decrease roughness here. And now for the color of the hair, let's see how, what I really like this pinkish color for the hair. And maybe we can go and adjust this reference here. I want it to look like it's made out of plastic. So everything is fine. We test part. Now for our for our Shirt, We are going to increase roughness on it. Make its full roughness congruent to keep everything gets debt. And the same for the bands we can go also, we can increase the roughness as well. And for our buttons, let's go with pipe material for buttons. Or we can make them dark. Let's see, which is better. Let's see. Actually we will need to make this unique. And we are going to keep White anyway, because it looks much better. We did this, this color on our Shirt, So last. But it's going to be this part here. And for shows we can go, I want to have some reflection on them. So to about here. Lets see how blacks looking on it. So maybe we can go and have the same disk green color or shoes, and maybe we can go and switch this color here. Actually the white is going to be best on that part because it's separating from the rest. And let's see if everything is okay here. I'm going to rise my arms just a little bit. And now everything should be fine. So now we can go and switch to layout mode. Let's save it by pressing control and s. And here you can adjust different settings. So first, under Output Resolution, here you will be able to decide the resolution of your final image and also file format. I'm going to keep mine as a PNG. And here I'm going to say mind on desktop, lastName it character set. So here is the position of it is going to be saved because we are not going via, We don't have any animation here. I'm going to keep everything the same. Next minute to turn on denoising. So here you will just press to turn on denoising in the rendering. And here also under color management, for example, you can go and select different looks. So if you want a really high contrast, you can use it. Medium, high contrast, very low contrast. And I think I'm going to keep mine as it is without any, any changes here. And also, for example, it can go and use curves. So here you can adjust and tweak those settings here. So I'm going just slightly to move this down to have a little bit more color than I had before. And if you want to render the whole scene out to can go and press render and rendered image. And you're rendering is going to begin. So that's it about this course. I hope you like to hope you had fun. And now you can see actually how easy it can be to have a really decent character with just under an hour practicing and exercising. And I hope you learn a lot and see you in the next course. Bye.
 Nodiken 3D, 3D Artist and Animator