Transcripts
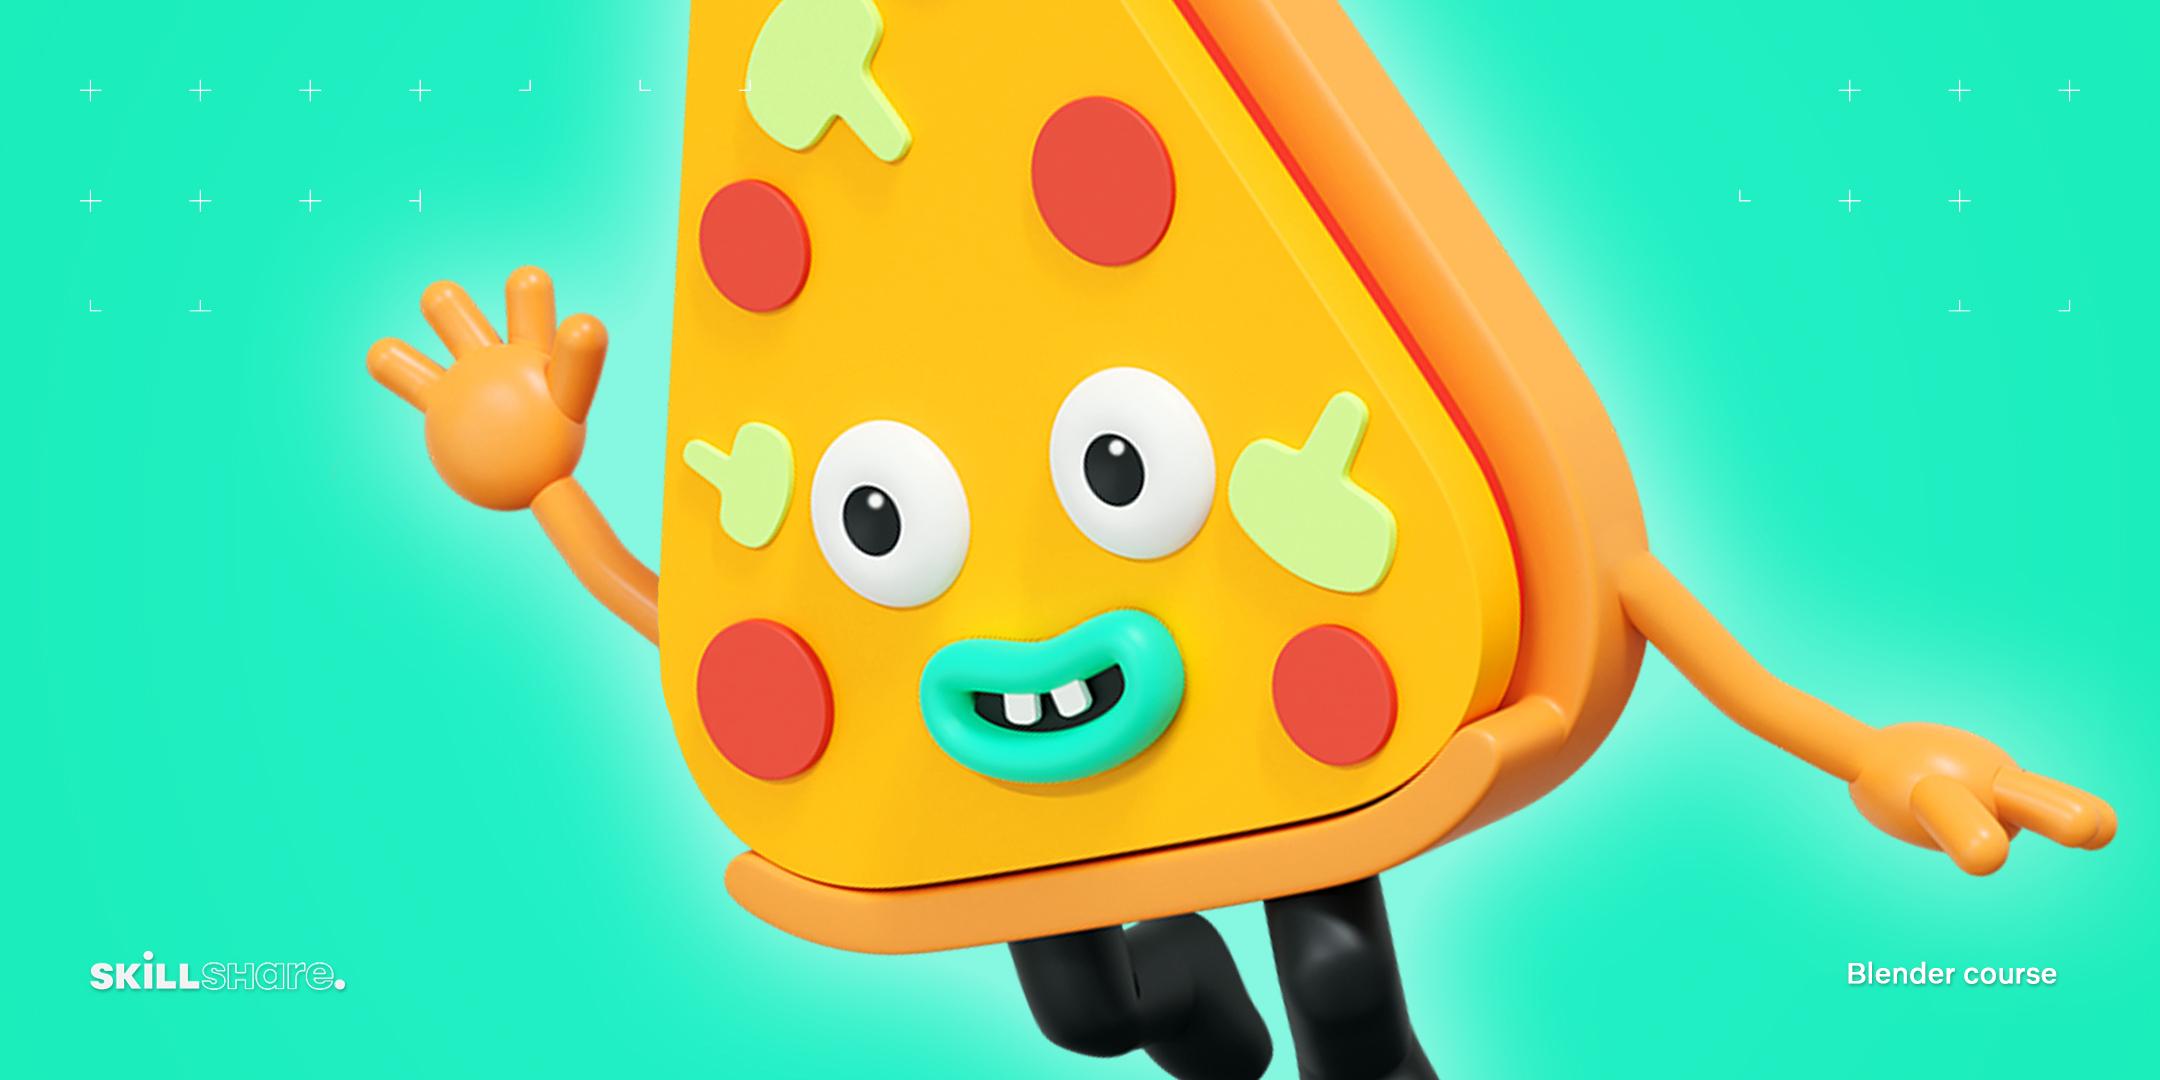
1. Class Intro: fine by hello, everybody. And welcome back to another blunder course. My name is Gena. And in this course I will show you how you can create this small character, Peter slice and also show you how you can rig it and also animated to jump like this. So in this course award blunder to 0.83 LTs, which sent for long term supports And also I will show you how you can model this or so Rick it and at the anti will animate it and prepared it for final rendering. So stay till the end and see there.
2. Modeling The Shape Of Pizza Slice: but the end. Welcome to our first video discourse. So as usual, let's open our blender and here, casino splash screen off when they're 2.83 dispersion is LTs, which means long term supports. So from now on, when the real support this version for longer time than the previous versions, so as usual, once, once again, we are going to create a new file under general. And here we have our default seen with our default you. So first that they are going to model is going to be the body off bitter slice. And here we have this default Gilf, and I'm going to use it. But before doing anything, I'm going to turn on my skin cast at eso right here to see what I'm pressing. So first I'm going to use this cube to make the triangle, which is the shape of pizza slice, and I'm going to breast s and why to scale it on the y axis. So something like this. And now I can go in at this mode by pressing step, and I will survive this face and I'm impressed as X to scale it on the X axis so you can see the tile that we have a triangle shape for my business lives body. And here I'm going to select now selection. And I'm going to build some of these edges because we need rounded edges on both sides. So I'm going to tow this top part and this one here and now we control be I will be able to travel this, But I'm going to hold shift and let me just go and so mean. And here you will see one more. So when you're school up, you will be able to add more agile ash looks and it's going down. You will be ableto animal. So here you concede that you have my number and you can go and make it actually speak much , some going to decrease it. So something like this is going to be fine. And now we can go at Bevel boat but upside. So I said those two with the shift and once more front article you I would be able to control be and two barrel does. So let's just go zoom in Jobie And here you can see that we will be able to travel there or big slice. By the way, I'm going to increase a little bit. Always a bit, uh, number off off faces that, uh, appearing for our bevel. And we have our basic shape for our vista. So the next I'm going to scale this down because this is going to be our but apart the beasts of the next is going to be our toppings. And also the last is going to be cheese at that. They're only sent maybe mushrooms later on. So here we have our bitter slice. And now I'm going to best a breast face selection, and I will select the space here, and I'm going to press I for sitting face like this. So I need only this space here and now I can go and select the select. Actually, this face here with circle selection by the rating going certain selection with C n. Just by scrolling your mouse wheel or Scott, don't you be able to increase the pain this brush here that you can see. So now you can select everything. And if you want to this left, you just press meet the mouse. So I'm going to select those here and as our dimension. I need the space here. But before that, I want to go in object mode and quickly apply subdivision surface and number of subdivision is going to be two for this one. So don't worry about this one here just laid down. We're going to fix that. And now I will just go and extrude this part here. Actually, we don't need those store. So on, Lee, this thesis. But the party is going to be extruded so something like this. And now we can go at it with controlling their at supporting cash. Looks So one here want here, and we will need one more here and also outside this. Now I'm going to go in inverted group and here on the normals. I'm going toe Check this on out smooth. So don't worry about this big this space here we can fix it by pressing G and you think one face there. So here you can see that we have our bottom bottom shaped for better. So the next thing that we are going to make it is going to be chased. So seeing in the next video
3. Adding Cheese, Eyes, And Mouth: but the end Welcome back to our second discourse. So here, concede dedicated our basic basic body for our business Life's character. And the next thing that we are going to do is we're gonna locate also saw spirit and also cheese on top of this. So for Jason and Sauce, we are going to go in and it moved and they will select this inside face here and shifting the We are going to duplicate it. We will breast breast lift to get any moment. And now if you breast you will be able to separate this face from this mash. So I'm going to Liq bee and I was like, separate And right now they are now laying on each other. So we are having this issue here. But if it's like the second job and move this to the side so but just go and select it, I need to go out and it remote object not You can see that we have only this place here. So now I'm going toe select this place here, and I will just go and rescue to extruded in front with you. We endorse a locket on the Y axis And now I'm going to go and add to support edge slopes and all sort of breasts and has tried to scale this on the by all the way. I think this and we have this here. So now I'm going to go and in a united mode by pressing tab. And I was like this front face and I would just create one actual. So now I'm having clean apology, so you you can do it also on the other side. But it's not going to be visible anyway, So I was just best s. And why to skill this on the y. And I'll hold it back toe original position. So this is going to be ourselves. And now I'm going just to go and tied Feingold Good position for it. So I'm going to name it sauce. So this is a and now we need Jay. So for James, we're going to duplicate this us and just move it in front of this and also be able to scale this up. So we want more cheese Dan way have sauce. So I would just go and pull this back. So let's ban around to see if it's good, maybe go and skilled is just a little bit. So we have goods would shape for our It's a slice character. So now we are going to go and with shifting a we are goingto bring to you re spears And those are going to be ice for our character and immediately ever go in under modifiers and I will apply mirror modifier You cannot see anything happened. But if you go up in edit mode and motives to decide J you can see that immediately. We have a second the second you received on the left side. So for the ice. And you interrupted this for the 19 debates on the X axis and I would just go and scale these down. And now I'm going to go also and scale those like this in device are best s and light. And now I can go and call it here a restaurant leaking object mode and change shading from left to smoke. So now we have those small eyes for our character. So now in at this moment, I'm going to turn on proportional editing and we're six election. I'm going to like this these verdicts here and now I'm going toe. Just pull those, he said. But I will need first toe decreased my paint So you will be able to do that by scrolling down your mouse field. And now you can see that with this proportional, I think you will be able to control moreover to season one. And I want just this part to be a little bitty inside Then those on the other site. So something like this and I think we are done with mother guys. So maybe we can go and put them just a little bit in front and breast last week. Change toe. Actually, I will need to first apply. But don't worry for now, because I want toe great new material. And I would just apply Theo for those. And also I want to have second material for this inner part here. So I don't need to select a month one more time when I apply material. So right now I'm hearing two materials, one for each. And also don't forget to assign the second material press assign Teoh, apply the material there. So now I'm going to see if the position off the Eissa are good. So maybe we can go and just skill down a little bit more So to about here is back to be fine. And now I'm going to create mouth. So with shift and a big object mode, I'm goingto bring curve And here you can see that we have encouraged the chicken bring the scene, but for mouth I'm going to you circle if you go in top, were too graphic you by pressing number number seven on a non political acidity have perfect Benazir Circle So number interrupted this for 90 degrees on the X axis and we need more geometry for darker. So if you go under Jammat e undercover properties in this pocket, this menu here will have different settings for this curve. So, for example, we can go and increase depth and you will be able to see more jam ITI and those are going to be our mouth. Also, you can play with the depth and also with the resolution, By the way, you can piece extraordinary as well and also offset. But I'm not going to do that for those. And now if you go into edit most you will be able to see those forward disease that you can play with. So, for example, that's like this one here, and I'm just going on my proportionally think and you can hold those around. So those are very quickly and simple way to create mouths and such things Gasol will be easier is you can easily added to those shapes. So, for example, if you bring this down, for example, those two and scale does as well. You could see that we have those smiley faces, but we're having issue here geometry. And here, if you keep geometry, will be able to add more resolution as well. And also here in the resolution previewing and also directed resolution. So this is radio and this is for the rendering. So I think this is way too big Song went toe basis toe say half of it. So 54 your health. So maybe 32 like this and here's older is there to do, and I think those are going to be fine. So now innovate boat. I'm going to scale those and pull it down and, like position for our character. Solid best presage e and by toe pull it back. So something like this and that's it about this video. Let's just quickly fix the backside of it so rest. And now we have weeks back off. Argueta. So has already said that it about the city of ST June. Because the next video, we're going to make goods and also finish our face and also air stopping such a mushrooms and pepperoni, So see you there.
4. Creating Face Details: but the end of nectar videos. So here to see the sea created our mole paste. And also we added eyes for our character. And now in this in this video, we are going to create towards and also wearing toe feel back off the smoke. So first, let's create our good. So with shifting day we are going toe bring your cubes are seeing so basically goop and immediately I will apply mirror modifier. So as usual, I will go in the small and veggie more to the side. So here considers he have a vote both groups obligated on the left. Actually, we have two cubes and now if you scale one, you'll be able tow scale three other ones as well. So now for our thought, we are going to skill all the way down and have a smooth to the bottom side. And we are going toe scale it on the white as well. I have a message e and y two blocks from the white and in the front. Now I just killed also on the X axis and with left like I was like Theis edge selection. And now I'm going to bevel those are passing command and B or controlled B and by schooling most I will be ableto add more, more double to it. So something like this is going to be fine for our boat Now I would guess timescale this also divide just a little bit more now in edit mode with a rolls I will select everything and pull it up J and white to move it in the front and one more time scale it. We're back and we're also close to skill on the sea One more time back and here we can decide also we can go and scale this in the UAE and here we can go, for example right there Those two. So now they are both following the curve off our mouthpiece and recreated our thoughts. And now I will add subdivision surface But here concede that we need toe have some absolutes. So here I had one put it up here and one point back all the way there and with face election I'll survive this can face and er, you know, face there. And also one more to close those gaps here on the sides. And I've trained fading Toby's smote also, for example, we can turn on out too smart and now we have our mouthpiece created here. You can also add a lot more gears, wo steps and have good books. So now I had also one more simple plain in update mode. I just go and scale it And here, just skilled, told the way down. And I want those to be back or some skilled the X So this plane will used to paint in black so we will have black behind our mouth. So now we can add some pepper onus and that is going to be very simple. So with shifted a, we can go and bring another cylinder to our street. And also we can just kill it on the X on dizzy. All right, thanks for 90 degrees. And now we can skillet don't the g and like pull it in the front And now we can just go. And also we can nab subdivision surface with number off subdivision which does So I'm going to zoom in and here we are going to add to edge loops and also we can turn on out too smart and maybe we can go after like this front face and press it for insert. And now we have linked apology for this. So now we can go and pull it back on. Divide about here. You can go in right off the graphic you to see if it's good have changed our brain, Toby in the center of the mess. So now if I start scaling, you can see that you can see that Skilling from the origin point also don't forget to change shading by pressing right click and change shading to smote And now I'm going to duplicate this couple of times maybe we can scale some of them So one more here one here also there can scale some of them as I would set I'm going to select also this one here scaled down So the next that we are going to create is going to be our mushrooms So we need mushroom shape. So I'm going to move to the site now with shift and rightfully Kabale move my treaty preserved toe the side So it right here and old object that I bring to our seniors going toe appear first year and with shifting day I can go and bring new plane. And here also irritated for 90 degrees on the X axis and at the top here I changed the world selection and we condone delete those voltages by Perspex. So now we only have one worth just Vertex here and with e I will be able to extrude these Vertex And now I can go and start throwing because later on we are going to extrude those. And that's the easiest way to create mushroom shape. So I'm going to go a couple times back. So I'm just extruding though this shape and right to make mushroom. And here I will be able to select those two worthless is and with him I will be able to mirth those. So now I can go and arrange those a little bit more better. So for example, I would grab this and also this. Here you go and pull those up g I can merge those am center also here Those store and the center. I can put this one down here. No, maybe a couple of times here they're now I just like those two and with right click I can sub d right, So I hear Got one new works and maybe we can go and pull a couple of those up. So you just some kind of shape mushroom. We can, for example, scaled this up. Now we can go and merge those butt pressing camp and those this man here and now with a I will select everything. And if if you press f, you will be able to feel those with the face. So now with this face, we can go and extruded on the why. And now we can apply sub surface modifier with number off subdivision dough. And here I'm going just to go and pull those to the sites change leading to this to the small tend here can see that we have mushroom shape. Also, For example, we could go as like this fund and this face year entity. We can insert a new face and for example, by changing people going to individual Arjun Witching Go and extrude those invert or outward. But we're not going to change that because I don't think we need too much too much drama tea and so much PolyGram's to waste on the those small details. So now I will go and scale everything down. Change my order point by pressing class click and I change to center of the mess. So right here you scale from the middle. And also, if you move it too will be able to move it there and now at a couple of those mushrooms. But first, I will just go and skilled out a little bit on the white. And now I will just go and try to find some good position to it. So maybe we can go and bring this one here. So let's see if it's physical. Maybe some of them we can pull inward a little bit and those out. So maybe just fuel mushrooms. There will be fine, maybe one more here. So let's see if they are visible. And I like how they are looking so far. You be this one. We can go and rotate skill out a little bit. So that's it about this video, ST Joan, because in the next video, we are going to drink Lex, and also people add hands for our characters. So see you there
5. Modeling Legs And Arms: but the end. Welcome back to our fourth video. So here consider tree at its toppings and also vacated face. And now they will need Lex and also also hands. So now I will select everything. And I will first return my teeth precursor to the middle with shift and see. So now you can snap your courses, Toby, in the middle of your great by pressing shift to see. And now we can select everything. Here. Enter G and C Baldo book our character up. So now we can go and start creating legs. So for Lex, we are going to use simple cubes. So with a shift in a, I will bring another Puked are seen and instead of my drink, one back. But on after that duplicate on the other side, we can immediately apply mirror modifier and immediately work on both legs. So here I would just go and move my Cuba to decide with the G. And here I will just try to position like So Now we can go under modifiers and also apply mirror modify. Now we can model our legs. So first I'm going to go to the site. And here I was like this face here and I can go and exclude it out with it. Now I will extort this up a little bit, but this so this is going to be our foot. And here concede that he needs more geometry to it. So I will go and select this but those bottom faces and I would pull those up. So now first, I'm increased number off Subdivision 23 And here I will just bring a couple of edge loop. So what here and maybe can go. And so, like this Stop face here, put up a little bit and now I will be able to add one. Actually there. So now we can go and get one more as loop here and now I can go and scale this down. But first I will go into politics election. And also I was like those at the bottom and I can go and sell like those and for example, I can pull those don't as well. So something like this I will change my shading to smote to see if everything is correct. And here I was just being did second. That's look pull it all the way down with this, and here you can see that created our foots. And now simply I will just extrude this. We'll do way up. So something like this is going to be fine. But I had a couple of edge loops so I could have Janet E. Later on. So we have those small legs, but we can go and like everything. And for example, now we can go and trying to find a good position for those. So let's see if it's good. Did you bring another here? And we have done with modeling our Lex. Now I'm going just like the whole character, and I can go and pull those down. So now is perfectly laying on the ground. And now we're going to start modeling our hands and arms. And now, with the shift in a for our hands, we are going to bring you Ito are seen and immediately apply mirror modifier. So now we can go in every remote and here we are going to use those to be our hands. So now, for example, I can go and duplicate this with the shifting day and rotate for 90 degrees on the y so addressed their wife not from 90. Now in I was there X ray mode, and I'm going to delete half this. Well, this is so now I'm having this shape here and without the left. Like, I will be able to select this schedule up here. And I'm going to just go and extruded a couple of times like this. Now I breast health and be two separate it. So now we have this kind of shape and for example, we can go and scare it down. So those are going to be our fingers. So I will go and dump photographic few and scale it up this Now I'm goingto bring this here and for example, I can go and rotate it a couple of times. I could change shading to smart also are our first you is here and now they can go and also changed. They changed Arjun, bring Toby actually cannot to do it because we have a mirror modifiers turned on. So now I'm thing just scaled a couple of times. So this is going to be good. You could duplicate it one more time. Our second finger positionings way want so on here and maybe Thursday got here. And now we will need to stamp as well so we can go. Actually, we need only one finger salute. Go once again, netted more. And here this finger. Actually, this is not the thump, so I'm going to position it. Took it down and also I just rotated. If you pressed double air, you'll be ableto gimble rotation or I believe does the name or I'm not sure about that. But if pressed, Apple Air is actually rotating around itself so you can see the irritation that you have. And this is going to be our dump. So now, for example, we can go on like this. Stop face here and with with proportional everything, I'm going to pull this down. And also this one up. So something descent. Now I can go. And for this insight, those So I believe this you have done with modeling are hands. And now we will need one more. One more cute are seen with the shift in D. So here you can see that we will need toe removed Those actually I'm going to remove our your money first the costume up. We are going to drive those together Somebody just like those two together and press command and Jay. So now we have only one shape. But here could see this. You will need toe select this group here because we have this empty spot here. So it's not involved. And now I'm a go that in turn off my proportionally everything and pull this down. And now I will be able to change my Arjun point because right here is moved to the site and I need to put it are Didi Gerson. And if you now applying your modifier, you will be able tohave the second hand. And now we will need are so for the army will you seem subdivision on number two Strange shading to smoke and immediately applied also mirror modifier. So now united mode, we can go. And I just tried to find a good position. So I'm going to use this position here skilled older we don't and I want my arms to begin from this here so I can start extruding this to the side a couple of times. So something like this. And now, for example, I can go and well those up. I don't need one more slope here and now I can go and apply mirror modifier and also subdivisions here and now with command. And Jay will be able to join those two together. I can also start playing other materials, other modifiers old. So I'm just selecting all of this. Also this from here So we don't have any and what first left and we are done. So now we can go and very name are measures. So those air, Lex, it's now we are going toe drying all of these together Weapons, E j. Mushrooms. Those are their own. I was selected have it together and with control and j other people to join them together. So those are their own e and what's left Everything is a name, probably. So this is my fault. So that it about this video stay tuned? Because in the next video, we are going to apply materials and later only will start licking our character. So see you there
6. Rigging Part 1: everybody and welcome back. So now you can see that you're done with modern car character and now we are ready to apply meter. We are ready to apply a material star character because it's going to be easier before we during our mashed together. So first, let's elect our Bitzer And here I will go on the materials. But first I need to turn on my render you and here will change my my leg, my default life we light it was pouring flight But now I want to have some some left. So later on, we are going to stay there anyway. But for now is going to be much better toe Have some cool light. So here consider Tree already applied our material for the ice and now we can go and start applying other material says Oh so first I'm going to apply me material for our pizza so I could see that immediately we have those are sharing the same deal. But now I will go and select Plus here. So for fees you'll need brighter material and we will need to go in edit mode, select everything with the A and press a sign So now we have cheese. So now I'm going to select Speroni's Select some Red color. Also mushrooms, some kind of discover here and also now I want this one to share the same color as our It's , uh, now I don't need for suss different color press Plus And here for suss locate, read material and breast sign. We will need the black color for back off our mouth. And also we can go and being some cool. Let's say some kind of green color, something this is going to be fine. And now we can go and create a new material for our legs so we can make them black. So now we can go and start creating break for our character. So for IEG Inc we're going toe big. We will need actually to drain all of this together so that it was going to be much better because now we have all of these materials created and here conceded we have some issues here. But don't worry, we can fix those later on anyway, those are not going to be visible anyway. So now we will need for our rigging tojoin all of these mashed together so I will select everything. And the last thing that I want to select is going to be a Peter body and now rest, command and Jake and drink all of this together. And also we will need to convert this about peace to match. So I was like this mouth and here on the render under edit I was Goto operated, search and search for And now you will be able to convert a mash from So just like this And now we can go and trying wholesome out. So now we have only only one mashed are seen So for the rigging were going toe Go and first apply old response so you can go in object And here we are going to apply. Paul transforms so which means now depressed and and go under item. You can see the scale is one. So with shift in a way, we are going to bring new amateur. So this amateur we will help us to control our character. And basically this is single boned which will control our character. So now, under you poor display in bone selection. Actually, it's right here. You need to select in front so Now we can see the whole bone Anyway, it's not hidden inside of our mesh. So this is going to be much easier Will help us to stay, to see how we are digging. So now I'm going toe in edit mode and I pulled my going up to about here and I was like this stuff, but and with GN z pull it down. So for the until top, I want to have, for example, on the two jobs we want It didn't need Onley to job also way Don't need anymore. So those two bones are going to control the whole body and now we also need to control our legs and arms. So now, with shifting d, I'm going to duplicate this to the site and I will irritated for 90 degrees by pressing glide and 100 date, actually, because I want oh, this want to go down. And now I could go and pull it down. I could like this piece here and all the way down to about here. So something like this actually have need to go back something you Now I'm going. I will select those to just those toe armatures and pull it in the front then Now I can go and focus only on one side. Because later on I will go and symmetry the who right side to the left. So you don't need to work on both sides when you were reading your character. So here we have this bone and this bone will control this part here. So with the EI extruded this down to about here. So now this bone here will control this part here and now. I will go in. Writer to Beth if you went. Actually, I don't need this Stop a bone. But this bone for a little bit up. And now I can go and stood to bones here so this bone will control the half off our foot and this bone here you control the rest off our foot. So now I'm going to go and duplicate this bone to the side like this and also rotate form I minus 90 degrees. So that's a reply at minus night, Dick. So I'm just going to actually do it manually. But if you do it manually, you can see that now. This won't have different rotations, so you can see that it's not perfectly straight and that can be a problem. So I'm going to delete this bone and with shift and er can grab any of these bone here. So now I can go and dropped a dish for 90. I could break best y and 90 and now you can see the whole The every single bone on our character is basic doubled us mystery need So now for our arms I'm goingto go and pull it also interpret graph if you so now I'm going to go and select this part here I need to bones I looked at the X pull this down here and I want only one single bone to control the whole the whole hands because I don't need for my animation would have control on our fingers. But if you want, you can go and extort bones for each finger and later on you will be able to have control on the finger. So now we can go and start renaming. But before that you consider it. We need to connect those bone toe our characters. So first I can go and select those two bones and to control and be I can go and make parent Despont toe this bone and I was let keep offset. So now if I write it this both most if you go into force moved by the way, If you want toe animate, this character will be able to do. You needs to go both mode. You can see that the whole that this bone is also moving with the second bone. So one more time I was like those toe bone and I can go and keep them offsets. But let me go and see if it's good enough. Actually, let's tried the opposite side. So let's first like this bone here and this bone here and now here. So basically this bone here will connect the other two balls and now we can go and rename our bones. So first, let's go in off with moat and mouth. Let's go back a bit more so I can go and select this bone here, and this one is going to be after our upper helps. So be careful about this naming because that l means that this is for the left side and later on, when we symmetry, itis on the right side is going to change to be that there so distant to be a lover r dot L capital l must be now we need for our hands So hence don't help This one is Don't tell lower like the L Now we need to bring in this born here. So this is foot bone l And this one is Stobaugh. So don't else. So that's it about this video. What's your name? And this is that we have. So as I was stabbed to death it about this video stay tuned. Because the Max video we are going to seem attractive studio at the site. And also we will add more controls for our characters, So see you there.
7. Rigging Part 2: but the end. Welcome back to our second video in bringing off this character. So here you can see that you are done with drinking car left side. And now in this video, I want to show you the one system that will help you with animation on also with the Rick before we also duplicate this to the right side. So this system is called inverse kinetic balls and those bones who help us to have better control on legs and arms as well. But for this character also, I've only make for our legs so I can if I the same the same effect also for the arms. So you never cinematic bone to create to create them. We will need to select this knee bone, but first I'm going to just grab it in brighter too. Graphic. Few MP's put boot a little bit in the front to about here. So now with e extrude a new bone and this bone, I will select and a parent it and also attract untracked deform so this bone doesn't have an effect on our weight baiting and wait. Painting is just telling bones toe, which which which part of the mesh. Well, both control and help. So now I would wrap this bone and lock on the wire and pull it back. So next I was like this, He'll and extruded back like this. And also, I will do the same for lover for this bone here. And also I will, um, Barrett it. And also, I would like on their for different. So those bones doesn't have any effects in weight painting. So to add universe kingdom it bones system, we will need to select this bone here because that's the middle bone and will help us to have control on how this black is behaving in our nation. And this will be much easier to control it. So now we're going both moat and I I select this a lower leg dot l and here under bomb constraint, I will serve for inner schematic. So this now is having this bone constraint. And for the target I will select here are mature. And for the bone, I'll search for my second bone. But before that, I need to rename those bones. So this one is hell. I k dot l and this one is full target. So I've been renamed them real quick. Full target. Dr. L make sure that your name he quit dot l B Castle duplicate is on the right side as well. So now let's go back and select our lower leg dot l And under constraint of the search for hell, I k that l And here on the train land, I will need to increase number of Strangler train like Toby, too, because I'm having to Bone's connected with this bone. And now if you go in post mode and grab this hell boning concede that now very simple We can go and animated this. So in order to have a little bit more control, you don't need to select Also both get so for the whole target, we will use the same armature that we have here and for the bone. We will select both target dot l. So now you can see that we are having issue and that's because we need to change pull, pull, target angle. So now I would just go and said, Write down 180. And now, for example, if I go and grab this to decide, you can also grab it all support this as well. So now if you want to change any any moment or an irritation, confess out them g or out the air. If you have injury station, impose moto faceted toe, dress it toe back And now a little bit more control if you want. With this Ike, a bone will be if you go in and edit malt and parrot those born again and keep the offset. So now if you go in force more to concede that if you press every will be able to write it this bone and also if you grab it, you can animate it Very simple, so I can see that this universe cinematic is very helpful. So now I'm rested by pressing Culleton J toe make sure that I cancel any movement and also often air for canceling can irritation. And now I will go in edit mode And I was like this left site. So make sure that you're selecting only life site because now all of these bones from the left side have dot else in their names secrecy that we have both full target hotel and a lot this having thought l and now you press that click you will be able to find Sima tries . And if you select that option, you can see that immediately. We have the same bones on the other size mirror it. But if you select them, you can see that they are named different things. So you can see that we have now upper arm that air. And this this one is upper arm that l. So now I will just go and pull this a little bit up. And now we can go and start bake painting our character So you can see that now if you're going both smote and move these bones to decide to consider to the half that are matches not following our bones, and we need to fix it. So now first, we are going to go in object mode and select first bone. And after that we need slept mash, and it told and be Actually, we need to select first mesh and later on with shift recon, select amateur and control and be we will go and set a bad beat Automatic Bates. So it will take some time to a lot. But now if you go on both moat and start rotating, he conceded. Our bones are start following our myth and it's also deforming. But as you can see, we are having some issues. So we need to fix it. So first I'm going to select bone. I need to like the bone aunt with shift. I will select later on my mesh and now I will go. You will be able to go in weight. Haitink. So here conceded the whole character became black, became a blue. And that means that know that this bone, which is the last selected bone, it doesn't have any any affection on our character. So if you go under this data properties, you can see that we have all bones on our character. We need toe, touch some of them and fix. So first, you can see that we have a body and head. So we need to touch some of these elements because you can see that our paper only sent I sent. Also, mouthpieces are not controlling are not controlled with those bones. So first we can go and select this headboard. And if you go in at it moat, you can go and de select everything by pressing a And now with L, we will be able to select those. But they're onus which will control head as well and you can just breast aside. And now you can see that all of these became red and which means that head bones will control those stop part. And now let's go and fix our body bone. So for the body bone, we can go and select everything in that it won't. And we can select all others a lot of pieces that we want tohave control so those and we can assign Those also need to tow select this things face here, this inside piece here. So I will go and find it and assigned this inside of the mouth. So now you concede it, but the bone will control all of these parts. And here next I want to go and sell back my upper Lech And with actor Lex elected, I will go at this motor and the selected. So it did say that if we move this you said that this bone is having some issue because it's also controlling this part here, which is good, but I don't want this toe have that much control, So we will need to fix it also. Let's see if other bones is having the same. So you can see that this bone is also controlling this part here. And I don't want that. So I will go in at it. Moat. Actually, I go and select my body bone and I need to fix it. So first I will go and best elf to select this piece here and also this inner pieces for this and I will turn on my X ray load. So now I can go and approximately dislike this stuff But here which will control our headboard. Actually, I'm going to go and this left the stop part. And now I can go and press assign toe body this part here. So now you can see that a lot too far. Our bone Our message is controlled by that bone here. So now we can go in object mode and try toe animate it, receive everything is good. So I reflect born and now I can go and see. So I considered this bone is still having effect on our mash. And also I believe this bone here and also you can see that we need to attach some bones toe. Actually, the stoppable mash do this had hand bone. So once again we will need to go in object mode, select our amateur and with shift select our our mesh. And now we can go invade baiting one more time. So first, I'm going to fix this issue with the dump. So I ever go again in edit multi. Select everything for the A and l click and select everything linked with the stump. And immediately I was sent this stump to be controlled by this. Hence left the boat. Now I will search for hence dot there for other born And here they select everything else to select linked dump and press assigned. So now this bone will control that part here and now I can go and search for my upper arm doctor. And here we go and really removed my actual acting Go Aunt disliked everything and rest here. Actually, I can go and remove and they select So now you can see that things bonus doesn't having it doesn't have any any properties attached to it. So I don't need to go and fix it. So first I'm going to select this upper air Born in edit malt. I can go and pass. L just like this link here and the circle selection with X ray mode. Be sure that you are having that turned on. I can go and press middle click until here and, for example, like breast A science. So now this bone will control this part here, and this bone will control other parts. So we are fixed. Rate that party there. So now we will need also to fix on our upper and that l So once one more time I was like everything removed the select. So nice to see that we don't have any any anywhere takes any weight being think anyway, it attached to this bone, actually. And now we need toe do it. So let's go back in edit mode with ex remote selected compress else to select this link won't here and immediately with circle selection with C, I can go. And this, like this part here. Actually, maybe we can select this birth here and pressed a sign. So now this bone will control this part here, but not mash here for our character and the last one is going to be our upper upper like that. So one more time, select everything. Remote de select and now in edit mode, one more time they select everything breast health, toe select everything linked here and in extreme haute. I need toe dislike some of these. So maybe some of these, like like so and press the science. So now if you go in edit mode, you can see that this bone is controlling that but way have some control on our lower leg. And now let's find our love for like that l So it's this bone here and now we can go and select everything. They removed the select and now, in front or photographic, you go back in edit mode de select everything select linked bone here. This'll left her left leg and with circle selection, we can go. And this left some of these parts here maybe one until here and now press society. So if you go back in a welter weight baiting bypassing Tabby, consider This bone is controlling on this part here. So I believe that you are done with fixing all of these issues that we had. So we congested and we can go in Obrecht moat, disabled this X ray mode and select our amateur and impose more. You can see that this part of control this part here, this one will control this part here. And no, you can see that we are done with great waiting. So that's it about this video. Stay tuned. Because in the next video, we're going to start animating our character.
8. Animation: everybody and welcome back to our core. So here you can see that we are done with drinking's our character And now we can start meeting. So here you can see that you have our camera and for our animation I want my character just to jump up and down. And first thing that I'm going to do. I'm going camera view by pressing zero off my number and also double the camera view right here. You will be able to see this icon here, and you will be You can enter in camera You So right now I'm goingto go back in abject note and with cameras left it you will be able to see here camera I couldn't. And if you go and press shifted grave key, which is a key above step, you will be able tow entering fly moat. So here now you can use your keepers to fly around your object. And right now I'm going toe Stop somewhere here Maybe to about here And also here in camera settings You you can change type of camera so you can play it or photographic or perspective. So for now I'm going to keep everything the same. But here I will just go. And then, on some of the compositing guides, for example, you will be able tow on center. So right now you can see it center off our camera. And also you can also turn thirds. And if you go on the bass part out, you will be able to enter. I don't raise opacity. Do you actually decrease capacity? So right now, you can only see what's going on in your camera and nothing except that so here could turn on golden ratio and the other stuff as well. So as I would accept, I want my character, Toby, right here in the middle to about here. And I want my character to jump. So now I can select my camera on my amateur and go under animation. So here you will be able to see the camera. And now you can animate your character. So right here on down, you can see dope, shit, and you can see that we have 250 face. But for this animation, I'm going to the crease number off frames and I will use 30 frames. So I would go on our first frame and here in both modes, you can now pose your character toe in first position off your animation. So as our set, I want him to jump. So the first key frame is going to be both where he prepares to jump. So something like this I'm going toe, grab it and pull it down, face toward. And actually I want him toe bent his knees do about here. So let's it, maybe something like this. And now I want him toe bent his to rotate his arms down, maybe to about here and now stopped you going to slightly move them for forward like so? And also I'm going toe grab this middle bones and I will rotate it, stored in like he is preparing to jump. And now I can go and get those two and rotate them slightly. So something like this, let's see. The first post is going to be something like this. Maybe both here. So it's it. Okay, so now we can go and select everything compressed high. For instance, think key frame on location, rotation and scale and let's try and see. And we can also been just a little bit forward This head So something like this And now I can go and slept a press aide to select everything and I for instant Ince frame on location , rotation and scale. So this is going to be our first frame. So I want my animation, Toby a loop animation some going to duplicate this key frame by pressing shift in D and moving away Deal 38 friends. So now we need in between frames. So I will go on the 15 frame and on this frame, I want my character to be up. So I'm going to go and grab all of these bones and actually the whole character and I pulled it up like this. And now I want him to go and I can go and grab these bones here in the back and I will just rotate them slightly from the back. And also Hedda's well, so to about here. And I want him also took more his arms back when he jumps more back. And also I want him to rice his arse a swell like so maybe hands as well. And now I'm going to go in writer too graphic. You and I will select those two, and I will also slightly bent those two together. So now I can go on 15 frame and press eight. Deflect all those and now once again have a insulted location, station and skip. So now you can see that he's jumping up and we have this kind of animation, which is good, but let's add a little bit more, more life to it. So you can see that when he jumps, he doesn't moving his legs straight at all. And I want, for example, him on the seventh frame tohave straight. Lex Reedus ample. So here, maybe we can go and slightly bent one of these like this. So let's try this both here. So I'm drink breast I and instead different on the seven fame. Now I'm going to duplicate this also for seven thing so undetected to free. And now we have this kind of animation. But I'm going to leave those toe defense because I want him to be perfectly toe, have perfectly straight legs here. Susan's fame and I just also those. And now I can go and those like this And now on the 73 Actually, I will need to insert give him here for case, rotation and scale, and I will grab it and put it back. So now you can see that he spends a little bit more time in the air, and we have this really cool animation when he jumps up and out. Also, you can now go in object mode and, for example, we can go and try how it's going to look like or the graphic you. So let's see the difference on camera view and now on rendered view. So let's try cartographic and we have a go character. But I'm going to use anyway perspective for this character. So now the only thing we could go to is going to be. For example, let's try one more think, and that one is going to be. I need to go and select my amateur and in both smote I was like everything and let's try to duplicate this here for a couple of frames so before frames there. But actually we don't need that. So I really do like how my animation turned out and I'm going to keep is it is so That's it about this video. Stay tuned because in the next video we're going to create backdrop. It also used maybe HD arrive for lightning and prepare our animation for final end. So see you there.
9. Final Render Settings: but the end locum vector Last videos. So here you can see that we are done with animation and offering drink in modern character . And now we should prepare Our are seem to be rendered So first thing that I'm going to do, I will go and with shifting Ai will serve for plain and I'm just going toe bring a new plane toe are seen indicated to feel the whole the whole scene So now I'm going to stop my animation And now I will be sure that my character is lying link on the ground perfectly so you can see the time needed just a little bit to bring the floor up So now I will go in Render trio And for this animation we are going to use TV and now you can see that our character is has to be rendered. But for this kind of animation I'm going to use age dear, I water so first thing that I'm going to do I will get rid of my plane off my son left and here I would go under shading and change from object world So basically this is the world settings that way need toe import some. If there I fought us so first we will need environment. Not so with shifting day. I will search for environment lecture and hear about black in this to color. So also, if if you have no Wrangler, Adam turned only compress control. And if you don't, you can go under a edit and searching on a preface. Answer and that the evidence you can find no Wrangler and you can turn on because this happened will have to increase your work for in blender. So basically, you could just now press control t and immediately blend. Ariel, Bring being Kendall so texture. Coordinate to your to your shading. So now, here in the environment, I'm going to find my age. Did I put up and here I just open my image and I will change rendering to render you so you can see that it will take some time because it's lodging my G i Fatah, and once it's done, I will show you where you can find three X theorize photo. Basically one of the best website for that. He's eight. There. I haven't so you can go to browser and search for a dare I haven't and here find all different kinds of h derives. You can use any kind, and you will be able to see all serious review how your aged ill will affect your mesh. So here concede that I'm having my stay. I lot it. And now I'm going to go in layoff mood. So here, under understandings on the render properties, I'm going to keep every e V as it is. And I'm going to turn on also ambient implosion because I want tohave ambient occlusion on my character. You can turn on blown, but I'm not going to do that for now. And all side of our skis based reflection motion Blur is always good for animation. And now, under color management, you can change the look off your character. So here you can see, for example, changed looked to be high contrast, and if you go under use curves, turn done. You can play with curve, and you will be able to find a different kind off bus for colors in in your under settings . So now I'm going to go and under output settings, which is this file with this up here and here, conceded your friend will start from free number one and then that on 38 frame and frame rate is 24 frames per seconds, which is good. But here for five for Mitt I'm going to change to a BJ pick and my output settings I want might save here. Be safe here. So vote animation. And now everything here is done. Don't forget toe increase the quality to 100%. And now, for example, we can go and add some some different colors toe Teoh, your plane, your background So something like this. And now if you go, you can preview and there because not showing the full potential of it you can also play with the roughness. So, for example, we could turned all the way up. And by the way, you can go under shading. And here you will be able to rotate your take your HD I Let's go. You put and for example, we can decrease number off alone, but we can add just a little bit. They're so everything. Here's okay. So here, for example, invented Chris number off samples. Let's try preview render and everything the perfect. So that struck one more time before that, we start trending our animation. So we have turned on our motion blower. Maybe I'm going to crease roughness. Just look more. Actually, let's go full roughness. So now we have this kind of effect, and now I'm going to go and render my animation. So the way you can render animation going to be very simple. Just go on render and rendered animation and you're rendering is going to begin so the final lender will be saved on your help. A folder. Where did you put it? And that's it about this video. Stay tuned till the next course and see her there by.
 Nodiken 3D, 3D Artist and Animator