Transcripts
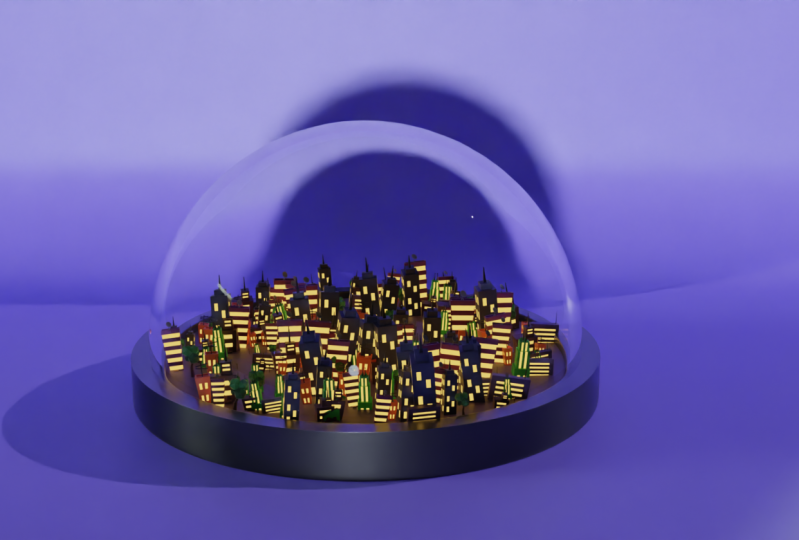
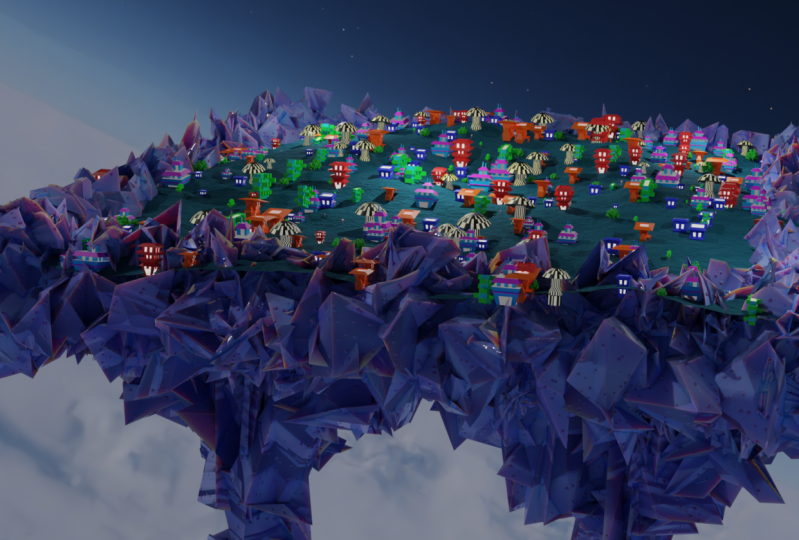
1. Introduction Class: Hello everybody, Dina here and welcome to another blended course. In this course, we are going to create a treatise UTI with cartoony style using Blender. Discourses were beginners. But if you're advanced user, it can be a good exercise. And in the end, you will have an interesting projects which we can include in a portfolio and uses for different purposes like animation and game development. First of all, we will begin by creating a new collection where we're going to begin by adding and modelling buildings for our city. After that, we will create a simple plane and give a little bit of deformation displacements for a second, we will add particle system and I will show you all set in that you will need to create a 3D CT using Blender. Once we are done with particles, we will add small details and later at materials to our buildings. At the end of this course, you will see how it can be easy to create a particle system using blender. So let's begin and I will see you in the first video.
2. Creating A New Collection And First Buildings: But the end, Welcome to our first video. So before we start for kinked with blender, as you can see here, I created a new folder where I'm going to say save all the necessary file here on my desktop. And you should always do that because that's the best way and the easiest way to stay organized while you are working with Blender and other 3D software's. So now let's go and open our blender. And as you can see here currently we are working with vendors to length time and as the latest version so far. But if you can get any version of this, you should get it because it's always best to work on the latest version because of the bugs, bug fixes and also new features as well. So right now I'm going to create a new file under General. And as you can see, we have our default queue up with default camera and default quaint flight. Real quickly, I'm going to press N and right here I'm going to turn on my screencast add-on. So right here in this left corner you can see all the shortcut that I'm going to use throughout this course. The first thing that we are going to do, we are going to delete our default cube. And we are going to create a new collection where we are going to save, save, and create and all, all models that we are going to include in particle system. And with those models, we are going to create a CT. So let's get rid of our default cube and actually we can delete the boat to DES. So right now we have only this scene collection which is empty one. And right now I'm going to press rightly to create a new collection. And this collection I'm going to renaming during him into to the models. And here in this collection I will create all the files, although the modulus sexually that I'm going to include in particle system. So first, let's go and start with the simple buildings that we can include on for our city Soviet, a shift in a, I'm going to create a cube. And right now I'm going to go into edit mode. But before that, I will go back real quickly object mode. And I want to move this on top of this grid, bypassing g and z. And now here I will go in edit mode and with the face of action, I can select this top face. And let's make this one a little bit taller. Sought to about here lets say. And now I can press S for scaling up. And now here I can press I for inserting keyframe, inserting not keyframe, but think face to about here. And now I can press E for extruding down. So we have this small gap for our first building. So now let's go and create doors and also windows. So we can go and select all these faces around and by right-clicking weekend go and select sub-divide. But here on this default setting here we can go and increase the subdivision size. So let's go and create, for example. This time I'm going to go when we did this for four number of cuts for those for those buildings. So now I'm going to select all windows that I'm going to. Extrude inside. So let's go and select on all sides by holding shift all these faces that are going to be windows. Also those here on the site as well. Now I can press E, but as you can see, if you press E, we are not able to extract those down. So we are going to return it back and now it controlled and z undo it. And here, under this extra option here we can hold left-click and change this one to extrude along enormous. So right now if you go and detect this outer all down, you can see that now we can exclude those windows inside and in the opposite side as well. So next let's go and create a door Soviet control. And there I'm going to create a new, new phase here, insight. And now I can go and select all of these here and press E for extruding this inside of it. Also, we can go and get rid of those here, those two, those two vertices. And now we can go and fill this insight saw with the vertex selection. I will go and select this hope those holes here that you have. So I'm going to select this one here, this one, and this one here. And I can press F to fill it in. Now I compress g and z to move this down. Or actually let's go and turn it a few times. Or we can go and use this from here without deleting those. And for example, we can just go and press E for excluding this slightly up. So now we have this stylized effect for the inside of the doors. And for example, we can go and press Control and there one more time to pull this all the way down. And now here we can go and extrude this here in the front. So now this is going to be the entrust for our door. And for example, we can press S and Z to scale this down. You can also, for example, press here. I must again to insert, insert space here. Like so S and y to scale it on d, y and e one more time to extrude it all the way down. So if you want, you can have something like this for your buildings. So now let's go and create the second one. So once again, I'm going to move my 3D cursor to the site by holding Shift and right-click. And here I'm going to create my second building. So I'm going to call this one will link one. So this is going to be my first building and now I'm going to create my second one. So with the shifted and day, I'm going to create one more time cube and two g and z. I can pull this up to be on top of our grid. And here I'm going to go in our neck in edit mode. But this time I will need to switch to select box. And let's go and scale this here on the X. So let's make this wider building. And for example, we can pull this up like so. Let's move this one to the side slightly. Or actually we can keep it here for now. And I'm going to do one more time. I for inserting face here, E for extruding down. And here I'm going to go and create a few edge loops by pressing control and air. And by scrolling up and down, I can go and increase the number of edge loops. So to about here, I'll place it right here in the middle. And also I will do the same here on the verticals. Let's say like so. So we have those kind of grid that we can now select the faces that we want to have for our building solid go and select this face is here. So all of this. So now I'm going to go and x2's all of these insights. Or you can use the circle selection by pressing c. And now also human, for example, to increase the size of your brush, you can scroll up and down. And if you want to deselects one of these phases, you can just hold the middle mouse. So as you can see, this is the very quick way to select the faces. So I will delete this button and now I can go and select record them before, like so. And now this one here, I'm going to deselect these bottom line. And here I will go one more time, extrude along normal. We're zooming. And just like we can go and extrude it, this one down as rapidly. So that's it about this video. Stay tuned because in the next video we are going to create more buildings and we are going to add details for our city. So see you there.
3. Modeling Other Buildings: Hello everybody and welcome back to our secondly didn't score. So here as you can see, we have those two buildings and now we should continue with the rest and create more models for our particle system and for our city as well. So first, let's rename this fun building. Second, and now we are going to get the TRL advanced. So with a shift and right-click, I'm going to move my cursor to decide. And once again, I will create a new cube. And with G and G, I can go and move this slightly up. Now with by pressing Tab and tap on my keyboard, I can enter in edit mode. And here by pressing w, I will go and switch to select box. And now I can start extruding this out. So first let's go and scale this by pressing S and G, and G, I can go and move this up like so. And now this one needs to be a little bit taller building. So to about here. Let's kill it a little bit more. Like so. And now I can go and select this fissure and which I can insert face here. Like so. Now with e, I can extrude it one more time. One more time. E or i for inserting Phase II for Extrude. So we have this tall building. Now, we need to press I once again and E slightly down. And now we need to go and add fuel loops. So first let's go and add. Let's go and add here for edge loops on the site. And we need also for on the other side as well. So here I'm going to lower it down to four. And now we can select also this here. So here I'm going to create three loops also here and here, or this bottom part, we can go and do the same here. G times also for this bottom part. And now I can select some of these. So for example, you can go and select all of these here. Also those here on the top. And here we can select only those two, like so. And let's go on the other side as well. So I will go and select all this by holding Shift and left clicking also here on this top part. And here we will need to go and select all of these. And here once again, extrude along normals, just slightly inside, like so, not, not too much, but just a little bit. And here, for example, we can go and select these phases here. So I'm going to go and as you can see here, we are having issue because we will need to go and move those up. So I'll select those two here. And also those two m2, g, and z. I can just slightly move this up. Or actually I could press E for extruding this up. So now we have different, different ending on this building here. So now I will go and select random, random, random cubes, random phases on the site. So lets go and select few. And also for example, Let's go deselect this one here, this one here, maybe this one here. And let's also do the same here on this side. So that's the way how you can get a little bit more stylized effect. And here we can just slice the, extrude this insight. And now we have our second building. So let's move this a little bit closer to those 2 first. So I'm going to rename this fund to building G. And now we can go and get the fourth one. So with the shift, I can move my cursor to the site, shifting a, and I want to have all my buildings to have this cubic effect. So now with the G, I can move this up in edit mode. And actually let's go and return it back. But I want my origin point to stay almost the same as the other ones. So now in edit mode with W I can, and they're in x-ray mode. And now I'm going to move this up. And here lets go of and MODIS slightly up. Let's also scale this one here. I'm going to make it a bit wider. So something like this. And here I can go and press I for inserting face. But this time I'm going to scale this on the x axis and with G index, I'm going to move this to the side. And let's go and create here a new extrude. And now i for inserting phase. Here we can go and press E Once again. So we have some inlet, this building here. And now I can go and select all of these phases here. And also the stop, those dot, dot ones. And here on the side and here we directly can compress sub-divide. And here I can increase the number of cuts, like so. And here I can start extruding windows inside. So I'm going to make this one here. So I'm going to make here and here Extrude. Also on the other side as well. And here I can go and select here. But this one on the bottom part. Let's go on the other side as well. Increase our brush size. Envied circle selection, I can just paint here. And now we e. And this time he is extra region, but we need to extrude normals. Just like Lee, you can see this yellow, yellow dot here and slightly pull this insight like so. Now also here, on those here sides, we can go and select visible and select vertical lines also on the other side as well. And let's go and do this here as well. The same this one here on the bottom part, slightly new site. And for example here I can go and press I for inserting face and E for installed. So we have our fourth building. So let's go and make door for this one here. So I'm going to select those three phases here. And here I will go into extrude this one insight. Now with controlling, edge, with control and there I will create an edge loop here. And for example, we can just go and pull this slightly out, or actually we will need to extrude it. For example, this one can go a little bit out, like so. And for example, we can go and select this face here. And to g and z, we can pull this slightly up. Here, m two, we have this kind of effect. Maybe here I confess G and lie to pull this slightly out. Or we can go and select those two phases here. And this one here. So far as this one and the second is one. And I can press M to merge those. And now we have this kind of effects. So right now I'm going to press twice here and let's renaming, rename this one building number four. Now let's go and make the fifth one Soviet shift and right-click, let's move our cursor to the site. And with this shift and a, I will create a new cube. And now I want this one to be just simple tall building. So can go press S and G. Let's pull this all the way up. Like so, I'm going to scale it up a bit on the x. And let's make it even taller, like this, S and X to scale it and the x axis. And we have this kind of building. So this is going to be a cool one. And also here on the top part, I can go and scale it up a little bit. So now we have that stylized effect for that stop dot part as well. Also here for example, maybe we can go and select this part here. And let's start to scale this down to see if, if how it's going to look like. And actually I'm going to keep as it is, as you can see. Maybe I can go and press Control and they're here to create edge loop here. And here with the face election, I will go and select this edge loop here. And for example, we can go and extrude the, this part is likely out. So now we have this corners to the sides. And for example, I'm going to go and select all of these faces here with S at X by n 0. I'm going to align all of this on the x axis. This time is as x and 0. Also on this side here. Two flattened, flattened those out on the x-axis and to make it straight. And also the last one is going to be this here. So this one is SY and 0. And we have that corners here for these buildings as well. Now we can go and focus here on this one. So what I am going to insert face here, E for x2's down entreat control. And I'm going to add edge loops here, but this time I'm going to add a little bit more. So let's go and make ten this time. And now I will go and select every second one. Also on the other side as well. And also on the sides. And the last one is right here. And now I can just go and extrude this slightly insight. So now we have this one, this building here. And also let's go and create doors. So this one here is going to be doors. So this, I'm going to extrude insight I for inserting face. End to G and texts scale this here and E for extruding down. And this part here can, can go a little bit. Or actually I'm going to keep that one like that. Maybe this one here, we can go and slice it and move this up. Or actually, let's go and see what can we do for the doors. So I'm going to perky and buy to pull this slightly out. And let's rename this onto the building for building five. Actually this one it is. So I'm going to move this one here, makes sure that this one is belonging to this scene collection here. So that's it about this video. Stay tuned because in the next video we will start with particle system, and later on we will add more details for our city. So see you there.
4. Creating A Particle System: Hi everybody and welcome back to our third video and discourse. So here as you can see, we have five buildings that we are going to use for our particle system. And right now we are going to make landscape and for our particle system and what is actually going to be emitted for emitter for those particles. So first, stink, let's go and move all of these assets to decipher side better, G and X moves to the side. And with the shift to see I want to return my tentacles right here in the middle of our grid. So now Don't forget to fish here to the first collection. So this one here, and right now, I'm going to move this to the moon, move this down. And now with the shifting a, I want to create a new plane. So now I can go and press S to scale, and now I will go into edit mode. So here as you can see, we have only one faces and with Dr. click, I want to subdivide this. And with number of casts, I'm going to increase to 100. So two bot here. So as you can see, we have this simple plane and let's add a little bit more, more modern landscape, look through this planes. So here and then Monday far stack, I want to use displace modifier. Misplaced modifier is alone. We allow me, us, me and thus to us textures for shaping these planes. So here I'm going to create a new OK. And here I will be able to select these texture and you can see that you can use our own image or our own texture to shape this geometry and mesh. But this time we have included those structures that we can control these procedural textures. So here I'm going to use mine as a cloud. And as you can see, it's a little bit to Sharpie. I'm going to change shading from pled to smoke the right-click. And now here I will go and play with the size to make it more, more flat than if T is right now. So the higher, the highest number you can go, essentially two. And here you can play with the, this depth as well. You can also play with this nabla effect and so on. You can also play with these grayscale and the colour here as well. So actually let's keep ours like, like so maybe let's add a little bit last size. So I think this is going to be just fine for our, for our own landscape, for our city. So maybe a little bit more. So something that this is going to be just fine. And here you can select if you want to have hard or I'm going to use this time soft. And also you can also play with the cell noise and gather stuff as well. So you can see we have two much different options that you can use. So you should spend a little bit more time with those. So I'm going to give mine blender original as it is right now and here I'm going to keep mine, let's say 1.95. And for the depth, let's go and make it maximum. So this is going to be just fine. And right now I'm going to go and rotate slightly. Now I'm going to go and apply this modifier here. And now on this, we are going to go and add actually Particle System. So particle system is right here under this modifier stack. And here if you press plus, you can see the vacated nano particle system. So now if you play this animation, you can see that we have those halos, those bolted are falling down. And the reason for that is the default from the blender. So let's stop our animation and lets go back on our first dream. So here as you can see, we have two types of particle system we have here and we have emitter. So for our city we are going to emitter, but also you can use hair. But I like this option which is rotation Mary, I will be able to control the orientation of those buildings. So here on our first, on our first menu here we have these numbers. So here you will decide how much number you'll, you'll have. And here also you can see that you have framed start Ephrem. And so here's how long your emitter is going to emit all these, all these particles. So you can see that currently we have ranged from frame number one till now, till 200, and from industry and those 100. But the girls are going to be shown. So if you play this animation mission, you can see that we are, we can only see a seed particles falling down only until this ten to a 100 frame. And each of this particle will last 50 frames saw, let's go and change this to one. So this ending, I want my all particles to appear on this first keyframe. Actually first frame and everything else should be the same for the source. You can use this, use motif or stock if you have, for example, different kind of modifiers turned on. So for example, if you have a subdivision, you can use also that too enclosed in this source of emitting. And also you will decide if you want to be emitted from the faces or vertices or volume. And also you can select this big order, random order and even distribution. I'm going to keep everything as it is. So the next important step is going to be here under render. We, here select what we are going to render as a particle. So currently is a set to render, render as bad. But this time I'm going to change this collection. You can also change the object material need Collection because we are going to include these models collection in this particle system. So for the instance collection, I'm going to select here models. And you can see that we immediately have the buildings that we have here for our models. And for example, here you can increase the scale. But as you can see immediately, that our rotation is wrong here. And the reason for this is because for now we are having this velocity turn on. But if you turned it off to 0, you can see that now all these buildings are standing straight. Also here under scale, we have the scale randomness. So I'm going to give maximum. And also here you can decide if you want to admit it to addition, this emitter to be seen in render it you and also here you can see, for example, if I select this whole collection now each particle will contain all of these meshes that are under collection, but we don't fund that. We can go and select only this big random. And also, for example, you can select if you want to have this breaker object notation, I'm going to give mine objects scale as it is. And also we have this use counter. So for example, if you want to decide how many of these, of these buildings are going to appear on your c. And here we are going to keep everything as it is under viewport display. You can also decide to what is going to be seen in your viewport. So let's increase a little bit our, our scale here. So to about here. And here for the children, I'm going to keep everything as it is because we are not going to use particle system is going to be only for steel renders. So that's it about this video. Stay tuned because in the next video we are going to add more details for our city entity will play a little bit more with rotation and distribution of these particle system for our city associate there.
5. Adding Details: Hello everybody and welcome back to our fourth video in this course. So here as you can see, we set up the particle system for our city, and now we should focus on getting more details to RCT. So first, let's go and select this second collection. And the good thing about setting the disk kind of particle system is that every new object, every new mesh that you add in this new collection are going to be appeared and show on this particle system. So let's say, for example, if we want to add Antennas on one of these buildings. So let's go here and select this building here, for example. Now, I'll press right-click and shift to move my cursor. And let's say, let's deselect everything and with the shift and a, for example, if we go and add one single cube here, skilled on the z-axis, let's kill it. Also download FitBit. I will go in top orthographic view. Let's move it here so we can see. So it's right here in front orthographic view, for example here. And if I go and select this top part and top face here, skeleton IT S. If I zoom out. And let's see on, on these buildings here, you can see that all these buildings has the same antenna here on the top, as you can see. So now let's go and add the other buildings as well, the same, the same things. So here I will go and select this building. Now, I'll move my 3D cursor. And here let's say we are going to add one more cube. I'm going to scale down with essences, scale it up a little bit more. Let's move this up. I'll move now orthographic Yo. Let's zoom in so we can see, let's move this one in the middle. And let's say this one is going to be to have, I'm going to rotate this one on the, on the y-axis. Let's scale it on the X. And now with the shift in DVR going to duplicate those to decide saw something like this. We will go and add here. Now let's go and add on this one here. So here I'm going to move my 3D cursor with the shifting a. Let's go and add this time UV sphere. Now I'm going to get rid of this half. This half. Or actually we can go and press X and delete this with l, I will select a decent linked object here, delete all these vertices. And here maybe I'm going to delete more of these. So I have now only this hub here. And let's say for example, I want this one to rotate on the y 490 degrees, a little bit on the z as well. Now I'll press, tries to rotate it here. And let's say here, I will try to add solidified modifier. But as you can see, we are also having this shoe because we're adding on this on this other building. So this time I'm going to separate these by selection, but select this one here, and we'll go and add now subdivision with two. And also this time I will need also solidifies. And let's add a little bit of thickness to it. Now I can go and apply all this. And now I can join those two together by pressing control and j. So now with the shifting a, I can add another cube here. Let's go in edit mode. I'm going to use X-ray now. I will scale this up. And let's go in tough cartographic q. Let's scale this a little bit more down. And for example, we can go and select this face here, press as to scale. It's more easy for Extrude. And now I'm going to position this on top of it. So now we have that antenna satellite also there. So let me zoom in and see if we have on buildings. And as you can see, we have all the same on all buildings. But as you can see, we are having issue. We cannot see the new cube that we add. So it's right here and you will need to join it with this building so we can best Control M, j. And now everything should be working. So let's see. Now all buildings have the same here, but we are having issue because as you can see, is going through this entry, we need to fix it. So here I'm going to present g and z to pull this up. But as you can see it don't team that you need actually to do is going to select this top face here. So let me just press g and z. And now everything should be fine. We can also zoom in a little bit more. So to about here. Now we can move the plate here, the j index. Or maybe we can go and select this face here, scaled up, deselect everything, and now position it. Like so. Let's zoom, zoom in and something like this is going to be just fine. And now we can go and focus on other things as well. So let's go and add also here. And here is going to be simple, so I can go and select those two. Press I for inserting, Phase II for Extrude. And let's say here, I want to add to UV spheres. I will need to move this to the side g and z to pull it up. I was killed all the way down. Let's move it here. And now I will duplicate this one on the x-axis. And now we have the antenna, also called that building. And also now I want to add a few streetlights for our safety. So press one on an unpaid and here on the front orthographic view, I removed my 3D cursor to the site here. And with the shifting a, I will go and create a new cylinder. And for the number of vertices I will go and decrease it to, or let's go nine. Let's try with ninth, and I will go and edit mode here. Move this up. Let's scale this all the way down. You need to make this small, like so. And here on this top face I'll press E for Extrude, right-click to cancel the moment as to scale, ie for extrude. Now our best AI for inserting face hold Shift. And if now e, one more time, t0 extrude S for scale e. And now I can go and just pull this up, like so. Now here I can go and actually let's go a few times back because we can go and press i here for instituting keyframe. And let's select every second one here. So as you can see, we needed to, I'm going to delete this one and we will need another cylinder. So with a shift and a cylinder and instead of nine, we are going to make it eight. Let's kill this up. I for inserting phase. Now we can go and select every second one, like so. And now here I'm going to go and select this button face with shifting the weekend go and duplicate it and move it here on the top. And now here I will go and extrude it up. Extra return more timescale it like so. And here I'm going just to go and pull this all the way down. So now we can go and have this street lights like this. Also maybe we can go and select Create edge loop here, like so. And for example, we can go and select this edge look and E, S, four extra drink it like so. So we had this street light and now I'm going to go and scale it and make it longer. Now, I will select everything and move this down. So let's see how we're going to look like on our city. And as you can see, we are having issue because you can not see it anywhere here. So we will need actually to go and update our particle system. So we can go and select our political system here. And once again, we are going to change this instance collection to remove it and edit one more time. And as you can see, we are also having the same state lights. So that's it about this video. Stay tuned because in the next video we are going to add Gs. And also later on we will start applying the materials to our buildings and repair our final and prepare our city for our final render setting. So see you there.
6. Density Of Particles And Settings: Everybody and welcome back to our knew we didn't discourse. So here as you can see, we added small details to our buildings and now we should focus on getting trees. And also later on we will start important materials. So first I will go and select that my street light. And here, as you can see, we are having a small gap in between. I will press L and with JNC, I will pull this down. So now we can not see gap anymore. And also let's rename this one here to street light. And next I'm going to add g. So I am Almighty the cursor here to the side. And here I will go and create a new cylinder and I will decrease number of vertices to eight. I was killed all the way down. And now I can go and start modelling out. So here I will go in next mode, I will select this top face here. I can go and start pulling this out a couple of times. Let's extrude it one more time. I will go and scale it. Let's move this to the side. Also. I will go and select this top part. And let's go and make it something like this. I will go and select this top part. Once again, scale it all the way down. And now we will need other part and that one we are going to pay to it I ecosphere. So with the shifting a NOT UV but I ecosphere. And here we can go and decrease number of subdivision to one. And now I can go and duplicate this few times. So I want to have really, really simple tree. Let's move this one here. Maybe one more here. Let's kill this one here and maybe scale it also in the x-axis. So something like this is going to be just fine. Maybe one more in the front. And let's kill it all the way up. And let's rotate a few times. So let's see if we have three on our scene or we will need to update it first. And I believe that we cannot see the tree. So once again, we will need to go on a particle systems, then off this instant collection and one more time, just select collection. And as you can see, we have also trees. So right now I'm going to rename first the name of the history. And also I want to have one more building to our scene. So now I will go here in front orthographic view, we directly current Moody's to the site, might do the cursor and I will create another cube. And this one is going to be just simple square building. So I will go and press S z to scale it up. And now I will kill it all the way up. And let's scale it like this soil top building. And this one is going to be just treat. And I will go and add few edge loops around. Also on the other side. So maybe four is going to be fine. Also here. And now we can go and select this top part here. Maybe it connects through this part out. So this is the simple building here that we have and I'm going to go and touch the different materials, Stuart. Also, this one is going to be building number six. And now I will move this one by pressing key index to the site. And let's update our particle system one more time. So for the instance collection, I'm going to return it back and now we have our buildings and Paul stuff. So there's also one more thing that I want to show you. And for example, if you want to decide variable, your particles are going to appear. We are not. You'll need to use weight paintings. So first, here, under seeds you can select the randomness of your particle being seen. And also you can, for example, pay with the previous number. So as you can see, we can lower it down to 100 to 800. Let's see if the scale is good and I like the scale, height, how it turned out. And now here I want to show you how you can use fate painting. So if you go underweight painting, you can see that we have this blue color. And actually this blue colors means that we have, we have on all these colors here are appearing. But if you start the drawing, you can see that we have line. And if four particle system, this means that on this, on this red line, there is going to appear the particle system. So I'm going to show you, so let's go out. We'd painting. And for example, if you go under particle systems all the way down here under textures and the vertex group, actually you can see density. And if you enable these group, we can see that now we have particles only on this, on this weight painting that we did so in the end deadline. So let's go and make a couple of streets. So I'm going top orthographic view. Let's watch the debate painting. And actually here I'm going to increase the strength of it. And I will paint all over this plane. So something like this is going to be fine. So right now we will have all particle systems on all streets. And for example, we can go and lower it down the radius here. And now this time we will need to take off this red color, which means you will need to change the brush. So if you go under top here, you can select brush and now you can select, subtract instead of add and try it. Now if you drag, you can see that to you. You will remove the red color and the boy is going to appear also under stroke. You can turn on this type of a stroke and now you will have more control on how you can. Use this, this, this how you can use this brush. So as you can see, I'm going to use mine here as a standardized stroke. And everything's here should be the same nth. Now, let's go and decrease the size of the bit. So let's go to about 60. And let's say we will have here one simple Street and maybe let's go and add one more across, like so. And let's go and add one more here on this site, like, like this. So right now, let's go out a waste being ignored and less left back our particle system all the way down here under density. And this time I'm going to turn on group. And as you can see, we don't have the particles on this, on this lines very, we added before. Let's play a little bit with the seed until you find satisfying result. So this is not the perfect and the best case for having this kind of effect. But sometimes you will see how it can be, how easy it can be to create the whole CT Using blender and blend the particle system. So let's say here you can see that we have some buildings appearing. There, shouldn't be. So something like this is going to be just fine. So let's go one more time under made painting. And now here you can go and adjusted a little bit more. So you can see that now you have live editing of those. So now you just need to find the perfect solution. And now we can see that you are moving all the way here. Those buildings. So human need just to paint around until you are satisfied with the result. And also we are having the issue here on this part. Let's fix it. So I will just paint over and over again until I lost all these particles on drunk places. It can take some time, but also here on this part. And now I think everything should be just fine. So let's see how it looks. I've got fed mode and now it's going to be fine. So as you can see, we are having both legs, really small buildings and that's not good. So this time we will need to be scaled. Remove this gear randomness just always been a bit. So I'm going to keep it half of the, the biggest volume. And now also for example here, what I like to use is going to be dissertation. So now if you enable dissertation, you can just press and increase the randomness here. And you can see that all these buildings are going to be to be rotate randomness. So that's the good effect. That's interesting, actually effect that you can have on your scene. And also now you can play a little bit more with the seed until we are satisfied. And maybe you can lower down the number of these particles. Let's make it 6600. And now everything should be just fine as you can see. So that's it about this video. Stay. See you in the next one where we are going to start adding materials and we are going to finish our course by final render setting. So see you there.
7. Applying The Materials Part 1: But the end. Welcome back to our last video and discourse. So here as you can see, we have all assets and now we are going to need to add materials to our particle system and to our buildings and also all the small details. So as you can see here, we added also Street to our, to our scene. And now we are going to go in look them mode. So first, let's go and switch to look demoed and try it. Now we can see material premium. So let's go and add for each building and unique material. So I will just go and add a random, random one. So in order to see it. So all these are going to have different materials with different color. And later on, I'm going to adjust all these individually so that the easiest and fastest way, because some of these can share the same material. And right now we added all this and also we can go and add a unique material for our ground as well. And now as you can see immediately, we haven't this colorful. Look for our city solid Go for the first building. So I can go and select it here. And I will go in edit mode and here I will go. And first of all, I want to go and pull this up like this with g. And maybe I can go and press I for inserting keyframe and E for Extrude. And now I can go and add materials to this building here. So right now I will go in Face Selection. By the way, I'm wounded to Swift two buck select nth. Now I can go and select some of these, some of these faces that are going to be windows. So as you can see, I'm going to use this random selection. So I will not select all of these, but I can just select few of those. So maybe one more here. And on this side also those not to this one here. And maybe let's go with this one here and try it. Now I can go and create new material under plus, and this one is going to be obviously yellow. So like this nth non forget to press assigning. So right now as you can see, we immediately got windows as material. And also, for example, we can go and make this one full black. Let's say for, for now, now let's go and focus on the second one. So first we compress L to select all of these linked here. And for this and thin on the top, I'm going to create a new material and that one is going to be pure black, and I will assign it. And now we can go and focus on this small details like these windows here. Also here. Let's go on the other side. So I will just hold shift and select. All of these and try it. Now I can go and create a new material with the plus end. Let's find that light material. They are low and I can pass a sign and immediately I will assign that. So as you can see here, we will need also to select these other sites of the ON Dean and I will need to assign it. And as you can see, we already have we already edit materials, dose also buildings and stuff. So let's go and focus now on this building here. So first, let's focus on this top part. I will press L2, select linked, and I'll create a new material here. Let's find this material. I'll assign it. Now let's go and focus on these windows here. Now I can go and press C for circle selection. I can select now all these windows. Let's go on the other side, the circle selection, like so. And with the plus, I'm going to create a new material. They allow material and now I can just press assigned. And we are done with the second building. Now let's go and move on this third building. So I will press L former selecting link. So only those spheres are zero-zero point ten material. Let's assign that. And now we will need to do this manually to assign those material. And as you can see, this one is also bit offset. So I'm going to move this addressing j index. So now we can go and dealers to, to those here. Let's go and select all these materials, all these phases also here. So now we need to focus on this side here. Soviet circle selection. I will go and paint on those windows here. And the top. Now on the other side. I don't want you to have the other materials on the box. So I will call middle mass if I made any mistake. So now with that kind of technique, you'll be faster for selecting. Also here. And as you can see here, we will need to remove those, those to deselect this one. Now we have here and also here. So those three and those two, and now I can press plus assigned new material to it. And I'm done with this second building here. So only we can go and adjust and change this color here. Later on we are going to more to work a little bit more with the colors. So for now I'm going to keep something like this. Let's go ahead and focus on the next building. So this top part is going to be black as usual. So create a new material assigned this vector material here. And now I will need to paint on those here. Actually to select not pain, but selected those faces that are going to have this white material. Material. So this one is not going to be actually, we will need to include that one as well. So now I can just go and select on the other side. Let's deselect those. Also here and here. Now, on this site has gone down opposite side. And I will create a new material, assigned light material. And as you can see, we will need to do the same here on this top part. So as you can see, it's very simple and easy to get cartoonish look for your city and stylized and we can see how fast you can build the whole city is VT just using particle system. So maybe this one can go black material. Now, this one, I want to paint all these at loop cyber hold shift and control to add materials here, I can create a new material. And now I need to edit detail here on this top part. And this one is going to be white material. And also this one here, I'll assign the right material to this. So now for the, for this tree, I'm going to deselect everything, breast L2 slang, this bottom part. Create the new material. Let's make it dark brown. Assign it. And maybe we can select one of these. And for example, we can assign the same material here.
8. Applying The Materials Part 2 And Final Adjustments: And for example, here inside the fit, we can go and add one UV sphere. I'm going to scale it down. That's going top orthographic view and place it right here in the middle. Skill it all the way down to G and X. I can go and pull this up. So let's go and see if it's in the middle. And here I will go and design the same way, the same yellow material here. So this one is going to be as a bulb. So let's go and see how our city looks like. And as you can see, it's very interesting from this look Dem mode. So now let's go and switch into the rendered view. And here under, under settings you can go and turn on ambient occlusion. We can turn on bloom as well, Anthropocene space reflection. And now we can go and adjusts the lightning here. So first with the shifting a, we can go and add one simple son here. And as you can see, we already have really interesting results. Now, for example, you can go and as few point light with a shift and a, you can search for point light. And it's appearing right here, but you will need to grab it and move it to the side. And here for the strength, you can increase the strength here for, let's say 500. And the issue that we are having here is that because, because we are, we inserted lamp here under this particle system, we will need to move this to the collection. So let's go and adjust this one more time. So let's go and increase this to ten. So right now I'm going to close this down. And here we have only one single sum. And this one is going to be point flight. So right now, let's go and move this to the site. Let's decrease power to one here for the strength of the Sun, or actually make it to maybe be a little bit more. I think two is going to be just fine. And here you will be able to decide how you want to have your shadows. Now let's go and see how are our spotlight actually, I'd like to suffer those kinds. And here for example, let's try with 500. Or actually we need to make it a little bit more room here, for example, we can go and change the color here if you want to have interesting effects. But before that, let's decrease the number of sun power. I'm going to rotate it. And let's go and try with despite flight. I'm going to move this slightly down. And now I will duplicate this few times with the shift in D. So for example, we can put here, some here, maybe one more here. Let's go and add one more here. And now for example, you can go and select one of these materials here where we have our lightning. And here you can increase the emission power to one saw under this principle because different df in principle be SDF material, you will have to find this emission power here. And for example, you can increase it to one if you want to make it to him to emit light there. And for example, on the remission, you can just switch here to have this color here. And for example, you can go and plot it slightly down. But we can keep as it is already. So let's see what else we can change. So for example, I didn't like the color of this building here. And taking go and change it, for example, to some, some green color here. I like to have colorful down. And this one, we already have almost the same material. Let's make it something like this. Now this black material here, for example, you can go and try to see how it's going to look like a black car. And I believe this building is a little bit too big, so I will go and select it and scaled ultimate down. Or maybe I can go and make it even longer. And now, as you can see, it's 14 collision bit saw out-breath G index to move this down. And maybe we can go and change the color. Let's try to have different color here. So maybe dark per pole is going to be fine. And for example, if you want to have street, you can go and drove straight here. But for that one, we'll need to do uv, uv editing. So first we can go and go in edit mode, press U, and here you can go and press unwrap and try it now is going to be unwrapped. Let's go and switch to Lou demoed. And now if you go in under UV Editing and select here everything, you can see that we unwrap this properly. So you can see that we don't have any, any mistakes here. And now you can go under texture painting. And we have this purple color that we are going to paint. But before that, we can go and rename this 125t Street. Greater note image and press OK. And now we will need to connect to this image with the shading here. The shading material. So under shading, we are going to select this background plain color. And now with the shifting day, we can search for the image texture. And now for example, you can plug in this to the base color here. And here. You can select Street. And now if you go under texture painting here, in this top orthographic view, you can go and start painting your area as you want. If you hold left click, you can see this year making the street. And for example, if you want to feel this color here, you can select this fill option here. And for example, we can just press one. And you will be able to feel the whole, the whole area, as you can see, very simple and easy. And now for example, let's say you want to have small street here going across here. You can go and, and switch back to draw. And now you can just paint here like this. Or you can go under these options here. Under this option here on the top. For example, we can switch to the black color here. And now I'm going to scroll here. And under stroke, we can turn on the stabilized stroke. And now if you drag it, you are going to have smooth, smooth control of your stroke. So right now I'm going to scale this down our radius. And now we can go and start painting this area here. If you want to make street. Now if you switch back to the rendering, rendering view, you can see the field already have this dark color for street. So I'm going to go a few times back. And let's say we want this purple color here. And for example, for our streets, we can go and assign this color, the, the greyish color, maybe some Ultimate lighter. I'm going to increase rate is a little bit. So you can hold shift if you want to be more precise. Or you can write down, for example, 80. And now you can go and drag here. And now you will have stroke also, for example, compress right-click in terms of this option here. So right now it's going to be full stroke without any shading issue. So let's go and switch here to render it u. And for example, we can start here, drag, dragging our line like so across the city. So for example, if you want to change anything here, you will need to go in particle systems and to paint on these, the painting to remove the unnecessary building of the streets. Let's do a few times. And as you can see, we have created our, our first Street. So let's go and create the second one. Or you can simply just go back few times N, For example, just increase this radius, for example, to 50. And instead of drawing over and over again, you can just now draw huge lines and now they will have the same size. And also we have Steve here. And also for now, I'm going to keep everything as it is. Let's go back to the layout. I'm going to turn on my skin under View. And as you can see here, for example, you can go and play with the specular here, and also with the roughness as well. So if you want to have a bit of reflection there, but I didn't like this student material. I will go and create a new material. And here you can select this Beck color here, make this dark gray like so. And as you can see, we are done with baiting our streets CT. So as you can see, we can go and use this for any kind of purposes. We can go and animate this. And also as positive for games and also making interesting video. And always you can go and add more stuff to it because he created the whole system that we can go and edit later on. So that's it about this course. I hope you had fun and I hope you now better understand how particles are working and how powerful they are when it comes to creating cities. And see you in the next course. Bye.
 Nodiken 3D, 3D Artist and Animator