Transcripts
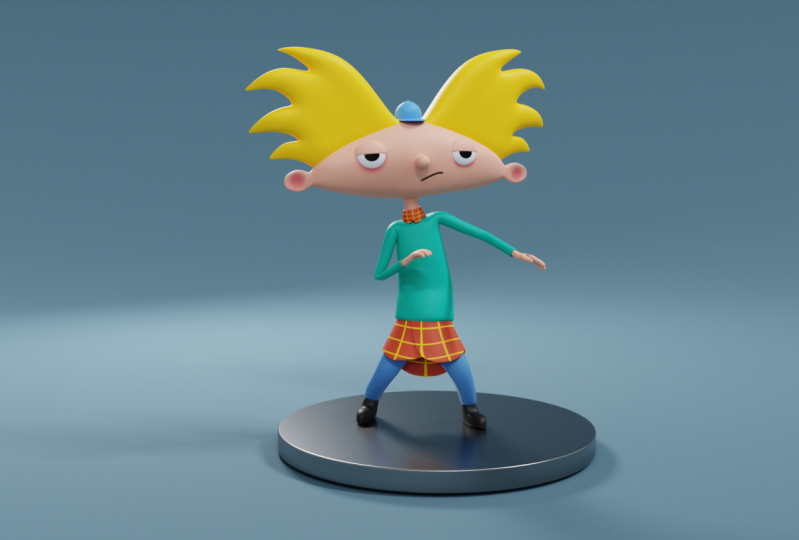
1. Class Introduction: Hello guys, my name is Dina and welcome back to another force. In this course, we are going to muddle out popular cartoon character Arnold from the famous nineties sitcom hey Arnold. The show centers on for greater, named Arnold who lives with his grandparents in inner city. Tina met episodes centers on his experiences navigating herbal life while dealing with the problems he and his friends and counter. Arnold is a calm, nice, kind, optimistic, upbeat, and smartly Taoist who always sees the best in people despite how unkind or sneaky some of them may be. Although he's usually a Pacific kid, he has his limits and can be a bit irritable when he's pushed so far, this character creation, we are going to be using basic meshes and modifiers. We will model the character into depots from Michelle will be easier for us to animate and set that they'll post later on. First of all, we will start with the modeling of our character. Once you've finished modelling the characters, we will export it as an FBX file so that you will be able to import it in myxoma, adopts on my rigging and they're emitting tool. Once you find our favorite animation or both, we will then download it and import it back into Blender. Later we will add HDI image for the lightening and applied the materials for the shirt that is varying as Kurt, We are going to play with the notes in shader editor to replicate the famous trek with shirts. For the rest of the body, we will use basic materials. In the end, I will show you how to set your scene and the final render settings. Also, you can get the reference image from the link of the description of this course. This course is a beginner friendly and if you're advanced 3D artists, you can use this course as a practice. So what are you waiting for? Let's hop onto the videos.
2. Importing Reference Image and Modeling The Head: Everybody and welcome to our first CD and discourse. So here as you can see, we are currently working to the blender version 2.91. And this is a later sludge and so far, but if it can't get any version of all this, you should get it because it's always best to work in the latest version because of the new features and bug exists. So let's start with a mono file. So I'm going to create a new file and the General, and we have our default scene. I'm going to turn on my screencast add-on. So right here you can see all the shortcut that and when to use in this course. So let's get rid of our default Q by pressing acts on it and confirm, delete. And now I will press number one, a key keyboards to go in front autographs. So first thing that you are going to do, we will import our fs image. So with a shift in a, I'm going to search under image. And here is a reference and now I will navigate through my folder where I'm going to save all the necessary files for this project and as the best way to stay organized while you are working. So all the reference image that we are going to use in this course, you will be able to get from the link of the description of discourse. And here, as you can see, currently I'm having this reference image of hey, are not front, front standing song going to import it. Lot reference image. As you can see, we need to create him. But as you can see, currently, we are going to also do some settings for our reference image. So let's go under reference image settings. And here we are going to disable this image from being shown in prospective mode. So I'm going to uncheck the perspective. So now if you move in perspective view here you can see, you will not be able to see the reference image. And now also, I want to turn on this depth here to be on the back because I want to shit to see all the, all the meshes in front of our represent mesh so it doesn't intersect with our modelling. And also there's this transparency options. So here it can decrease it to about 0.5, is going to be just fine because it will be easier for modeling. There's also one more thing. The last thing is you need to do before we start modeling is enable this option for selection. So this is selection filter. And now if you track this year, you cannot select our represented much anymore. So first thing that we are going to do, we are going to model the head out that hey Arnold character, the main character Arnold. And here as you can see, he got this football hat. We are going to matter solids begin with a shift and a and b. I'm going to go under Mesh and I will search for the cube. Now, immediately I want to add subdivision surface modifier with number of sargent took. And I will change shading from flat to smoke by pressing right-click and select these shades mode. So now I want also to go in edit mode and hit Control. And I want to add mirror at actually actual up here because I want to add mirror modifier. So weed control and there I will add ash loop in the middle. Now I'm going to go in exam mode and I will delete this hall here by passing x and confirm this. Delete it, and now let's go and add mirror modifier. And don't forget to move your mirror modifier always on the top off all others modifiers on your mesh. So there's also this thing called clipping. So you should always enabled because now they are always merging and we will not hit her double vertices here in the middle there they are intersecting, intersecting with each other. So let's start modelling. So I'm going to scale this all the way down into g and z. I will move this up now and I will select despite Don't forget to work with the x-ray old time because you will be able to select the back part as well. So I'm going to refugee index two. This here. Let's pull this up and also this one down. Here is going to be fine for now. Now I will select this but ends with e io and extrude it here on the side. And let's actually make it to about here. I will scale down one more time for extrude. Let's scale it. And here I will go and add a new edge loops. Also. Not there's lows but extrusions. And let's move this here down to match our reference image. So to about here is going to be just fine. So now I'm going to go in, out of vaccine mode. And as you can see, you need a little bit more geometry to play with to get the correct shape. So now I'm going to go and start working on the years. So let's move this to the side. Let's scale this down. And also I will add one more edge loop here and kill this path out. Now, I will move this to the side and let's add one more here, edge loop. So I can go and select this one here. Let's scale this. We can move this here and this one here in the middle, like so. And this one here, we can just pull it all the way here. And now we have that shape for the year. So let's work with a bit more with the rest of geometry. Now we can go and select everything here. And as you can see, we can go and scale this down, or actually can select those two here. Let's move this up. So now you will need to adjust those shapes here. Let's move this one to the side, also, this one here. Now we can scale this one here. I can select this part here and I can just press S to scale it up twice g to do edge sliding, like so. Also we can move those two as well. Let's make a little bit more gap between those two. Now I will go and add one more edge loop here on the top part. So I will press control and enter and add edge loops here. And now I can go and select all this empty test and y scale this down like so. So now we have more rounded shape than before. And also we need a little bit modularity here in the middle. As also, I will add one more edge loop here in the middle as well. And now we will need to go and round this shape a little bit better than it is right now. So let's go back here and I'll turn on my X-ray now. Now we can go and pull this here. Now, outburst G, Actually I can go and move those here. And also this one here as well. I can scale this up. And here we can go and add one more edge, look like so. So now we created the year. Let's go in top orthographic view. And here as you can see, we can go and scale this into y. So press S and divide the scale on the y axis. Let's see how it is looking so far. And as you can see, now we can go and select this box here and also this part here. So those T, actually, let's select all of this. And by pressing fighter G, we can go and do edge sliding. So just a little bit like so, so we get a little bit rounded shape. Or actually we can go a little bit more. And also I'm going to do the same here for this button side. And also we will need to select all of these here. Also on the other side. So twice g, hold this up and exfiltrate. We will need to select also this one in the middle. Let's go here on the button side. Now, I can go in right orthographic view and with twice g i can do air sliding just to run this shape a little bit. And now for example, we can go and select this part here. And we can just move it a little bit in the front with g and y. Also this one here. And this one also same with the Chandra. And now we have this rounded shape. Now, as you can see here, we will need to pick this issue that we have here in the middle. So the other thing that we need to do is we can go and scale this up. So let's see how it looking so far. And now let's do a little bit adjustments. So I'm going to scale it only on the z axis. So this part needs to be, I'm going to call this. Actually you can go and scale all of these slightly down. So as you can see, we need just to follow these reference imagery as much as possible, but we will not be able to do it because you will need to move it here just a little bit to the side. And now we can go and try to match this reference image so I can go and select this part here. Will this here. Now with g and g, I'm going to no those down. Like so also this part here. So only those two here. Actually this one will stay there. Now, as you can see, we will need two more this, I'm going to scale it down and to G and X. Let's move it here. Now I can scale this and pull this here. Let's move this one slightly inside. And those, so this part here. Now I can go and hold this edge here on the y-axis. So G and white, boldest insight. So now we have the whole for the year. And we are almost done here. So we have this shape for the head. And the next thing that we need to do, we are going to model the model knows and also the next. So I can go and select this edge loop here. Actually this verb is in the middle, and I will double this vertice by pressing Shift Control MB to get a new face, which I will use for excluding our nose for our character. So to about here, let's make it. And also now I'll press number three to going right orthographic view and Es and divide and 0. I'm going to align those k to be perfectly straight. And now I can go and extrude this part in the front, like so. Now I'm going to hide my, my model here for a second because I want to show you that Arnold, that perfectly rounded nose. So we are going to make it sounded. So let's elected back here and I will go and add two edge loop like so. And now let's make it round it. So first I'm going to go and select this part here. And let's scale this up. Also, this one here. I'm going to press space g to do ash sliding. And here this front part, I'm going to go and pull it a little bit more in the front. And now I can go and also scale it a little bit like so. Also those three here, we can go and adjusted how we like it. And let's move it slightly in the front. So let's go to about here is going to be just fine. And now there is also this neck part here on this bottom part. So I will do the same here, shift control and before bevel getting your face here. Now I will press.'s z and z to make perfectly straight on the z-axis. But as you can see, we did. So that other vertex as well. So we will need only this part here, this down vertex, so controlled and beat four bevel, like so S, z and z to make perfectly straight here, aligned on the z axis. Now, I can go into a cartographic Q and extrude this down, like so. And here I will go and add edge loop here, and edge loop here on this bottom part. And we have this neck part as well. And now let's adjust a little bit shape here. So I can go in x-ray mode. And here I'm going to go End edge slightly here. And here as we can go and do edge fighting also here, let's say, by the way, can go in x-ray. So SG. And now let's move to about here. Also do edge sliding here. Now I can go and scale this bulk. And this part here it can go and slightly slight skill IDA, let's bend around to see. And also this part here, G and X. The longer we can scale this part a little bit here. And sought to about here is going to be just fine. Let's turn off X-ray now. And as you can see, we are done with modeling the head of our note. So maybe we can go only and scale. This part's just slightly more than, and now it's perfectly football hat for Donald. Also, there is also this part here for the nose. Go and select this birth by placing C and its circle selection. I'm going to select this with a left-click. But as you can see, we need to disrupt this back part. And now we can adjust the size of it. So let's make it a little bit bigger. So two volt here, and that's it. So we have nose and we have also created the head of Donald's. So that's it about the studio. Stay tuned because in the next video we are going to add here and also will create this top hat for the anode. So see you there.
3. Creating A Hair And Small Hat: Everybody and welcome back to our secondly Dean discourse. So here as you can see, we created head for Arnold, and now we should focus on creating here and also this head in the middle. So first let's address this. This had a little bit more to match the reference image as much as possible. So I'm going to go and move those slightly down like this. And also maybe you can go and scale this just slightly up. And now also this part here. We can press SYN S, x and 0 to align it perfectly to be straight. Also this one here, and also this one in the middle. So something like this is going to be just fine. And now we can go and pull this all the way down like this. And also we can go and scale this part also slightly down. Let's pull this up. And now we can go and create the hair. So as you can see, we have these 12344 stripes like here, and it has the same on the other side, which means that you are going to need to use Mirror modifier. So with the shifting a, I will go and Kate cube. And in edit mode, I want to add ash loop in the middle, and I want to get rid of this house here. Now I'm going to go and add mirror modifier clipping on. And also I want to have subdivision surface with number of subdivision two. And now I will go out of edit mode and change shading too smart. And don't forget to have it mirror modifier always on top. So now let's go and start modeling here. So first I'm going to pull this above about head like this. And now I'm going to extrude four faces because we have 1234 for this hair stripes. Let's call them like that. So we have already won and now I'll press E to the second one. But before that, I want to adjust this one here so I will go and rotate it slightly like this. And also, for example, they can go and pull this to about here. So we have to now. So this is going to be the third. And now we have this fourth one, which we actually can immediately use for picking this one here. So I'm going to go and start from this part here. So as you can see, we have this four faces that he can go and start extruding on top like this. And I'm going to add two edge loops here. Now I will go and adjust all these vertices to match the reference image. So let's go and pull those vertices. Now, those we can go and rotate scale them until scale them just like this. And also now am just pulling those vertices like so. So this one is going to be about here. And now we created this one stripe, let's call it the debt. The first one here. Now let's go and start working on the second one is just meant to be this one here. So I can go and press E. Let's rotate slightly. And I'm going to go and extrude it one more time and scale it all the way down. Let's rotate a little bit. And I will go and add two edge loops here. Now I'm going to adjust also the second one like this. So I will just go and pull it. And as you can see here, we can go and merge those inside here. So I'm going to go and merge those two faces. So I'm going to press M and merge at the centre and also will do the same for the other side. But be careful because as you can see here, we have now these phases which can make problem and we can get through defeated by pressing X and selecting face. And now everything should be just fine. So now we can go and continue. So here we created a second, but let's go into justice ultimately, better to measure the reference image as much as possible. So let's go and scale it all the way down. This, but also here. Now we can grab this one here and pull it slightly insight. And now we can go and focus on this third part here. So this face here. Now I'm going to extrude it up. Let's write it slightly. And now I'm going to do it one more time. Scale this all the way down. Let's place it here and it to Earth loops. I will have those two. Those actually forward to see is that I can go and adjust to measure the reference image. So I am just putting those like this. And as you can see, we can once again merge those here. So I can go and select this one and this one. And with M merge and on the other side as well as the centre. And once again, we have this face in them inside, which will need to delete by pressing X. And now we can go back and vertex selection and the trust, this one as well. So as you can see, it's very simple and easy. So now the last part is going to be this part here for the hair. And for now I'm going to turn off clipping because I want to move those here. By this, let's go and select those two as well. Let's move them a little bit like this. And now I can go and start excluding the last stripe. Let's call it like that, like this. Now I'm going to scale this all the way down and flood control and err, I'm going to add two more edge loops. And now I can adjust those, the position of those vertices like this. And as you can see, we will have also to merge, as you can see right here. And I'm going to adjust the last one here. Let's pull this and arrange it. This one alphabet better. Also this one here. And pull this one down. Or actually we need to move this one like this. And now let's go into measure those inside. So with red vertex selection, I'm going to merge those at the center, also this one on the back side. And also we can go and merge. Even those are actually are going to keep this one as it is. And don't forget to delete this inset phases by selecting good delete. And now let's adjust a little bit more those vertices. So I'm going to pull this one here. Let's move this one up. And now I'm going to connect those two. But before that, I want to turn back my clipping gone. And now we can go and arrange those with better like this. And now I'm going to go and make the place for hat. So let's go on the backside to see what we have. I'm going to go out to the x-ray. And now I'm going to go and also see, let's pull this on like this. And now I'm going to go and focus on this back part. Soviet g and g and z. I can go and pull those down. And now I'm going to go into orthographic view in the x-ray. And I can select all of this here in the front part and also this one. And maybe we can select this one. But I'm going to deselect this one and this one here. So now I want to scale those on the Y. And also, let's go and let's see what we have here. I'm going to go out of x-ray also and pull those inside slightly. So this one as well. And now we can go and pull those out. And we have also this one here with January. I'm going to change shading too smart. And also now we can go and select those stop part top faces, let's say all of this. So we have this one small here and this one. And now we to G and Y, I can go and pull this from the backside. So now we have a little bit dynamic heat there. Also. We can go for this one here, close and get like this. Now I'm going to go back on the backside once again. And I'm going to go and modus down. Also this one here. So let's see what the hell, I'm going to select this middle part here to go on the back. That's more all this done. So now we have also created the back part for the hair. And now we can go and focus. Caitlin cat, as you can see, we are done with modeling here. But before we continue with the head, I'm going to do small adjustments on the head. So first I will go and as you can see, our nose is looking for a little bit smeared and I want to fix it. So here I will need to go in edit mode. Actually, I will need first to apply mirror modifier. And here, as you can see, we are having this shape here, which is m gone. So I am going to delete those phases here. And now I can go and select this part here and press f two, fill it. And now we have perfectly rounded shape. Now like best SY and 0 to make it perfectly straight, also do the same here. Actually, we need to be selected this part here as y and 0 to make it state. And now it's looking much better than before. Now I'm going to go and also move this slightly back. And now I will also scale this down as well. Just slightly entry tries, gee, I can go and pull this a bit more on the backside. So now this is how topology should be. Something like this, to be just fine. Maybe we can go and for example, this one, we can press S, Y, and Z also on this one. And maybe it just scale this slightly down. And now we can go and focus on the head Soviet shifting day. I will add QC and also I will add subdivision surface with number of subdivisions to right-click to change shading into J. I'm going to position it right on top of head, like this. And now I can go and edit mode we control and there I will go and add edge loop, move it all the way down like this. And I will need one more edge loop here. Now let's select everything and pull this up. So now I can use this face here and E for extruding. And also I can go and add agile appear and petrol up here. And now I can go and adjust also shape here, but I will need one more outlook. Ok, so first let's go and focus on this top part. So as you can see, it's a little bit big. So going g and z to pull this down. And now for example, we can go and put those as well down like this. And in top orthographic view, I will go and also select those here, but end with S and why I wanted to make this one around it like this. And the next I want to go and select those desktop top faces with right-click. Convert those to the circle. Now I can go and david The shape. So let's see. So something like this is going to be just fine. Let's go into turn into position. But now I'm going to go and add edge loop here in the middle. And next, I want to go and adjust this frontal part so as you can see, it's a little bit big. So I'm going to pull this back. And now I will go and for example, we can go and pull this down. So also those here. So all this outburst G and white pulled back and now is reacting to get, it's starting to get the shapes in it. So let's go to about here. Now. I want to round this back part as well. So let's see. And also I want to go and select this button part. And for example, we can go into g and g and g to pull this up to make it thinner. And actually you can go and scale this down on the z axis like this. So let's see how it's looking. Let's place it where it should be. So now maybe you can go and, and just the scale here. So I'm going to go and see the scale. And now I will go and select only those three. And the front end to j and y, j and z, I can go and pull this down. And now I can go and also do the same here on this back part so that the g and z, I can pull this down. And now we created the hat. So maybe can go and just this part here. And we can go and add one more edge slope. Let's travel and debt. And here we can go and scale this part down. And as you can see, we created this shape that we need. So I'm going to go twice g here to pull this off almost all the way down like this. And now the last thing is this top part, as you can see, I'm going to go also and to add number of subdivision three here, four here. And as you can see, we have this small top parts, so which is going to be simple UV sphere. Let's kill this down. Let's place it where it should be smooth. Let's make it smaller. And let's see how this shape is looking. So maybe we can go and grab this frontal part a little bit more. So I would perky and y to make it more rounded shape here. And now, as you can see, we are done with modeling. Sort of pulled this also here. And I can pull this end finished ahead like this so that it about this video stay tuned because in the next video we are going to start with the ice and also we will finish this top of the body. So see you there.
4. Adding Top Part Of The Body: Hello everybody and welcome back to our third video in this course. So here as you can see, we created head here and you have had and also had and just focus on the ice and also on this top part. But before that I want to do small adjustments on the hair had. So I will go and Moody's slightly down and now here on this top part of the nose, I'm going to go and actually scale this up to make it even bigger than it is right now. And now for example, they can go and select this edge loop here. And also this one here. Let's go and select this 1 first. And now I'm going to go and select this 12 j and y. I can go and scale this down. And now it's looking better. So your Vestas should try to find the best shape as you, as you can. So satellite dish is going to be fine. Maybe it will return that later when we add ice and so on. So now as you can see here, we are having issue with the head. And also Vietnam need to adjust some of these. So let's put this one here. Me and also this one here. Maybe we can go and select actually the whole edge loop here. And to advise G, We can just Moodysson slightly here. And now for the ice, I'm going to add simple UV sphere. And immediately. But before that actually we will need to return to change these default settings because we will be able to do this only when we add mesh. So make sure that you change those settings. So we will need 16 by 18 drinks. And immediately I want to add mirror modifier because I will need to UB spheres for each i. And now I'm going to scale this down. First. I will go and rotates this one for the 90 degrees, but on the y, because I want to take this top part and use it for our pupil. But make sure that you are working in X-rays. So I will select this part and it's shifting D, I will go and duplicate it and that lead to cancel moment and for separating this mesh from the rest of the objects. And now I can grab this one and fold this slightly. And now we have this part here. We can go and rotate for 90 degrees. And now I'm going to go and get rid of this half here. So I will select this back part, delete all these vertices, and now I'm going to go and actually do the same for this islet. So in top orthographic view, I can go and select actually already did there. Now we need for the pupil and now I want to go and add also subdivision surface with number of sedation to right-click to translate into smooth. And also right here, I will do the same chain shaped into smart. So now actually, I'm going to need to scale this device so I can select both of these and scale this. Until now, I will go in edit mode. More. Let's place it inside of our eyelid. So something like this is going to be just fine. And now we can go and actually, let's go ahead and press Control and G. So now we have both of those together, and now let's go and place it where it should be. So I'm going to scale this down. Let's scale it up. And also I wanted to scale this on the x axis. So if you go in x-ray, you can see this is, it's not perfectly round it, but it has elliptic, elliptic shape. So to about here. Now I'm going to select my, if you pull here and I scale this down, up into g and I'm going to move slightly inside. So now I can go and select everything that gee, I can rotate it right, like this. Place it inside of head. So let's see how it is, how they are looking so far. And now we can go and mass again, separate our lit by pressing P and separated like this. And also I want to add solidify modifier because I want to have some thickness inside. So but before that, make sure that you have solidified on top of your subdivision. And here you can go and increase your sub increase the thickness or solidify modifier. So actually I think it's way too thick, so I will go and clover it down slightly. And actually we can go and pull this slightly inside this out. And now we created the eyes for our Arnold and now we should focus on the body. So as you can see, it's starting to get into shape. I'm going to go also to move those here. So as, as already mentioned, we are going to go back and forth with modelling care and Dustin details. So now for the body first I need to return my T D cursor in the middle of our grids. So with the shift NC, I will go and return it here. The first thing that I'm going to do, I will add cubed arsine. And immediately I will go and add edge loop in the middle, which means that I will use Mirror modifier. So I will need to get 1.5 and also don't forget to turn on clipping. And the next step is going to be as usually a subdivision surface that number of subdivisions to anti-chain shading, to smoke. And don't forget to always have mirror modifier on top of other modifiers in modified STX. And now I will go into just the scale of this. So here I will go and scale this to measure the reference image. I'm going to press it. G index to scale is on the x-axis. Let's go and scale this one as well. Now I can go and press E for Extrude. Like this. I can go and pull this one here slightly for sleeves. Let's pull this a little bit more. And now the last part is meant to be this part here on the top. And I will add one more edge loop here. Pull this down. Now I'm going to go in right orthographic view. And here I will go and select all these phases. Here. And I will go and scale this on d y, like this. And now I can go and add one more edge loop here in the middle, like this. And now I can select this part here and this one here. So those three, those sexually four faces pressed vice. But fresh G index to move it on the x-axis. And to S and y. I can scale this down like this. And now I can select this part here, which is meant to be for sleeves. And now we derive click. I'm going to convert this to the circle. And now I can go and rotate it slightly like this. Scale it down a little bit. And in front orthographic view I can press E to extrude. Let's go and pull it like this, Sx and 0 to make it aligned on the x axis. And here I will go and add edge look, I will align the same edge loop here. Also. I want to go and add one more here. And I will need one more here on this side as well. Now I can go and may call for the sleeves for hence O plus i for inserting face hold shift. And now I can press E to extrude it inside. And I want to go and add one more edge support loop, support for this top part on the sleeve. And now I'm going to adjust this, the body shape a little bit. So here in right orthographic view, I will go and x-ray mode. And let's go and scale this a little bit. Also here, this button parts as well. So I can press S and skills on the y-axis. And here I will go and make those here, this, those, those 1-2-3, But this is perfectly state on the z axis, so plus S, Z and 0 to make it perfectly straight. And let's go and do edge sliding here. So I will go and select this edge here. It's Dr. Gee, I'm going to pull this back like this to make this more around its shape. And now I can do the same here for this one as well. So I can rest 5G edge sliding like this. Now I will go in x-ray mode here. And now I'm going to go and scale this on the y, like this. I'm going to do the same here for those two as well. So x and y. So let's go ahead and pull those here as well. So in the back, so g And vitamin disk on the back side. Now here on this top part I will go and select this edge here and pull it out spit here. And now I'm going to go and go in front of the graphic here. And let's see how everything is looking so far. So let's make Hall for this button part. So I will get rid of those faces. Now I can select this button, button, edge loop. I'll press E to extrude, rightly to cancel any moment asks for scale. And now I can extrude this on the z axis, scale this inset, and press f to build the whole for the insight. So now let's go and adjust this in front orthographic view as well. So let's go in x-ray mode, and here I'm going to go and adjust some of this. Let's switch to the solid fuel. We need x-ray mode. And let's go. And for example, I can go and scale this up a little bit of best-first it to pull this off, we'll get more here. And now I'm going to pull this apart slightly up, like this. And now I want to align those three vertices it perfectly state on the z-axis, so S z is 0. Pull them a little bit down. And now I can go, and for example, I can pull this slightly up. And this one here is going to be, let's see. Let's move this. So those two needs to be perfectly states are plus S, Z and 0 to align it perfectly. And S, x and 0 as well. I will do the same here to make this perfectly aligned. And as you can see, we are done with creating body shape for Arnold. So let's go out if extremal to see how everything is looking. And maybe we can go and do just like the sliding with this edges here. So best of HG. And also this edges here on the side. Just left it. And the last one is going to be this one here. So to make more rounded edges, more rounded shape. Let's go in x-ray mode. And here I'm going to go and switch to vertex one more time. And let's go and select all of this. Just kill this a little bit more. Let's pull this one here by pressing G and X to make it thinner. And now everything should be just fine. Let's go and select all of this on the top. And two g and z, I can just pull it up slightly. And here we are. We've done with the link, the body shape of panels so that it about this video stay tuned because in the next video we are going to add lex and also shoes. And after that, you will start with Hans associate. There.
5. Modeling Hands: Everybody and welcome back to our fourth video in this course. So here you can see we are done with muddling our nobody top part and now we can go and continue with the legs. So for the next we are going to use simple cubes. So we the shifting a L, I will add cube and immediately I want to add subdivision surface and also mirror modifier as well. And as I already mentioned, don't forget to pull this on top of. Sorry, I will now go and change shedding too smart. I can go in edit mode by pressing Tab and with G, I can just go and separate those two here. And as you can see, we will need to do a little bit more adjustments in the body. So here I will go in x-ray mode and I'm going to select all of these. And let's go and scale this part to be slightly bigger. And also maybe this one here as well. Now I can go in x-ray mode and for example, we can go and put this one back. So pledge GI and white pull this back. And also here I will go and pull this. Those G as well, slightly back solidus. So let's go out the vaccine mode. And now we can go and do one more edge studying here, psi compressed twice g. And now let's go and do air sliding also right here to about here. And the last one is going to be edge sliding on this part here. So now we got better shape than we had before. So you can always go back and correct it as much as possible. So let's go and scale. This may be just a little bit and divide. And now we are done with that part and now we can focus on the legs. So here I will go and scale this down. Let's place it inside. Let's go in red orthographic view and now it e, I can go. And as you can see, I didn't turn on x-ray modes. So now if we, if I turn on, I will need to go. I can now select all these vertices here on the back side as well. So I will go and extrude the this Q times. Now. I will go and press right-click on the last solution here. So now I can actually scale it here and press I for inserting phase insight. And also I want to add one more edge loop here. So now I can go and select this edge loop here in the middle with twice g and move it slightly down. And now I can select all of these and separated a little bit. And also I want to bend out, relax just slightly. So I compare G And try to bend it in the front. So let's see what we have. So now it's looking good. And the last step is going to be to add this pair of shoes. But before that, let's adjust the scale a little bit. Let's move this here inside. And now I can go in x-ray mode and for example, we can go and actually scale this a little bit of this part here and now everything seems done on how we can continue with the source. So the shift and a I will add cube and also immediately either add subdivision surface with number of subdivisions to. And also I will need mirror modifier as well. Chain shade into smart and don't forget to bring near modifier on top. So now I can go and position it where they should be. But before that, I want to go and select once again, and let's move them slightly from each other. And now we can continue with the show's sold. Let's go and adjust scale. I will go in, right autographed few best e to extrude as to scale. Let's go and pull this out a bit back. And I want to do one more scale here. And now we can go and move everything and the back. So like this and we have paid it shows. So let's see how they are looking. And now I'm going to go and do scale here. Let's pull this here, so I want to make it rounded like he already has. And to let go and to edge sliding here I've pressed by g. And now I can do the same here on this top part. So let's select this space here. And let's go and pull this here and scale it up a little bit. Now, let's return this edge loop here, times g. So now you just try to make to shape shows. So something like this is going to be just fine. Let's go out to that same mode to see how they're looking. And let's pull them a little bit in the front. So we are done with shows nth now we can go and continue with hands. So for the hands we are going to use cube. And also you'll need mirror modifier and subdivision surface. Pick number of subdivision two. And now we can go and change it into smart. Let's pull this to the side. I'm going to scale this. And first I will go and go in extreme mode and select vertex selection. And here I will need one edge loop here. And I will need to edge loops for three fingers because he got three fingers. And now I will go and scale this on the VI. So press S and vital skill it on divide. And here I can select this bug here and a G and X. I can pull this a little bit in the front like this. And now I'm going to go and use this face here. Let me just find it. I can use this face here. And I'm going to go and press E to extrude F or rotate. Now I can go and press E Once again to rotate. Now this is going to be placed where my thumb should be. And here we have, we are going to each of these top faces for each finger. But before that, we aren't going to go and get rid of these phases here. So let's go out of x-ray mode. I will go and select all these phases. I can press E to delete phases. And now I'm going to go and I will need here to merge all these g. Now press M and at last, I'm going to merge all these vertices. And now we have this face here, this edge loop here, which we can go and extrude it out. So like this is going to be fine. Now I can go and scale this on the z, slightly like this. And now I can go and select each of these phases here. And I'll bring my tool, tools with d. And here I'm going to select e by holding left-click. And I'll select these tools for four extrusion and select destroyed individual. And now we have this yellow dot v3 can go and use for extraordinary endless Extrude two times like this, three fingers. And now I'm going to go and extrude this face as well for thump like this. And now we can go and just the scale and adjust the shape of our hand. First, let's go and extrude this one more time here on the x axis like this. And as you can see, we have all this rounded edges. But we will need to go and adjust some of this. So let's go and select here and here, and here. So all this and v, g, and z. I'm going to pull this down and I'll stamp as well like this. Now I can go and go in selection here, inverted selection. Let's switch back to Selection, Select mode. And here I will go and pull this up, also those here. And now I will go and also do GNC here for this part here, but I will select only this part here to make this UI to look like a hand and also here this part as well. And so actually you don't need to start this but between Z and also this one as well. So like this and now this little bit here. So we are already getting the right shape between it. And as you can see here, we will need to adjust fingers a little bit more. So here I can go and in x-ray mode, I'm going to go and pull this finger slightly down. Also this one here. Let's move it closer. And now plus one is going to be this one here. This, let's go up and out of x-ray mode. And here, as you can see, we all need to scale this a little bit more. So this pink hearing. Let's see how they're looking so far. And here I will go and crunchy and z to move this up slightly. And let's go and convert this to the circle. So plus right-click and make this circle. I will do the same here. The circle, and get more rounded shape. And now I can go and select it, this part, and I can extrude it one more time. Now I can select everything and the g x, I can go and adjust its bed day shouldn't be. So toolbars here, let's say. Let's move it on the backside of that G and Y will go right up to the FAQ. And here, as you can see, we will need to adjust this alphabet better. So let's go and pull this here. And as you can see here, we are having issue because our cube isn't perfectly aligned in the meter soil press right-click and change dotted point to do back on our digital services middle of our grid. And now as you can see, let's go and add a little bit more. Shaped our hand. I will go in Edge Selection. And let's go and select this edge here. All this, I'll press right-click and to make circle. Now I want to do the same here. Plus right here. And this one is meant to be the same circle. I will do the same for this one as well. Now I can select this absolute here and also converts a dismantle the circle. Let's go and small disk stumble a little bit. That will scale this down. And as you can see, we are having issues, so we will need to kick this one. Let's go and scale this and also this part here, not the debt much. So let's bend around to see. And I will go in their selection and for example, let's write this down. So now we have pasted arms, hands, and, and the rest of our body. So that's it about this video. Stay tuned because in the next video we are going to create this under t-shirt. So let's go and move this out a little bit. And now I will go and select this insight. But I'm going to scale this up a little bit on the z axis, like so. And let's see, I'm going to slit the whole hand. I will scale it up a little bit and let's pull this out of bit out. Let's go into orthographic view. And here I'm going to move this slightly insight. And now as you can see, we are done with muddling our hand. And Clover disbarred slightly down, slightly down and also this one here. Or we can go and for example, pulled this down as well to make this more rounded shape like this. And maybe also this one, this one. And here we are done with modern IC. And for our R nought. So that's it about this video. As you can see, we are done with getting the whole body. And in the next video we are going to create this under the shirts. So see you there.
6. Modeling Shirt, Legs And Shoes: Welcome to another video in this course. So here as you can see, that did all muddling parts. And the last part that is left is going to be this under tissue that he is varying. And right now I'm going to unlock my reference image because I want to select it and make another copy here on the side. Now I will select both of these and disable those two from being selected. So now with the shifting a, I'm going to start with the this button part, Soviet shift and a I will go ahead and create another circle to our spin. And also not, not curve, but we will need mesh circle. And here I will lower down number of vertices to 16. We can go in edit mode and also just the size of it. So I'll scale this on the x axis. Now I can go in right orthographic view and press S and y to hide it inside. So let's go and see if it's hidden. And also maybe we can go and increase here the size of this part inside of this top part. And now here I will go. I will need to find my circle. Right here. Now we can go in x-ray mode and here I will go and extrudes the sparse down like this. So to about here. Now I will go and pull this front part. But before that I want to go and add edge loop here, actually subdivision surface. And I will change shade into smooth. And also I want to add solidify or modifier, which is right here. And I will go and place it on top of subdivision. You will always need to do that first. So we have something like this and I believe that thickness is good. So I will keep it as it is may be, I will change the thickness. And now I will also check this even thickness. So we have even thickness everywhere. So now let's go and add a little bit details so as you can see, we need to rip it off. And here I will press V for ripping off the vertices. And now for example, I can go and pull this here on the top. So per g and z. And let's go and see how it's going to look like. And as you can see, we will need also to do RIP here on this part. So o plus v. Let's move it here. And now I can go and select those two here. And let's go and move it a little bit here inside. So now I can go and select those two here. And now I can place it in front of this one. So let's go in and out of edit mode. And as you can see, we will need to pull this a little bit inside, so per g and y to hide it inside. And as you can see, we are almost there. So the only thing that I want to change is going to be this part here. And I will go and move it here a little bit in the front. Like so. So it's following this rule here. And now let's go and edit out of edit mode to see ferritin is a k here. Now let's go into just the backside. Backside as well. So as you can see here, I will go and select those two vertices and those two here and two g and z. I can go and pull this up. Also. Now I will select those last one here, like this. So let's see how it's going to look like. And maybe this part here can be done with those two as well. And now I will go ahead and select all these G and the backend, pull it up. And now I want to add edge loop here, like this. And I'll add edge loop here in the top part. So you can see we already made it here. So now we can go into just this just a little bit. So here for example, we can press z0 and z2 MOOC, pull this G and X to pull it on the X axis. Also this one here. We can adjust it a little bit. We have that back button that is showing us. And now we created that under under under T-Shirt that he is varying. So maybe we can go and slightly move this down one more time. And now I think we are done with modeling part. Now we will need color. So for the color, I will use the same one. I will duplicate it and now I will go and edit mode with X-ray. And here I will just need to adapt it, but before that, I want to do something. So here, as you can see, if you select our neck, we need to move neck a little bit on the back. So per g and phi to pull it back sides like this. And now I will add one more edge loop here in the middle. And with G and Y, I can go and pull it like this. So now is standing inside lake. It's supposed to be. And also here for hair, I can go and just had I will just go and adjust this a little bit to be more rounded. So maybe and go and pull this one down. And let's see an x-ray mode. So maybe I will go and pull this here. I will do is sliding on this one here on the top. And now I can go and pull this one here down. So now let's go and continue with our color for t-shirt. So let's find another circle. It's right here. Let's place it on top. And here I will need to scale this on the z. I'll first return urgent point to the center of the mass S and Z to scale it down. And now in edit mode, I will go and adjust those settings here. So here I will go and grab those two. Let's Move, move this one to the side. Now, I will go in right orthographic view. So let's see how we're going to look like. So as you can see, we will need to pull this head up with all of these bullets to look something like this is going to be fine. And now I can go and place it where it should be. So here in x-ray mode, I'm going to go and rotate slightly and place it should suppose to be. And now I will go and select XA modes. And here I will need to scale this on the x axis. Now, I can go and pull this one here on the back, so G and try to pull it back like this. And now I will go and select this button part here. And I can go and scale this up. Let's go and select this part here. So we can lower it down slightly. And I think we are done with all details. So now here if you want, you can go and increase a little bit thickness. So let's go and add even thickness. So I will copy the same size here, and I will use it on this bottom part. Let's place it. And I believe this is way too thick, so let's go something like this. And here also I will have the same n. Now we are done with modeling part. So that's it about this video. Stay tuned because in the next video we will start with importing our character and the mixing of air we are going to find pose and also eke our character. So see you there.
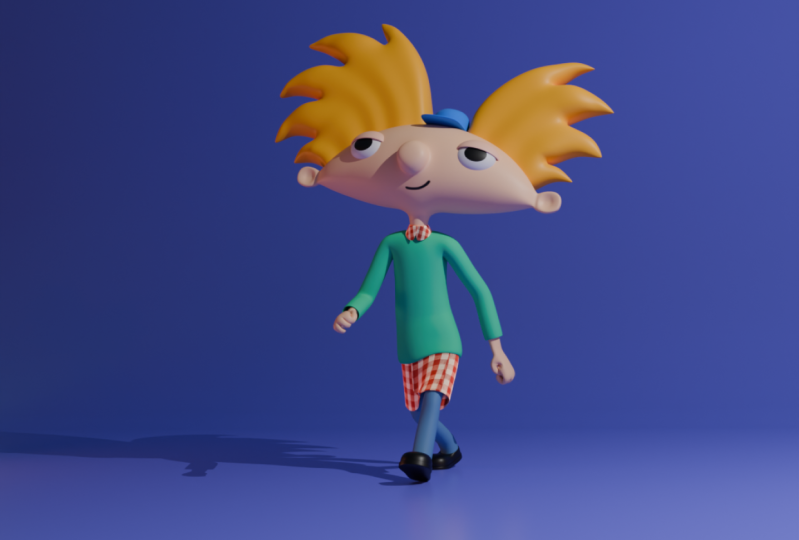
7. Final Modeling adjustments And Mixamo: The body and welcome to another video in discourse. So here as you can see, we are done with modular part and now I'm going to do a final muddling adjustments and also prepare our on Mondale for ageing and also an emitting imposing Caswell. So first, let's go and start with this shows. So they are a bit too big. And right now I will go in EHR selection. I can select this edge here, scale it down. All of this. Now with this face here selected, I would bet G and try to return it, beck. So I just adjust the size of it. Maybe we can go and scale this also this back part as well slightly. So let's go on the site. So just like with scaling down. And maybe now I'm going to go and move this a little bit more and scale it down as well. So if fixed shows enter Now I also want to fix hence as well. So here you can see that they are way too small. So I will need to scale this up to by pressing out and S to shrink scaling. So to about here and the G and X, I will move it a little bit more in the front, like so. Now I can go in top orthographic view and I want to adjust the size of these fingers. So here in vertex election, I'm going to go and written this middle finger to be perfectly straight. And also this one here. Lets go and throw it over here. And now actually I can select this edge loop here with x and 0 make perfectly state. And also I will do the same here for those as well. And right now I will go and select this edge loop, move it to the side slightly. The G and Y. And also i was killed is done as well. And now let's go and select all of this. And with the G index, make these a little bit longer than before. So let's go out x-ray. So here I will go and Skill Each of these slightly like this. Now, this slightly Beck, also this one here as well, like this. And also I want to adjust the scale of this dump dot part. So I will go and select all these vertices. So let me just go and select this face here. Let's scale it down and moved here like this. And now as you can see, it need to fix to lower down this part here. So I've got g and z to pull this down. Also, this part here has gone to site. And here I will go and best G and see if the code is done up and here as well. And we'll do the same. And right now I will go and kill this on the z axis. So now they are looking a little bit better than it looked four. Also, we can go and scale this part as well called bit under z. And also the last one is going to be this part here into S and G. So I can scale it down. Now we are done with modeling. And, and now I'm going to fix the issue with this top part. So I will go and x-ray mode. And here I'm, I'll go and scale this up slightly like this. Maybe a little bit more, and a G and X, I will go and pull this a little bit more in the front. So let's turn off our x-ray mode and see how it's looking. And now I will go in on the backside, on the right, the orthographic side actually end with g and z. I can pull this up like this. And now here I can go into just also this color as well. So with the GNC and I can pull this down a little bit. And now we fix also this top part. And now I want to also focus this a little bit more on the head. So here I will go and select this edge here and pull this up. Also this one here. I'm going to move this one to be like this. And now I think it's following Better shaped and before also this top of the hair pet, I've needed to move this on the backside. Now I want also to do a little bit modification here on this on this ISIL set object to the center of the volume less than of mirroring for now also right here. And now I want to go and move this a little bit in the front. Now with vice, I will slightly rotated and let's go and pull this closer, like this. And now we can go and apply mirror modifier that on. But we will need to go and return center, center of this art into where the cursor is. I will need to do the same also here, right click enter, Return my origin point to the center. And let's go and maybe we can go and slightly more those here. Let's see. And I think we are done with all these details. So maybe the only thing that I want to go and do is going to be a rotation of this source until this is going to be just fine. And also, let's fix just a little bit more. So I'll select this button part. Will this insight also this one here. Let's see how it's looking so far. And actually you don't need to go and also due on each of these. So here I will select because we delete mirror modifier because of the nose. So I'm Reggie and z to pull this. It may be this one and this one we can go and slightly move this down. Let's move this also, have it down like so. And I think now it's matter may be a bit more down. So plus S, Z and 0 to make it perfectly aligned on the z-axis also right here and here as well. And now let's grab those here and pull it down. And now we are done with modelling. So maybe we can go up also. And here, inside of here we have this small dot. And for example, we can go shift control and B, if you wanted to babble this out to create a new phase. Here like this. And for example, we convert G And by to make hole inside S and X to scale it on the x-axis. So now we have this whole four year. So now we will need to prepare this for Reagan in myxoma virus. Myxoma is a free software for ageing and animation. And T will need to export this one to the, to that web page and that software which is online. And you can get account for fee to create an anteater. It's made by Adobe. So before that, let us go on each and apply all modifiers, soil pest control and a, or it can go here, apply and apply all this. Now here I'm going to increase number of subdivision. And now for each I will go and apply and all these modifiers by pressing control and control and a. So here. Also you can follow here as well. So right here and here. And now we have all these modifiers applied on. So next we are going to go and get rid of our action. Let's hide our reference image for now. And also they're going to hide camera and this default point flight. Now with the left bleak. And I will go and select all these meshes here. I will go under File Export, and I'll need to export as FBX. And here I will go and export in on our, on my desktop. So here I will go and call this R naught. And you can just press Export and expert i dx. So now we will need to go and open our internet browser. And here there is a website which is called myxoma.com. And here you will need to create a new account. And now this page is very helpful and useful when it comes to drinking, get the emission because it's coming with a preset rigging and visit an emission and poses as well. You can use for your character. So right now, here on left, on right side we have this upload character. We can select our character file. Let's navigate to our Arnold FBX. We can select this to be uploaded and is going to take some time to be uploaded on dismissed Samovar page. And once it's done is going to be shown here how your model is looking. N2, you will be able to set all these points to, to, to recur character. So now we can see our character here. We can press next and here we will need to drag. Those points where it should be. So we need to chain. Chain. Here is a wrist. Let's place it where it should be. Something like here. Let's place elbows here, nice. And growing to about here. Now I'm going to select next and now is going to take some time to be really good. And later on we are going to select both for our character. And here are going to download it and import it back. Dean, burn there where we are going to do apply materials and prepare our character for final render. So as, as you can see here, it can take up to two minutes. So we will need to wait a little bit. So as you can see, our aging is done and we can see the preview of our character. So you can see how it's looking. Nth Now I'm going to press Next and here as well. And I will go here under animation where we can go and select an emission that you want. So for example, we can select this and preview our animation on our character hurricane IS looking. So here you can see that how it's going to look like when it's shifting. And you can try each of these and later on imported in Blender and also create animation for that as well. And also here on the right side we have some, some settings that you can play so we can select a character size and also I will dry. And if you want to be mirrored ID, we can select those working backwards. And there's a lot of these poses and animation that we select and us for our animation. So right now I'm going to serve for samples. And here you can see that we have a different poses that you can select. And I want to go with something by this. So it's a walking bows. And as elder dimension here, you can select your character and space. And for example, if it appears it is going to spread arms a little bit. So let's lower it down. And as you can see it also IQ and position these fingers as well. So you can see how it's looking. So let's see if we have any issue here. And now we can go and select a download. And here we can go and select if, because this is not an imaginary, we can just go and select a download. But if you're selecting this animation, you can select, you can select how many frames. Frame per seconds is going to have your animation and set that the same value in your vendor file. So now let's go and return it back. And here I'm going to input our FBX file that's been cut from myxoma virus navigate through that. They're so it's a male, a male boss. I will go and select this input. And as you can see, it imported our character. So right now we can go and move our previous character here on the side. You also have this hat as well, and I believe that we have the small dot forehead. I'm going to press G index to move disc the site all of this. And now with altitude h, I will go and unhide our our character, but depart so much more discipline as well on the site. And now, if you will enter this overlays, you can see your character. It's right here. And we've got the, the samples that we got from the maximum. So that's it about this video. Stay tuned because in the next video we are going to apply light. And also we will prepare our character for final render setting. So see you there.
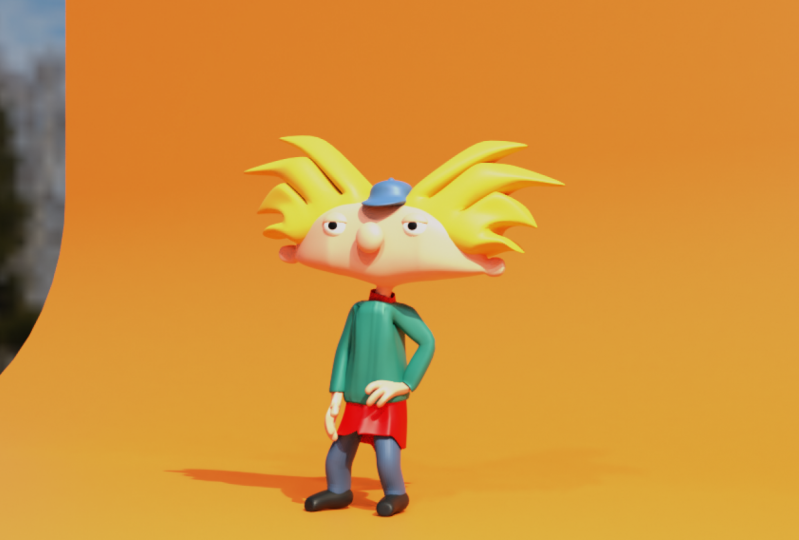
8. HDRI,Materials Texture Painting And Final Render Settings: But the end welcome Todd, lasted in discourse. So here as you can see, we've got both from myxoma and now we are going to apply lightening and also materials and prepare it for final under settings. And as you can see, I organized my scene two bits. So here I got all my previous measure that I created to the backup mesh, moved in a new collection, which you can do by pressing M end here can just press move to new collection or you can select over the existing one. And I also delete it and get rid of all these necessary. For now. Files and objects like let's and also camera and one extra reference image. And also I return my transparency to one, to one customer to grab these colors from our reference image. So first let's go and hide my previous collection. And also I added this field there which disable these measures from being rendered. And also I'm going to disable this from being selected render at NTU in viewport. So let's go and add lightning. So further flattening, we're going to use HD, right? Or you can use custom, custom whites in Blender. But because I'm currently recording, we will not be able to set up the good lightening in cycles. So we can go here on edge data, I haven't dot com. And here under ADA rice, you can find different environments that you can use for your lightning. You can select any of these and save it on your desktop. For example, select something like this. And here you can see the preview of your materials, how they are going to behave. And here you will be able to select the size of actual the resolution of your environment image that he can get. So you can select this and save it to your file. And now let's go and open our blender. So here under shading, I'm going to go and change from object to world. And immediately I will go and find environments, texture. And now I need to plug in this two color. So right here I'm going to navigate here to my abundant environment, texture that I got from Asia Heaven. And now if you go in rendered view, you will be able to see, look, look, do you got for your under. So also here, don't forget to fish to cycle because she wanted to have higher quality of the Render and try it. Now we can go and also add backdrops over the shifting a, I will go and create a new plane to our scene. Let's kill this up. And here I will go and select these vec vertices. I can go and extrude this up. Let's switch to solid you because you can work faster at weed control and b, I will go and double this up. And also you can scroll up your mouse wheel to add subdued, to add edge loops. Now, I'm going to press right-click to change it into smart. And we created this backdrop. So next we will need camera. So with the shifted a, I'm going to bring camera vector c. And if you press 0, you will be able to enter in camera view or it can toggle it here. And now with the shift and shift and key above Deb, I can just turn on my screencast add-on Soviet the shift and gear box there, which is this dot here. I don't know the name of it. I'm going to navigate with my keyboard. And here I'm going to go and try to find good, good camera view. So let's say something like this. I want to be Arnold in the middle. And also if you go under camera here, you can go and turn on, for example, compositing guides here under compositing guys, for example, you can use third, you can use Center. And also, for example, you can turn on this base part out. Solvers go and position it to be in the middle, like so. And now as you can see, we will need to scale this on the x axis, sorry, S, x and N scaled up. And now if you go and render it here, you can see how your character is going to look like in your final vendor. So right now we can go and switch to material, material preview. And here I will go and add material for each of these. And this time I'm going to bring this in front, this image similar to the target. And now I can go and start grabbing the colors. So here for here I'm going to use eyedropper tool entry guts that yellow color. Now for the sweater, I will use once again, this base material. Now for pens and do the same. Also for shows, we are going to use just black, black material. So we can just lower it down here. And now I want to have this hence material the same as head like this. And also for this hat, I will go and grab the from the reference image. And also we have that top, top but also to be the same materials. So I'm going to apply the same material there. Now for this, for this color and also this T-Shirt under, I'm going to use the same as he does. Also here. Actually, I can go and select the same material from the list. Later on we are going to add those stripes on this material. Now, let's go and work on ice. So for isolates, I'm going to use the same material as we had for face. And now for this, I will go and add new weight material, but now I will need to go next mode. And here I already selected this rink, which will need to be black so I can assign new material and this stamp is going to be black, press assign. And also you can see that if I go out Vedic mode, you can see the T will got the same on the other side as well. So here I will go in render due to see how our character is looking. And also here on this backdrop, we can go and select any color that you want. So for example, you can select this orange color for now. And now we can go and work a little bit more on the details. So first let's go and unwrap the hat so I can go and select my head. And here I'm going to go and I will go into edit mode. And first actually I want to use shift and age to isolate it from other scene. And now I can go in edit mode and in top orthographic view with alt, I will select this Agile UP here, right-click and I will mark seam, which means that there's going to be where it shouldn't be cut. So here under uv edge Marxism. And now if I go and press a to select everything, you to unwrap it. Now if you go in UV Editing, we got two sides of his head, which is going to be just fine for now. And because we will not do any texture painting here, complicated texture painting, we don't need any extra details and extra work here. So next I want to go in UV Editing. And here I will go and create a new image, which is going to be a face image. Let's call it like that. And I will press ok. So we have created this image which will need to attach to our face. So I will go under shading. Let's see, homo vault to object vec. And with the shifting a, I'm going to serve her image texture. Now I can plug in this color to base color here. And here until this drop down menu, I'm going to select this face image. Next, under texture painting, we will need to paint this over. So it's very simple. Here we have this field tool and right now I'm going to press 12 without an H. Actually, we will need to only disruptors image for now. So here with the distal mode, if you go under here, this top, top menu here, we have colored here. And when I dropped the two, we can select this color. And with a left-click, we can just select, and immediately we will paint over our character. So next I want to draw them out. So we have this draw tool and as you can see, we will need to switch here color, which is going to be the first color here. And now let's go and return other as well. Actually, let's go in object mode. And without an H, I will go into turn the rest of Arnold. And as you can see, we didn't, we made them stake here when we applied texture image structure to our character. So I will go and back a few times. So under shading here, we will need to make this unique because we share material with the eyelid and also with the face. And here is that number three. It's telling us that this face is sharing the same material with three other different meshes. So I'm going to make it unique by pressing condition number here. And right now I can go and plug in this one here, face image. And now let's go and do the same process once again. So I will return my reference image field tool to fill the whole face here. Let's do I drop into left-click to fill this. And now I'm going to press out an h to return actually only two mode out and H to return. It does return it back to unhide it. And now I'm going to go and also turn on back my texture painting. But I'll first need to select my face textured paint. And here I can go and draw with this drove brush here. I don't need to change once again, here the color. And with Lastly, we can draw on his face as you can see it, but we are not drawing anywhere else. And let's go and stabilize the stroke. So here I'm going to go on top and scroll this here until we find stroke. And here I'm going to use stabilize stroke. We directly, I can go and change the radius. So let's make it something like this. And here if you draw, you can see that now is slow, slowly slowing down, and it's much easier to draw. So this is way too thin. So let's go to about ten, lets say. And here you will be able to draw the phase. So here we can make it bad s And for example, small smile. So I'm going to zoom in, let's scale this on 9. And here I will go into DO this face like this. And now I can start from here and this small arrow here. Solving this. And actually this is way too thin, so I'm going to go and increase it to 12. So let's go and draw here by this. And now I want to have small arrow here on this top part. If you have graphic, doublet is going to be much easier for you. And also I want to return it because here on this top menu here, I'm going to select the blend mode from mix to multiply. So now it will look more natural than before. Actually, let's go and do it one more time. This time, I will go and visit one more point. So something like this. And here I want to have the small arrow. And it's not. If you go in and render it, you, you'll be able to see how it's going to look like. And now we'll need to go out of edit, knock out of texture painting mode. And let's switch back to render at you. And as you can see, we got almost done here. So the only thing that I want to add is going to be here on this. In addition, I want to add those stripes from our, from our reference image. So let's find it. So I'm going to select it. And as you can see, we need to turn on other less. So we have these stripes here, but now I'm going to select this shirt material here. I can also go and add one more subdivision here as well. Let's increase it to. So now they are not overlapping antenna under shading here, I will go and switch to material. So first thing that we need to do, we need to add those stripes so we will need some textures. So this time I'm going to use this wave texture. Now also with the color ramp, I can go in and add colors to this texture. So now if I plug in this core to base color, you can see that those lines, and now we already got vertical one and we will need horizontal one. And we can switch it here with z. And also you need to turn on this add-on, which is not wrangler add-on. So here you can always keep it on and off, but you should always keep it on because it's much easier to work with him. So now for example, what this does is if you press Control and t, you will be able to immediately to go and bring texture coordinate and mapping together. So now I will go into duplicate this one and now I'm going to switch here from x to z. And now if you plug in this to this color here, you can see that we will go and have this horizontal lines that we need. So first, let's go and change the color here on our color ramp so I can go and use eyedropper tool. So here I will go. And for this black color, I can go and grab this yellow. And for this white color, I can go and grab this being red color. So let's go and move this to the side. So here you can see how it looks like. So now we can go and scale this a little bit. So let's go and make it something like this. I'm going to use the same size for this horizontal one as well. And here you can go and make it closer together. So we have separate lines and as I already mentioned, we will need to connect those two together. So with the shifting a, I will search for Matt note. And now I will go and plug in this first one here. And the second one is going to be up here. And now I'm going to use minimum and with the shift in D this time and we'll use AD. And the reason for that is because I want to, if you plug in this, you cannot see it here. How it's going to look like. If you increase the size, you will have some issue. But this time if you plug in this value here on this top part and now switch it here, you will be able to see those stripes. And now you can go and play with this value here. So if you move this almost here, you will have stripes like he got on his under Tisha. So as you can see, we immediately got on his color as well. And also, for example, you can play with this phase offset. So maybe you can go and push this up and down. And also, for example, you can play with distortion as well in detail. I'm going to bump up my detail, roughness on one. And also here for example, you can play with the scale, but I'm going to keep everything as it is. And for example, here, you will be able to select how smart are going to be an in-between your now your colors Solara. Right now we can go and continue with Final Render Settings. So let's go and search to render due to see if everything is okay here. So maybe we can go into our cameras slightly down and here and the settings. And let's go and see all the redneck vendors. So here for the samples they can bump up this, for example, 1400, and don't forget to turn on denoising here. So the next, but we can do, we can go under color management here. And for the look, for example, we can select this medium high contrast contrast. So if you want to add a little bit more dynamic and contest to your scene. And also, for example, you can use curves here. And now you can play with it also this line here, if you want to add dark, dark color here, and also to brighten up your final render. So I'm not going to use any, any of this here for this output settings. You can select your resolution. So let's make it square. So this time I'm going to use 100 by eight into 100 by 80. And as you can see, we are having issues because we are seeing this, this back here. So I'm going to zoom in with the shifting Kaikeyi. I will go in your camera view. And now I will go and use also my camera once again. And here for this, I'll turn on my depth of field. And let's select we want to help focus on his face. And for example, I'm going to lower down the the F stops here. And also, for example, you can play here on this top part with the focal length. But I'm going to keep man as it is. And also you can always go and select Europe from perspective to go in orthographic view. So I think everything seems done and ready to be rendered it out. So let's just see our output settings. So for the final file format, I'm going to get PNG. And here you will be able to select your file, various made to be saved. So let's go and rename this one r naught. And I'm going to keep it here. And heritage seems done. So if you go under render, you will be able to render the whole image. So our rendering is going to begin. And that's it about this course. I hope you had fun and I hope you learned something. And I believe that you ended up with good projects that you can show to your portfolio and austere audience on social media and see you in the next course. Bye.
 Nodiken 3D, 3D Artist and Animator