Transcripts
1. Introduction: Define yourself, doesn't link while on the phone, or daydreaming in the classroom or at work. While then you are most certainly an artist. All you need to do now is learn how to draw while you've come to the right place. This course is designed to give you a maximum amount of knowledge for the minimum amount of effort. All you need is a pen and paper. So why is it important to know the basics of drawing? While this is basically the alphabet, are drawing one you now, the alphabet of drawing. You can choose which of rules to follow and which rows to break. You will have a solid foundation on which we can build your style and your artistic development. During my career, I have been able to draw in many styles. I've worked as an illustrator and animator, storyboard artist, and even portrait artist. Knowing the basics of drawing, I could experiment with styles, but the basics of drawing gave me a solid ground on which I got to experiment and develop. So what will you learn here? We are on line drawing in perspective. Shading an object structure and shading of still-life composition helps to draw a portrait using basic shapes. Finding your own artistic manner, and many more insights, tips and tricks from my professional life.
2. Materials - In this video you will learn about what kind of pencils and erasers are good to have.: So here I am going to talk about materials and UDL, but now we're going to use a normal pencils. And what do you need to know is the specification of these pencils and why is important to use different ones. Now, there is a number in here on each pencil. This one is, for example, to be, and this is three b, for B6, B and 80. There is also HB and numbers below HBS, HB, so to say it's the number 0. And what do these numbers mean? It means that the thickness of the pencil, the lines they're given N is different. The higher that number from a to B or to be, the darker the stroke and the shading is. Now let me give you an example. Now this is to be, and I'm going to do an equal amount of pressure. This is three b. And it starts getting a little darker with the same amount of pressure. And this is for B. And you see that it gets even darker. And this is 60. It's even more. And this is eight b. And it is darkest. There is also nine B as well. But I am going to use mostly these pencils. The importance of that is that E1 to start with to be or for b, what do you find the structure of the joint, which means that you want to lightly draw and you don't want have a thick lines on your block. You want to be able to erase those lines. And later on, when you are sure when you do your whilst draft your, your last lines that you're drawing, you can put accents on your drawings with eight beats. Basically makes lines darker or shades darker. This is something that I'm going to talk about later on in this lecture. So about erasers. Here are three erasers. Are, these are pretty similar. So what is important is these are hard erasers and you can use those in the beginning to erase. But the more, the more shading you add on new picture, what you would want to do is gradually erase a shading or a tone. To do that, you can use this kind of eraser. This is from the brand cocky not there are other brands as well. I'm not making any advertising for a company here. But these are basically these big, looked like a chewing gum. They are all a plot de, are so you can basically just drag them and just pick a piece of them. And when you start squeezing down between your fingers, they becomes soft. They become like a plus Paulina. And the moral hall that mean you hand the software they become, and you should not hold them too much in your hand because then they will get dirty. So the more you erase, you can take away a shading like that by just doting on the shading and you see that you can just erase a little bit. You don't have to erase everything. That's why they are useful. They are also very forgiving to the paper, then they don't tire down the paper, so to say, because the more shading you add on the paper, the more exhausted the paper will become. So you need to be careful. So that's why you can use this kind of erasers and you can use those a couple of times until they become, they become absolutely dark. They will they'll soak basically the pencil. You can just go visit him and tried to find a cleaner area. But at some point, you will of course, need to change that because it will do more harm than good. It will leave darker spots on your on your taper. Instead of erasing, you can use that for a long time. These are a little bit more expensive from the artist store than this one. And I would suggest that you don't use scan of children theories are.com along children packages with colors. And so because they are very hard and they get dirty on the corners, are a lot like here. You see this eraser can get dirty and then it can leave traces on new drawing. Now this one is pretty good. It's it's a Faber Castile. And this one is erasing even the dark parts. But some of the erasers, they don't get rid of this black spots and they just mess up your drawing. So the other thing is how you sharpen your pencils. This is very important because the draw, the pencils, sharpening them with a sharpener is not the ultimate way. And, uh, for those purposes, the batter are, the better solution is a mike like dots. And what you do basically is you start from the site, you hold a pencil like that, and you start easily sharpening them in this way, gradually and easily. So you get a longer part of the pencil here, which you can't get when you sharp on wisdom sharpener. And also you get on a better tip here on the pencil. And you're going to use both. Your going to bulk draw with more free hand. And you're going to loosen up your hand to draw more adds an angle rather than like dots. But you will also be able to use the points out of pencil and gas. More thinner line or more precise line like that. So that's why using this kind of pencil and just sharpen it until you get a nice pointy like that. And you see how much more of the graffiti regard here. So we can elaborate on what that size with that one and start drawing. So these are the basically the main things that you need to know before you start. And that's it. So let's get going.
3. One Point Perspective of a Cube - How do you draw perspective and what is a Horizone line? How do yo: Hello there and welcome to the first lecture of this drawing course. I'm going to start the lecture by talking about perspective. Perspective is a complex matter. It is very important to know perspective to be able to draw the shape, the right placement of the objects, the right proportions, and the right place it. Although as a beginner, this can be a little bit confusing and to be honest, a little bit boring. So just bear with me while I go through this basic principles. And I'm going to take only three shapes. I'm going to take a cue, our cylinder, and a sphere. And we're going to use district shapes throughout or in lectures. And I'm going to show you how to use them, how to apply, apply this basic principles of perspective and later on on shadow to draw whatever you like. So I'm going to try to be as simple as possible to explain to your perspective is because this is a beginners course. This can be a very complex IV gene. You can go in depth and perspective, but I'm going to try to be as simple as possible so, so I don't bore you out and you just give up altogether or it just gets too complex and you can't understand what I'm saying. So what is a perspective and what is the horizontal, horizontal line of a perspective? Let's say we have a person here. I'm going to draw a head with the notes symbolically, very roughly. And let's say this person as at this length intos going to schematically draw this guy here, this person. And here is his eye. Now, when the person is looking straight ahead, he is. I will eventually reach a point where the horizontal line is straight and the line that is his horizontal line is aligned with She's eye line with the line of his eyes. So for this person is going to be approximately here. And this is the horizontal line of this person. Now, let's say that we have a small child. So a small child which had is over here. Let's just draw this also schematically. Have child speaker and the nose. And here is the child I. Now the child perspective is going to be on this line. So obviously his parent and the child will have completely different horizontal lines and they will see the objects in different perspective. Just to clarify what it means, I'm going to draw a cube over here. One is here, one here, and one over here. Now, these cubes are aligned, have different perspective for the child and the parents. This cube is below the horizontal line of both the child and the parents. So although they will see the cube differently, we assume that we see that we have a vanishing point. This is something I'm going to talk about in the next lecture 19. Take the perspective for the queue. Just bear with me on to explain that. So let's say this cube have a vanishing point, assuming that we are looking at the cube from from the front. So this vanishing.40 child, it means that if the child terms this way and looks at the Q From the front, like the child is over here. So it's going to have a vanishing point on the horizon line. For her father. The vanishing point is going to be over here on his horizon line. So it means that when we try to find the perspective for this cube, this will be the sides of the cube, or just connect for the vanishing point of the child. And if we assume that we see the cube transparent, if we have lines here and here. So the cube for the child will look something like that. But the cube for the parent is going to have another vanishing point, which is going to be like that. So if we continue, if i'm those lines here, we connect them like that. Which means that the cube will be much wider, which means the father will see much more. There are upper side of the cube then the child, well, because they have different horizontal line. Now, this cube in the middle is going to be completely square for the child. But it's going to have, again, this vanishing point, but the father. And it's going to be something like that. If we connect these lines and we assume the cube is transparent, the father will see it. Something like that. And this cube is above the horizontal line for both the Father, the father, and the child. It means that for the father, the vanishing point is going to be over here. So they're not going to see the upper part of the cube, but the lower part of the cube, both the father and the father and the child are going to see the lower part of the queue. But for the father, this can be much less of the law of part. While for the child who has this vanishing point, the angle of this cube is going to be much wider. It's going to be seeing much more of the law part of the queue. So this is just a roughly to explain what is perspective is basically the line that aligns with your eyeline, with the line of where you're looking at. And the perspective line changes for every person, depending if you're standing on something on something on a chair, YOU perspective line will change if you're shorter, if you're sitting down or if you're laying down if the father now go on and lays down here and just relaxes. Let's just set a crude drawing of the father or relaxing on the grass maybe while the child is standing. And he's just casual here. I'm just drawing it schematically. I don't care so much syndrome, nice features here. I'm just trying to show you the principle of the horror horizontal line and the perspective. Now, why is this line? It's over here, which means he is horizontal line will go even lower than the child. And in we have still the example of these cubes. Well then they're going to be, all of the cubes are above his horizontal line. So let's continue with just bringing this cube and going in more details to show you the different principles. How much of the queue, your scene, and how to decide where is the cube placed according to where you stand and why you horizontal line things. I'm going to do that in the next lecture.
4. What is One Point Perspective and how do you draw a cube then? This is the lecture that will explain: Hello there and welcome back. Now let's go into depth with the perspective of rows. And let's start with the cube. In this lecture, I'm going to use a basic ruler just to make things more cleans for you to understand among get too messy. You can use that or you can just draw very roughly as I did in the first lecture. The main point is for you to understand the principle behind the perspective and how this changes the way we see the object. And the main thing that q. Now let's draw the perspective line and assume that this horizontal line here. And let's assume that we have a cube. And I'm going to talk about now 1 perspective and two-point perspective. And what is the difference between them? Now let's assume that we have a point, a vanishing points. And vanishing points is the point where all the lines are disappearing in the distance. You are now when you look at, for example, the railway city in the railway station, you can see a very clear example how the lines disappear in the distance. It's not because the railroad gets smaller, is just because the perspective is changing your perception of how they disappear and God gets smaller and smaller in the distance. This is basically the simplest way for me to explain it. So let's assume this is our vanishing point where the orange line disappear 1 and we don't see the cube anymore or the lines anymore. And let's assume we have one cube below and above the perspective line. Now, if we have perspective with one vanishing point, means, it means that all the sides of the cube will be perpendicular to or horizon. So it means it will have a cube. Let's assume it's one over here. And we are going to see this cube from from the front and the vertical lines are perpendicular to the horizontal line. So we'll just have one over here. And we'll just drag one over here. And mosaic the ABL line. Over here. It's parallel to the horizontal line. So there is no difficulties in that. I'm just going to draw these lines and drag the line for the other tq. Because they are exactly the same. They are there two sides are vertical lines are perpendicular or parallel to the horizontal line. Let's have one on the horizon, M1. Now I'm not going to have its place. Let's have one above, above the line and above the horizontal line and one below. And I'm going to draw on here and I'm going to eyeball the cube over here. So these are the front sides of these cubes. So how would we decide which sides of the cube? We see? Well, one thing is that every corner of the cube, this one, and this one connects to the vanishing point. But here, let's do that. Let's connect all those lines, even among those that are behind the cue, to the vanishing point on the queue. And this one here. And let's do that to deal with the other tube. So you can be as precise as you want to be. You can draw it out pretty quickly just, just by hand if you want to. But it's a kind of a relaxing exercise. At the same time, if you don't want to get too technical. This can be a little boring. I can totally understand that. But when you know that already, it will come naturally to you. It will get build-up in your system and you will not have to think too much about the lines and want to connect what not to connect, you just know it. So how do we decide where the cube ends? While it's basically, there is no the right way to measure it. Awhile. There could be, but I'm not going to get too technical. I'm just going to assume that the cube, the other side is over here. I'm just going to draw one line here and 11, one line here. So this line here that is intersecting the line on each side that is intersecting with the other parallel line of the backside of the queue describes basically the outside of the cubic going to see in perspective the same here. Now they're intersecting lines for the lower part of the queue, because now we have a cube that is above or perspective wine or horizontal line. This will decide what line we're going to see over here. And now, if we want to see where the other lines are here, what we'll do is take each point of this corners of the cube. And what you do is you just draw a perpendicular line down, downwards. And here you do it with the other point like that. And same here for the upper tube. You just connect this point here up and you just draw another perpendicular line. And what you get here now is two new points where the lines of the cube crosses, which is this line, this point and this 0.1 does it gave us, it gave us the backside of the cube now and draw as if the cube is transparent. So I'm just gonna connect dot and here, where are those points? Obviously they're here. And here. Just has to be precise. So it doesn't have become twist it. So it's approximately over here. So from all this mess, I'm just going to make the lines very thick here so you can see exactly how we got the queue. Now, these are the front side of four cubed. This is the side we see. And this one is the side we see. And hear from. The QFD does is below or horizontal line. These are the sides and these are the backside of the cube, as if the cube is transparent. In case we need to know exactly where the cube is standing, which we will do for later purposes. Also, to show you how to draw the shadows of this cube. So this is basically very simple way to explain 1 perspective and how you basically decide your perspective with this, this applies to the cube. The cube is lower down. It means that he will see more of this part is going to be more open. Or if the cube is more up and until it comes to the top, if you look straight up, you will see just the lower part of the cube or the cubist just below, straight down of where you're standing. Eoc just the upper part of the queue. So now I'm going to explain the two-point perspective in the next lecture.
5. Two Point Perspective of a Cube - When and how do you use a two point perspective?: So now let's continue with from where we started with the cubes. And now let me talk about two points perspective. Let's assume that this cube is slightly turned, so we don't see the cubes from sight, but we see the cubes corner. So if we see only this corner and this corner will still be perpendicular to or a need to degrees of the horizontal line. Let's draw this one here. And now. If we have the same queue, if you say this is the corner of our Q, approximately over here. Now, how do we decide who are the other two sides of the cube are? And these come with 2 perspective, which means that these lines are not perpendicular. They are not parallel to the horizontal line anymore, but they're also changing in perspective. Let's say, how do we find that? We find a point here in the horizon? It depends how this cube is turned, what how we decide up is while we observe in real life through a live drawing and so on, did here, we'll do just an assumption. And we have another point that is going to be over here. Let's assume that is over there. So what it means to find the other sides of the cube, and what we see from the cube is basically connect the two sides of the cube of these corner to each these two vanishing points. So we'll have one here and we'll have the other vanishing point. Then. This is basically clear mathematics. And so far, it doesn't have a lot to do with creativity here. Because we are trying to copy a real life. We trying to create the illusion that what we see in real life is basically applied correctly on the paper, and it applies to certain rules depending on our vision. So how do we decide the two sides of the cube? Well, this is just an assumption. And again, if you have this cube in real life, you will see that you can measure dots with a line or aligning into other objects, which I'm going to show you later on. But let's assume that the other part on this side of the cube is over here. So just draw another perpendicular line, or 90 degrees from the horizon, the horizontal line. And do that similar on the other side. Let's assume it's over here. Now we have two other points which are crossing with the lines that connect to the vanishing points. And now we have two more points to connect. So connect this line to the vanishing point. Over here. As you see, the line is already connected to this vanishing points. We don't have to redo that, connect this line, this point, to the vanishing point. Let's do that. And I also connect this one to the vanishing point, the A-site. Again, it already connects. It is connected to this vanishing line, and we have one more line to connect, one more point to connect and to find another line from for this cube like that. And now we see that what we find is a point over here where these two lines are vanishing point connect. And you see automatically that actually if we've done everything correct, the point here and the point of this line will draw a line that is exactly perpendicular or forming 90 degrees above the horizontal line. And yes, it does exactly that. You see and hear. What we see now is that the two sides of the cube and not only one-sided perspective like it is here. So if basically this is the side we see of the cube. This is the upper part of the cube that is because it is below the horizontal line. And this is the other part that we see here. And now we can do the same for the upper part, but let's change the vanishing point. Afford a cube that is above the horizontal line. So let's just go ahead and draw again the corner of the cube. Let's assume it's, it's over here. So this point and this point. So let's use this vanishing point for this Q2. But let's stretch the vanishing point for this job over here. Again, where the vanishing point is depends on where you're standing and which side you see the cube, how much you see from it. And this is something that we can experiment with an observed from real life drawing. That's why it's very important to draw things from one. So let's connect these points again to this vanishing point, this one as well. And now we have a new vanishing point here. Let's connect down here, and let's connect it on the upper point here. Okay? So now we assume that the queue, this is the sides of the cube. Let's stretch these lines because they're aligned need to, need to degrees 90 degrees where that Q with the horizontal line. So one will be here, and the next one is going to be here. Let me draw the rest of the lines so we complete the cube and you will have a clear picture. What I'm talking about. So connect this corner, this corner, and this corner to this line and this corner. So this lines. And what is left to do is have this point here. And now let's connected to this vanishing, the new vanishing point M. Again, if you've done everything right, there will be a point here and a point here that would be aligned. We'll build up a line that is 90 degrees with the horizontal line is perpendicular to the horizontal line. And you see that is pretty much correct. So we've done things right. So here we have a cube that is above our horizontal line. And the size doesn't we see are the sides. And as you see in this queue, when Miss changed the vanishing point, we see much more of this side of the cube rather than this side. And the next thing is that if we have the cube on the horizontal line for both cases, here, we will not have any changes of the cube. See one square, we will not see any other side of the cube. And if we have this one, then you will just have, we will have this line here. If it's exactly on the horizontal line, will have two new points, which will be connected again to the vanishing points here. And here. Which means that we will see on the two sides of the cube. Now we have this side here. And if we continue down with the site and connect this time the line to the ultimate fishing point. Here. And here, you see that we are not going to see either the lower, the upper part or the lower part of the cube. But we're only going to see the two sides. This one and this one. Just to clarify, I'm going to just make these corners darker. And you see how we built these blocks and how the perspective and the 2 vanishing, vanishing points change how we see the cube. So I hope this was not too confusing. As soon as you get a grip of it, we will find that it is even fun because suddenly you get a perfect cube, perfect perspective. And I have used a ruler on purpose because you need to have positive feedback from the get-go when you start drawing. And this is very easy to achieve. I can just use this mathematical principles. So I'm gonna go ahead with the next lecture and the next shape that I'm going to show you the perspective of. See you there.
6. Perspective of a Cylinder - How to use perspective to draw a Cylinder?: Hi there. Now let's continue with the next shape with a cylinder. And we are going to use the principal with the cube to show you how to make a cylinder in perspective. And here we're going to use only a prospective below the horizontal line and 1 perspective because the cylinder is round, so no matter from one would look at it. It doesn't have two sides obviously. So let's have a one-point perspective here. And I'll start with designing a cube. So I'm just going to draw a line straight down and just draw another line that is perpendicular or 90 degrees with the horizontal line. And another one here. Just to design the cube. That's not very even, it has to be a little bit more on this side. I'm just going to do it approximately. And now, let's go for the upper corners of the cube and the lower part. Now how do we go about to and to create the cylinder out of that width will connect these points on the queue where the vanishing point here and here, and for the lower part, here and here. Now again, let's find where the upper part is. Let's assume the cube and over a year, and it's again parallel to the horizontal line. And now we have 1 here and 1 here. Let's draw 90 degrees line down, vertical line to find the next point. And let's do the same thing here. Find the next point. Now, our calculations is a little bit wrong or mind, because this point is far away out. So obviously this line is wrong. But it's approximately, let's say it's approximately over here. And just draw the parallel line to this point here because it looks more correct. And now it's intersects here where the other vanishing points. If you do this correctly, it will align perfectly. So now we have a queue as you see a transparent ones, I'm just going to thicken this line so you can see it clearly. So how do we place a cylinder over here? Basically, the upper part of this lines will, will be the upper cylinder. So what do you do is find the middle point here on these lines. This is where the ellipse we'll touch on the site. And you will need to find approximately the middle line of this cube here. So it's approximately over here. And the middle line of this points will form the curvature of the cylinder. Now, you will have to learn how to draw the other because they're not exactly even the cylindrical. This elliptical lines like this one is more narrow. This one is more open. This thing you will learn from drawing over and over. But this, this is going to be, placing this in a cube is just giving you guidelines. It is, it's helping you to, to draw this cough spheres while you're learning how to draw. It's going to take awhile but don't get discouraged. You can draw this line couple of times like that until you get used to. Because even I can do that. Even I do dot icon. Draw the lines perfectly. And the more lines you draw, the more, the more you get the right shape after awhile and you can always erase it later on. But because your studying here on your learning, you don't have to worry too much about. Making mistakes. So how do you find the middle point here for the lower circle? Well, basically, again, connect this point here of where the ellipse, the ellipse touches and done the upper part of the queue and draw a vertical line of need 90 degrees to the horizontal line is approximately here. And connected with one parallel to the parallel line to the horizontal line. So here you will find the other two points on the sphere of the ellipse and again connect them with each other. This point, this point, and this point just make a round sphere around angle here. And as you see, this ellipse is much more opened them, the other one, because this one is closer horizontal line to the hormone horizon. And the lower you get with the cylinder, the Moore's, the cylinder will come closer to a complete circle. And if you look at it from the top, it will be a complete sphere. It cannot be l lips anymore. So now we have the lower part of the cylinder. And here we will connect the end point of this cylinder of this ellipse here, where the lower part of the ellipse for this one. And this one. I'm getting these deviations here from the main form because somewhere my cube is not perfect. But this is just to show you that the more you do it, the more you understand the principle. And you will learn how to make this shape. So assuming that we have a cylinder here, I'm just going to shade it. So you can see that gets a perfect cylinder. And the thing is that now we're seeing the back sides of the cylinder, which we are not going to do if our cylinder is solid. So just to show you how it looks like, I'm just going to erase the back part. The one that we actually don't see. And just save the cylinder. And you see how easy it is to have this perfect cylinder. So now let me show you one quick thing on with the cylinder and the perspective. If the cylinder is laying on the ground and this is a little more difficult. So if you just need to take a break, grab a glass of wine or whatever or pink or no, just kidding. So it's basically the same principle with with a cube. We will have here 2 perspective. We will assume that we have on one corner of a cube. And that vanishes over here. And I'll have a shorter part of this cube with a vanishing point. Let's say we have another vanishing point over here connecting the two points, like dance. And this part is going to be a cube while the other side is going to be longer. So I'm going to draw just a perpendicular lines here. And again, connect the vanishing points. This one and This one. Now here we have another cube. And what we do here again is that finding the middle part of these two points. And let me draw another line here so we can have the queue transparent so we can find the other elites of or cylinder. And this is over here. And let's connect also this line here. So now we have this cylinder laying down. And again, we find the middle point here and the middle point of this side. This side and these virtual beat exactly the same. You can also connect this point where the vanishing points here to find the other corner D Other middle of this side. And we can connect these points to this vanishing point here to find the middle point of this sphere. And now we'll just draw 90 degrees because this is a vertical line and all vertical lines are 90 degrees to the horizon. To find where the other middle point is. And to find the backside of the cube, Let's just draw another vertical line here, or connect this point to the vanishing, to the vanishing points. And this one here, now we have this one, this one. Let's connect this one to this vanishing points. And we have across here and across here. Now, let's draw or ellipse in this between these lines. This is something that you'll get used to as well from observation when you observe things and also from practice. So don't be discouraged if you find it too difficult. This is, again, boring, boring exercise. I mean, it can be fun for you. But this is so necessary if you want to learn how to draw. Because later on, when we start drawing from real life, you'll see that you will need this knowledge and you don't want to go forth and back and just wonder what I'm doing right now. How do I find a proper structure for this form or the shape? The thing is that the structure is everything. It's like building a house. You need to have the basis of the house. And you know, the skeleton of a house doesn't look pretty and doesn't look. It's not so much fun to do, but it's completely essential for afford a house. Now, let's connect the end part of the paragraph we see from the from this ellipse with the other part, with the other ellipse in the back here. And connect me to the vanishing point where it is to meet here. That's where or cylinder ems. Same here and the same thing here. This is d ending. Take the vanishing point and connect the tangent that aligns with the nth point of these obvious ellipse shapes. And now there are a lot of lines happening. So I'm just going to delete these lines in the middle. So you can see the cylinder. And here we have the cylindrical shape. Later on, I'm going to talk about shaming. So I'm not gonna take it now. But a cylinder with a perspective that is laying down a cylinder damage standing up. And here we have only 1 perspective, obviously because of the cylinder is round. So from which ever point you look at it is the same shape. If you look at the cylinder from, from top, you that perfect round shape. And the ending of the cylinder a will be just a smaller round shape. And the vanishing point will be somewhere here in the middle. And this is going to be the inside of the cylinder if you're looking from straight from above. So I hope you enjoyed this lecture. I hope they're useful and easy exercises to learn how to draw and I'm going to continue with the next lecture. See you there.
7. How to draw a Perfect Sphere - As a beginner, it may be difficult to draw a perfect sphere. Here is : Hi there and welcome back. Now we're going to talk about the perspective of a sphere. And as you understand, no matter from where you look at sphere, a sphere is a sphere. So there is no perspective rule of how a sphere changes in perspective, except if it's an extreme camera angle with a lenses and so on. But we're not going to talk about that because the only thing we're going to talk about how this looks in real life. Now, when you draw a sphere, it can be a little tricky because if you're not used to drawing, you might find this very difficult. So what I suggest is you just go at an angle and with a very loose hand, just draw a sphere. Does move your hand at drawing a sphere a couple of times and move it from the shoulder down. So use all your arm to draw that. Don't do tests from the wrist. Don't do white dot. That can be a little hot and you'll find it frustrating adults. You can't draw a clean sphere. You get used to it. And just do a couple of times until you get kind of, oh, very nice sphere shape. You will see where is the most wine that you're kind of getting a nice shape of a sphere like that. And let's decide where or horizon was going to be the horizontal line of a perspective. Let's say it's here. So let's draw it with a ruler, just to have a cleaner drawing. And to give ourselves a little bit courage to see that we are getting done. Or drawing is clean because when you're a beginner, every single steps that encourages you. You can see, well, I can do that. This is easy. I can, I can go from here and continue. This is going to motivate your motivation is very important when you start drawing, because many people think that they can't draw and they give out for it too easy. But it's practiced that is most important. And to be able to practice, to continue drawing, you will need to get some small steps that monitor each you and make you keep on drawing. And now that I have this sphere, I'm going to use this eraser. It's from coffee nervous specifically this one is basically a soft one so you can just tear it off. Tour of a piece ends. After squeezing a couple of times, it becomes soft. And why is this useful? Because you can easily, in the trucked a pencil and it's very easy to erase this one. And you don't have to destroy your paper. The most erasers that you get in the stores, especially the normal ones, you have to raise many times until you kind of get a clean line. But with this one, it's very easy to erase, so I wouldn't recommend that to go on your local store. There are also other brands and he could get one of those. It you can have for a very long time. But also because you can use just a little piece of it and you can squeeze it like that and it becomes like a very elastic, you don't have to call the too long because if it gets too soft, it's going to mess up your drawing as well. But in this way you can erase the third that is over here. You can just hide it within the eraser. And after a while, this will get darker, so you have to change it. But so far, you can just, you can just use that and erase and clean up your sphere. Like dots. Don't push it too hard. The thing is that you want to keep your paper clean here because you're going to draw on top and done many times. And when you find in mutuality of find the structure, you will do a lot of wines. It doesn't go, it doesn't happen with the first line. So, so just erase it like approximately where you see sphere becoming clean and you can just go with a pencil on top of that and define this line here. You see a sphere completely clear. And I mean, don't be afraid if it's not full effect. When you're learning, it is important that you give yourself a break. You don't sweat it too much because you're in a learning process. I know people or even myself, I wanted to just do perfect from the first drawing. And I got very frustrated. So I drew a lot of stuff around, it's around my picture. And then suddenly Agilent completes the structure of my main forms. And they never got to clean and at some point you kind of give up, Sarah, I'm not talent. The talent has nothing to do with it. As you see a man, mathematicians can do that pretty easily. And when you know how to find the form and the structure of the form with the perspective, the shadows, you can draw, anything you like. And I'm going to show you how to do it later on. So don't get port for now. Don't just hang in there. This is this is kind of can be a little boring. I know I couldn't wait until I get to the fun stuff and have like photorealistic drawings, dust. But you need to notice that. So hang in there, I'm going to explain to you. So now here we have our sphere. And this is a little bit twisted because I'm looking at that from an angle. Another useful way for you to see evil sphere is completely correct. You can put it in a square, in a perfect square. You can measure dots with your ROA and you can just draw a square. Measure is really a while. And just as I showed you in, in the last lecture, with and the comb, just have every side of the square tabs. These points find the middle line here and here, and just tries to put his engine to make it as perfect as possible. Also, another way to see geosphere is correct. Just flip the drawing upside down. Like that. Just a different perspective will give you a more correct view of if your drawing is correct or not. Something like that. What we are trying to do here with our drawn is basically creating an illusion, a visual illusion of a real life. So to do that, we will need to give the perception of something being completely around or the right proportions. So.
8. Shading a Sphere - In this section you will learn how to shade a sphere.: So now that we have our sphere here, you can still clean it up, but just erase the help lines here, the square and the lines inside so it's clean. So how do you draw the shadow? There is a clear principle on the shadow behavior. Depending on where the light is. Sometimes when you draw from real life, you will not see every single path of shadow. But when you know these bizarre shadow is good to put him there. And this will give you a better volume of your drawing. So let's assume we have a light or sunlight coming from here. This direction. It's sunlight. In a sphere. We can recognize a couple of different shadows. Dimensional is a core shadow that goes all around the sphere approximately in this area. But the core shadow is the main style, which is the darkest shadow of the sphere. It stretches around this area. And there is also the brightest point of the sphere of light. And on the sphere is approximately over here. It is called highlight. Now, the area from the highlights to the core shadow is called a mid-tone. So this is a core shadow. This is a midtone, and this is a highlight. And the space between the core shadow and the ending of and the sphere is called a reflected highlight. It means that there is a bounce light that goes from the ground and reflects on the ending on the sphere. So this one is called a reflected highlight. Now, you don't have to know these names to be able to draw. But just because I'm into the technical stuff, so I'm just going to give you the names of it so you are aware, what do you draw, how these lights react. Also, there is another solo dot. The sphere casts on the ground. And this is basically depends on first, on the direction of the light. There is like an axis. If the light is straight from the sun, it's quite a light touches the point of the shadow is basically the first where it's going to reflect on the ground. And over here, the shadow will also be adjusted according to the perspective of the floor. Let's say we have a perspective, a vanishing point over here. And this is, so just drag some lines from the vanishing point. If you are going to be mathematically correct. These lines can be even, but I'm not going to go into too many details. I'm just going to show you the principle. Because when you understand the principle later on, when we draw from life, I'm going to show you how you can use and measure in real life and apply it to your drawing and you can predict correct measurements. So basically, we'll have to draw the parallel line to the horizon. And again, it has to be approximately, there is a rule that has to follow and it has to calculate an even amount of distancing between lines. And these lines. According to the perspective. But again, I'm not going to talk about it. I'm just going to roughly draw some lines to show you how you find the perspective for a sphere. So here is basically the points where the light bounces on the sphere. And according to this perspective, or white, will have to calculate where the other point on the sphere is approximately. It will apply basically around this side of the sphere. It will look something like that. It will end where this line that connects the sphere with whether it meets somewhere here. Now, this slide, depending on this shadow, is called casts, shadow cast setup. Which means the settle that sphere casts one. It's little on from this direction. Now this can change depending on the light. If you have a spotlight and you have a light that's coming in this way. Well, that means that that the light will be much wider. It means that it will go maybe around in this direction. It will effect a bigger area, it will be wider and more spread. So I'm very scared to be too complicated. So I'm just going to leave it at that and telling you how the sunlight affect the cast shadow. And it creates this area, this area. And later, I can teach you how you can adjust this knowledge by drawing from life. Because this is the most important to understand the principles of drawing. So let me show you how these areas of white affect the volume of this here. And I'm going to clean up the sphere again. There are different ways that you can you can shade a sphere. What I do is I used a so-called methods where you draw straight lines like that. And then you add another layer of lines in an aim, an angle and not NGO need 90 degrees, but maybe 25, 30 degrees angle like dots. And that creates a way of of shading that is very smooth and very even. Now, for this method, you need to practice a lot to make a line thus even. But there are other ways you can just roll like doubt. Just create a shaded part and maybe with another layer. If you find this way easier, you can use that to start with. But it needs to create an even shading of, of the shape. So here I'm going to use this merit and show you how this core shadow ace. And I'll start with shading, maybe everything at the same time. You don't have to shade one thing and then continue to the other does will give you a pretty defined edge. And that's not how shapes behave in, in real life. You can see that the shading is very smooth. You can also use your finger if you want to smooth it. There was so many different ways of shading and before him, a classic school, we only have these mattered if a teacher shows during shading in this way, well, you will not get a good grade. But right now there are many rules that are broken. And as soon as you gave up a livable, our believable interpretation of real life. You can use any shading that you like and any metal that you like. But what is basically a solid is this principle of shading and light and how the shading effects the volume. Again, here, what we are doing here is creating an illusion of life. Illusion that this is real. So we can basically erase these areas because these are just four informative way to show you where sailing is. And I'm going to just go ahead and show you how, how this reacts. So the strongest, the darkest area of the shadow is the core shadow. And the core shadow is approximately. In this, in this space, in this place of the steer. So let's start enhancing the core shadow. You can go forth and back, draw a little bit in the mid-tones or a little bit an overall shape. And don't forget that you actually have to draw a little bit in a reflected highlight because that reflected highlight is not the same. And the highlight, the highlight is where the most light bounces the reflected highlight. It has to be a more smoother transition to core shadow. So you can shade out to and later on erase it with an eraser. So you get a more of a bounced light it. Because if you have shading on this part to start, to start with, it will look like the shadow continues in this way, but there is a bounce light reflecting from the ground from the surface to your sphere. And you see that I can even mix different techniques. The most important is for that you actually get the shading right. And the meats own is a bigger area, the biggest area. To the highlight, the meat zone is a very smooth transition, starting from from a little bit darker. It's basically a transition from the core shadow to the highlight. So the farther you get towards the highlights, the lighter the meeting is going to be. So you see how with just this knowledge we're getting, we're getting a volume for sphere. And you can continue just enhancing this until you get, until you're happy with the volume. Also, this, the strength and the intensity of the shadow will also depend on new material. If you have, for example, a darker sphere or darker elements, it will be a more intense. If you have a white sphere, this will go on to be much lighter. So I haven't assumed a material for the sphere. So I'm just going to move until it as much as possible for you to get a knowledge until I find that the volume it looks right. So you can see that data. The sphere gets a volume. And also the highlight does not start from here. From this part. It starts some millimetres from the engine of this line, outer sphere. That's because this line is a little bit farther away than this part of the sphere. The highlight bounces on the top of the sphere, where is closest to us. And this, because the sphere is round, it's still continues in this direction. So you will still have some shading here. Suggests that the sphere continuous. So as you see, the core shadow doesn't have a distinct line, what it EMS, as well as the other lines. The line that I drew in the beginning is just to show you approximately where the core shadow is. But then it has to have a smooth transition like that. And now that you have the sphere, you can also take the eraser. And what you do is just you dealt a little bit LGN so you don't erase completely this part of the shadow of the midtone, but you just create a small lighter area. That is the bounce light, reflected light, which is from the ground. And again, it has to be smooth so you can just add another tone to it. When you notice principles, what will make you understand them better and how you will learn them is basically to draw that and to go back and forth, back and forth. This is about an estimate. How much do you need, how much silo you need to put, how much you have to adjust to what you're writing. It is an estimate. That first year one when you see it in real life. But then you learn when you practice even from imagination, knowing these principles. So I hope you are enjoying and at the moment simultaneously. And now let's erase the highlight and gets rid of this circle here. Sometimes if the surface of the surface of the sphere is not very, it's very glossy. It can look something like death, that even this place is kinda fun. Shadowed. And then you have a very dense, distinct lights where the highlight is. And here you can turn down the intensity of the pencil, of the shadow by just taking away from from the pencil and just having a smoother transition. That's why this and this eraser is useful. So it's something like that. And let's do the cast shadow. Now. In the cast shadows, the darkest area of the cast shadow is right below the sphere. So this is going to be the accent. You mean the darkest area of your shadow. And the farther away it gets from the touch points on the sphere, the lighter is going to be. It is useful to work on all sides of your drawing to turn it upside down again. And check, is doing fine. Infrastructure is right. Structure in this drawing is very important. I mean, does why utero in the first place to have the structure, right? Because when you know that you will be free to draw anything you like, you will be able to measure and adjust all objects. According to the knowledge of perspective. Shading, volume, distance. No matter what you start drawing a tree or a still life, or if you draw houses or even a face, you will be able to use these principles and creates a freely go drawings. And I'm going to show you how you do that later on. So you see how we've got the volume of the sphere in a very easy way. So and just do this exercise in a very simple way. The US and the toning market in the way you like it. I will use it in this way. I've used the combination between this and dots. And you see that I can still get the light, right and I get a pretty artistic and classic look of the shading. I'll give some outer sphere. Now I can even erase a little bit of this. The lines here, because we don't have such a defined lines in nature and clean it up even more. This is a drawing, so you want it to look like a drawing. You want to have this hands touch. So to say you want to see that it's not a mechanical thing. It's something that you've put your, uh, your art and your mind into and it has your signature. So I'm going to continue with showing you the shading up to other geometric shapes that we drew. See you in the next lecture.
9. Shading a Cylinder - How do you shade a cylinder and what are the main shadows placed there? That is: Hi, and welcome back. Now let's continue with the shading of the cylinder. Now, we also have the same shading areas. Shading passes as we have for the sphere. They just in a different position. So if we assume the light still comes from this direction, we have a shadow, core shadow that is approximately now take and in this one, the shading is approximately over here. Now, how big the core shadow is going to be? Depends on many things. It depends on the material. It depends on the reflected highlights. If if the surface where subjects are standing is to white, it's going to have a very big reflective white on this part of uptake geometric forms. So the core shadow will be stretching maybe higher up. This is something that you can investigate when you draw from real life. But now I'm just going to talk in principle. Now, let's fill in the score light here. And we have again the two reflected highlight, which is over here. And here we have the reflected highlight here. So I'm just going to mark these areas for you to see. And we'll have the highlight here all the way down. And obviously it's the same for the cone. If you draw a cone over here, the main highlights will go along the shape of the form in IV if we drew account. That's why I'm not showing you how to draw the count because the principle is similar to the principle of the cylinder. So NCR, the highlight is also going all the way along, along the length. And we have one little area here that is a midtone. And again, why we have this midtown is because the object is not flat, it's round. So, so this part of the cylinder is the closest to us, so it's going to be brighter. So the cylinder continuous in distance. So let's draw this lights then we have the mid south here. And now one technique for drawing is just drawing in the length of the certain shaped. Like for example, the cylinder will, will see that these lines go this way. So we can try to just follow the shape of the cylinder in this direction and it will give us a parish safe. This is another way of drawing and create more realism to the subjects that you're drawing. So by drawing the midtones, here, you are giving yourself the possibility to, to draw another layer and to have a smoother transition later on when you draw the core shadow. So you see that now I have a midtone that is an event for overall. And now I can go in and add another tone, another layer with a pencil, which will give me more of a darker area, which is the core shadow. And I'm showing you here another technique of how you can use the different manner of drawing, just following the shape of the form. I suggest that you experiment a lot with, with what fits you best. Because if you go into a flow of drawing, it is important that you're comfortable with one neutron. But practicing is basically very important for you to reach this level of confidence when you draw. And also you need to feel pleasure of drawing. You need to see a nice results. I mean, when I was in art school, my work, 24 students. And all of us had a different way of drawing, even though the teacher recommended certain manner of drawing. There are different ways of drawing so, so you can choose to, to experiment with you won't own way. So here is also a Meta, and here we can add with the eraser where I'll highlight this. Now you see I have some, some pencil here. That's because this, this paper we started dating To tortured, so to say, careful with how much you use the paper. So I will erase a couple of times. Now you see that this eraser is getting dirty. Either I can squash and so I get to the cleaner areas, or I can pick a new one. Let's see if I can still use that one. And just smooth the lines here and just do another, another pass. Our midtone to add a smooth transition like that in here, and another one from here. So I can have the highlight in a smooth way. And now I can just dot. I little bit like that to erase. And to have a highlight. Cast it highlight. It means that the light from the ground bounces on order, form or shape. And I cleaned it up here. And also here there is a cast shadow. It is a similar perspective as in a circle. So the light comes from this way. Now this is too mathematical again, I'm going to show you how to do that when you observe from life. So if you don't want to get to mathematical about it, I'm going to just give you just an I'm just a little hint how to deal with the cuffed, the cast shadow. But the most important is that you observe it from real line. And you have the darker area of the cast shadow very close to your form for your safe. Like that. And the further away you go, the lighter the gas setup is going to be. And if you don't have a very strong light and the cast shadow will even disappear. And it will tune out in the distance. So I'm going to do down here, I'm going to do a cast, a shadow, dance, smooth out and disappears. And here you can use a different manner, upselling like that. So this is basically the principle of shading. Now about this area on the top. Again, and the darkest place is always closest to the lightest place. The closer something is an edge or anything is towards us, the lighter it is, or the darker it is. So what a contrast meets over here is where the darkest spot as the core whites and the lightest spot of the highlight. So we have a tuning of a midtone here on top of this area, which is slight Midtown. The farther away the surface is, and the mid-tone gets lighter the closer it comes to us, which is around this area where we have a little oval highlights that gives depth to draw it in this way. So let's complete this shape. As you see. I'm shading it along the shape of the cylinder. So I'm using, I'm using this manner just to create more. A realistic look. Again, you can use even this principle. We can state it in this way. If everything is allowed as long as you get the lives and something. Being realistic, looking realistic, I'm just going to erase these areas here. Now it's too late, I guess, because I'm the paper can take just so much of erasing. You should be careful with how much UV rays. I'm using a pencil here for B, which is quite, which means it's a soft pencil. Why my draw? It's darker than, for example, if it's to be, the lower the number, the lighter the pencil is. The higher the number, the softer pencils in the darkest that darker lines it makes. Now, if you want to start shading, you should maybe start with to be, which is more lighter pencil. And you can enhance the core shadow, for example, with a darker, with the softer pencil for B or six be. But you can use only one pencil as you see, it's achievable even with one pencil. What you need to know is the principle of where do ITS and how to use it. Because later on, many you will not be able to see very clearly this distinction, this definition of light. But knowing you can put in there, you'll see how this works. This will give you a more volume. Obviously after your object. Also, the thing is though with the shadow, the further away you go from the point that is closest to you. The lighter shadow debts. So the darkest part of the shadow, and the more contrast is always from the objects, from the places does is closest to you. So you see just gets lighter the further away it goes. And also here is done and bounce light on a reflected highlight. And here we have a midterm that stretches from the backside of the cylinder, the shape of the cylinder, front of the cylinder. And we have the lightest point, like over here, out the highlight. And now we can add some, some highlights here with the eraser. And we already have a reflected highlight, but we can test dot a little bit and adjust the highlights so we have a more a reflection from the ground. And here we'll assume the shadow that is over here. And it has more upon. It follows that perspective, that vanishing point up the slide so it's up. So it also reacts to the vanishing points of the shape. But you can find as a beginner, you can find the shading, just finding the right shading of something a little bit confusing and thus can be annoying. So just know that you can find the shading and one new drawing from real life, but also that the darkest part of the shading is whatever it's close it close to you. And the shades, the sailing you just becomes lighter. The further away it goes from the point that is closest to you. And how cell the saving is down against the closest to the object it is. And then it turns out the Father from the object. It gets, depending on the strength of the lighting. It can either either built a sharp edge flight data or it can turn out depending on the ambiance of the light. So you just build it up basically. When you start drawing and when you see how the form shapes after, you know, what you have to do, the drawing will suggest to you how to complete it. But that's why it's very important to do the live drawings because you will see how these shapes and how the shadows behave in real life. And when you run that, you will have this stored in your memory. One interval sampling from your imagination. Because if you, if you want to draw, for example, as an illustrator, you want to draw things that you cannot see. Anyone draw a comic book or you want to draw an illustration for a, for a Voc or a storyboard. This is something that maybe is made up and you will not see. So you need to know these principles. And for you to know them, you have to see them in real life. Or you have to find similar references online, for example, from images. But this is like this. Shadows are basic knowledge. So it applies always to the, to the physicality of things. So knowing doubt, learning that you will have the freedom to create in things that you haven't seen. So even though you find that frustrating and maybe a little boring, too technical, it is very important to have that, to learn that if you want to start drawing. So this is the principles of drawing shading from the cylinder. And now I'm going to continue with showing you how this applies to shading a cube. And I'll see you in the next lecture.
10. Shading a Cube - How you shade a cube and how to make one corner of the cube looks as if it is close: Hello and welcome back. So let's continue with the cube shape and go through the shadow passes here. And now I have drawn another cube on a separate paper. So it doesn't get too messy. Because FBC, the paper can get tired. So we say, or we call it like that, don't tire out your paper. Don't, which means don't draw too much and don't erase too much. Because there is just enough possibility for one paper to how much erasing it can take until it starts messing up your drawing. So here we assume that the light comes from this source. Again, it's sunlight. And, and we have two vanishing point for this Q. And we have again, one core shadow, which is where the darkest and the widest point, the highlights of the cube appears is at the points at the corner which is closest to us, which is in this area. So, or core shadow of foreign cube is over here. Also, the core shadow doesn't behave the same way. All the way down. The darkest area of the cube are at the corners on the lower and upper part. And so approximately over here, the shadow life and up a little bit over here, but still it's dark. But the darkest spots are on the lower part and the upper part of a queue, the corners which are closest to us. And then the shadow goes into a midtone, which is slightly lighter than these two points, the course at all. And it continues all the way back to for the whole surface of this part, this side on the queue. So you can give it a midtown 0 all the way to the ends. But then there is a part of the cue for where there is a bounce light from the environment and from the floor. And this is the part when the cube farther away from us, there is a bounce light. Just dotted out to get it a little lighter, but then just add another pass of shading to smooth it out. So you don't have the spots over here. And you can add as many layers as you like until you get the volume that you like or a core shadow. And the end until you smooth out the shading. For a whole science. Now the highlight is, as I said, next to the darkest part of the cube is also the brightest part of the cube. So this side is the highlight opportunity. And the further away you go from the cube, the darker it is. And this is the meat tones of the cube, of the size of the queue. So just dark shading it from the backside towards the highlight. So you can accomplish a small, we're tuning the part of the site. Also, the darkest part of this corner is around this area, because then you have this bar of a cube which the light bounces. And the closest part to us is this part of the cube. So you will have a midtone that goes from the backside. The cube and tunes down until it comes towards us. Until it reaches these corner of a cube. One principle is where the dark side is. There is always a brighter side on the other side. So there is a highlight in this power or the cube. And also here where this side is darker, there is a highlight next to it. Not as drastic as here as this part because this is the closest one. So you can use that as a, as a measurement and just lighten up the cube a little bit on this side. But still it's a midtone. Nothing in this cube is brighter than this side, which is closest to us. And nothing of the cube is as dark as the core shadow, which is this side. There are many different ways to find the shadow. Afford a cube depending on how the light bounces. But I'm just going to show you one easy way. And in case this is a sunlight, it's coming straight down from this direction. So you basically dragged a line in 45 degrees that connects 1 with the direction of the sunlight. And you do dots here. So these lines are basically parallel to each other, 45 degrees down from the direction of the light source and intersecting with the, with this point of the corners of the cube. And another one for this one here. So where this line intersects is basically we draw a parallel line that is parallel with the, with the horizontal line here. And another one. And that is also connecting this point. And we are going to need the backside of the cube. So I'm going to mess it up a little bit just to show you the principle. And I'm just going to connect this line and find this point over here. That's what I'm looking for. So I'm just row one particular life here to find these points. And I'm going to also draw another line that is parallel, parallel to the horizontal line. So I'm going to see what is lines intersect. So this one, there is 1 here, the line that intersects with the direction of the light here, and another one that intersects with the parallel line from this point for this site. And there is one line that intersects with this point here. So it's, there is a point over here. You see for this side. And there is another one that intersects from here to here for this side. And here we don't see the shadow. So let's connect these points here. And with this one. And basically, this is going to be the set of the space that is shadow cast shadow of a cube. This can be a really technical and the Sun that directional light changes. You have to draw new points. And it can be really mathematical. And thus while you can have a live joint, so you can see where your shadow is. When we draw from real life and learn in that way. So that the darkest part of the shadow is again, near the queue, near the edge. And the farther away it gets, the lighter it gets. So I'm just adding shading one step at a time. I don't shake everything at the same time because I want to have a smooth transition. So it is better it up. I just add one layer at a time with a pencil. And also if you add one layer here, for example, if you do something like you add one layer here, like it is, this is done the edge. You just want one layer here, and then you add another layer here. You continue. You see that you get this kind of bond. Let's say if, assume this is the cube side here, you see that you're going to get an infant shading here. So it's better to just tuning in and add a little bit, a little layer at a time and see how much you need to add more of that. Yes, something like that. So on. This is basically a simple way to draw the cube. And I just want you to practice doing that using the double law. You can also do it without it, but you will be more happy if you have nicer results and you'll be more pleased with yourself that you know on the way of drawing better and better. And because this is very achievable and it's easy to do so why nouns? I would suggest that you do it that way. So I'm going to continue with the next lecture where we start drawing from real life. See you there.
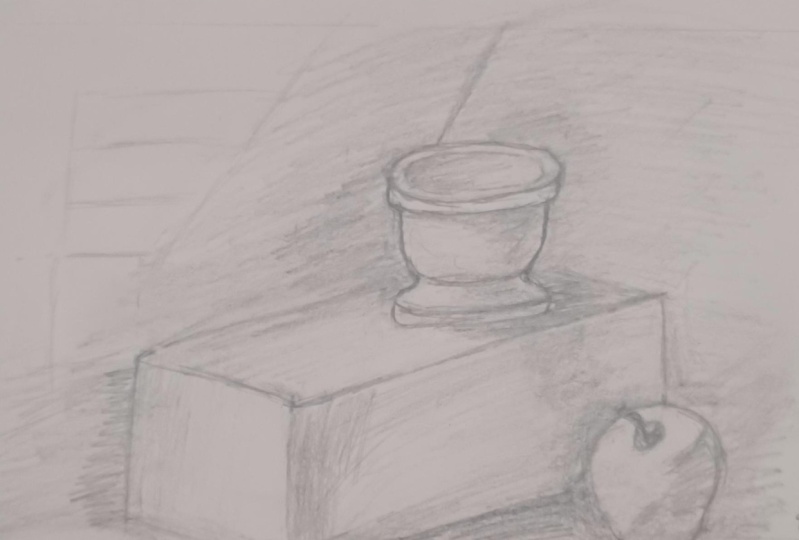
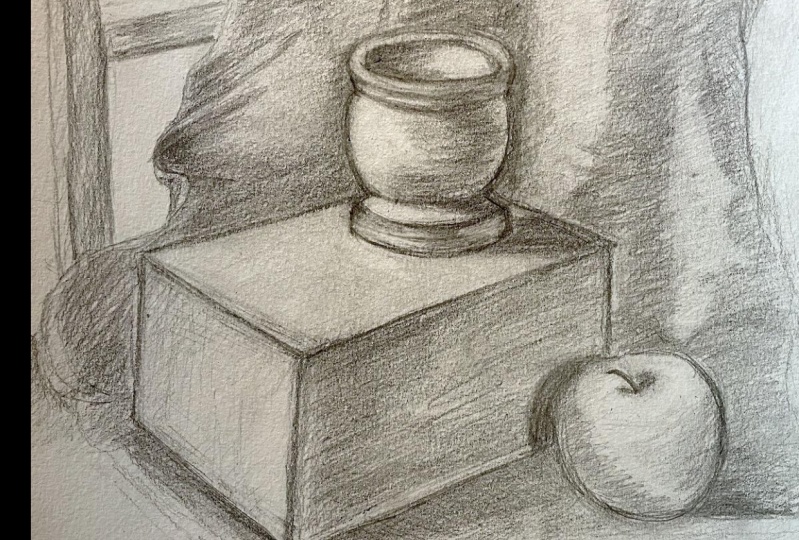
11. How to Measure - There is a specific measuring technique that allows you to correctly apply the size: Hello there and welcome back. Now, let's start drawing from life. Here is a little preparation. Before we go ahead, I have chosen this objects that our presentation for the shapes that we went through when talking about prospective and shading. So there is a cup that represents the cylinder. We have a box and we have an apple represents a sphere. Also, I have chosen to add a cloth because there's also a shape and a shading method for the cloth. So it's good that you learn something about that too. Before we start drawing, I am going to talk about measurement and how you use measurement methods to apply and measure the objects and how they relate to each other. Basically, how you construct your image. So first of all, let's talk about posture. You need to sit up with a straight back and your arm needs to be straight up in front of you. And you should not bend your arm one way or the other. Why is that? Well, because for the right measurements, it is important that we have exactly the same measurement to all the time. And if you bend your arm, you wouldn't know at what angle you bend your arm before when you start measuring. So now, why is this important? And how do you measure what your pencil you see of an artist that stretch their arms and squint their eyes and look at something. And it's like suddenly it's on the picture and you don't really know what they're doing. Well, thus why what they're doing? So how do you measure exactly where here is how it goes? When you stretch your arm and you squint your eye. And you will see that all the objects apply to the measure of your tip of your pencil. Or you can limit the amount of measure with your finger, placing it up and down, and decide which object to measure. And this applies of the exact measurements of the real object. Because we see the object at a distance, there is a perspective change without weekend, see an object even on the tip of our finger. And that way you can even cover an object with your tongue, for example. And that is how you apply a measurement. So in this example, I'll show you how you measure, for example, the cup and apply it according to the measurement of the cube. So if you measure the cub with that technique, then you can apply the same measurement on the cube. And thus how you can measure how many times this cup applies to the cube and where do you measure it from? So here I am measuring the cup where I see it from, and not measuring the cup from where the ellipse start, for example. And I measured the cube of how many times this cup is applied to the cube from the place I'm seeing it. This measurement be applied in any direction for any shape. And it's up to you to decide what do you want to set as a ground measured to? Is it a COP is at the apple? Is it something else? Or you can compare other measurements as well. It's up to you and it's up to your choice. You can measure up absolutely anything according to something else. And thus how basically you find how big something is compared to something else in your picture and where the objects are placed in space. For example, you can measure how big is the distance from the box to the end of the chair, or how many times the cap applies to the upper part of the chair does how you can find, for example, the placement and the size of the chair. And the same thing with the apple and the other parts. So let me show you this in an example. You can do the same thing even if you don't measure from real life. I'm going to use a picture, an image of this composition to draw from real life. You can download this picture from the lecture and use the same measurements that I use and started drawing and using, using this principle. But you can measure that from real life and it can look something like that. You can come closer to the objects, you can even measure with a ruler. You can use any measuring tool. The most important is that you have your arm straight up, you have your back straight up. And that is because you need to have the same distance each time you measure. You understand very well that if you change the distance or if it change the angle that you measure, the measurement object the next time you measure will look different and it will not apply to the first measurements that you've taken. That's how things will get out of proportions. So posture is important and I angle. Also, you squint with one eye because that's how you will see the measurements correctly. So let's start drawing and I'm going to show you how this looks like when we start working with this composition. I'll see you in the next lecture.
12. Compostion and placement - How do you start drawing a still life compostion? You will learn about it: Hello there. Now that we're ready with our composition and we have measured everything, we can start composing the subjects on the paper. This is one of the most important parts of the process. And because a proper composition will also give you the freedom to do a nice picture eventually. And this is hard to start with as a beginner and even as an experienced artist, the blank paper is always a little bit frightening. So how do you start awhile, I showed you the measuring way of doing stuff. It's basically that's what you use to compose the image. And no matter if you start drawing from real life or you have apps on your phone on, or an image on a paper. Now, I have photographed this image from the sitting position that I'm on right now. So you have to have your measuring like that. Your arm has to be a straight forward like that. You should not bend it. If you highlight on your phone as well. You can also measure it or you have a printed out on paper. You can find this image enclosed in the files. You basically do it the same way. You measure the distance between the spot. How many times does it apply on any other given distance? It, you can choose any distance that you like. You can choose. And you can choose to apply it on this distance or this distance. You can even use a ruler here and to measure how many times an, a subject or an object applies to other measure of the objects. So how did you decide the composition? Obviously, because we have this nice angle upwards, I'm going to have the composition being on the length of the of the paper. It doesn't matter if this is a smaller A4 paper or if it's a bigger one, you should compose the objects in a right place here in the middle of the paper. And how do you do that? We'll start with approximately measure, very roughly where or objects will be. I'm going to start from this cup here. And I'm going to say, now I'm doing it's very roughly, let's say give it some measurements of this size. I want it to be slightly on the side of a composition. So I give also a space for that typo here. So let's say this cup will be The big. And using a for B pencil, you can also use harder ones like to be or three B pencil of the brands cocky not. You don't have to have the same brand you can choose any other brand is not important. This is what I prefer. So now, when we compose the box here, if I, if I draw a line up here, invisible line, how many times this cup applies, the measurement of this cup applies to this distance here. It's approximately the same distance of the scalp. So basically if it's, the cat is done, think any phi ends here, approximately here, will be aligned. And my, my box, the ending of my box will finish somewhere here. So I'll say, and also what I'm going to measure is that you see that box ends up approximately in the middle of the cup. I'll temporarily draw a line here and that will place one line of the box over here. And where is that box ending? So let's measure the size here. The box like that. How many times does it apply? Let's say to the bottom of the cups are one and a little bit more. It's an approximation. So I'm going to say that approximately in this size is where my box. And so I'm going to apply this one over here. So that's the length of the box. And I'm going to draw our line downwards. And see how wide these boxes. So I'm going to measure again the cup over here. And I'm going to measure down, it's from the ending of this cup. It has approximately one measurement, what a box is entering. So let's measure dots. And let's place the box over here. So this is going to be the corner of the box. Now, I'm just doing us a very rough placement. Is, is it this is not a good composition. You can always move this up a little bit site and even this a little bit on the side, or make them smaller N adjusted measurements according to that, again, let's measure the act on the apple is going to be from, let's measure the cup here first. This is the box and the apple, Let's see, roughly. It just sticks out a little bit off from the box, approximately over here. This is something that we can adjust later on. When intro. Let's have it this way so far, just roughly now we have a rough composition of our objects. We're going to also include the chair where the objects are standing. Again, measure how long is the distance from this point to this point of the chair. You can eyeball it or you can compare it to some other measurements. Let's say, we'll say the cup again. Let's say one cup is a little bit less than half of the cup is where the distance and to the ball. And you see that I'm out. I bolded the project, correct. The the ending of the table or chair is going to be over here. And I can roughly estimate, estimate approximately where white cloth, the rest clock is going to sound like dots over here. And just rough it out. So far. We don't have to be too precise now. Now what we are only looking at as how to compose or picture. So it's in the middle of the composition, is well-balanced. It's not like too small or too big. And adult level. We can readjust and replace the objects and change the composition like manga things a little bit smaller, so they have nicer composition in the picture. So let's go with that. And now let's find the perspective of our objects and continue with building up the structure of the objects before we even go into shading. I'm going to do that in the next lecture.
13. Finding the perspective and drawing the box - How do you find the perspective in your drawing and ho: Okay, so now that we have the composition, Let's start shaping or subjects. I'm going to start with finding the perspective for the cube. Because it will give us a clear guideline of how to find that perspective for other objects that are, for example, the vehicle that is a little bit more undefined, It's a little bit more round. And also for or so-called cylinder. And, and how I do that is that I found, I find that the placement of watts, the corner where is the corner afford is Q. And again, how do I find doubts? I measure approximately where this corner is, so I draw a line, invisible line from the middle of this Q straight up MIC approximately where this line lines up to this gulp. So this line is if the ending of the cup, Let's say it's over here. Let's push it a little bit more at the site. So this is the length of this cough, for example. And I'm going to draw this line. It's going to be aligned that it starts over here. And I'm just going to draw an invisible line down like that. And I'm going to find that this corner is somewhere, starting somewhere over here. What else do I need to measure? I need to measure the length of this cube, how long it is. Again, I'm going to find an approximate measurement that I already have. Let's say, let say again the thickness of this cup. This is, this is the thickness of this cup. How many times does it apply to this corner here? So it's like one and a little bit more. So the thickness of the scalp applies one time and a little bit more. So one end is slightly more approximately here. So this is the corner of the cube. Again, everything in this stage is adjustable, so don't be afraid to actually re-adjust whatever you've measured and replace it and just find the measurement because the construction of your, of your image is basically going to tear everything all around. Because if you just one thing wrong here, it is going to be very hard to correct when you go into the process of shading and constructing everything else, just lay more, bring up playful at this stage. Don't be afraid of mobile is messy lines and on the scene and that you have to be precise, just become a construction worker for your drawing. So this is approximately where this is going to be. And now we, we assume that the horizontal line, as you saw that I measured it is approximately over here is a bowl of doubt that goes when I was sitting and sitting up and then looking down at this end at those objects. So we have an horizontal line that is over here and the objects are below my horizontal line. So the vanishing points is they're not going to be on my picture. They are going to be somewhere here and here as you see. So I'm going to go and assume belt. But another way of doing it is also again with measuring first-time going to measure exactly and see exactly where this is. And what I'm going to do is I'm going to measure the thickness of the cup. And I'm going to measure how many times it applies to the length of this approximately. The thickness of the skull is applied in approximately where the round shape ends and a little bit more until the emptying of the cup. So let's say this one. And this one is the thickness of the cup. So I'm going to move it a little bit up because I need this place for the lower part of the cup. So basically, it is approximately from here. I'm just going to leave that up a little bit so it doesn't get too small. But this is a cube. The dot contains the shape of my cup and I'm going closer and closer to the measurement. And that's approximately over here, is how big discussed is. So this is the round surface here. And this is the surface, this is where the cup, the bottom of the cup is approximately. And now what do I measure now? Now we have a size here, done. The cup is very clear. And now you can measure how long it is to the corner of this cup and where this line here from the ending of the calf to the corner of the box, how they align. And I can see that they align pretty correctly. Pretty much so. This is the ending of the shape, but the corner of the box aligns with the bottom of the cup. It doesn't matter. There is no rule of how you measure and how to measure distinct. You can choose any side, any measurements you'd like. You can measure the cup to the MPO. You can measure this line to double the distance here from the chair. You decide, but you need to have one measurement that is pretty much decided and you measure everything according to that. So basically this is the other corner of the box and this is the other corner of the, MM going to connect them. And I'm going to get a good perspective here already. And now what I do is just because we have two vanishing point, you see that I can see even three sides of the cube. So we have two vanishing point. And this one is going to be slightly more tilted this way because I know that somewhere in the distance we just reach, I don't see these lines. We're going to connect on the horizontal line. So I'm going to draw another line here and it's going to be behind the Apple. Any slack is Dutch connecting such disappearing in this way? Now I'm drawing a very rough lines. This is something that you can clean up later. Here I'm investigating and searching in investigating for the structure of my object. And now we have two measurements. One is the long part of the tube and one is of approximately where the cup is. Now let's find this side of the cube. And again, how do I find that? I mean, we have already the length of the cube over here to be more precise of where this point is, where this point is two. I am going to also draw, drag an invisible line from the cup to this line to this corner. And I see that the corner is just a millimeter lower than the ending of this cup. So I'm just going to draw this invisible line here. And I'm going to make it more feasible for me. And I know that this corner here is just a little bit lower than this line. So it's going to be approximately here. And I'm going to connect this corner with the other one to find that side. And now, and now I know that all the vertical lines are building 90 degrees with the horizontal line. So this I can find immediately after draw, the lines drift straight down. It means like in 90 degrees or is parallel to the ending of my paper. So just find this line here. And now you have two sides. You see how you build that. You've built one measurement at the time and you erase if you have two more things, if you have two, just don't be afraid to be messy. And that stage, and you should be messy. You shouldn't be searching for afforded the right proportions. So one thing now that you have these two sides is just to connect that part of the tube as where the cup is standing. And how do you find out, you know, that you see that the line that is connecting to the other sides of the cube ends up approximately where this discount is emptying, so approximately over here. So what you do is basically you need to follow the perspective of this line. And this line there will connect somewhere in the distance. So you add this line that is approximate, approximately parallel to this line here, and see where it vanishes. And you see that the ending part of the cube is somewhere behind there. So you tried to follow the perspective here. And you also try to find this line here and this line here. They should also disappear in this vanishing points in this direction. So it kind of connect this line here. And now you see that when I measured one, I've measured this to the cup over here. What I see right now is that I have two little space for the account, which means that somewhere I have my measurements has gone wrong. So what I do is that I lift up this line over here a little bit more. So I see that many the cup that this corner should be in the middle of the cup. So I just raise up this point here and I go in with a more thicker eraser. Erase this line here. And I lift it up a little bit. So half of broader space here, MIC that this corner, it intersects almost with the bottom of the cup, like, like here. So I readjusted out in the perspective. And when I readjust that, I will need to readjust even this line because this line should be continuing and should command this corner of the eye, the subject of the box, with the law of out of the box somewhere in the distance. So I even readjust that you will not get this thing in the first and the first goal. So again, it is a discovering process. And you will need to go forward and back until you find the right perspective. And the right, the right measurement. Maybe not as much. So it means that this one here is even a little bit more tilted. So you have even stronger perspective on this side. So let me correct him and dots. I'm using a harder erasing here because the softer one messes up the paper a little bit too much. So I'm going to leave it at the end. And I'm going to, and just the perspective here for this line that IS goes approximately might be another swipe up. And I'm going to maybe lift this corner a little bit more. Evil. Not be completely precise, especially if you're a beginner, this is your playground right now. To find the construction of these shapes. And I'm going to connect, follow this perspective with this line. That connects, goes this way and it's going to be a slightly less slavery won't do that. Let's be adjusted perspective here. Doubt. It will not be parallel, it will be slightly, slightly tilted. So they connect somewhere behind. And now, and now we have a more precise perspective that I see. And now we can find even the lower line is also going to vanish this way. So they will meet somewhere in the distance. Like does. Now we have the cube. And now we can see the chair of a years. It's less margins. And now we have one perspective of the cube, already stable. And we have the size, the size of the cup on, almost decided. And we have the apple that needs to be leaked. It's a little bit higher up as we see now. So the F0, the pace of the ERPO, will be approximately here. And then o will be slightly smaller coordinate to the other national movements. So just readjusting, that's roughly this time. And let's erase the other mentions. It's like building, building a sculpture. When constructing your composition is like one thing at a time. You measure one thing, you apply it to, the other thing. You kind of look at it and then you readjust. There is no there is no secrets here. The, there is no magic pill or magic method. This is how it works, but you need to train your eye of how to do things. That's why I just important to have the composition on a tripod. So you can see a straight ahead and you don't see it on an angle. So I would suggest that. And I would suggest that you start learning how to draw from a standing from this position, which is a little bit challenging in the beginning. But you basically place once one thing here and you navigate from that finger so you don't mess up your drawing too much. Another thing is that you place a paper on this site and you start drawing with the paper under your hand. But so far we are going to message join up just to because you need to be to get you used to be.
14. Constructing the Cup - How do you use your knowledge of how to draw a cylinder to draw the cup in yo: So now how do we find the construction of the cup? Now we see that the cup, the bottom of the cup, is almost the line of the box. And I'm going to draw the box of the cup. And I'm going to apply the principles of perspective for the scalp. So what I'm going to do is find the middle point of the current is approximately here. Now I vote up. But what to get? What I can do here is I can measure that this side of the cup as its thickest point is the same as this site. And for now it is because I eyeballed it. Well. But if you need to measure it, even aim at the ruler you to doubt. You just have to find the middle, the middle point of the cup. And that's what we do now, is is control this box. And I can see that how big is this part of the cup, according to the rest of the cup and the opening of the cup. So what, that is, what I measure. So I'm going to measure the sum and this distance and see how much it applies to the whole cup is like one and a little bit more. So is approximately here and I can measure it. So it's 1 and know that it's bigger. So it's one and a little bit more. So it's approximately this one in a little bit more. That's that how big it is the opening. The opening and this corner. So it's approximately. Now this is a little bit tricky to draw that perspective. So pay attention to that. What I'm going to do is let's form basically the lower part of the cuff. So handout. And I'll just run out like a bowl. Also. Let's form also the lower part of the cup. And it's going to be approximately over here. And how do I decide how big is this shape here? So the shape, as I see it starting around here, it's going backwards around here. So I'm going to assume that this deck is the signs of this lower part of the cup. And I'm going to find the middle point here. And this one is the thickest part. And what I'll do is just connect this part and this part. And I'm just going to find the, this is the same. This is the thickness of the lower part of the cup. So if you don't have anything around to measure the perspective, and the thing is that you will have to learn and you have to assume the perspective. So another thing is basically to measure according to this line. Where is this shape ending here? So he's basically over here. And you try to find, because it is even, you try to find the similar shape over here. And now that you have this shape, you can apply it for the ellipse here. So because this shape continuous on the back side and you have to round it off. But to be correct for the partner to see it, you have to draw even the parts of the shape that you don't see. The lower part, the higher up you go, the more closed. This almost shapes are going to be because we are coming closer to the horizontal line. So how do we find the shape on the upper part of the cup? Now there is a lot of ellipse shapes here. So one easy way is to choose one of them, like the upper part, this one. And what do you do is kind of a measure where this ellipse is approximately. Let's say it's around here. Again, this is something that is adjustable, so don't serve in stone yet. What do you do is draw a rectangular and why do is find the middle part of this rectangular? The thing is that the elements of the upper part of the cup is slightly wider at the lower part, then at the upper part. So move the center of the, this rectangular just slightly above the middle point. This is an approximation again. And here we have two other points. Now, what we can do is just connect this part of the side here that is meeting the MOF is see the farthest. So this is something that you have to eyeball and you have to try over and over again. It's okay to do a couple of lines like that to start with. And later on, you can erase them and just try to find an oval form and here as well, and around the form here as well. And four on the upper part, just can this corner and this corner. And just to try to be as even as possible, I would suggest that you eyeball the measurements so you train your eye to see the reality and to get a feeling of, to get a feeling of what's correct and even out. So you will not be able to do the permanent drawing from the first drawing party will be much closer than what you're used to do using these models. And again, I'm encouraging you not to be afraid that if you can do it from the first time, you freak out, this is completely normal way out development. You have to get something into your system the same way that you learn to ride a bike, for example, you can always write a buying from the first time you get on the bike and start paddling. It's the same way withdrawing. It's a habit. It's not something you have or you don't have it, something you train to have. So let's draw this inner side of the cup. And as you see the, we see more of the upper part of the flood area are the count then the lower part, which means we can place it around here, here, and the carpus. More open on the lower part, we can use the rectangular and that we drew for this outer elliptic, elliptic shape. And use that to eyeball even the inner part of the cup. And just connect these lines, trying to be as precise as possible. But don't get too neat, don't get too freaked out. The FREC, a freaking out will basically parallelize your ability to see and to explore, to draw. So. So now let's draw the outer part, which is exactly the same one. Part S here is not this, the upper part is less openness this one. So all because it is closer to, closer to the horizontal line. So let's draw him on this part, again using this queue and using these guidelines that the size of this part, the size of the spot, is it equal to the size of this part of the cup? So just measure the points from here to here. The next another point has to be approximately here, and we'll just smoothly connected to where the lower part is finishing. Now we'll have to readjust because we have evolved to start with. And not everything is completely correct. Now, let's clean up our drawing. Let's make the rounding here, the camp, and swell like that. So now let's clean up the drawing a little bit and see what we've got. Just erase this helped lines. And I'm using the soft eraser. Now, be careful for here. Just does it a little bit. Don't press too much because you will have more layers to porin on this drawing. So just be careful not to tire the paper. This is something that is happening when you are constructing your drawing. What I suggest choosing is a sort of paper that is not for watercolor drawing. The, this kind of paper is very grainy. It's very thick, any types of really quickly. So when you draw, I'm going to practice this on watercolor paper. You should be very careful. You should have practiced this technique in a separate paper. And you should have done a study of your drawing on a separate paper before you start with water column. But now we are going to do just a graphic drawing where we explore the shape. We explore how the shadow and composition. So for doubt matter, I have a normal sketching block. The paper is not to spin and it's not too thick. It's something in the middle. So you have to experiment a little bit with rough paper. Suits best because there's so many brands out there and there are slight variations will give you different results. I haven't tried all of them. I kind of like feel the favorite attics a little bit grainy, but not too good news. Not too grainy and not to glossy. So now that we have a cleaner, cleaner shape here, I'm just going to define these lines a little bit more. And what you can do now is also connect the cup, the law part of the cup, to its edges. And because you see that this elliptical continues this way. So the connection of the cup is going to be approximately over here and the cup will continue, the law part will continue behind this disconnecting port. And this is something that we will define later on or with a shadow. So how can you see if you were on your lips is even? You cannot turn a paper upside down. And you can see here, when you do that, how easy it is to see if the, if the ellipses cleaned or it is twisted in one way or another. So you can go ahead and correct it's a little more. I can see now that my my elliptical and why pop-out is a little bit twisted this way, a little bit shrewd this way. And there is a light unevenness done. This shape here looks a little bigger than this shape here. So I'm just going to try to correct it. And a little bit more. Perfectionism is good unless it freezes you out from doing what you enjoy most. And he's drawing, I assume that you are here because you love drawing, otherwise you wouldn't be doing it. This is something. Notice. It's a pleasure and pain because sure. The process is painful because you want to start drawing right away. But when you start learning how to draw, start process and going through the frustration of not being able to draw through small wings, small victories when you see your drawing coming to why? When you see you kind of understand how these things work, you can see the balance between being extremely structural. You've being extremely proportionately correct to where you actually go to have some freedom of expression when you start shaping the objects in your still life. And see how you draw income to live. Something.com came from a blank piece of paper, comes to y and becomes, becomes a picture. So now you see, I have corrected the drawing a little bit more. When they turned up. And down. And let's go, let's go back. And you see that I have the shapes now, even parallel. Now I'm sitting a little bit from the side of the drawing, so I'm not blocking the camera for you. And this is giving me some twisted perspective. That's why it's important to sit in the middle and to see your drawing from the front of the drawing, every single deviation from where you sit is going to give you some small margins. So trying to think about that when you want to be as correct as possible. Now, I'm just going to I'm trying to be as perfect as possible and draw on top of it and just go to just get the best shape as possible in the correct shape as possible. But now we see that we have or a cup here. So I'm going to limit at that and go and construct also the NPO. Before doubt. I'm just going to add the small detail here, that brown line and needs between these two lines. So it's slightly narrower than this one. Pellet slightly wider as, as an abbot. See if I draw the invisible part of it, then this one here and the upper one. But I'm going to eyeball it as a detail. And this will be somewhere in the middle. And here as well. Just slight because this is a detail. It's not, a part of the cup, is not a shape, is just a detail, an ornament on the cup. So just mark it like that because you can add the details later on because you will need to, evil want to have the freedom to erase later on when you add the shadow and all the small elements you can add at the end, when you know that your shadow is correct, the proportions are correct and you're on the right track. So let's go and draw the ethyl and the IPO, and it's around shapes. So it's one of the simplest form here for, for a still life. And we have, the proportions aren't the apple here. So the EPO is approximately ending here. It aligns the line of the apple, aligns with approximately this corner over here. Like that. And where the EPO is stunting as aligning with approximately over here. So let's draw a round shape of the apple. This alcohol is not completely around. So if we are to this sucker, this apple is going to be as, as a cylinder, as slights as something between a cylinder and a sphere. So it's going to have lines like that. It's going to have an ellipse, lines like that over line that are wider in the middle and that are narrower at the end, like that. But let's just assume for the sake that this apple is a sphere. So what we need to do is to find this around this ellipse line here about the ending of the dipole. And it's slightly but on the side. So it's not completely in the middle because this is an organic shape. It's not a shape that has a tight structure. And this is the easiest object or a vote still life image. So let's find some freedom with it. And let's eyeball it as much as possible, again, to train your eyes, but also to give us a little bit of credit that we can do things organic life like fruits and like apples and tomatoes, are very nice to do because we are allowed to have a wrong margins with them as well as we can train or iPad. And the sphere, spherical form of it give us more freedom to get that perspective kind of rights, but not to be too clean encoded as we are, for example, with the cup. The cup shapes are the most difficult when you start drawing because there's many elements of the elites and the overall shapes, the opening is also, this is going to be the most challenging element for you to do.
15. Drawing the Drapes - Even the drapes have structure. How do you go about when drawing them in your s: So now that we have the main composition ready, what we need to do is also to find the structure of the cloth. Because even they have structure, they are closest structure is the one of a cylinder. So if we see at the cloth and the image, we have one shape that comes down here and goes behind the cup. And we can define the perspective of doubt. If that is a shape. There are lines going thrown the cloth. If we add two to design it in the perspective, they are going to be elliptical shapes that are going all the way up and further out. We go the narrow world they become. But because we don't see the shape and we don't see any opening. What we need to know is just this bulging here. And to note where the shadow is, there is one stretch here, whether cylinder is the club is finishing and there is another shape here that go this way down and it has a slightly different shape of a cylinder. Even though they're uneven shapes, they are not like this one as its heart. We have to acknowledge their principles of shading according to how they found. And I'm just going to just note as if they are cylinders, how they, how they change. This shape is also a little bit tilted, which will give the cylinders a little bit wider range of perspective. And here is another shape. And let's note where this one is skin machine. And we have the chair over here. We're not going to draw the whole chair because we are going to focus on this composition. So I'm just going to mark it as something that is out, sits behind it. So we have a solid where or composition is. And I'm going to note these bulging here on the shape very, very slightly, again, following the principles of the cylinder. As if, if I can see through there are a couple of round shapes or ellipse shapes that are forming this bulge over here. This one. And then the clot is falling down. So this is the darkest part in here is where the chair continuous behind. And I'm going to say to slightly how the chair looks like. The ornaments on the chair behind. Just marking them briefly. And I'm going to talk about the composition later on. Why we don't save everything. And the same way when we design something, why we, why we strive to keep the composition here in one spot and one, why it's not evenly distributed the way of treating H material for the whole composition. So here we have a shape of the drape, of the drag as well that is a little bit surround the cloth. And this one, save that going in here. So let's leave it at that. Unless not, tire our paper more, just clean up everything out with the eraser. When you have studied it, when you have discovered the main shapes, make sure you clean it. I would suggest, again, you use the subset eraser because it's more forgiving for a paper. But if you don't have God, it doesn't matter. It's okay to use any eraser possible. Just be aware of not doing it too much until you are ready with the construction. So you paper is fresh and ready to take on moral lines for the shading of the humans.
16. Shading - Part 1 - Learn how to see the shading and use your knowledge of those three shapes to appl: So now that we have everything in place led start shading our composition. And what we need to do, first of all, is great. The composition, which is the darkest object, which is the lightest object. Obviously here, there is. The lightest objects is our cup if we compare it and the trade is the darkest object. So it's the background and then comes the box. So what we do is we start getting a slight tone of the Drake, which is our darkest objects. So every other object will be lighter than this one. So why do we do that? Is because we gradually need to shade everything. We don't have to shade one thing at a time because you need to get a grip on the whole image at the same time. Because it's very easy when you draw something. You kind of start from one subject and you put in the shadow and you focus on that shadow and light. And suddenly you discover that you have put too much. And an object that has to be the lightest object has already taken someone shading and so much about pencil work that you can not take it farther and doubt and to have the darkest object even darker, it's, it will become a hard task and T will fire the paper as observed. Used yet, shading to that is, even for all objects despite material and despite have shading on what is darker, washes lighter. Also, you will need to be careful here with what material you are shedding. Every material has different, different shading and different strength of darkness. And how the shapes, how the light and reacts when it hits the material, how the highlights are, is also different from each material. Like you see, the trade is a little bit along seeing the material. So we need to acknowledge dark later on. While we see that this is the darkest material. So we'll just add a shader to prepare to grade the shading depending on the material. And here you can go forth and back with adding more tone behind that cup. And every man part. One material looks brighter. The white in the background behind them is Duncan. So even though visible and this draft is too dark, I don't have a dog all the way through. Just acknowledge that you wanted to be dug just next to the brightest material. So n more volume of the shape around this gap, which is the brightest. And maybe you is out around the box, which is not as bright. So just think of like dark, light, dark, light. The light comes out if there is a contrast next to it. So add the contrast white and brightness holidays. And limit the contrast who are, even if the shading, the shadow of the bright object is. What you also can do is now to add more tone to the other objects because we don't have an immediate shadow mixture. Objects, they merge with each other. You will have better integrated objects if you turn them down simultaneously. If you, if you let the tongue go into the object. Because some far we are just adding the default tone of objects to see two great at which one is the outgoing, which one is brighter? So I'm going to start now, any given a tone of the q, p. And now that the shading of the cube is here is the core shadow of the cube. And next to the core shadow is the highlight of the cube. So this is the brightest part of the queue. But still we see we don't have as lossy materials here. We have a cut on box. So I can add some more tone to the cube. Now, that is the next. In Spain, in our composition, everything should go simultaneous. And as soon as I added tone here, I'm just going to fill it with another tone on the drape. And very little sleep. And here for where the shadow is going to be, I'm going to add even more, saving. Just use the pencil very loosely. Just hold it like dance from higher up. Not like that because this one will give you very small and sharp lines and he will not be able to get this tone. Just hold it like that little sleep and just move your mom your hand from the wrist down. So you get this even shading. You can practice this technique in another separate paper. How to do the shading. Because I know as a beginner and this can be challenging and you end up doing just spots of shading that are uneven throughout your picture. And it looks like as if you're meeting, if you've committed to that picture, it doesn't look, even, it looks very strange. So practice it. And homosexual achieved the prey for. So you get used to that technique. But you can tell him any way you want in one way or another. And we just add more value, add more volume. So far, we adjust grading the image. And here it's good to see where the light is coming from. So where does the light coming from? It's coming from the spot from above, from a spotlight here. And we have a highlight here. And we have a pretty strong shadows in this part. So now let's start noticing that and let's start determining where or core shadow is going to be for each object and enter that as you see, as I mentioned before, especially for the scalp, because of the structure of the cup, you don't see a clear core shadow. But now that you know that it is there, you should put it in there. Plus all the core shadow will be approximately this part of the cap because this one is like a sphere. It's round, but it's starts going into a, come into a cylinder here. So you add the darkest part of the shadow. And the shadow continuous even on this part. And this is a cylinder. So you added here. And this is the brightest part of the shutdown. But here on the other side is the opposite. We have the darkest spot next to the brightest spot on the company. So we'll have a core shadow in, that is going to be a little bit of a cast shadow that is inside the cup. So this is our brightest spot. And the inside of the cup will be the darkest part and the highlight will be on the other side. Let me add another tone for dance just to make it more distinct, to show you where the core shadow is. And as well, I'm going to add some meat tone for the whole cup. Because we see that in this oldest shades, all the shadow has to be well-integrated. This should not be aligned between one shadow, the other ones that the naming of the core shadow on the meat side of the highlight. So this is just to know approximately how they react, that one shadow is darker than the other. That's where the ends, but they should not be a clear line between these shadows. So they have to be evened out. And the lower part of the cup here is also approximately the core shadow. So I'm going to add that. And there's even a core shadow. And then this in this part of the contract count is kind of on another part that is lightened by the source. So it's going to have a different kind of lighting is if we see the cylinder from the top part. So it's going to have its brightest part in this area. And he's going to be done down in this area. And I'm just going to put another neat sound here for a whole cup. And I have approximately and the towns of this cup. And now let me add more core shadow for a box. Just for the one bit at a time, 14 simultaneously that all the objects, not just one before, because you need to add more shadow later on to some objects and less to others. So be careful not to put too much, not press too much with a pencil because that's going to tire, tire of your paper. And you will not be able to put a lot more shading on the objects. And let's add some 40 apple. We see that the eyeball is not completely around. It has a more flat surface here. So basically, the shape of the apple that is round is something like that. The shade is going from this place to approximately displace. Just put a caution on here. And let's add more tone to all of it. And when you add the tone for the Apple, just the event of a shave and core shadow, because those will give an even tone. It will add another layer on the core shadow, but it will give a new layer on the shading is not as, as dark as the core shadow. And now let's decide also where the cast shadow S. And as we see from the image to the cache shadow falls also our perspective. And I'm going to add it here. I can see now that the cap here, it needs to be lower down because I can see a slight light from from the back side of the box, but I can just adjust that by deleting a little bit of this cup here, this narrow of all posts. And even though it is not completely precise, it's gotta, you gotta have a small deviations from the main composition. That is, that is fine, but try to be as precise as possible for each time. And if this stage, I'm just going to be careful while you raise because what I want is to have my my paper claim at the time. So I'm just going to add the shadow here for this one and I have a slight corner from the other side. I don't think you have done the cube of that box that has a little white, some branches to that. And I'm going to add the shadow from the queue, which is approximately here. And for the Apple.
17. Shading - Part 2 - Adding layers of shading and gradually building your still life drawing.: So now I'm going to continue adding more shading. And as well as I'm trying to correct the small imperfection here with the, with the size of certain objects. But I'm not going to get too concerned without because at that stage, it's going to do more harm than then it's going to do heels. So I'm going to just extend slightly this shape of this of the box. So I can add a little bit more shape here. So I want to get the slight lighting, light spot here, one nor destroying the perspective and not adding too much, not having to erase too much because that's why it's so important to focus on construction before you add the shading, because when you get to this stage, it's going to be problematic to erase again and again. If I have a white spot here at the moment is kinda be hard for me to erase that white spot and to add the same kind of value to the drape, to the background. So I'm going to leave it at dance with this small slight imperfection of the cubing. Not exactly as I wanted it because I noticed that at that point. So you see what I'm doing this in front of your eyes and I'm talking about the imperfections. Just to take the use of that and don't get too stressed. I'm taking a pencil is softer in which is HB. Software means that the pencil adds more volume to the shading. It gets darker, basically with fewer strokes. So I'm going to go and add more value to the shading because they are the darkest place of this composition. And I'm going to add more shading here in front of the queue. Note that this is an artistic freedom that you have. How to create an illusion of an object. Being closer to us. The illusion you create is when you have something that is closer to us, like for example, this edge of the cube. You add more value to the shading. You have the darkest part of the sailing home here and much less on the top of the cube. So you're graded in that way that this object sticks out most for us. So I'm going to draw the shading. We don't see a clear and of the shading. So I'm just going to turn it in. And here we have another shading for the apple. The setting for the apple also overlaps little bit apps on the cloth that has the shape. Now to estimate that, mathematically, for a beginner, it's going to be a little bit of an overkill. And I'm going to pour it into that. So just use your common sense and see where the shading is. Just to create the illusion of life and the illusion of shape. And it's approximately over here. And we have this shape here for the photon to rape, going all the way down here. And this is the dark part of the trait. I'm going to add up to. And as you see, I'm adding a little bit twice as much. That price isn't much setup and value to the dark part of the train. But also I'm going and going over even the white part of the drape. Because they need to be integrated. The center cannot be just one part justifying the shape of the drape. Why it is important district is because it's very close to an object of mind that is on front of the composition. So we need to know the shape of this drape and how this ends. And I see that there is the other drape here behind that, there is a darker shadow that follows from the other object behind the apple in it has nothing to do with how and under Q, how the box. Cast shadow is on the app bar, is just a combination of the cast shadow on the box and the depth and the drag on that part. And I'm just going to define the apple a little more and add a little bit more value for the shading of the box. Now, let's start even going into the cast shadow of the cube. And I'm even doing strokes that is at the length of the cube. Does this one trick that you can do when you shade. You just follow the direction of the shapes that you see on the object in a drought, like for example, here, is a round sphere so you can add lines that go along the shape, that geometrical shape of this cup. And add more core shadow as well as you go and calm or even some mid shade and shadow on it. It will take a while for you to learn how to do this trucks. I mean, it did take me awhile. But as long as you learn and you'll find extreme pleasure in doing that. Now, there is a shading here below this shape that is a cast shadow of this shape here. So this one is a cast shadow. The cast shadow is on the cup itself. So I'm going to add that as a darker shape on the cup. And the cast shadow is not even out. It kind of like continue a little bit here and a line. So with the core shadow, it spreads out basically. And let's continue with adding some more shading, integrating it. And now I'm going to start again adding more shading on the lower part because this is kind of like a sphere. This part, so this part has its own rules of shading. As I showed you, the sphere part is going to be, it's going to have some midtown here until it comes to them. Highlight part. And this part of the cup is a little bit flat, so it's not completely around. So what I'm going to do is just drag out some shadow. I'm going to have the eraser. Soft. What I do is just dab it like that. Just take away, extract some shading on that very smoothly so you don't leave any, any light. And I see that I have a little bit super hard edge here that is not erased. I'm going to soften even with and, and correct it. So it's more, we're here. Let's erase some more. And now say that. So it's integrated. It go perform them back until you see that it's smooth transition. And it's integrated. It's not just it doesn't look like just some parts of it are safer than some parts are not. Partial shading. And again, women do that. You can go forth and back and monotone to the rest of your image. And here is the darkest part of the cone of the cylinder and the cup. And now invented fire the shading here and even here and now we're gonna go and do some neat town. Even for the upper part. Now that we have one pod that is darker, it's easy just to go over the whole forum, the whole shape and add another tone and we get immediately the midtone. And in comparison to the core, the core shadow. And we have immediately awesome. I mean, it's own bike and highlight here that is coming out. And even here. And now let's get, let's have the cast shadow of this shape. And the cast shadow continues even on the lower part of the cup. Just do a tone without, again intensifies 11 town at the time. And again, you see how I draw with my finger, with my pinky on the board, on the paper, and I just navigate from here. So I don't mess up the drawing now. So it's like that. And now let's intensify even doubt part of the cup. Add some more shadow. And again, another tone on, on this cast shadow here. Because as soon as the event intensifies something, you see that what we need is this one to be in the wider brightest part of our composition. So we'll have to intensify the back, the background color even more. And now let's start adding more value. And you see here that I will not need to add the same kind of intensification, the same income of shading allover the place. I will just need to have it next to the brightest part of the cup to make it look brighter. And I'm still not working with the drape, with the background. And you see why I focus on the middle part of the composition. And I don't really work on this part of the composition because you have a better drawing, a better composition. If you, if you don't have everything even out, you have a focus for a composition instead of just needing it out and have the same composition all over the place and the same strength of the shadow. And here I'm a distinct thing. This drape here that I can even now start shading. I'm going with another tone on top of dots. And as soon as I do something, I'm integrating x. I'm just doing another pass of the setup of the tone. So the cup looks brightest. So which means I'm going to go for that bike approximately in this area of the composition much more. And I'm going to define the brightest part of the cup like that. And here when the cuff is and the shading of the cup, even though there is some documents, their materials still darker. Because I want the shading I'm discussed to stick out. I long to have the illusion that the cup is full bef before this drink, I will try to make so that the cups shadow is darker than the shadow. So I'm going to leave a brighter shading in these areas. Less than it out as a whole thing, as one holds to Drake and not have that drastic shave, shaving nano dot drastic highlights as I have on my objects that are on the front row center of my composition. And now I've worked a lot on this area and that left this behind. So let's now go back and even forth on the queue. On the Fox and the box. Now we have this, this thing here, this tape here, which I'm going to ignore. And you can do that if you are an artist, you can swap to take into your composition one not attacking conversation. And here you can actually follow just a loose of shading to create the illusion that this box being solids and being in the right spot in the live perspective. And as you know, the brightest part here on lines with a dark spot of the box. And goals. And twos out, becomes lighter the further away it goes. Here you have to be careful with the HB pencil because you see it just guess likes darker strokes in the middle of the shading. So if you feel that you cannot keep your hand LOS, just call and use a harder pencil, which means a lower number. Maybe like for me. And just go as long as I have long been at the time. To do the saving of your composition. And we'll define the edges. Again. It is basically like that. It's like if you do one thing and the composition itself suggests you what you need to do next. And now here I have a cast shadow that falls on the box from the apple. And I'm going to put that in here. And now I'm going to define again the apple. And now the thing that I drew from the Apple is to hire out. So I don't need to have this big one, this big branch from the Apple is approximately here, and I'm just going to save it here. And let's start to go into the shading, even out the apple. The apple is also pretty bright. And it has this glances here. So to get to have the Glance, I'm going to say the apple on top. This is as it is, cylinder one bit at a time, not simultaneously. And again, if you do something wrong on either your eraser it with the soft gelatin like that. You just extract lighting. You don't erase your extract lighting from the shape.
18. Shading - Part 3 - Finalizing your composition and making creative choices. How to create depth and : So now that we have the main shadow, the older main shadows on place, just legs graded. What we need to do now is to come as close as possible to the final image I. And what we want to accomplish. So what do you do is basically use the principles that you know now and use the artistic creativity and the composition to create it. Again, to create an illusion of blood, sampling is brighter, is to put more darkness, more shading behind it. So you want to, you want to say that this cube, this side of the cube is much brighter than here. So you weren't on the shadow behind the queue, but you don't really care about this area here. Because if you start even drawing this one here, is going to have your main center of the composition to disappear. And just do as much here as you need to create some volume for the cube. And a redefine things again. And now that we have the box here, Let's, let's also work on the place that the boxes standing less work on the chair. You don't have to go all the way down, but you need to have some kind of a solid base. The closer you are to the final project, you'll have to grade things. So let's go into the capstone of the queue. Because now you don't want things to be from the graded. They have to be integrated. And this is one of the most difficult part, is too great. Your objects to know which one is darker, which one is brighter, and to add the rights of part of Tony, this is the hardest part for us. Basically. Shaving your composition. So you call aim, you save something, and you then, if you integrate as you have another tone to think that our darker, because you still want the background to be darker. So just keep your hand loose. Now I've switched to form B because I don't want to have a drastic changes. I want to slightly great the shading of the drape and the dark material. So I'm going to add more shading here you see still want to keep this part of the Drake still breaks down as one term at a time and decide after each term town, where do I need to add more? How can, how can I make this shape brighter? How can I have, how can I chose it now? So I've got more center of my composition in here. So if basically different decision you have to make, You have to wake the decision or where to where to make the shading, even though it's not there. And to use the principles of shading to create the illusion of volume. Where to put more shading and where to let b. So you can center your composition. And you have to grade your objects here. So they have approximate value for how dark they are, how bright. And now we have the IPO heroes teach out as the brightness. And now when you have that, let me clean up and let me add more light to the brightest objects. So I have a definition here for the darkest part of the couch. And I'm going to extract light. Here. I'm going to extract like here, it's the highlights. And I'm even going to instruct light on the lower part. And I'm going to extract sunlight here on the backside of the cup, which is the highlight very slightly. And on the apple. And this is something that you can do even without looking at the composition because you notice things. These are things you add. You will find in the objects because that's how the light works. And I'm going to integrate a man, this box here. So it's not that bright because. The box is not the brightest part of the composition. Just add a tone on all the bugs. But because the box, the edge of the box is what is the closest to me. This has to be, this has to have the most contrast. So basically, the decisions you have to make when you draw. A little bit beyond, what do you see, you have to decide Composition, white structure, what's closest to you? How you balance out the lines, how you balance the same, and what to what to draw, what to let D, or to what you see and what you don't see. But you have to put in like for example, the core lights that you don't clearly see batches now it's there and I gave you an illusion of the object being solid and an object having volume. These are decision that you'll have to make and just add more value one step at a time. And any stage you can decide that. Okay, I'm happy with my image here. There are different stages when you work with a pencil. One is that you decide that you can't stop there and you have enough volume, enough evidence to say that this is the composition I work with. And I have enum value here. So people can see that this image is complete. You can continue along. A1 can really draw until you get absolute photo-realistic. Look for this image. But also there is one thing that is a limitation is how long, how far in the paper will allow you to work on the image. Because at some point, if you have a paper that is too thick, you will get a value that well, not allow you to put more value on the image. So you have to grade out. Obviously, if you're working on in integer document digital painting, you can do endless process, you can do, you can work on this image a long time and each will not, you will not get us trouble. So you can continue adding value extracting and can erase and so on. But I would like you to do that for an on paper first because there's so much happening when you build things on paper. Now I'm grading here the tray because it also has, the thread has also volume nicely and about and here is the core shadow, the drape over here. And here is the shape of the other drake here. I'm just going to add it as a tone because I want this terrain basically behind the cup to have most value. And the drag also has, as you see, has a highlight that is over here as if it is a cone. And I'm just going to extract the highlight because what I want is that and that it has enough detail. But I don't want this shape to compete with a cup because I wanted the capital look more detailed than the drape and it will stick out. It will drive attention to the viewer with this image, basically MR1, the drag to be less detailed. The father of 50. So just send her the composition to what is the most important and is basic in this object here. And I'm going to add another layer of shading value to the DRE With more. And for all the lines, we will set her hands. She goes, I want to say I want to point out that the DRE is darker than any other object. The fact ground is done to it one bit at a time. And if I add the shadow to the brightest part of the cup, I'm going to change even more than value for these objects. And I'm going to have that cup stick out even more and gain one step at a time. Integrating it. And I'm not going to pay attention to much of the drape here. Now I'm going to focus a little more on the cast shadow of the apple. Give it a small town because this is in the center of my composition. And even for a cute little box here, just going to make it darker given more accents. And this'll make my Apple looking even brighter. Again. Wherever you want to have the brightness points, you just add more shape, more darkness next to it. That will, that will make the point bright them. It's not the brightness. Brightness is what next to it that makes it brighter. Just always think about that. If you want to center something, make it brighter and have the darkest point with darker shade next to it. So, and I want to add some glossiness to the apple so I can add the glossiness while I'm adding an extra tone for the whole apple. And I just extract some glossiness. So that's Delta collect data on the upper part. And say that again. And now I can just add slight glossiness and I can add more highlight, reflective highlight here. So I can have the apple, the apples material being glossier than any other material. And I can add another tone. And if I want to brighten the apple, just go with him, the whole gum and just extract them. Light. Doesn't melt it like that, and integrate with another layer of saving. It is always our decision-making process, the drawing. This is something that you have to get used to. Our decision process done by the artist. Wants to putting N12 let hours. But what is the most important? Basically, it's how you construct an image and how they follow the perspective. And as long as you have that in place, shading is just icing on the cake. You can, you can play with that in many different ways. You can play with different techniques. You can play with. Maybe just even have this object darker. You don't have to have it this way. You can leave all the Drake's to be actually brighter. It doesn't, they don't have to be darker. But you can play with the material, with the glossiness of the material. This is something that is actually important. But to be able to even draw that for a composition when you don't draw it from real life, it is important to know the rules and entire, It is important to have practiced it as much as possible from real life. Now I have this bright spot here that I want to add that I deleted, that Ryrie adjusted my composition because of that, because I'd miss this, this perspective paint one I drew. And I see that just this shading here has given me more space, more light. And we're going to add another layer. It can continue forever until you're satisfied with the video drawing and refining it one bit at a time. And now I'm going to put it even more shading here because I want to integrate the objects within the atmosphere. And now that I have is integrated, what I want here is to have the shading. Cast shadow of the cube to be more drastic. How do you do that? Well, because this is pretty dark. Just extracting light. Exactly. Shaming us. Again. Why is the dog just add some more light there and you'll have it look even darker. And now I have got, now I see that the cube looks pretty even. So. I'm just going to say that one more time and highlights one tone darker. And I'm going to do that by saving all the cubes all together with another layer of shading. I'm going to intensify the core shadow for it. So it's in differentiates from the core shadow of the other objects. One more tone. You'll see now that when I have the shading is much easier just to add another layer. And I'm going to shade it more around the cuff here because it will integrate. It will give me the perception that the copies brighter than the queue or the box. And what might need densify one shadow I'll need to go in. If then is applied the shuttles around that as well. I'll still take the brightest point here as much as possible. John, add another layer altogether to graded. So great, we just write this which is the arctan darker and thus have an issue as one layer at a time. It densify the shut off. And now you see that the cup is now the gun out as the brightest objects. Now let's add another layer where they meet. So here we are coming to unknowns of this image. And again, here you can continue and draw it as much as possible. But there comes a time where you have to let go. And you see that we have a pretty nice composition here that is very well-balanced. It has a center and it mimics the real life pretty well. By using the principles of structure, principles of composition. We have used the principles of shading. We have drawn what we know and what we, what we seen that there is there, you can still continue perfecting is like for example, extracting some, some white here and smoothing out some shapes. And going forward from bank intensifying some shadows. But this is approximately what you're trying to achieve. With every image in your mind, you will get better. You can put different challenges for yourself. Like for example, the integration of light and shadow or I'm being more proper with the structure or everything altogether. What is important is that you keep on practicing. And perfection is seldom achieved because every time you do something, you're already better than what it being before you draw it. So every time you do that, you just go on to the next level. And from this level, you can just continue perfecting small things. But at some point, again, if your work on paper, your paper will not be able to take anymore strokes anymore. And that's where you have to say, well and happy with this image, I have achieved some photo realism and I've learned about shading, about how to grade the shadow, about composition, about light, and about perspective. And how I made the decision. While to, what to continue draw, want to tune where to extract the light and where to live in the. So. I am going to encourage you to do more of these exercises and to keep on drawing.
19. Drawing a Face - Part 1 Construction - How to build a face using the three basic shapes that you lea: Hello there. So here I'm going to show you how to simply draw a face. The human face is one of the most complex things to draw because there is first a symmetry to it and also their different proportions, but you have to follow. But using the basic shapes that I've showed you, like a sphere and a cube, and a cylinder. You can use those proportions to measure and design the human face very easily. Now, there are couple of ways of doing that. So what I'm gonna show you here is one way and it's pretty easy way. And so there are other more complex ways of doing that by measuring every single distance between the eyes, the nose, and so on. But if you're a beginner, you would like to some positive feedback when you're drawing and you would like things to be simple. So for the sake of simplicity, I'm going to give you this very simple tutorial. I'll how to draw human face. Now, start with drawing a one sphere. One circle. And again, keep your hand laws. Because if you're a beginner, you will struggle with doing glyco, very neat, nice circle. So to be able to, to work faster and to be more precise to draw circle, just loosen your arm. Draw from the shoulder up and it just draw a sphere. Something like that. So now when you have that sphere, we can start splitting it in half. You can use a ruler again to measure. Whereas the house or you can approximately eyeball it. So I can now measure is approximately 10. Then you see I eyeball that's already in the right place. And I'll draw a line down. Like doubts, just let it go all the way down. Now, the human proportions is like split in three parts, approximately. The now's where the nano start, let's say from here. And it's 1 third of the face from where the eyebrows thought. So here we'll need to assume that we'll have these two parts is 2 third of the face. So let's split it in half. So approximately here, measure dance is approximately ten. So splits into, so find the middle of this sphere approximately here. And this is where the eyeline is or where the nose ends from here, because the eyebrows will be a little bit above that. So now to find the other third, we'll just measure. You can also use your pencil as you used to measure Diels-Alder proportions in still life image. And you measure another tort. So you can get approximately over here. And now to be able to measure correctly the face, you can draw a rectangular around the face, connecting the endline, outer sphere with the line that is 1 third of the face like that. And the other point here, that is the ending of the sphere and you just measure, measure it to be 90 degrees to the ending of the papers. And another line here that is parallel to the horizontal line of your paper. Like dots. These are just help lines. This is like kurtosis if you, if you will, if you want to draw, this is something that you will not need when you've improved your techniques and when you can see that without the help lines. So this is going to be the chin. So what we're gonna do here is connect smoothly like an egg shaped like. And here is, of course a little preferences if you want to draw, for example, a mere female phase or main phase, the female phase have a more pointy chin. So I'm going to choose to draw a female face. So the chin here is rather smooth. If you draw a male face, this is going to be more square, square like. Because males have stronger jobs. And females have a more gentle and Joel's and females have more gentle features. So you can put a lot of lines here just to find the right proportion. The thing is now, you can measure if you want to be neat, you can measure this part like where this point is, that it has to be symmetrical to this point. So you can draw a line in here and find the day around us point of the chin where where it ends and what you do is basically compare the distance between this part and this part. You can be really, really neat here if you wanted. But this rectangular will give you a cut. Measuring proportions for the have. So I'm going to clean it up here. Now, what we also need to find is basically the neck. And the neck is on the back side of the head, starts there and he's basically a cylinder, a cylinder shapes. And again, the female neck is smaller than the male and neck, the mailman neck medieval start from here approximately. It's more muscle are more robust while the female neck is gentler. Now this is an average female neck. Their females that are skinnier, that have smaller Mac. And of course this is a general face features of a female. Then you can go in depth late around and you can have features that are precisely for one person for portrait drawing. This is something that I'm preparing right now that I'm going to have a lecture on portrait drawing later on where your levels will discuss different features. So now we have this shape, and here we have the ending, the beginning of own nouns. So where the mouth is. Now let me save that knows, and what you'll do to count the helpline 14 ninths is basically to draw a little sphere or even an oval shape, not a complete sphere. Just to define the thickness of the mouse. Because the nose, as the shape is kind of like a cylinder. Or you can split it into and have the nostrils on the side are like small shapes, like small sphere shapes. So doing Splitting the human head in different shapes will give you also a hint how to put the shadow. Because the shadow follows the same principles, no matter if you're drawing a cup or you're drawing a human shape, the shapes are hidden in every form. So when you learn the basic principles of drawing, you can draw just about anything. So now we're going to have the nulls until this part here. And the novice is kind of like a cylinder, but rather, rather like a cone actually. And here is about the symmetry of it all. The cemetery is important. But when you start drawing, just try to do the best for each drawing. Again, you will not run out of paper. So give yourself credit, give yourself permission to fail with some drawings and just do it again and again in the practices, what makes perfect? So the mouth here is approximately down position. It's kind of like in the middle of this 1 third part of the face. And it also depends, this is now the standard kind of thing, a general generalisation of the mouth. So what you do is like when you draw a line of the mouth and let me again use the spherical shapes to build up the mouth. So I'll have a smaller circle shape here, spear and one larger here because usually or lower lips are thicker than the upper lips. This dice of course, m here is the help lines of more mth order, The helps shapes. So let's go in and also until all the eyebrows. So the eyebrows are almost what announce ends. Also, let's start drawing the eyes. And the eyes are where the foreign know starts curving up. So they're approximately here. I'm just going to draw the line here where The smallest part are more analysis. On the face is where I start. So the eyes are approximately here and they usually start a little bit from the nostrils, from where the nostrils are. So if we just draw a line from a no show up where you will find where the start. So it's approximately here. And from the middle line. This should be a little bit in. So you can measure basically if it's the same distance from this one to this one, it's approximately the same. Also, the eyes are exactly the same size as the distance between them. So if we measure this distance with a pencil, the one I should ends approximately here. And the other eye, if I measure this distance, should add approximately here. So let's measure the distances. This one, this one is a little bit too big. So let's minimize that. And this one is approximately here. This is an approximation. Again, there are specific, hence why this doesn't apply. Some people have more narrow space between the eyes, some have more tighter space, but this is in general how you draw the eyes. Also, the pupils are wider mouth and back. Now, let's go ahead and draw the features that we already get. Now. The eyes are usually not aligned on one line out of phase, but they are slightly in diagonal and they start from here, but the end slightly above the central line. They're more like an almond shaped. So we'll just try to do an almond-shaped eye. You can first start with marking whether your eyes is. You don't have to do everything at the same time because the more you allow for the proportions to stay loose, the more you can adjust them later on or you can adjust them during the process. Because you know, everything is about observation and upper about decisions and measurements. So sometimes even if you do everything right, you measured everything right, it doesn't look really good. So you wonder why is that? Well, it is back and forth. With your decision-making. You have to adjust and readjust what you see with what you know. And so we have one, the upper lid here, like that, and we have another after laid down, MBA should be approximately similar. Now while I'm drawing this symmetrically, but as you know, we don't have symmetrical house. So if you photograph yourself and you take the left part of your face and mirror it on the other side, you will look completely different. You will get completely different person and he will now look like yourself. And the other way around with the right side of the face, or faces are not symmetrical. So if you draw a portrait of someone is important later on to practice features down in different, different areas and to see the specific enough everyone's face. But for now, we're going to just do everything seemed magical. So you get the principle of how to do it. Now I'm going to draw the eyebrows and they start like a little bit from the ending of the nouns. And they curve up above the ice. Something like belts. And let's do the other one in approximately symmetric of space. And the space is approximately a little beds before the line of where the eye starts here. And does to mark an eyebrow. Again, you can have to be loose here because you will need to readjust. So the next feature is how to find where the ice is. Now that we've drawn a little bit the position of every feature of the face. Let's refine what we've got. Let's refine the mouse. And the nulls is approximately at like a cylinder as we said. So let's draw an elliptical shape over here. Just to show you that there is a shape of the nulls that goes this way that is like a cone or a cylinder, things that we already know how to do. And we'll just shaved the nostrils and acknowledge the surface here. This is for the purpose of shading later on. So we know that this curve here, it goes down. It's not a flat surface. So we can shape the nostrils here and we can let the nouns continue up. We will not draw that. This is like one thing you have here is an artistic of freedom. How many things you want to draw G1 and draw all the nodes the way up. Like a shape like that, or do you want to live it like only with the nostrils? Usually when you draw a female face. And the last line you draw, and the more characteristic or a mild tenderness you get to the face. That's why females news a lot on Instagram filters because they want to soft and their features. They don't want the whole everything to be visible. And this is something that applies to drawing. You can soften up the fetus. It means that you can choose not to draw everything and you get a more tender features. And so that's what we call an x2. And now we're going to connect this part of the sphere here to the corners of the mouth. Just smooth it out. You can choose to have different kind of mouth. It's up to you how to choose paralysis, going to help you to easily find the proportions of the mouth. And let's connect these points here when the corners of the mouth in a more round that way. So we don't have to measure it with a ruler just connected smoothly. So you get some rounded lips here, thicker ellipse. And now as you see that we've got already features of our face very easily constructing it one bit at a time. So now the eyes, the pupils, are approximately where the corner of the mouth ends. That's where the pupils start. So if you draw a line here and here, we can design the pupils to be approximately in this area. Now the pupils is going to be the hardest part of your drawing because they're so important. Because if you shift the eyes a little abates one side or the on-site, that character can look cross-eyed. So keep it loose until you're completely sure that this pupils are at the right position. Because the eyes are the windows to the soul and they need to look at people. We'll look immediately the ice at your character. So keep it loose and draw with those hands. Draw the eyes, were really loose so you can adjust them. So now I'm pretty confident that this character is looking straight forward. So I can even draw the pupils inside a character and get even more clarification if that is true. So the pupils are basically some other circles, the US molar NP inside the iris. Just to adapt and even live a little bit of a highlight here to keep the character more alive, even though it's not shaded yet, it can give you a motivation. Seed phase coming to y. So now we have already our features here. Now let's delete a little bit to help lines and start constructing and drawing the face.
20. Drawing a Face - Part 2 Refining the features - When you have the construction of the face you can a: So now that I have my face on plays out and just readjust the features, what I can see here is that one eyebrow is shorter than the other one, so I can readjust that and refine it. Again. Human features and very delicate. So if you don't measure properly or if you twist the features, it's easy for the face to get disproportional. And the only way to fix that is actually two practice because some symmetry is a hard thing. And sometimes it's even easier to draw a face in three quarters. It means that it's a little bit turned to one side or the other, then it is to draw a face from the front. Because then if you do a three-quarter face, you don't have the same symmetry that you have to follow. But if you have the face from the front, the symmetry is something that you have to take in account. Now, let's draw the eyes. So we have a better shaped eyes, NBC or a character come to life. So we can just draw the the eyelids and delete this help lines here. So we get a better structure. And let's do the other eye. The easiest way is to work simultaneously on both eyes or to jump from one feature of the face you another. This is an easy way to take your eyes off of something that you draw and just go in and adjust the other particles. When you go back to that, that feature does your drawing, you will see whether you've made mistakes. And the only way that you can see where are you drawing is, is by taking some step back, you can even go and make a coffee or tea or something and come back to the drawing later on and you'll see how much new things you see in the joint. That's why taking breaks while you draw is very important, is essential. So now we can shape the lower part of the eye. It's something like an almost shaped eye. And it starts from here, it's rounded and it goes below the eye. The pupil. A sign here just says still keep it loose until you tighten up all the features so you see the eyes are correct and erase the help lines and the redefined as much as possible. And now let's draw the eye more precisely, the pupil. And you see how our face comes to life one step at a time. And even though you're a beginner, I'm sure by now, you have managed to follow the steps so far and you have a face that you can be proud of. First face, if you haven't drawn faces before. And just do your best. Again, if you're frustrated right now that you don't get the result you want. I can tell you again, faces are hard to do so I assume that you practice and you will do another phase. Now let's deal it even does eyes, those lines. And let's shade a little bit over iris so we get a thicker shading out the IRS and get more light to the old portrait. And this will motivate us. Sometimes motivation is all you need. Now we have the face and now let's add some eyelashes to it. The eyelashes are not as big as some people being m. They are not straight up, but they're slightly at an angle. Now because this is a female, female usually have one to eyelashes and we don't see the lower part of the eyelashes because there is a perspective to the eyelashes as well. They are rounded shapes and they have a perspective towards the eye. So what the eyelashes do, they give a setup that is falling only ice that I'm going to add later on. So let's just shade the eyes from below. And usually when we draw the phase, we tried to draw a little bit lighter the lower part of the eyes, especially in females, because there is a surface that is under the ice that usually is brighter. That because the light post from this point, any bright themselves, the surface. So it gives more volume to the eyes. So here we have the face. So now let's add the hair. The hair is come in where the third part of the analysis, so you'll remember as like 123 part and where the third part is, there is where the hairstylists, and now where the hair starts, it means that there is an extra volume of that. So the Skoll continuous a little bit more up. But above the skull we have the thickness of the hair. And the thicker the hair is, the higher up it will behave. So there is no real rule here how big the hair is going to be. It really depends on the haircut. It depends on the thickness of the hair, and it depends on the racial features. For example, the hairs of African person's going to be really big and thick and it's going to have another forum. But this is something that you need to have under consideration. So let's have a curve that has a straight hair that is not as thick and is not as thin. So the hair has also some volume to it. It's not It's not an volumetric. Everything fall follows the order of folly of each styles here and it cleaves off political pet. And let's have her hair cut comes from this side and it just falls down over her face like that. I'm just going to choose this kind of hair. And the chunks of hair, really volumetric surfaces like for example, this chunk here. And I'm going to mark where the the shading is of this surface. And just designed, her hair comes falling down. And this one on this side of the hair will be thicker because now there is no symmetry to the hair in the same way that is the symmetry of the face. The hair is a freely falling volumetric surface that has its own roads. You can also draw it by following the rules of shapes like for example, this shape is more like a cylinder form like if you see, if you split the hair, you can see clear shapes like that and there is a thickness and and a volume following the rule of a cylinder. So if you've tried to put the shading, you will follow the rule. I'll cylinder to put the shading on that chunk of a hair. So let's get the hair-like over here. So we are not going to see her ears and just have the shape of the head going this way. And let's redefine it and bring some chunks of the hair falling down or show those even though we'll go we'll not going to continue down with her shoulders. And let's add here the shading where the chunks of the hair disappear in words like dot.
21. Drawing a Face - Part 3 Shading - How do you start shading the face using the knowledge of shading t: So now that we have the proportions, our phase ready, what you can do is just clean up the help lines. With the soft eraser. You seek out easier it is to clean it up. And you have a face of a girl that is totally made up. You haven't follow any phase that you know, you have only follow the rules and the principles of a proportion for our face. So even though this is a general phase and you don't have a real person that corresponds to this face. You have a realistic face that looks pretty good. So now what you can do is grab a softer pencil. So I'm going to have ADB here and just enhance the features of the ice. I'm going to make a thicker eyelashes and I'm going to have the iris darker just because the eyes are the window to the soul. And we want them to look really expressive. So, so I'm going to thicken the eyelashes and have some more blackness to them. And even the iris again, if you draw with your picture straightened up, you should use why there are paper or you should use your pinky to keep your hand not touching the surface, the paper too much because it's going to mess it up. This is one way of doing it, but if you're practicing, just do it as it, as it's comfortable because you can always do another drawing, everything. This is a practice. You should find that distinction when you practice and when you do something for real, so to say. Because even though professionals draw one drawing, I have done several studies of doubt drawing to find the right angle, the right proportions, and the more you draw, the battery drawing is going to be. So even if you draw one face, just do it a couple of times. So now what I'm doing is I am enhancing a little bit her eyes. And also I want to have a cleaner line here because I want to have some shading, some more definition of her eyes. And now that I have the highlights of eyes, I want to enhance that. And I can do that with having a little sip of this and, um, this eraser and just extract some highlights here. Very likely. And this is very good for this purpose. And I want to have extract some light even here on one side of the iris. And also what I want to do as give her some shading that falls from the eyelashes on her eyes. That will also get some depth of the eyes like that. And here I want to have white eyes are finishing. I want to have some slight shading because there is a rounding of them here. So I'm just going to say them a little bit here to note that. And I can give her some eyelashes, not exactly on the line but slightly below the line. That's how I can draw, even though I don't have the main line here, I can see that there is a shape here. There is a lighter shape where the light bounces that is tried straight under her her eyes. And it gives more depth and more tenderness to her eyes. So now I can add some eyebrows here. I can do the texture of her eyebrows with some more realistic eye pearls. Now that I have the shapes and the toning, right? And the eyebrows are going, they're not going up like that. I've seen many beginners I doing like eyebrows like that. Well, they're not going direction. They're growing in length, in the length of the shape. So they're slightly tilted. You have to be more observant awesome when you draw portraits on when Joe anything. Because observation is important for you to be able to draw while and talking a lot about it. When my other course, how to sketch humans from life, there is where were you turn off your analytical brain in a way and you kind of draw from life. And you learn how to observe, because observation is the key for you to be able to draw well, so now I can go ahead and even, and even Sade the mouth. And this shape of the mouth is kind of rounded. So it is kind of API, you are up to spill up, is going to have almost shapes. This is also a cylinder that is laying down cylinder. So if you split it, it's going to have this all shapes. And this is what makes the mouth look thick. It's not flat. So you follow the rule of how you shade cylinders and on. But first you have one main shading and then you will add little bit of shadow on this side of the mouth. So the core shadow as if you are drawing a cylinder here. And he will leave this part as the highlight. But also there is a glossiness to the lips. For example, if she has wet let it also has some glossiness on it. Or if she, if she has, for example, a lipstick. So here also you will need to choose how to draw the mouth. Do you need to draw all the courses that out here? It's also an artistic choice. I would suggest you go forth and back to decide, but I would suggest you to not do even saving. You choose to have the amazing shading around the center of the mouth and leave it a little bit unfinished. That will give them out even more volume because it will make the mouth stick out. The lips are not in the same distance from what we are seeing. The lips are placed on a shape that is Omar. To be able to note that just follow the principle of non completing too much of the shading. So you can give more life to your image. If the same applies for the lower lip. It's also has a core shadow. If we assume the light comes from this way, from this side. And so the core shadow is below, but even more on this side. And m, we have a slight cast shadow from the upper lip. On the lower lip here. If the light is coming from above, that will give it more. Volume. Here is like that. And now you can extract some highlights, like lipstick or something for some glossiness. And even here, now you can see there is, there is a volume here that is this thick part of the mouth that is also a separate shape is more like a, like a sphere here. So you note that by extracting some extra highlights on this part, but also you will need to integrate it with the whole shape. So you go with an extra layer of shading and to integrate them better. And you see, I'm drawing the strokes, the length of the mouth structure because the mouth has this small lines, you know, for other skin. So I follow the lines of the mouth structure to get the material of the mouth. You see the material, the skin on the mouth is different than the skin of the face. So using this technique, I'm, I'm giving the mouth the right structure and the illusion of being at different skin type. So now I'm going to work on the mouse. And here I'm going to give a very slight shadow on the nose. As we said, this is like a cylinder. And I'm going to give the lower part of the nulls of shading. And I'm going to put a core shadow alike right here, because this part of the nose is more like a sphere actually and this year continuously when this way. So I'm going to do some shading in here, like the core shadow continues. And the whole structure of the nose is like a cylinder. But each bar of the nose, the tip of the nose and the two nostrils, then a rather more like two spheres. So I'm going to acknowledge, acknowledge this. Shapes like that. And I'm going to give a slight shadow, core shadow a little bit above. And announce and I'm going to give this a reflected highlight on the nose over here. And here, I'm going to turn out I will not overdo the nose because as I talked about it, this is a female. I want her to have tenders features. So I'm just going to mark the shading of the unknowns of this part of the nulls because the light is coming from this side. So I'm going to use my artistic choice. And non-0, all the part of PAN-OS. But just what's important. And here around the eyes where the depth is strongest, I'm going to enhance that part just to make the viewer know where the light is coming from and to give more depth to the character. And also I'm going to shade this part of the eye because there is a surface here that goes inside and there is the surface of the nulls, of the cone out the nulls that's coming here. So very lightly and very gently shake it like that. And I'm going to work on the inside of the eye. There is a mesh inside of the eye here. That is where or a tears come from. And I'm just going to enhance it a little more. And now I'm going to give the nulls. Here we have these two parts are the mouth that connects the nostrils, and I'm going to give a slight cast shadow of the nose on top of this feature of the face here at that connects the mouth and the nose. A cast shadow, as you remember, is the shadow that is cast from the object to the surface that it is attached to or whether it's stenting. So this is the cast shadow of the nose. Very slightly. I will not go and going to overdo it. So it doesn't look like this as if she's having a mustache. Know that actually that everything else in the portrait. Very gently. I'm not going to overdo down, so I'm just going to extract some lighting here. So I will give her enough definition to have the volume, but not too much. And now that we have our face or show feature, I'm even going to shade her one part of the face because again, the light is coming from here and the face is like a, basically a large sphere. So I'm going to first find the middle tone of the face and which part of the face is shaded. So it's basically around here. And again, the same way that we did or still life images, you just add one layer at a time. You add shading one layer at a time. And here we have the jaw that has a separate shading. Then the face is still one with the face, but it continues a little bit in the mouth. So you can just enhance that. And because this is basically the part of the face that is more closer to us. We'll need to add a lot of tone. On the other side of the face. It's like a middle term, so we can add more volume to the head. And now we have the core shadow here. Again, you're in manpower. The core shadow of the face. Atmosphere is approximately here and it follows on the length of the face. Again, I'm going to do it very gently for this portrait. And there is also another shape of the eye brow area that also has its separate core shadow because this shape is a separate shape. So I'm going to enhance even the core shadow of the eye area here. So you can break down each area of the face and treated as separate as a separate shape. Now, I'm going to add some darker features. I'm here on the hair and I'm going to press with the pencil. Just to note that this part of the face is darker. It's like a whole. And this is because to enhance also how the hair is attached to the head. And I'm going to give her and give the volume of the hair here this way. And also I'm going to add now the shading which connects the head with the neck, because you see the neck is a surface, is a cylinder that is behind the head. So I want to make the head stick out. And to do that, you remember was one we talked about. The brightest point next to the darkest point. So if you want something to stick out, just add more shadows next to it. So I want to add more definition here to the fence and refine the features. And let's add the core shadow of the neck. So you draw that first and you continue adding this setup. One thing is does, besides that the cat is like a shape. There is anatomy of the muscles in to it. So this is not completely a shape that is like a cone.
22. Drawing a Face - Part 4 Final touches - Refining the shading, the features and making artistic decis: So now you can just refine the ice again. I told you that a four-firm back four come back with a refining and readjusting the features. And and now I can give some, some volume to the hair. Again, I'm not going to draw all the hair because this is the artistic manner does I have is that she's center something to draw attention to, something you kind of quote the most detailed there. So if you treat the hair and everything else and at the same intensity and the same care, the viewer will get destructed. And you will not experience the same depth of the character of the fortunate as if you would just hint of where is the volume, how does this behave here with just a few strokes? So I'm going to hint here that the hair, there are highlights to the hair cells. The hair is more like a wave kind of thing that has its own structure. And I'm going to add a tone here for all the hair. And I'm going to extract the highlight of this shape of the hair which reacts as if we have the drapes. If you remember, when we draw, drew the treads, there is a highlight cylinder that comes almost next to the face. So I'm just going to give it a tone of the hair. Just to give a delight volume. And I'm going to give him hence the places where the hair are a touching to the head and to give her some highlights of the hair higher up. And I'm going to also draw the cast shadow, doesn't give me another depth. The cast shadow of this chunk of hair on her face. So the cast shadow is going to be approximately here. This is something that you have to either observed or field. But when you just draw still life images, you will get a grip of how the cast shadow behaves. Because every time you draw someday, you will learn about the matter of all the objects, not just what you're drawing, but you get an understanding of, okay, if I have this shape here, I mean, how does the shadow behave and so on. So drawing will give you an understanding of everything, basically, no matter what you draw, but just drawing simple shapes like fears and rectangular select boxes. This will teach you a lot. So I encourage you to start with a basic drawings that he had and add ones that either time and every now and then just challenge yourself. So this is now something that you might be challenged to do, to do this kind of portrait. But don't be discouraged. You will not get it from the first goal. So now just follow the steps that I do and what I'm showing you. And once that by the time your MOOC all there. So now what I do as again, I treat the hair like a shape, like a cylinder here with the core shadow coming in here. And the highlight over here. At the same time, I'm integrating the hair so it's not just a separate shape of a chunk of a hair I'm integrating and some adding a midtone for the whole hair. So it doesn't look like just one chunk. And at the same time, I'm adding the most detail of the chunk of the hair that is closest to the main focus, which is the head, and extract some highlights here next to the face. But I'm not reading it. Same detail as I treat like, for example, the rest of the hair. I don't need to go forward and do that for the rest of the hair. And you see that it has already a volume of fortunate. And here is up to you to take it to the next level and do a more enhanced the hair even more. And some more details. Add some more highlights and just intensify some lines, intensify some shapes. But when you have the understanding of these shapes that they're following this principle, then. It's easy for you to do and to go extra and extra length and do some other steps. But I hope that this has helped to, at least to start with drawing cast. I'm telling you again, it's a process. This is not something that maybe you were blunt or right away and I hope you will. I hope this has given you lot of feedback and a lot of things that you can think about and take into consideration something that you haven't been thinking about before. Now what I'm adding here, I'm just wanting to tell you what I do is I add another cast shadow from this chunk of the hair on her face. So from this point on, you can decide on how detailed you want. You want to have this portrait. And what I will suggest is basically just add more details on the eyes, like polish them more like add more shadow beneath the ice and continue with the shadow approximately until the lung, the line of the lower lid. Because this space here, you see that you can define the eye globe by just adding some shadow from the eye luscious that falls on the eye globe and defines the lower part of the eyelid. And do this here as well. And just adjust and more highlights on the eye. If you want. You can have you can go as detailed as you want. Because the more you add to the eyes, the more alive for your drawing is going to have. You see the hair is not as important for giving the portrait character and life, but the eyes are. So I'm going to redefine the eyebrows here. There are many people out there that too extremely detailed portraits. But if you are a beginner, I would suggest that you start from here and then advance a little bit more in the technique. What you need to advance in actually also is basically how you approach shading, what technique to use. It's very difficult in the beginning, I know when I was a beginner, just to do this kind of shading, just to have the lines aligned like that. It was difficult for me and I assume it can be difficult fields. So I would suggest just shade. Just keep your hand on the paper or with your pinky finger. And just slide a little bit like that up and down, up and down. Just to get used to this movements. So this is something that you need to practice and it will give you more volume and smoother shading. When you draw your portrait. At some point, you will exhaust the paper, so it will do more harm than good to continue. This is a struggle for every artist, because with every detail and the better than drawing gets, the more you want to improve it. And this is very normal, but at some point, you will know where to stop and not well-defined on your view as well as your manner. Because even if you draw the same fortunate, we all have different manners. And one in the same artist, the matter house called the R. They all have different manners of drawing. So this is just an advantage of also having different personalities and different tastes. This is also like a fail more. Any other painting? Have you seen any artist the exactly the same as the other one, even if they do the same style, they all have different manners. And you see I'm starting now to add more and more tiny details, which is like adding some more definition on the shadow, enhancing some course chattels, enhancing some mid shadows, doing more accents. Accents in something means any more of a thicker line. So it enhances the value of this place. For example, like the mouth, I'm adding a darker line of the mouth, the middle line of the mouth because that's what way the mouth sticks out. And it centers in this area while here in the hair and just like turning it out. So this is one way of drawing head and I encourage you to practice. And you can take any image that there is that you're going to find included in this lectures. And start from there. And you'll find that difficult. Just print it out and start from the middle, from the end. And for it, even though this image and try to copy it, I mean, copying is not a really, It's not really bad because that's how you learn to draw. Now I've noticed that I haven't given the islands here some shading as well so I can continue like the more I looked, the more I want to touch it and continue drawing himself. But as I was saying, copying something is not really copying E, We're going to one a lot. So I encourage you to print it out, copy, It's just grab whatever file you want and start from there. If you find it difficult to start constructing, grab the file that I'm including in the lecture. Start building out the face from there from any stage and learn from it. Just learn from it until you can do your own days just from scratch. And I hope you enjoyed this lecture and keep on drawing.
23. Drawing a Tree - How drawing trees can improve your drawing skills and free you from the fear of the: Hello there. In this lecture I'm going to show you how drawing trees can immensely improve your drawing skills. Now, why is that? So because trees are organic forms, they do have structure and they do have character. But the difference from drawing something that parallels are very specific construction trees are very free to draw because whatever you draw, you can not do wrong. And the tree will look like a tree. So it will give you a quick feedback that you can do that, that you can draw that, as well as it will free you hand to move freely without being afraid of making a mistake, without being a rigid, so to say, in your way of drawing. So what do you do? I've taken a picture from a tree outside. You just do that and try to choose a tree that is older, that has more branches, like, like this one here, and it has more massive branches. Any kind of tree is nice. I would also advise you to go outside and sit on the bench if if you have possibility parades and draw some trees. So tree is a bunch of cylinders here with different lemons. So what do you do first is you get a really thick pencil, which is ATP at the moment and just draft and freely. Just the structure of this tree. So we have a chunk here and we have one tree here. Just even, even do a wavy lines. You don't have to be very neat with the lines. That is the beauty of it. So just use your hand limit on the paper. And this time and use the side of your pencil. You don't don't use the tip of your pencil just with the side of your pencil. Because here you don't have to make very clean lines and it doesn't matter that you don't have all the tree, your paper that you can grasp the whole tree, just to a chunk of it. And I can show you how. You can have pretty nice pictures, even you can friends among this picture. And then will just help you improve your turn. So you just roll that the trunks, you can also use. Just wavy lines, just double the lights. Sketchy depends how you feel comfortable with it. Again, this exercise is to get to use too rough drawing and use the structure of the tree to anyone get some positive feedback from neutron. Now, let's draw this other branch. You will not be able to draw all the branches. Exactly correct, but because somewhere they become too many. So here is a good example of how you can reduce the number of details in your drawing to be able to get the essentials. And now showing you how you can use the same principle as we talked about, like using the essentials, focusing on the same jobs. Where is the center of the composition for your drawing? To send them to your drawing and to add most details there, unless details the farther away you go from there. So I'm just watching this prime is here and I'm adding them approximately. You don't have to be afraid here. You can just grab the structure of the tree and, and start from there. So here we have already a pretty good tree. And I will add the ground. It's very important to add where the tree or the objects are spending because that will give you a stability for a composition also doesn't give you a sense of of where the perspective is. So you can draw as many branches as you need, but just try to get the main branches to start with. So now we have these three branches. They're all combs as the sea. And what we focus on here is basically the places where the parameters are fastened to the tree, to the main core of the tree, like this area here or this area here. And if we add more branches, just focus on the skeleton of this branch here. And This branch here. So these are the main points where you see where the branch is connect to the tree, to the trunk of the tree. So now you kind of first add a structure for the tree. And now you see that the light came here, comes from this side. It's from this side here. So you start with adding the shape of the light. You added as one shade just to find the tongue out of the tree. And later on you can add the core shadow. You cannot. The highlights, midtones. And this is something applying to all objects that you drop. But you see already, we don't lose hands. How you get a tree. And I'm sure if you already done this exercise, I'm going to put this image in the files that you can use, but I'm encouraging you to go outside if you can. I'm doing this lecture and the time of the pandemic. So this is something that if you're watching it right now, I hope if you're watching it a year from now or some months from now will be long past this, but this will be in history. And I'm also stuck inside. And I'm just grew up that tree trunk on my way to store. So I hope you can go outsides already if you're a year from now, but if you not tell something that is around your house or in your garden, or you can find something on the Internet, or you just use the picture that I have here. And here, I will add one branch here that is behind just to break the composition. You see it is nice when you have this old diagonal branches and then you have something that's branching out behind this other branches. It gives them more perspective. And again, you see, I'm doodling it mostly. I'm not really following ME perspective and just following whatever this image gives me and just doodling these branches. And now I'm continuing to add more details. Let's add the shading, the shading, and we have this Trump, trump here that is split in three parts, and every part is a separate cylinder. It has a separate structure and a separate, of course shadow and vowels shadow you see does we don't see a lot of bounds shadow here because the material of the three is very thick, but we still know that it's there. But I am choosing to do this rough, rough drawing of the tree because I want to be more testicle here. If I'm, I don't want to be too photorealistic. I just want to experiment, express the tree as something that has its own body and its own character. You Jane a lot, even drawing humans you to Jane a lot by just drawing trees. And here you can experiment. You can draw this way, you can draw with with of the pencil. Just follow the structure of the trees. Now let's save this tree here. Add some shadows, and again, you add more details around where the tree connects with the branches. This is where they're most details are and what you do, even in these spots, you can even add more graphic details. Yeah, like you can draw with thin lines. The structure of the trees. Like having it more for its size. It will give you a brand new way of expression. And again, I'm going to do a branch here and just add some core shadow, even if I don't see as I would like to add it there because it's going to give me the volume that I'm looking for. Notice why you need to know the main things, the principles of shading and structure. Because later on it will help you in your drawing. Again, remember that we create an illusion of life here. We are not. Necessarily just copy in real life, we are creating an illusion, but that's something real for the viewer. That's why it's so amazing to see when someone is joining. I hope that you will be admired when you learn how to draw and you'll be able someday to teach on your own. And it's always amazing when you start drawing and when you see how things come to life. And now I'm going to add even some more details here. On the on the trunk, on the law part of the trunk while the tree starts building up. And I'm going to add a, there is a clear shadow here. There is a clear cast shadow and shadow from the branches. I'm just going to add this shadow here because I want to keep my composition centered. And I'm not going to draw all the, all the stuff that there is on the ground. I'm just going to focus on this trip and I don't need to draw any background. What I'm interested is only just this particular tree. And here you see, I'm going to add enough details in front of the tree. So I have it's stenting solids on the ground. And you see the core shadow here. I'm just going to express it stronger and the core shadow, this branch. And now I'm going to add more, more tuning to the tree. And I'm going to add more details of the structure of the tree and expresses even mobile. You see I'm not doing it all the way up until the next time, until that this branch, I'm just doing it where the tree connects to its to the ground, what is standing? Because it's going to be just too noisy. Noisy is the proper word. You want to be, your image to be interesting, to be alive, to brave. So for that point, for that matter, choose, choose what you want to explore and what to let b, and just leave it to the imagination of the viewer. And this is the part of that I choose to explore and to enrich with shading. And even this part where the tree connects to the branch. And I'm going to even add some shadow here on this branch because I see there is a darker shading. And even I'm going to explore this little shading here on the tree to play with the light. Just to make it more interesting and play with the light. The thing is that you should be careful also with that, because as soon as you start exploring one detail and you add it, you will be forced to do more detailed image will demand of you to complete even that's manner, the manner that have already started. So as you see, this tree is not necessarily a copy of the tree that I started with, but it has a character, but it looks very much like a real tree. It has the right shading, the right proportion, neck and character. So I would encourage you to do exercise. It's like down and draw some trees, explore them, and just enjoy, enjoy the process because this is a time where it can have fun with it. You can make mistakes, you can explore it and even draw trees with the match just been some mat or just an explorer drawing that when different materials and different manners you can craft, you can just go wild exploring the trees. I hope you enjoy that process and fill out a whole block with very weird, nice twist the trees and see what happens when you're drawing skill. After you do that, I promise you you will not be disappointed. So I hope you enjoyed this lecture. Have fun drawing.
 Maria Avramova, Illustrator/Animator/Filmmaker