Transcripts
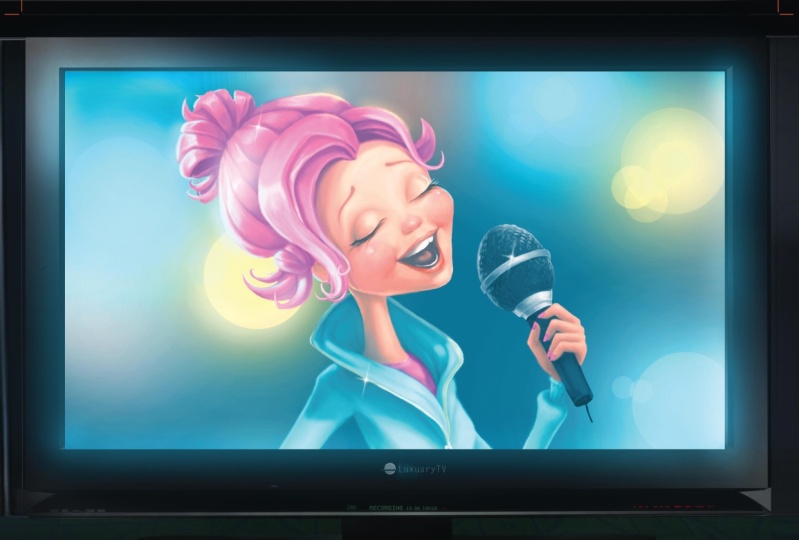
1. Introduction - Welcome to the course and what to expect to learn.: Have you ever wanted to draw female faces as perfect as those of Disney princesses, faces that you can apply to your book illustrations, for example. Or if you're making a movie to your character design. Or if you just prefer and like to draw for fun. Well then this is the course for you. Here. I'm going to teach you how by using very simple shapes, you can design a perfect, this snail-like female face. Believe me, he will be surprised how easy it is. So what are we going to warn here? We're going to learn how to find the proportions of the face and how to draw a face from the front and from a profile. How to add shading to the face, how to use simple shapes to draw a mouth, and how to draw noses, and eyes and hair, but also how to draw emotions or characters. This and much, much more, you will find in discourse, the best time to start was yesterday, to next best is now. So I hope to see you inside the course. Welcome in.
2. Warm-up - In this lecture you will learn how to warm up to start drawing Disney-like characters, how: Hi there. So here I am going to show you how to draw a Disney like female characters. This may seem like an impossible task, especially if you are a beginner. But I promise you this, that already in the first or second lecture, you will be able to do this yourself. And I'm going to use pencils because it's easy to do. You have a more free hand, which we want for the moment. And to not be too stuck with precise lines in the beginning. You want to train yourself for us to see the proportions, to see how to grasp and how to do these shapes and these faces. Instead of just doing clean lines, will come and get the clean lines at the end of this lecture. So what I wanna do now is just dumb. Grab a blue pencil. Here. I have two blue pencils. I have drawn that with this one. And this is a Faber Castile pencil. And this one is a ram brown pencil. It's a kind of like a softer pencil, blue pencils. What I use blue pencils one I start drawing. This is because when we draw with a black pencil, we kind of have a feeling that the drawing is already complete and we're more careful not to make mistakes. So we get stuck in just making clean lines. But when you draw with the blue pencils, you're more free to sketch. As you see, I have a structure underneath this head, what the blue pencil, and even here. So I want you to use the blue pencil so you're more free to make mistakes and to draft, to draft your character before you even start cleaning up. And then you can get them on black pencil. I have gotten this thick, thick black pencil. This is also, this is a Faber-Castell pencil. You can get the help without from your local art store, but any pencil will do. These are kinda of like artistic pencils. Just make sure they are like softer pencils spot not a crayon. And so so, so to start with, I would like to ask you to just grab a blue pencil and just start Nick making circles and hold the pencil a little bit tilted in an angle. Don't hold it like that and try to make clean circle. Just hold it loosely and just draw circles. Let you hand me the movement from the shoulder down, not from the wrist down, but from the shoulder down. Just draw with the whole arm. Just continue until you see a clear circle. And do it again. You'll see that soon IO forming pretty good circles when you do that way. And here what we want here is to loosen up and we're going to use spheres to construct the hand and to find the proportion. So you want to, you want to have this kind of habits, this loosen hand to draw with. Just don't be afraid, even if you'd draw over here or here. And even if you're stiff in the beginning, if you're afraid, this is completely normal. Everyone has been through this stage. So don't be afraid. And you will see by the end of this lecture, how much better you will get and drawing Disney, Disney like female characters, princesses for your book, go for you or your project. And even if you want to apply later on for character design them, this can be used for step and doing it. And the more you dare to do this, these exercises, the faster you will grow. As an illustrator and character designer. You see how different it is from this circle, even for me who has trained a lot. This is something that we need to practice. And the difference between this circle and this circle it has, it has gone through a couple of versions. But the difference is very big because here I'm more loose now I get a perfect circle with fuel lines. And the more I draw, the faster again the sphere. So this exercise, even though it seems meaningless, it is very important because this is not your handle draws, it's actually your mind, your brain is drawing. And we have an instant fear of the white paper of things that we can't do. So we are stiff at when we start drawing, even if it's a new day and you start drawing, you need to do some exercises to loosen up, to tell you brain, It's a playtime. It's not torture. So it, when you've done these exercises. Now, I'm going to move on and talk about the phase and the proportion for and how we can use these fears to create or character. So I'll see you in the next lecture.
3. Sketch the Proportions of the face - Learn how to start finding the proportions of the face with thi: Hello again. N glad to see you here in this lecture. Now let's start the farm work and something that will give you a result in the nice, this new line character. So what do we do? In the beginning, we are going to use the sphere to draw the characters hand. So just draw a big sphere. We're going to do a character from the face like that. So this is going to be the character's head. Now draw another sphere is a little bit squashed. Just the smallest fear, but more on ellip, elliptical and lead Chick form just squashed. And this is going to be the lower part of our character. I'm going to keep this really simple because if you're a beginner, it is nice if you can get the results really quickly. This will keep you motivated and we'll keep you working or so. I would like to give you a very, very simple tips and tricks. So you can start getting the result from the get-go. And here we'll call them find the middle point of the character's head is approximately here. Just draw a line. And this is going to be the middle of the character. And each side of the face, it's going to be mirrored. So this is going to be the chin. Now connect the gene and use these guidelines here from this circle to find the face. So, so the line that goes to the chain, It's going to to be around the circle dot withdraw the law part of the circle. So just use dots to draw the face. And here, when we draw the face, we want to quickly find where the face is placed. We want to find the neck as well. The neck is important to give us the proportion of how the body, how the, how the head is connected to the face. So just going to drop the mic here. And here is a line with the shoulders start. And now, with a very simple, very simple lines, we already have a head that looks like a female head. Now, the head is split in three proportions. One is magnitude of now's. Another. One is the line of the eyebrows. And the third one is where the hair starts. They are kind of like very, very much the same. So if you measure this and this, and this, they kind of have the same proportions. Knowing that you will know that the nose is 0 is always sludge here. So you kind of eyeball or even measure and split the head in three different parts. So the eyes are on both sides of this line. To find where the eyes are, we'll gonna do two circles. The eyeball of all eyes are always the same since birth. And while we grow older and the eyes look smaller because our hand grows. And that's why we'll, babies are small. Their eyes look really big because their heads are smoking. So Disney characters have really, really big eyes because this is a sign of you and also of cuteness and innocence. They say the eyes are a window two or so. And the eyes in Disney characters are thus why a little bit exaggerated. There. There are bigger than in the normal person. So let's find where the eyes are. And there will be approximately here on this line. Now pay attention, this line is not always the line of where the eyes are, even though you might think so, but there are approximately in this distance. So let's draw just eyeballs. Again. Use your hand to trials throw balls and they are on equal distance from the middle line. So just try to make them equally big. This is the challenging part. The eyes are really challenging how to find the size of the eyes and how to find where the eyes are looking at. So that's why it is important to have a drawing which is temporary because now you're just experimenting and you're just trying to find where his eyes are. If you draw with a clean line, you will definitely make a mistake. It doesn't matter if you're an experienced artist or if you're a beginner, this is how you draw basically, this is how even experienced artists do it. So there will be approximately here. Now let's find the eyebrows. The eyebrows. You connect the nose to the eyebrows. And there will be approximately here. With different characters. You can play with features of the characters later on because this is an approximate measure and you can lower the eyebrows a little lower down to have more of a determined character. You can raise your eyebrows higher up to have a more innocent character. Here we'll draft where the mouth is going to be. So here we have already the placement of where the features of our character are. So now it is about to basically just shape the character. I'm going to do that in the next lecture.
4. Draw the Features of the Face - How to find the facial features now that you have the structure. Lea: Hello there. So now when we have the placement of the features of the face are going to be. Let's start to draw the actual face. First. We need to find where the eyes and these are the most important. So the corner of the eye in the normal person is approximately where the nose and it's like over here. So so basically the I is going to be started like over here. If it wasn't normal person. In Disney characters, the eyes, the distance between the eyes is a little bit larger. And as a rule of thumb, the distance between the two eyes is another eye. So if you measure the psi, psi d is the distance between them is going to be another eye. So this is approximately sometimes the eyes are really further out and the characters still skewed. This is the advantage of drawing cartoony characters. You can play with the features. You can exaggerate them and still gets a nice character. But if you do that for a two or normal phase, that will look weird and distorted. So we're going to start the eyes from here, approximately a little bit further away from the nose. Like that. And again, keep the lines loose because you now still trying to find the features. We still don't know what the features are and you're trying to find it, this will take you some more work, so don't be afraid to do it over and over again. The end of the eye is a little bit higher up than where the eye starts. So, so if you draw a diagonal line here, I like that. They will end up like here. They have such kind of a more almond-shaped eyes because these are features that is also sine of u and sine of innocence. Let's find the upper part of the eyes. Usually because the it is Ni eyes are very large. They usually use them very large area over the eyeball. They open the eyeball more than usual, then it won't be the normal person. So the upper part of the ice will be approximately where the eyeball is. So just mark that here like that. And we'll connect worthy. I start with the upper part of the eyeball like that. And we'll just continue this eyeball. The IRS is going to end up here, but these aren't going to be thick lines because of the eyelashes. And the lower part of the eye is going to be maybe halfway up this eye, but still pretty much opened. You see that you discovered a character. As you go. You have some guidelines and then you just discovered just lower the eyes a little bit more, the beginning of the eye. So now you have the shape of the eye. Now let's find the most difficult part to the IRS and know where your eye is looking. So now just keep the handless hit the lines very, very loose. And we're going to make some big eyes here. When you draw the character in the first place, they look a little bit cross-side because this is the most difficult part to find the points where the eyes are looking forward. So keep it loose and just try experiments where the character look. So let us draw it here. It looks pretty girl. You have to do this a couple of times until you get it right. So don't worry about it. You are not a total failure for not doing it right the first time no one has done it right the first time you'll have to do it over and over again. Does the same thing as one you have learned. Walking, you haven't started walking just from the first step. You have on start biking from the first time you biked. It is the same thing. It doesn't, do not expect to start drawing perfect characters as you have them in your hand. Just from the first joint. Keep on, keep on exercising and keep on training. I mean, I sometimes hear people saying that, Oh wow. I can't really draw a more of less. I just can draw a stick figure. Well, how many stick figures had you draw? I mean, if you draw 11000 thick fingers so soon enough the stick figure is going to be looking like a real human if you try it. So this is like e, people thinking that it's talent that makes us great art is no, it's actually practice talent is just 1% of your artistic skill and 99 percent is training. Now let's do the mouth as well. Usually the corners of the mouth are lined up with a line straight from the eyes where the pupil is. So it's like if you draw a line, this is going to be the end of the mouth. And the mouth looks bigger because the ISR separated, they're further away from each other compared to a normal person. So the mouth is going to be with various smaller lips like that. And now we have some features that we can start work with. Now I'm going to grab the black pencil and just define these features. So let's, let's just define where the eye is here. And I'm going to start with the darkest part of the eye, which is here. And just draft the eyeball. And now I'm going to draw the pupil here and I'm going to leave a slight white spots as our reflection just to keep the eye moral life. And before I even finish in finishing it, Let's go to the other eye. Because even though you're drawing with a black pencil, you will still trying to build this character. So keep on searching it. And let's now draft even the pupil in the PSI and just check, is it looking at, is the character looking straight forward. So, so she's not cross tight, Are they in the right proportion to the rest of the eye? And just keep on drafting it. Yes, like that. So here is the most important thing that the eyes need to be the same size. If the circles, the spheres on the other part, doesn't need to be the same size. Here it's important that they are. And let's now we have the bullfights, the character comes to life. We see that it's looking good. So justifying the circle, the area where you think it's most appropriate, it's closer to the have the eyes similar to each other. And now we can also draw the lower part. She, she has big eyes. And again, you can try with different characters. They have different proportions in a way, but this is basically the main principle of how you draw these needs, these new line characters. And let's give her some shadow from the get-go around the area where the eyelashes are, because this gives a depth to her eyes. We see that her eyelashes are creating this shadow around her, her eyes and give, give her some more depth and a finished look. So let's draw the eyebrows. There'll be a little bit arched, a nice eyebrows. And let's connect the eyebrows to denounce in one line. And the mouse just markets as a line like that and give a shadow with a noise-like a triangular shadow over here. Later on, I'm going to show you how to practice with designing different gnosis. But for now, just follow this example. And here we have even the nose. Let's define the eyes a little bit, will always be gone back to the eyes, redefining them, formatting them. And now let's draw the mouth. Will draw the middle line of the mouth. And her upper lips. Very thin and nice. She is like a young girl. She's she's a young girl closer to being a child with these big eyes. Because as I said, the eyes are big. Eyes are assigned of innocence, of being a childlike. And now we can also give some shadow to the mouth. And the upper lip is darker because it gives a more volume to the lip. It means that it goes in this direction. And the lower lip is more lighter. And we can shade it with some light here. And we can leave maybe some little white spots as if it's glancing just to give it more life to it. And now we have already the face of our character. Let's define even the facial features. Just outline. Outline the face. Now, when we have these helpline with the blue pencil, we can really be more brave and nowhere or had is. Now we see how the eyes are, that we are on the right direction. Let's define the neck. Again, it's so much easier to trace things when you have a helpline with the blue pencil. And when you exercise in the beginning, when you've just had the loose hand and you've not tried to be perfect. Because perfection is nothing. There is no perfection. There is discovery. Look at the process as a discovery is not like it's not a perfection. Every drawing you will discover, and if you don't get the drawing right wall start over. The paper will not end. You will always have new tools. If you don't have a paper, just draw toe on the ground, look at it as a discovery until you get it right. You will not get the perfect drug because with every drawing you do, you grow, you get better. So every time you draw something, you've already outgrown yourself. And when you look at that drawing, maybe even after half an hour you will find mistakes. And so I could do that better. Well, just do it better. And that's how we grow. That's why you have saying that artists are never satisfied while does because with every drawing they grow and that will happen to you. You will grow as an artist. And it is basically a blessing and a curse because you get better and better and better and you get more unsatisfied 2, which is funny, but the pleasure of seeing your character coming to why it's actually pretty cool. So let's find the hair. And this is all very specific, this new kind of hair. So you see the hair as big chunks. You don't see one hair straw at the time. They're drawn in chunks of hair. And the chunks of hair have also volume. So they are bending like data, for example, this chunk of hair. And here we see another chunk of hair below. And will this hair has a volume that goes over here. And we'll see a hint of her ears here. Just mark them up. There's this chunk of the hair and it's, it's like a wave, wavelength, wavy hair. So let's find where the hairline is altogether. So it's approximately here. Let's draw her hair on one side. Disney characters have a really thick hairs. Very nice the cat hairs. And now the hair goes outside of the head where we drew the proportions. Because if this is the skull, there is a volume. That is the hair. The hair has more volume so it exceeds the line of the skull of this inner circle that we drew. So trust, draw it as this kind of a wavy line. It's like a wave. It always curves. And the hair is very important for Disney characters because that gives them this glorified look, this Cretan look. It's a big part of that is the hair. And you know, with the Ponzo, how much money and time is spent just to make the hair. As a CGI artist. I admire those artists because working as an in an animation as well. I know how much time has spent to simulate that hair to make it look just perfect. And right. So let's make the chunks of the hair and that goes this way also. And now you can be more brave with the lines. And they end up here. And here we'll have a playful little chunk of hair just have fallen down. That makes her look glorious and pretty. And just a hair over here. And now we can define where the hair is a little more and we can draw the shadows of the hair to give more volume. The part of the hair dot, dot bends here is where the hair goes on top of other chunks of hair. So just giving us some shading, just gives it more volume, volume to it. So here we have basically or first character. Now, I'm going to do some light shading on this character in the next lecture.
5. Shading the Face - Give the face more volume by lightely shading it. Learn how to do that to get the: Hello there. So now that we have the basic lines of our character, and we can do a lot with it. We can color it, and we can trace it, and we can redraw this character even to clean it up. But I'm going to do some shading here just to improve this character a little bit. And the shading is very light. And what you do is basically you find the areas when the phase where you know that the volumes are going in a different direction, they're going backwards. And the like, for example, in the eye area here, just to find the volume of this character and the face. And when you do it with just a black pencil, you are eliminating this, wondering which pencil you're going to use before you even color it. So just try to find the volumes before you even go in and color this character with what color pencils is, we'll just make it easier for you later on when you color the character. So just define a little bit. You don't have to be very anatomically correct because Disney characters are not anatomically correct. Cartoony characters are not anatomically correct. They are exaggerated features of the human face. Even though if there look real to you, they are not real. There are exaggerated, refined features of the human face. So just have the shadow of the face as well. A little bit more light and exaggerated in a way just the way that makes the character pretty, pretty enough and appealing enough for your viewers, for your audience to like it. But not too much to create photo-realistic face. So I'm just going to have some shadow here under the head just to give it more volume. And later on you can use this shading just to color it with different color techniques. You can put it in Photoshop and other program and continue working on this character went with color. But for now, I'm just going to show you how you shaded, where the shading as and how to make the character even more alive and more appealing. Just a chunk of hair that is underneath, that creates a deeper shadow, gives it more volume. And the part where the hair meets, the neck area is also more depth. So just make the area around the face darker. And you can have some shading, light shading on the chunk of the hair here. You don't have to shade the same all the face. You have to remember that shady has to be with measure as well. If you do the same shading all over the place, the shading will lose its impact. You have to find the right areas to shade in, usually where they're like a contact between two surfaces like for example, the hair, the neck, and the phase here, you can give it an extra accent, make a darker, but do not have the dark area. Just go all the way down in the same manner and break it up a little bit. I'm going to talk about this later on. But and the chunk of hair here is where the hair has some volume. So if there is a light hitting the chunk of hair, It's going to create a bright area here. And we signify this bright area with some more darker color. And you see that the hair chunk immediately get some volume. This is in the same way, the wave bands. And we can give some the same brightness here. Maybe when, where the hair bands usually these bright areas when the hair bends. And I'm just going to do the same thing here. And here is if the light comes from this direction, then it will give some glands on the chunks of hair over here. And and they're usually on the same on the same line. So if you have this chunk of hair here where, where the hair bands just have it equal on the other chunks of hair in the similar manner and where the hair is bending. So just to give a glance on. The girl's hair. You can do it with very different lines. You can share it with different lines. You can, you can try to make lines that are parallel to each other. But I know that if you're a beginner and this is kind of difficult, this takes practice like how to make lines next to each other in case you can just color it like that. Just make sure that when you end up the shading over here, that you don't get this corner line over here. Because usually when you're a beginner and when you color like that, you see that you can easily get like a corner at the end of where the area, the dark area. And so just with very light hand to still keep your hand. Light, drafts some lines. You will get used to it. After a lot of practice, you'll get used to it. And you see that I have an area here that is on the same side, but all chunks of hair has similar glance on this side. And let's give even this chunk of hair some glands. Just define more that these chunks of had, this chunk of hair is on top of the others. And you can have some glands on the hair. You been on these chunks. Here as well. You see how step-by-step or character is shaping. And what we started was, was with blue pencil, was with very loose lines and how we build it up from inside and out. That's why it's very difficult if you start drawing down from outsides to start with, the thin, the nice lines to start with. You gets lost quickly because so much exploration that needs to have for this character that you have to do the steps in this way. Instead. We don't have to have to draw all the hair the same because you see that it can get pretty boring. You have to break it down. The chunks are not exactly the same. The chunks that are around her head, more defined, that have more detail and further away you go. You can just have the chunks of hair fall lose or don't have the same amount of detail. Just to keep it interesting. And this is just a sketch. So if you draw down for a painting, this is going to be different. We'll have to have a different manner. But for sketching because the scheduler is also incomplete here, to make the hair complete in one side is going to be too much. But if you're drawing a painting, that's going to be a different matter. So let's give her some neck here. And so we'll have the shadow of this chunk of hair continuing here and maybe fall a little bit on her face. So we have first this new like character. And I hope you enjoyed this lecture. In the next lecture, I'm going to break down what you can do and how you can find the same shapes but in different perspective, in different forms. And we're going to do exercises, more exercises to get you, to get you used to drawing these forms without any fear and with more confidence. So I'll see you there.
6. The Proportions of a Face in Profile - How can you draw a Disney-like face in profile and how do you: Hello there. Now that we've drawn one and face from the front, you're wondering how can you break this up? How can you draw this space from different sites? Now, I'm going to show you using the same method, how you can do that. Let's draw the phase from the side. So in profile, just start with the blue time again. And when the loose hand again, draw from the elbow down, not like dots from the wrist. And just draw the ones circle. And again, draw a smaller circle little farther out from this one. And again, the Disney faces have this kind of a challenge like look. And let's draw the neck. Now we have the face over here. Maybe you don't see it right away. But the neck connects and thus the scalp with the spine. And let me show you where the faces. So here is the forehead and where the know our circle starts. It is actually the mouse. So if you measure three times, so this part and this part are the same while the circle ends is going to be the CIO of our character. Just connect this line. And when analysis going here and use this lower line, you see, you'll see where the head is yourself to draw the lower part of the head. And this is where the chain is going to be and just connect that with a nice curve to the neck. That's why it's important to draw where the neck is. Approximately like that. And now we have already the head there and the nose is a little bit pointed up because this is skewed. Everything in this new design and designing characters is to have a very appealing character and very cute character. So the features that we apply to them in the features that we think are acute and usually a child-like features because we all think babies are cute and demoing, grow up people that still have this baby like features. We, we tried to find them cuter. So here is again, the eyebrows. Approximately here. Because your measures like 11 part, two parts. So approximately here are going to be the eyebrows and here the eye now is going to be in perspective. But again, when we draw the eye ball, which is always round to find where the eye is. And the eyeball is going to be here, even though it's in perspective now. And let's find the ear. The ear is what yields thoughts, is approximately in the middle of the eyeball. So approximately here. I'll just draw another sphere, squashed sphere to find the ER. Now we are still discovering this will still just experimenting, exploring this character. And the eyebrow will end up here approximately. And here is going to be the mouth. So now draw whether my office. And here we'll have actually the cheeks so the mouth will not go that far out like GIF or not gonna go here. Because the mouth is also changing in perspective. It will auto boat the chicks. So what we will see here is actually the cheeks bulging like that, and this is the upper lip. So now let's try finding the features and we'll have the sum, this area here where the mouth is and the lower lip. Well bout over here. And because we already have this shape of the head, it's very easy to find. And then we'll round up the chin here. And here we already have almost our character. And the nows, let's give it some nostrils here. They're a little bit in words like that. Very, very, very gentle. And now let's find where the eye is. So if the eye starts here and it finishes over here, and this is going to be the eyeball because now we don't see the whole eye. The eye is also in perspective. So we'll have to find where the eyeball is looking forward. So the eyeball will be approximately over here. And it will not be a circle, but it will be like a squashed circle because it changes in perspective. And the pupil will also change in perspective, so it will not be around bot. Bot is going to be a squashed or elliptical circle. And now we can have the eye here. This is the hardest part, again, finding the eye because they're so important and they are basically the essence of Disney character. And we can have some iron block here as well. And let's find the eyebrow like that. And now we have a very good idea where or a character is. So let's give her, give her some hair. It's gonna start approximately from here. And this time the hair chunk will fall on this site. So we might not see the ear. We know what it is, but we're not gonna see it perhaps. Let's see where it takes us. I'm also drawing here as I go along. So you see the process from start to the end. And every artist, no matter how experienced the are, the blank paper, is always a little scary and exciting as well, because you will discover a new character. And this time I'm going to leave the year and I'm going to give this character a ponytail. So if this is the skull, you will find approximately where the hair is. It's where the chin ends in this kind of area where her hair ends and have a ponytail. And we'll give her a nice ending here. And again, the chunks of hair here. Just draw the chunks of hair. They don't need to be a lot. Very few are enough. And now let's give her ponytail and it's always a wavelike line, a wave, like a wave. And here we have, our tags are already. Now we can go with black pencil and refine that. And let's do that in the next lecture.
7. Outline The Face in Profile - How to Outline the face and refine the facial features.: Hello there. So now let's go with a black pencil and refine or character. And here is easy to go because we already see where the character is, is just a matter of refining and finding her features. And the thing is that if you want to do that in Photoshop in another program, you can just immediately start without or scan your picture or photograph at with your phone. Put it in some program like Photoshop or something, and maybe even start coloring. So here are the lips and immediately will give her some glands. So we get the character. The more character we get from the get-go, the more motivated we are going to be. And we will also see who this character is. Just small details. Small details will give us hints of how to continue. The drawing. Always suggest to us what it needs to be done next. You will see that when you start drawing, maybe it sounds like a lot of nonsense. Some kind of a woo hoo. But that is how it is. The drawing suggests to us how to be continued. It doesn't talk to us. Know, it's it's not that magical. It's not the voices that we hear in our head is just the hints we get. We see the face with their inner eye. So let's give her the eyebrow here. The eyebrow doesn't have to continue so long. And if you get it wrong, just redraw it. So lens design the eye. And the eye is going to be approximately over here. We see that it's looking pretty good, so just let's be brain with it. And we'll give her some eyelashes here. That is something that we will see if we see someone in profile a long eyelashes, and shade the eye a little bit so we can see what it is. And just find the lower part. Maybe here, also some eyelashes. And here we can have the eyelid visible. Some eyelid here. And here we have very easily or character in profile. Now we can mark the ears and the neck, and the ponytail here. And you can be brave now when the lines, because you see, you see underneath where the drawing is and here is our character. You can give her some shading. Again, where the hair is, the chunk of the hair. You can give some glands. Approximately here. It's always around the top of the head. Just to give her more volume. And here let's have these lands being around this line. You can even mark it, like have the glands of the hair or going into Iraq here and just have some shading to give it more glands to have more volume of a hair. If you, if you draw this lines at the length of the hair, that will give another, another layer of volume of the hair. So just shaded at, with lines that are at the length of the hair. So if the length is this way, you see that the lines are going this way. So try to keep your lines also going this way. And the length of the hair kind of like in the same line as the next line of the hair. So if this line is going like that, if you do shading like that, it will not look as nice. So try to follow the length of the line that is closest. And you see that this line is going like that. So try to find the length of the line that is closest and do the lines of your shading in that manner. And now you see that the lines going like smaller and smaller because there is more light on the upper part. And here you can just turn it down. It doesn't have to be the same because if you do something exactly the same, it's going to get boring. You have to Varro, have a variety of lines. And also let's give some specular here on the hair. Let's say it's here approximately. And let's give a specular even here on the lower bottom of the hair. When the hair terms again, you see that I keep the length of my line, the shading, and in the same way, that is the closest line around this area. It gives a direction to, to the volume that you are drawing. And let's give it a little bit uneven here because you know that the hair is not very even here like that. And you don't need to color everything. So now we have another character now this time in, in profile. So I hope you enjoyed this lecture and I'm going to give you some more insights in the next one. Hope to see you there.
8. Sketch the Face in 3/4 - How to prepare the sketch for a 3/4 face. How to handle the perspective cha: Hello there and welcome back. Now, I'm going to show you also how to draw a face in three-quarters. What does the three quarters mean? It means that it's not really from the front and it's not really from the profile is just a little bit turned. And why is it challenging to draw that? This is because there, we don't have a 3D. The possibility to follow the symmetry, because if we have the face from the front, it can kind of copy one side and apply to the other. If you have from the profile you told me to draw the other side. But if you have the face in three quarters, it means that one side will have some kind of more of a dramatic perspective change. So this gives you an extra challenge to work with. And that's why I'm going to show you here how you can do that. So let's start again, loose hand and just draw the circle. The hands will be turned in this direction. So just keep it loose until the data clear circle like that. And now let's draw the other circle. So if it's a three-quarter, what you can do is just draw at the middle line already. So you just make sure that it kind of make a nice arc. This line. It doesn't have to be super precise, don't worry about it. You will fix that later. So now approximately here, you draw the middle circle. Just eyeball it so it crosses a little bit. The other sphere, you see how you already get like a face. Because now you know what to expect as you're going to have when you train your eye. So you will kind of immediately see where to place this circle and how to find the face in this construction. So now we have already the starting of the face and we see that here we are going to have the chin, what is middle line? And here we'll have the rounding of the face. Now we have drawn here a really large more boundary elliptical sphere. And maybe we don't want the girl to have that checks. Well, this is something that we can decide actually. And we can just minimize her cheeks. Just draw it roughly so you can change it later with the black tensor. This is again just discovering, discovered the process. And here we have her skull. So let's connect this here with this circle and the ending of this circle, you get her, her chin basically where the chin starts and rounded out here from Chin. And now let's find again the neck. The neck is important because it gives stability to the Healthy know exactly how she's styles. And even though subconsciously, it will dictate it the choices you make about her facial features. It will give a more finished look. The more finished look you get for your drawing, the more you drawing suggest to you where to put the features. So if you, if you imagine the head being one here, you can see that here approximately you're going to have in the spine and the neck. You can draw on top of the lines because again, you don't, you don't keep the drawing screen. Now, this is the exploration phase. So you can draw as if the head is transparent and you can find the shapes underneath what you see. And here we have her her body starting her shoulders. And we'll just mark that. I'm not gonna keep on drawing it like that. And now we already have a pretty solid shape pretty quickly of her features. Now again, let's find her features. And how do we do that? So we know that this line is approximately what the eyeline is. But if you watch this one, dislike more DIS m's and approximately winded up with this line, you can find the eyeline. The eyeline is not necessarily exactly on the line of this poem. It, It's trace a little bit on one side or the other. So finite approximately here, where this, this corner ends up here. So now let's find the eyebrows. Eyebrows will be approximately here. And Let's then find the nulls. And now we can split it into three parts. So if the nose is here, if you see, if we have one, even knows approximately here, you will learn soon to eyeball because I'm used to it and I can eyeball it. And thus what you got to train yourself to do as well. And here is where the third party so the eyebrows a little bit higher up. And here is where the hair starts, approximately here. So let's, let's connect that and let's find her features. So here is going to be the noun house, and here is going to be her mouth very roughly is, you see that I'm not making any strong lines here. I'm still exploring because I can still change the shapes. And let's put the eyes approximately here. And the other one is here still, the both of the eyes, the eyeballs around, but this one is starts getting smaller because the head turns in perspective. So this one is going to be bigger than this one. And this is what I'm talking about. The difficulties in drawing in three quarters is that you get a perspective change. So not everything looks exactly the same on this side as on this side because of that perspective change. And now I find that I can put the nose a little bit higher up here and even the mouth or Lyft bit higher up. Now you don't see it because I see it in my inner eye as I told you about, I marked here that the nurse will be a little bit higher up. And let's find the eyebrows. So I'm just make an arc. The arc from the nose connects, actually the arc from the eyebrows. So you can just do that, does all that in here, and just connect with the eyebrows like that. And the other one. And you see the other one also has a perspective change. So it will arc a little bit earlier than this one. So this one will be more spread out, so to say. And this one will be shorter and more arched because it has this perspective change disappears because the head is non-flat, the head is round, so and the things that will be farther away in perspective, we'll have this perspective change as if it's a round ball. So just r-star to any year we have the basics of the hand. So now let's find where the eyes are going to be. This line here, the ice will start on these lines are fine. The starting of the eyes over here. And now let's find the top of the eye. Let's imagine that the eyes is fully open here, may be slightly closed. And just define this line on the upper part of the eyeball. And let's decide that the AI will end approximately on this line here, maybe a little bit higher up. So have the ending of the upper lid there. And you see this eyelid is going to be a little bit squashed. We are not going to see completely the ending of this upper lid. So just squash it. You see they're not even. So let's find even the lower part, maybe over here. And this one is over here. Very, very lightly, give the possibility for you to change it. And now let's put in the eye of the hardest part, the AIF has to sit in the right place so they're not cross that. So keep it loose so you can change it. Now, She's going to look at us. And here, and here she is. The AI is going to be much closer to the North. And this is something that you have to get used to. Just try it a couple of times. Don't worry if your first sketches look, the character Cross died or they like to farther away, just do it again. You'll get the feeling for it. And define the eyebrows. And here even, Let's give her a smile. And with an open mouth. Again, the mouth, even here, to change in perspective. So this part of the mouth here will be shorter than this part on mama because it just turns this way. And a smaller lips. And let's give her an open smile with a TIF. It's very easy. You just like instead of having that as a lip, just have that as a tip and just draw something like an extra lip like that. And then you have the character smile and you see that now the chin has gotten too little. Here. Let's draw the chin a little bit lower down to have her face more proportionate from one withdrawn it initially. But you see how having these circles first is help lines help us define the phase from the get-go and then we can change it. So let's find the ear. The ear is approximately on the line of the eye like that. And the year you can just mark it with a little curve like dots still is a stylized ear. And let's just give her some hair. Here. The chunks of hair, again. Draw it in chunks. And we have pretty much or character already lined up. I'm going to give her another ponytail here. But with bigger chunks of hair than the previous model, than the previous character, like that. And let's give her some really nice chunks of hair falling on her back and a ponytail. It can be visible just a little bit from behind, like that. Okay, so here we have basically the basics of our character. Let's go with the black pencil and see what we've got on to that in the next video.
9. Polish and Outline the Face in 3/4 - Refine and polish the face.: Hello and welcome back. Now that we have our character with the blue pencil, let's refine it and let's find the unit. And let's define the features to see while character we got there. So just start with the black pencil and you will see which lines you have to make stronger. Let's start from the ice. So we have that defined and the eyes are sitting pretty well as we drew it and draw them, the pupils and leave a little bit of a white spot. For the highlights to make the eyes look more alive. Again, you will have to do that a couple of times. So do not get discouraged. Even if in the second or third time you, John, do what's right. It is very important to have your drawing in with the blue pencil done before you go ahead. And that will give you much less headaches and anxiety over the gene counts draw well or so on. It's natural for us to, to beat ourselves up. If we can do something we think that we are not talented, just really forget this wild thinking. This is completely wrong. Well thinking you are blocking yourself up and you're diminishing your ability. The thing of the talent is actually the amount of practice that you do. So here are the eyes. They are kind of linear momentum. The character live up already. And let's thickening this area with the eyebrows where the eyelashes are. And the shadow under the, I am here as well. And let's design the data and the lower part of the eye. Like that. Again, almost like ice. You know. And now let's continue with other features. We'll go back to the eyes, just go four-firm bag between different features to, to make sure that you are drawing the proportions right? And you see that one I hear is much smaller than the other eye. And this is because the character is termed in perspective. Designing the eyebrows when she's with an open face so the eye brows are higher up. And here this one is a little bit more raised, a little bit more in a cheeky kind of expression. It's nice to give your character's expression because they get more personality, decides that you are drawing a face. You are also discovering who they are and their personality. So this can give you an extra motivation and an extra push. And the nose you tells market as a triangle like that. Like some kind of var, one shaping and give a little nostrils over here. You don't have to go to advanced to get a nice character because Disney characters are stylized. So you can use the octave within your advantage. I always want to go back to the eyes because the more I shaped things I kind of see, uh, what can I do more with the eyes to give her a better expression and to make her CUDA and, and nicer and more appealing. And there is different characters, different personality in all this character, even though the features are very similar and the design is kind of the same, you can still have different kinds of characters within this features. Very, very small adjustments can give you a completely different character. So just follow the curve of the mouth. And here again, one bottle the mouth. The mouth is a little shorter. And the other one that is towards us is a little longer because this mouth disappears. And here we are going also to see the space between the teeth. So market with black to make sure that we see, that we see in perspective. So this bar leg moves in this side and we can see some space between the teeth and the lower lip here. And define the lower lip like that. And maybe give her some chicks here. But chicks are bulging and shade it up and give some glancing of her lips with some small sales. And already before we even added some extra features, we can see that the character is shaping up. Now we can also define the nulls better. And just go ahead and define her chin. It's easy from here. You see, it's like building almost skeleton. That's already solid. Drawings that we already know what to do. We already know how to find the lines. So let's go with the hair and you see how quickly this goes. You can do these drawings many, many times. You just say a couple of minutes really. It doesn't take long. Imagine if you do tens or hundreds of den, of those in a day, you can just have your sketchbook and while you're sitting at school or at work, you have some downtime and you don't know what to do. You just like draw some faces like that for practice, finds him characters and before you know it, you've got an even better drawing. These characters would give her some eyelashes, lens give her some iron losses even here. Let's open up the eye a little more like that. Just row maybe the law part of the eye just to give it and to give her more volume and work more on the eyes. I like to go forth and back and just draw the, the whole character and the same time and not finished one part and then go to the other because it just gives you hints, suggest you what to do next. So you can still change it because this drawing you can still, later on, get in Photoshop or another program or redraw, redraw it clean and colorant. Use it in your project. Whatever project you want and to character design. Or if you want to work with it, you have to just practice and practice. So you can do that with many other characters. You see now here that the hair needs to start a little bit further out because it suggests that the hair is very thick. So if you started from here, skeleton finishes here, it means that it will not have the same volume. So just give more space and imagine yourself how the other parts that are not visible continue in space. And to give it more correct anatomical look of the character, pay attention to these details. If you want to draw better humans. I have also a course on sketching. Sketching is so important when you want to, to draw characters, when you want to draw people. Because we have to train or inner thigh to, to see things that are not visible for the eye to know what's behind 11 shape one surface. This is very important because we don't draw only one we see. We need to establish it and place it on things that we don't see. There is structure under every shape and form which we need to know about and we need to acknowledge it when we do our drawings, like for example I did with the neck, you see that the shape is not visible. The head is sitting solid on the neck and it gives the impression of a real human. It's not like a made-up human because if you draw the shape wrong, then you just break this illusion of a character being a real person. So here we have this little curl that will give her some very fancy little look, very cute. And we have this point here, starting I'm a little bit out of space here, but I'm just going to give her this kind of a short pointing tail. And again, we will not see the whole ponytail, will just see a part of it, but just acknowledges with a little curls because the silhouette of a character is important. So if you don't see the ponytail, that will give a character a less appealing silhouette. Even though we may say that, okay, but the point Intel is behind. So what do I do if I don't see it? While you are the artist, you decide. So give her some curls. Social looks more appealing. And again, wave-like shapes, like waves. This is something that you have to train to do, to do this way. Wave-like shapes. And now our character is done. It's outlined. You can you can adjust some lines, you can fine tune them. And you can give her, again some shading where the hair curves. It's going to have this glance on her hair. Again, follow the shape on the nearest line like this, for example, the shape of the hair. To give it nice form. And to suggest in what direction the hair is falling or moving. And in from the front chunk of hair, it will have maybe a light over here. If the light is coming from this direction, you have to decide where the light is coming from. And be true to the rules. Don't have the slides everywhere. Just be aware of that. And follow these principles. Follow these rules. Give more correct impression of your character, will be livable, setting and more believable. Lighting for your character. You see how she comes to life. Something that we started with, just spheres. You see this. As soon as you get the main shapes for your character. You'll be able to find her features pretty quickly. And if you want to work at Disney, for example, it will be very good if you become good at drawing these faces. Even if you are storyboard artists, even if you want to be a storyboard artist, you have to draw characters that looked like that. So you have to get used to that. Again, I'm following the directions of each line that is closer. You see on the length of the hair chunk how the hair is going. If there is a real hair on the NIF, which there is, of course, just follow the direction of those lines to shade it and to give these glands. And here behind, maybe you don't have to be as neat because this is also disappearing and the back. So everything doesn't have to be lined up. Needs. So be aware that here we have surfaces that are not flat. They are curving away from us, which demands that we acknowledged that. And we don't treat them with the same amount of detail. As we read the things that are in front of us. This gives the drawing more lightness and more, it feels more correct, even though we think that while we need to also colored dot with the same amount of detail, but that overwhelms the eye of the viewer and the view of things. We accept everything that is while drawn or wild, fixed, something that is with equal attention. So to be able to point your attention on the main place which has her face and her front. These features here of the chunks of the hair over here. We need to direct the attention in this place. So we need to have more details here. And the farther away we go from what is the point of view of us. The last details she should have. So just give her some shading. And the darkest part of the shading is where the contact is, where the darkest part is, and the lightest spot. So here we need to have the darkest part of the shading and just shaved her nose a little bit on downside and the nose and a little bit on her face. Very light shading just to give her some more volume. And around the hair will just going. We can give some shading from the chunk of the hair that is falling over her face to give her an extra volume. And this shading is kind of Y1. Thus why it's separated from the shading of her face. It looks more even. So. There's a different way of shading dat and shading her face. And this is the very light strokes. Just skip your hand. Very loath to have some shading of the face. You can use softer pencils as well. And in this array, here, the surface that is turning on inwards there, the shading here just around her face a little bit to give her more volume. As if is there is the 50s lighting, the Marilyn Monroe lighting where we have lights on here, but also the light on the face. Straight forward. So you can see the features clearly. Just defined everything more. You can better at drawing at all stages of your drawing. So here and now we have all other character and three-quarters. So you see how easy that was? I mean, it looks easy probably I hope is going to you're going to get used to it. And you will. Definitely you will. I mean, I haven't started with knowing how to draw that. I had to practice and I had to discover this technique that I'm giving you all these two shapes. How to work with shapes to start with how to get help out these freestyle at first before you even shape your face and your drawing. To be more precise, to be more correct. And just deal with that from that one step at a time. So I hope you are happy with this video and start practicing and continued practice. Bye for now.
10. How to draw Eyes - This is an easy technique on how to practise to draw eyes.: Hi there. In this lecture, I'm going to show you how to train to draw eyes. The eye, as I mentioned before, is the same size, kind of inhuman one from one we are born. The thing is that as we grow older or other features of the face are getting bigger. And that's why the eye in grownup person looks smaller than the one in the baby. So for the Disney characters, they always have big eyes because this is a sign of youth and innocence. And if we start drawing just eyeballs, I am going to draw different eyeballs here. Different sizes. It is good to practice with different sizes of ice just to, to be able to grasp actually the proportions and the way you draw eyes rather than just a certain size, because you will have to draw characters in different sizes. And if you just learn to draw at one particular size, for example, features or eyes, your eyes in the character will get sometimes dips just proportionate. So it's good to practice to just draw different ice. And I'm starting with the blue pencil, but later on I'm going to use even normal pencils. Normal, it means that they are not this thick. This one is. And the polychrome pencil, Faber Castile. And this one is CAUTI nor its Tooby to be means that it's kind of soft, but it's not as soft as for example, HB, softness, the softness of the pencils means that they give you a different kind of shading. You see that how much darker ATPase. So this one is harder pencil, MD S1 is softer pencil. So we're going to draw with this pencils as well. To draw, to practice, to draw our eyes. So here when we have different eyes, as I mentioned before, the opening of the eyes is expression of how big or eyes is. So if the eyeball is the same, for example, someone that has asian and feature will have a slightly narrow opening, while someone with other kinds of features or someone with bigger eyes will have a more opening of the islands. So it's not that their eyeballs are smaller than we have different eyeballs is just the features of the opening of the eyes. Why Disney characters have this open eyes is again, because the eyes are very expressive. We talk with our eyes. So when we want the characters, you have a strong appeal. And so we can read this character's emotion very clearly. It's important that the cat has big eyes. So we can focus on that. It's more expressive. We will start to draw with a thicker pencil. Will just have the eye ball here. Just decide that. And let's have the eye opening like that. So you just draw different kinds of eye-opening. Now this one was kind of like a scared I when I looked down. And the beginning of the eye is over here. And we also have an eyelid. So we have a little bit of space over here. This is where we have the thickness of our island. And we don't draw that often in these new characters because these characters are stylized. But it's good to know that if you have, for example, a distance between the eye and the eyeball here, this is because of the eyelids thickness. So you can just mark it, but you don't have to draw it all the time because this is a stylized I. So this is all scared aisle looking from the bus, we can have this eyelashes here. And we can continue with drawing now, a Disney kind of eyes so you can train wed, drawing in another eyeball. It's OLED. I start here and draw a line where the eye will end over here. Again, it's a diagonal I when we try to draw an album like ice. So you just follow the upper part of the ball and you're shortening this way from the law part of the ball. And you here you draw a big, big eyes. And you kind of draw here. The eyelashes. Just practiced doing that because the eyes are the most important in the character. And the only way to grasp it is to practice it. Now let's have the I slightly closed. Let's have a look in this direction. So because stylized, It's going to have a clear line like that. And it ends up here. Let's close the eye and again, let's draw the eye. But now we're going to see just a part of it over here in the middle. In this exercise, we'll just train your eye to see different eyes in different positions. And how the eye reacts, how the muscles on the iron reacts in different positions. So just make the eyelashes here. And again, you can draw outside of the image because you know that this is just an exercise. Let's have the aisle looking in this direction. And because we have them in the perspective here, how you find the perspective, if you draw a line in the circle. This line is when we look at the eyes. Straightforward. And this one is if it's like right in front of or horizon, all the lines after that are changing in perspective. They are bulging until it gets to this line. So the eye that you will draw will follow the curving of the line that it's standing. So for example, if it's going to be an I over here, is going to follow exactly this particular line. And it's going to be in perspective. And also the, the pupil will follow that. You see. And then the eyelid and the I will not go all the way here. They will end up kind of like over here. And then we'll continue on the other side of the aisle, which we will not see. And here we'll have the eyelashes. And here let's draw another. I just do many of those. Again. The album I looking this way. And here you can be really free with the shape because you are exercising, your training is pretty pleasant exercise. And here is like when the aisle look downwards, you have also did the lower lid. Here. You have the upper lid all visible and you have the i inside the eyeball over here. But what we will see is only this part of the eye. And this means that the eye is looking downwards. And you have the eyelashes over here. So you can fill up a sketchbook with designing on playing when the ice like that with open eyes, you can draw eyes in profile. You can draw eyes in different position, or you can draw only are open eyes just to get used to that as well. Where it just defining the eyeball and placing the eye on different position and defining where the eyelids are and how they behave. And after that, to terrain. To train your ability to see eyes without any problems.
11. How to draw a Mouth - Learn how to practise to draw mouths in different positions and of different s: Hi there. In this lecture, I'm going to teach you how to practice to draw different mouth for this new line characters. So you start with just having online like that, who are the middle of the mouth is going to be. So what you can do to get it right away or to have it easier for self is like draw two balls on top of this line and one ball a little bigger on the lower part. So what do you do? As here between two balls is the curving of the mouth. And here, the lower lip. You have to connect away the corners of this mouth. So if you connect that from the upper lip and not from the lower lip, you will get a perfect mouth shape. If you need to have more help lines. You can even draw some ball in-between here. So you can draw a perfect mouth. And now you can go way down with the black pencil here and just define it. And you'll see that how quickly you get the shape of the mouth pretty correctly. Like that. And you can add some shading here. You can later on delete these lines, the ball lines with the ball if you want, but they will disappear pretty quickly. And this is also an exercise. So be free to just experiment. And here you have a perfect mouth and you can add more shading on this part. Does because the mouth voters here in the middle to give it a more volume. And here you have a pretty nice mouth to design. Different kind of mouth shapes. Just play with the thickness of the balls and the length of this mouth to create a smaller ellipse, which are thicker and just have this middle part. Now I'm drawing this mouse in different angles. I don't have any face to follow, so I don't draw them in one line. I just want to show you how free you can be in your expression when you practice to just learn to draw these features. Okay, So just draw these two balls closer together and bigger. And one ball over here, which is also bigger. And now connect those, those two with the ending of the mouth. You can also decide to curve it this way or in the other way around, you will get different shape. But let's curve it upwards. The connection between one ball and the other. And also this map here and this one here. And here, you've got another perfect mouth very easily. And you see how important it is to draw the spheres in the end, in the beginning of the lecture. And you can have a little bit of boating here. But in the Disney characters mouth, they have everything pretty stylized. So they stylize even these shapes. Even as humans we have this bulging. The turn, draw it because the stylize the characters. So that makes it simpler for you to draw. And here is another shape of the mouth. And let's have given small ellipse. So with a blue pencil, you can just draw like that. And you can draw one ball here and one ball here as well. And in this boat of have the curving of the ball over here and just connected. With the end, with the ends of this mouth. Just round that up and round up this one here, the law apart. And have this curves over here just to mark the cheeks. If we have this character when Dick ticks and now you just around that up with a black pencil. And you'll get this cute little, very little mouth. And just shade the upper part a little darker. And maybe leave some glands here for a thicker ellipse. And here you have a completely different mouth. So you can fill up a whole paper with this kind of miles. Now how do you draw mouse in profile? Because the morphing profile has these two things. So just design the middle line again and have one ball here a little bit further out and another a little bit further in. And if you have the ending over here. So this is going to be the upper lip. Just connect this part of the mouth with the help of the front of the sphere here. And lower part of the polyp and has continued a little bit to the chin here like that. And just connect that. And here you have a mouth in perspective. Now how do you do an open mouth? Here you'll have to draw two lines. First, define the upper line and the teeth. Usually if the, if the mouth is smiling, it's kinda like a curve, like a triangle MAF. So here other TIF doesn't make a shape length dot signify that the teeth are over here with one little line. And now when we smile the mouth, drugs or lips, so we don't have this line. Usually we have a much more calmer upper limbs. So you can draw one little bowl here. And while it got little boy here, just to signify that this part is stretched because the muscles are pulling this part of the mouth. And we have a much more closed lips. And then you can have a squashed ball over here because it's also pulled by the ending of the mouth. And now just connected more smoothly. And signify that the T4 from here. And the good part is that the Disney characters are stylized and you don't need to draw a lot of teeth and you not to eat, don't have to be. So true to the net, to a realism. And to be able to draw a nice mouth enters draw. Connect this part of the mouth with a rounder line with the end of the lips like that. And now just shaded a little bit and give it some glands in the middle. And thus how you can also play with the shapes and the forms, even for these kind of mouth, smiling mouth. So you can train yourself to make a perfectly good mouth. Now this is the chin in case you don't see what the lips are here. These are the chin like that. So here I'm going to show you also how to draw a smiling mouth. Also in profile. Again, have a triangle like that. And signify where the teeth are. Already here. You have a mouth of a ready if you can't see it. Have a little boat here on the front. And there is a little bit, a little tilt in this, in this direction for or a mouth. And here we have the chin for example. So just have a little boat over here, a little sphere, and connect these lines with these lines and have the cine coming over here. And here we go with the nose. And you see how fast you get a perfect mouth here. And just use this be spheres to identify where the mouth ends. And the lower part here also, identify the shape of the mouth will help on the sphere you draw underneath. And here you get a perfect mouth. If you want to have a smile, that is smile with both teeth, you can just separate this part of the TIF because usually a nice smile is one Missy their upper teeth more than the lower teeth. So now you have a mouth also in in profile. So I hope you have something to work with and and do a lot of exercises to get used to.
12. How to draw a Nose - There is an easy way to draw a symetrical nose. You will learn how to do that h: Hello there. In this video, I'm going to show you how easily to terrain to draw noses. Now, you can start with drawing a line where the middle of the nose is going to be and where the nose is going to end approximately here. You can draw one circle over here, and this is going to be the tip of the nose. Now, on each side of this nose, you just place to small circles. And here, and here, approximately the same length. You see. So what you do is to design a nows is just connect that the lower part of the circle with the lower parts of these other circles like that. And just the curving of the circle, just have it as a part of the nulls. And now you can go with the black pencil and define that. You can find that this is the end of the nose, and this is the curving of the nose. You can design that and outline it. Here are very close to the middle. We have the nose, nostrils. And here you have a nice nose. So just shade until the middle part of the nulls to signify that the North is boating higher up here. Like the female nurses are in here. You can continue the nulls or you can decide not to. Because to draw Disney characters, you usually don't need to draw all the nodes to be able to draw a nice character. Now let's try it again. I'm going to draw it a little bit bigger. So you just, you just find the middle line and you draw one circle here. You'll decide that in the middle of this circle is going to be the boat, the upper part of the nose. So you draw two small circles here. Let's make a smaller nose and just connect this part with the ending of the nose here. Use these parts are the spheres here to define the two nostrils. And just find a curvature where the nose nostrils are. And now let's define that. That and like that here. And you have a perfect nose and then just shade it like that. And now, if you want to have a more pointy kind of knows while, then you draw the middle line and the circle in the middle. It should be more elegant ellipse. And then you draw two small circles on the side. And just connect this part of the nouns with the other two circles, you decide that this is going to be the point of the nose here. And now, define it with the black pencil and find the nostrils. And here is where the nose is coming up. So shaded like dot. And here you have a more pointy nose. So you can play with the shapes like that and design many different noses. Now how do you do unknowns in profile? So this one is more difficult to grasp, but you can also use the spheres and just use a sphere like that. And this is going to be the law part of the nose and a sphere just next to it. And this is going to be the nostril. And if you have, for example, a head over here, you just connect this part of the hand where it meets the lower part of the hand like that. And just connect them with the upper part of this md sphere. A nice curvature. So this line also touches the order, the part of the circle here. And now you have the nose and you can just define it. And here you can decide how this nose tip is going to be. Is it going to be up or is it going to be lower down? And here on the end of this sphere is the curve of the nulls. And here you just connected with that. And here you had the curvature of the nulls. You shade that part to get more volume, and then you continue with the mouth. So here you have a perfect nose. Now what you can do if for example, you have announced dotted more straight, well, just draw this sphere a little bit more straight and a little bit more pointy like that. And draw the other sphere closer in like that. And then just write to find where the head is, the forehead. If it is here. And the other part of the head if it's over here. So now connect the forehead and just connected with the ending of this tip. And the North is just curving over a year. Now, most of the Disney characters, they actually have these kind of gnosis. They don't even have this kind of tip here. So this one is even more smooth, like that base move or all the lines that it's possible just to have a very stylized shape or with fewer lines. It's very appealing to the eye in case you want to draw a character that has a more pointy nose. This is the way to do it. I want to give you hear as much knowledge as possible. So you can be free to learn to practice and experiment with your own characters. So you just connect the nouns and you have the tip over here, and you have the nozzle over here and here is the nostril. So you just connect the law part of this circle. And here you can start with the mouth and just shade it like that. And here you have a more appointed kind of knows in profile. What you're gonna do if you have anoles in three quarters, as we talked about, that there is no symmetry between those. So the nulls in three quarters, as you can start with a sphere here. And you know that you can draw the line and you can find where the first ball S and is little bit n is not exactly on the site because you're looking at three-quarters, which means that the other ball is going to be in perspective on the side. So you find what is ball as. And you kind of draw a line from this side. And depending on how the perspective looks like, say if the perspective as going this way, I'm not going to take talk about perspectives on not to confuse you because you can practice on that later. But say you have a normal perspective and the other sphere is over here. So you draw it behind this nose to see what part of the nodes you're going to see. So you draw the middle, the middle part of the nose. Now you don't have to draw all the parts that you don't see with the black pencil. You'll just know that here is the nose, here is one nostril. And what you're gonna see from the other nostril is just a little bit over here. And here you can draw one nostril here. And this is the nulls is going to be when the head is turned into quarters and you just color, not part of the Node.js going to be underneath the nose to give it more volume. And here you have announced that is termed in one side. It's not straight and it's not profile. And there's different variations of that. The more you turn the head, the models will change and this nozzle will disappear until it gets to disposition. The more you turn the head to the front, the modern nostrils on boldness to affordable visible until both of them are symmetrical to the face. So I hope this is a nice exercise for you as a beginner to practice how to draw noses for your Disney like the characters. And goodbye for me.
13. Draw a Chunk of Hair - There is a volume to the hair Disney-like characters, which is usually being : Hello and welcome back. In this video, I'm going to show you how to make a hair chunks very easily. Even though the hair chunks like something or really easy to do, it is hard to actually to make this kind of a volume of the hair, which is very typical for Disney characters, Disney female characters, and even male characters. There are specific rules of how this hair chunks behave that if you understand it, is going to be very easy for you to apply to your drawings. And I hope to help you with that here. So to make a hair chunk, you have to know which part is underneath and which part is on the upper side of the hair chunk. So if we have a hand over here, so it will have a hair falling down from this girl's head. I'm just signifying the head with the lines, with the middle line and when the ion line is because this lecture we are just focusing on the hair. So too easily to do that. You also do it with the spheres. You just have a sphere here which is a little bit stretched. This is going to be the law part of the chunk of the hair. And this one, you just have another sphere that is going to be on top of this chunk of our hair and just draw it stretched out. And this one is going to be the middle chunk of the hair. You can draw a nice line from this part here, the upper part, and try to find a curve that is to the law apart. So over here and here, you can do another sphere to help you define the form because it is a specific form of the chunk of the hair. Now we have this help lines and this line here to help us define where the hair is. So you can start with this part where the hair is starting on the head. You see that there is a line here that is not really around. It's kind of like going in this way because it signifies that this part of the sphere here that we've drawn. So you follow the roof line that is not quite curved and you just follow the line down and you connect all these spheres here, like you can make this dot, this dot, and this dot here until the end of the hair. If you need another one over here, and you just draw a smaller sphere. If you need to connect these dots. If you don't need that, you just connect these lines here until the end of the chunk of the hair. And here maybe you will need to adjust the way the hair gets smaller. Now this pencil is pretty thick, the blue one as it's meant to be because it's meant to keep your hand loose and not have a clear definition on the forum because it's an exploration pencil. See it as dots. So just connect the lines here and where this sphere ends, you just signify dads, you mark dot, this is going to be and what a chunk of their hair changes directions. So this fear signifies where the chunk of the hair is below on the lower part of the head and this one is on the upper part of the head. So you just go with a black pencil and start defining things that you got. And you just sing them. Find these chunk of the hair. The thing is that the chunk of the hair here is not around a, it has a little edge, softer edge. But you can, you can just give it a line like this to signify that this part here is going to be much darker. It's going to be in the shadow. And the chunk of the hair just curves in this direction. So just connect these lines with the black pencil like that. And you see that we are getting a pretty nice hair chunk here like that. So when you get that, as we talked before, there is a glance of the hair that is hitting the hair and that makes the hair shiny. So the glands is usually where the hair starts changing direction. Like for example here, it's not really on top of this edge, but it's a little bit below. So maybe approximately here. Sometimes there is a line like you see the hair is curving here. It could be something like that here. So what you do is as it's OK before you just follow these lines, that direction of how the hair is going to find these chunks of light of glands on the hair. And the thing is that when you shade the hair like that, there is principles of shading. I'm not going to go into too many details of DOM because I don't want to get your confused without in this lecture. But just After the most shining light over here, there is a shadow that is softer here, and there is another shadow is darker just after dot, just a line that is darker. And it gives the hair even more volume. And you can spread it out so it softens out. And here as well, there is a line here that is slightly darker in shade that gives the hair more volume. That if you want to keep more details to the hair for later on, but right now, even if you give the hair just these glands in your drawing, That's going to give you more volume. Now, the ponytail and even longer hair have a different anatomy. And as we talked about before, like a wave. For example, if you have a ponytail over here, it just curves like dark like a wave. And how you do that. I mean, it can be hard to have this curvature over here. So again, take a help of these spears that I showed you. Just have a sphere over here and find the middle line of the sphere over here. And just have another one over here is a little bit stretched. And just find this lines that connect the upper part of this sphere with this one. It doesn't matter if you get a straight line over here. You can still help yourself with another sphere. But even if you do it like that, you will get a pretty nice curve. And here. And you'll get another one, a smaller one here as a chunk of hair, and another one here. So you kind of just connect the spheres is very easy method to use to train yourself to make shapes, organic shapes. And that has this very nice line in lines, curvatures. Because I know I have been there as a beginner. It's hard to do. I mean, it seems like you've, you're doing it, but it just get something like like that. Now have trends and motherhood. I can't even do it wrongly. And this is what will happen to you as well. Because the anatomy Avon of the hair, of how hair falls down, the hair has its own weight. You can define it later on, habit, thicker over here. And you can follow again the principle when having the shading on the hair, where the hair starts curving. Maybe like this here. I be like this here in this, in this place. And just define it with some lines. And you can have maybe some extra elements inside the hair to define that. This is not just a chunk of hair, but there was like hair struggles. This is just an element you can give to you drawing something like that. And you can use that even if it's a straight hair, if it's a curvy line and the hair goes like that and it curves like that where this part of the curve is just turning. And there is this very specific volumetric expression of Disney, Disney characters. What do you have this nice curvature like a, like a wave again. Again, you can use spheres to define those shapes and connected these shapes from one place to another. You can use as many spheres as you want. You can decide like, let's do this one, this shape without me having drawn it already. So you can have a sphere over here, a sphere over here, sphere over here, and maybe a smaller one over here. Again, because we are keeping it loose with the blue pencil. We don't have to be so precise until we find the right shape. So you can find your own method of what is best for you to do. And now here you can have this curvature over here by connecting the end points of the spheres. Because when you learn to draw spheres very loosely, that will help you a lot actually in drawing nicely, in drawing your characters without any effort. And also these lines that are designed just help lines. As soon as you learn drawing this, you see that I couldn't even draw it wrongly is so stuck in my system that it's hard for me to draw wrongly. Sometimes if I want to draw and I visited drawing, it just takes an effort to actually forget all these skills and draw something that you are not used to draw anymore. So that's what will happen to you. And I hope you enjoyed this lecture and just keep on practicing and fill up a lot of paper or a lot of notebooks with these exercises. And it will help you get ahead with your drawing.
14. How to Draw a Happy Face - How to apply the knowledge that you´ve got so far and add an emotion to t: Hi there. In this video, I'm going to start talking about emotions and how to draw emotions in your carousel. So first, I'm going to draw a really simply some emotions just using spheres and very, very simple shapes without any heads. So let's draw, for example, a happy emotion. I'm just gonna go to two spheres just to, to see what's happening in the character or when the character is happy. So the mouth is drawn like really happy character. And the eye lens is going to get together. And the eyebrows are a little bit lifted. Like that. This is a happy face. Now, let's draw an angry face. So I'm going to draw again two eyes. And in the angry face, the eyebrows come down and the upper eyelids come down as well. And squint. Like that. We have the nows and we have the mouth in an angry position and the like that. And let's draw also a sad face. It's very similar to the angry face, but this time the eyebrows are gathered in the middle, in this way instead of this wave. The opposite way. And the eyelids are a little bit also in diagonal. While I'm doing that is just to know which muscles are involved when you doing this expression. And then the mouth is sad and kind of tired and sad. So let's start with these expressions. What you also can do is you can gather references from people that are doing these expressions. When you are a beginner or what can be challenging is how to summarize these expressions in your drawing. Because if you have a human face, you're going to go for our photo realistic features and you find it challenging to apply these to your character, to your dismay like character which is cartoon stylized. And you'll wonder, Well, where do I start? How do I go about? So having this simple drawings and we'll keep you focused on the main thing of what to change in the character. So let us start from the Happy Drawing. Angels draw here I happy face. Let's start with again, the head, defining the hand here with the sphere. And let's try a left find the law part of the half. And again, let's find the neck connecting the MSc with the head and the shoulders. And here we have or had already, Let's find the middle line that splits these two parts in half. And here is going to be the chin of all character. Now, let's define the features of the face. Now, when the face is doing an expression, the chin is also moving and changing its position. So be mindful of that, of how the chin reacts to this expression. So how does the chin react to when the character is happy? Now let's find for us where the eyes are and all of the parts of the face shows. So the nulls is going to be approximately here. And here are the eyebrows. And we will find the eyes on this line here. And this is one eye and approximately distance of one away is the other eye. Here. And now let's add these features to our character. So what it, what is the significance of this feature? So the eye is squinting. So if the eye starts over a year and it ends up over here a little bit in diagonal. Armand, like ice. And the IASB squinting and tilted a little bit upwards, is going to look something like that. And we're going to have an eye. If you remember your exercise with the eye, you draw the all eyeball to find where the eye is. And you will just have one part of the eye visible. So in this one here is going to be underneath just one part of the eye, invisible. Now, already we have some kind of heavy, heavy ice. Let's find the, the nose here. And the eyebrows are a little bit tilted. In words. When we love sometimes it's kinda of like in a painful expression, even though we are happy. You, you know, sometimes you love so much, you can't handle it anymore. Annual kinda of like mostly one stop laughing because it's painful. So the eyes, if you just know that the eyebrows are in this position. And we just draw the mouth. And here are the Mao who will actually pull this chin a little bit up and underside and the cheek, the chicks will bulge. So, and the mouth looks at this way even in the, our character. So let's just draw it and let's boat the chicks already. And here the chin is pulled a little bit down from its main position to leave the space for the laughter. And here we can have the TIF separated so we see more of the inner side of the mouth like a real laughter, like if we have this mouth even more wide open. So let's do that. Just mark it here. And we'll have the ears. And the hair is going to be approximately over here, the chunks of the hair. And let's give some volume to the hair. So let's go and refine these features with the black pencil will just define the eyes, squinted eyes. And what we see from the eye here. They bought out. We'll gonna see a little bit of the eyelid. So we can draw that. And let's draw the other eye over here. And really squint those eyes in smile. And the pupil here we see very little event. We can even draw some eyelashes. And now let's draw the eyebrows. We can refine them and have it even more refined than DOT like a really feeling that it's in a way painful to love. We can also draw the bulging of the eyelid. Here, not too much because it drawing a wrinkles and even a laughter wrinkles. It just ages or character. And when we draw these characters, we want them to be appealing and it'll look very young. And you can draw the nulls. You can use that technique given you with the, with the spheres. And here. Or we can just mark the nose on the NIF. And here we can draw the lips. Now the math is going to be even more stretched. So the shape of the Mao who these two bulges in here is going to be actually almost invisible because when the mouth stretches in laughter, in just erases all disease stretches out and erases all these bulges that we have when we are in a relaxed position. So we're just gonna see the lower part of the TIF. We don't need to draw the teeth because in this new characters they're stylized. And just give the lips some volumes, some glands. And just define that the chin. And the chin is pulled up in any bulges in the chicks over here. So so we can just note that that's why it's important to draw with a, with a blue pencil because it's formable. You can change that later on. And here, you can give her this chunks of hair and her ears marker years or we hear ME know now where the neck is. And let's give her the hairline here and just make her hair like that. A very thick and lively hair. And even here, don't worry, if you can't draw this line from the get-go. Just use in the spheres as I showed you. Or just follow this example to start training to how to draw your hair. But now when you know how the chunks of hair are reacting, you can, you can just train yourself and get used to drawing that. Angels have shading a little bit. And here we have one smiling character. And just give a slight shading to make it look nicer. And you can continue, you been working on this character later on. But here is an expression that we took from a very simplistic expression here. And we applied the features of the face that we already alarm for, the neutral face.
15. How to Draw an Angry Face - Learn how to draw an agry face and how the perspective changes of a tilt: So, welcome back. Now, let's go further and draw an angry expression. Now, let's start again here with drawing the top of the head. And here we are going to draw the lower part of the head. What enhances an angry impression is that we tilt a little bit the head, so the chin is lower. And like we're looking angrily underneath or eyebrows. So I'm going to draw this both and tilted a little bit downwards, which means that I'm going to draw this circle little bit smaller because we have a perspective change downwards. And I'm going to push it up a little bit. And imagine that the face will look a little bit down. So now let's connect this face. Let's have the gene being here. And the phase here is going to be smaller. Because when we tilt the head down, this part of the face gets smaller because it's in the perspective. Let's find the middle line here. And again, and we don't have the same chin bones here. You can find it difficult to keep the symmetry from this part to this part, but it's just a matter of practice. So now let's draw the line, the eyebrow line here. And the eyes will be slightly looking down. So basically this line here does the atmosphere line will kind of a line or the line of the eyes. And we'll have the nose. So here we know that the head is tilted down and the nulls will have also a perspective change. So just see the upper part of the nose and we will not see this lower part of the nose. So we'll just market this way, which makes it even easier for us to draw because it's just a mark. And now we will find when the eyes are going to be, we'll draw the eyeballs. They're always around. And remember the eyelids made in almonds shape. And the more you open the eyes, the rounder they get. So we need to find this expression here. The mouth will have this shape downwards. So the mouth here will be closer to the chin because the face is tilted downwards. And it will have this shape and the mouth will be smaller. Because we draw, we drag the mouth downwards and we press the lips together when we are angry. And so King saw the hat dot. And here we have our basic shape. Let's draw also the neck. So we have the head sitting on the Mac. It is important for balance and now we will see less of the neck because the head is covering even this part of the neck over here. So we'll see less of the neck like that. And now we have already basic shape like that. It looks like an alien. But we know that it's not going to be like that all the way through the drawing. And let's make the hair here. Just draft the chunks of hair. You can have a different haircut for four different characters. We don't need to draw the same character. Just practice to draw that. Because you will find it difficult in the beginning to find some similarities of the character. That's all right. Because B, when you're a beginner, the main thing is not to find to have the same character, but to keep the proportions right, to find the facial features. This is something that you have been struggling with. So just try to find those and don't care too much to draw the same character later on when you get used to that, you'll be able to draw the same character. So let's find where the eyes are. So the eyebrows will be lowering down and the eyes will start here. And they'll be pushed the worst, the eyebrows, when we are angry, we dragged the eyebrows down. And here is where the other ice starts and will look as if we look from underneath, under our eyebrows. Let's find the AIF and the pupils. So the character is looking straight forward and is not crossed iot dot is the hardest part. And the ice, Let's draw where the eyes are finishing. Over here. Something went that and maybe we can push the north a little bit higher up and find the lips. And now we have just basic shape of our character. Now, let's go with the black pencil and discover, discover the character. So we'll just shape the eyes and you see how easy it is when we have a basic shape, just to find within that or character. And y is easy to use pencils is because if you use another kind of pen when you, when you draw this your first characters, it's, again, You mean you cannot explore this lines. It is important in the beginning that you're allowing yourself to make mistakes and not to have a correct line 2 from the get-go to explore it first before you go. And in kits with the pen or with ink, or even in Photoshop, you can always do that later on. And we, even when you have now with a black pencil here, you'll get a more definite character that you can go in and color and in later on in Photoshop. But for now, you need to have the flexibility to draw this character and even to readjust the lines, even while you're drawing it like that. And here we can just add some shadow because this muscle doesn't stop here. It continues a little bit. So maybe you can draw this wrinkle over here on the forehead. And the eyelashes. She looks appealing in 2D, even though when she's angry. And you can draw even all the I here. And let's draw the nulls, just the mark. And let's draw even the angry lips. You see I'm going forth and back all the character. You can even add some eyelid here. So I don't draw one thing and then go to the next. But I draw all over the character or the time because when you move your attention from one part and draw another part, you'll see the mistakes you've made and wants something else needs to be fixed. Now we don't have this extreme pose here, but we have just the lips a little bit down, down and sulking about. We don't have. Just as extreme dislike, too cartoony, we still have to apply this, this facials on a character that is somewhat more realistic than those one. And round out the face. You can make the Chine even smaller. And you see that I'm still not using eraser. You can do the odds. But if you don't use eraser, you train your brain to relax more that you are not doing any mistakes. We're stressing score cells up by giving these values to yourself. Oh, I'm not good enough. I Control dots. Or, you know, when you draw something and your peers are telling your ion notice now and all these kind of demeaning banks. And you kind of why'd you use scarcity when, when you along and you don't have anyone around you, you'll kind of scared to do something. You are hearing your own voice saying these things, which is very bad actually view because there's no artist that has been, that has started knowing how to draw from the get-go. And you need to be able to make mistakes. So allowing yourself not to use eraser is one step to take your power back from those voices in your head or around you. And see you allow yourself to explore, explore the shape of new characters. Because you don't need these voices. They are not helping you. They are only heard in new. And we've all had that. And we've all had teachers that has erase these voices. I mean, for me to work in this career, to work with what I do and to enjoy what I do now. And it's basically I've had someone or that has been telling me that that has taught me how to be critical to myself, but also how to be able to explore the shapes and forms and how not to be afraid to make mistakes, because that's how we learn. So we'll have this character with the spawning tail here. You know how to draw the chunks of hair so far. And now we have already an angry character which is kind of taking this stylized shape. Of course, the eyelids are not this lower down, but we just want to find the features. The main features of being angry, which sales were lower eyebrows, a tilted head, the lips, or gin downwards. And here you can say you character or non-dot you have. Now you can take it in your, in some program in Photoshop or something. Or you can color it with pencils. So you can have the hair. Jiang saw the hero with the glands and the shadow. A little bit shaded phase and some shading even on this chunk of hair. Now this became a little bit to, to even so if I will redraw this character hour, just break this down. Because you see that I'm drawing in camera in front of view. And you see this, even the mistakes that I make. Black this chunk of 2 hair cell, there are two similar. We have to break down the similarities, we have to the evenness. We have to strive to have an unsymmetrical things to give more alive to our drawings. So if you can break things down and have an uneven, just do that. If I had to redraw that, I would change this gun shapes in different way. Maybe something like that. You see P1, if they're the same chunks of hair, they are not the same, they're uneven. So given a little bit of a glance here, and now we have, I'm angry, this new line character. And you can continue exploring this directory. Now, let's make a female character in the next video.
16. Hot to Draw a Sad Face - How to draw a Sad face and how the features of the face change when the fac: Hello there. So let's draw the third expression here. And this is a sad expression. Now when we're sad, we're kind of tilting the head up instead of down. So this time I'm going to draw a phase where I slightly tilt the head up. So let's start again from the sphere. And now that I know that the heads will be tilted upwards, I'm just going to push the lower sphere a little bit. Just slightly upwards. So, and let's find the middle line here. And let's define or character the facials. The chin here. And let's connect the upper part with the neck again. So here are our eyebrows. The eyes will be over here. And remember, because we're tilting the head up a little bit. So this sphere here will be just millimeters slightly below the line. So we'll have we'll have the eyeline may be over here a little bit, and we'll have the nose. Now we're going to see more of this part of the nose instead. So the nulls will be slightly higher up because of the perspective changes. So let's draw a sphere over here, just to note that we'll see more of the nose. So the lower part of the nose rather than the upper part of the nose. And let's draw even the lips. There'll be slightly opened and the lower lip will be in this position, the lips are dragged downwards because when we are sad, the muscles around the mouth are dragging the lips downwards. So we'll just have this triangular shape of the mouth to form the lips later on. And now we will have the eyebrows here. And let's have done tilted up in a sad expression and a little bit separated. And let's draw where the eyes are going to be some way here. So just draw the eyeballs approximately here. And now the eyelids are going to be squinted in this way. So we'll have said in a way said even eyelids. Will the eyelids a little bit down. So we're going to see the upper part of the eyelid here and like we have here. So just dry the eyelid over the eyes and they will not go in a straight line. But because we have the eyeballs underneath, there will bulge a little bit. There is a shape underneath, so devil bulge a little bit and just draw the eyelashes. Here we already have kind of said, I even, even if we don't have the pupils and everything else, we see that we already are getting a sad expression. And just draw where the pupils are. Approximately here, drafted, drafted, drove couple of lines and draw them simultaneously. So you know that you're having them in the right spot because if you finish one eye and you haven't finished the other, you may end up with having a character that is a crossed out and you don't want that. So just roll the lower the lower lid. She's kind of almost crying. And the upper lid is also almost meeting the eye like that and connect where the eye starts with the other. And now let's have the lips a little bit drafted before we go with the black pencil and define that. And here we see that the head is a little bit too small. So we'll just define that better. We'll fill it up a little bit more here. The sphere that we've drawn was a little bit too small. Because here is okay to be small because the face gets smaller. One in tilts up, but when we it tildes, when it tilts down, but when it tilts up. And the phase actually we can see more of this chin bones and decide. So we'll just need more space here for this face. Like God. And then where the hair starts, it's going to be a little bit higher up because we are going to see less of the head in this direction and more of the head in this direction. So let's give her a hair like that. And different kind of hair. A little bit of hair in disarray, so big chunks of hair. And again, she's still she's sad, but still looking pretty cute. So here we have already almost the face down. And let's go with them black pencil and define those features. So just trace where the eyelids are. And we have even this eyelid being visible again, you see that it traces over the eyeball. We'll have the eyes there. Is. It is very important for you to train to draw the eyes because it's, it's a sensitive places, the ice and because they are thus where we're looking at. And the more you trying to draw them, the better you get at it. So just a duty exercise where I showed you how to draw the eyes. And you will be able to draw them even symmetrical to each other. Because this is hard. The symmetry. And now let's pull the eyebrows down in a set expression. And the nows, we'll see more of a lower part of the nose. And still it's a very tiny little mouse. And I'm going to set it this way so it gets more volume. And here I can even have a wrinkle here, just to signified at. She's pulling her eyebrows together in a sad expression and just draw the mouth. We are seeing a little bit of her teeth again. And a little bit unknown law of the upper lip. Your practice of drawing mouth here. And in here we start getting the shape of a sad but still very cute character. I'm here, her hair is in disarray. Gives more impacts to her sad expression. And here we can even shade these parts. This needs to be a little bit smaller. And you see how you notice things as you go, things that you need to fix later on. Like like having the hand being a little smaller on this part. And just add some shading here for the hair. Adjusted as you go along. You should make a couple of expressions like that. The way I showed you just to get used to finding the right one. Because you will not get that right from the first time, don't worry. And now you can play with the hair and have her has different chunks of the hair. You can make different hair cuts. I mean, study the characters that you want to draw and try to find the haircut that you most like for your character. And just use these principles with the chunks and the highlights of the hair to give the care more volume. But it's very pleasant actually to find is like dressing up a doll. It's a very pleasant to find a different hair cuts and to explore the Piazza because it does give a character different expression. When you, when you also design their hair cut, it gives them different kinds of personalities. Here, cut is important and you see how it frames the face in a different way. So just play with it. And somebody who does you can do is like when you sit in front of the TV or watching a Netflix show or something, just practice to draw these lines that are parallel to each other. This will help you also when you shade your characters. And I'm just going to save her face a little bit just to frame it. And you can continue exploring this character more when you say that. And you see how fast it went, it doesn't have to take a long time. And even if you're a beginner and you've never drawn, I promise you, that you will be able to draw these characters easily with this simple technique. And I hope I'll have proven your wrong that you think that talent is everything. No, it is not. There's simple techniques that you can learn how to draw. And so Talent is Overrated. All you have to do is actually having the will to explore them, to learn how to draw. That's all you need. And obviously for you to be here, you have that already. And that is all that you need. The rest is just practice and practice and just enjoying seeing your character coming to life. It is very enjoyable. And the better you get, the more you'll just one and do it. And who knows where this will take you from, whatever you are and whatever you are doing. This may change the course of your professional life. Give you a career as a character designer or make a new children's book. Characters like that. Who knows? I hope this helps you improve yourself and I'm glad that you hear. So you see that this character get more and more involved. I mean, when you start drawing, you just can't stop because one thing leads to the other. And this one, I guess I haven't shaded enough. But this is something that I've already shown you how to shade it and how to explore different features and different emotions in the characters. So I hope you enjoyed these lectures and I hope to see you around again. And good luck with the drawing.
17. A pencil and a Paper - Learn how to easily get the knowledge you learned here in your system so you : Hi there. In this lecture, I'm going to show you an easy exercise that you can do and practice your skills, practice to draw these these faces. This is something that you can do while you're on the bus or your if you're traveling or if you have some some leisure time that you're watching TV or something. Yet the block and without a lot of thinking, just practice this exercise to move your hand freely so you can even grab a black pen. So here, when you've done your exercises with the blue pencil, this is something that you can do later on because, you know, you put it in mind that this is just an exercise you don't have to be perfect. You can do very small, small hands. You don't have to put the whole paper. The thing is that the larger the scale is of the drawing, and the better it is for you to draw. But when you exercise, you want also to keep your hand over here because it just helps your creative process as well to do draw is indifferent size and proportions. So just keep it around your wrist. And also when you travel or when you sit in front of the TV, if you draw this big head is going to be demanding your attention. This is something that you can do mindlessly when you are not too focused. Something that is more playful, that is more like temporary. This is because your subconscious mind will pick up this proportions and it will get them in your system. So it will be easier for you to notice later on the proportions and to get used to that. So just draw some heads, some circles, and just draw small spheres underneath. Just practice to draw the face and draw them in different position. And we draw one phase here. Mindless, mindless way. Just don't try to push it too hard. Like DAT debris to need. So now you fill out this paper with these faces and you try to find the middle line in this drawing. Let's say this one is here, Let's ones, this one is here. This one might be is a profile thing. This one is here, for example, this one is three-quarters like dots. Let's say this one is looking down after a while, you will feel where these heads are pointing, what they're tilted too. And just try to find the face in this, in these proportions in these circles. So let's have this one being like dots. This one. Mean here. The profile one. And this one, you get many different faces, even different features where the same kind of style. And this one is looking maybe a little bit up. In this one is looking a little bit down. Saw the face is a little smaller here. Now when you have this heads, just try to find the eyeline and split the face in three parts and find where the eyes are. So let's say this one. The eyebrows are here. The nose comes over here is approximately tree is split into R3. This one is approximately the same as this one. You can add more hair later on here. But let's try to find the eyebrows here. And where the eyes are, somewhere here and the mouth. Try to find it, even in this one approximately over here. You'll get a hand of where these proportions are. The more you do this exercise. And the mouth. And here we see already the nulls. We add the lips. And in this one, maybe over here. No, this one was lower soldiers. Place it over here, have the nose here. You can also play with motions here. You can have an angry or sad one. You can play also with the eyes. They can be closed or half-closed. Let's have said one here. This is just playful. You can have the nulls in this one. Little smile. And now already, without any effort, you have a couple of different heads. So you can add the ice, you can play with the size of GIS when you now you know the principles of how to design the eyes, you can place them differently from the center, from the nose. As I told you, there are different designs were some, some eyes like farther away from the nose and somewhere closer in DKIM, play with those features as well and see what you get. And here we have a profile picture, or profile is still hanging around. I just place your eyeballs forest on all of them. Approximately at the right spot. And now you can place the pupils just to have the MOOC and the right direction. You can place also the pupils looking differently, just train that as well. Just complete the eyes. Were they looking? It doesn't matter. Dot sometimes they can look completely wrong. This is why you're doing these exercises. Because your brain will pick up these measurements that you are doing, these changes. And it will suggest to you later on how to finish your other drawing where you enjoyed so-called for real. Now let's shape the eyes and let's add, give them some features. Now, this heads. I know that when I started drawing, my teacher told me that you will be suggested by your drawing what the drawing needs. Which seems pretty strange to me as saying because, I mean, why wouldn't it suggested now when I come to draw? And why do I have to draw? To be able to draw? I mean, it, it is a reserved word, paradoxical what I've heard. And when I practiced and learned how to draw, I understood one, what he meant. So and just draw different features, different eyes. And they don't have to be completed. This is your playground. So use that as a playground. And here you can add some. You you see how the the lock behalf because you can see where the eye boys and this one you'll see more on the aisle log. And this one here. It's a little cheeky one, gets turned more upward so we see more of her nose. And the eye will be like higher up. And this one will disappear there. Moon, just see the eyelashes. Let's open her mouth for little bits. In this one, you'll see that she starts looking very cute and even her neck. So this one is more. May be scared. She looks scarce, so let's open her mouth in a scared kind of way. Scared expression. And you see that not every time you'll get the same character, you'll get it right. But that's why you do this exercise. Now find the shape of their hair and where it is located. So now you can play a really with their hair. Let's start from here. Let's do this one, have this kind of fluffy hair, hair cut and maybe have some I don't know, just playing around. Just having her hair up here and as a half ponytail. And and here you can also train to make here chunks, chunks of hair. This is also important. And this one, Let's shape her face better. Maybe she has straight hair with some small hair chunks here. You see not always the sphere is at where the hair is. Sometimes the hair is much bigger because the silhouette of the hair helps to, to design, to create a personality. And these girls, these females, they have a thick nice hair that gives them also in the way they are nice characteristics. And let's have this one a little bit modern. Maybe something like that. You can play with it. This is not something that you have to show later on. You can find a really nice characters from here that can be a part of your book or your new design. We just this small playful techniques. You see that I started completely without any thought of how they'll be unjust following the principles and the techniques that I am given you here earlier on on how to design these new likes females. And as soon as you get a grip of it, you'll be able also to make this kind of designs and it will be a lot of fun as well. You will not struggle anymore and feeling that you can't draw. Because this is learnable. I'm just designing it as I go along. As these girls are suggesting to me what kind of hair cut it's suitable. Just chunks of hair that when you know how to draw the chunks of hair, you just think on chunks of hair and volume. You don't really think of hair as a separate hairstyles. And volume just give them more volume. And they will look cuter like that. So now we have a couple of phases, starting only from just mindlessly drawing these spheres, connecting them with one sphere, with the other. Trying to find their features, their proportions, trying to find different expressions. Not all of them are looking completely correct. If you have to redraw them, you'll have to redraw them couple of times to find their personalities. But this is an exercise you can do when you have some free time or when you're, when you're watching TV, or when you are just mindlessly sitting at your desk at work or at school and listening to something to podcast or something. If you don't put too much effort and if you get rid of your fear of drawing, you'll be able to actually loosen up and find these features. So just play with it. Have fun with it. When you're not like serious drawing, because it's, one thing is to study the drawing and another thing is just to play with it and to give it time and to give it many, many drawings. So I hope you enjoyed this lecture and I hope you are having fun drawing. Buy from me.
 Maria Avramova, Illustrator/Animator/Filmmaker