Transcripts
1. Introduction: Have you ever wanted to become an artist to draw cutie characters? Something that you can use in your book project, your illustration, or the character design, fashion design, or even just for fun. But you just find that too hard to draw people. You've tried sketching before, but it ends up looking like this. What you actually had in mind was maybe something like this. Yet sketching is the one thing that will help you get better at drawing people if you know how to do it, right? If you know what to look for and how to think. I've worked as an illustrator, animator, character designer, director for many years. And still, I have a notebook in my pores where I draw people constantly. In this course, I'm going to share with you my 25 years of experience and show you how sketching people can be easy and fun and help you become the artists that you know you can be. All you need is just a pen and a paper. This is what you will learn here. Human proportions draw people in perspective, balance and weight. Approaches of sketching how to observe people and many more insights, tips and tricks from my professional life. I'm going to guide you step-by-step what to think, what to observe.
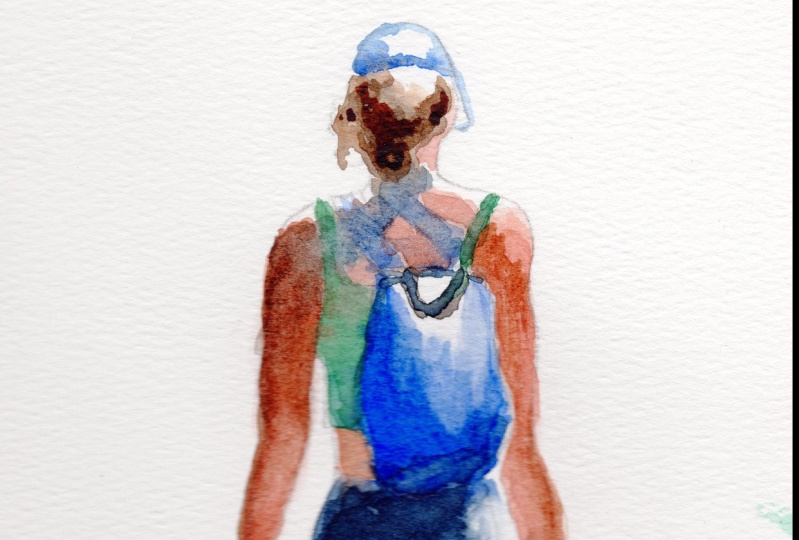
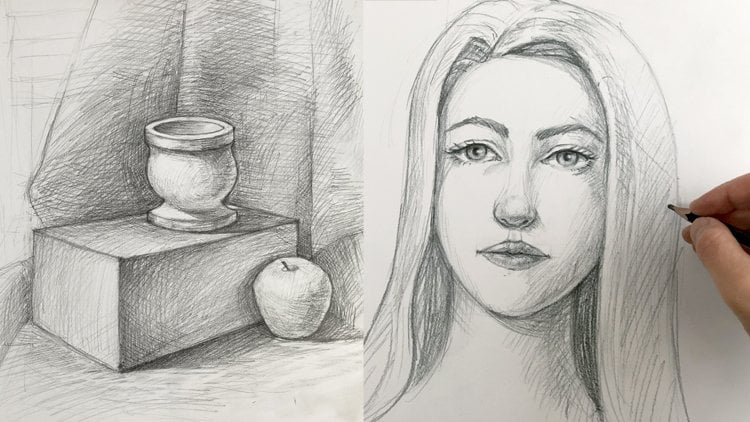
2. Materials and Styles - Get variaty of pens and pencils. Learn why changing pencils is important.: Hi there. Before we start drawing, I want to talk a little bit more about what kind of material kind of pencils you're going to need. The thing is that you can use any kind of pencil. And the good thing is that you actually need to change different pencils and different paper. Even, you can even draw on the small notebook or an, a big paper. And it is good that you actually change between those while you need to do that, is that you don't have to get used to one size because if you then change size, It's going to be difficult for you to fit the proportions within a different kind of size of the paper. So it's also a good technique to actually train your eyes to cash proportions. And anything that can make you more observant. Anything that can make you really pay attention on proportions, on the body posture, instead of trying to make a nice drawing, tried to fit it into the frame, into the picture, and so on. So this is like a very soft black pencil. And why is that good? Because you can have a really broad lines and you can focus on just shapes. You can draw the people in that way. Just catching their shapes, their silhouettes. That's very good way to practice sketches when you don't, we don't pay attention on details. The face is not interesting to us at the moment. We will only draw the poster of the people. And the more you can focus on dat, the morning can ignore details, the better it is. So, so thick pencil like that is very good for that. Also, blue pencil will pencil as I talk in my previous videos, is that when we have a black pencil, we kind of feel that the drawing is more complete, this more final, and we're really careful. We tried to draw things really nicely. And that thing, it actually limits us to see the whole, to see the whole body. So if you take a blue pencil and draw with the blue pencil, It's feels as if it's just temporary. It feels like it's just a sketch. And when it's just a sketch, you can actually allow yourself to make mistakes and to not worried too much about the forum. So you can draw with this one too. And the thing is that you can use also scribbling. You don't need to, to draw in a certain way. You came to free yourself and draw in different ways. Like if you want like a person in line with the hand here, you can just mark the hips here. And you see that you see the shape pretty quickly even though it's scribbles. And that is what is important with you with the sketching. I mean, why do we otherwise would sketch and non-zero immediately? We need to train our eyes is just when you start biking or when you start learning the alphabet you need to practice to be able to see it naturally. As you see now, I don't have a person in front of me to see this pulse. This is built in my system. I can see that in my ethanol. What are the things where the body parts and one, where everything needs to sit and how the poster is. But until I got there, I had to do a lot a lot of drawings and I still do drawings. If I stop drawing for awhile, I get rusty and my drawing really gets worse. Also, there is there are different pencils here with different thickness. This one is called, it's for B, which is a kind of a soft kind of pencil. Eight, b is a pencil that is also very, very soft. Normally or school pencil. Hb, which kinda like hard pencils. But to be is kind of a pencil dada artists draw with. And it's not too soft and it's not too, too hard either. As HB, this makes very nice line. So you can draw a lines like that. You can draw the shapes with just outlines. You can use this kind of style of drawing. And it tells very roughly what you need here, is again, following proportions. And balance poacher. You do not need to draw the face. You can draw the middle line where the eyes and the mouth, Arafat. For now, that's just what you need to draw. Now this is another style of drawing. Also. It's good for you to use a pen like pickles, then you cannot erase. With this one. You can make a really thin lines and you can, knowing that you can't erase in a way frees you. Alphago, uh, first is limiting and it's scary. But after a while, you will find out that it's very freeing. And you can draw a guy here were someone that is looking at something with his hands. I'm just going to roughly draw just to show you how nice it is to draw even with this pencil. And we have some thinners here. And you see with a very few lines, these are four different techniques. And you see that with very basic shapes we have, we have a guy here, we have a figure. We can see the posture, and we can see that proportions and, and body posture are already there. So these are four different techniques. You can find more techniques you can use even Torkel, you can use watercolor to paint with white spots. You just have to be playful in this exercise and you need to train your eye his own. Have to be scared. This is the best part is that these pictures do you will not have to put them on your wall. You will not have to sell them. You will not have to show them to anyone and say, Look, I am an artist here, look how fit nice, I drop know, these are the pictures that you keep to yourself. You don't draw them out in keep them in a stack because they will show you your, your progress when you draw, for example, just do dot draw every day for a month. And you will see the progress that you get after a month of drawing. Just compare the first drawing and the last drawing. When I was in art school, we had to draw 50 drawings every day. I was 14 years old and felt we had to draw after school. So we went to the recitation and we did a lot, a lot of drawings. And the thing is that the joys that a teacher preferred for the drawings that were not very nice demo, very scribbly devil, very undefined about what they had. There was posture, it was balanced, it was proportions, and also the freedom of expression, the free hand the teachers felt up. And now you're free to discover these forms to really go into the structure of the body. You don't try to just make nice drawing. You are there to learn how to draw. So here you are to learn how to draw. So use the variety of techniques and a variety of formats to just train your eyes, train yourself to become a good artist. So let's move on to the next lecture.
3. Human proportions - A rule of thumb - Learn some simple guidelines on how to measure the proportions: Hello there. In this lecture, I'm going to be talking about the human proportions. And I'm going to give you a rule of thumb of how to approach human proportions, so you have the correct proportions. Now, this is shifting a little bit depending on if it's short person or very tall person. But this is approximately how we measure human proportions. Now let's start from the male proportions. Usually we say if that's the male has, Let's draw, I'm just going to draw a rough circle here to find the head. And I'm going to define the middle of the face and the ion line over here without drawing any, any ice or facials. So the rule of thumb is the main proportions are 7.5 heads. Each means that the head applies 7.58 times to a male. Now let's do that exercise. Now. Let's now measure the head like that and apply it. So 1234567 and a little bit more and a half. Approximately done. Now the first line here on the first head is where the chest area is. So if we draw now the neck, and I'll draw the male early schematically. So it's very easy for you to follow and also draw it. And this is the chest area of the male. The next line applies to approximately the waistline and the stomach. Here. It's just complete the line. And the next line comes to the crotch area where the legs stuff. So justifying that with a line. And the next line here is the middle of the ties. So we'll just draw the ties here, and this is approximately in the middle of it. And the next line is where the needs are. So I'm going to draw the knees over here. Just mark them with a little needle line very schematically. And this line comes to where the calls the middle of the Gulf are. So just draw the legs and define the cows where the thickest part of this, of the under legs are here. And the next line is again, where the feet are approximately here. And let's define the toes. In here we have the proportions of a male feature. Even if we don't have any facials or we don't have any personality. We see that kind of diseases or a male figure. Now what about the other parts? Now the arms are the upper arm and the lower arm are the same size. And the Elbow comes usually approximately at the waistline. So if you squeeze your arm next to your body and try it on yourself, you'll see that the elbow will come to your waistline. Exactly. So you draw that and you know that the upper part of the, the arm is exactly the same at the lower part, that minus the hand. So if the hand is stretched, it will come in the middle, are approximately in the middle of the ties. This is the next measurement, general measurement. So we have the lower arm and now we have the hand, and the hand is stretched. We have the TM over here. So it will come approximately on the sides. And let's draw the other one. The elbow on the waistline here, and the under arm. And then the hand into the middle of the ties that meet the other one. And we'll just draw the tongue here. So this is a male character. Now the woman's body is a little smaller than the men. So we say it's about a 6.57 times blight, so the head is a little bit smaller. So if we say the male's head is this and the female hat is approximately the size is just very slight difference is not a lot of difference. And so just let's try now to apply. This had thrown the bottom up. Of the female body. So let's try it. Let's start from here and apply 123456 and approximately and a half. And here is approximately the hand. So company like A17 times. So let's see how this applies. Now if we go the other way around. So whammy measure one head down. Where does the line is, is again, where the chest area is. So just draw schematically the shoulders and we will draw the, the tests around here. The other part is like if you go and now the head down and the measure from the top down is going to be over here as the waist area. The eight waste cheese in the next one is where the crutches or where does the lex dot. So we'll draw the hips around here. The female has a wider hips. And then here is approximately the middle of the time. And here as a little bit above this point is the knee area a little bit below. I mean. So we'll draw the knee or in the line or on the line like doubts. And the next point is the middle counts. And then we end up with the legs, with the feet. And then we end up with the feet and we'll just draw the TLS. So here we have very quickly a female proportion, proportion in body. Now let's draw the arms again. The elbow comes in the line on the waistline here, and the arm comes to in the middle of the types. So the upper arm and the lower arm, or the same size. And if the fingers are stretched, the hand, WorldCom, approximately in the middle of the ties over here. And let's draw the other line again. The waistline here. And the lower arm. And the fingers come to the middle of the time. So here we have a proportionate female body, even though we don't have, and you face, we recognize that this is a female and female body. So what about kids? They have slightly different proportions. Bank of male and female body. A child approximately between 78 years old. It has a smaller head, and the head applies approximately five times on his body. So let's take the head and applied five times from, that's up. From the top up. So 1, 2, 3, 45, and the fifth time. And time is the head. So I'll just make the middle line and the eyeline here, so to signify the face. And let's go with the shapes. Now that gets body don't have the same principles because obviously you feel lines, but approximately is going to look like that on the chest here. And what we know here is that the lengths are exactly the upper part of the leg and the lower part of the leg are exactly the same size. So if you draw that, if you find that this one and this one are the same, like from here to here. So the body starts from around here. And we'll leave a little bit space for the feet. And let's draw the other one. The knee and the cults. And here the arms again. The elbow comes to the moon, the middle of the waste. So we can measure dots. We can draw the other arm like that. We can draw. And the hands here. Now this arm got a little bigger. So it's approximately 0 here. And here we have the measurements. Our child approximately. And what about a baby? Now, the baby's head is slightly rounder. The babies had applies three times on his body. So if we start from here, S-like 123 and the head, this over here. Now we don't have, again the same measurements like here too, to note down the chest and the middle area. So we'll go with other measurements, dots approximately the, the upper part of the body. And we can't do that here. D, the body is the same size as the legs altogether. So here is approximately the same size, the same thing. If the leg area is this size, is the half of the body. And we can signify where knees are and the knees and the law part of the leg is the same size as the upper part of the leg. So it's approximately over here. And so we can draw the other leg. Now, the baby's feet are really chunky. So the look shorter, but they are proportional. And of course we don't see a lot of standing baby because they're very still can't stand. But if they could stand, there'll be approximately they will look approximately like that. And again, the arms, the elbows, the elbows come, the waist area, and the upper arm and the lower arm and the same size and and the hands come to the middle of the legs. And here we have the baby and babies proportion. So these are basically the rule of thumb of how to find human proportions. You can do this exercise a couple of times on your own. And if you can't draw these kind of figures, if you think this is difficult for you, one thing you can do is just draw them schematically. So if you draw the head like dots, the first thing you do for a male, you go and find how long the male is. So 1.5234567. And then what we can do is you measure the shoulders and you just signify this figure, flanked doubt. With some triangles. You don't need to make clean lines. You can just do though is not important in a clean drawing is not important here. What is important for you is to get a grip on proportions. This is the main thing. And then you can have a triangle, a triangle here. And then you can have the legs together like that. And triangles, four feet, any node up here are the knees. And you can draw the arms just like a line length dots and find the middle of them, um, the ties. And here you can have a very simple male figure. You can also use another kind of principles. You can draw two straight lines. You can say, again, just measure seven times 1234567. And how basically the same size. And what you can do is just draw this fine out the mail, draw the shoulders. This is something that I'm going to use in many lectures. Draw the hips with another line here. And here signifying the shoulders with one ball and the hips with another ball. And the spine and the legs come from the dot-com from the hips and see if there are heaps area. And here you have the underline where the knees are here. And then you go down and you have we're under the feet start and you draw another line. Food off here. Just very, very simple, just to signify the proportions, to find the proportions. The same thing with the head. You just find the elbow over here and you find the end of the arm. So this one, this line and this line should be the same. And then the R movie here and another one here. And here. This is the other way to do it, which I'm also going to use a lot. Another thing you should do is just make just gets used to the head and apply seven times on the body. So once you can do is when you have done util tab or big triangle and data to find the male proportions. Just like that, just, just to get used to dump their head is as small y you have the size of a male. So this is different ways that you can practice of drawing the body to get used to the proportions.
4. Human proportions - Exercise - How can you practise so you can draw human proportions without having: So here is an exercise that you can do to train the human proportions. Just get a blank piece of paper and just start doodling. Just do though. This kind of figures where you try to make the head apply seven times or you just eyeball that the head apply seven times on the body. You can try with different figures. You can try and make our triangles. It can combine them. Just draft and really, really quickly with the arms like that. Doodle it out. Do not try to be, to be neat. Draw a woman as well. You can draw even the figures in that way. You can draw the upper area with a big fall and the heaps with another ball. And you can connect them with a triangle. And you can make the legs altogether staying together. Now, remember that we had only training to grasp the proportions here. Another one here, just do many of them. Another one went down hips. Just find your methods. What is, what suits you better? How is your brain finding the right proportions? Some people like to do a lot of triangular forms. It suits them better. For me. I like to do though around forms because my hand is automatically, automatically doodling the realm of forms and it's just become so easy. You see I'm holding the pen very, very lightly, so I'm not like trying to find a clean and neat lines, just very, very lightly and tried to find the proportions. You see that after a while, the measurements like the space between the upper part and the law part, here and here it starts to get the same, even though I didn't measure anything, I just eyeball things. You have to get used to eyeball things. The whole idea of when doing sketches and not just draw clean drawing and perfect drawing is basically to train your brain to eyeball things and to see, to see the correct measurement. No matter how the person stands or sits down. You're going to get this, this habit or this instinct in your body when you start drawing. You can even draw our kid. Even though this is can be a little more difficult because we are more used to see people who've grown up people. And when we, when we draw, when we start drawing without drawing first, the grown-up default. Thus what we are, we can identify where the kids are a little more difficult. So if you find this difficult to grasp, okay, leave it aside, leave it for later. Just do a lot of this exercises. You can also do a female like a symbol you see on the toilets, like dots with a dress. Again, what you tried to grass here is the size of the hand that applies on the body and that the proportions are right.
5. Why is it important to sketch - The beginner's mistakes - Why you struggle to draw people and how to: So why are you doing all these exercises and why is it necessary to sketch and not start clean drawing right away? Here is some beginner's mistake. When you try to do a perfect drawing from the get-go, How could that look like when you start sketching? It can look a little bit like that as a beginner. Now remember everyone has gone from this process and because I have trained so mouse to draw people, it is actually harder for me to go back and draw a person wrongly. I really have to push it. This is going to happen to YouTube. The more you practice, you're going to build this instinct in your body. So every time you try to draw wrongly, you will have to make an effort to do it is going to be the other way around what is now. So what you do is basically, you start mainly from the hair. We start usually from what we see and what we look at. And we always look at the face of the people. When we meet someone, we don't look at his or her chest who's going to be completely inappropriate, especially if it's a woman. Well, we don't look at other parts of their body, but we've focused on the face. So we will maybe start from the face. And we will have like a really nice eyes here like that, for example, who will find it important to draw the eyes here, like dot and the ISO be kinda of length Kim article. You will really, really try to grasp the features of the face. And you will think that if you grasp the face, you will measure everything else correctly according to the face. And maybe you have a little mouth here. Usually the beginners, they draw the mouth really big because we are looking at people's mouths when they talk. While we point attention at something, we tend to exaggerate that when we draw, this happens unconsciously. It's not something that you're aiming for. So you have this person here, for example. You have drawn the face like that. You draw though the neck. It could be big or it could be small. And then you start to grasp on the body. When you focus on different parts of the body, again, they tend to grow bigger. They look bigger because you, when you draw, when you're a beginner, you never compare body parts. You just try to draw one part at a time. Now, correct me if I'm wrong, if you feel that way to you and why you drawings are not getting good. So you will basically not see the spine. Of course we don't see the spine so we don't draw it. So we just ignore when the spine is and we assume that the spine is somewhere on underneath the clouds. You don't have the habit of seeing through the body, are basically studying the structure of the body. So you may be make a T-shirt like that. And you will put a lot of effort on making the patterns of the tissue because this is something that you can do. That is you're right. And the arms and dots and out points gets really big, so the shoulders get disproportionate and either person is turned in one direction. It's probably get like the shoulder. We'll get a little bit up and gone and get a little bit down. And you don't know where the arms and because if you don't have the knowledge of the human proportions, you'll just draw them approximately while you feel like, Okay, this is quite long, arm-like. Let's end it here for example. And you'll be very precise to draw the hands because they seem important. And you'll start drawing the plans. And you will draw them. And because you have to look down to see where a person stands and looking down will make the person appear really, it's all so you'll just exaggerate the legs here and you just make them really, really tall. Probably. Like dark and muddy. One leg is bent over here. Like if the person is walking or it's dense and dark point, you see if I don't draw a structure on the needs of the body. If I continue the lines NID, only thing I think about is to make a clean line. Well, you don't know where the line continues in or it can continue and anywhere. So you don't care anymore who are the legacy is and where, where the proportions are. The only thing you care about here is to make a clean line. This will becomes number one priority. And maybe you'll make some shoes and usually you use some details on the shoes because this is something that you can do at least. And then you add in the other arm. Now this also gets this proportion minutes probably. And you get the arm here and here you get a picture. And you felt like, okay, I started, well, I had the good intention and he felt like I was looking at the person. Now, why didn't I get good proportions, widen and get the person looking like the one I'm looking at. Even though I really put a lot of effort on drawing gum. And this is, as I explained before, the only reason why you do that is because you're looking at the lines. What you're trying to do here is trying to make clean lines. You're trying to make a nice drawing that are hopefully going to frame or you're gonna to show someone, you will get a complement, you will feel good. Well, it doesn't start like that. To be able to draw a clean drawing, you need to draw on the LT drawing first. You need to do though, and you need to get messy. And you need to study what is underneath these lines, where the shoulders, you need to know where the shoulders, how they apply to these proportions of the head, whereas the spine, what is the spine doing? How is this person standing or or bending? Or is it that the person, a young person or an older person? Where are they? What are the proportions here? Now, this is the reason why you are doing this course and why it's so important to actually start drawing messy, dirty drawings and focus on proportions. Now the next thing I'm going to focus on and talk about is balance. This I'm going to talk about in the next lecture.
6. Weight and Balance - What is balance, how to decide whether there is balance in the figure you are d: So in this lecture, I'm going to talk about balance. Now these are the two things that are most important when you draw the human figure is proportions and balance. Now, how we define balance, there are different forces that affect the way we stand and the way we sit down. And the most important, the most important force is basically gravity. So if we have a figure here and we'll draw the spine, there is always a pressure of gravity pressing on mouse. And we're trying to define this gravity and be standing or sitting and not falling down. To do that there, there is a really big mechanism in our body that are holding us are priced. So the spine is does y very flexible, That's bands and holes or balance really well. But also different muscles perform different functions too cold or body together and to keep us upright and not falling downs. So if we have a person standing up like dots and there is a force applying a from above and we're completely straight. Then the point of weight is splits between two halves of the body. So we balance on or both feet. And then the spine is straight and the arms are straight. And this is like the default situation. If we don't lean forward or we don't do anything, we just stand straight. The point of balance is approximately between the two feet. And now. And if there are different forces applied on mouse, if, for example, we have to lean forward, or if we have to, if we stand on only one foot, for example, then the balance shifts and all spine first, let's see if we only stands on that leg. So the whole weight is on that leg. Let's draw the hips over here and let's signifying them now with the balls and a LifeStraw, the spine over here. So the hips. Now this is the spine in the middle. So the hips and the spine tilt in the opposite direction. If this is the head and the head tilts a little bit forward. If this is the line here and the middle of the face to keep us in balance. And if we lean on that foot, now these foods will go slightly inwards. And the point of balance will be if you draw a straight line over here, it will come approximately on the heel. So we will balance on the heel of foreign body at the same time as we tried to distribute the weight of our body. So it's even on both sides, so the hips tilting in that direction. And maybe sometimes we will have the arm on our hips. So if we have the arm like that to help the body balance, and here the body is involved balance and when the other leg, we can just relax. We can have it like over here. We can bend it with already because our balance is basically on that foot. And we can have it like this cash-flow situation. And the other arm can also yield unlike relaxed. So this how it will look like if we draw just a skeleton of a person who balances is weight on one foot. And if we are to dress up the skeleton, say if it's a woman and it's going to look like that. So it's going to have her waist over here. And Chest and the head will dress up the hips. We have the arm over here. We'll address of the arms would dress up the under arm. And here we'll have her hips and her stomach will be slightly tilted in that direction. And here as the belly button. And we'll have the legs over here, the knee and the lower part of the leg. And the other leg will be slightly relaxed. Now you see that one, we know the rules of proportion and the rules of balance. It's very easy to dress up a skeleton. Primitive forms that we define as the shoulders and the spine. When we find where their positions are in the body, it's very easy then to try and dress it up and get everything right. And the figure just looks right because we know the principles and we have find the points where the weight of the body rests. And that's how we learn to draw a better humans. That's why you need to practice both proportions and balance. So let's take another example. For example, what if we are carrying a heavy objects? What if this woman is carrying a bucket of water? Then we'll have a really heavy objects on that side that will have where our body, um, and the spine will try to compensate for the extra weight and how it will do that. Now let's take the example again with DOM, with the spine. And just to clean lines of where we draw the shoulders will draw the head approximately here. And we have these buckets of water. So what it does that the spine leans on the opposite side of the heavyweight and the hips are well, probably just tried to pick up this weight here. So the heaps will in this direction. And if we have the other hip over here, this length will try to compensate to basically push the weight while, while the woman is walking or standing. And the other leg can be a little bit, a little bit relaxed. And the whole weight will come on this leg over here. And let's draw the bucket of water. And here the arm will not be able to have any distance from the body. So the arm will be as closer to the body as possible because of the heavyweight of the bucket. And we'll have a signified the arm here. And we'll have the buckets of water over here that the body pushes through really hard to compensate for that extra weight. And the slag is over here trying to balance all these movements on the other side of this part of the body of the bucket. So it compensates. And sometimes even this arm is stretched outwards in a casual pulse just to compensate to compensate for, for this weight. And where the point of balance is going to be is if you draw a straight line, while is going to be somewhere over here in between. And how did you decide really where this point is going to be? Well, it's actually really difficult to decide. This is why you have to draw many people to be able to get this into your system. Now let's dress up the skeleton and see if we get it right. And you can see how easy it is when you know the proportions and when you know what's happening in the body, in the skeleton, to dress up those skeletons, those simple lines and just get the right, the right figure basically. So we'll address up here with them the waste and the chest area. And we'll just work on the legs. Drawn the legs here. We'll draw on the cults. And you see that when we know the proportions, we can start dressing it up from any part of the body. It doesn't have to be. Exactly from the, the head. In fact, you never draw the hand, the hand utero last when you know and you're certain that you've received, that you've gotten everything else right? Then you draw the head. And here we have the other leg supporting and and feet like that. And then you have the arm stretched out and the lower arm, like adults. And here we have the figure of this woman carrying a bucket. And we have started with one single thing. We knew that she was going to carry a bag, get on this side. So what we were looking for is to push, to follow the rule of balance when the gravity is pressing on, on the body and to find where the weight, how the weight is going to shift to make this woman standing, solid leaves pile on the ground, as well as give an impression of these buckets weight, that is, bucket is really heavy. And now we can have the phase over here. And we can have some hair. One we have followed the rule of proportions. We have the grasp of how big these faces to the other proportions. And here we have the figure of a woman and from that post, so you can now dress up the Yvon, this body. If you want to have, for example, some clothing on the woman. I know some costs Jiang. Some scourge. Let's say it's a scourge. You can, if you want to have a clean drawing, you can redraw it out and you have a regular drawings. So that is why knowing the balance is so important. And the only way to study that and to grasp this, to, to know that as I know it. It is to draw a lot of drawings. Now let me show you another example here. What will happen if this woman doesn't have the right balance? Let me have this woman carrying a bucket over here, but she doesn't lean in that way. So we'll have the woman over here. We'll start with the skeleton. And so we'll have the spine over here. And the arms. And the heaps will just be straight. If you are just focusing on drawing, go drawings and you just do not study how the body reacts to the forces applied on the body. And the rule of thumb, gravity and balance. So if she carries this she carries this bucket of water here like that. And let's dress her up as well. Now, let's assume that we are following the right proportions. In this case, we have the waste on the line of the elbows. Will have the hips over here where these two balls are. And we have the leg starting from here. And and the other leg over here, like a dot. Now, how heavy do you think this is? Bucket is the thing is that it doesn't matter if we make the bucket really, really, really vague. If you made the bucket so big. For example, it doesn't matter if we might get this take this bucket does not look happy because the body does not support the weight as if it's heavy. If it's heavy, the way to be supported by the body in that way. And here, even if we make the bucket really, really small or really tiny, if, for example, we delete this area and we'll just draw black cylinder here. It doesn't matter if this bucket is smaller than this one. This one looks much heavier than this one, because the balance applied to this body is much more correct for a heavyweight object then in this one. So I hope you have grabbed his lecture and you have enjoyed it. And just practice just with this simple skeletons and do a couple of drawings like that. Where you have a character standing like dots or carrying a heavy object. And if you want, just practice some of your own sketches of observation. But later on, we're going to go into the live drawing and how these roles and these principles are proportions and balance will help you to draw live drawings. And how the live drawings in itself will teach you how to draw human figure and how to be precise and correct and become a better artist and be able to draw without looking at the people or without having the person in front of you to be able to draw correct? Our body posture and correct figures like I do here. So let's move on to the other lecture.
7. Perspective - Lesson 1 - Simple description of perspective and some easy rule of thumb on how to dra: Hello there. In this lecture, I'm going to talk about perspective. And why is perspective important? It can be very confusing to understand, uh, how the perspective works, but it is essential to know for you how to place your characters and how to place the people that you are drawing and where they're standing or sitting, and also how their body changes in perspective. So I'm going to explain it here. A really, really simple for you to understand. I'm not going into a 2 perspective and all these complicated things. Because here you just learn to draw people. And I'm going to give you as much knowledge as you need for the moment to be able to freely go ahead and go outside and just sketch and draw people. So what is a perspective? Let's assume that there is a person here standing. I'm going to draw two really schematically in, in a profile with the eyebrow. And I'm just gonna measure is going to be a male person. And I'm just going to approximately add the male proportions as we talked about approximately seven times. I'm going to eyeball it the approximately where seven heads are. So where is the perspective and what is the perspective? The horizontal line for this person, many of you perhaps know, but the horizontal line is basically, if you look straight ahead and your eyes are relaxed, so you don't look above or below. If there is no buildings around. If you're in an open field, your eyes will actually draw this horizontal line. So the horizontal line where the perspective is, is basically where your eye line is. This is the horizon, the horizontal basically. So from here, this is, this line will decide how things change in perspective. Because the longer you go from where you are, the smaller things are. And how do we place them in perspective with talking about the vanishing point? Like a point somewhere on the horizon. There is like two-point perspective. This point can be in many different points of this horizon. So it is basically drawing a line from the height of this person and connecting it to the height of this person. And one line from one person is standing to that point. So everything until it vanishes. Like for example, you will have a person standing over here. I mean, this person won't be visible more than just adopt. And the closer we get to our character, the more this person starts growing. So if we have, if we have someone just some meters ahead of us, this person is going to stand over here and it's his feet. If the person is exactly the same height as or example here, his feet are going to be here, so he's going to be standing over here, but the eyeline is going to be the same line as ores because we are also standing. So if we have a person over here, this person's eye alanine is also going to be on the horizon, on this horizon line. And the same one as ours. But it's going to end his feet over here on this line. And this is similar for all the people that are on, on this line that is actually parallel to the line where we are standing. So if there is a person standing over here, is going to be the same height as this one. Because if you draw a line from this point I am connected to to what the other person is standing. Well, it's going to be approximately the same height and it's the person's eye line is going to be gone the horizon as we are. And here is, again, this other person is going to be here. And it's going to be standing on a parallel line with the one that is from where we are standing. And the farther away we go, the smaller the people will be. So you can draw a couple of lines and just practice to see why do people standing will be standing and how how large are going to be according to where we are standing. I mean, there is another easy way to do that. If this is with a drawing on the lines is too confusing. I'm going to show you another example of how you can approach dots.
8. Perspective - Lesson 2 - An easy and playful way to measure perspective.: So here is another way to approach this, which can be easier for you. Let's do the same drawing. Let's have this person here. And just to, to explain how to measure while the other people are. If you draw spending. For example here. And let's find the eye line or horizon line here is going to be approximately here in the height with the eyeline of this person. So what you do is basically all the other people that are at this height are going to have the same eyeline, the same horizon as this guy. So you basically think of a person standing over here and you draw the head. There was a person farther away. So you find approximately one this eyeline is for this person. And over here, and there's another one here which is closer to us. So they have the same eyeline because there S, So S as the sky. And they have the same horizon, that's the same horizontal line. So while to do is basically if they're the same height, you basically measure seven times the head. So you go for the proportions. And so for example, if this head is so big, you measure 123, 45671 more because they have, the head is the seventh time. So this guy will be standing over here. And if we go with this guy, okay. So the head and it's like you measure the head and it's like 1, 2, 3, 4, 5, 6, 7, seven. Let's approximate this guy here. So, and this one is 1234567. Some of these guys going to be over here, and this one is approximately 1234567. And these guys is going to be approximately over here. In this way, you can easily find what is people are spending so you get the right proportions for them and they know that their perspective there is back to that horizontal line is the same as the horizontal line of where we are looking from.
9. Perspective - Lesson 3 - Learn how to find the perspective when you are sitting down.: What happens if we're not standing up, sitting down, and if we sitting on the bench, for example, or on the grass. So let's say we are sitting here. We have a person who is sitting down like that and probably drawing and drawing people who are wanting around. So in this case, how do we find the perspective and where the whore Horizontal Align S. You can have guessed correctly. It's always on the line of the eyes. If they're relaxed, the eyes are looking forward. The horizontal line is going to be in this height. That is the horizontal line for a person who is sitting down. So which means that the horizontal line, It's not something permanent. It's something that is changing depending on where you're standing and the horizontal line is different for different people. This is, it is not a constant value. So how big would the people did? And if a guy is sitting down and drawing, well, what we come from is if a person is standing up, if this guy standing up, then we count from the height of the person who's standing up. If these guys will just stand up. And it's standing over here. So the next person disguise see, it's not, there will not be sitting down, there will be standing up. So it's the same principle if there is a vanishing point over here and we're sitting over here. So the person who is going to be in this direction is going to be the same height as if the guy is standing up. And if we connect his height to the vanishing point, this person who is in this line will be downtown. Now the vanishing point here, I have drawn really close. The vanishing point can also be over here. And this guy can be alike on this side. But let's complete this drawing. So this person will be here. And this means that part of his party will be above the horizontal line and part of his body will be below the horizontal line. What does it mean in practice? Well, that means that you don't, you don't need to go to too many details right now. But what practically means is that the shapes of the body, if we are drawing, for example, the chest. Here, if we symbolize the chest without, with a sphere changing in perspective upwards. So here is going to be the chess, and here is going to be the stomach. And all the lines of the face. It will actually, we will look as if we're looking from from below to above his nose. We'll see that law powder of his now's the brows will be lifted up like that. And all the parts that are above this line will actually be transformed in perspective as we are looking at them from below, which we are also on. Also doing. This is the main thing that you can take from this lecture. I would suggest you don't go too complex in particular, because what you are looking with these exercises here is to train through observation. Things that you notice when you draw is train them through observation and compare to how things look like. I just wanted to give you this simple guideline of what perspective means. I'm about the perspective and how things change. And later on, I'm going to show you that when we go into exercises, how this applies in practice, and how you can approach it.
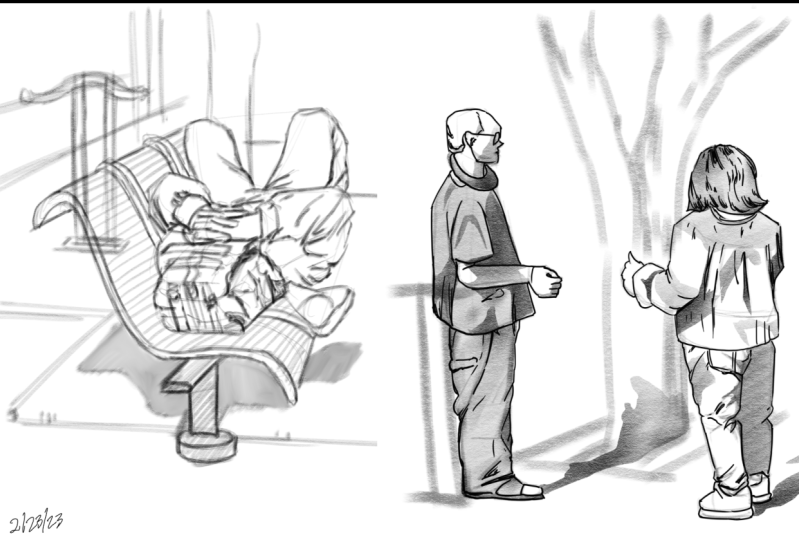
10. Choose your model - Learn where are the best places for drawing. How to choose your models. How to: Hi there. Now that we have prepared for or a live drawing, we have to get out there and start drawing. Now, how would that go about? First, we need to choose place with a lot of people. Usually rail stations and coffee shops are a very good place. I would prefer rail station because you're in an enough distance from your model that you can pretend that the EU and not looking at them. And people are waiting there for a long time. So, you know, there will be sitting there for at least a while. Also, you know, that there'll be people carrying bags, people walking, or just wandering around. So you have a lot of variety of models that you can choose from to practice your drawing skills. Now, one thing that you have to overcome is you fear looking at people and drawing them. I mean, obviously it is uncomfortable, but you can get used to it and you can create your own technique of how to just glance at the person and just glance at some other points somewhere in the building. So they will not be very sure whether you're looking at them or you're looking at someone else. This is the technique that I have developed to be able to freely look at people and draw them without their permission. Now you don't have to have their permission. You don't have to ask them. And because you're not going to broadcast it. And even if you do, there will not be looking the same as they were as they were. And afterall, you have a copyright of your own art no matter what you draw. So I would just sit on the rail station. I have done most of my drawing on rail stations. And I really enjoy being there. And I can just find the person that is in a good position. And I'll scan the building now, scan the people being there and decides, OK, I'm going to draw this person. Now, how do I go about that? In this case, I'm choosing this, this guy sitting there and hanging. He seems to have a very nice character. He has a nice poster. I can see clearly how his body is sitter or how he his spine is, how his posture is. I can define an age. Basically, this is a person who is a very characteristic and it is easier to catch his personality in a drawing. If you're a beginner to look for people that have that kind of characteristics. I mean, usually old people are perfect for drawing that younger people tend to look like each other. So it will be hard for you to grasp or personality if you want to have someone that looks like exactly this person, but also younger people are also very good because you can see a different kind of poster. Basically. Every model has something to give you. So when you choose your model among all people. Now how do I go about starting the thinking process and the discovering process with this guy in the rail station. And I'm going to walk you through how I think in the next video.
11. Life Drawing - How to approach it - Learn how to quickly draft the proportions and balance before th: So now that I have chosen my model, how do I start and how do I go about 19 start drawing. The first thing I want to know is where my model is seated and how his spine behaves according to the hips and according to his shoulders. Even though I don't see where he is seated, I tried to imagine if I continue the legs where his hips B. So I would just scan, sketch it randomly and just try to find the position for them. And I'll also go and try to find where his shoulders are. And from this position here, I see that he's slightly tilted in one side because he's leaning on one of his hands. So I will just notified that and then I'll try to figure out how the other parts of the body are located and how they are relaxed or tense and where they are. And this is something that I eyeball. Something that I'll do is also compare distances. The distance from the face, for example, to the shoulder, the distance from the hand compared to the body, the distance from the need to the head. Also, I compare distances in from the environment just to find anything to compare. And I never just draw one thing at a time. And after I've done that, I'll just roughly sketch the body parts in a very, very rough shapes, just with round shapes on top of the joints that I just measured. And I'll just find the overall poster. So I'll be just dressing up the skeleton as I showed you before, very roughly, just to find if that makes sense, If this line that I drew just make sense. If the proportions are really correct that I've drawn. And I will, I'll just adjust that afterwards. And then I'll have a drawing that is looking something like that. One I've done that. I will start on refine the drawing. So I'll just go with a thicker pencil and, or with another color pencil. And I'll just refine on top of this general shapes. Basically refine the man's body. And I won't get something like that, which looks actually pretty neat and adult look like the character in here. You can see that I have the proportions, right? He's definitely seated, He's definitely leaning. So I have graphed the main proportions and domain balance of the body and the main character for this man. And even though he doesn't have a face, I have executed the exercise, right? Because I have learned from his posture and from this character how a guy like that will be leaning or sitting. And I have put out in my memory bank to gather one I needed later on for my own projects.
12. From theory to pracitce - How to translate the theory into practice on the blank paper? Here we wil: So how would it look like if I didn't have the picture underneath the firewalls on the spot and those drawing these people from life. And this is the same way I was going to be thinking as the I showed you on the picture. So basically this guy, I'm going to try to find where his pioneers. So basically he is and where his hips are, where he's sitting. And I was going to basically trying to find where the shoulders are and how the spine inside the body is bending where the balance is. So I will see that he's leaning on his arm. So I will quickly draw justice arm here and I'll find where he's leaning. And what I'm, what I'm doing is basically comparing distances like the arm. Where is the arm compared to his belly? So I would like in my mind, draw an invisible line to find the spot where this elbow and the part of the body are kind of on the same line. So I would say approximately here, thus how I would measure distances between different parts of the body. So it's basically eyeballing things so far. And then I would say, well, he's sitting like around here, so his torso is here. He's leaned in this direction and he's had is done leaning on his own, his hand approximately here. And this other arm is where the knee is exactly what is needed. So I will try to find knee here. And he's a he's on the upper part of his leg has a perspective change to first because the seats are a little bit bend in this direction. So our try to find the shortening of the knees. And how do I do that? Again, I compare distances. I feel like this knee here, if I draw a line of where would that point here? Cross another part of the body. And I see that. Okay. It passes through this shoulder. It's slightly on the side of the shoulder. I'm doing all this eyeballing it compared to this arm, where does the seating position ends? Well, it ends approximately here. So this is kind of the bending of the leg. And then our try to eyeball again to see how the feedback NIC that he's bending. He has turned a foot in this direction. So I'm just going to know that. And again, compare it to some other part of the body. And all j2 dot for the other leg. Saw his hips are here sitting down and spine is bent, and his legs are here. So I would draw a line between this leg and this leg to see approximately where, how long the distance is between the other leg. And I will measure data at the same time with the feet. So how long is it from this point, from where his food is two the next point well, it's approximately here outside, just eyeball it. And I can do another measurements like the place where this foot is ending. If I draw an invisible line upwards while without end. And it will end approximately here around these value. So I would say, Well maybe It's around here, which means that his leg is bent that much and just draw the food out. We'll see that the food is like stitching enter the food is placed on the ground in this direction. And this is approximately my sketch, the way I think of this character. And then I would just go ahead and add some details. When I know the position of this body parts, I would just go and refined and refine the rest of the body. And I would just draw, okay, The food is here. And on Jane got very roughly because you don't have a lot of time to think when you draw a human's outside because they change position. So you have to be able to really grasp the pose very, very quickly. And you don't need to really analyze so much. Just eyeball things to start with. And you will learn to really see how this changes go in perspective. One thing is to understand that. Another thing is to practice it and learn it through practice. So I'm just going to quickly eyeball dot and the hand I my schematic as a cube or something. Because what I'm interested in this position is really how the body is the poacher. So I'm just going to do the shoulder adjust that. I see that his shoulders are a little band and he's looking at me adopt position. He has noticed that I'm filling him. So I'm just going to draw the eye line. I'm not going to draw all the face just to make sure that the face and the head is in the right proportions according to his body. And I'm going to draw his stomach. Now. I'm also going to add the other arm. I see again that this is his hand here. And his other arm is the point where his other arm is approximately this point of his body. So I'm just going to add that and adjust even though on the arm and see if this really corks correspond to the position of his body. And I'm going to tilt his body a little bit in this direction and just add briefly the place where he's sitting just to make sure that he's sitting on the right place like that. And I'm just going to add his stomach because it is a very specific part of this guy's body. And in, as to his character and to his spotter dot He's Lin for. So I'm just going to find according to the proportions of the body and water is see how his stomach is linked for just really roughly. And now I already have the sketch. And from here, what I can do is basically just to refine some stuff. I see if everything is correct, I can add some hat here. Now he's getting more and more character. I can add my be the shadow of his eyes like that. If I have time if I have eBay, he hasn't moved and I remember that. But some of the things if you notice the movement, some things you will remember and use dot also in your drawing. Try to memorize how the person was the post-doc. This person was n because she will definitely move and you will be very annoyed that you didn't grasp the pulse, but just pick up a pose that you memorize and try to add up to your face. Why? Using what you know about proportions. But it is y. What is the most important is basically grass, the balance, the proportions, and the overall character of this guy. And later on you can maybe just put some shadows here on this leg just to add more to that perspective. You can add some accents somewhere with the pen where he's contacting the sum surfaces dot add some more steadiness to the character. And here we have the sketch pretty much I have not used from the picture. I have just observed the guy. And that is my basically thinking process 19, draw when I draw these characters. Now, let me show you another drawing as an example and use another pencil and to see a different kind of approach. Drawing sketches.
13. Life Drawing - A different approach - How using the same method of thinking but drawing with a diffe: Hello there. So let's pick up another model and I'll show you a different approach of how to sketch with a different pencil. Let's pick up this guy. Now he's walking, is not working fast, but still his moving. So what I do is I memorize one pose and water. I again scan for is where his hips are, where his shoulders are, and how his spine is bent. So I quickly dropped out and also I looked at where the balances. Now because he's a little bit hunched forward, he keeps his balance taking small steps. And this also affects his book. So I also sketch where his feet are and I quickly to try to grasp the way he walks while while being hunched. And also he's old so he doesn't stretch his knees all the way. So she is a little bit slower. And I sketched out and then I put it on the shape, I dress up the skeleton to see the shape is right. And then I start adding details until I get the full sketch. This is the way I think in your head. Now, let me show you the process. If I don't have this picture to draw on, because usually you don't. Now, you can do that. You can also go outside and, and take pictures and take films and just draw on top of them. This is a really, really good exercise. It's not cheating at all any way that you can actually learn and study. The figure is a good way of learning. So just copy that this method and this way as well. Now, now how I do it, if I don't have the help of this video and this picture beneath. So now I'm going to use a black pen that I cannot erase. And it does have a really thin lines which forces you to, and to think in a different way. Again, as I mentioned before, it is important to change pencils and pens and to change formats just to force your brain to get his to the proportions of the characters despite different mediums and despite different formats of your sketching block. How do I approach the sketch now? Because he is walking and he continues walking. So I need to grasp cuz proportions really quickly. So the first thing I see is that his, his spine is bent. So I just sketch very quickly his spine, like gut and I keep the lines really loose. What I see is that his face is little four, so I just make a mark of that. And I mark where his arm is, like Darth one, he's fine, is bent. I see that his hips are around here, but I don't draw the hips because he's working really fast. So what I do is I scan all his body at the same time am I find points which, which to measure. I measure how the proportions of his leg matches the proportions of his upper body. So I eyeball it and kind of add dot as Justice online. And then when we walk, we are kind of like falling forward and, or a body picks up our awaits when we actually transfer a one leg up front of the other. So here he is kind of like starting tools, balance, so his body is moving forward. But because he's back is banned, He will not make such a big steps. He will kind of like try to balance on his hips. So I know that and I make the leg and just go forward gut. And again, I'm measure very quickly the distance between this food and this other end of the other leg, this distance I basically measure and adjust role disposition. The thing is that you choose which position you want to. We want to pick, but pick a position you don't have to get stressed out that the character is moving. You need to just pick a position because what you're training to see is posture. Your training to see proportions. You don't have to draw a perfect guy. And then this head, these caps is giving him some kind of character. And now I have proportions, I have posture, and I have an overall attitude of this guy walking. So now, even if he's moved on and continue walking, I can see where his body's. I can then add. Some of the features that I've noticed, and this is something I can do from memory. And I know where his hand is here in his pocket, and I know approximately how big his jacket is. And here also, I add the knowledge that I have about the proportions like where is the elbow here? Well, it's approximately on the waistline. So I will add the elbow here from the knowledge of our proportions of human body. And I will just continue with the jacket. I have his back here band and the jackets will just continue falling down. I have approximately where his knees are bent. So I'll just gonna go and where his knee is. And then I'm going to add up his shoes. And here again, I adjust my measurements depending on the knowledge I have of how big the needs are and how many times the head is applied on the body, how big the the legs are? How big the upper part of the leg, according to the lower part of the leg, just, just the main knowledge of proportions. That's why it is important for you to train, even to just draw schematic people or just to get used to these proportions. But also drawing the sketches will give you a really good knowledge of human proportions. Because now here you let your subconscious guide you. You're not over analyzing. You're just letting your subconscious notice, notice things for your endoscope, you will learn. Because when you start over analyzing, tried to rely on knowledge that you're actually don't really have yet. But your subconscious see more than you just realize. And now I can go in and just add some features and know that the nose is approximately under the head. So I'm just gonna go and add the nose and the mouth here. It doesn't have to look like this guy. You just have to give an impression of these guys posture and character and have the right proportions. And now I can just add some more features, maybe add some remembered that he had Snickers and I can add some extra features here from my memory. I know that he had a gene, so I can add some wrinkles here on his genes. I can, if you want, you can add a line here on the genes just to make it more alive, to make it more believable. I can then go ahead and add some shadows here. Just to give the drawing a little more artistic look. I can involve the drawing basically. But you can see that even with, with a pencil like that, you can do a really nice drawing and it can actually help you free yourself from just being too precise and too stiff. So this is another way of approaching sketching and actually drawing people in movement. It is, it is very important to any to get used to that and to get rid of your fear. Started doing drawings like God and Savior drawings. And I'll see even by the end of the day, the first and the last drawing. And you'll see what difference does it make to actually sketch like dominance.
14. Life Drawing - Yet another approach - How to draw with a soft pencil and what is the advantage of th: So let me show you another drawing approach where we don't use the lines, but instead we use shadow to define the shape or the silhouette of a character. Now, I'm going to scan in another environment, again the railway station. And I'm going to pick up this interesting guy here who is eating. Another metal dot I'm using trying to find the silhouettes. So I'm squinting my eyes, so I see the character really blurry. And this guy is not going anywhere for a while, so he's not walking, so he will be staying there for at least a while. So what I see is just shapes. I'm, I'm taking a really thick or soft pencil or crayon and I'm having my hands really loose. And what I'm looking for here is just to see the silhouette of this guy. So it's basically he has this one shape of his body, that is the jacket here. And another shape are his legs are bent a little bit on that direction. And sometimes I can even exaggerate outposts like this angle here. So I'm just going to sketch That's really quickly as a silhouette and I'm going to draw and both legs together and just defeated like one foot is spent in this direction and the other foot is bent in this direction. Because his silhouette suggest dot. And I'm going to even draw his his jacket here. And I'm going to draw his head that is bend forward so that he can eat. He has some, whatever he's eating. And now I have already the proportions of this guy. And I'm going to add the hand sought to suggest that he's eating something. And also I'm going to add the other arm holding something. So it has like a little bit bit of the other arm. And now just with a few brushstrokes, I already have the shape of this guy. As you can see. I have not drawn any lines, but I have a silhouette. And what I have here is the balance. I have the character of the guy, I have the proportions of the guy. So here I can go in and just add some details. I can refine this and these features here, I may not need to draw the whole the not that he's eating. But now I have that the poles already there. And I can just go in and add details. Doesn't have to be really neat. I'm just going to add the fingers like small circles. I'm going to add the mouth. I'm going to suggest where his cheek is. Just the really loose with your, with your pencil on the new drawings, the moral rules you are with your hand, the more you just focus on finding the shape and thus how you will even find the details. So I'm going to draw this hand here just like a blur. So as he's holding his pizza like that and just add some tiny details, I'm going to refine the jacket and maybe draw that. Here is his elbow. And again, I'm also using the guidelines that the shadows are giving me, but also the thing that I know about human anatomy and human body that the elbow is like approximately two down the waistline and his hips forward so he can keep the balance while here. And I can form this jacket like that. And just this sketch a line gives you a really nice artistic look. So just use that, use that to practice your drawing and to actually loosen your hand and to not be afraid to really to do things wrong, the wrong way. Because if you just start drawing the outline, that will confuse you a lot, you will not be able to grasp this very complex things duct and the body is. And if you don't have this on place, while does like building a house without grounding it. You need a skeleton to build something on an adult that you're drawn, we will not be complete. And after awhile, after you've drawn dots, you will be able to draw a really complex characters without even having to look at them. You, I will be trained and you will be able to draw anything, anything. So this is another approach here. Like I started with just the shadow and I found the shape of this guy. Now, I have actually exaggerated his poetry little bit. He's not been done much. But you can do that just to train your ion known to yourself how the spine is bending and why is it bending? Yeah, because he's trying to balance here and he's trying to to lean forward with his hand and eat pizza. And also this is kind of like more of a cartoony look, exaggerated spine. So this is another way of drawing, drawing people in motion. And try it out and see if dot x2, x2 and y2 and y1. If you've tried two different ways, I mean, you should change the way you actually draw. You should change the method using change. Like if you're drawing like only walking people are all new people standing and so on. So you just, you need to to do different approaches of.
15. Life Drawing - A third approach to sketching - Here is yet another approach of sketching a fast pac: So here is another method. I'm going to, I'm going to draw this girl who's walking really fast. If you draw people, walked out fasted can stress you out. But that's why you kind of draw. Also really felt and what your thinking is. Again, posture and balance and proportions. So I would just find the way she is walking. Mic does, She's tilted in one sides or I immediately will draw the bike because the bag or change curve posture. And by that, I'm just going to find where her elbow is. And again, I'm comparing always where things are compared to other things. Now that I have her upper body, I know that her elbow is going to be around here and then her hips are going to be here. And she's walking really fast. So she's a young woman and she has this face or her her spine is straight, even though it's bent a little bit from the bag. She has this poster of a young woman. And I've noticed that her jacket reaches half of her ties. And I'm going to quickly just sketch where where her feet are, approximately approximately here, with the straight lines. Very sketchy. And then I have already I'll sketch that. I can refine. Now. I have everything I need. So now E1, if she's far gone, I have something to work with. So I will continue drawing from my memory and just add the head and her jacket. Like that. Just really, really sketchy. And I'll add her arms like dot here. And I've chosen this position of the arm, so I'm just going to roughly draw, I draw both with the lions are like that and also with some lines inside the body just to make them just to make the shape more solid. Because if you draw the shape like that, if you see a shadow, yeah, Your brain is kind of connecting it as a shape and you see more clearly what the shape is doing and where is it going. So I'm just going to draw like Don her jacket and held calls and call here and she had high heels. So I'm just going to really quickly her high heels. Something characteristic above her to make her look more like the young woman. And to signify her posture. She's in a fast-paced approximately like that, and I already have everything I need for this for this woman. And you see how fast it went from one I started the drawing to when I finished that. And you don't need to be really specific here because this is your drawing, already done, your sketch. And if you want later on you can refine that or you can trace it. But you already have right proportions. You have right balance, and you have the motions, you have everything in place. And you can work with this drawing. You can, if you want to use an enum in another sketch or if you want to use in a painting, you already have an observation of a woman in motion, a woman with the bag. So this is another way of doing it. And I hope you find your own ways of sketching from what I've shown you and, and how I think why I started sketching.
16. What are your sketches good for - What can you use your sketches for? What are they good for?: So what can you do with all these sketches and drawings? And what are they good for in your professional life and in your practice as an illustrator? When you are able to draw figures freely. For example, if you have a project to, when you need to draw people and you have all the sketches and you have this built in in your system. For example, let's take the guy with a jacket who is working. Well. You have maybe this communist block and down. You know how this guy looks like because you already have a reference of it. So you start drawing him with already inbuilt knowledge of how a person like doubts look like. And you want to put this reference, for examples. An agent of his walking on the street in the rainy day. He has this hunched, hunched back. It doesn't need to be the same guy. But because you've drawn this drawing, you now have the knowledge of how the proportions and the torture of this guy are. So you just apply that. The other thing that you have observed, It's a rough it out. Again. You see that I'm still holding on very rough style. I did not draw the 3D drawing or from the get-go. So when you have that, you apply it to your illustrations and you use your drawings as a reference from your future illustration. It's a great example. And because you already have the practice and the knowledge of proportions and balance, this will come very easily to you and you will not be afraid of making mistakes. When you have the proportions, you can dress this person even differently from what's in the initial model that you've drawn from Was it can have a jacket, maybe he has some kind of a scarf blowing in the wind. You can draw the scarf blowing. To add more drama to it. You can find all this kind of small elements later on. And, and use your figure drawing to add more life to your drawings. You can have you can have this jacket as well. That is unlike like an agent, like a detective for something. And here you can play with the details, you can play with the style. But when you have the main figure, when you have the main proportions and you have studied out. While it will come easy to, you should do the rest to fill in the gaps. Can make the jacket blow in the wind a little effect. And you can give him some kind of a more fancy habit. Like about. And just here you can use imagination to draw this character. He can look even a little bit more shady. And, and the thing is that when you have the main structure, you see how easy it is then to put in the shape. It's like building a house. You cannot build a house without having the structure before the skeleton of the house. It is the same thing with having character, building a character. You need to know the structure. That's why drawing sketches is so important, so important, I cannot stress this enough. How important this is. That's why maybe this, this lecture is one of the most important lectures you can, you can get because it will teach you to see. And we'll teach you how to draw a human body. And here you can have other kind of shoes then sneakers. And you can have him walking in the rain. Lens, give him on black jacket here. Just filled up. And it's already looking like a comic book character. Something that we just drew on. A guy from a rail station, suddenly became a character or a comic book. Because we know now how exactly how such character world can looks like. And maybe you want to have a street here with some water. Maybe he's walking in the rain. And because, you know, the perspective is lower, we can just add some pavements, like dots. We can add some rain. Buildings behind him. He does not have to be from the same environment that we've started from. Now, we can put him in any environment in just use our imagination to add to this character. And we could not have done that without studying the real character from live drawing. This would have been difficult. So something like that. And now you already have a story with the character that you've used. So save all your drawings that you have, those doodles. They're very important for one thing is to compare how much better you have become. For the other purpose is to use them for your illustrations, for your comic books or for your other projects. Or if you're a painter, you can use all these characters in your painting and you know exactly how they look like. So I would suggest just sit in the coffee shops on the railway stations in parks and just draw people the way I showed you and do not be afraid to make mistakes and to doodle. Sometimes when we see it in the park and draw and people start picking out, we want to kind of show off that. Well, we don't just do though, we actually make nice drawings. So with regard to kind of get scared and we tried to go back to just draw, just drawing a perfect drawing without getting the structure of the character of the body. Don't be afraid. This is for you and this is for practice for you to become a better artist. It's not for other people to judge. Just do your own thing and you will become a great artist and you have a brilliant career. And theater as, as an artist and exploration of body mechanics is so much fun that you have just opened the Pandora box. So I'm glad to have you here on these lectures. And I hope you've enjoyed it. And I hope you have fun drawing. So buy from me.
 Maria Avramova, Illustrator/Animator/Filmmaker