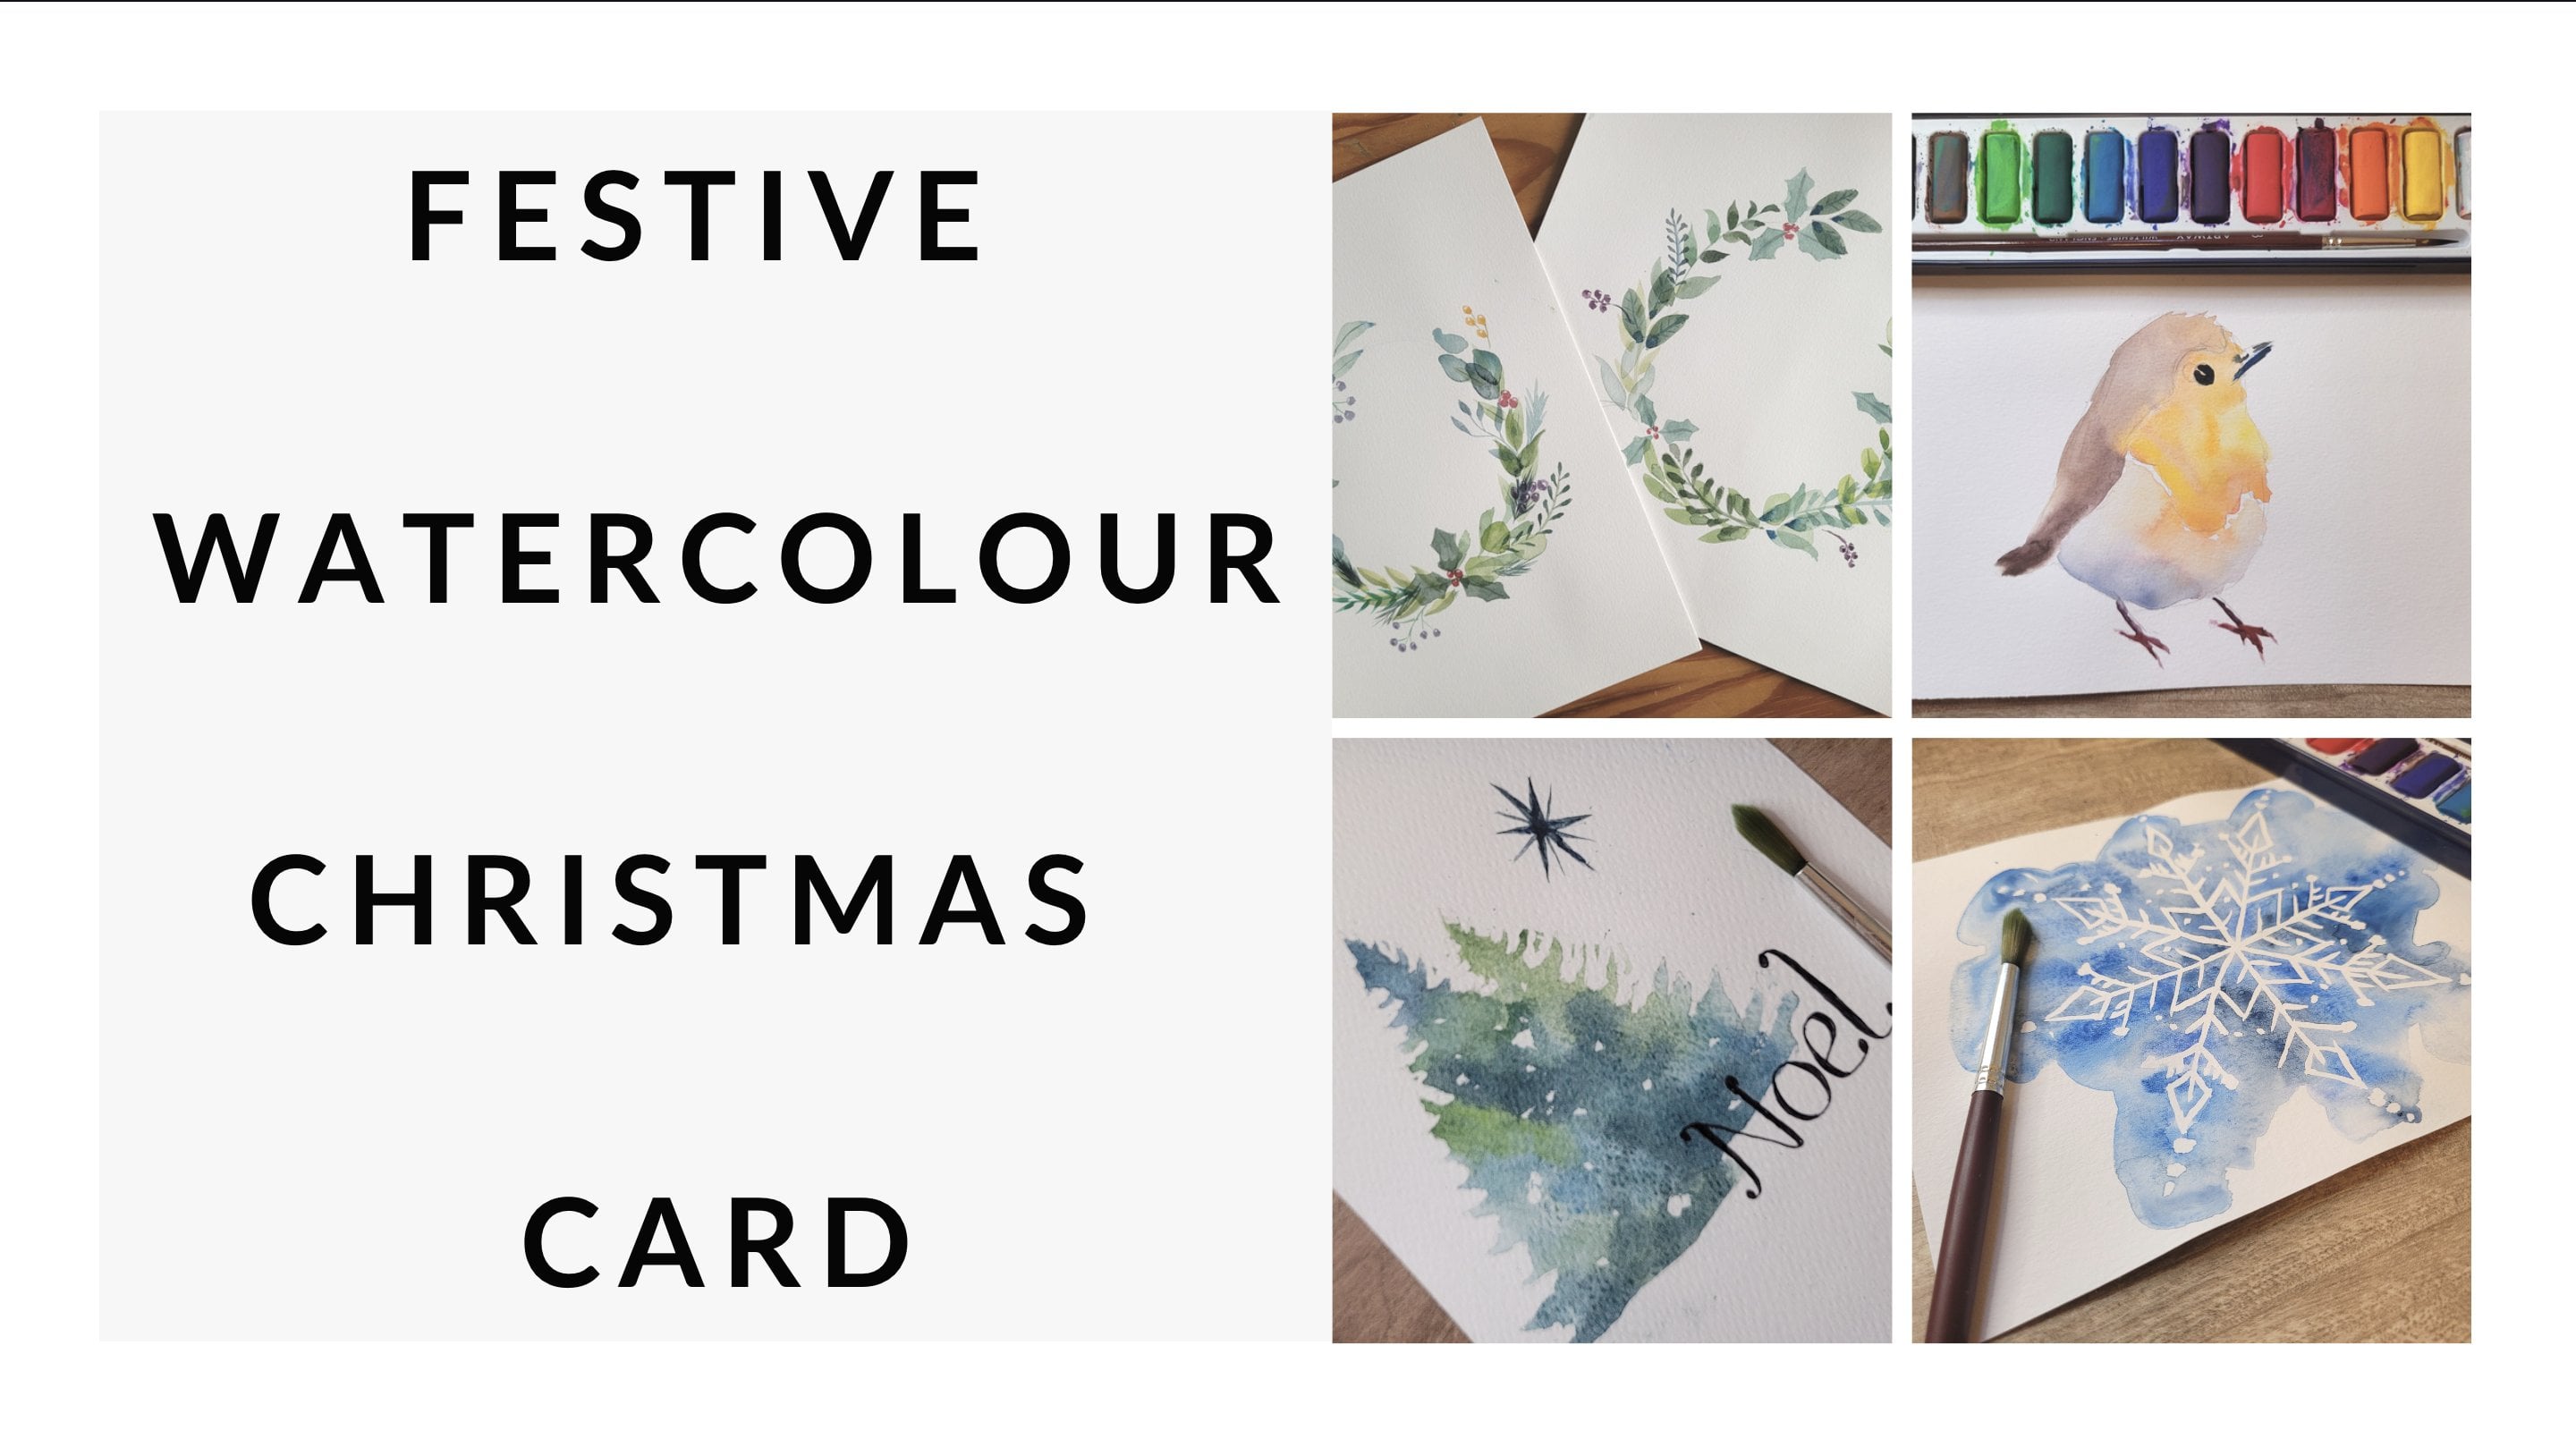
Transcripts
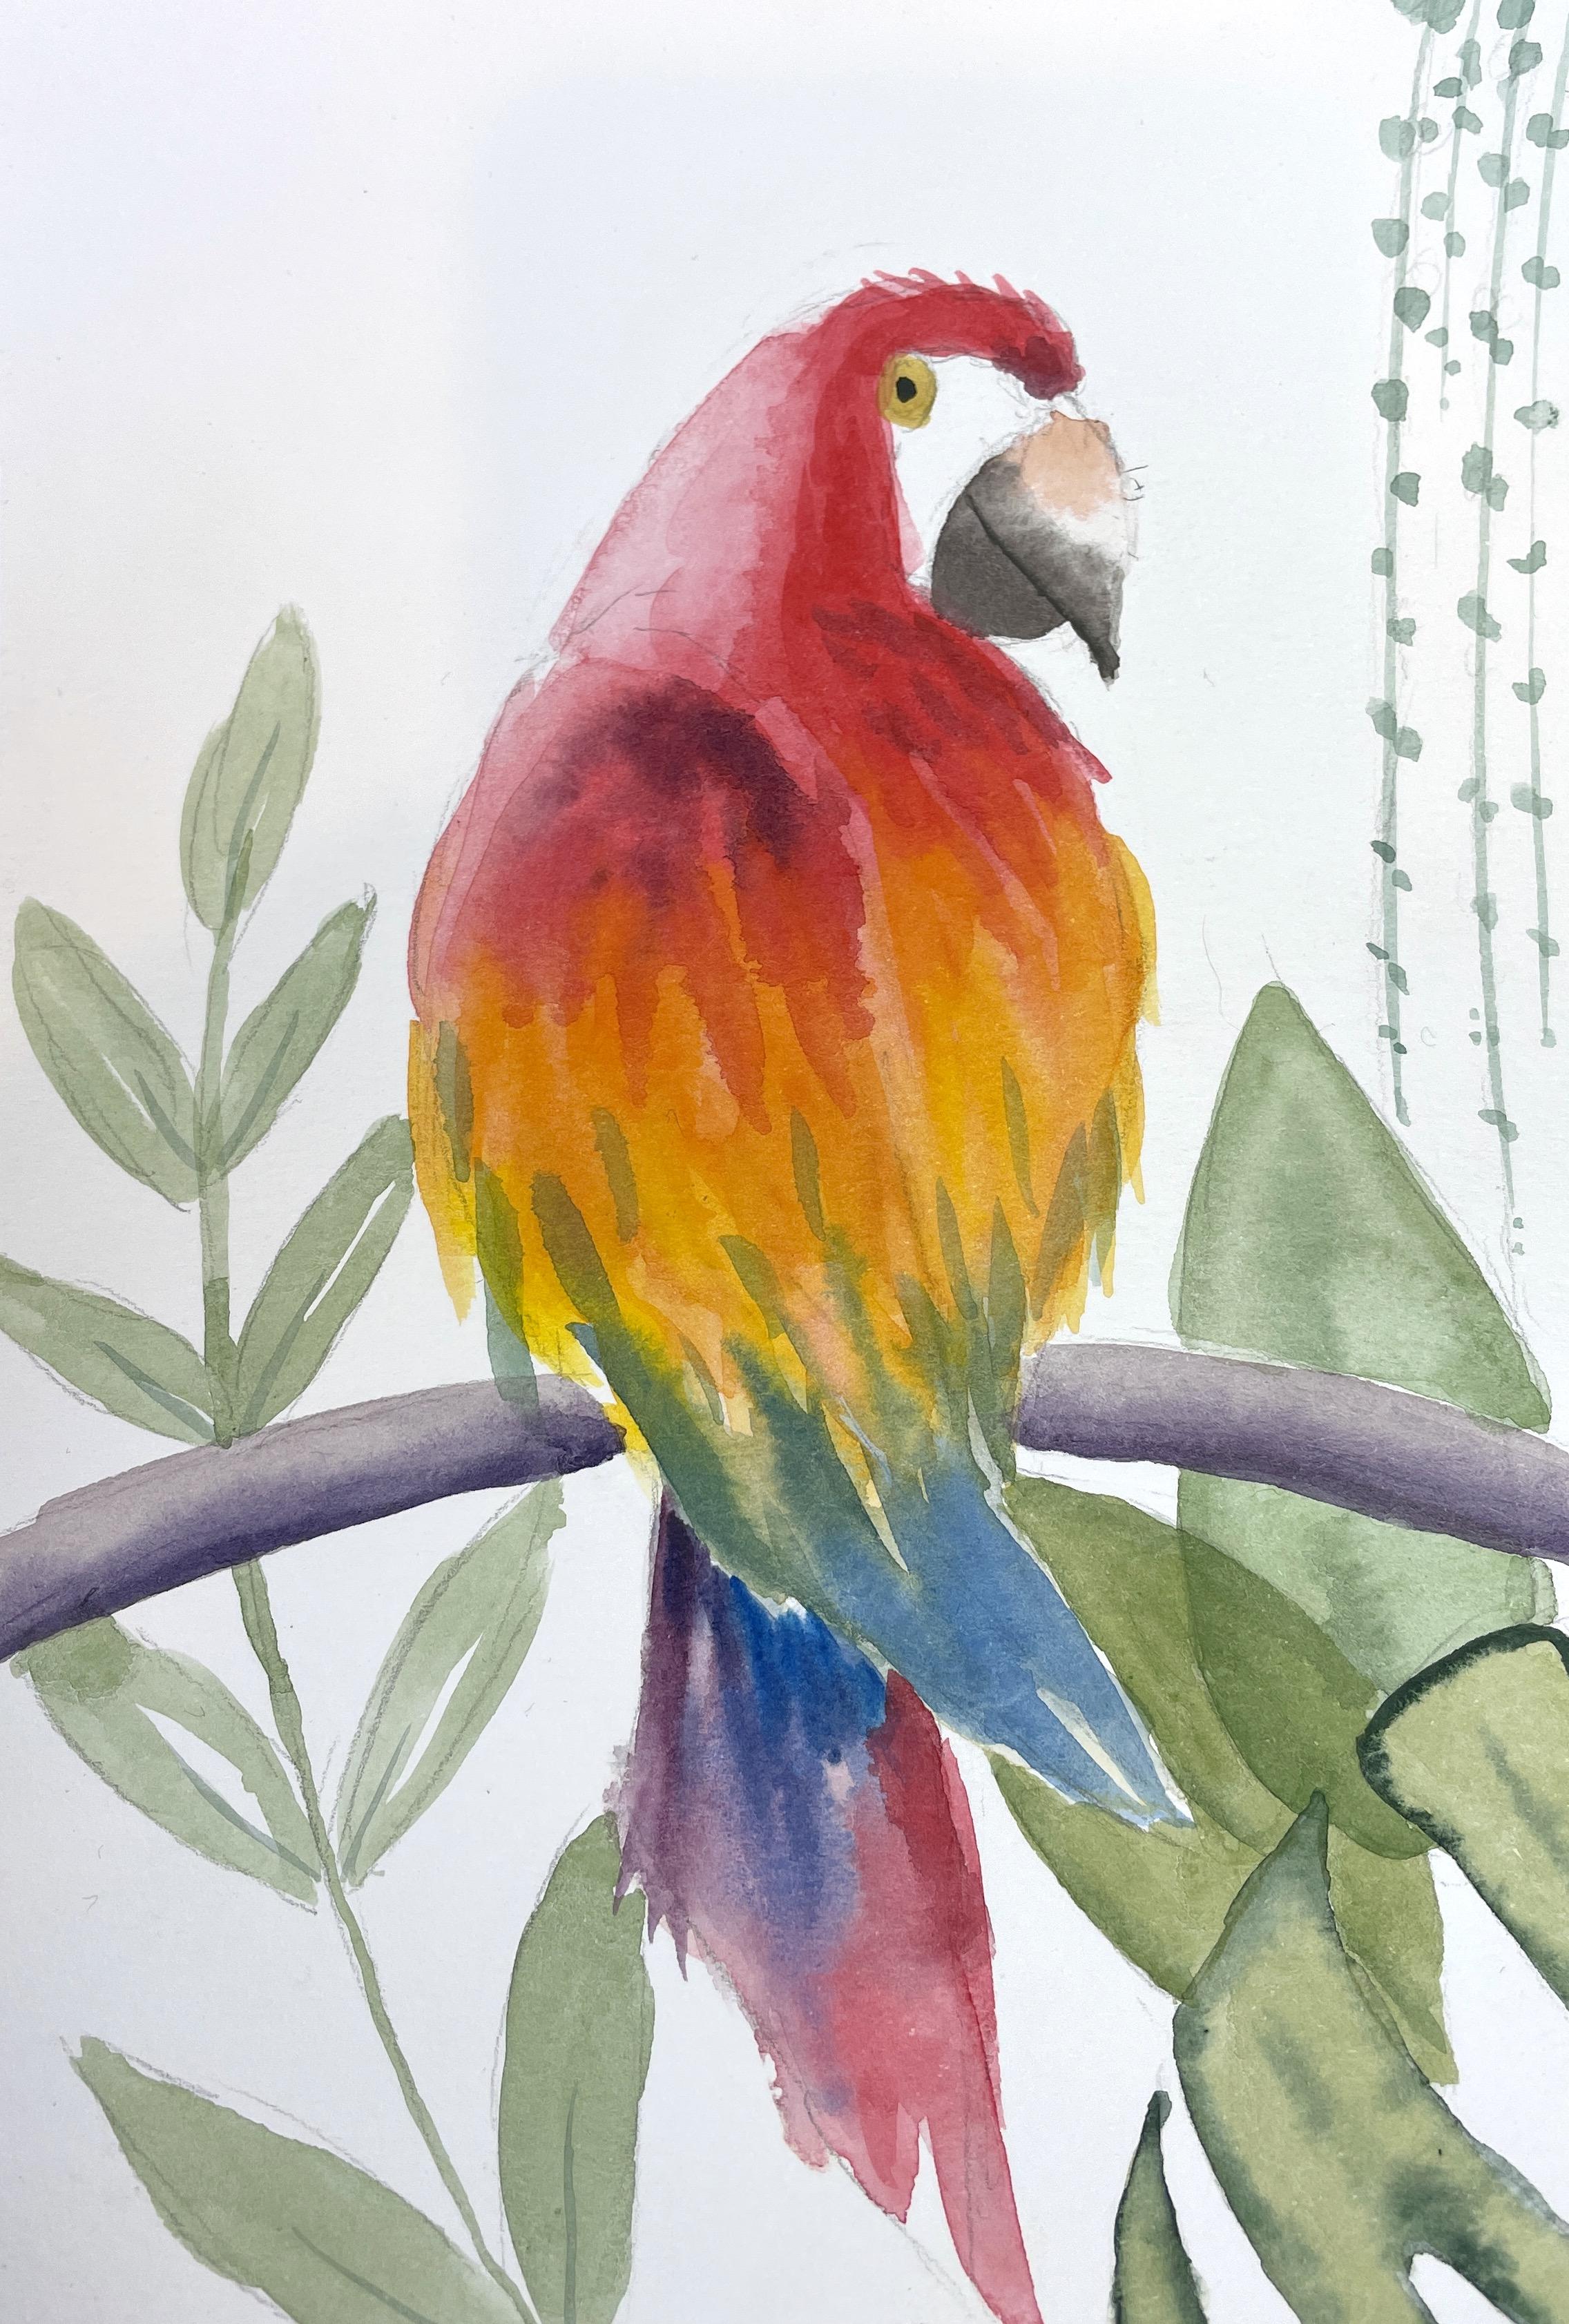
1. Parrot Intro: Hello. My name is China, and I'm a realistic artist. I specialize in oil paint, but I also teach bat
color and pencil too. I think that art is
incredibly good for you. It gives you a chance
to sit with yourself, to give yourself some time off, and to do something creative, it doesn't always matter
about the end result. But what matters is the journey, switching off and
improving your well being. In this class, I'm going to teach you how to paint a parrot. We're going to use loads of different colors and try and get that rainbow effect
from top to bottom. We'll use different
techniques such as wet on wet, wet on dry, and also see if we
can add lots of layers to keep the
vibrancy really alive. I believe that everybody
can learn how to paint. You just need a good teacher that understands you
and how you think. There's so many different
ways to do something. So what I say may not
be the bell and angel, but it is a different
approach to painting. In this class, you will
need a paint brush, a water colored palette. You'll need watercolord
paper, a pencil, razor, an old rag or kitchen towel, and a water jar, not to get
mixed up with drinking. If you have tubes, you
can use those too, but they may be slightly
different to the ones I've got. So come and spend
20 minutes with me. Do these sections 5
minutes at a time and create a lovely painting
that you're really proud of. And of course, let me see
what you make at the end. Okay, Team, grab your paints,
and let's get started.
2. Stage 1 - The Outline: Okay, let's just start with
the outline of the parrot. First of all, I'm
using my natural arc, which means my arm is
planted on the table, and then all I'm doing
is pivoting from there. It just makes life
way easier for myself and I can literally
just twist the paper, keep my hand in
the same position, and then I can get these
feathers on really quickly. When you go to the other side, even though it's a bit harder to understand
what we're actually drawing. It does mean we can get the
torso nice and quickly. Let me try and get a rough face. So I'm not overthinking it
at this stage before I just want to get it on and then
see where we go from there. I'll just get these
feathers at the bottom. I might need to downsize
it a little bit, which is absolutely fine. In which case, my
feathers go up here. Get that high chest and then get let's rub out the lines we don't need because it can be quite confusing. Okay. Getting the eye in the right place is probably the most difficult part because if you get
it in a wrong place, it can look really
******* weird. It's worth just
spending a bit of time on the outline to make sure you're happy with
where everything is. And then it will just make
everything so much easier. Remember just to tidy up any lines that
you're not going to use and then it'll just make it easier for
our painting phase. So just check that we've
got this lovely fringe. Somebody fringes it.
So we've got there. And if you are in Patrio, you can just get the
downloaded outline, so you could just
skip this altogether. No judgment. Okay. Good.
That looks like a parrot.
3. Stage 2 - Wet-On-Wet Layer 1: So for this phase
in the painting, we're going to work damp on wet. So this is going to be damp.
This is going to be wet and. There's going to be a
lot of jumping around. Well, we're going to
I'm not jumping around. We're going to go from
red down to some colors, but it won't be
painting like this. We're going to be trying to do some long strokes like this, long feathers, and we'll
do a few layers as well. So first of all, let's get
our but a little bit damp. So make sure we go
up into the hair, and then we're just going
to bring that down here. Okay. So our first color is red. So let's get our red ready. And we're going for a
medium consistency, so it has a lot of movement, nice pigment and water
ratio. It's about 50 50. And then we are just going
to drop this in here. Okay, so it's a little bit
too damp at the moment, but that's fine because
it's our first layer. So this can be a bit
like a practice round. And if I pick up
a little bit more red and do these big strokes, you can see, that's really
splaying out like feathers. Let's pick up an orange
now. Don't get that. Ready? Then let's just start
to add that into the mix. So my colors are still really
nice and wet at the top. Then I can pick up some yellow. Just trying to
integrate that as well. So we'll allow some
feathers to just fall off because that's going
to look really nice. And then let's just make sure. Our feathers are the bottom
are nice and damp as well. And we're going to add some
slightly different colors. So let's go for blue with
a little bit of green. Let's just get some of those
colors in there. Blur. Let me go. And then
maybe let's get a little bit of purple
coming down here. We add a tiny bit more. Red. All right, team. I like the gaps.
Big kind of gaps. You know the drill let it dry, come back to it in a second, and we'll go for a second layer. Okay. She's nice and dry out, so we're going to go
back in and try and add a bit more detail with
some more gradients. So let's see how we're
going to do that.
4. Stage 3 - Wet-On-Wet Layer 2: I like the way it is dried, everything's blending
into one another. If yours isn't, I don't think
that's a bad thing either because the idea is to try
and see some of the feathers. What I want to do now is, first of all, check that it's dry. Check that it's the same
temperature as the white paper. Then I'm just going
to go over it again with a less wet version. I don't want it to be soaking wet like last time is
a little bit too much, but weak with that. Let's just try and get it less damp to really
spread that water around. Then I'm going to use
slightly thicker paint so you'll see it's much darker, doesn't move as much. Then what we want to do is try and do the same thing again. Try and just get
those stripy bits. And this time, we're
going to try and think about where there's
a light source. So on the left side, it's
going to be a bit lighter. So it might not
do as much there. And then on the shoulder, I might just want to show that
it's a little bit darker. Just kind of let that flow. So I'm just going to try and add some damp water as we move
down, might leave the odd gap, which I'm not angry
about and then use a thicker orange allow that to mingle in
there with the red. And then let's bring
some of the color down a bit and then a thicker
yellow. Allow that to mingle. Allow a few things to
come off the page, and then let's try and
get that teal again. The blue with a bit of green. Oh, nice. A few strands through there. And then I might
just try and go for a bit of a pure blue. Okay. Good. And then
the final part is just the bottom again just
a slightly damp area. And let's get some purple, a few details on the end there. And then maybe a bit of blue. And then a touch of that red. Whilst that's drying, I want to just think about
the background. Are we going to leave it white? You could really nice? Or should we add a
little bit of forest? I'm thinking to add
a little bit of a branch and then a
few random leaves. Now, this isn't
going to be properly situated in the forest. It's just going to be
some really nice leaves that I think could look good. We're going to play
around with some greens. But first of all, we want
to draw the branch and then just make sure I'm happy with everything before I paint it.
5. Stage 4 - Jungle Background: So first, let's just figure
out where this branch is, so I'm just going to
go I'm just going to go I should go the ways to see what it looks
like all the way across it. I'm not sure if I want that, but not too bad actually. Then I want to draw a
stem that goes up here. I'm just eyeball in this, feel free to do
whatever you want, whatever feels right
for your bird. Then I want to have alternating
leaves by one at the top. That feels a little bit sparse. So why don't I just do
not alternating leaves? Okay. Nice. One more. I want to have
something down here. Maybe let's do a
bit of a monstera. Those leaves attach, but they don't leaves
a little bit of a gap and there's usually
a gap going through here, so I'll have monstera there. Then it'd be good to have
some draping plant down here, so let's go for maybe a
couple of lines that go here. A we'll do is a couple of dots and I'll be able to
do those better in green, but for now, I'm just trying
to see what that looks like. I think that looks quite
nice actually. What else? What else do we want?
Maybe something Maybe we can leave it then. Maybe just do a few really
big leaves down here. Now there's layering actually. That's going to look really
good. Let's start with that. Let's start with the
leaves in the background first and work our way forward. Let's start with these leaves. My favorite combination is dark green with this dark blue. It makes a lovely lovely teal. But maybe that's a bit too
close to this blue area, so let's add a little bit of green just to pick
up that brightness. And then I'm just
going to go for it. So this will be my leaf
in the background. So let's paint that in first. I'm just going wet on dry, so I don't need to
wear anything before. And then I just want
to let that one dry. If we move to these leaves now, these should be nice and easy. But I just want to make a
slightly different green so I'm going to add
some yellow ochre. Maybe that's a bit to olive. Maybe let's go back
to this green. It's a little bit of a darker green with a touch
of yellow ochre. Then first of all, let's start with a stem. Okay. Then I just want to
make sure there's no clumps in random places. And then all I'm going
to do is fill that in. Again, wet on dry. We'll have a look at adding
detail after it's painted, but you can also
just at this stage, kind of leave a few little
white bits to show. I don't know if
some highlights or just some texture because it
is quite texture painting, so nice keep it
similar as well. Okay. Let that one dry too. So let's add a bit of the bock just because that
could change the color a bit. I'm going to go for purple
and a little bit of blue. Maybe a touch of yellow ochre as well. Let's just get that. A little bit. It's more
purple than blue, I guess. And then it's just a light wash, so I'm just going
to go over this. We will add a
shadow in a second. So I'm going to work quite quick and whilst it's
still wet hopefully. Add that shadow. I'll
make it thicker blue and purple and just go
over that bottom bit. Okay. And then let
that do its thing. Okay. So whilst we're
letting those leaves dry, let's do another
layer on the parrot so that we don't get bored. That way we can work both at the same time and not
have to wait too long. So let's go back to the bird and do a very
similar thing again.
6. Stage 5 - Wet-On-Wet Layer 3: This time, I might be tempted to use a little bit
less water actually. So so much so that it's literally
just a little bit damp. So this should be
drying very quickly. And let me go to that red. Let me see it's not
really moving anywhere, but it's still just going to soften those edges, the touch. And if I just wanted to blend, that edge than I
might do because I do want that to be a
little bit softer. But then moving down here, I just want it to be a
little bit more defined, so maybe just watch for a second to see what
we're aiming for. And then I'll just help you to do a similar one
to yours as well. I'm actually going to leave the feathers at the bottom because I think they
look quite nice. And you can always
make the decision to stop and not
overwork something. But what I will do is just a little bit
underneath because I want to show that these
feathers are behind. So that means I want to go for quite a father just at the back both with the
purple and with the blue. Then just blend those into
the feathers going down, and then of we'll
have darker red, which I might just add a
little bit of purple too. Then that will just show that
those feathers are behind. So that's looking
good. The only thing we need to do once this is dry is just add a
slightly darker feathering up here on the face. But for now, let's
just go back to the leaf and let's
do the monstera. Okay. So I'm aiming for a
slightly different green, which means I'm just
going to add a bit more of my lime
green to the mix. Still with a touch
of dark green, and I might just add a touch of black just for a slightly
different color. Then all we want to do is try to remember where the gaps were. Obviously, we've got the
gaps in between the leaves, but also there's a few
gaps on the leaf as well. You've got to work
fairly quick with this because it's wet on dry. If you remember, dry
paper, wet paint. You can just see that the color is ever so slightly different, which is nice it just breaks up. The details a bit more.
Keeps it interesting. Okay. So let's get
these draping leaves. I think I'm going
to mix a little bit of blue with that green. So that is a little bit teally then all we want to
do is very thinly, try and get the line
going down, b them. You might just add a few
pretty short ones as well. Medium. Okay. And then let's just go for
some little circles. So they don't have
to be perfect. I can vary in size. As we go down,
it's probably best to just make them smaller anyway because anything in nature will always get
smaller at the end. The words grown from, I think, so that they can grow
big. Yeah, sick. I think I've got one
of these plants. And I absolutely love it. Nice. Whilst we're here, let's do a little bit of
work on the face. I'm going to mix yellow ocher
with a bit of a yellow. That is not too bright. Then first of all, I'm just
going to try and go in this give them the golden eye. Then let's go for a
damp beak obviously, make sure you have feathers
around it are dry. Then I'm going to mix black
with a little bit of brown. And a little bit of purple. Then just weaken the other
bits so I can see the color. And then we're going
to go for the base. And then I'm just going to
try and go across the line. I'll let that doing. Maybe add touch. Red with the yellow
oak a bit too much, try and mix it in layer of
red with the yellow och, and then just dab that on the
top and let that fall down. So when that dries, it's
going to look really organic, hopefully, and we'll
go over it again to define where the
mouth is a bit more. As we move down here team, let's try and add
another leaf there. Try and get a variation
of your green again. So maybe we go bright green
with a touch of black. A little bit olive,
which isn't too bad. And then what if we
go a little bit of this blue. Okay, good. So I'm going to try
to avoid my feathers. It's okay leaving
a little thing. I think that looks
quite nice sometimes. And obviously, try to avoid Itera then we'll just fill it. C. She's looking pretty nice, but I think it looks
a little bit flat. What I want to do is add
some details in the feathers and on the leaves just to push that contrast a little bit
more because at the moment, all she has are blocks
of color and it's okay, but we can make it a
little bit better. It might feel a
bit nerve racking, but watch me first and then
try your stuff. We got it.
7. Stage 6 - Wet-On-Wet Layer 4: All right. So my
feathers are dry. I want to add a
bit of a shoulder. So I'm going to
go for some damp. Just randomly spread that cross, and then I'm going to mix
some purple in with the red. So I want it to be
nice and thick. Relatively dark, maybe
a touch of dark blue. And then we're just
going to pop in a few splogesG in different
directions as well. And then I want it to be denser. Near the top here, so that
means I'm going to go back in, make sure that is darker. Then I would like to add
some te feathers down here. I'm going to go a
bit of wet on dry. I'm just going to add
a few little sploges Let's some of that go
inside those feathers, and then let's do
the same in here. Not many at all. Then let's think maybe
some wet on dry red, so we can go from the feathers. And then also a few over here.
In the head a little bit. But on the head, we can
click some hairs backwards, but then also add some of that purple right
in the center there. We can just add a few
purple streaks on the side. Good. That looks. Nice. All right, team. So let's
go for a bit of detail. Let's start with a buck. Go to mix this purple and
this blue nice and thick, just to have that ready. And then what I'll actually
do is reverse wet on wet. So because the paint
is still quite thick. I can paint that on and
then clean my brush, Dave out the excess paint, and then go over that. And then I'll do that once more. With a clean, pretty dry brush. It just go over that edge again, so it's help me to
control that contrast. Let's do that again
on this side. So you're controlling the
consistency of the contrast, and then we dab dab dab brush. Get rid of the excess. Go across Daba tab on the edge
and pull that across two. Whilst that is drying, we can add a bit of
detail on the monstera. So first of all, get it damp. And then all I want to do
is pick up my dark green. If you don't have dark green, mix the green with a dark blue. And then I just want
to go across the edge. So it's as if I'm
drawing an outline. But because the water is all damp or some more
damp than others, it should blend
in rather nicely. So let me just add a bit more water from that
because this one is it. Stream version of this one. So that was a little
bit too damp. We still work with
it, we can do. Just a couple of veins
through there and let that dry. We are nearly there. So I want to add a little pupil inside this
so start in the middle. And then just try
and do that circle. And then I'm just
going to try and go for a bit of a mouth. Again, reverse well and dry I'm trying to
act quite quick. And then just get it
down above so that it blends in to the top
rather than the bottom. And that should be done. So the final thing I need to do is a bit of detail
on this other leaf. All right, let's
get a little bit of detail on this final one. So mix of as two. What should we do on this? I'm thinking to do
a similar thing. W we go slightly
darker on the edge, clean and dry the brush. Bring out to the middle. Same with you. Then let's
just go for little vein. Nice. We'll just do a
little in this one as well. So there we have
a team, a lovely, colorful parrot in paradise with lots of leaves and
layering in the paint. So I hope you enjoyed that. I hope it wasn't too painful, and I hope you followed it
through to the end because sometimes it can be frustrating in the start and the middle, well done for persevering and I'll catch your next time
for another session.
 China Jordan, Art Teacher