Transcripts
1. Watercolour Introduction Music: Hello, my name is China and welcome to an introduction to watercolor painting. Now, I have been an artist for many years and I've tried a lot of different techniques. Some I really love and some I really don't. What's close to me is so amazing, it's so therapeutic, and there's so much you can do with them. You can have thin washes, thick washes, you can lay things over each other. It's not so difficult to clear up if you make a mistake. My main focus as an artist is to get realistic results in the easiest way possible, and I know that you can achieve this too. Now, a lot of people feel quite nervous when they start something new, and the aim of this class is to take away any of those nerves that you might feel. I'm going to show you step-by-step how you can achieve your own painting of a hot air balloon too. There's some equipment that we can use along the way just to make our lives a little bit easier. Maybe if you've got something circular, some solid tape or the bottom of a cup, you'll need a pencil to draw your outline, your watercolor paints to fill it in, and then if you want, you can use a fine liner to go over the outline too. Now, every stage is optional, it's completely up to you how far you want to push this painting. Maybe you're happy with it at the early stage and that's great. These paintings for you, not for me. If you've got some watercolors and you want to try them out, or maybe it's been awhile and it's a little bit rusty, grab your colors and your brush and let's see what you can do.
2. Water Colour - Stage 1 - Equiptment: Let's start off by looking at our equipment. Now, we're going to look at a number of things but hopefully, you should have everything at home already. What we need first is our paint palette. Mine here is quite an old one and I love it. It's lasted me years. Now, I don't do watercolor all the time, but when I do I know that it doesn't really need refilling that much. What I've got here is a Daler and Rowney. I might have said that wrong. But as I said, I've had this since I was a child. It is a professional watercolor kit and I absolutely love it. At the top here is our palette. This is where we can mix all of our colors. You can see where I have mixed a few colors previously and that's that. This is our paint palette. Now, you might have something very different. You might have a long one that maybe feels a bit chalky or you might have something like this which looks a little bit oily. There's no right or wrong way to have watercolor. You might even have tubes. Whatever it is, they all act the same. Whatever watercolor you have, give it a go, and let's see what happens with them. Now next, let's have a look at our paintbrush. I have got this round-headed paintbrush here. It is a number 5 but it doesn't really matter. This is quite a big brush and you might feel uncomfortable using a big brush. If you want to get a thinner brush then by all means please do. It will still work the same so long as it is a round-headed brush. It needs to have a point at the end. We don't want a flat-headed brush, we don't want the square because it doesn't really give us that many options. We can do so many different things with this round-headed brush. Next, what we're going to need is a little jar of water. I've got a lovely gue tab (phonetic) here. Perfect for washing my brush. We need to make sure our brush is clean between each layer or whatever we add in. A nice little jar of water, you can use whatever pot you have. On top of the water to clean our brush, we will need a rag as well. This is just an old sheet perfect for cleaning my watercolors. As you can see there I clean it quite a lot. It's just a messy old rag. You don't need anything special. If you don't want to get rid of anything, maybe a paper towel from the kitchen or even toilet roll. It's just something that we can dry and clean our brush with as well. Pop that to one side just so we have that. Then finally just a couple of extra bits. First of all, something round. I'm going to use this masking tape because it's easy, it's big enough. We wanted roughly masking tape or cello tape size. Maybe you've got a mug, something with quite wide circumference or you can go freehand or maybe you've got a compass, you can use that too. For me, I'm going to use this masking tape and then of course a pencil. I just have a 2B pencil. It's super soft and super sharp, so I'm going to use that for all the outlines. Let's get started on stage 1.
3. Watercolour - Stage 2 - The Outline: Let's start with the outline of our shape. Grab your circle, whatever that might be. Remember, mine is masking tape. Put that near the top of your page, not completely at the top. We always want to leave a little bit of space, but high enough so that we have a lot of space at the bottom. Grab your pencil and very lightly draw around that circle, so it's very light. If I remove that, you can hardly see it, but you can see enough. From here, what we want to do is get some curves going down into the bowl. I'm just going to stop on the right-hand side here. Can you see this lovely curve that goes in there? It's mashings the arch of my wrists there. For the other side, it's always difficult to get symmetry, so do be careful, you might find you want to turn your paper around, or maybe you just want to give it a go. See if you can match the symmetry going down there. There you go, quite happy with that. What I'm going to do now is just tidy up, finish off the bottom. Add another little section there. This is the end of our air balloon, and I'll just remove that outer edge, and then let's remove that section in the middle. There you go. Now, you can really see if your shape needs tweaking. Mine can probably go a little bit narrower there, maybe tied a bit wider here. Much better. Let's add the patterns, it might be easier for you to get a straight line down the middle again, very gently. This shows us where our mirroring should be and where the edges are. Let me make that a little bit straighter. Maybe grab a ruler if you're a little bit wonky like me, but otherwise, you can just add a vague straight line down there. Let's start with our first shape now, one thing to bear in mind is that it's going to be really narrow. The gap between the outside and the line we're doing is going to be very narrow at the top. It's going to be widest at the widest part of the circle and then as it travels down, it will start to get narrower again. This should be our widest part, this should be our narrowest part. Let's try and do the same on the other side, there we go. Then let's work our way in towards the middle. As the hot air balloon is turning towards the whole thing, the whole strip will be getting bigger. That's to do with perspective, if you want a lesson on perspective, do check out our other video about the fundamentals of drawing. This should help you in understanding perspective. A final one here, only a little gap. I guess actually what I do want to do in this, just change the tops a little bit. That one comes to the middle, this one also needs to touch the middle. There we go, so they are all coming out in the middle there. Make that bigger, so don't be afraid to tweak your drawing. It has to happen now before we do the painting, so do any tweaks that you might need. Sticking to those rules of it being bigger as it faces you, each stripping bigger as it faces you, and then narrower as it turns away from you. There we go. The final thing we need to do is just to add a basket. We'll do a couple of strips down here and then what I'll do, my basket will be circular. I think that's normal for circular baskets. Let's work on our ellipses here, I guess. Our ellipse has to be widest at North and South, and widest at East and West. It's a squashed circle, then we are going to get a nice curve down here, brilliant. We'll add some strings later on, to show that the basket is more attached to the blue. For now, do rub out your outlines, and we can't be good. Great, that is stage one done. We've done the outline, we've used some tools to help us get there, and now we're going to work in with watercolor. Grab your paintbrush, your water and let's get started.
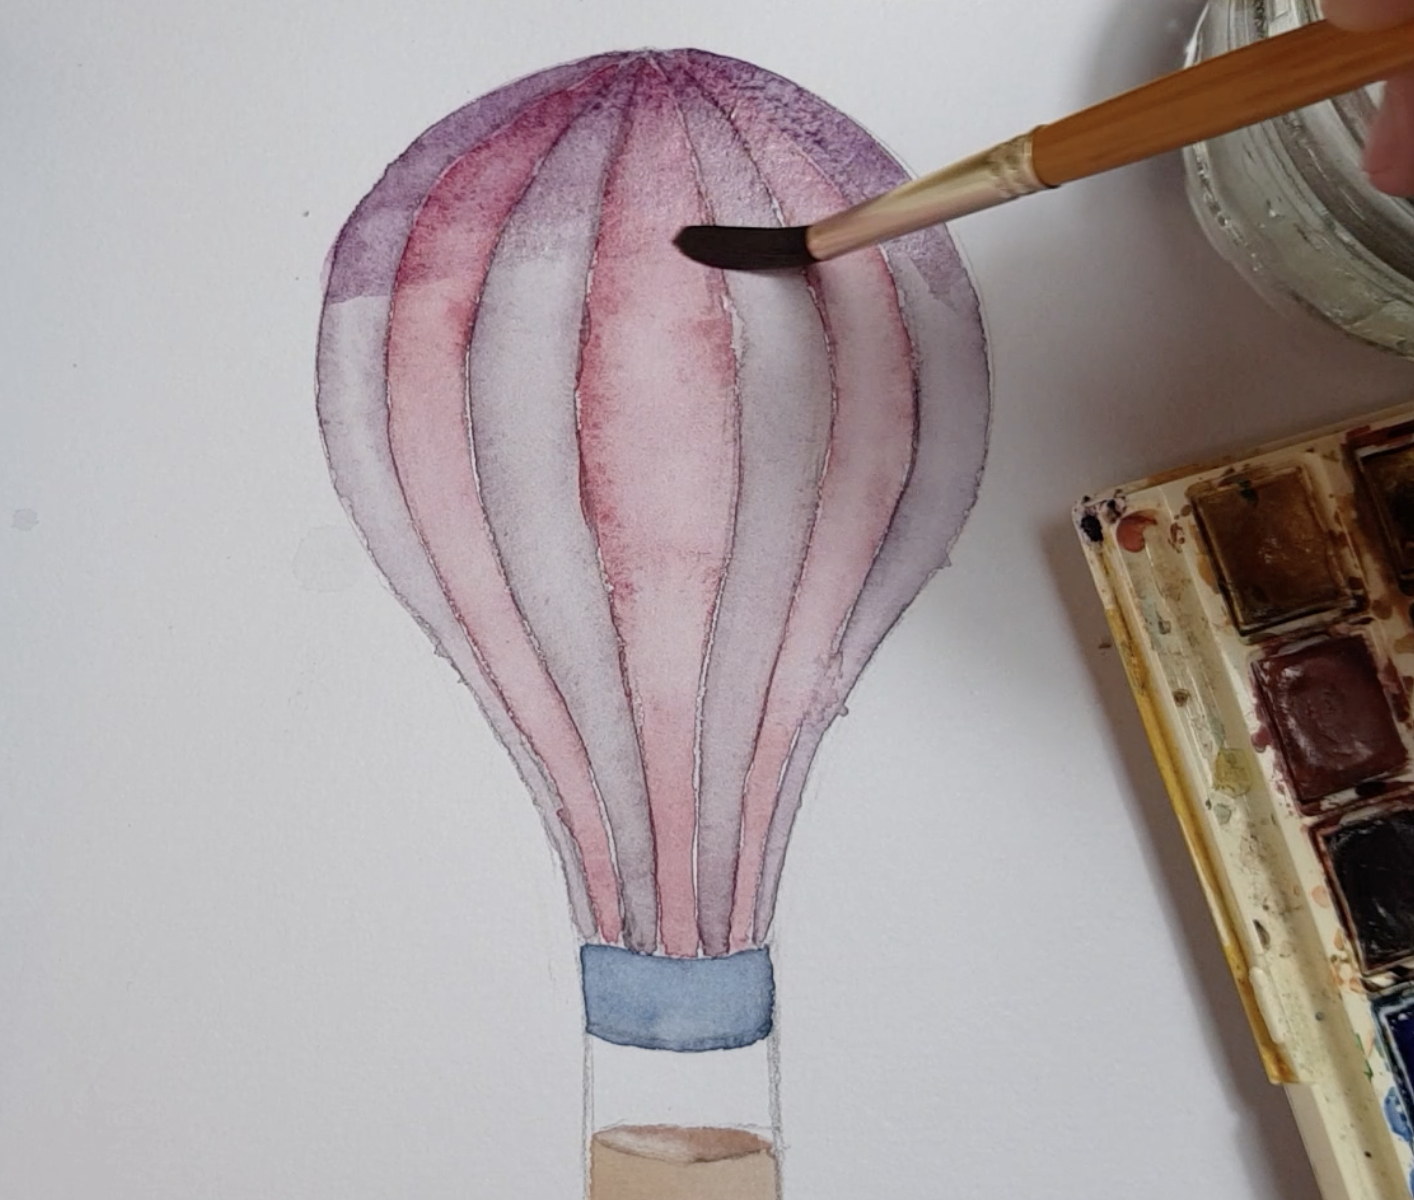
4. Watercolour - Stage 3 - 1st Panels: You can choose whatever color you would like. Maybe you like blue, pink, yellow, maybe you want to make some together. It's completely up to you. What I'm going to do is alternate my colors. I'm going to go one color there, one there, one there, etc. It's up to you, you you do them all the same, but you might find it a bit more entertaining, a little bit more fun to alternate your colors. Maybe you want to completely mix it up and not have one color the same. As I said, it's up to you. Let's start by doing the left hand side. I'm going to use a mixture of colors. I'm going to use my blue. It's the lighter blue of the two. Often you'll find that there is a mix of two blues. All I'm going to do is get a bit of the pigment and put it in my palette there. Add a little bit of water just to make it nice and loose. We don't want it too thick, we want color, but we don't want it to be like acrylic paint. We want it to be watery. Now once I've got enough of that, I'm going to add a little bit of red. For me I'm going to use the alzonium red, which is just above. It's bit more of a deeper color. A bit more serious for me, but you do not have to copy my colors at all. Maybe I'm just going to add a little bit more red to lighten it up, and then a bit more water as well. For me, that a very nice color. It's a good thickness. You can see through it, but it's still thick enough to see the color. Let's apply that to our segment. Now you want to be quite quick with this because we don't want it to dry. If you find it starts drying, just pick up a bit more color or you can add a little bit of water to make sure it's nice and wet. This is one of the good things about watercolors, is that it likes being wet whereas sometimes when painting you want it to be dry as soon as possible so you can add more colors, more layers, whatever it is. But with this, we don't have that worry. Your only worry is will it dry. Again, add a little bit more water, make sure it goes right to the tip. I want my edges to be nice and smooth as well. Pick up a bit more color. That for me is a very nice coverage. Now just notice how I'm holding my brush. I'm not pushing it in. I'm just using the tip of the brush. Giving it nice and soft and not pushing in because that just gets a little bit too aggressive. Now once it's all got color on it and it's nice and wet. Pick up some water and I want you to just dab it in. I'm going to do this regularly. Put my brush in the water. I didn't clean it. I'm just picking up water and I'm dabbing it in all the way from top to bottom. The good thing about the water is that it has a skin, so it has its own skin. The more water I put in, it's fine because it will hold its shape. Just keep adding water. It's probably quite a lot on the paper, but as long as you've got watercolor paper, then it should be fine, it should hold it very well. Now there probably will be a point where there is too much water on it, so don't go wild, just add enough that the color starts to move. What I'm going to do now is just clean my brush, get rid of all the excess. It might feel a bit counterproductive, but trust me, it works. Once the color is off the brush, just get rid of the excess on your rag, so gently rub that off. Then all I'm going to do is very lightly stroke down the middle and then wipe my brush again. Can you see how the water is attracted to the brush. It just comes towards the brush. I'm leaving this in the middle of that section. I'm not going to the edges because I want to create that texture. I want the edges. I want it to look darker. By leaving that on the edges, it should have that effect. That is a great start. Do the same again, whether you need to remake your color, whether you've got enough still. Well, only you know the answer to that one. Mix up your color and start again. If you weren't too happy with the first one, now is your second try, maybe you want to add a bit more pigment see what happens to that. Technically, is the third strip. I'm going to add a little bit more pigment there. Now this is a good thing. Let me just make sure it's nice and wet. I just slipped up there and I need to fix that. So clean my brush and then I want it a little bit wet, what I'm going to do is just wiggle on the paper and then soak it up just like I did before. You can still see it. Let me try again. Clean brush, tiny bit wet. I don't want to soak the paper. I do want it to dry. It just picks up that pigment. Now it's still there a little bit, but that's fine. Hopefully, I didn't leave the rest of the painting long enough to affect it. I'm just going to start adding that water. Remember, I'm dipping it from the middle so we want to push all that paint to the edges. Dry that brush, make sure it's nice and clean. Then let's pick it up from the middle. Sorry, I've really wanted to do that. Feel free to do it, it's quite therapeutic actually. Nice. Now the next one. I am in love with this color, it's so satisfying. It feels quite liberating, I suppose, because you don't have to stress that much. Whereas in oil painting, it is quite stressful because you're trying to represent nature exactly how it is. Watercolor, you're trying to get an essence of it, I suppose. Some people might disagree. Obviously, it is art, it is there to be disagreed with. I just think there's something so much more freeing using rose than using other mediums. I'm going to make sure I get plenty of pigment on there. Nice, and then time to dab. Even that looks nice. You might just want to leave it at that, to be honest. Now it's completely up to you. This is your painting not mine. A bit more actually, a bit more to the middle. Great, now clean it, scoop it. I'm quite happy with that one actually. Let's do the final one, the final strip in this color. This is great that we're alternating actually because it means that there's time for the first strip to dry because we don't want our edges to blend. That's when the colors can look really messy and it just mixes all the colors. Just taking our time to move around. Just keep it nice and wet. I don't know why I'm saying wet so weirdly. Great, clean the brush. Dry the brush. Let that dry. In the next stage, we will fill in the gaps.
5. Watercolour - Stage 4 - 2nd Panels: In the next stage, let's choose a different color. It's going to be the same technique, but choose whatever color you like. I think I'm going to go for a pure pink this time. I'm going for a bit of a purple and pink theme. Again, try and make sure you've got lots of pigment and lots of water. There we go. Just like we did before, we want to fill in these gaps and it's super, super, super important that your painting is dry. Otherwise, we end up with a big bleed from one color to another and it just loses the effect a little bit. So make sure it is dry. But obviously, the strip that we're doing, we want to make sure it's nice and wet. Always thinking about what the previous thing is doing and what we're about to do next. I'm very, very happy with that color combination there. Just got to be mindful not to really go over the previous color either. It won't sit next to it. If you do end up leaving a couple of little white bits, I think that's fine. It's actually quite nice sometimes. Again, make sure it's lots of colors. There we go. Again, starts to bring in some water just to disperse those pigments. Clean the brush, dry the brush. Then just in the middle, scoop that up. Remember, I'm not going back and forth just soaking up the middle there. Great. The next one, the centerpiece, exactly the same. Keep adding those, a little bit of water. There we go. Clean the brush. Then the final one, same consistency. Final round, remove that central bit, soak it up with the brush. There we go. Let's leave this layer to dry because we need to add the basket and the base of the balloon. Let that dry and let's move on to the next stage.
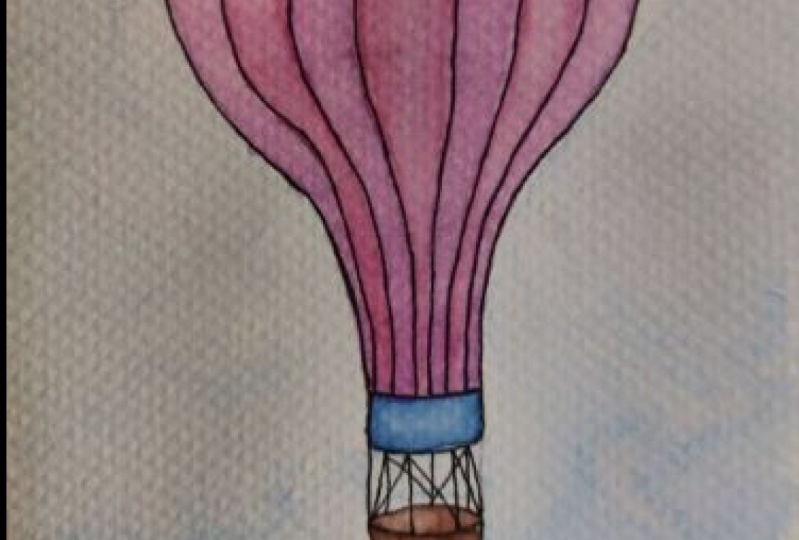
6. Watercolours - Stage 5 - Bottom & Basket: Now, you can again choose whatever color you want. I am going to go for a deep blue. It might be ultramarine blue, that is quite a nice color. It's a little bit bright, so actually, I'm going to add a tiny bit of this red to see how that changes it. Brilliant. It's a dark blue now. I'm going to use that at the base of my hot air balloon. We want to go for the same principle as before, so lots of color and then drop a whole bunch of water in them just to try and disperse the pigment. Clean that up, and then just dry that on the napkin, and then soak that up. I'm just going to hit that middle, there we go. It starts to look like the balloon has a bit of a bend that. Let's now do the basket. Now, for the basket, I'm going to go for a little bit, not too brown, I want to add a bit of color in there. I'll make it a bit lighter with some yellow perhaps and a bit of that red, there we go. I just want to do the same thing on the outside, maybe a bit of yellow ocher just to give it a bit more color, there we go. Same as we've just done, so add all that water, just to push the color to the outside. Just pick up the color in the middle there. Push that out. Okay, good. That's going to dry it really nicely. Let's get the middle a little bit darker, so just add a bit of brown to my yellow ocher. Maybe a little bit of this red as well. My voice has gone very deep. This has to be darker because this is inside the basket. We don't want this to be a lighter color, it has to be a darker color. This one, I don't want to over saturate it with water because I want to keep that nice and dark. What we'll do is just pick out a little bit. I'm just going to go for one side. It just suggests that there is a light source. We'll let the whole thing dry now and then what we're going to do is just add one more layer. After that, it's up to you if you want to do a sky. So let this dry and let's move on to the next stage.
7. Watercolour - Stage 6 - Dark Bits: For the next stage it has to be completely bone dry, so if you put your hand on it, make sure nothing changes. Mine is bone dry. The top is a teeny tiny bit down at the bottom, but that's okay because we're going to start at the top here first. Now because we do have pigment on it, we can't really get it too wet. We want to make it wet but we don't want to rub out anything, so when you're using a brush be very gentle, we just want to have light strokes. What we're going to do is make a very similar color to our palette, so choose something as very similar to one of the colors you already have on your balloon. I'm going to go for the purple. I have a little bit left on my palette actually, move that closer, but I still want to make a fresher one. I want to make it fairly strong in colors, so I add in more pigment. What I'm going to do is just shape the balloon. I want to go round in circles, and as I move down, I'm just adding water, I'm not adding any more pigments, so we only add pigment to the top there. If I go all the way down, then keep just adding water because it's just moving that color downwards. There you go. You can see that it's moving the color already, so I don't want to overdo it, it's very, very gentle strokes. Now, this is again, just to make it a bit more dynamic, we've got dark at the top and then we're heading to light in the middle of the circle. Now the bottom, again, makes sure it is dry. I'm going to do the same thing, I'm going to use that deep purple. This time because it's underneath, I want to make it a little bit darker, so let's make it darker. I just add more of the pigment. Again, I'm just adding a stroke of dark pigment there and then as I move up, all I do is add water. You might want to start to clean your brush a little bit if you feel like it's quite dark. I'm going to meet the strip in the middle that we did. There we go. I'm fairly happy with that, very pleased indeed. That's all, hot air balloon done. Now the next stage, we're going to add a little bit of detail. We're going to add a bit of background and some strings just to attach the balloon. You can work straight on this from your hot air balloon, so no need to wait. Let's crack on to the next stage, which is the background.
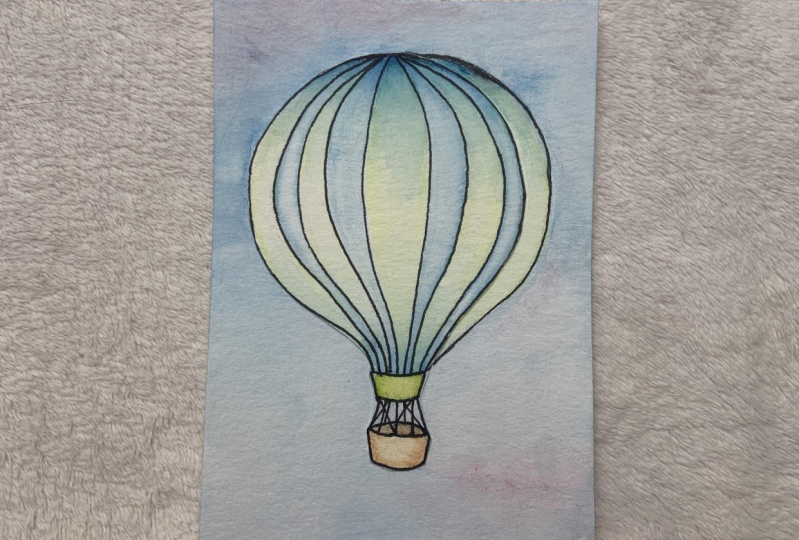
8. Watercolour - Stage 7 - Background (optional): Now for the background, we want it to be really, really wet. What we're going to start off with is just applying water, just clean water to the background. We'll just start on one side. Try not to touch your balloon a lot because it will get a lot of bleed. Now, sometimes it looks good, but I just don't want that. Don't worry about the top for now because our color is going to come from the base. Just make sure you get in this gap here. There we go. So skies are blue, and I'm going to start with the blue at the bottom of the page. I'm just using this blue here, the lighter blue on your palette. I'm going to use my brush quite wildly. So I'm using it on the side. I'm just going from side to side. I want to get that very soft look. I'm moving my way up. Once I get to about halfway, want to stop adding pigment from my palette. I'm just making a soft gradient all the way to the top because as we look up into the sky, the blue disappears as it merges into space. It doesn't mean we want to start adding a black background. That just means that we have a very gentle gradient all the way to the top. Push your water now all the way to the top, there might be a tiny bit of color leftover, and that's fine. You might want to make this even darker and get that gradient even more. Let's move on to the left-hand side first, and we can always make it darker. It's much easier to make it darker than it is to make things lighter once the decision has been made. Lots of water on the outside. If you are doing a danger dip just like I did, then make sure you don't spill it on your [inaudible] , so let's go again. Get the same color and sideways strokes. You don't have to do blue. You could do some sort of sunset and you could add a mixture of colors in there. When this is all on, I might reassess and see if I want to add a different color. Maybe I add a tiny bit of pink. A tiniest bit of pink. Just mix that in. Just add another dimension to it. You don't want anything to look to flat. Good. That is the background. The final stage will be to add the strings, and if you want, you can add some outlines. I might do that as well, actually. I think at this stage it, it looks nice, but I think you just need some definitions. You can either use water colored to do the outline or you can use a fine liner. I'm going to grab a fine liner. It's completely up to you what you choose, and then that will be our hot air balloon finished. Next stage is the outline.
9. Water Colour - Stage 8 - The Dark Outline (optional): For this stage is just the outline. We're going to add a couple extra bit string just to attach a hot air balloon securely to the basket, but we can just enjoy this part. I mean, hopefully you've enjoyed the rest already, but we're going to use a fine liner now. You can either use a fine liner like I have here, or maybe you just have a biro, so you probably have one or the other at home, if not, do invest because these are so good to use. Now, I'm just going to move everything out of the way to keep myself a bit of space, but all I'm doing is going over the outline of the balloon itself. Again, this needs to be completely bone dry. Already you can see a really nice outline start to happen here. I mean, you might want to just leave it as it is. There's nothing wrong with that whatsoever. But for me, I really like to get this strong definition between objects and background. It helps to allow all the colors to pop out and it helps to just define everything beautifully. Take some time now, just to outline your hot air balloon and see if you can zone out. I'll stop talking but you might be relieved at. Just very gently go over all the edges and I'll see you at the end where we can add a few more extra strings. Just at the bottom, just want to add a couple more bits of string to make sure is very secure. Maybe you want to add a person in there, I don't know, up to you. But I'm just going to alternate, so one strip in the background, one strip in the foreground and it helps it look a bit more secure. Maybe you want to add a couple of dye lines. Maybe I'll go for one there, one there. Don't want to keep it or get it too messy. Let's get one there. Actually is quite nice. There we go. That is a solid hot air balloon and there we have it. Introduction beginners, what color course to painting a hot air balloon? I hope you enjoyed that and do show me your artwork at the end of this class because I would love to see what you've done. Thank you for joining me and good luck with your what color adventure.
 China Jordan, Art Teacher