Transcripts
1. Welcome!: Hi guys, this is Jack. And welcome to my second series of learned back that are calligraphy. And today I'll be teaching you the major skills. If you haven't already. I encourage you to take my first series where I discussed about the brief history and the characteristics of lack better. This grass is beginner friendly. As I relieved you eat a step-by-step instructions of how to build the letters. And if you are an experienced calligrapher, may classless still be helpful. S going back to the basics will help you enhance your skills. Be sure to download the worksheets on their research that below, where you can use any flat neat bands or markers, we 3m, 4m m insight. By the end of the glass would have a quick project where you can test your newly found skills. Once you're done, please upload your work on the projects tab below to help inspite of immunity. So gathered to listen materials and let's get started.
2. Tools & Materials / Creating Guidelines: Hi and welcome. Before we begin, please gather your tools and materials for this class. Pencil, eraser, ruler brought edge spent or more current, but favourably violet barrel Ben 3.8 m m. Inks S needed for your pen. A good quality paper for your practice and supreme through workbook. Be sure to download a copy of the workbook for this class. You can see the instructions on the class description below. Once download and print them on a good quality paper that is ink friendly. How to choose your paper for practice and printing. For your project. You can use a specialty paper like watercolor paper, heart stop, or craft paper. For the paper supplant your workbook and the inkjet paper will do. Follow this pointer is interesting. The correct papers. It should have a thickness of 70 to 80 GSM. It should have a smooth surface. And asks you write, the ink should not father. Now, you need to research and test each paper that you have and choose the one that will give you the best results. Here's a sample for testing. This paper is not as good. As you can see, IQ is feathering. This paper is good to use as the ink, thus not feather. Both our ink jet papers in 70 GSM, but different rents. So you really need to test them yourself. In case you don't have a printer, you can still follow along without the printed workbook. All you need is to create several papers with guidelines. Aside from a plain paper, you can use paper with green dotted and read or line papers to save time, 18-year guidelines. And thus I mentioned earlier, you need to test the paper that you will use. Here's sort of refresher on how to create the guidelines for this class. We will use the ratio of two is to five ec2. If you want to know more about the proportion, please watch my first series where I discussed the characteristics of black letter. Using a plain paper. First, will create and the bladder suing the width for the descender line, five nave width for the x-height, N2, and live with for descender line. That create the horizontal guide. We'll create the vertical guide. Please note that the vertical guide does not have any exact measurements. These lines will just serve as a guide when you're creating your strokes to keep them straight and consistent. On my video, I only use the greed on my ruler. Using a green or a guarded read paper. First, we'll create a neobladder suing the width for the descender line, five neighborhood for the x height and to Nim width for an assembler line. Then we'll create the horizontal guide. You don't need to create the vertical guidelines as you can using greed or a dotted green to guide you when you're creating your strokes. Using a line paper. First, you need to rotate your paper or notebook. Because this way you will automatically have vertical guidelines. Then we'll create a neobladder due in the width for the descender line. Five neighborhood for the x-height, and two in the RID for an ascender line then, but vth and horizontal guide. Now that we're ready, let's start with the jails and see you on the next video.
3. Drills: Drills. Drills are very important in mastering this fruit, as this will help you to build the letters correctly and efficiently. The importance of drills lies in the effect on muscle memory. We have four sets of drills from simple strokes and building it up to a compound stroke. First set downstrokes. Using your workbook or your blank paper with guidelines. Practice this basic stroke in different sizes. Keeping your ban at 45 degrees at all times. She appears strokes, even by writing slowly. Downstroke, we'd serif with the angle of your band at 45 degrees. First, create a short slanting stroke towards a left to create the Serif and continue to add downstroke without changing the angle of your pen. Created bow stroke first. And before reaching the baseline without changing the angle of your Ben, slide your pens or is the left creating the end serif. Practice both of these strokes alternately downstroke with double serif. Combining the two strokes were created with a double serif. We the angle of your bank at 45 degrees first, create a short slanting stroke, torso left to create the Serif. A downstroke without changing the angle of your pen. And before reaching the baseline without changing the angle of your Ben, slide your pencil. Where's the left creating the end serif. Second set, horizontal and diagonal stroke. Horizontal stroke. With your band at 45 degrees, create horizontal strokes in different sizes. You can use your guidelines to create a straight and consistent strokes. Horizontal stroke, we'd serif. Start that it'll be lowered a baseline. And the angle of your band at 45 degrees create a short slanting stroke upwards to create the Serif and change to a horizontal stroke without changing the angle of your pen. Start with a horizontal stroke. Then Slider and Ben upwards, keeping the angle of your band to create the serif. Practice destroy alternately horizontal stroke with double serif. Her going to combine the two strokes to create a double serif. Start a little below the line with the angle of your band at 45 degrees, create a short slanting stroke upwards to create the Serif, and then change to horizontal stroke without changing the angle of your pen. Then slide your band upwards to create the second serif. He can pause the video and practice on your own. Diagonals strokes with their band at 45 degrees, slider bend downwards and towards the right to create a diagonal stroke. Do the same, but with a longer stroke. Keep your strokes even by writing them slowly. You can create several strokes with different angles of strokes. Sec, three curves, strokes over curve. With your band at 45 degrees, create a smooth over Curve. Practice by creating a long and short over curbs. The short version is also called a hackathon. Under curve. With your band at 45 degrees, create a smooth honor curb stroke. Practice by creating a long and short on their curb strokes. S-curve. With your band at 45 degrees, create an S-curve. Keep your stroke smooth. My writing them slowly. Set for hairline strokes. Hairline downstroke. Use the corner of your Ben or the narrow side ever need to create the hairline strokes. Using the same technique, creates standards strokes upwards and create the second stroke from top to bottom. Do it is several times for your practice. Horizontal hairline strokes. We, the same technique, create a straight horizontal stroke. Hey, allied with the flick strokes. Slapped with flick. Create your hairline stroke and before ending it, slowly lift the top corner over Ben while making a short curve towards the right horizontal wind fleet. It creates your hairline stroke and before ending it, slowly lift the right corner off your pen while making a short curve downwards. Be sure to take your time to practice as Rails so you improve your strokes. And when you're ready, I'll see you on the next video.
4. The Majuscules: Group 1: We are now ready to start learning the majuscule. I divided the alphabet in seven groups. Fair grouped according to the similarity and strokes on how to write each letter. This way, it will be easier and faster to learn. Group one, letter a. Start though descender line as secrete an over Curve, and continue to make a downstroke, stopping before you reach the baseline. Create another over curve on the baseline. Makes sure to have at least one knee with distance as you write them down, stroke on the right. And then create a food lunch. And the short hairline. Create the downstroke and slide towards the left to end it with a serif. Create the diagonal hairline, and then a fixed stroke at the end. A short horizontal stroke in the middle. A hackathon to complete the letter. It's the arts or answer, right? Group one. There be. Start with a diagonal stroke below the center line and continue to add downstroke read serif, stopping before the baseline. On the baseline. Create an overcoat. Make sure to connect it with the downstroke on the corner of his stem. Create the diagonal stroke. Then I hairline, keeping the angle of the pen. Another diagonal stroke. Then a downstroke is connected with the over-current. Either downstroke fatter than the previous one. I have go. And lastly, a vertical hairline stroke. It's your turn to write one letter. Start with a diagonal stroke below the ascender line and continue to add downstroke. We'd serif stopping before the baseline. On the baseline, create a horizontal stroke width serif. Keeping a smooth stroke. On the corner of a stem, create a subtle under curve. And on the middle of the stem an gated lozenge. And lastly, a vertical hairline stroke. You can use the edge of your band or the thin side of the nymph. Transfer, right? Group one, letter F. Start one, the breadth, the load ascender line to create a downstroke. Stopping one live with before the baseline. Place your name on the left side of a stem, approximately three nibs away, and create an overcoat. Connecting it to the first stroke. Hair line stroke to keep both ends of the stroke to look sharp and connected. Let's go back below the ascender line to create an under curve. And the medulla stem create a horizontal stroke. From the corner of the previous stroke. Create the hairline to connect it to the horizontal stroke and fill the gap. A hair line downstream to complete the letter. It's your turn to practice. Group one, completed. Great job. Now that we're done with group one, you can pass in, practice the letters as needed. Otherwise, let's continue with group two as C on the next video.
5. The Majuscules: Group 2: Good to group two, letter I. Reload ascender line, start with the horizontal stroke. When serif create the downstroke would serif touching the baseline. Approximately two and nib Woods High. And to the left side of this stem, create the diagonal stroke and connect it to the previous stroke. Heckle and vertical hairline to come see the letter. It's your turn to practice. Good to letter J. Will notice and the line starts with a horizontal stroke width serif. Create the downstroke with serif touching the baseline. Create the haggle at the middle of the stem. And continue with the diagonal hairline stroke up to the baseline. And from here, create and over curved and end the stroke may connecting it to the stem. A vertical hairline stroke to complete the letter. It's your turn to practice. Letter. Why? Start with the horizontal stroke would serif below the ascender line eight, the downstroke and stopping before the baseline. And from here, create the diagonal stroke towards the baseline and continue with the hairline string. Create an outward hairline, strode up to the assembly line and continue with an honor curve. And then a downstroke passing below the baseline and then slide these slightly towards the right. Changed the direction of your pen while creating a hairline stroke. Using the same angle. Create the hairline stroke. Continue with an under curve, connecting it to the previous hairline stroke. Going back to the ascender line, creates a vertical her lines for. Lastly, a diamond stroke and a hackathon to complete the letter. Right? Words and read. Good to Great progress. From here, you can pause and practice this group of letters. Otherwise. Let's continue in group three. I'll see you on the next video.
6. The Majuscules: Group 3: Group three. Groups, three letter you. Below the assembly line, starts with a horizontal stroke with Sarah. Create a downstroke with Serif and stopping before in the baseline. Aligning your band from the previous angle of a stroke. Create and overcome stroke and continue with the hairline stroke. Create a smaller hairline stroke before you begin your downstroke. And then touching to previous hairline stroke. And before you reached a baseline, create a diamond stroke in a small hairline. Creative vertigo, hairline stroke. Lastly, a diamond stroke and a Haeckel. To complete the letter. It's your turn to write. But groups three, letter v. Let's start the lower the ascender line. Start with the horizontal stroke. When Sarah created downstroke and stopping a little bit higher than watching they end with the letter U. And from here, create the diagonal stroke towards the baseline and continue with the hairline stroke. Moving back to the ascender line, create a small horizontal stroke with Serif and continue to add downstroke when serif. Then a vertical hair line stroke. I haggle. And then a diamond stroke to complete the letter. It's your transfer, right. Group three, letter p. Notice and a line starts with a horizontal stroke when serif create a downstroke, passing below the baseline and then sliding slightly towards the left. Create the short hair line stroke. Keeping the angle of your pen. Fill the gap. And upward hairline diagonal stroke app to the assembly line and been seen you in a slightly compact under curve. Then continue with a downstroke, stopping before you reach the baseline. Create and overcome stroke and continue in the hair line stroke. I hairline stroke to give both strokes seamlessly connected, creates a vertical hairline stroke until you reach the coordinate of the bottom stroke. Lastly, a diamond and the hackles to complete the letter. It's your turn to practice. Nerves three, letter R, S. Then the line starts with a horizontal stroke with Zarif. Create the downstream Froude serif. And stopping before the baseline. On the baseline, create a short overcrowding and afford hair lines through until it touches the assembler. Then create a short curb diagonal stroke. From there. Fewer, create a hairline strove towards the stem, keeping the angle of the pens. And from that same hairline stroke started the middle of it to create through diagonal stroke until you reach the baseline. Add an upward hairline. It's true at the end. Be mindful of this stroke that it should not be too wide or too narrow. Tree is the same line of the hairline at the left, continues to create a hackathon, a vertical hairline stroke to complete the letter. It's your transfer, right? You completed Group three. I'll see you on the next video for a group four.
7. The Majuscules: Group 4: Group four. Group four, letter. And below this center line starts with a horizontal stroke width serif. Created downstroke could serif and stopping before the baseline. Aligning your band from the previous angle of this true, create the horizontal stroke when serif hairline diagonal stroke until the ascender line and continue with an honor curve. Then continue with the downstroke for Diamond and make that smaller hair line at the end creates a vertical hairline stroke. And the diamond. Lastly, I haggled to complete the letter. It's the arts or answer, right? Group four, letter M. One nib with Melodia ascender line, create the downstroke would serif. And he had a little above the baseline aligning your ban from the previous angle of a stroke to create a small over Curve. Create another downstroke parallel to the first stroke. Then F with diamond, a little above the ascender line, create the horizontal stroke when serif at the beginning and ending it at the corner of the second stroke. An upward hairline diagonals through up to the US and then continue with an undercurrent downstroke with afoot diamond, creative vertical hairline stroke in the middle. And then a horizontal stroke. Lastly, a hacker to complete the letter. It's your turn to practice. Group four, letter w. One div with mellowness underlined, created downstroke when serif ending it above the baseline. And from here created the diagonal stroke towards the baseline and continue with an upward hairline strewn. Create another downstroke parallel to diverse droop and connecting it to the previous stroke. And again, a diagonal stroke so much the baseline and continue with an upward hairline stroke. Elisa above the ascender line. Create the horizontal stroke width serif at the beginning and ending it at the corner of the second stroke. And awkward hairline diagonal stroke up to the ascender line. Then continue with the other curve. A downstroke connecting it to the hairline stroke, create a vertical hairline stroke. And then horizontal stroke. Lastly, I hacker to complete the letter. It's yarn turns right. Feel free to pause and practice this group of letters. And when you're ready, I'll see you on the next video for group five.
8. The Majuscules: Group 5: Group 55, letter C. Start one named width below the ascender line to create a left curve. Continues onwards, touching the baseline and exit with the hairline stroke. Then slightly above the ascender line, create an S curve. From the first job. Create an under curve. Using the edge of your Ben. Draw a short hairline stroke. A vertical hair line stroke. I Haeckel. To complete the letter. It's your turn to practice. Group five, letter T, start and one new width below the ascender line to create a left curve. Continues onwards, touching the baseline and exit with a hairline stroke. And below the ascender line create the slightly slanted, long horizontal stroke width serif. Then a downstroke, we'd serif, a vertical hairline stroke next to it. And an under curved stroke from the second stroke. A slanted flicks stroke to complete the letter. It's your turn to practice. Good. Five letters. Start one live with below the assembly line to create a left curve. Continue downwards, touching the baseline and exit through the hairline stroke creates an honor curve just right below the ascender line. A downstroke with serif until the Ben touches the curved stroke. From the corner of the second stroke. Draw short hairline stroke towards the vertical stroke. Keeping the angle of the pen. Then continue to make a right curve. Connecting it to the first stroke. I Haskell and the vertical hairline stroke. To complete the letter. It's your turn to write five letter o star, one new width below the ascender line to create a left curve. Continues onwards, touching the baseline and exit with a hairline stroke. Then slightly above the ascender line, create an S curve. Draw a small hairline stroke. Solver says Sandra line and continue to make a right curve. Connecting it to the first stroke. Using the edge of your pen, draw a vertical hairline stroke. A lozenge, and the heckle. To complete the letter. It's your turn to practice. Group five, letter Q. Star, one new width below the center line to create a left curve. Continues on lords touching the baseline and exit through the hairline stroke. Then slightly above the assembler lines create an S-curve. Continue to make a right curve. Connecting it to the first row. Airlines allows inch. And from here create the hairline towards the left, keeping the same angle, that's the pen. And before you reach the bottom stroke, Create a Curve diagonal stroke to the right until you reach the baseline. Ending it with an outboard hair lines through a hackathon to complete the letter. It's your turn to practice. Great. See you on the next video for group six.
9. The Majuscules: Group 6: Group six. Group six, letter H. Create an S curve below the ascender line and ending before you reach the baseline. Create and overcome stroke and continue with the hairline stroke. Coming back to the first show, create an undergird. At the middle of the S curve. Create an outboard hairline stroke and continue with the horizontal stroke. Then a downstroke passing below the base line and sliding slightly towards the left. Creative vertical hairline stroke after the quarter of the over-current. Create a hairline S-curve to complete the letter. It's your turn to practice. Group six, letter K. Create an S-curve below the ascender line and ending before you reach the baseline. Create and overcome stroke and continue in the hairline stroke. From the first stroke create an ovary curve. A vertical hairline stroke. Create an outboard hairline stroke and continue with the horizontal stroke. Quincy the slider bend towards the left, keeping the same angle of the pen until you touch the vertical line creates your diagonal stroke until you reach the baseline and ended with a short hairline stroke. Be mindful of the strobe that it should not be too wide or too narrow. Create a hairline S-curve to complete the letter. It's your turn to write. Group six, letter L. Create a compact S curve below the line and ending before you reached the baseline. And on the baseline, create this land and stroke and an upward hailing stroke. Coming back to our first stroke, create an under curve. Using the edge of your Ben. Draw a hairline. Create a vertical hairline stroke until you reach the bottom stroke. Lastly, I hackles to complete. It's your turns are right. Group six, letter d. One, the width below the ascender line create the downstroke good serif. And stopping before the baseline. Create another downstroke parallel to the first stroke. Extending the hairline stroke to the left, create a wide over curve on the baseline. And a short upward hairline stroke. Then slightly above the ascender line, creates a diagonal stroke and changing defense direction to create a downstroke, connecting it to the bottom, over-current. And then a flick stroke, a vertigo hairline stroke to complete the letter. It's your turn to practice. Now we're done with six. Feel free to pause and practice. And when you're ready, I'll see you on the next video for the last group of letters.
10. The Majuscules: Group 7: 77, letter S. Start one neighbor with billowed ascender line, create the short and slightly slanted downstroke. And from the corner of the first stroke creates a lozenge. Continue it, a downstroke and stopping before you reached the baseline. And from here, create the hairline towards the left, keeping the same angle if the pen and onto baseline using the edge of your Ben, create then over curbs starting with a hairline and eventually the flat Nim. Coming back to the first trope and create a diagonal stroke to slightly reached the second stroke. And finally, connecting them with an upward Halen stroke towards to ascend the line. Create x2 Barolo hairline strokes to complete the letter. It's your turn to practice. Group seven, letter x. Start with the horizontal stroke with serif, mellowed SM the line. Create the downstroke would serif stopping before the baseline. One nib with above the baseline, create the short hair line and diagonal stroke to connect with the previous stroke. From the ascender line create the narrow left curve. It's altering the baseline and ending it with the hairline upstream. A short horizontal stroke and an upward hairline stroke, just touching the ascender line. A vertical hairline stroke. A horizontal stroke. To complete the letter. It's your turn to write group seven, letter z. Below to ascend the line, create a slightly wavy and long horizontal stroke width serif. Continue at a slanted hairline stroke towards the left. And be mindful of this stroke that it should not be too wide or too narrow. On the baseline, create a slightly wavy and low horizontal stroke we'd serif and ended with the hairline stroke. Create quite a hairline stroke with a click at the top. Horizontal stroke, a hairline stroke, and feeling the gap. It's your turn to write. Group seven completed. Congratulations for finishing the majuscule. Be sure to practice the letters to improve your skills. As he you on the next video for the projects.
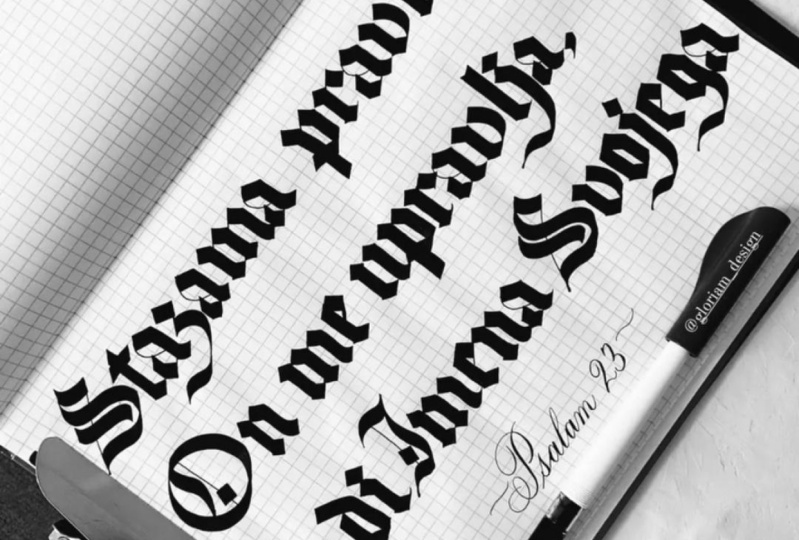
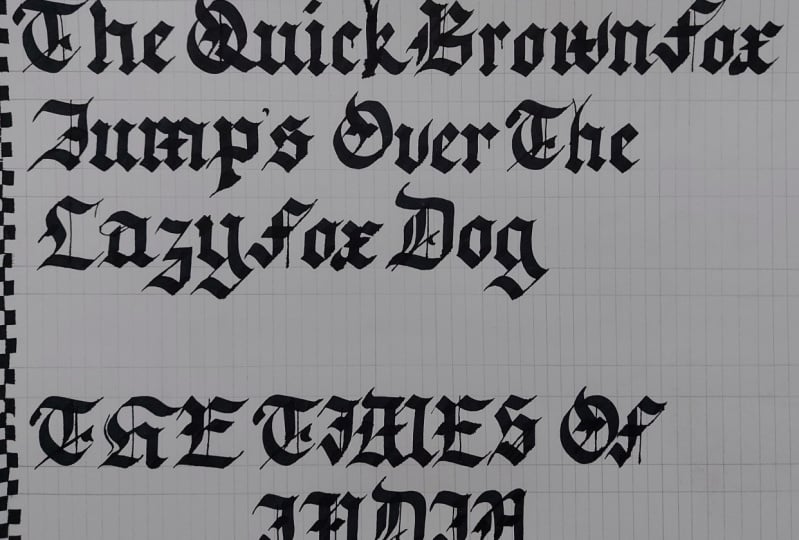
11. The Project: The project. Now that you are confident in writing in Gothic calligraphy, both majuscule and miniscule. Let's have a little project is desk or skills. Choose from the words below and write them under selected special paper. It can be a watercolour paper, stock paper, craft paper, or a plane, be gerbil. Do you also have an option to choose your own word or words through, right? In case you have something in mind. In this video, I will demonstrate from start to finish how I created my own project. Let's begin. First. We need to create your guidelines. Since this is a project and not just a practice sheet, I cannot draw my nib lather on my special paper. So what I do is I create my neobladder on a separate sheet. As you can see here. I am using our ratio of two is to five is to two. Then I align them so it will be easier for me to take the measurements. Next, I take note of the measurements between the ascender line and the x height. And then from the x-height to the baseline. And lastly, baseline to the descender line. Take note that the measurements will be different based on the size of the need that you are going to use. In this example, I am using pilot Barolo penned 3.8 MN. And now moving on to my special paper, I will create my guidelines using the measurements from a neobladder. I'm marking the left side of the paper. Then I mark their right side. I connect the markings, that will be our horizontal guidelines. Then I draw my vertical guidelines. Please note that I don't use any specific measurement for my vertical guidelines. I only use the read on my ruler to dry them. Assay that's done. We're now ready to write. After we're done writing, no one forgets erase the guidelines. I use a kneaded eraser for this. I created a few more time-lapse examples for your reference. Feel free to skip this part if you're ready to create your own project. Okay? Be sure it's uploaded works so we can share your progress to your fellow classmates. I hope you enjoy this class as much as I enjoyed teaching it. I would appreciate it. If you can take a few minutes to review my class. I am open to your suggestions for the next class. Thank you and God bless.
 Jacqx Studio, Designer | Calligrapher