Transcripts
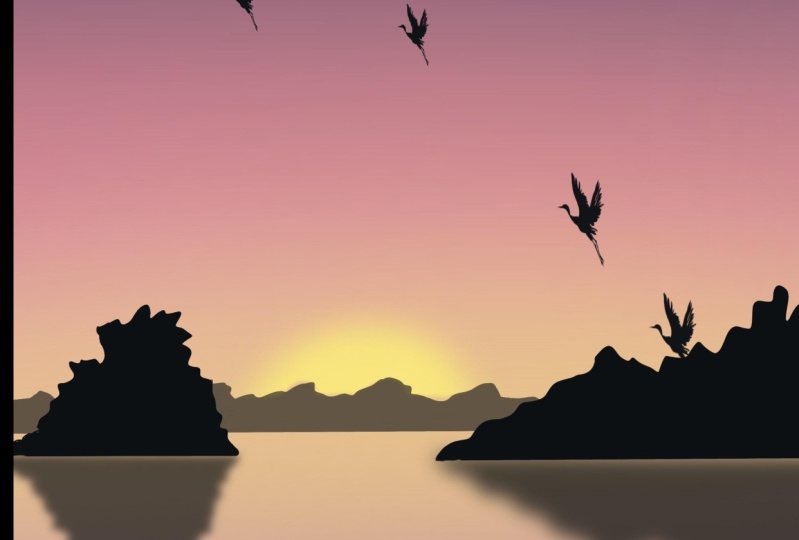
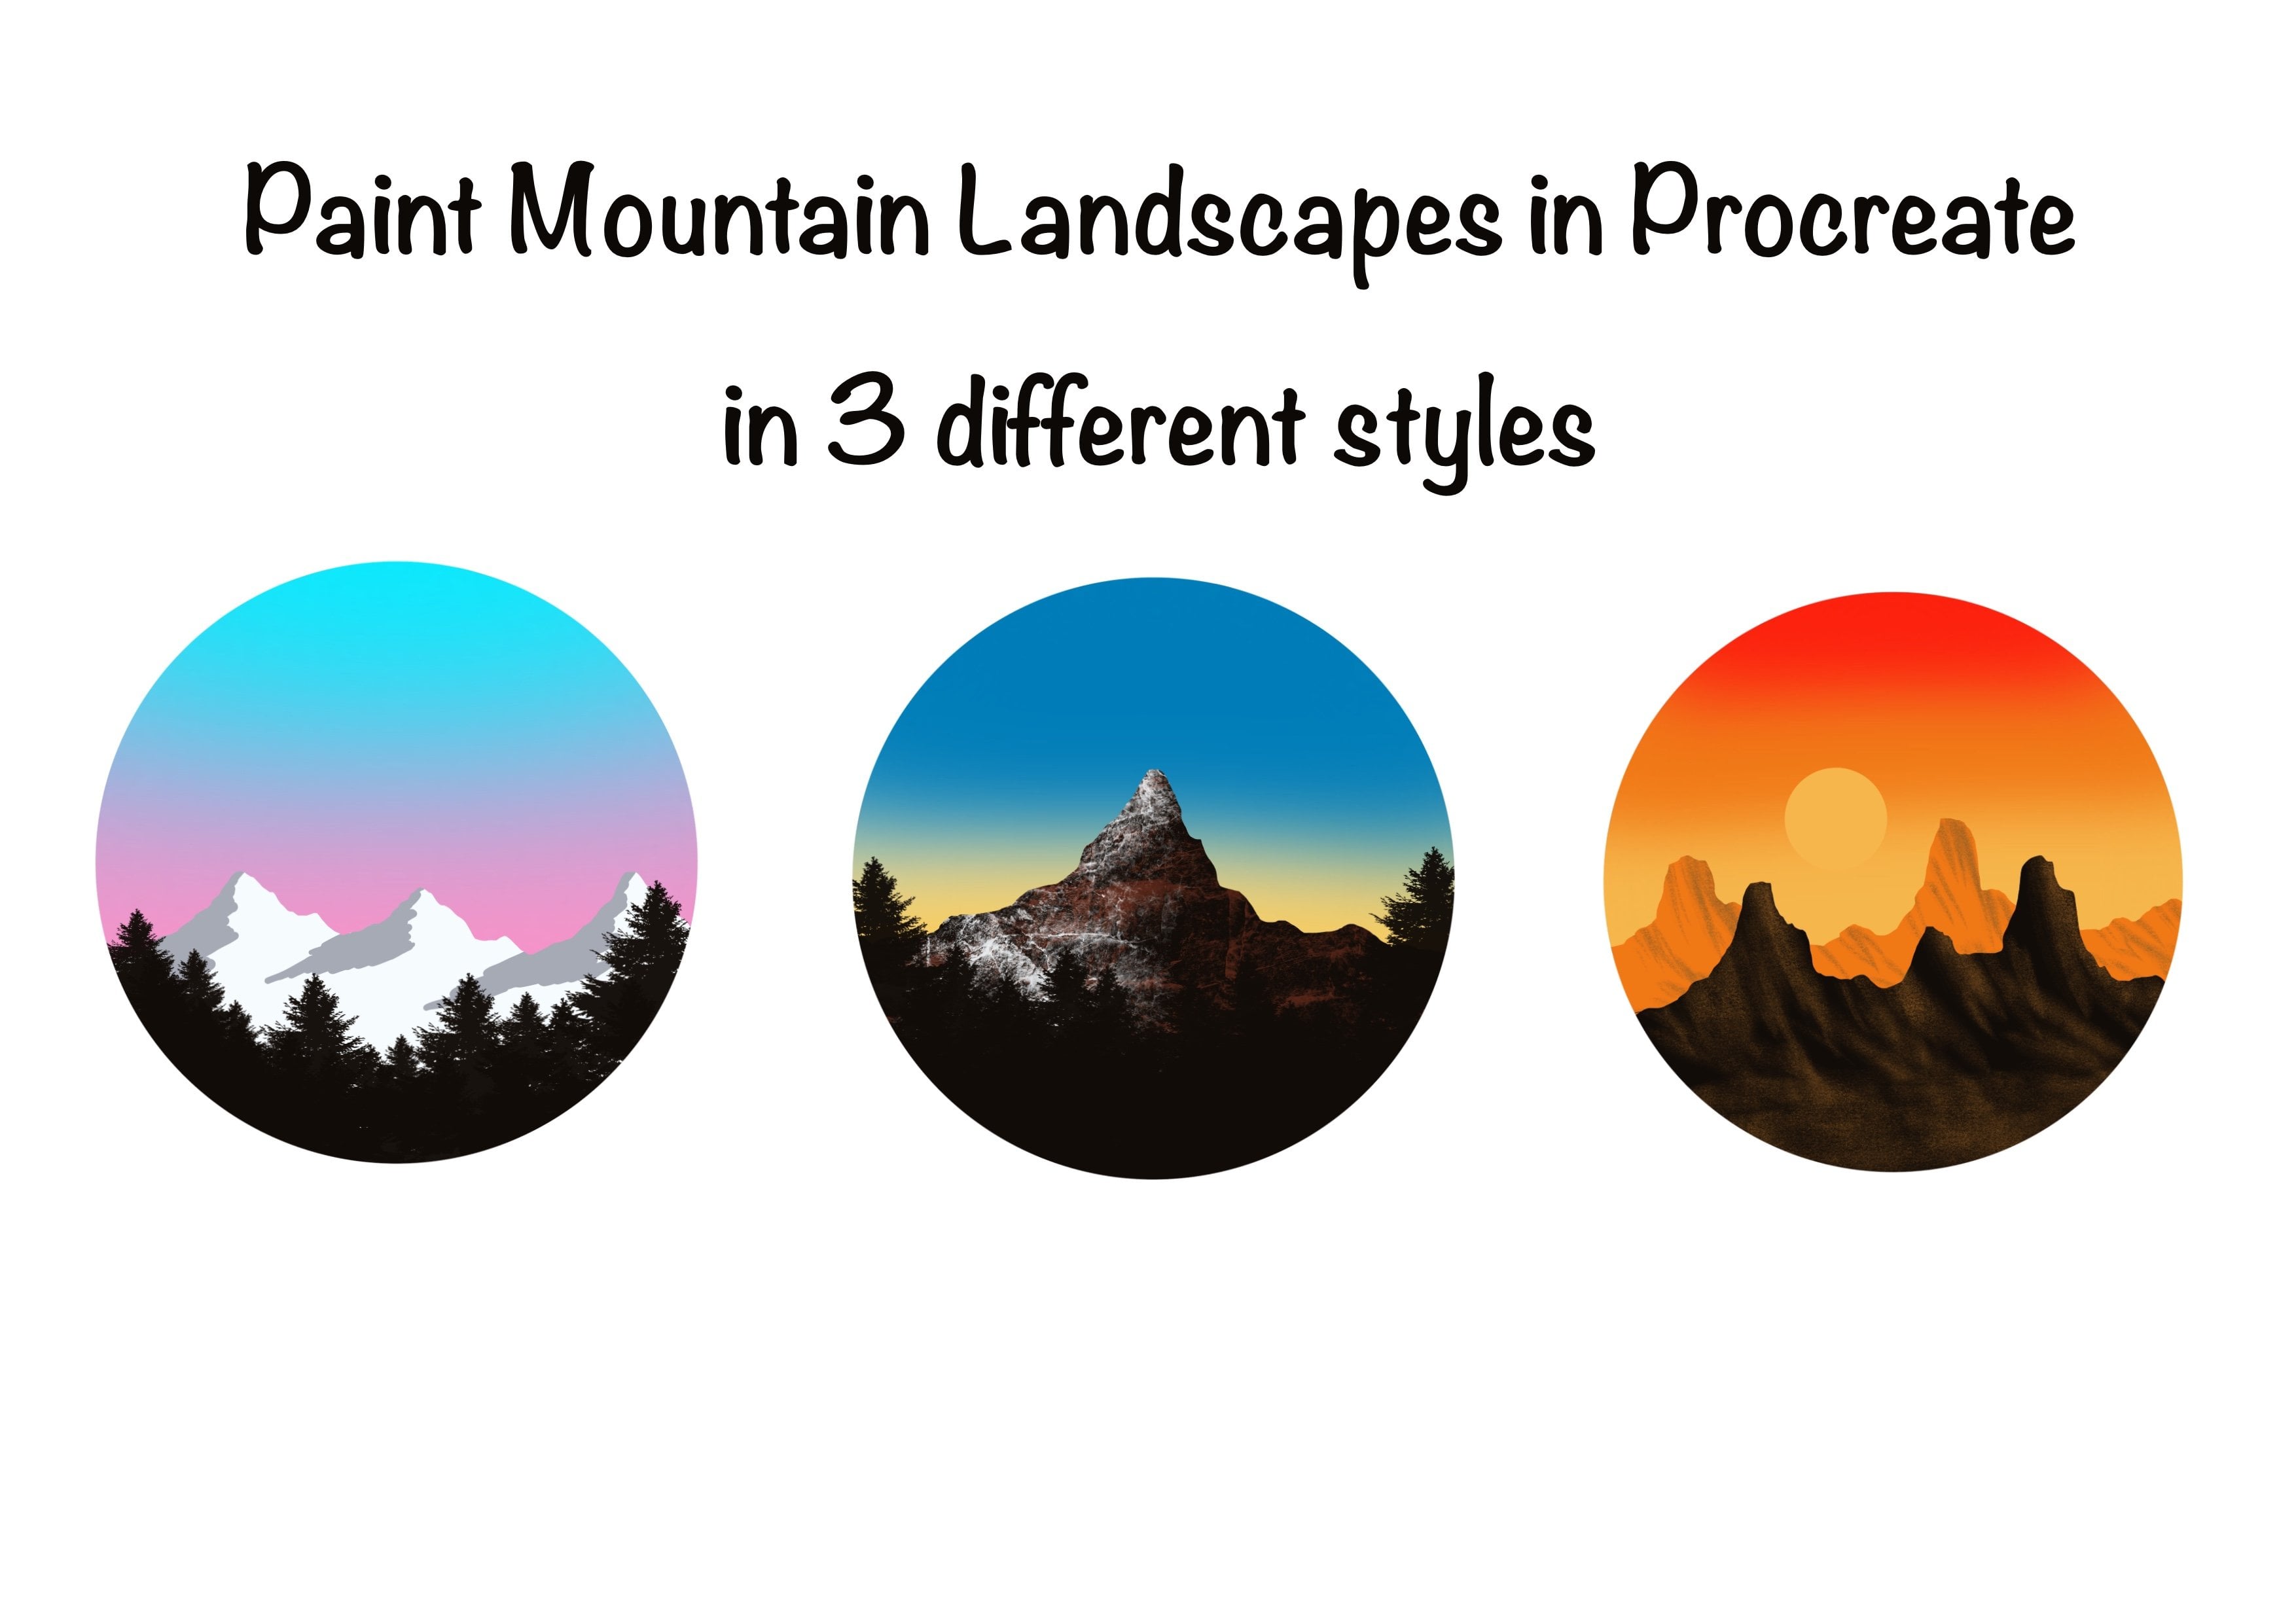
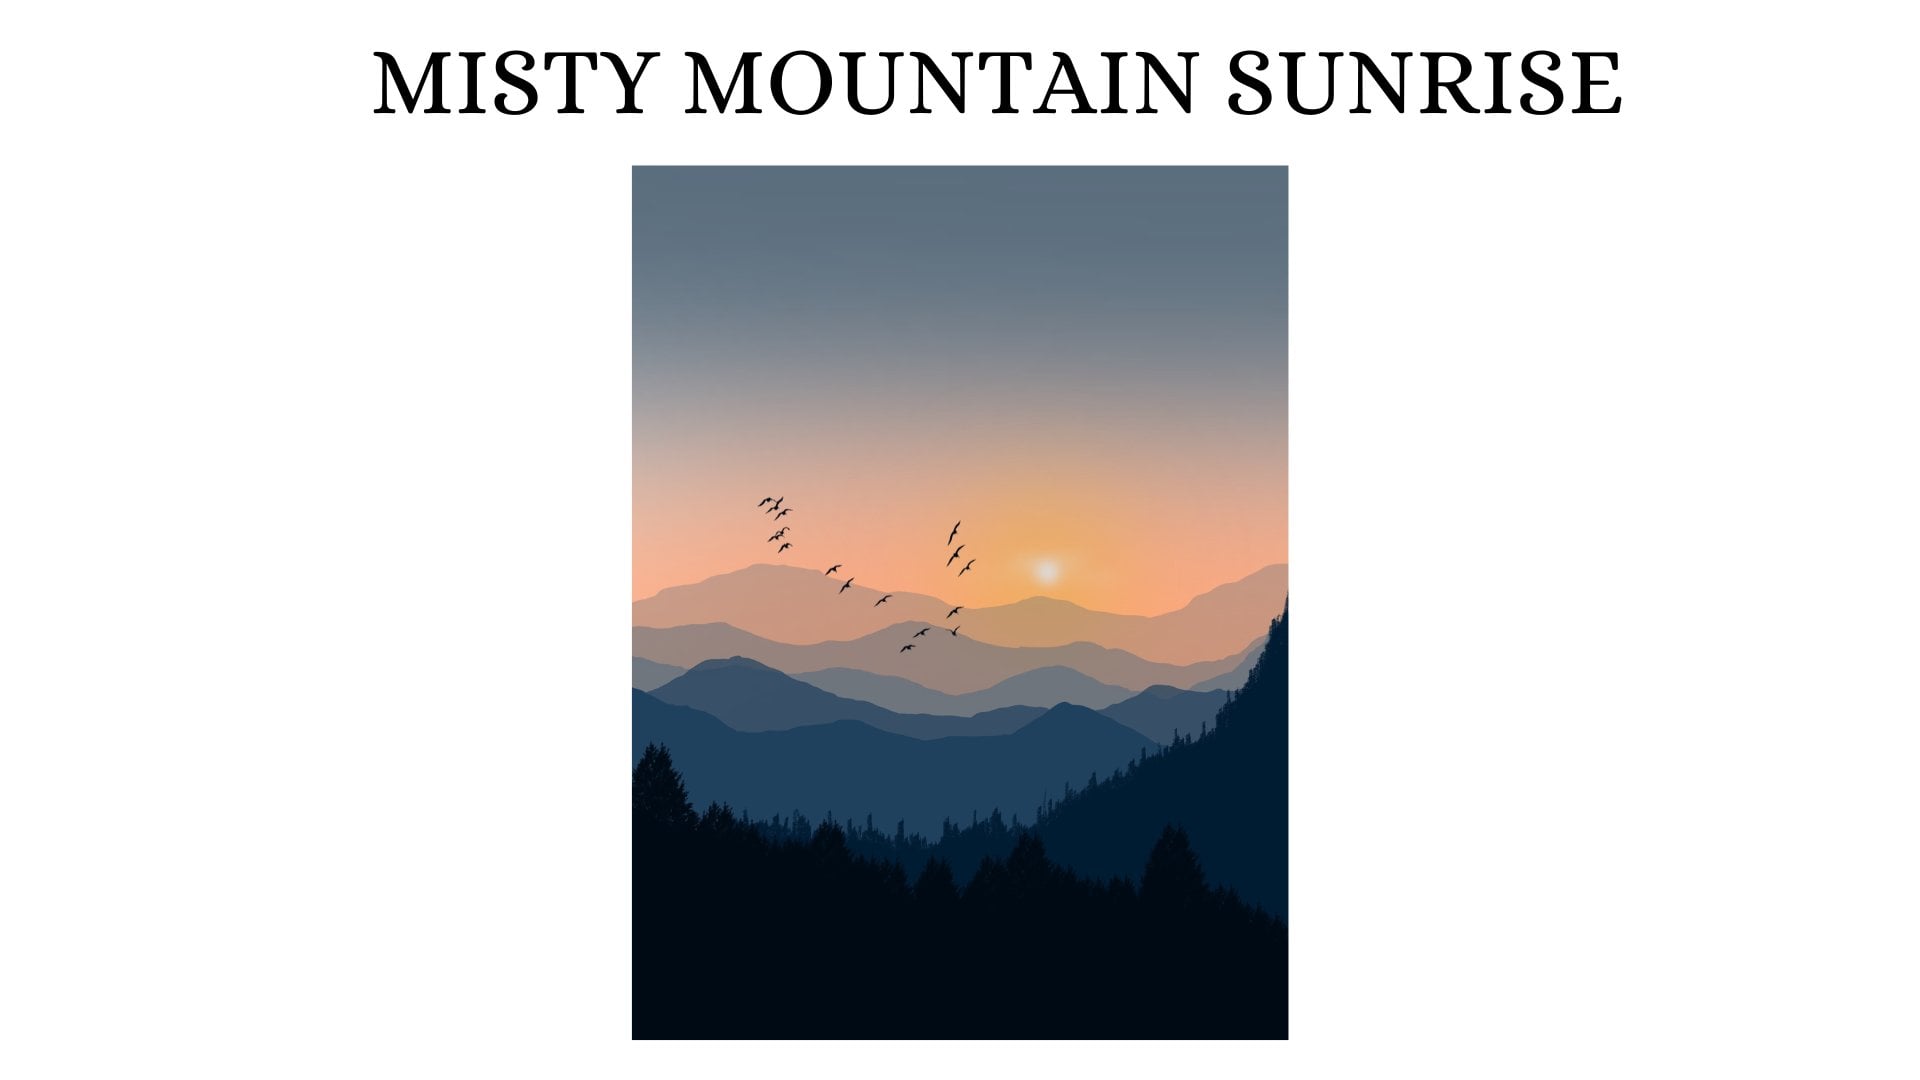
1. Introduction: Lakeside is a place for
peace and relaxation. It can be truly an inspirational
place where ideas flow. Lake views offers a gateway into the arms of mother nature. I'm sure many people like me
love to visit on a off day, on short trip to release the stress put by
the everyday life. You might spend a day just
sitting on the shore line, fishing, or just having a picnic and appreciating the
beauty of nature. Hello,I am Sheetal and welcome to
my Skillshare class. In this class we will be
painting not just one, but seven colorful and
beautiful projects that will transport you to lake side that will give you the exact feeling of
being somewhere similar. We will be painting Sunset, Sunrise, misty lake. And much more in these
projects would be, calming, serene, and beautiful. you will be able to paint
your own landscapes with the techniques and
tricks learnt in this class. This class is for
anyone who wants to paint quick and
easy landscapes. Beginners who have little
or no prior knowledge about Procreate and anyone wanting to try few fun and easy
procreate projects. By the end of this class, you will learn the basics of digital painting in procreate, you will learn about
the brushes that are available on Procreate. You will learn how to save and export your procreate drawings. How to compose and create your own landscape illustration by adding other elements in it. If you're ready, grab your
iPad and let's get started.
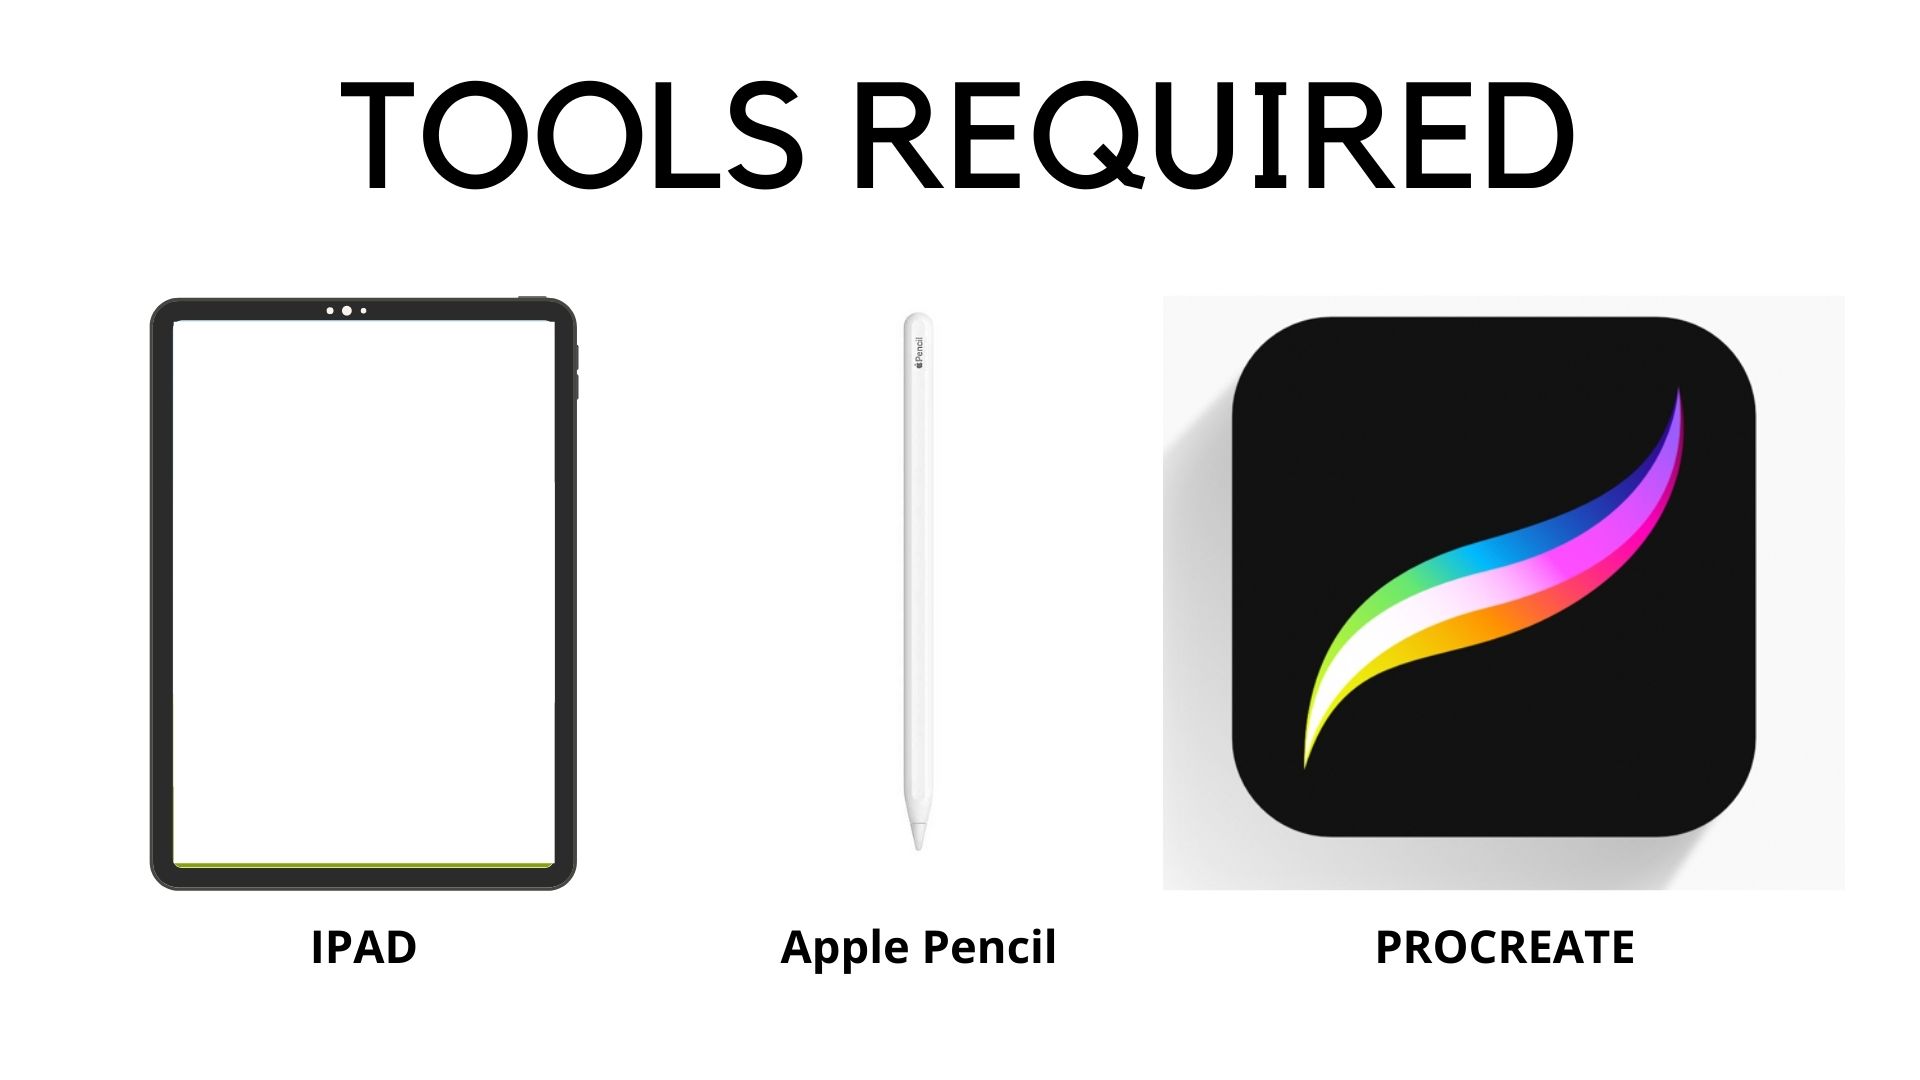
2. Tools: Now let's quickly look
at the tools status required to start the projects. You need an iPad and Apple Pencil and
procreate application. I am using seventh generation
iPad for the projects. Using the latest version of Procreate application,
which is 5. Apart from this, you will
also need to download the color swatches use for each project which is available under the
resources information. I have also included
the stamps brush set, which includes a set
of stamps that will be used for the projects under
the resource section. Once you have them downloaded, I will show you how
to import them to appropriate application
in the next section. If you're an idea with
these tools and you have downloaded co color swatches. Let's move on to the next
section and start up projects.
3. Importing Burshes, Swatches and Setting up the Canvas: Now let's look at how
to import the brushes and swatches to the
Procreate application. Go to the location where you have your downloaded swatches. That is the color swatches
and the brush set. I have here I will first
import my stamp brush set. All you need to do up
is just tap on it, and it will be
automatically imported to the Procreate
application like this. Now you can see this
stamp brush set and all the stamps that we will be using for all the projects. In a similar way, we will also import
the project swatches. So I'll go to the
location where you have your downloaded color
swatches and just tap on the project
swatch in first, So I will first open my project one swatch. So just tap on the project
one swatch and it will be imported automatically to
the Procreate application. Now you can see the project
one color swatch at the bottom of this
palette section. Now you can just
tap on it and move it around and place it
wherever you like it. I'm going to bring it all
the way up and place it. Now in a similar way, you can tap on all the other projects swatches and import it to the
procreate application. I Will be using the A4 Canvas for all the seven
projects that we will be doing in this class. All you need to do is open
the Procreate application. And you see the plus icon
in the top right corner, and you get a set of options
for the canvases here. I will go with
this A4 Canvas. If you are ready. Project swatches, stamp
set and the Canvas, Let's move on to the next
section and start the projects.
5. Painting the Sky, Lake and Mountain: Let's start first project
that onto color palette. And I have this project one
color palette ready here. This last color from row one. Go to the Brush Library. Airbrushing. Go with
the soft brush. I'm going to set the
size of this brush to about 20% and opacity
is set to 100%. And I will add horizontal
stroke like this for the Sky. Now go to the color
palette and pick this 3rd color from row one. And again add horizontal strokes like this. Now go back to the
color palette in pick this first color from row one. And add some that color
stroke using the same brush. Tap on the color
palette and pick this second color from row 2 to add this light pink shade. Finally, go to the color
palette and pick this by yellow color from row two
and add some yellow shade. Now we have the
colors for this sky. Now, we need to blend
all these colors for a nice gradient tap on the
adjustment icon Gaussian blur. and set the blur to about 40%. We have a beautiful
gradient sky baby here. Tap on the layer and
rename this layer one. I'm going to rename this
layer one as Sky. Now, tap on the + icon
that you see here and create a new layer. I'm going to rename
this layer 2. I will rename it as mountain. Now, go to the color palette. This black color that is last
color from row 2, Now tap on the Brush
Library, Calligraphy. Select this mono line brush. Now I've set the size of
this brush to about , 3 to 4% and opacity
is set to 100%. I am going to draw a straight
line first like this. Now I will add curvy
edge on the top, which is going to be the top
section of the mountain. Using the same mono line brush, draw a line on top of
the straight line. Now, make sure that the line
is completely filled so that you can drag and drop the color to the mountain layer. Now, tap on the mountain
layer and reduce the opacity of this
layer to about 60%. Now tap on the layer
and create a new layer. I will rename
this layer now. I am going to remane it as trees. Now, I will use
the same mono line, brush and add some trees
in the foreground. I'm going to draw a straight
line first like this. Now you can use the lines on the background that
does the grid that is that you can see in the background as a reference
to draw a straight line. I'm sure you
cannot see it here, but when you pinch in
in Canvas a bit, you can see a grid-like
formation in the background. So you can use that
as a reference. And draw a straight line. And now on top of
that straight line, I'm going to add some curvy
line like this and join these two so that it
becomes a closed formation. And you can drag
and drop the color. I'm going to zoom it in so that I can see that
it is a closed area. Now, I'll drag and
drop the color. I'm going to do a similar thing on the right side as well. So I will draw a line first. So let's do that on a new layer. I'm going to create
a new layer and I'll rename this layer as tree 2. Add a Foreground tree like structure. by drawing a straight line first and
adding some curvy lines on top of this line
and make it a closed area. Don't worry about how this
shape should look like. It should look like or
distant tree structures. So go ahead and add
any curvy shaped line. We have a second tree layer. Now lets add the lake, so tap on the layers and create a new layer
above the sky layer. Tap on the plus icon, go to the sky layer and tap on Plus icon and
create a new layer. And I will rename this
layer 5 as Lake. Now go to the color palette. Pick this second color from
row one to the Brush Library. AirBrushing and Go with
this soft brush. Now the size is set
to the one that was previously set
that is about 20%. I will add some horizonta strokesl
like this. Next I will go back to the color palette and pick
this third color from row one and add some of
that color for the lake. And finally, we'll go with
this last color from row one and add that violet color
or lavender color as well. Now I will pick this yellow color
and add some that yellow.
6. Adding the Reflection, Birds and Grass: Carlo on the doll. Now go to the adjustment icon. Gaussian blur
and set the blur to about 30%
or 40%. Now tap on the layers and
go to these trees layer. Swipe three fingers
down the screen, and you get this
copy paste option. Copy that layer
and tap it again, swipe three fingers down
again and paste it. Now you get this options. We want to flip it vertical. So I'm going to go
with this option flip vertical and drag it down like this and place
it below the tree layer, which is going to
be the reflection. Now, I will tap the Adjustments icon Gaussian blur. I will set the
blur to about 15%. I'm going to repeat
the same process for the second tree layers. And you can see that the inserted , layer will be a new layer. And I'm going to reduce
the opacity of that layer. 70%. Now tap on the layer and repeat
the same steps for the trees 2 layer as well. Swipe three fingers down the screen to invoke
the copy option. Now copy this layer and swipe down with three
fingers in paste it. So we have a new inserted layer. Now we have to flip it for it vertical and bring it below
and place it somewhere here. Now go to the adjustments. Gaussian blur and set the blur about 15% go to that
inserted layer, tap on that 'N' icon that you see
and reduce the opacity to 70%. And we have the reflections of, the trees layer ready. It looks perfect. Now tap on the Layers and create a new layer
by tapping on + icon. I will go with this
black color. Tap on layers and rename this layer as Grass We will be adding grass
in the foreground. Now go to the Brush Library, Calligraphy and select
this mono line brush. So I am going to set the size of this brush to about 5%. Add curvy line
first and for the area. And later on I will
add the grass. Now you can drag
and drop the color. Now go to the Brush
Library calligraphy and select this script brush
to add the grass blades. I'm going to adjust this. The brush to about 70%
and opacity is set to 100% and add the
grass blades like this. Adding the grass blades
strokes from bottom to up so that it remains
sharp at the tip. I'm randomly adding some
short and some taller grass blades. Once you're done filling this area I will go to
the grass layer on the N symbol that
you see there and reduce the opacity of
this layer to about 50%. Now, we're going
to add one more in the foreground . Go to adjustment icon Gaussian blur
set the blur to about. 10%. Now tap on the layer and create
a new layer and rename this layer as grass 2. We will be repeating
the same process of adding grass in
the foreground. Again, I draw a line first by drawing a curvy line go to the Brush Library and select
this mono line brush. Drag and drop the color. Now go to the Brush Library
calligraphy and select the script brush for
the grass blades. Now using same black color, add some glass blades
in the foreground. repeating same steps that we
did for the previous layer. Make sure that you've filled this layer completely
with grass. and it looks full. I'm going to stop it here. Now go to the Brush Library. go to the stamp brush set. and I have included this bird stamp, I will select this bird stamp and add some birds,
flying birds. I'm going to reduce on set
the size of this brush to about 80% and add a set of
flying birds on the sky. And we done with out first
beautiful project.
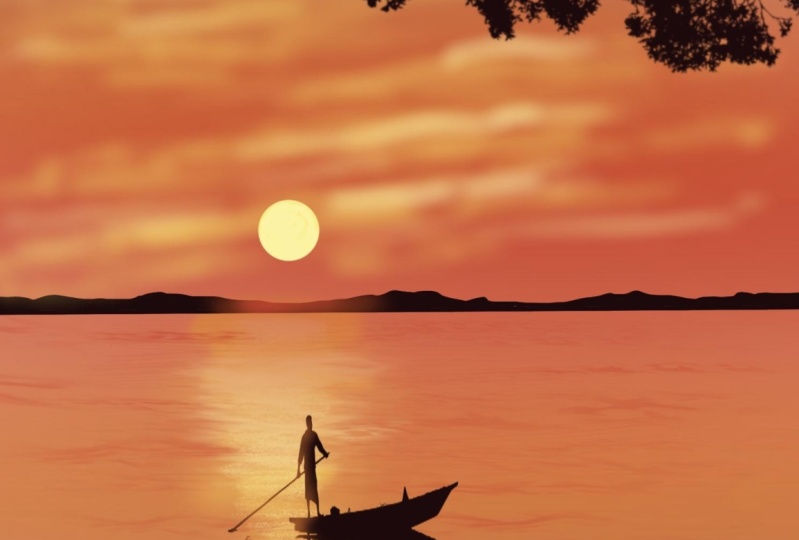
8. Painting the Sky, Lake and Mountain: Let's start our second project, which is going to
be a sunset lake. I have my A4 canvas ready. Tap on the color palette and go to the project 2 color palette, which has these sunset colors. Now pick this first color from the project two color
palate from row one. Go to brush library. Airbrushing Select soft brush. I'm going to set the size
of this brush to about 20%. Opacity set to a 100%. Start adding horizontal
strokes using this brush and this color and now tap on
the color palette. pick this third
color from row one. Fill the next section of
the Canvas with this shade. and apply horizontal
strokes using the same brush. Now, tap on the color palette. Pick this color 4th color from row 1 . Apply this lighter. yellow shade I'm thinking of making
this sky even more darker. So let's go back to
the color palette. This first color
from row 2. Use the same brush. Now add some darker
color on the sides. the sky like this. Go to the color palette and pick the 1st color row one, and we apply the orange shade. Now, we need to blend
all these colors. So tap on the Adjustment icon
Gaussian Blur and set the blur to about 50%. Tap on the layers and rename this layer one. I'm going to rename as Sky. Now, tap on the plus icon
and create a new layer. I'm going to rename this
layer 2 as mountains, Go to the color palette. And pick this llast color that
is black color from row 2 go to the Brush Library, calligraphy and select
the mono line brush. Size of the brush is set
to about 5% or 3%. Using this mono line brush, I will draw a straight line. I will now add a curvy line
on top of this straight line using
the same monoline brush. Now, drag and drop this black color to
this mountain layer. Now, I'm going to tap on this arrow icon
that you see here. And I'm going to adjust the placement of
this mountain layer. I'm going to bring this up. And please it exactly in the
middle of the canvas, Tap on the Layers and create a new layer
above the sky layer. So I'm going to sky
layer and then back on the plus icon and
create a new layer. I'm going to get it below the sky layer because
we are going to add lake. So I'm going to rename
this layer three as Lake. Go to the the color palette and pick the second
color from row one, Go to the brush library. Air Brushing and select
the soft brush. Set the size of the brush to what It was set previously
that is around 20% and horizontal
strokes like this. Now go to the color palette and pick this first color
from row 2 and add, that color horizontals, strokes. The lake layer. Now go back
to the color palette and bake this second color from row 2
and add this darker shade. Now, tap on your color palette. pick this third color
from row 1. Add some yellow here mid section
using the same brush. Now we need to blend
all these colors. tap on the Adjustments icon. Gaussian blur and set the
the blur to about 40%. Now Tap on the layers go to the mountain layer and create a new layer just above
this mountain layer. I'm going to rename
this layer four. I will rename
it as trees. Tap on the color
palette and pick this black color that
is last color from row 2 to go to the Brush
Library calligraphy and select this mono line brush. Now I will add a
line for the trees. I will draw online for a
straight line first like this. Now I will add a curvy line on the top
starting from this left corner and joining
it to this straight line. And make sure that there is no gap between
the curvy line and straight line so that you
can drag and drop the color. I am going to make it
pointed at the end here. I'm adjusting this. Now. Let's move on
to the next section. Now go to the Brush Library
and select this Script brush. I'm going to reduce the size
of this brush to about 50%. Now using this brush, I will draw some tree trunks. Now as you can see, this not straight but slanted. And that's okay. I'm going to thicken
this up a bit. I will start adding some
branches to this tree trunk. if you adjust the. the pressure on the tip of
the brush and add thinner and thicker strokes
using this script brush. As you can see, the line
are thinner so I am applying tiny amount of pressure on the
tip of this brush. Drawing these branches. Now I will add one
more tree trunk. Now, I will add the branches
to this tree trunk. You can go ahead and add as
many branches as you like. Now add some tree trunks
in-between these two trees. One more tree trunk,
making it thicker. At the bottom. Add the branches. I'm going to add
one more dead tree, trunk and branches here. Now once you are done
adding the trees, Let's move on to the next part.
9. Adding the Reflection and Water Ripples: Tap on the layers and
go to the mountain layer. Tap On this 'N' symbol
that you see here and reduce the opacity of this mountain layer and
set it to about 70, 80%. I'm going to set
it to 80% Tap on the layers and
go to the trees layer. We need to add the
reflection tap your three fingers and
swipe it down like this to copy the trees layer. copy the layer. Swipe
three fingers down this screen and paste the layer. Now we need to flip this layer. Vertical so I'll flip it. And adjust the placement of this vertical image Tap on the adjustment icon,
motion blur and set the blur to about 20%. Now tap on the layers and
go to this lake layer. Tap on the color palette and pick this 3rd
color from row 2 go to the Brush Library elements and select this ocean brush. Set the size of this brush to about 30% and opacity is set to 100%. Add horizontal strokes like
this for water ripples, we're going to
increase the size to about 75 to 80%. And I will add some
water ripples. to this lake layer, decrease the size now to about 45% and add
smaller waves in this section. Decreasing it further down to about 25 to 30%. I'm adding this water ripples. increase the brush
size to about 85% and add some strokes here. In this bottom section,
of the canvas. Now tap on the color palette. And pick this color 4th color from
row 1 and use the same brush, reduce the size of the brush
to about 50 per cent and add some yellow ripples
to this lake area Tap on the layers and go to the sky layer and create a new layer just
above the sky layer. And I'm going to rename
this layer six as Sun. Now go to the color palette. Big this last color from row
go to to the Brush Library, calligraphy, and select
this mono line brush. Now, draw a circle, can tap two fingers
on the screen. And edit the shape to circle now drag and drop
the color this circle. And we have the sun ready. We need to add the
reflection of the sun. go the brush
library elements and select this ocean brush. Now reduce opacity of
this brush to about 70%. I'm going to reduce the
size of this brush too about 30% will , add some water ripples. This, using this color to show
the reflection of the sun. I'm going to stop it here. We are done with
our second project, which is the sunset lake. I hope you enjoyed
painting this.
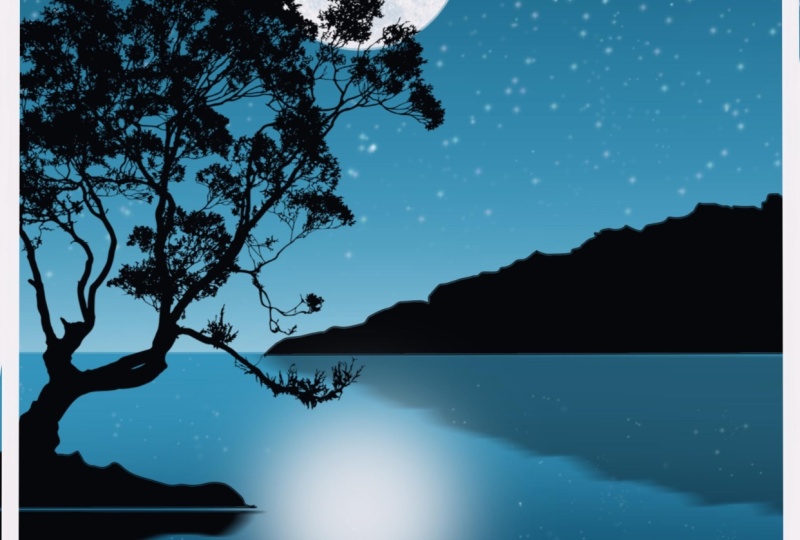
11. Painting the Night Sky, Lake and Mountain: It's time for the third project. So I have my Canvas ready. Tap on the color palette, go with the project,
retail upon it, and make this first color
from one brush library. Airbrushing, soft brush. Adjust the size of this brush to about 15% and opacity
is set to 100%. And horizontal
strokes like this. Using this first color and now go
back to the color palette and go with the third color. Add some more of
that color as well. Now go back to the
color palette. This fourth color from row one. Add this lighter shade. Now it's time to blend
these three colors. Tap on adjustments. icon, Gaussian blur and set
the blur to 40%. Now tap on the layers. Rename this layer one as sky and now tap on the plus icon
and create a new layer. I'm going to rename
this layer as lake. Go back to the color palette. Pick this second color
from your brush library. Calli graphy. Select the mono line brush. Adjust the size of this brush to about 3% and draw
a straight line. You can use the
background grid as reference to draw a line. Now, drag and drop the color. Go back to the layers and apply alpha lock
on this lake layer. Moving on to the details, Let's go back to the sky layer. Gaussian blur and set
to about 60%. I'm doing this because
the gap between the horizon and the sky looks whitish and
I do not want that. I want it to be a little dark. But if you have it dark its. Okay, I'll now go back
to the lake layer, the color palette and this
second color from row one, go to the Brush Library. Airbrushing. Select the soft brush. The size of the brush
to about 40 per cent. I will add this dark blue
shade and the bottom section, Adjust the blur about 40%. Now tap on the Layers
and create a new layer. Rename this layer as Mountains. Now go to
the color palette. Black color that is supposed
to collect from row two. Go to Brush lib, calligraphy, and select the mono
line brush. Set this. size of, this brush to
5%. I will draw a line over, the horizon line like this. add my mountain, by drawing a curvy line. Let me just zoom in. Take it from
the point that I stopped and add the curvy line. Make sure that it
is a closed area so that you can drag and
drop the color like this. now swipe
three fingers copy that mountain layer
and paste it again. Now we need the reflection
so we will flip it vertical place it below
the mountain layer. Now go to adjustments. icon ,motion blur. I'm going to set blur
to about 25 per cent. Now go back to the layers. Tap on that inserted layer and reduce the opacity
of this layer to 70%. We have the reflection ready. Now it's time to add
some more details. So tap on layers and
create a new layer. Tap on the Brush
Library calligraphy and go over the mono line brush. Now go to the Layer and I'm
going to rename this layer as grass because we will be adding some grass
in the foreground. So I've been first add the copy line under board from section of
the Canvas like this. Now drag and drop black
color to this area.
12. Painting the Tree, Grass , Moon : Tap on the Brush Library and select the script brush
from calligraphy. reduce the size of this
brush to about 40 to 42%, opacity set to a 100%. I've been now add the grass
blades to this grass area. Adding some shorter and some longer grass blades like this. Now, I'm going to fill up
half of this grass area with the grass blades and I
will show you how you can fill the complete area. I'm going to stop adding the blades here because
I have filled half of the area with the blades now I will show you
how you can fill the other half tap on the arrow icon
that you see here. You can see that the
grass area is selected. Now go to this action. icon copy and paste it. I'm going to place this grass. blade in this empty area. I'm going to fill the
complete grass area. By pasting it again. You can place it
wherever you like. So I'm going to adjust
placement of the grass blades. And again, I'm
going to paste it. There is no need to copy it. You can just paste it. Goes who have already
copied the grass blades and I'm going to
fill the remaining area. But this glass blades like this, So we have complete
grass area filled with grass blades. And you can see I have 2 interested images of those blades. Now I'm going to merge
all these to get up that it becomes one
layer of grass leads. Now this is how you
can avoid the repetitive step of adding
the grass blades. Now, I need to make
this look fuller. So I will go to the layer, slide the glass
layer to the left. Duplicate. And you can
see two layers now. Now go to the arrow icon, tap on the arrow icon
and flip it horizontal. Now you can see that the
grass area looks fuller Now this is one of the ways to avoid adding repetitive
strokes. Now you're getting
fill mode 1 fourth and then you can copy paste, flip it vertical, horizontal, and make it complete. So now we have our grass area ready. Let's move on to the next part. That on the layers. Create a new layer by
tapping on the plus icon. I'm going to rename
this layer seven. I'm going to remain,
rename it as tree. Now go to the Brush Library and go with the
mono line, brush. The size of the brushes
set to about 5%, and I will draw a straight line. Now, I am going to add a curvy line on top
of this straight line, joining the straight line
and make it a closed area. No drag and drop
the black color. This up. Now go back to the
Brush Library. And I will go to
the stamp section. And I've included
this tree stamp I will select this tree stamp. AdJust the size of this
stamp to about 60%. Now, add the tree by just
tapping On screen like this, and the tree is placed here. Now we need to add the
reflection of this tree.. So this tree layer, so I will go with this, tap on this icon. Now I'm going to Actions Icon copying that layer and pasting it again. And I will flip it vertical
for the reflection at Adjust the placemeant by
dragging it down like this. We have the reflection image ready. Now I'm going to the
adjustments icon, Motion Blur. And I'm going to send the
blur to about 20 to 25%, so set 23%. On the layers. Go to the first reflection
of the mountain layer. Tap on the N symbol that you see that and reduce
the opacity of this. to about 40 per cent. Because the mountain
layer as far away and the reflection
need to appear lighter. So I did use the opacity of
that reflection to about 40%. Go do the layers and
go with the new layer. We are going to be adding moon. I'm going to rename
this layer as moon on the color palette
and pick this a white color. Now go to the brush
library, calligraphy. And select the mono line brush, the size of the brush, and said, it was
said previously. So it's about 55, draw a circle, tap two fingers on the screen
to edit the shape. Make it a circle. We have a perfect moon here. Now, drag and drop the color. Tap on the arrow icon
adjust the size of the moon. Please it behind the tree. I'm going to the layer and
dragging this moon layer, placing it below
the tree layer. Now that on the arrow icon
and adjust the size. This looks okay. Now, let's add some details
to this moon layer. Below the moon layer
and apply Alpha Lock. Now go to the Brush Library. Before that, go back
to the color palette. And select this last
color from row two. Now go to the Brush Library and charcoal select this burnt tree brush. Reduced opacity of the
brush to about 50%. I'm going to set the size
of this brush to about 20%. I will add some texture to
this moon ADL. Going to zoom. It will show you how that looks. You just need to add some. It's Joe is ready. Now let's add the
reflection of this mall. I move, copy the layer and
stick this reflection down. Drag it down like this. Please hit Enter Lake area. You can adjust the placement of the moon wherever you like it. Make sure that it
is aligned with. The reflection needs to
be aligned with the moon. Now, go do that just meant
I couldn't go shown below. And I'm going to set
the node above 30%. We are ready project, which is the lake at night. I hope you enjoyed
painting this.
14. Painting the Sky , Mountain and Trees: I'm going to create
a new canvas board, the project for,
which is sunrise. On the color palette. Select this first
color that I knew from row one will do the brush
library at blushing. Select a soft brush. Now at just the size of this
brush to about percent, opacity is set to 100%. Now add some horizontal
strokes for this guy. I'm going to fill about 1 fourth of the canvas for this color. Next, the color palette, and select this light blue, the second color from Rowen. Going to reduce the size
of the brush to about 15%. And I'm going to fill the next. Shouldn't this light blue shade? Back to the color palette
and colored Carlo from row one and
the next portion, but this peach color. So this guy layer is now ready Stanford blend
these three colors that bond the adjustments. Gaussian blur and
set the blood before the percent on the layers and rename this
layer one as guide. Tap on the plus icon
and create a new layer. I'm going to rename
this layer as mounting. Tap on the color palette. This second color from row. Go to the Brush Library, calligraphy and go with
the monoline brush. I'm going to set the size
of this brush to about 3%. And I'm going to draw
a straight line. Now using the same
mono line brush, add a Gobi line on top of the straight line
for the mountain. I'm going to add one
for the mountain. Now drag and drop the color
to the mountain, Leo. It's time to add some details
to the mountane so-called to the mountain layer
and apply alpha lock. Whatever details who will remain within the
mountain layer. Go to the color palette and pick this first color from row, which is a dark gray color. Tap on the Brush Library. Sketching. And select this drop brush. I'm going to set the
size of this brush to about five to 6%. Opacity set to a 100%. I will add some shadow,
this mountain layer. I'm just going to look like some dark extra
shadows on the mountain layer. Now the mountain layer and tap on Laos and create a new layer. I'm going to rename
this layer three trees. Now go to the color
palette and make this black color that is
third color from rote group. Go to the Brush Library. Calligraphy angle with
the mono line brush. Now, decisive sector, what
it was said previously, that is spent on 3%. I will draw a
straight line first. We load the mountain layer. Now I will add a copy
line on top off, straight line governing
the mountain layer, not completely,
but a part of it. Now, drag and drop the color. This tree layer. Now let's, in some trees
do this three layer. Go to the Brush Library. Stamps. Select this
dead tree brush stamp. Set the size of this
dam to about 15%. I've got adding the
tree stance heel. Introduced this ice photo
down to about nine to 10%. Then I will start. I'm adding the trees stamps. Keep adjusting the size of the
stamp to add some smaller. Go trees. Now keep existing
the size of the stem and add the trees
and this tree Leo. Now this tree layer is completely
filled with the trees. Let's move on to the next spot.
15. Adding the Reflection and Birds: Now it's time to add the
reflection of this trees. Go to Actions. I can copy the tree
layer, paste it. Now flip it worked because
for the reflection, just the placement
of this reflection. Now that on the layers and create a new layer
above the sky layer, I'm going to rename
this layer as sleep. Go to the color palette and make this post blue from
no-one will do the Brush Library and
select the soft brush. Adjust the size of this brush, set it to about 30%. I will add this blue strokes here and the Board them section. Living a very tiny
gap for each color. Now go to the color palette and let's talk
color from row one. They'd use the size
of a soft brush to about 10% and fill
this white ADL, but this peach color. Now go do the adjustment
icon Gaussian blur. Set of node to about 10%. I'm going to set it to
above would be pleasant. Now, on the Leo's
inserted image, which is the reflection of
the tree in this layer. Go to the color palette and
select this black color. Now go to this smudge icon that you see next to
the brush library. Now before that, go to
the Brush Library thing. Select this dry brush. Now go to the Smudge Tool
mixed to the Brush Library, adjust the size to about 5%. Now had horizontal strokes like this to smudge
the reflection. This brush. Those match the deflection
so that it looks natural. Repeat the same step on
the other side as well, and smudge that deflection, but it will leak. Continuous matching the
reflection under your hat, David, this how the
deflection looks. I think. Stop it here now. I'm happy events
how the deflection. No king. So let's move on to the next spot called the layers. Go to the lake. Leo.
Select this first color that is great from row one. Go to the Brush Library
and use the same Dr. Josh. Now at just the size of this
brush to about 20 per cent, add some dry brush
strokes. On delete. This is going through GW. Appearance on the lake. Now, I will increase the
size of this brush to about seven people are sent
and add some more strokes. I'd use it for people who are
sent and add some strokes. Now that on the Layers
and create a new layer. And I'm going to rename
this layer as buds. We're going to add some flying
birds stamps on the Skype. Brush Library and select
this black color. Will do. The brush
library. Stamps. Select this flying bird scan. I'm going to adjust the size
of this stamp to about 8%. I will add the stamp here by
just tapping on the screen. We're going to
create a new layer. Then I'm going to change the
appearance of this word. Tap on the arrow
icon, select Wrap. Use this blue dots
that you see on the four sides to change the appearance by
wrapping the moms. You can change how
the board looks. Ingest edges still, no dots that you see
on the four sides. You will have a
different looping. Using the same board stamp. I'm going to change
some mobile app on the arrow icon. This dot. Going to change it by
dragging the corners. I'm happy with how
this bird is looping, so we'll go into it here. Now at that on the Laos club, or combine the bird layers
by pinching it together. Now that the arrow
icon and select free-form at just the
placement of the boats, I'm going to get good in
the middle of the Canvas. Please say PR, happy
with how this looks. So our project is now ready.
17. Painting the Sky, Sun, Clouds and the Lake: It's time to paint
our fifth project, which is boat on a lake. Let's start tap on the plus icon here and create a
new A4 Canvas. Now tap on the color palette and use the project
try color palette. This first color from row one. And I'm going to the Brush Library,
airbrushing and soft airbrush. So I'm going to set the opacity of this brush
to 100% and size is set to. to about 20% some horizontal strokes using this color and
brush for this sky. Now tap on color palette. And the third color, that is orange color from
row one and add that shade. Now go back to the
color palette. Pick this second color
from row one and add some red stroke
to the sky. Now, we need to blend
these three colors. On the adjustments icon
Gaussian blur and , blur the sky to about 3%. Now tap on the Layers, and I'm going to rename
this layer one as sky. Tap on the plus icon
and create a new layer. And I'm going to rename this
layer to renamed it as Lake. I will move this lake layer
below the sky layer. Now go to the color palette. Select this orange color
3rd color from row one. fill in the other half. of this lake layer,
with this orange shade by applying horizontal
strokes like this. I'm using the same brush. Now go back to the
color palette and pick this first
color from row one. I am going to reduce the opacity
of this brush about 80%. Now I'm using the same
soft brush admin, add shade, horizontal
strokes like this. now need to blend these
So tap on adjustment icon. gusssian blur and
set the blur to about 40%. I'm going to adjust
it to about 50%. Now, tap on the Layers and create a new layer
above the sky layer. I'm going to rename
this layer three. Rename it as mountain. Now go to the color palette. Select this black color
that is third color from row 2 to go to Brush Library. calligraphy and select
the mono line brush at just the size of the
brush to about 5% or 3%. And draw a straight line. Now, add a curvy line
towards the mountain. Going to keep the width
of this mountain very small. Now, drag and drop
the black color to the mountain layer Tap on the Layers and
create a new layer. Iwill reman layer 4 for I'm going to
rename it as sun. we'll be adding
a setting sun. So go to the color palette. pick this second
color from row 2, which is a very
light shade of yellow. Now go to the Brush Library and use the same
mono line brush. I'm going to draw a circle. Tap your two fingers and edit the shape to circle. Drag and drop the color. We have our sun ready. Now tap on the layer and
we'll do this sky layer, the color palette and this yellow color
that is first color from that on the Brush
Library and brushing. Select this soft airbrush. I'm going to set the
size of this brush to about 40% and opacity
is set to 100%. And I will add some clouds. Applying very little on the tip of my pencil and
adding some clouds. I am keeping the strokes are most likely going,
but circular strokes. I'm going to increase the size
of my brush to about 50%. Add some more clouds. Reduce the size of the brush to about 37% got to the color palette and
pick this orange color. Go a little strokes
that I just did. Go back to the color palette. This light yellow color
with a second color from blue to adjust the size of
the brush up to about 27%. Add some more clouds here. And the top section, you can add the clouds
wherever you like. Going to add some
lighter clouds. Reduce the size
further down to 17%, and add some lighter colored
clouds here near the sun. If you want, you can
add this clouds and the separately by creating a layer
just above this sky layer. But I added the clouds in the sky layer. tap On the Layers. Go to this mountain
and apply alpha lock. Go to the color palette. Select this brown
color from row one. Tap on the brush library. And using the same brush, I'm going to lighten this area here just right below the sun. To increase the size
littered further. Going to add this brown
shade below the sun. Now go to the color palette. Make this orange
color from row one. Decrease the opacity of
this brush to about 80%. Add some orange shade
to the mountain.
18. Adding the Water ripples, Boat and Tree Stamp: Now I'll go to the layers
and go to the sun layer. We need to add the reflection of the sun and the sun area. So go to the color
palette and pick this local color from row two, and then go to the lake layer. Tap on the Brush Library and select the same soft airbrush. And I am going to lighten the
area right below the sun. We will be adding the
reflection of the sun on Lake. I'm going to increase the
opacity of the brush. Using this soft airbrush, I am going to
refeclting sundries, adding horizontal
strokes and lightning, this area where the
sun rays are reflecting. Now, I will increase the
size of this brush to about 100% and
widening though area. Applying very little
pressure on my, on the tip of my brush
to add some water ripples. So go to the color
palette and this red, the second color from growth
to tap on the Brush Library. And select this fine hair brush. I'm going to set the
size of this brush to about 70% and opacity
is set to 100%. And I add horizontal strokes like this using this
fine hair brush. I'm going to add this, fine hair brushstrokes
or the lake layer. This brush will give wake like
effect on the lake. Once done, tap on the color palette and
pick the second color, like using the same brush. I'm reducing the size of
the brush to about 30%. I add this light shade. Sparkling water effect. Reduce the size further
down to about 15%, and add few more final strokes. Go to the brush library Calligraphy and select chalk brush I'm going to set the size of this chalk brush to a
about 30%. I will reduc the opacity
of this brush to about 40% I'm going to add some
strokes like this to give it the
sparkling water effect. Now at that color palette, make this black color
from row 2. Go to layers, and create a
layer above the Sun layer. I'm going to rename
this layer five. I will rename it as shore. Tap on the Brush Library
Calligraphy and select this mono line brush
size is set to 5% or 4%. And I will draw a
short line like this. Drawing a curvy line. Now, I will drag and
drop this black color. Go to the layers and apply alpha lock on this shore layer. Now let's add some
texture to this layer. So I will select this dark
brown that is bold color from Tap Brush Library industrial. Select this heavy metal brush. I'm going to set the
size of this brush to about 20%
and opacity set to 100%. And I will add some
texture to this shore area. Tap on the color palette
and select black again and go and add
some black texture. Tap on brush library and
go to the stamp brush set. We will be using this boat stamp. Now adjust the size of
this stamp to about 40%, tap the boat stamp
on a new layer. So tap on the layers and
create a new layer. I'm going to rename this
layer 6 as boat. Now. Just tap on the
screen and add the boat. We don't have to add the
reflection because this stamp already has the reflection.
It's simple. Just tap on the
screen and you have the boat and his
reflection ready. Go to the boat layer and apply alpha lock
on the boat layer, tap on color
palette and select this orange shade from row one. Go to the Brush Library. Airbrushing. Select
this soft airbrush. I am going to reduce the size of
this brush to about 20%. I' will lighten this area ewere
the sunlight is falling. Me just zoom in and
show you how to add the shadow light in this area. Go to the color palette This dark brown
that is full color from blue to use
the soft airbrush. Blended with this brown color. Pinch in. Now let's add some tree branches
in the foreground. So go to the stamp brush set. Select this tree 1. Now let's add the
tree on a new layer. So tap on the layers,
tap on the + icon. and create a new layer. And I'm going to rename
this layer as trees. Now go to the color palette and pick this black
color off from Go to Brush Library and make sure that you have
selected this tree brush. Going to set the size of this tree stamp to about 25%. And I will just tap it
on the screen like this. Now, tap on the arrow icon Turn it around using the
green dot that you see. And increase the size by that taping on the blue dots that you
see on the corners. Now adjust this size and
palce only the branches of this tree by flipping
or turning it around. Increased the length and
width using the blue dots and place it at the
top of the canvas. I'm going to place it here on a leaf and the branch
section, so good. You can adjust
the placement of the tree the way you like it. You can either add a complete tree or you
can add just the branches, like how I did it. We are done with our project.
20. Painting the Sky, Mountain and Trees: Let's start the 6th project. I'm going to create a new canvas by tapping
on the plus side. We are going to paint
of Pier over the lake. Let's look at the color palette. So I have this project
6 color palate here. Tap on this first color
from row one. Go to the brush library. Airbrushing. Select the soft brush. I'm going to set the opacity
of this brush to 100% and size to about 20%. I will start adding. horizontal strokes
like this for this sky. I'm going to fill it about
1/4th of canvas with this color mixed up
on the color palette. And pick this second
color from row one. The next one for 1/4th, the canvas with this orange
shade, light orange ship. Now go back to the color palette and pick this yellow color
that goes toward color from no-one and add some
yellow horizontal stroke. We have this sky ready. Now, let's blend it by
tapping on adjustments. icon Gaussian Blur and
said the blur to about 40%. Now we have a beautiful
sunset sky ready. Tap on the layers and
rename this layer as SKy. Now if that's on the plus
icon and create a new layer. And I'm going to rename
this layer to as mountain. Now go back to the
color palette and pick this first color from row two. Go to the Brush Library, calligraphy and select
the mono line brush. Again, the size of the brushes set about three
to five per cent. And I will draw a
straight line first. Now, add a curvy line
for the mountain. Make sure that it
is a closed area so that you can drag
and drop the color. Go back to the color palette. And I think I need to change
the color of this mountain. Select the second
color from row one, and drag and drop that color
to the mountain layer. Now let's add some
details to this layer. So tap on the layer and apply alpha lock on the
mountain layer. Now go to the color palette. pick this First color from row 2 go to the Brush Library, charcoals and select
the willow charcoal. I'm going to set the size
of this brush to about 10%. I will add some shadow to this mountain layer and just darken some areas
of this mountain by applying pressure on the tip of the pencil and adding
the darker areas. Not adding this darker shape to the complete
mountain back though, just the left side
of the mountain. Now go back to the color
palette and select this orange color that the
second color from row one. Now go back to the
color palette. And select this color from
road to reduce the size of this willow charcoal to about 5% and add some more details to
this mountain layer. Tap on the layer and
create a new layer. And I'm going to
rename this layer too. I'm going to rename it as
trees onto color palette. The second color from row two, which is a darker
shade of brown. Now, tap on the Brush Library, Calli graphy and select
the mono line brush. I'm going to add one more straight line
and draw a curvy line. The mountain layer like this. Just make sure that you cover already tiny part of
mountain layer like this. And now drag and drop the color. Now I will add some pine trees
on top of this brown part. So go to the Brush
Library stamps. Select this pine tree brush. I'm going to set the size
of this stamp about 8%. I will start adding
the pine trees. I would say just
to keep adjusting the size of this pine tree stamp and add some small and
some tall trees in this layer. Now again, while
you add this trees, if a part of the tree comes
below the horizon line, you can always go ahead
and erase the extra part. Now, once you are done adding the trees on
this tree layer, now tap on Layers. Go to the sky layer
and select this area. And it is the extra
sky color that has come down below the
horizon line that you see. tap on the eraser icon . I'm erasing the extra yellow that is below the horizon.
21. Adding the Pier and Reflection: Now tap on the Layers and I'm going to pinch all these
three layers together. That is the sky, tree and the
mountain layer together tap on the arrow icon and you can see that the tree layer, single layer now
go to the Actions. I can copy this
layer and paste it. Now we are going to add a single reflection instead of three different
reflections here. I'm going to flip that
copied, inserted layer. What? I'm going to
place it below. the horizon here Now, I tap on Adjustment
icon. Motion blur. set the blur to
about 28 to 30%. Now you know how to use a single reflection instead of three different
reflection of sky, mountain and the trees. We have done all three together by combining it as
a single layer. Tap on the layer, and you'll see the inserted
reflection layer here. Now tap on the plus icon
and create a new layer. I'm going to bring this reflection layer
below the sky layer. And I've been renamed
this layer three. We will be adding
pier in this layer. So I'm going to rename as Pier. Now go to the color palette and pick this last color that is third color from row 2 . Go to the Brush Library, calligraphy. And select the mono line brush. I have set the size of
this brush to about 5%, and I will draw slanted
lines like this. Now, I will draw a straight line and join these two slanted
lines using that line. Make sure that the lines are
joined and there is no gap. Otherwise you will
not be able to drag and drop the color
to this Pier layer. I am going to draw one more
line and making it to form. Now I've been drop the color to this pier layer on Tap on the Layers and
apply alpha lock on this layer because we will be adding some details
to this layer. I will go to the color palette. Select this 2nd color from row 2 go to the Brush Library. Airbrushing. I've been
selected the soft brush Adjust, the size of this
brush to about 15%, and add some darker sheet
on the left side like this. Let's add some darker shade
to this pier. I'm going to zoom in and
show you how to do that. Tap on the color palette
and pick this first color from row 2 go to
the Brush Library. Calligraphy and select
the chalk brush. The size of the brush to about
60% and opacity is set to 100% and I will add
some parallel lines. Also, I am adjusting the, pressure on the tip of
the pencil to reduce, use the thickness of the line. As you can see as I'm
going farther away, the thickness of the
line is reduced. That you can achieve that by adjusting the pressure on
the tip of your pencil. If you apply a lot of pleasure, it is going to be thicker
and if you reduce pressure on the tip of the pencil it is
going to look thinner. Now I will add some very
light strokes by applying very little pleasure
like this and add some lines in between
the gap that you see. I'm using the same chalk brush. Just that I adjusting the
pressure and adding this lines. Once you are with done this, Let's add some support. to this pier. Tap on the Layers
and create a new layer. I am going to rename
this layer four. And I get this layer fall
below the pier layer. I'm going to rename this
layer 4 as support. Go to the Brush Library and select the script brush
from calligraphy. Now, I have set the
size of the brush. I have said the size
of the brush to about 40% and
opacity is set to 100%. I am drawing 2 vertical
lines on the left side, one at the bottom of the pier and another at the other end
of the pier. Like this. I will add another
vertical line, which is shorter
than the first one, at the other end of the pier. Like this. Now let's add some details to these two logs of the support. Go to the support layer and apply alpha lock on this layer, go to the color palette and
pick this second color from row 2 back to the Brush Library
and select this chalk brush. AdJust the size of this brush, 100% and reduced opacity
of the brush to about 50%. Now I'm using this chalk brush I'm going to darken few areas
of the support like this. Repeat the same step on the other support or the
vertical line that you see. I'm just darkening some
areas of the support. We need to we need to have the same lines on the
other side of this pier as well. Well, so what we need to
do is tap on the Actions. icon copy
layer and paste it. Now we need to move it
to the other end. So flip it horizontally and get it to the other side
of the pier and place it by adjusting it. We have Support on the
other side of the pier as. Well, I'm going to pinch out and see how this
complete setup looks like. This looks good Tap on layers. And you see 2
inserted image layers here. If you are getting confused
with the nameing, you, go to this first inserted image later and
rename it as lake, which is the reflection of
this sky, mountain and the trees. Now, tap on the color
palette and pick this 1st color from row
2 go to Brush Library., painting And select this old brush. adjust, the size of
this brush to about 30%, opacity set to a 100%. Now I'm using this old brush, add some water ripples
to this lake layer, which is the reflection layer. Just add some horizontal
strokes like this. When you come near the
mountain reflection, it will blend with the
mountain layer as you can see. Same applies to this tree
reflection as well. This old blush basically
blends the color, which is kind of wet brush
effect, as you can see. Color palette and pick
this ayellow colour blender area here because it
looks out of the place here. That reflection
looks out of place. So I'm just blending
the yellow colour. Now go to the color palette
and pick this first color from row 2 and add
some brush strokes. We are done with
the project 6, which is pier over the lake.
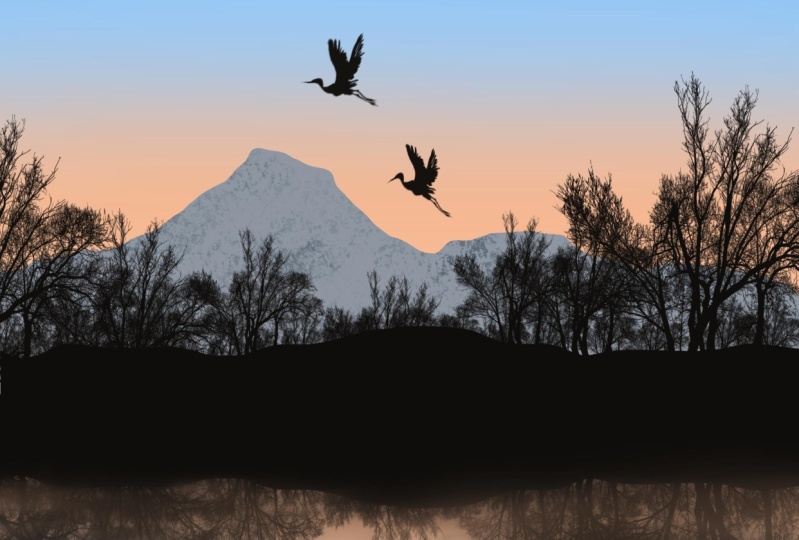
23. Painting the Night Sky and Snowy Mountain: It's time for the final
project which is Misty Lake. I'm going to create
a new A4 canvas. Going to adjust the canvas. Now let's go to
the color palette. I have this project
seven color palette. I will pick
this last color from the palette . Go to brush library and go with airbrushing
and soft brush. And I'm going to set the size
of this brush to about 30%. And I will add horizontal
strokes like this for the sky Go back to the color palette and pick this 4th color
from the palette, which is a shade lighter
than the previous one. And again add some
horizontal strokes. And will next 1 fourth of the
canvas with this color. I'm going to blend
these two colors now. Before that, I'm going to
make it a little more darker. Now let's blend it together. Go to Adjustment Icon
Gaussian Blur and set the
blur to about 40%. and We have the sky Ready now go to the layers and rename
this layer as SKy. Now go to the color palette and pick this white color
that is 3rd color. Go to the Layers and
create a new layer. And I'm going to rename
this layer as mountain. Now go to the Brush
Library, calligraphy. Select the mono line brush. I will set the size of the brush
to about three to 5%. And I'm going to draw a
straight line for the mountain. Now we have the horizon. Now I am going to draw a snowy mountain peak
by drawing a curvy line. Now, I'm going to drag and drop this white color
for the mountain. Now, tap on the layers and apply alpha lock on the mountain layer
because , we will be adding some
shadow to the snowy mountain. So go to the color palette
and select this black color. First color. Go to
the Brush Library. charcoals and select
this burnt tree brush. Now reduce the opacity
of this brush to about 50% Adjust the size of the
brush to about 5%, and add some texture to
this snowy mountain. Now, this brush works great to show a rocky mountain
covered with snow. I'm adding texture
to the right side of the mountain to
give it some depth. I will add a tiny amount of texture on the other side of the mountain as
well like this. I am going over and darkening some
areas, , mounting, apply more pressure on the tip of the brush
to darken the areas. Now, I'm going to increase the size and add
some more details. I'm going to reduce the
opacity further down to about 40% and add some more textures. Now go back to the color
palette and this white color. If you think that texture
is looking too dark, you can go over with white shade. To make it lighter. You can keep on adding the details by
adjusting the size and opacity of this brush until
you're happy with the details. I'm going to stop it. You're quite happy with how
this mountain is. So let's move on
to the next set of details Tap on the layers and tap. on + icon and
create a new layer. Go to The color palette and pick this black color go to the Brush Library, Calligraphy, and select
the mono line brush. Now I'm going to rename
this layer 3 as trees. So we will be adding trees in the foreground using this monoline brush, I will set the size of of this
brush to about three to 5%, Draw a straight line just
below the mountain layer. Now draw a curvy line over. The mountain layer. Now I will drag and drop this black color to
this tree layer. Now apply alpha lock on this layer, and let's add some details. So I will go to the
color palette and pick the second color
from the palette. Go to the Brush Library, organic, and select
this Spires brush. Now this is again another
great brush to add texture. We're going to set the
opacity to 100% and size. I'm going to set
it to about 50%. And I will add some texture
to this tree layer like this. Go back to the color palette
and pick black color and go over the brown shade
and make it a little darker
24. Adding the Moon, Reflection and Misty Effect : Now it's time to add
trees in the foreground. So go to the Brush Library. Stamps. Select this
tree pine brush. Adding the pine trees
we have to go to this tree layer and
remove the Alpha Lock. Now set the size of this tree to about twenty-five percent
and start adding the trees. Now, add the pine trees
on both the sides. Keep adjusting the
size of the stamp. and add the trees. Now, don't worry if the bottom of the
tree comes below this horizon, a line we can, erase itlater on. Go back to the Brush Library and select this pine tree brush, which is another type of tree. So I'm going to adjust the
size of this brush and add some more pine
trees in-between. Now once you are done adding
the trees, go to this. eraser icon that you see. Adjust the size. I'm going to reduce it to about 5% and I'm going to
erase this lower part. You can see the trees
just clean it up. Now, don't worry if while erasing the horizon
is not straight, we will fix that. And the next tap on layers. Make sure that you
are on tree layer. Go to the Brush Library, calli graphy, and select
the mono line, brush. And drop a straight line just
below a new horizon line. So you're drawing a
new horizon line. and add the curvy line. Fill in that gap. Now, drag and drop
the color to this. And we have a
straight toward eyes. And now it's time to
add the reflection. Now, let us combine all
these three layers. That is sky, mountains, and trees, by
pinching it together. Now, we may be adding the
reflection of all these three. Go to the Actions icon, Copy and Paste layer. Flip it would become adjust the placement
of this reflection. Going to get it down. This as fine, don't worry about that white gap
that you're seeing between because we are going
to add the mist later on. Now unlike the
previous projects, wherever we are adding the
reflection separately, we are adding reflection of sky in the tree layer altogether. Now at tap on
adjustment icon, use this perspective, blur, set the blur to about 40 per cent. Now it's time to add the mist between in-between
the gap that you see. So we'll go to the color palette and pick this white color. Will do the brush library, airbrushing and select
the soft airbrush. I'm going to adjust the size of this brush to about
20%. And opacity. set to 100%. And I will add some circular
strokes like this for, giving them misty look. Going to increase
the size further. I will set it to
about 40 per cent. Will continue adding
circular strokes to create that misty look. You can keep adjusting
the pressure that you apply on the tip of the pencil to make it look
denser or lighter, as you can see towards the end. So I'm going to, I am applying all
little pressure on the tip of my pencil. Now go back to the
color palette. I will select this black color from the palette and using
the same soft airbrush, I'm going to add some strokes
that this black color. Once you add white and
black misty effect, it looks more realistic. now,I will go back to the color palette and
pick this white color and go over once again with
the circular strokes. I will stop it here. Let's move
on to the next part. I will go to the Layers
and create a new layer. I'm going to rename this
layer tree as moon. Go to Brush Library
calligraphy and select the mono line brush and
add a circle like this. Tap your 2, fingers and
edit the shape to circle Now drag and drop the
color to the circle. I'm going to make
it crescent moon so that on the eraser
icon that you see, I'm going to erase. half of the moon like this
by going with the, circular stroke so that it looks
more like a crescent moon. Once you're happy with how the crescent moon looks
lets move on to add the reflection . tap on
the Actions icon, Copy and Paste again, lay on the moon layer. Now you need to flip it vertical and bringing it down
to the lake section. Now here you're not able to see a reflection of the moon because inserted image is below the lake reflection layer. So I'm going to bring it up. Now. You can see it now
adjust the placement reflection. Tap on adjustments icon and select
perspective blur, set the blur to about
40%. And we are done with
our final project, which is a night sky, snowy mountain,
and misty lake. I hope you enjoyed this
final project with me.
25. Thank you!: Thank you so much for
watching the class. Hope you loud painting this beautiful broad ***** off late landscapes and procreate. If you have dragged
this projects to upload them in the
project gallery. I am eagerly waiting to see all the lovely projects
that you will be creating. Don't forget to drop off the bat about this glass
when you finish it. To reach out for any kind
of doubts that you'll have. Next class. Happy painting, and stay safe.
 Sheetal Shetty, artjauntwithsheetal