Transcripts
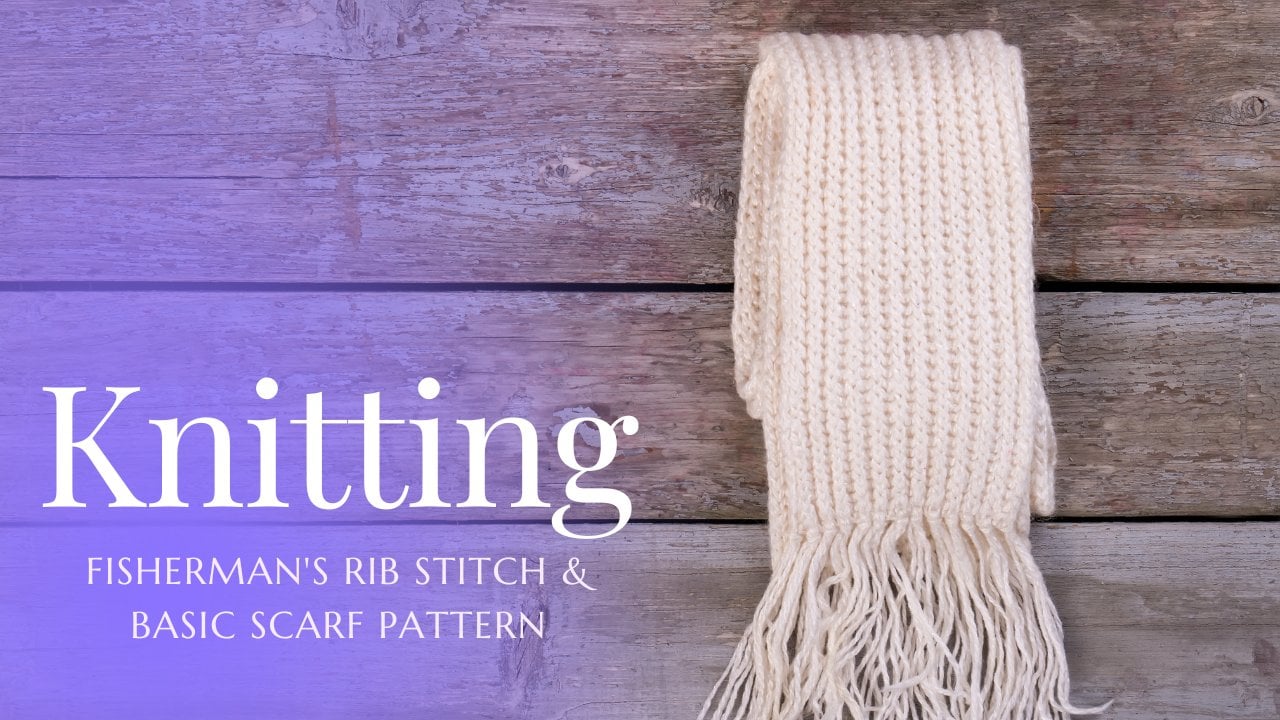
1. 00 Introduction: Hi everyone, I'm Sara, and in this course I'm
going to be teaching you how to knit your first scarp, just like this lovely
scarf I'm wearing here. Now, don't worry if you don't know anything
about knitting, you don't have to for this course because I'm going
to teach you everything you need to know from a
casting on your stitches, a basic knitting stitch
or gutter stitch. I'm also going to go
through what to do if you need to add two pieces
of wool together. So if you run out of wool while you're trying
to get through your scarf, you can attach another ball
of wool and keep going. I'm also going to go
through what to do if you drop any stitches, which is bound to happen when you were first
getting started admitting. So I'm going to teach you how to pick those stitches
up so you don't have to take apart your work and start the scarf all over again. And I'm going to show
you how to bind off the ends of your scarf
so that they sit nice and flat like this, along with binding in any end. So any strings that
might be poking out that you don't want
to show with your scarf. Be sure to add a
picture of your scarf when you're all done in
the project section of this course so that I can see and let me know if there
are any questions that you have while we go through
these steps so that I can help you along this journey as you start getting
into knitting. And with that, let's get
into the first lesson.
2. 01 Project Materials: Some of the basic things
you're going to need for this scarf project are
of course, some wool. You're going to need
quite a bit of it because of how long
scrubs can be. It will depend on
how much length you want to include in it. You're going to need a
pair of knitting needles, just a one-sided one. So they should have
these little blockers on the end so that they can
keep your stitches on that. I'll make it a lot
easier for you once you start getting into knitting. And don't worry too much
about the size of them. The ones that I'll be
using our 5.5 millimeters, but it really just
depends on what you want. You can use smaller ones,
you can use bigger ones. Bigger ones tend to be a
little bit easier to use, but you can use
whatever you want. It will also need some scissors once we get into binding off, we also have a flexible
measuring tape so that you can measure how long do you
need your scarf to be? And you will also need a
tapestry needle like this. So when we are binding off, you have something
to help you with. So those are the basic materials you will need for this project.
3. 02 Long Tail Cast On: The first step of getting into knitting is to
cast on your stitches. We're going to be doing
a long tail cast on. This basically means
that you are going to be knitting the first row as
you're casting on the stitches. It's going to make that first
row a little bit looser. So one of the big challenges when you're starting
a project is that the first row is going
to be the tightest row. So it makes a little
bit difficult for you to start getting
your stitches in. A long tail cast on is
going to be a little bit looser and it's gonna
make that easier for you, especially as a beginner, to measure your wool for
your live telecast on, I like to use the whole length of my arm if I can get all add frame here. So you're going to be taking
the end of your wool. You're one hand, measure
it up to your shoulder. And then this is
where we're going to start our first loop. So now that you have this loop where you are going
to start your first stitch, you're going to put
your index finger into that loop and you're
going to twist twice. Look something like this, and take one of your
knitting needles, stick through the loop. Now, this is the tricky part, so you want to
make sure that you keep the end of
your wall that has all the end as far
out of your way as possible because you don't
want to knit with that. So you want to take
your working wool. So this is going to
be the wall that is attached to the
rest of your yarn. And you're going to put
the wool over your needle. Take your original
loop and pull it up and over and then tighten it, and that is going to
be your first stitch. Now, here's where
the tricky part of the long tail
cast on comes in. You're going to take
the wall with your end. So not the one connected
to the rest of your will. And you're gonna make a
little loop like that. A simple loop are under
finger and put it onto your needle and you're going to take your working yarn. That's the one that is attached
to the rest of your wool, rapid over your needle. And then pull that
last loop up and over and tighten it and
make sure you don't take it too hard because again, you want to be able to
go into these stitches later to actually
stitch your stitches. So one more time, repeat for how you
cast your stitches on with the yarn on the
side with your end. Make a loop over your finger. Secure needle into it so
that it's on in need on now, take you're working on an attached to the
rest of your wall, rapid over and then pull that loop over and off and make sure you
don't take it too much. You are going to repeat that until you have
enough stitches. I am going to be
casting on 30 stitches, so that'll give you
a place to start. But you can really
just measure it with your flexible
measuring tape so that you can get
the right width for how wide you want
your scarf to be. Just keep in mind that as we actually start to
emit these stitches, your scarf is going to
stretch out a little bit. So aim a little short of
what you actually want.
4. 03 Knit Stitch & Scarf Pattern: Now you should have all
of your stitches cast on like idea here on my needle. And that is basically
our first row. Congratulations, you have the first row of
your scarf debt. So now we have to actually get into learning a knit stitch, a simple knit stitch. This is the bare, bare basics, and this is the stitch you'll
be using the entire time. So you won't be switching up in any way as you go
through this scarf. That's why scarves are such a good beginner project
because you can just use one stitch over
and over and over again for a lot of rows
to get your scarf done, you'll get lots of practice while going through
this project. So make sure that the
end of your wool, so this will end here, that doesn't lead anywhere. You want that as
completely out of your way as possible because
you won't be using it. Do not use it. You will run
out of wool so quickly. So you want to
make sure that you have a good hold of
your working yarn, so that is attached to
the rest of your yarn. You're going to
want to make sure your stitches are close to
the end of your needle, but not enough for
them to slip off. You don't want to
drop any stitches, but close enough so that
you can start to work. So you're gonna take your
empty needle and you're going to put it into
the back of the stitch. Just like this. And then you're gonna make
well X pattern with them. You're going to take
your working yarn. Remember attached to
the rest of your, well, I've had it before
where I've tried to use the shorter end and it
only ends in satis. You have to start the
whole thing over again. You're gonna take your
working yarn and you're going to put over your needle. So your needle where you don't have the rest of your stitches. We have it through
one of our loops. And now we have this working yarn before
working yarn looped over it. And then you're just
going to slide the needle with all the rest of
your stitches and keep a good firm hold on. You're working yarn. I like
to put it in my hand that is holding this empty needle
so it won't go anywhere. Then you're going to slide the one fogger
stitches up and over. So the only thing left on your empty needle is that loop you made with
your working yarn. And then you just slide
the original stitch off. You can tighten it a little bit, make sure it's not too
tight because again, you want to make
sure that you can still stitch it nicely later on. It's gonna be weird
for your first stitch. Don't worry if it's
a little bit loose and stuff like that. It'll tighten up later. So let's go over that again. So take I always have it in my right hand
because I'm right-handed. But if you're left-handed,
it'll be in your left hand, whichever is your
dominant hand with your new mostly empty needle will isolate our next stitch. So we're going to insert our needle so that
we have our x. Take our working yarn attached
to the rest of our yarn, wrap it over top, and then with a firm hold
on, are working yarn, holding on to this empty needle, going to socialize with
the other needle up over so that we hook that
working yarn onto our needle. And then still with a firm
hold on, are working yarn. We're going to slide it off of the rest of these stitches. And that is your
basic knit stitch. You are just going to repeat
that for this whole row. So let me do that really
quick so I can show you how to do a turnaround
to start your next row. So now you should have
your first row done. Congratulations,
it's going to be a bit of a learning curve. I know, but once you have done, it'll look something like this. So how do you turn around
and do your second row? Pretty easy. I just take this
needle that I had in my right hand but I was working on in which it to my left hand, take the now empty needle. I just had scooch
all of my stitches so that they're close to the
end but not pushing them off because we don't want
to drop any stitches. And then I just
start over again, just like we did
with the other row. I insert my newly
here to make my x. I take my working yarn attached
to the rest of my wool. Or stupid over, keep a firm hold on both my needle and
that working yarn. The other one up and
over so that I have my loop and then push
the other one off, just like that to go through
the rest of my stitches. And that is all you
need to do for a scarf. You will just repeat that stitch over and
over again for rows upon rows upon rows until you get the
length that you want. Make sure that you have your flexible measuring tape around so that you
can figure out how long you want
your garment to be, or he run out of Wo,
whichever happens first. And in the next lessons I'm
going to teach you how to pick up stitches that you've
dropped which can happen, and also how to
connect your wool. So this isn't going to
be enough well for me, I'm going to need to
use my second role of wool to fully get the
length of the scarf correctly, which you might have to do too. So we will go through some of the things
and issues that you might encounter with going through the process
of your scarf. But if you don't
face any of those, just keep doing the knit stitch over and over again until
you finish your scarf, you're going to lots and lots of practice with this stitch.
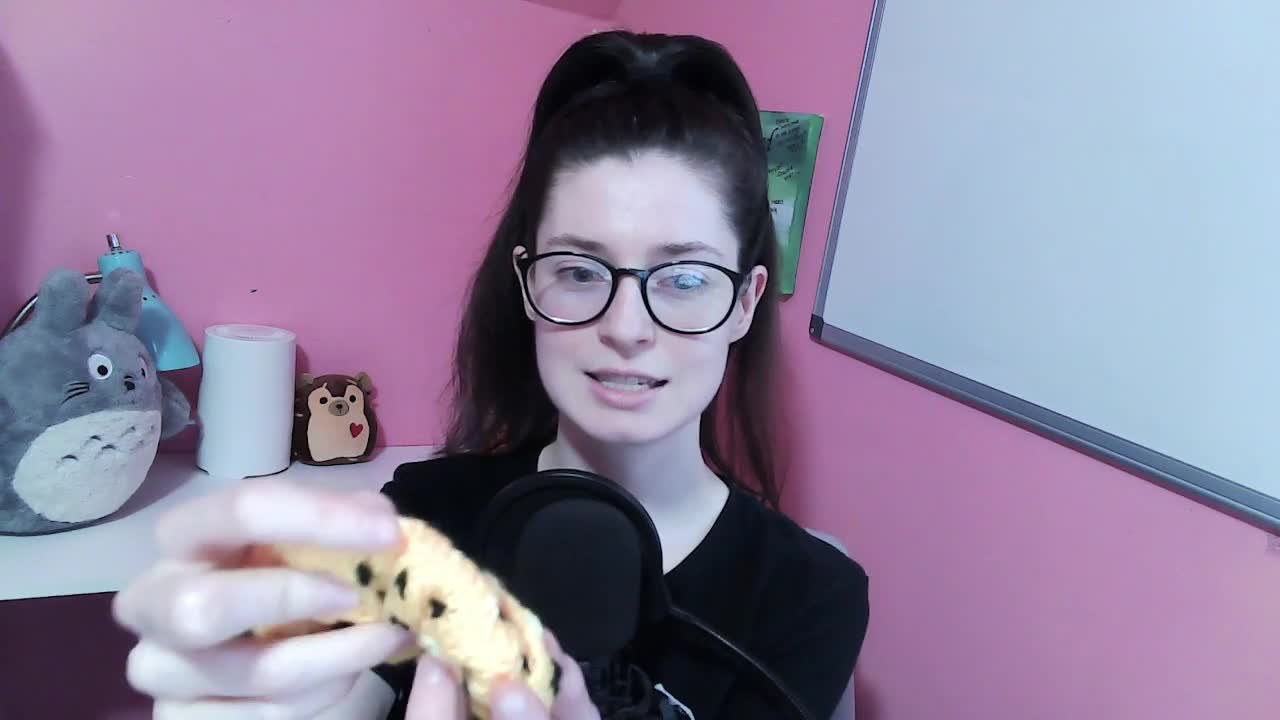
5. 04 Connecting Two Peices of Wool: Chances are that at
some point while you are getting into knitting, you're going to have
to attach wool to the working yarn that you're
using on your project. I suffered for years
drying divide. The best way to
bind two pieces of
6. 05 Fixing Dropped Stitches: The chances are that
at some point while going through your
first link project, you're going to
drop some stitches. So that basically looks
like this where you've got some stirrings going over
the top of your work. Now the sooner you
realize this the better. So you don't have to
pick up those stitches. I'm going to teach
you how to pick up those stitches and
redo those rows so you don't have to take apart your project and
start all over again. So to do this, you are going
to need a crochet hook. You can use another knitting
needle if you want. It's the, the easiest
with a crochet hook. So that's what I'm
gonna show you. If you've basically got two
kinds of sets of strings, you've got strings that
are gonna be closer to you sticking out at
you and then ones that are behind your row. So the strings that are in front while
you're doing your row, those you're going
to want to Pearl. Don't think too much about
exactly what that means. But what it means in
this case is that you're going to want to
take the strings. So this is my loop here
for my dropped row. If you have a string that is pointing closest to
you on your row, you're going to put
it over the row. Here's my string,
Here's my loop. I'm gonna put my hook through
that loop facing towards the piece of wool
and then hook it over my hook too
so that we have, are dropped stitch and the
piece of wool from that row. So I'm just going to
pull that string through the loop and that is
going to redo that row. Make sure that you
pull pretty tight to you want to make
sure that there's some good tension on it. If you have a row where the string in
the back of your work, then you're going
to put your hook through the facing
towards that back string, and then you're just going
to pick up that string. So here's my drop stitch. Here's the piece of wool
from the dropped row. And I'm just going to pull
that through just like that. And that is going to fix that road for me to
make sure that you give it a good tug to tighten it up and to help
with that tension. And again for the purlin rows, or when you have the string
closest to you and go in the back of the loop
towards that string, put that over your hook to my dropped stitch and then the wolf from the
row that I dropped. And just pull that through the loop and try to pull
it as tight as I can. And then you can put it back on to your needle to
continue knitting. And just like that, it's like nothing ever happened. So keep that in mind. If you do drop any
of your stitches, don't go bad if you have to take apart your work and start again. It just when you get
to the end of a scarf, you don't want to have
to redo the whole thing. So that's how you pick
up your stitches.
7. 06 Binding Off: Now you have finished your scar, forgotten it to the
length of that you want. It's time for us to
bind off of the end. One of the tricks with this is that you're going to
have to make sure you have enough leftover that
you aren't going to only get partway through binding off the row and suddenly you
don't have enough wall, so just be careful of that, especially if you are just kind of knitting until
you run out of walls. So make sure you have enough. Now we need to bind
off in this row. We need to do it in a way
where it's still sits nice and flat so we don't
want any kind of curling or anything like that. So make sure that you keep things loose while
going through this. To bind off, all you
need to do is knit the first couple
of stitches just like you've been doing this
whole time with your scarf. Just knit the first two so that you have two stitches
on your working needle. Now that you have
those two stitches, what we're going to do
is we're going to pull the first stitch
that we knit over the second stitch
with our left needle or whichever needle you are
transferring stitches from. So you're just going
to slip your needle behind just like you would
with normal knitting. And you're just
going to pull that stitch off and over
the end there, you've just started to bind off your stitches and
that's all it is. You want to make sure
you have two stitches on your working needle. So I'll knit the next
stitch as well to transfer it over than
just slip my needle into that back stitch
and pull it over and off so that now we have
this flat edge to our work. So you're just going to keep repeating that until you're
done the entire row. So let me just do
that really quick so you can get a look at it. Once you've bound off
all of your stitches, you're going to
have an edge that looks like this now you
will also notice that you still have one stitch
remaining on your needle. It's super easy to
just tie this off. So I always just give myself a nice big
loop to work with. And then I take the
remaining wall that I have. Now if you still have your wool connected to the rest
of your ball of wool, you'll need to cut it
so that you have like an actual end to pull through. But you're going to
make a nice big loop with your hand and
you're just going to pull that remaining
wool through, tighten it so that you have
a nice little not there. And that is how you
bind off your work.
8. 07 Weaving In Ends: You may have noticed when you
first stopped your binding that you have this big long tail coming off of your scarf. And you really don't want
these strings hanging down. You're gonna have
one from when you started from the long tail cast on and then on the
other end where you're just bound off your work, we are going to weave in all of those ends so that you
can't see them at all. And that is what we want in this whole project
because with a scarf, again, there isn't
a back side to it. So someone who is going
to see both size and you want the stitches to be
as invisible as possible. So you're going to
need your middle for this so that you can
easily read those in. And you're just going to
take the end that is coming off of your work and pull
it through your needle. Just pulling it
through so that you have a needle that it's a lot like if you've
ever done any sewing, but just to give you a
nice long overlap so that you can hold on to those strings so they don't
slip out of your needle. I'm just going to flip this over so you want
it so that your string is coming off of the
left side of your work, just so that the pattern
works out the best way. Now if you look
closely at your work, you're going to
notice these ridges. We've talked about that
before when we were talking about how to pick
up dropped stitches. So you really want to pay
attention to these grooves. And they're going
to be loops that go under and those that go over. So that's really important
for this particular pattern. I like to stay as close to where my end is being
bound off as possible. With your needle, you're
going to go up through one of the over ridges in
one of the rows and then into the under
on the row above. So you're gonna have
to that you're going through to pull this string up, make sure that you
don't get all knotted, end tangled when doing that. Now, make sure when you're
doing this pattern throughout the whole work that
you're not pulling too tight because again, you
don't want any curling. You don't want to have a
bunched up area because then people are going to
be able to see where you were weaving in your ends. Then you are going to go down route the under rich
next to where you just came out and then into an overage down on the next row right next
to it where you went up. I swear that this is the
trickiest part because you have to start the pattern, but then it's going
to get a lot easier. So now we're down here. You're going to go in
through the overlook, the bottom, and into the overlap where you
just put your needle. So you're going to go back to the loop you've
already gone through, and you're going to go
through the under loop right to the right of that, and back into the overlap
from the underwrote. So you're always going
to be doing the under rows for the top row that
you're going through, these ridges and the
overall for the bottom. And you're just
going to continue that pattern until
you run out of end. Now, I'm just going to go
through this one more time, but I'm gonna get a contrasting
colors so you can really see how this weaving
pattern works. So hopefully you can see
this weaving pattern a little bit better with the
white wall contrasting. Basically you want to match up these little loops
to match the ridges. So that's why you don't
want to pull too tight because you want to
make sure everything is lining up so that
it's at the same kind of tension as close as you can get to the attention you are
using while knitting. The best part about this, see how we have this contrasting
color with the white. You can't see any of it
on the opposite side. It's completely invisible. And that's what you
want, even though we have this contrasting color, that should be
pretty easy to see. So that is how you
weave in your ends.
9. 08 Final Thoughts: Congratulations, you've made it through the course
and you now have your first scarf
along with being pretty good at the
basic knit stitch. I hope you were able to follow
those lessons fairly well. Let me see it. Your scarf that
you've created in the project section
of the course, along with any questions you
might have of stuff that I didn't elaborate on as well as you
would've liked me too. And I will be adding other
courses to Skillshare so that you can continue to learn lots of other
stuff with knitting. So be sure to check those
out if you want to take on your next project and all the best in your knitting journey.
 Sarah Carswell, Fiber Artist