Transcripts
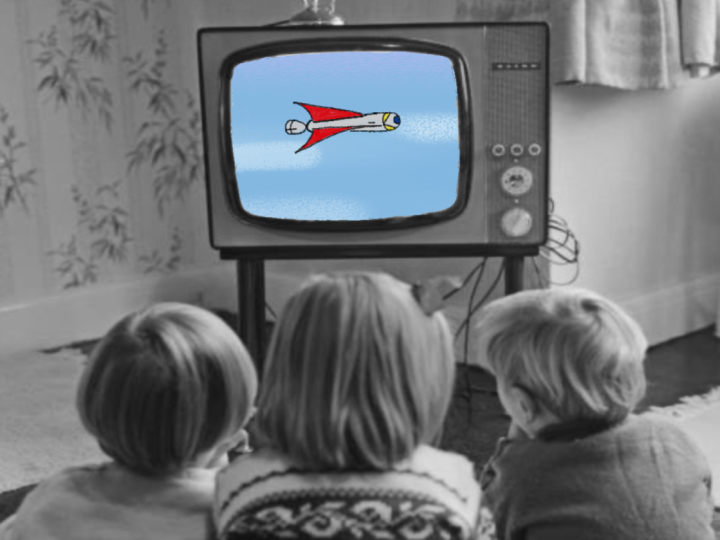
1. Introduction: Hey, I'm Isaiah Cardona, and I'm a multi hyphen
creative who loves using Procreate dreams to add animation to all
kinds of projects. Animating is one of my
favorite things to do, and I'm all about making it easy and fun for
everyone to jump in. If you've seen my tutorials on YouTube or taken
my online classes, you probably know I'm all
about helping people get started with animation and
discovering how enjoyable it. I truly believe anyone can
create something amazing. I'm here to guide
you through it. In this class we'll make a playful looping
animation while diving into the basics of
procreate dreams, too. I'll walk you through
simple lessons and interactive exercises
to help you set up your file and get
started with confidence. We will also be exploring the three different
animation techniques, key framing, frame by frame animation using
flipbook and performing. And we won't stop. I will also walk you through some helpful
animation principles to help your animations
really blast off. And finally, I'll
show you how to export your work so you
can share it everywhere. You don't need any prior
experience to join in. I designed this class to be welcoming for
absolute beginners, as well as anyone looking to brush up on the latest updates. All you really need is an iPad, an Apple Pencil, and the
Procreate Dreams app. If you're ready to kickstart your animation adventure and
have some fun along the way, then let's get started.
2. Class Overview: Welcome to the class. I'm
really glad you're here, and I can't wait to
see what you create. Your class project is to make
a looping Scifi inspired animation using one or more of the animation methods
and Procreate Dreams. It could be a flying spaceship, a helpful robot, or anything else that
sparks your imagination. The main thing is to have fun and let your
creativity flow. As we go through this course, I'll be with you step
by step showing you how to set up your
file and get started. Animate using three
different methods, Keyframing, frame by frame
animation and performing. We'll also explore three animation
principles Anticipation, overshoot and follow through. That will really help bring
your animations to life. And in the final lesson, I'll show you how to
expert your animation as a video and a gift so you
can share it with the world. My goal for you is to walk away with a solid understanding
of procreate Dreams, animation tools and how you can use them in any
project you dream. The possibilities are endless. And if you ever get stuck
or have any questions, just ask in the discussion
section. I'm here to help. All you need for this
class is an iPad, the Procreate Dreams app, and an Apple Pencil. I've also included a guide and some starter files for you to download so you can
follow along easily. And once you finish
your project, I love for you to
share it with us so we can celebrate
your awesome work. I'm really looking forward
to seeing your animation. So let's dive in and get started with Procreate Dreams
in the next lesson.
3. File Setup: This lesson, I will walk you through getting started
with Procreate Dreams, including setting up a new file. Once you've opened
up Procreate Dreams, you will see the theater. This is where all your movies
and folders will live. And if you've just recently
upgraded from version one, then you may see some
projects with a 1.0. That means that it's still
in the original formatting. So to upgrade it to version two, all you have to do is tap on it, and then it will convert it
over to Procreate Dreams two, and then you'll be
able to access and update it just as
you did previously. And you'll see, like what
it'll do is it'll create a new copy while
maintaining the old one. Now, to create a new movie, all you have to do is tap on the plus icon up here in
the top right corner. This will open up an interface where you can
create a new movie. Here you can swipe
up and down to view several common screen sizes used for animation and video content. Each screen size can be set to four different resolutions
with four k being the default. To select the resolution
for your movie, tap on the four K
icon and choose from the resolution options that will appear
in the contacts. You can also tap
on the ellipsis up here to access your frames
per second and the duration. For my frames per second, I'm going with 12 frames per second to simulate old
traditional animation, and then I will tap
on the duration, and I will input 15 seconds. And the great thing is
all these settings can be updated later within
your movie project. Last, you have two options
for opening your movie. First, you have flipbook, which will take
you directly into a new flipbook
within the project. This is great if you
want to jump directly into creating frame
by frame animation. The other option will
open up an empty file, which is great for starting
projects from scratch. So I'll tap on that. And as you can see, I just
have a nice empty time line. And that's it. We just
created a new movie. To recap, I walked you
through opening up Procreate Dreams
and how to create a new movie and how to
customize your settings. And the next lesson,
we will dive into animating with key frames.
4. Keyframing Robot's Entrance: In this lesson, I will
walk you through how to animate a friendly
robot using keyframes. Before we dive into animating, let's take a moment to
break down the animation. In this lesson,
we'll be animating this fun robot that
rolls into frame. I pauses, and then it rolls out, which creates a nice
looping animation. To elevate this animation, we'll be using multiple
animation principles, such as using overshoot
by having it go past its final starting place before it settles
back into place, as well as follow through, which is where you have limbs
that will kind of continue moving after the main body
has settled into place. And then the third
principle we will use in our final exit of the animation by adding
a little anticipation by having the robot rotate backwards before
springing forward. Together, those make a
really fun Eleva animation. And if you'd like
to follow along, you can download
the starter file in the resources section of the class and to show
you how to do that, once you have it downloaded, you want to open up
your files app and find the file and then tap on the Select button
to select the file, and then we are going
to tap on move, and then you're going
to want to move it into your Procreate Dreams file
within the theater folder. And then hit Move. And so now it'll be available within your theater
on Procreate Dreams. And so there it is
ready to go for us. Now let's dive
into the exercise. The Robot starter file
is already set up with two separate groups of background in the robot group. For this exercise, we will be only focusing on
this robot group. And the first step
will be to get into the right timeline mode. Timeline modes are a new feature that allows you to focus on specific tasks like composing and arranging
assets and compose, recording movements
in the perform mode, and add manual keyframes
in the keyframe mode. And you may be wondering, how do you choose which mode to use when animating elements? I like to use performing
when animating elements that will have
a more inic movement, like an object flying around. Then for animations like this robot that will have
very linear movement, I will use the manual keyframe so I have greater control
of its movements. I'll tap on keyframe. And so now when we
move objects around, it will add a keyframe
to the track. Since my robot is in
its final position, I'm going to go and add a new keyframe to
record this final pose. I'm going to put it at around
the two second mark as I want the entrance animation
to be about 2 seconds long. I'm going to tap on
the action icon and hit move and then move and
scale to add that keyframe. Now I can work backwards and go to the start of the timeline, and then I'm going to
drag it off screen, and I'm going to hold
on one so that it snaps and it stays
linear as I move it. And so as you can see, we have our animation where it rolls in. But obviously, this is really flat and boring and
not very lifelike. So as I mentioned, at the front of this lesson, we'll add in those
animation principles to bring more life and
energy to our animation. So I'm going to go and
tap on the 1 second mark, and then I'm going to
click and then drag it forward so that it's gone
past the final position. And to help me keep it linear, I'm going to expand
the keyframes. So I'm going to hold on
to that keyframe track, which is going to get
me some more options. One of them is expand,
move and scale. Tapping on that now breaks down all of the elements
that we can keyframe. And so one of the things is, I just want to focus on the X, which is going to have its
left and right movement. And so I'm going to go and delete these
keyframes that are the Y, so it just stays in one
position the whole time. And then I'll also just
delete the scale keyframes. So then we're just focusing
on it moving left and right, and then rotation, which
will add in later. So currently, I
have it where it's overshooting and then
coming back into place. But to make this more fun, we're going to add some
rotation to this animation. So then it looks like it's lunging forward
as it's springing forward and then have it kind of rotate back and forth as
it settles into place. So I'm going to just go to
beginning of the timeline, and then I will tap
to add a key frame, and then I will go to
the overshoot frame and then rotate it. Tip. Before we start
rotating our robot, it's important to
properly set up the anchor point so your character elements
pivot naturally. So since the robot is powered
by the wheel at the bottom, we want to make sure that
the anchor is aligned to it. So to properly align that, let's hover over a robot and
click on the ellipse icon. And you'll see this
provides you with multiple options
from flipping it horizontally or vertically and then also editing
the anchor point. Which when you tap
that, it'll show you where the anchor
point is set up. I have already set it up to
be aligned to the wheel. Typically, though,
it can be aligned to the center of the canvas
and you'll have to, like, tap it and then drag
it to the right place. But it's important before you
start rotating objects to double check that
the anchor point is where you want it to be, so your objects will
pivot really naturally. And then once you're done, you'll tap on the check mark. And now we're ready
to start rotating. To rotate, all you need
to do is hover over your robot and then go to the corner that
you want to rotate. And as you can see, I have
this curve that will pop up. I can drag that Another thing that you
can do if you want a more precise rotation is to actually click
on the keyframe, and then that will
bring up your rotation. And then if you tap on that, you can input them out. So let's say, oh, you know, I want to be 18 instead. Now that's in there. Next, I'm going to go
a couple frames down, and I'm actually going to copy and paste the
final X frame. So I'm going to hold
on to that X keyframe, which will bring up the
option similar to when we expanded the move
and scale keyframes. But we also have
the ability to cut, copy and paste a keyframe. So I'm going to hit copy
and then go to this frame, hold it again to bring up the options and then
this time, hit paste. Next, I'm going to tap on
the rotation track to add a new keyframe and then just rotate it to
the right this time. And then I'm going to
play you back just to show you how it's
looking so far. Now I'm going to
go a couple frames forward again to about kind of 1 second
and seven framework. And this time, I'm going to
rotate it again to the left, but I'm going to go
about halfway this time, as I want to show
that the rotation is starting to slow down as
it settles into place. And once again, you can do it this way by hand
or if you want, you can tap it and
choose what you want. Actually, I think
I will lower this to ten just to make it
a little more subtle. Next, I'm going to
go to the frame ten, kind of in between the last keyframe and
then the final keyframe. And this time, I'll actually
just use the input function, and I will say three. So just kind of a
very subtle rotation before it ends back. And that's looking really great. Adding that overshoot
really helps bring some dynamic and life
movement to the animation. But we can take it a
step further by adding some follow through with
the limbs of the robot. So the first thing
I'm going to do is expand the robot group. If you go to the group name
and click on this arrow, that will expand the group. Another cool thing
about Procreate Dreams too is now the timeline
height is adjustable. So if we ever need extra real estate from
vertical perspective, we can adjust it to
give us more space. So remember that as you're
working through the project. Another feature I want to
call out is if you ever need to adjust how like zoomed
in you are to the timeline, you can hold down with three
fingers on the timeline. To slide it to kind of bring
it in or bring it out. Now we're ready to add
some follow through to the animation by
animating the arms. So as with the main body, I'm going to add
some key frames to mark the beginning
and final positions. Since the arms are going to be following the
movement of the body, I'm going to have my
first keyframe be a couple frames before
the overshoot frame. And then I'll have
my last one be a couple frames after
the final movement. This way, the arms
are going to be following through
on the movement and will continue moving a little after the main body has
settled into place. And so for the first movement, I'm going to go
past the overshoot. So I think I'm going
to go to frame two, for the first
keyframe of rotation. And as with the main body, it's important to double check to make sure
your anchor point is where you want it to I've already set up
for the starter file, but as with before, it's always good to double check to make sure it's where
you want it to be. And for the arms, if it wasn't already set up, I would want to drag it to where the joint is as
that's where I want the rotation to be and
then for this rotation, since it's moving the
motion of the body, I'm going to rotate
it to the left. And then I'm going to go to the next frame where the body
is rotated to the right, and I'm going to go to
the frame after that, and I'm going to
rotate it inward. And then once again, I will go past the other frame and then this time kind of
follow the same direction. As with the body, I want to make sure that
the rotations are kind of settling down as it
settles into place, so I won't rotate it as much as I did with
the first frame. And then for this one, I
think I'll go to frame 12, and then I will bring it in. And then if we play that back, we can see how that looks. And that's looking awesome. Now we will apply the same process to the
er arm of the robot. So I'm just gonna go
down to my right arm, and the great thing
is I can just follow the key frames of the first arm. So I will create a new
keyframe for the first one and the last keyframe since they will be
the current position, and then I will go in align
with the next keyframe, which is the one where we'll
have our first rotation. But this time, I'm going to
go inward with my movement. So it's going to move the same way as the
under arm will be. And then I'll go to
the next keyframe, and then this time
it'll go outwards. Then I'll go to the next
one and then bring it in and then go to the last keyframe where
it's going to go out, but just not as much. And now I'll play that back
and that's looking awesome. By just adding in the overshoot and follow
through principles, we've created a really fun
and dynamic animation that feels more lifelike and has
a lot more motion going on. To recap, in this lesson, we walk through using keyframes to animate
movement and rotation, as well as how apply animation principles to
elevate your animations. I hope this has really been inspiring for you and shown you how you can really elevate your animation work very easily. Then next lesson,
I will walk you through how to keyframe
the robots ex.
5. Keyframing Robot's Exit: Now that we've animated the
entrance of the animation, now let's go and
animate the exit. So now we can collapse
the group and then go to where we want to
start our exit animation, which I know I'm
going to have it be around the six second mark. So I'm going to go
and tap on the X to add a keyframe to lock
in its current position. And I'll also do that on
the rotation as well. By duplicating these
frames over here is going to create a hold
on the animation as we just want the robot
to be still during this moment and then have it move out with
the next keyframes. If we didn't add
these keyframes, it would be slowly
shifting out of frame. Now it's time to add
an anticipation frame. So what I'm going to do is
go back a couple of frames. I think I will go to frame five and then I will
rotate it back. And since I'm not going to have it move its
actual position. I'm just having it kind of lean back before it
springs forward. I'm going to actually move this keyframe to align with
that rotation key frame. And then I'll go back
a couple of frames. So I think frame ten and then I'm gonna
rotate it forward, and then I'm going to
have it move off screen. Now, let's play that back
to see how that looks. And that looks great. Now let's review the
whole animation together. I definitely recommend
getting into the practice of reviewing your animation after
each step of the process, so then that way you can catch any issues before you proceed with the rest
of your animation. Another tip is if you want to view your animation
in full screen, all you have to do
is tap four fingers, and then it will
expand to full screen. And that's it. And now that we're done with our animation, we can actually shorten
the duration of the video. So the great thing about the new timeline is
that now you can just click the end of it and drag it to adjust the length
of the timeline. Since I know I want
this to loop out, so I'm going to shorten
this to about 7 seconds. So that way, the robot
completely exits out, and then it'll loop
back to the start. Another cool thing is not
only can you drag it, but if you want it to extend
it to fit the full content, you have that option
as well as the ability to actually input a
specific duration. So this is a great way to adjust the timeline very easily
within the timeline mode. So at the start of this class, I showed you that I
typically like to start with 15 seconds or whatever I think is going
to be the longest. And then I do that
because then I can just trim it down as needed later on. To recap, in this lesson, we walk through using key frames to animate
movement and rotation as well as how to apply animation principles to
elevate your animations. And the next lesson, we
will dive into Flipbook and walk through creating a
frame by frame animation.
6. Animating in Flipbook: In this lesson, I will
walk you through using Proc Dreams Flipbook to create a hand drawn animation
to complement our robot. To start out, let's tap on the add icon in the
top right corner. This will give you all
the different options to add content and assets
to your timeline. You have photos,
video, text, drawing, and Flipbook, as
well as the ability to add additional tracks. So now let's go ahead and tap on Flipbook and this should be pretty familiar
to most people. If you've ever used Procreate, this has a very similar
layout now to that. The big difference is now, instead of having just
that one track timeline, we have a multi track
flipbook which allows us to create and adjust
different animations that are going on at once, which really allows us to create more complex hand
drawn animations. And before we get started
with the animation, I'm going to exit out of Flipbook mode by tapping
on Flipbook icon. And then I'm just going
to drag it to 6 seconds, as that's gonna
be the duration I want my speech bubble
animation to be. Before we dive
into the flipbook, let's take a look at
what we'll be creating. So in this lesson, we'll be creating a hand
drawn speech bubble that animate out with a little greeting
and then disappear before the robot moves
out of the room. Now that I've adjusted the
duration of my flipbook, I'm going to tap on the
edit Flipbook to re enter. First thing I'm going to do
is draw the speech bubble. I will make sure I have the right color that
I want and brush, and then I will
begin my drawing. And instead of spending a lot of time drawing
in the shape, what I'm going to do is
I'm going to tap and hold on the color to drop it in and then just go all the way so it fills
in the full space. And then one of
the great updates of Procreate Dreams
two is now we have the ability to transform and
move within Flipbook mode. So let's say like here, I actually want the bubble
to be a little bit higher, and I think I want to
rotate it a little. And then all you have to hit is transform again to
lock it into place. Now that I have my speech
bubble where I want it, I'm going to redraw the bubble twice to create a
looping animation. By redrawing an image
at least two times, we will create a
wiggle effect caused by the variations
in each drawing, creating the illusion
of movement. So I'll go to the
second frame and begin redrawing
my speech bubble. And then in the third frame, I will repeat the process
and redraw it again. Now that I have the wiggle done, I'm going to use the
multi select tool, and I will select
all the frames, and then I'm going to shift them down a couple frames so then
I can animate in the bubble. So I'll tap on the second frame and redraw the start
of the bubble trail. Then I'll tap on the third frame and redraw
both little bubbles. And now I'll review
the animation. And I want to make the
animation a little more subtle. So what I'm going to do
is I'm actually going to select all the frames, and I'm just going to extend
them one extra frame. So I'm going to hold down
until I get the edges, and I'll just drag it until it's all being held for a frame. Now I'll hold onto the selected frames
and shift them over. Now, I'm just going to select
the last three frames, and then I will hold down
and then hit Duplicate. And then I'm going to select the original three frames and
then hit Duplicate again. And then I will keep hitting duplicate until I've reached
the end of the track. And now we can play it back. And this looks so
much better now that I've reduced the
frames per second, so it's a little bit slower
and a little more subtle. Now that I have the
speech bubble done, I'm going to add the greeting. So I'm going to go to the first frame that I have
the full speech bubble, and I'm going to tap on the add New Track icon
here to add a new track, and this is where I'll
put in the grating. So I'm going to
first go and change my color and then I'm going
to reduce my brush size. And so I will go to the first frame that I have
the full speech bubble, and then I will
draw in my grating. And then just like with
the previous step, I'll redraw it two times. And then I will
select all of them. So I'll drag them, so they're two frames. And now I'm going to add in an animation that will appear
before we see the high. So I'm going to select
my looping frames, and I'm going to drag them back. And then I will draw in but And then extend all
of those frames. Now I'm going to go and
duplicate these looping frames. So I'm going to
select all of them, and then duplicate
and then continue doing that until I fill the
duration of the flip book. Now is time where
I can just play back my animation to
see how it looks. And that's looking good. Now I'm going to
exit Flipbook mode. And so now I'm going to review the full animation to make
sure everything looks good. So I'll go back to the start
of the timeline and then hit play where you can tap with four fingers to play
in full screen mode. And that looks great. I just walked you through
how it's setup and use the Flipbook mode to create
a hand drawn animation, as well as another
animation trick to create a looping
wiggle animation. And the next lesson, I will walk you through a new exercise where we will use
performing mode to create a fun space animation.
7. Performing: In this lesson, I
will walk you through a fun spaceship
animation that will allow us to play around
with the performing mode. So diving into the starter file, I have everything set
up in two groups. I have the UFO and the
spaceship elements. So the first thing I'm
going to do is move my main character outside of frame and then I will
click on perform mode. So now, as you can see, the playhead has changed
into the record button. And then one thing
to call out is that to adjust motion
filtering, now, you have to tap
on the hand icon, and this will allow you to adjust how much motion
filtering you want. I have mine set up to 55%, but you can definitely
play around and customize which one depending on kind of what result you want to have. And so to start out, I'm going to make
sure that my playhead is at the very start
of the timeline, and then I'm just going to
click and then move it over. And I just kind of
wanted to, like, hover in the center for a
bit and then fly off screen. Now, I'm going to play back
to see how that looks. And after reviewing
the animation, I'm not satisfied with how
my alien space shift exits. So what I'm going
to do is I'm going to delete the last
couple of frames. And a nice easy way to do that is using the
multi select tool, which is this icon here, and then you can select multiple key frames and then hit Delete. You can also use that multi select tool to
move multiple key frames around or if you want it to you can select it and
then press and hold, and then you have the ability as you can see, you can drag it. But if you press and hold, you also have the ability to
cut or to copy and paste. So that's really great. If you're trying to make
a looping animation, you can use that to loop it. So now I'm going to just
focus on having it fly out. And then now I will
play that back. And then I'm just going to make a quick little
adjustment so that there's a little anticipation
before it shoots off. So I'm going to click
on this keyframe. And just adjust it so it goes back a little
before shooting forward. I'm also going to adjust my
duration of the video so that it actually will end after
it's fully off screen. And so now I'll play back again, and I'm actually going to tap with four fingers to play in full screen mode just so
that I can see it bigger. Yeah, and then that's
looking great. Now that we have the
main animation done, now I'm going to play around with using
the perform mode to create some subtle animations to some of the elements
in the background, which is just going
to help kind of just elevate the animation more. So we're going to go into
our space elements group. And so I'm going to play around with animating
this planet first, and I'm just going to
have it rotate a bit. And to do that, first, I'm going to make sure that the playhead is at the
start of the timeline. And then if you hover over to, like, one of the corners, you'll get this rotation curve, which you can use to just, like, subtly adjust
the rotation. And so just try to
keep it really subtle. Next, I'm going to
work with the moon. And for this one, I want to make sure that the rotation is around the actual
center of the moon. So I will tap on the ellipsis
and then hit edit anchor. A lot of times the
anchor may be kind set up for the center
of your frame. So all you have to do
is click it and then drag it where you want it to go. And then hit this check
mark to confirm that. And so, once again, I'm just going to play
around with rotating it. I'm just going very subtly. Now I'll go on to this planet. And with these,
I'm kind of having them rotate a little kind
of around the center. And so I'm not actually going to adjust the anchor
point for these. Next, I'll go through
and do these stars. M and just keep repeating the process. And then now for the last one. And once done, now I will play back again to
see how it looks. And that's it. To recap, I just walk you through using performing and
Procreate Dreams. We used performing to
help us create a fun, organic movement of
a flying spaceship, as well as playing using the performing tool
with rotation to create some nice subtle
background animations to just elevate our animation. I hope this has shown you how fun working with
performing can be and it's giving you
some exciting ideas for projects you can
use with performing. The next lesson, I will walk
you through how I export your animation as a video
and an animated gift.
8. Exporting: This lesson, I will
walk you through how export your animation
as a video and a gift. To get started, let's walk through exporting your
animation as a video. To start out, you're
going to want to go to the top left corner of the timeline and click
on the slider icon. This will bring up
the movie settings, and then to get to
your export settings, you're going to want to
click on the Share icon. This will give you several
preset ways to share videos, gifts and images
from your project. And so to export as a video, let's tap on the first
one, which is video. And then it will go through
and export your video. And then you'll get this
pop up which will allow you to choose how you want to
save or share your video. I'm going to tap on save
Video, and that's it. Now let's walk through exporting your
animation as a gift. To get started,
let's go back into the movie settings and then
into the share section. And for this one, we do have
an animated gift preset. Though I prefer to use
the Advance Export, the animate gift is
optimized for file size, and so I tend to find
that when I use that one, the quality isn't as great. And so to preserve the quality, I like to go to Advance Export. And the cool thing about
advanced Export is it allows you to preview
how it's going to look, and it gives you the ability
to adjust the format, resolution, and other settings related to what type of
format you're working with. So the first thing
I'm going to do is go with format and tap on gift. And as you can see, now I
have some brand new settings. It's important to always
preview when you make changes, as this is going
to show you what it actually will look like. And as you can see, I'm missing some details
of my animation. Like, the moon is kind of
missing some of the quality, and it's looking generally
really pixelated. So to fix this, I'm going to make
some adjustments. Like I said, it
currently has settings really set up for
lower file size. And so I'm going to bring
it up to my 1080 file size. I'm also going to
adjust the number of colors and go with
the highest amount, which is 256, and now I'm going
to go and tap on preview. And as you can see, like, the quality is just
so much better. I'm getting so much more
details in the animation. Though if you're
still having issues, the next thing I would
do is play with some of the dithering settings like
smoothness and intensity. And then every time
you make a change, make sure preview and
just kind of play around with it until you get the quality that you're looking for. But for me, I think this looks
really great for a gift. So I'm going to go
ahead and tap on the Share button up here. And then I'm going
to hit Save Image. And then one thing
is, once you've exported your project
with Advanced Export, it doesn't exit
out of the screen, so you'll just hit
Cancel to exit out. That's it. I just showed
you how to export your animation as a video
and an animated gift. Videos are a great way for sharing your animations
on social media, and gifts are an easy way to share your class
project on Skillshare. Now that we've gone
through the full process, it's your turn to create an animation using
one or more of the animation methods
from this class and make sure you share
it in your class project. And then once done, join me in the next lesson where we
will wrap up this class.
9. Final Thoughts: Congratulations on
finishing the class. I really hope you're proud of
the animation you created. I bet it's awesome, and I can't wait for you to
share it with the world. I hope this class has shown you just how fun animating and
procreate Dreams can be. I want you to feel inspired
to keep practicing and applying these methods and skills to your future projects. I'd love to see what you made, so be sure to post your project
in the project section. Sharing your work with
the Skillshare community is a great way to inspire others and keep
your creative momentum going. And if you're hungry for
more animation classes, just follow me here
on Skillshare. I've got some or courses
that I think you'll love. And if you enjoyed this
class and found it helpful, please take a moment
to leave a review. Your positive
feedback helps others discover the class and
get inspired, too. Thanks so much for joining me on this creative exploration
of Procreate Dreams, and I hope to see you
in a future class soon. Bye for now. Oh
 Isaiah Creates, Art Director & Motion Designer