Transcripts
1. Introduction: Hey, I am Isaiah Cardona and I'm a multi hyphen
creative that loves opportunities to
experiment and bring in my constantly expanding
skill set to projects. I've chosen mixed
media animation as my way to create magic. It's a fun way to express yourself and quickly
catch your viewers eyes. And in this class, you
will be developing your own mixed
media animation and procreate dreams
which you can share on social or include
in your portfolio. If you know me from
my Youtube tutorials or my popular online classes, then you know I am passionate
about making the world of animation accessible
to non animators. Which is why in this
class I have taken my animation process and broken it down into simple to
learn fundamentals. I also have the class
set up so you can follow along on several
project examples. So you can see my full
process for using the techniques and developing
various animations. Which will give you
the knowledge and the confidence to apply these techniques into
your class project. I've designed this
class to gradually walk you through different
levels of animation. Whether you're a beginner or an intermediate
level student, there is something to
get out of this class. In this class, you will learn basics of using
procreate dreams, helpful workflow
tips and tricks, as well as some key
animation techniques such as frame by
frame animation, key framing, easing and
straight ahead animation. And we won't stop there. You will also learn how to develop your mixed media style, how to plan out your animations, and so much more. By the end of this class, you will have a solid
understanding of mixed media animation as well as the tools to create your
own expressive animations. So if you're ready to dive into the fun world of mixed
media animations, then grab your ipad and procreate Dreams and
let's get started.
2. Course Overview: Welcome to my class
Mix Media Animation and Procreate Dreams. I'm so excited to have you here. Your class project is to make a mixed media animation using
one or more techniques. From this class, it
can be anything from a simple looping animation
to more advanced animation. Just make sure I
have fun with it. We'll start with the Animation
Fundamentals module, where I'll walk you through
some fun techniques that will be the foundation of your
mixed media animations. Which include
looping animations, masking animations, straight
ahead animation, and easing. We will also walk through
a warm up exercise to learn the basics of creating
motion and procreate dreams. And then in the
application module, we'll walk through multiple
project examples so you can learn my process for
developing the visual style, as well as planning out animations at different
levels of difficulty. This way you will gain a strong understanding
of those techniques as well as how you can apply them to any animation
application you want. The possibilities are unlimited, which will naturally lead us to the final module
where you will apply what you've
learned to create your own expressive
mixed media animation. For this class,
all you'll need is the ipad with a procreate
dream app and an Apple pencil. You will also have access to my helpful animation guide
and class working files, which all can be found in the resources section
of this class. These support multiple
learning styles as you can review
screenshots from the class or even dive into the actual files for a
hands on experience. Once you've finished
watching the lessons, I encourage you to
share your project in the project gallery so we can all see the cool
animation you've made. And if you get lost or need any help anytime
throughout this class, feel free to leave questions
and I'll be happy to help. I'm so excited to see
what you all make. Let's get started with
our first lesson, Animation Fundamentals.
3. Animation Fundamentals: In this lesson will break down some fundamental
animation elements of mixed media animation. Looping animation is
a continuous sequence of animation frames
that repeat endlessly. I've broken this concept
into two techniques. First, looping
movements are when objects move and return to
their original position, which gives the illusion
of an infinite cycle. For example, this
flower shape uses rotation key frames to rotate
the object 360 degrees, which can be looped
seamlessly multiple times. And the second is
repeating frames, which is when you repeat a
set of three or more frames, which creates an
endless animation. This technique is
great for creating texture and pattern animations. The second concept I will walk you through is
masking animation. Traditionally mixed media is made up of different
images, art, and paper that are
overlaid using layer masks like this allows
you to recreate that effect. Here's some examples of
animations that use masking. First we have these looping
pink scribble animations that are clipped to this shape. Here we have a video mask. Over here we have a
hand drawn animation of ice cream dripping that is
masking the pink pink texture. The mask shape is
actually animating. So there are so many ways to use mask and mixed
media projects. The next concept
I'm going to walk you through is straight
ahead animation. Which is when you draw out an animation sequence frame
by frame from start to end. This technique is great for visual effects where
you want to create a liquid animation or spontaneous action when creating straight
ahead animation. I find that helps to sketch
out an animation guide to help you determine the path of movement and the timing
of that movement. As you can see here, I have
drawn this animation to follow the path and have created frames for
each tick mark. Here's a closer look at
that animation and action. The last concept is easing, which alters the look and
fill of an animation by affecting its speed and timing to achieve a
more natural movement. Procate Dreams comes with four common easing
curves to help you bring more organic
motion to your animation. First we have linear easing, which gives your animation
a constant speed. Ease in will make your animation start slower and gradually
pick up speed at the end. Ease out works the opposite, where your animation
will start out fast and then gradually
slow down at the end. Ease in and out combines these
two easing types together. Your animation will start
slowly before picking up speed, then reach a constant before slowing down
towards the end. To recap, we just walk through several elements of
mixed media animation. Including creating loops
or repeating animations, masking animations,
straight ahead animation, and easing animated movements. We will dive deeper into all of these techniques
throughout this class. The next lesson, I will walk you through some procreate
dreams basics.
4. Procreate Dreams Basics: In this lesson, I
will walk you through warm up animation exercise as well as some Procreate
dreams basics. To get started, let's dive
into setting up our files. To add a new file, you will want to tap
on the plus icon here. In this screen, you
will be able to swipe through different screen
sizes including vertical, social, and wide screen. For this exercise, I'm going
to use widescreen Next, you can adjust the resolution of the video by typing
on the red box. This will give you
a dropdown with all the resolutions
available for your device. I'm using four K as my
ipad fully supports it. I'd recommend most
people use HD for a more smoother
experience and to reduce any compatibility issues. Next I'm going to
show you how to set up your video duration
and frames per second. These are both hidden. To find them, tap on the
three dots over here. This will give you a pop
up with those settings. Frames per second will affect the look and smoothness
of your animation. Traditional animation is
typically 24 frames per second, where stop motion is less because mixed media animation
was traditionally shot. Similarly to stop motion, I'm going to go
with a lower number of 12 frames per second. And then for the duration, I will use 5 seconds
as a starting place. We can always adjust it later. Lastly, once you're happy
with your settings, you will have two options
to open the file in either drawing mode
or completely empty. It really doesn't matter
which one you use. Drawing mode just opens
with a track already at it. With drawing mode toggled on, I'm going to tap on empty, and it opens up a completely
empty file with no tracks. So I'm going to tap on this swiggle icon to
enter drawing mode. Now I'm going to draw some
shapes that'll later animate. In drawing mode,
I'm going to use the drawing icons at
the top of the screen. These are only available
in the drawing mode, so if you don't see them, make sure the drawing
icon is highlighted. Just like in pro crate, I will tap on the color
circle to choose my color. For this example,
I'm just going to use a blue for my
personal palette. And then I will tap on the brush icon to pull
up the brush library. And I'm using a default
brush tinderbox, which can be found in
the inking category. I love its texture
in the rough edges, and I think it works well for the mixed media static I use. Next, I'm going to
draw a simple circle. As you can see, the circle is
only visible for one frame. So I'm going to have to
fill the full duration. To do that, I'll go tap on the frame until
I get a pop up. And I will tap Fill
duration located here. And now the circle
fills the full track. Next I'm going to draw
an asterisk shape. So first I'll add a
new track again by tapping the ad icon and
then tapping track. And I'm going to change the
color for the second shape. And then I will draw
my second shape. And then once done, I will fill the shape duration so it's visible for the full animation. Next, I'll add a new
track for a third shape. And for this shape, I'm going
to go with a pink color. And I'll just draw a
simple triangle shape. And once again, I will feel the duration of the third track. Now let's dive into
animating the shapes. As you can see, I'm
planning on setting up this simple animation where I have my shapes animate
into position, and then have the asterisk
shape spin around. So the first thing I'm
going to do is rearrange my shapes to get them position
into that final layout. Once I'm happy with the
layout of my shapes, I'm going to move
the playhead down the timeline to where
the animation will end. And I will tap the
red action icon to bring up the
action pop up here. I'm going to tap on move. This will give us all the motion elements
that we can key frame. I'm going to move and scale to add a key
frame to the track. I'll repeat this process to add keyframes to the second
and third tracks. Next, while on the third track, I'm going to move the playhead back to the start
of the timeline. And I will go to the
canvas and tap and drag to the right to move
the circle out of the frame. And as you can see, that just create a brand
new key frame at the start. Next I'll position the
playhead at the start of the first track and move the triangle out of
the frame to the left. And then I'll repeat the step on the second track and move the
astract out of the frame. As you can see when I tap play, all my shapes will
animate into the frame. But to push the
animation further, I'm going to add some
easing to set easing. Just tap and hold in between the key frames you wish
to apply the easing to. Tap set easing and then choose the easing
you want to apply. I'm going to go with ease
out so the animation will start fast before
gradually slowing down. Next, I'll repeat this step to apply easing to the
rest of my shapes. Next I'll tap play to
review the animation. And I realize that
it's moving too slow. So I'm going to collapse
the key frames and move the second key
frame of each track up earlier in the
timeline to frame seven. By shortening the distance
of the key frames, it will speed up the movement. Now I'm going to add
some playfulness by adding an overshoot
to the movement. Overshoot is when
an object that is stopping will miss the stop
point a bit before stopping. Eventually, this gives the
animation some bounciness. So on the top track, I'm going to move the playhead a couple frames behind
the last frame. And I will tap on
my triangle shape and drag it over past
its original stop, which will create
a new keyframe. Next, I will drag
the new key frame, a couple of frames before
the final key frame, which ends up being framed for. And as you can see here, the triangle now overshoots a little before resting
in the final position. Next, I'll repeat the process on the second track and
move the asterisk down a bit and will reposition the overshoot key
frame at frame five. This way the speed of the two different shapes
will be different. I found that variation
speeds of movement will make your animation more
dynamic and interesting. Next, I'll repeat the process again for the circle object. And I'm going to set the overshoot key frame
to frame five. Lastly, I will play back
the animation to review. And that looks so much better. Just playing with easing and
adding a little overshoot in the motion has created a much
more interesting animation. Next I'm going to
show you how you can animate rotation
using key frames. Now I want to add a rotation
to the Asterix shape. So I'll click between the key
frames on the second track. And click on Expand
Moving Scale, which will separate
all the attributes so we can individually
key frame them. The last keyframe track
here, controls rotation, so I'm going to create a new keyframe and drag it
to the end of the animation. Next I'm going to tap on the corner to get
this curve line, which I will drag
clockwise twice. And then I will have
it just stop just before I reach its
original rotation. I will review the
animation and I notice that it spins quickly
and then slows down, which isn't what I want. I want it to have
a consistent spin, so I'm going to change the
easing here to linear, that way it has a nice
constant rotation. And then I will play back again. And that looks so much better. Now that I'm happy
with my animation, I'm going to show you how to export animation and
procreate dreams. First, tap on the project title to bring up movie settings. And then I will tap on Share to bring up all the export options. So I can choose my
specific video settings. I'm going to tap on Advanced
Export Custom settings. I prefer to choose my
settings so I can make sure the file is compatible
with its intended use. So now I'm going to change
the video code Ac to H 0.264 and the
container to MP four. Then I'll just tap
export. And that's it. To recap, I just
walked you through how key frame movements
of objects and how it animate rotation and how
I set easing and I shared my trick for elevating my motion with the
overshoot principle. We also walk through some
procreate basics such as file set up and how
export your animation. And the next lesson
I will walk you through my process for
developing the design.
5. Creating The Design: In this lesson, I will walk
you through my process for developing the design for
my mixed media animation. This step is where
you can really bring in your personal style. I've broken my process
into three simple phases, which is research, moodboard and laying
out the rough design. During the researching phase, I like to review inspiration and not elements that appeal
to me in my style. I'll also gather
assets from sites like unsplash or take
my own pictures. After I've gathered
ideas and assets, I will make some quick
mood boards to help me start defining the look and
a static of the project. An important note
about the step is that you'll see throughout
my examples that I don't include any inspiration or mixed media references
in my mood boards. This way I'm not being influenced
by other people's work, allowing me to keep my projects unique and to showcase my style. Let's take a look
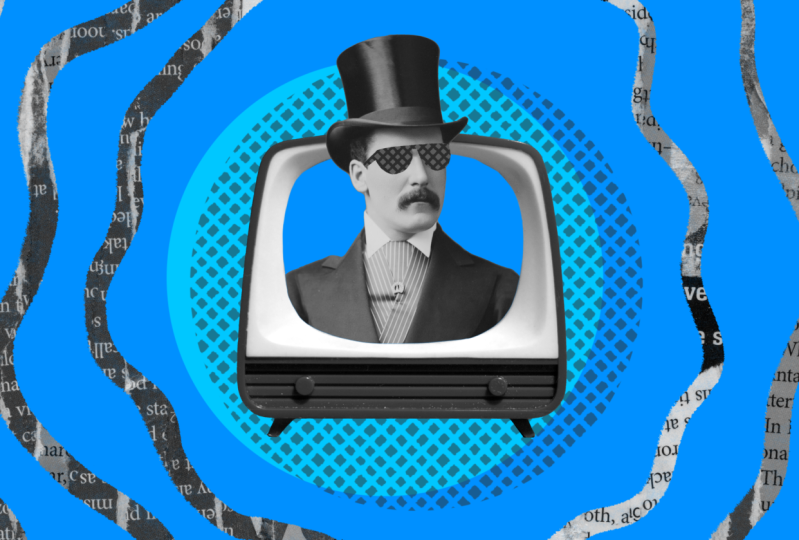
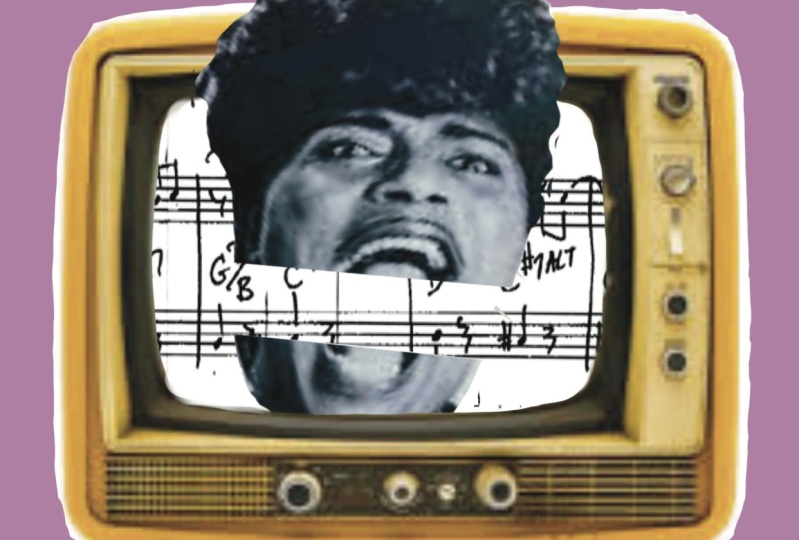
at the mood boards. For the first case study, I went with a retro
mid century theme, with vintage photos, paired with half tone patterns
and a paper collage. Then I pulled in
blocks of colors to speak to what colors
I wanted to use. And all these elements
really speak to me. I've always loved the
mid century design and the colors are all based off
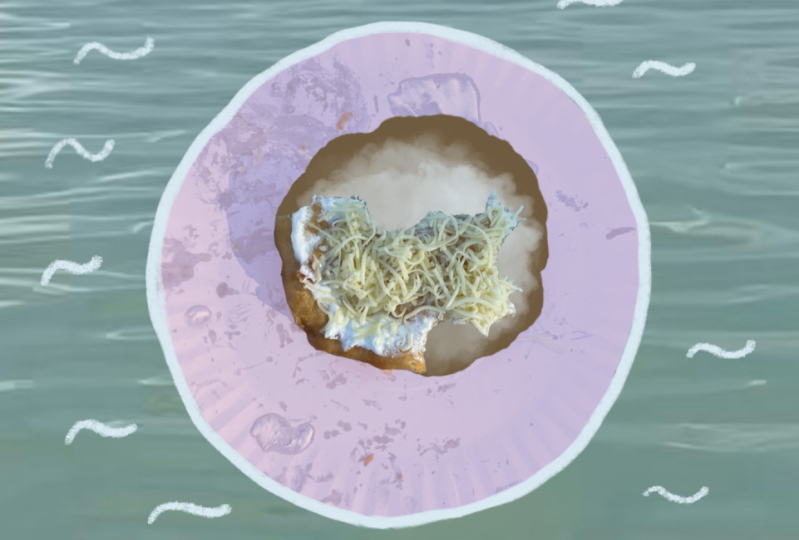
of my personal branding. For the second case study, I wanted the visual style to be bright, bold, and colorful. I want to play up the
theme of ice cream. So I picked other
assets that had colors that reminded me of
different ice cream flavors. You can also see
here that I've added energetic hand drawn marks
and scribbles throughout. Lastly, I'll call out that I included this dripping
ice cream image. I love opportunities to include liquid or dripping
animation in my projects, so this will serve as a
nice reference image. I love incorporating space
elements into my projects. For the third example, I collect a space image with a space mand and a
hand drawn rocket. I also knew for this
project that I wanted to do a colorful collage reveal, so I have multiple
distinct assets to create a cool animation. And as you can see, all three of these
mood boards bring in very different and unique
themes and elements. I enjoy. Now I'm ready to create rough
layouts of each project, so let's take a look
at the first one. As you can see, I've taken my elements from
my mood board and made some changes like making the color images
black and white. I've also brought in some
circular elements and I incorporate these wavy lines that I use a lot in my work. I also didn't end up
using this pattern. That's the nice thing about mood boards is that it
allows you to gather your ideas while still having
freedom to push it further. Here's my second rough design, side by side with
the mood board. As you can see, this project has a lot of different elements. From image textures to hand drawn shapes and
hand drawn doodle. There's a lot of elements that
I will be able to loop and rotate to create some fun,
energetic animations. As you can see here, I have this dripping ice cream
shaped clipping mask, which will become a
really cool animation. And the last project is going to be a more advanced animation. So for the composition, I laid out one style frame where you can see
all the elements. This allows me to figure out
how the collage will come together and everything will look when you start
seeing the reveal. I definitely recommend
that if you're planning a more complicated animation
with a live change in movement to pick a key
frame or storyboard that showcases your big
elements to recount. We just discussed my process
for creating the design, beginning with inspiration, research, and gathering assets. Then I walked you through three different
moodboard examples. And then I walk you through the layout design of
all three examples. If you're new to mixed media, I definitely recommend
you taking the time to research and create a moodboard to help you create your design. In the next lesson, I
will walk you through how I animated my first project.
6. Case Study 1: Simple Animation: In our first case study, I will walk you
through my process for animating the simple
animation project. Once I have my design created, I like to take time to
plan out the animation. It's important to plan
out your animation. So when you dive
into the software, you already know what to do, what to expect, and how to integrate the things
you're going to animate. And all of that is going
to save you a lot of time. So for this project I'm
planning on turning the cross stitching patterns here and
here into looping animations. I'll also make the
paper texture inside the wiggly lines into
looping animations as well. Since I'm keeping this
animation simple, I'll keep all the
other elements static. Now let's dive into
the project and start laying out the assets
for this project. I'm using four K wide screen, 12 frames per second in
a duration of 3 seconds. So first I will
import my assets by tapping on the plus icon
to get all the ad options. Depending on where you
saved your images, you will either tap
on photos or files. And then I'll select all
my images and tap open. Next, I will drag each image
into a separate track tip. Since Dreams doesn't
have any shape tools, I'm going to make my
circle and procreate. I will go into a blank
file and procreate and use the Select ellipse tool to
quickly create a circle. And then I will drag that
over to Procreate Dreams. Next, I'm going to
fill duration on all my static
elements since they will stay the same
throughout the video. Next, I'll add the
blue background by creating a new track. And I'll tap and hold on the empty track and
drag it to the bottom. Now I can select my color
and then tap and drag the color circle to the canvas
to fill the background. Then I'll fill Duration, since the background
will also be static. Now that I have all
my assets in place, I will start to get
them all into layout. I'll move the circle
backwards and then I'll start resizing and
positioning my images. Here's where having already made that design comes in handy as you can reference
your design. Next I'm going to tap on the check mark to
hide the top hat guy. And then I will create a
new track below him and draw the blue shape
for my TV screen. And I'm going to go into flip book mode so I have
more space to draw. And then I will
switch my brush to mono line so I can get
a nice clean edge. Once done drawing the outline, I will use color drop
to fill in the shape. Once again, I'll
use field duration, since this will be a static
object that won't be moving. Next I'm going to create the layer mask for
the top hat guy, it looks like he's
coming out of the TV. I'm going to duplicate the blue shape that
I just created. And I will draw
around the top of the guy and make sure
it's all filled in. Next, I'll move the shape
over the guy's image. Then I will tap and
hold, then tap mask. Then here we have the options of using clipping mask
or layer mask. Since I just want to control
the visibility of the guy, I'll use layer mask. Layer masks are great for
instances where you want to mask a layer without having
that mask shape visible. Now I'm going to
resize the cross stitch pattern to the
size of the canvas. Next, I'm going to draw
the sunglasses on my guy. Now let's animate our patterns. To start out, I'm going to move the pattern track
above the circle. And I will tap on the edge of the pattern content and drag it to the right to reduce
the duration to two frames. Next, I'm going to
duplicate the frame and reposition the pattern so there's some subtle differences. Next, I'll duplicate
the first frame again. And this time I'm going
to tap on the circle with the three dots and
hit flip horizontal. Then I will play back the animation to
review the sequence. Next I'll tap on the
timeline edit icon. I will select all three
frames by dragging the pencil across them
and I will tap group. Next, I will tap and hold on
the group to get the pop up. And I will tap duplicate. And I will keep duplicating
the group until they fill up the full
duration of that track. And once that's done, I will group all of these
groups into one long group. This way it keeps that whole animation in
just one simple group. Which will make it
easier if I need to move it around or move
it to a different track. Next, I'm going to duplicate
the circle track and drag that track over
my pattern animation. To drag tracks, you have to tap and hold on an empty
area of the track, which is why I shifted the circle content
over a little earlier. Now I'll turn the circle
into a layer mask and group both tracks with
the group selected. I'm going to move it over to
the right so it's offset, just like my design layout. Next I'm going to
tap and hold on the group and select Blend Mode. And then choose Multiply. As I want the pattern to blend in better with
the background. I will do some
additional repositioning of the pattern until
I get it just right. Next I'm going to add the
pattern to the sunglasses, which I'll do by creating
a new track over the glasses and pasting
the animation group in it. Since I want the animation to be clipped to the sunglasses below. This time I'm going to use
the clipping mask option. Now the pattern animation will only be visible
over the glasses. Lastly, I'm going to select
the pattern group and we'll resize it to better fit
the size of the glasses. Next, I'm going
to add the wiggle shaped text paper animation. First I will add two new tracks above the background
and then I'll go into flip book mode and
change my brush to tinderbox. I like using tinderbox
brush as it has nice rough edges which feels appropriate for the
torn paper aesthetic. And I will go ahead and
draw all the wiggle lines. Once done, I will exit flip book mode and will fill the duration of
the wiggle lines. Next, I will tap
in the blank track above and import the
text paper image. And I will zoom out
in the timelines by taking three fingers
and dragging them. Next, I will drag the
edge of the content to the right until it's
only two frames long. And once again, I will duplicate the content and we'll
flip it horizontal. Next, I will duplicate
the second frame, and this time I will
tap on flip vertical. This will make all
three frames different. Once again, I will group
the sequence and then duplicate the groups until it fills the full
duration of the track. Next, I'm going to
tap and hold on the group to get the
content options. And I realize I need to select the group to
get the full options. If you're not seeing
the full options, make sure to deselect. And now I can tap on the group to pull up
the full options. Now I can tap on
mask and clipping mask to clip the group
animation to the wiggle lines. Next I'm going to go
the Blend Mode options and then go all the way
down to Luminosity. This will make the image black
and white, and that's it. To recap, we walk through
my process for making a simple animation that utilized looping animations and
layer and clipping masks. In the next case study, I will walk you
through my process for animating and intermediate
animation project.
7. Case Study 2: Intermediate Animation: In this case study, I will walk you
through my process for animating an
intermediate project. As with the previous project, I will start out by
planning the animation. I'm planning to use repeating animations
for the background, the text paper underlay,
and the doodles. I will also loop the
flower rotation as well as giving a looping movement to the hand holding
the ice cream, almost like it's
waving the ice cream. And to really elevate
this animation, I'm going to use
straight ahead animation by creating a cool ice
cream drip animation. And now that I have a plan, let's gather the assets
for the ice cream. I'm going to use the
selection tool in procrate to cut out the
object from its background. And just like with
the previous project, I will drag my isolated
ice cream hand layer from procrate into a blank
pile and procrate dreams. And then I will just drag the edge divider over
to get rid of Procr. Now I'll do a quick resize and move the image over
to the right side. Next, I'm going to import
all my image assets from my files and then rearrange
them into separate tracks. The first element I'll animate is the looping
background animation. To help me better
see the background, I'm going to toggle off
some of the other layers. Next, I'm going to
scale up and reposition the image until I get a similar result to
my reference design. Next, I'm going to duplicate
the image and rotate it. I'm just trying to make that secondary frames different to
create a subtle animation. I'll then repeat this step and duplicate and reposition
the third frame. Next, I'm going to
reduce the frame lens. Next, I'll zoom in
on the timeline, So I can just play
back the portion of the timeline that
my sequence is in. I'm happy with the result, so I'm going to go ahead fill the duration
of the track by grouping the sequence and duplicating the
group several times. This is a big reason why I use short durations
for my animations. It definitely helps
reduce that work needed to create full
looping animations. Now let's animate the
ice cream animation. First, I'll add a
new empty track above the ice cream image. And then I'll switch to drawing mode and
enter the flip book. And since I want the edges
to be clean and smooth, I'm going to use the
monoline brush again. And since this will
become a mask, it doesn't matter
what color you use. I'm going with a dark color, so it stands out against
the bright background. For the first frame,
I'm going to draw the basic shape of the ice
cream without any dripping. And after filling in the shape, I'll tap on the second frame. And to help me continue drawing, I'm going to use onion
skins by tapping on the time samp in the
bottom right corner. And on the pop up, I will make sure that the onion skins are
on which they are. Next I'll tap on
Edit onion skin, and I will increase the
opacity and play around with the color options until I find one that pops
on the background. Onion skin is nice
as it helps you see a light version of the
previous or future frame, making it easier to
align your drawings. I'm going to start by tracing the edge of the
previous drawing. And as I get to the
bottom of the ice cream, I'm going to start drawing some small drips beginning to form and will
fill in the shape. Next, I'll tap on
the next frame, and this time I will redraw the ice cream and I will
draw the top a little lower and increase the
size of the drips to show that the ice cream
is continuing to melt. Once again, I will
fill in the shape. In the next frame, I will start creating
disconnected drops. With each frame, I'm just keeping the drawing
very organic and loose and trying to mimic how something
would drip in real life. For the third drop,
I'm going to draw it like it's sliding
down the thumb. This will give the animation
some depth and dimension. Then I will redraw the
rest of the ice cream. In the next frame, I'm going to redraw the ice cream
with drips extending and stretch the
drops further down to show them moving
faster as they fall. In the next frame,
I'll first redraw the drop smaller
and further down. For the third drop, I will draw it as if it's
dropping around the finger. Then I will work on drawing
the shape of the ice cream. And we'll continue stretching
the connected drips, and then we'll
fill in the shape. And I'm feeling pretty good
with what I have so far, so I'm going to exit
the flip book mode. And tap on timeline head it, so I can select the full
sequence of frames. And then I will drag it to extend each drawing
to two frames long. And then I will group them and
duplicate the groups until the animation repeats for
a total of 3 seconds. Because Dreams has a
limit on subgroups, I'm going to go
into my large group and ungroup all the groups. So it just has the
individual frames. I try to limit the subgroups and more complex animations
like this project. Next I'm going to
work on creating the looping texture animation that will get clipped to
the ice cream animation. The first thing I
will do is drag the abstract paint
image above my frames, which will create
a new track above. Next, I'm going to tap on the content to make
it a clipping mask. I do this so that
it helps me see how this image will look when it's clipped to the
ice cream shape. Which is really going
to help me as I resize and adjust the
image to best fit. Once satisfied, I'm
going to reduce the length of the image
to two frames long. And as with the other
looping animations, I will duplicate the content
and reposition the image. Next, I'll repeat the
previous step and duplicate and reposition
the new frame. Once done, I will skim through the timeline to see how
that sequence looks. And that looks good to me. So I'm going to go group
the sequence of frames. And then I'll turn the final
group into a clipping mask. Since I'll be turning that final group into
a clipping mask, I'm going to go into the group toggle off the mask
in each frame. Next, I'll duplicate the group until it fills the
full duration. Now I'll group all the
groups into one big group. Just like before, I'll ungroup
all the interior groups, so we just have those
individual files. Once done, I will tap on the large group and make
it a clipping mask. And now that group animation is clipped to the ice
cream frames below it. Last thing I'll do with
the ice cream animation is to add an animate
hand drawn outline. This will help the ice cream pop out against the background. So I'll add a new track
above the ice cream group. And then in the flip
book mode, using white, I will draw an outline
around the full shape. And then I will redraw
the outline five times, skipping a frame each time. Once done, I will
return to the timeline. And we'll select
all the frames and extend them so they're
two frames long. And then I'll group them
and duplicate the groups. And once again, I'll ungroup all the interior groups
of the animation. So we just have the
individual frames in that final group. Next I'll do some
clean up by grouping all the ice cream groups into one group and renaming
it to make it easier. Fine, also delete
the empty tracks. To start out, I'm going to
extend the text paper frame. Then I'll toggle on its visibility by tapping the check mark in the
top right corner. Since I want the
background texture to overlay the text paper, I'm going to make the
layer transparent. I'll tap on the
red playhead icon and select filters
in the middle. And the first option is opacity, which I'll slide over to reduce the opacity
of the content. I'm not moving towards
a specific number, I'm just looking at
what looks best and I end up at 60% Next, I'm going to adjust the
canvas background color. To do this, I will tap on the time stamp to get
the stage options. Then tap on background color, and I will change
the color to purple. This change will allow
the background to align better with my
rough design reference. Now with the text
paper image selected, I'm going to start
repositioning it until I get a big chunk
of the smaller text, similar to my design example. Next, I'm going to add a new track above it
to make a layer mask. Next, I'm going to change my brush to the dreams
default brush shell. As I like the range of
texture I can get from it. And to help me better see
what I'm going to do, I will hide the ice
cream group for now. And I'm going to just brush
over the area of the text, creating a nice,
solid, decent stroke. And I will redraw this twice, and then I will group
the sequence of frames and duplicate them
to fill the duration. Once done, I will turn the
group into a layer mask. Now only that portion of the
text paper image is visible. And then I'll group them. Now I'm going to
add the sweet text. I'll first add a new
track and then I'll tap on the ad options
and then text. This will give me a text box and I will type the word sweet. I definitely don't want
to use this default. Font. So I will
make sure to select all the texts and tap the A's icon over
here in the corner. This will pull up the
text styling options. And I'm going to change
the font to impact. I like to use chunky
font so they are bold and stand out in my
mixed media projects. Next, I'm going to scale
up the font and get it into the right
position I want it. Next, I'm going to change
the color by selecting the text and clicking
on the double as icon. And this time I'll select a
pink color from the color Will and then hit Done to it. Since I don't want
the background applied to the sweet text, I'm going to drag the text
above the background layer. And then after looking at this, I've decided I'm going
to adjust the color to a brighter pink just to
make it puff even more. Now that I'm done
with this part, I will toggle back
on the ice cream. Next, I'm going to add the rotating flour
in a blank track. I'm going to enter
the drawing mode and quickly draw the shape. And since I won't be doing any frame animations
with the shape, I'll just extend the frame
for the full duration. Next, I'm going to add the
repeating scribble animation. I'll add a new track. And using the
monoline brush again, I'll draw out some
random scribble lines. Since this is a random
repeating animation, I'll move the playhead to
the next empty frame and redraw the scribble lines and repeat the process
for the third frame. Next, I'll group and duplicate the groups to loop my sequence
for the full duration. Next, I'm going to tap on the large group and turn
it into a clipping mask, so the animation is clipped
to the flower shape. As I've done previously, I will go inside the group and ungroup all the interior groups. I just have the
individual frames which will keep my
total subgroups low. Lastly, I will group the flower shape and the
clipping mask into one group. And with all the work
I've done so far, I'm going to take a
moment to playpack the animation to review
how everything looks. Now I'm going to add the
spin to the flower shape. So I'll start by adding a key frame to the
start of the time line. Next, I'm going to
add a key frame at the end of the timeline
on the rotating track. Before I can rotate the shape, I will need to make sure that my anchor is at the
center of the object. The anchor is going to be the origin or the center
point of your rotation. If it's not in the
center of your object, then your object
is just going to rotate around that point. Now I can rotate the shape
for a full rotation. Next, I'm going to
review the animation. And I instantly notice the
movement looks awkward. So I'm going to
adjust the easing. I'm going to select
linear as I want it to be just a smooth constant
speed as it spins. And that is looking
so much better. The last step will be to add the hand drawn doodles
and scribbles. This will be just like the
pink scribble animation I did for the flowers. So I'll start by drawing
different doodles all over. And I'm adding some elements
like the arrow and the text underlined so we have some interaction
between the elements. Once done, I will
repeat the process, but change up the
location of the elements. The animation keeps
a random fill. And then in the third frame, I will redraw the doodles again. And then once done, I will group the sequence
and duplicate it to loop the animation
for the entire duration. After that, I'm going to
reduce the opacity of my doodles to better match my design reference.
And that's it. I now have this very
sweet animation to recap. I have just walked you
through my process for creating an
animation with a lot of animated elements
that were created by combining multiple
animation techniques. And the next case said, I will walk you through a
more advanced animation.
8. Case Study 3: Complex Animation: In this case study, I'm going to walk you
through my process for animating a more
advanced animation. With the previous
animation examples, they utilized a lot of looping
or repeating animation, which kept the elements pretty much in the relative space. But for this animation, I plan to have elements
fly in and out of frame. To help me plan
out the animation, I create a quick
storyboard sketch. As you can see, I will open with a shot of an empty space. Then have my space rocket enter from the bottom
and fly out in an arc shape with the reveal animation
following directly behind it, revealing the full
animated collage. If you're interested in learning more about
storyboarding, I'd recommend you checking
out my storyboarding class. The first element I'll animate
is the space background. I'll first add a dark background
for the full duration, then I'll work on creating the repeating frame sequence
for the space texture. So I'll add a new track, and I'm going to
use a speckle brush from Esther's collection. There's a link in the
resources for this brush, and I'm going to just apply
the speckle throughout the screen to give it
a look of a night sky. Once satisfied, I will repeat the process twice to get
my looping sequence. Now I can group the sequence and duplicate the group
to fill the duration. Now I'll use frame animation and straight ahead animation to create the space
rocket animation. Since I'm going for a hand
drawn look with a rocket, I'm going to switch to the default six pencil
brush to draw it. Next, I will feel duration as I'm keeping the rocket
drawing static. Next, I will animate the rocket flames
using frame animation. I'll add a new track and
go into flip book mode. And on the first frame, I'll just draw the flames, similar to my reference design. Next, I will redraw the
flames multiple times, but vary up the length of
the flames in each frame. The changes between
frames will give the illusion that the flames
are constantly moving. And to make sure the loops don't stray too far away
from the original frame, I'm going to tap on the
first frame and paste it over here as a guide
for my last frame. Next, I'll adjust the onion skin to better see the next frame, I'll tap on the forwards tab, and I will increase opacity. So now that orange
color is easier to see, I will draw my new lines in between the
purple and orange, which will make the
loop more seamless. Next, I'll it out of flip book mode and delete
that copied frame. And then I'll group
my sequence of frames and duplicate the group to fill the duration
of the animation. Next, I'm going to group the
texture and background image to clean up my file and I'll make sure all my
groups are labeled. Now I'm going to scale down my rocket group and
move it out of frame. As discussed in the animation
fundamentals lesson, I'm going to create an animation
guide to help me create a more fluid animation for the rocket movement and
the reveal animation. So I'll add a new track
and inner flip book mode. I'm going to first
sketch out the path I'm using this bright
green color to stand out. Next, I'm going to draw
tick marks to help me plan out the timing of the
movement between frames. I'm going to start
out with a mark next to the edge of the canvas. And I will increase the
spacing between the marks. Increasing the space will create the illusion of
acceleration while decreasing the space
between tick marks will make the animation look
like it's slowing down. Which I will do with the
end of the animation. So it looks like the animation is easing out as it
leaves the screen. Now I'll exit flip
book mode and reduce the opacity in my guide to
make it easier to draw. Next I'm going to go back to the start of the
timeline and position the rocket along the path just below the edge
of the canvas. I also rotate the
Rocket to better align with the direction
of the path of the curve. Moving to the second frame, I will add a new key frame. And then I will position the Rocket at the
first tick mark. Next, I'll move to
the third frame and position the Rocket at
the second tick mark. And I will again rotate
the Rocket a little next. I will repeat this
process of repositioning and rotating the Rocket
for the fourth key frame. Then I'll add a
new key frame for the fifth frame and align
the rocket accordingly. Beginning with the
six key frame, my rocket is starting
to slow down. For frame seven through 11, I'm going to be making much smaller
adjustments each time. Starting with frame 12, the Rocket will begin
to exit the screen. And I will continue
repeating the steps until the Rocket is
fully out of frame. Now I'm going to tap play
to review the animation. Next, I'm going to animate
the collage reveal. I'll start by adding all the
images to an empty file. Next, I'll arrange each image on its track so we can create
some looping sequences. Next, I'll select all
the images and drag the edge of them until
they're all two frames long. Starting with the
dot pattern image, I'll create a three
frame sequence and then group the frames. Next, I'll apply a layer
mask to the sequence. I'll just draw the mask shape and color drop to
fill in the shape. Now I'll extend the frame
for the full duration of the sequence and turn the
content into a layer mask. Now we just see the dot pattern visible in the first area. Next I will group the layer mask and animation
sequence into one group. Next, I'll move down to the
yellow text paper image. And I'll make sure it's
positioned where I want it. Then I'll make the three
frame sequence and group it. Next, I'll draw the shape
for the layer mask. Once done, I will extend the content and make
it a layer mask. Next, I'll group the layer mask and animation sequence together. Now I can move down to the next track with the
black and white pattern. I'm going to first
rotate the image so it's in a horizontal format. Then you'll see I'm scaling
down the image a bit. Next, I'll repeat the
process to duplicate the content to create the
frames for the sequence. Once again, I will draw
the layer mask and convert the content into a layer mask for the black and white
animation sequence. Next, I will group
them into one group. Now I'll move on to making
the last looping animation. I'll start by rotating and positioning image
where I want it. Next, I'll create the second and third frames, a sequence, by duplicating and repositioning
the image each time, just like I did previously. Then I'll group the sequence. Now that I have all the
basic parts of the collage, I'm going to work on
that X animation. So I will toggle on
the image and then begin resizing and moving the
image to where I want it. Next, I'm going to draw
the layer mask for the X and turn the layer
into a layer mask. Now I can see how look and then now seeing
it within the mask. I notice that there's more
white showing than I want. So I'm going to go back into flip book mode and I will bring the edge of the shape in
so less white will show. Next, I will create the
group frame sequence. Once I'm satisfied with
the look of the sequence, I will group the animation
with the layer mask. Last step will be to play back the animation to review
how all looks together. And now it's time to animate
the reveal mask animation. The first step will be to add a new track above the
background group. Next, I will go into
the under file and copy that full collage group and paste it back into
my space file. Now I'm going to add a new track and with a playhead at the
start of the track, I will enter into flip book mode and I will start
drawing the reveal. And as I'm drawing, I'm just trying to
have the reveal begin just under the
flames of the rocket. I'm making sure that it follows the arc of my animation guide. And in each frame, I will also try to widen
the reveal as I go. As you can see here, I'm curving the
end of my reveal. It really mimics that
animation guide. And I will continue to
repeat the process as I go. At this point, I will have just a little empty
space on each side. The next frame, I will use the color drop to
fill the full screen. Now with the
animation completed, I will return to the
timeline and I'm going to extend the last frame to fill the remainder
of the duration. Next, I will group
all the frames, and now I can convert the
group into a layer mask. Next, I'll play back the animation to review
how it all looks. After playing the animation, I noticed that the rocket
flies in really fast. And I would like to have
a little bit more time just seeing the empty
space before it comes in. This is why reviewing
the animation is really helpful as I
find that I'm always catching issues
with timing or it allows you to see if there's anything off with your elements. So to fix this,
I'm going to drag the rocket animation
group a few frames back. So it starts around frame four. And then I'll have to drag back the reveal mask to align
with the rocket as well. So it starts in the right time. And then I'm also realizing
that I need to move back the collage
animation group as well. Now everything is aligned again and starting
later in the video. And that definitely
feels a lot better. I've just made this cool
space rocket animation with a colorful collage
reveal animation. To recap, I just walked
you through my process for planning out and executing
a more complex animation. And the next lesson will walk you through
your class project.
9. Class Project: Now it's your turn to
apply the techniques and skills from this class to
create your class project. The class project is to create your own mixed media animation using one or more techniques. From this class, you also have complete freedom
with your project. Make sure I have fun with it. The project steps include
creating your rough design, planning out your animation, applying one or more
animation techniques. And lastly, to export and share your animation in
the class project. Here are some tips for
sharing your project. There are two ways to share your animation to
your class project. You could share it as a video. You can upload your video
to a video platform like Youtube or Vimeo and embed
it into your project. You can also share a link to a social post from a site like Instagram into the class
project description. The second option is to
upload an animated gift. Procate Dreams currently doesn't support exporting
animations as gifts. If you'd like to
share your gift, you could use a site
like Easy Gift or Canva to convert your
video into a gift. I have included more information on uploading your class project in the class guide PDF attached in the resources
section of the class. If you run into any questions
or problems along the way, feel free to reach out to me in the class discussion and I'll
be happy to help you out. In the final lesson, we will wrap up this class.
10. Final Thoughts: Congrats on completing
this class. I hope you have
successfully created a fun mixed media animation that you're excited to
share with the world. I really want to thank you for taking the time
to take my class. Throughout this class,
we have walked through fundamental mixed media
animation techniques. How to develop your style through research
and mood boarding. How to plan out your animations, as well as how to animate your animations and
procreate dreams. I hope this class has shown you how fun mixed media
animation can be and has inspired you to apply these skills
to future projects. I'm so excited to see
what you've created. So be sure to post your work to the project section
of this class. Sharing your project with
the skillshare community is a great way to help inspire each other
and continue growing. If you would like more classes to help you learn animation, then follow me on Skillshare and check out some of
my other classes. You can also follow me on
Youtube for fun animation, tutorials and updates on new features on
Procreate Dreams. If you enjoyed this class and
found the lessons useful, please take a moment
to leave a review. Positive reviews like yours helps other students
find the class. Thanks again for taking
this class and I hope to see you in a future
One soon, Bye for now.
 Isaiah Creates, Art Director & Motion Designer