Transcripts
1. Muted Valentine Palette: If you love muted colors and are looking for a
Valentine project, then this class is for you. Let us learn how to turn our bright pigments
into its muted version, play with different color
combinations and work on these lovely projects that
can be turned into a card, bookmark, tag, or any
customized project. Hi, I'm Bianca Lustre from
Betangas Philippines, and one of my recent
obsessions is color mixing. If you've been with me through my other classes, welcome back. And if this is your first time, hello, let's have
fun with colors. We'll start off by designing our palette and getting
inspiration online. Then we'll swatch
and test our colors. I'll share with you alternative
pigments you can use and how to mix the muted tones
using primary colors only. We'll have a quick review on color theories to
better understand why such combinations
work and test out this palette with these
abstract shape studies. To better apply what
we have learned, we'll work on these
Japanese inspired illustrations and use the
palette that we designed. I'll provide you a scanned copy and line drawings
through the class guide. Once you finish this class, you won't be held back by the
pigments in your palette. You'll have the skills to
mix custom muted colors for any reference photo you choose using the paints
that you already have. So if you're ready
to learn more, grab your materials,
download the class guide, and I'll see you
in the next video.
2. What We'll Do: Our goal for this
class is simple. Use a muted palette for
our Valentine projects. You have a few options in
uploading your class project. You can either
upload a swatch of your selected pigments as
long as they are muted. You can share a photo of the three illustrations
demonstrated here or go extra by applying the muted colors on
your subject of choice. All of the materials list,
swatches, alternative colors, abstract exercises, and scanned copy of projects can be found
in the class guide. So please download that
if you haven't already. Even though I work with
watercolors primarily, I encourage you to use a medium that you're
comfortable with. Maybe you prefer guash, watercolor pencils
or colored pencils, markers, a simple graphite
pencil, or even a pen. Once you're ready, I'll
see you in the next video, and I'll share with
you how to choose your own palette and get inspiration for
your illustrations.
3. Finding Inspiration: One convenient way to get inspired in designing your own palette is by
browsing through the web. For example, going
through Google Images and searching muted
Valentine palette will give you tons of ideas. As I scroll here, what caught my attention is the combination
of reds, yellows, and purples, not the usual
pink and green combination. Now that I have a
base for my palette, the next thing that
we can decide on is the subject of
our illustration. Personally, I love
Japanese related items. For example, wood block prints. The Great Wave of
Kanagawa is one of my go tos, so
I'll choose this. I also prefer cats over dogs, so this cat figurine works. And, of course, my day isn't
complete without desserts. So let me browse some and pick what appeals
to me the most. As you can see, the process
is really personal, so you can do the
same and choose your own references or
follow and paint along. Now that we have
some inspiration and a general idea on what
we're going to create, let's start testing our
colors and see if they work.
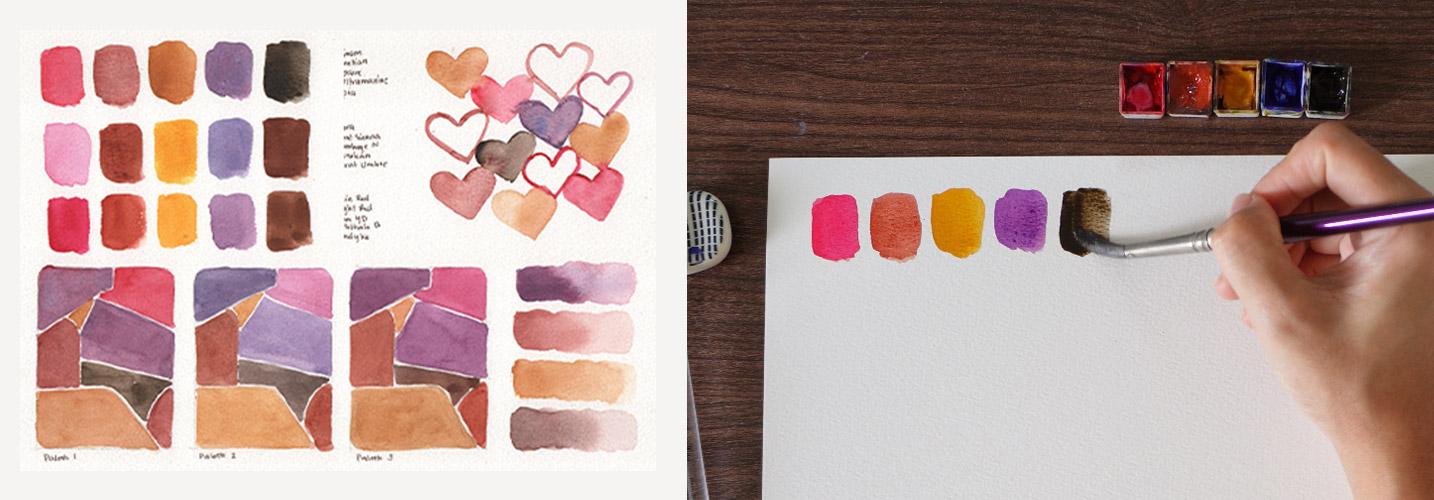
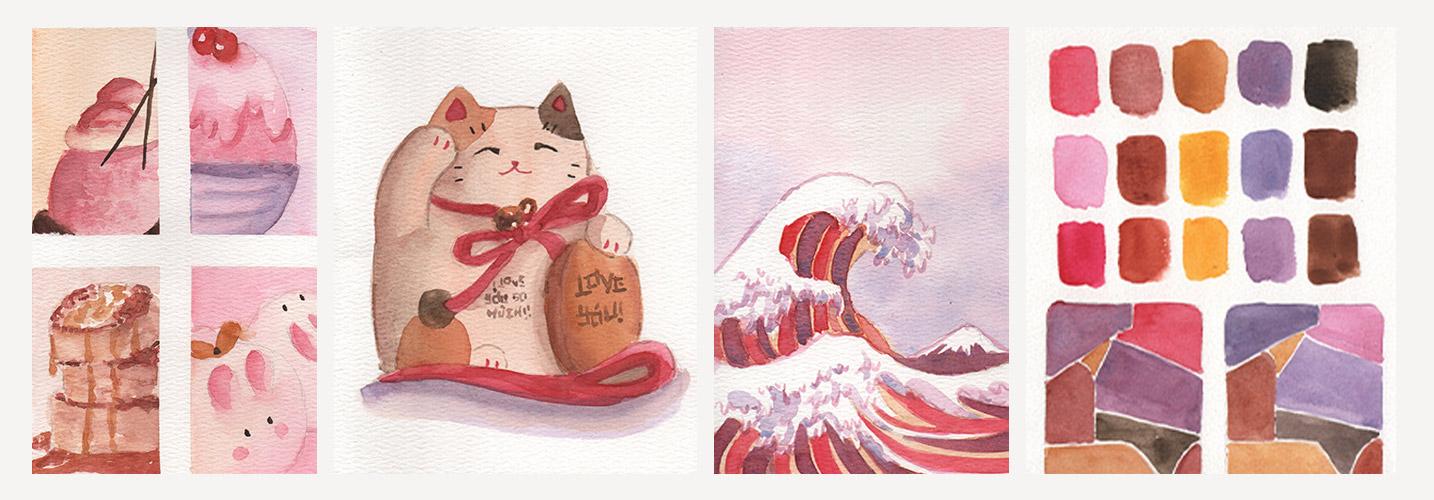
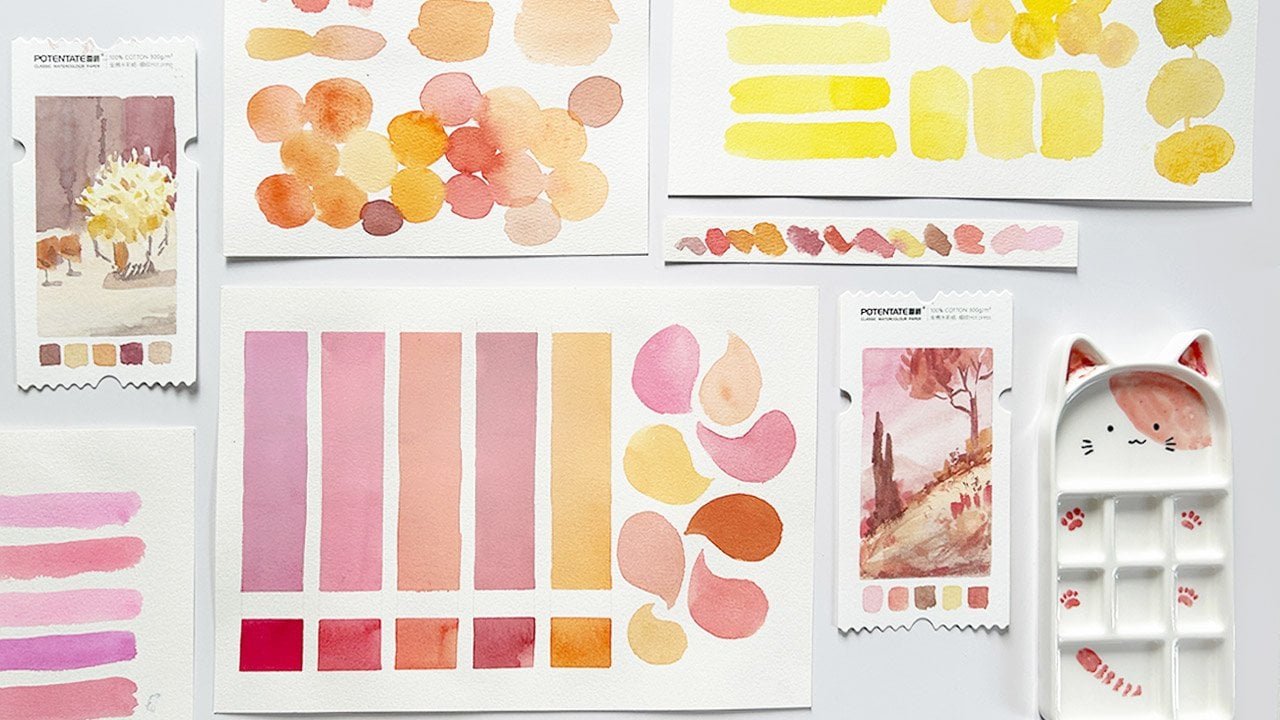
4. Alternative Colors: Here, you can see that I've
substituted a brighter pink, orange and brown, but
by adjusting them, we can still see that it's relatively close to
our original palette. For our second palette, we have Opera, burnt sienna, Gambochnova, cerulean blue mixed with opera, and burnt umber. For the third one,
I used coin red, light red, permanent
yellow deep, palo blue, and Van **** brown. So don't get too
constrained and worry. Oh, no, I don't have Venetian
red or crimson lake. Switching them with
other pigments from the same family works too. Now, let me show
you how I adjusted the colors and make them
muted or desaturated. To understand how this works, we need to revisit
the color wheel. To make a muted or desaturated
version of a color, all you have to do is mix a bit of its
complimentary color. If you've joined any of
my color mixing classes, you'll recall that
complimentary colors sit opposite each other
in the color wheel. So in this case, if you
want a muted red or pink, just mix in a bit of green, and green is a product of
mixing blue and yellow. Of course, you can use other
pre mixed greens, too. As you can see here,
just a tiny bit of green added to my pink
already made a difference. Don't add too much, or it will muddy the color and create a neutral color instead. Of course, this can also be used as a
substitute to brown. The same goes for yellow. If your yellow is too
vibrant to your liking, add a bit of its compliment, which is purple and you will
be able to tone it down. Next, let's try creating a
muted version of orange. The compliment of
orange is blue. Then let's mix in a bit of blue. This will immediately create
a muted version of orange. Again, remember to
add just a bit, or it will turn
into brown instead. Now to mix brown, which we have already
seen earlier, we can mix all of the primaries, and it will result
in a neutral color. Let's see what kind
of neutral shade the primaries will produce. Of course, depending on
the pigments you use, the resulting colors will vary. If you have other
pigments available to you, have fun experimenting, mixing and matching your
primaries and once ready, see you in the next video
for our first class project.
5. Testing the Colors: The first thing that we
have to do when trying out a new combination is see
if they work together. I like to swatch
pigments closest to the reference
palette side by side, following the rainbow pattern, RojebevRd, orange,
yellow, green, blue, indigo, and violet. In this instance,
starting with my pink, I chose Crimson Lake, followed by my
orange, Venetian red. Yes, the name mentions red, but it looks orange. Then yellow. I
chose yellow ochre. Purple, a combination of crimson lake and
ultramarine blue. Of course, you can pick a
ready mix of purple, too. But the reference palette
seems to be missing something. Yes, we need something dark. You can either choose
a darker version of any of the colors here. To make it simpler, I'll
pick sepia or brown, a darker version of orange. Checking the color wheel, we'll see why this
combination looks good. Pink or red, orange and yellow are placed
next to each other, and they are called
analogous colors. For additional contrast,
we have purple, which is a complimentary
color of yellow or the color that
sits opposite yellow. This means you can also
substitute purple with blue, which lies opposite
orange or green, which is a compliment of red, and it will still look good. Now that we understand the theory behind
this combination, let's do some exercises
before the actual painting. Let's create abstract shapes. This one is not based
on imagination. I looked around and found
interesting shapes around me. Then I will simplify the
shapes and fill them in with the colors that
we swatched earlier. It's a great way to see
if this combination will work without fully
committing to it. Need to fuss around
or get too technical. Just look around and see
shapes that appeal to you. Our goal here is to see how these colors will
turn out when placed side by side in varying
sizes and shapes. I have done this for
other colors, too. This one doesn't look so good, so I save time by testing out
this combination first with abstract shapes
rather than getting frustrated and working on
a painting right away, only to find out that
this palette won't work. So go ahead, look around you, find fun shapes to work with, and fill those up with
your muted colors. In the next video, let's discuss what
alternative colors you can use and how to mix them
using primary colors only.
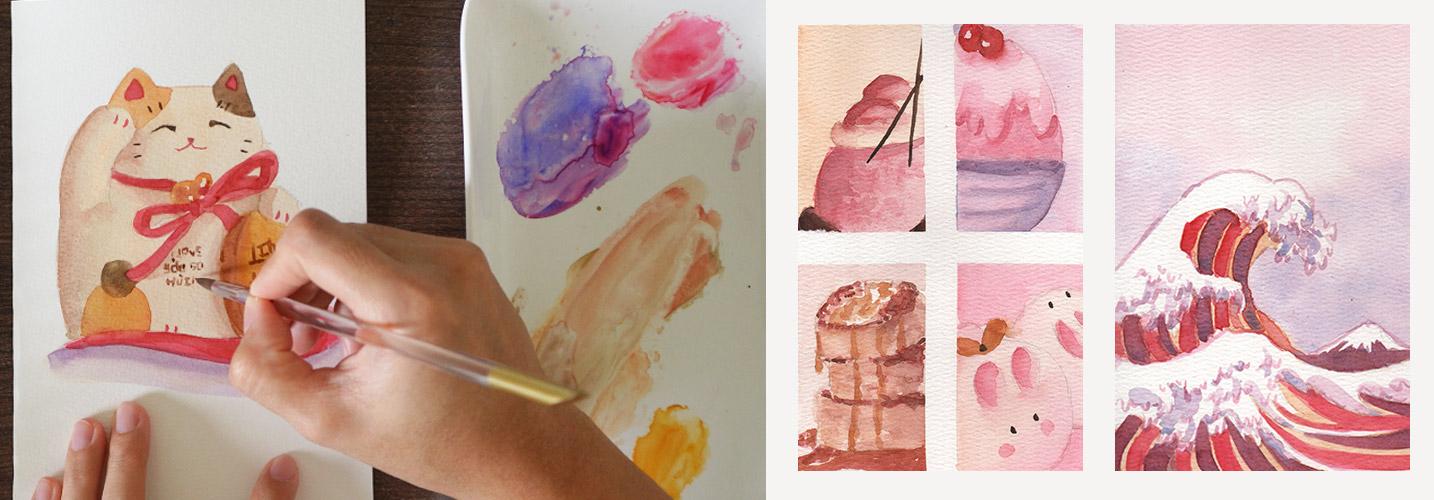
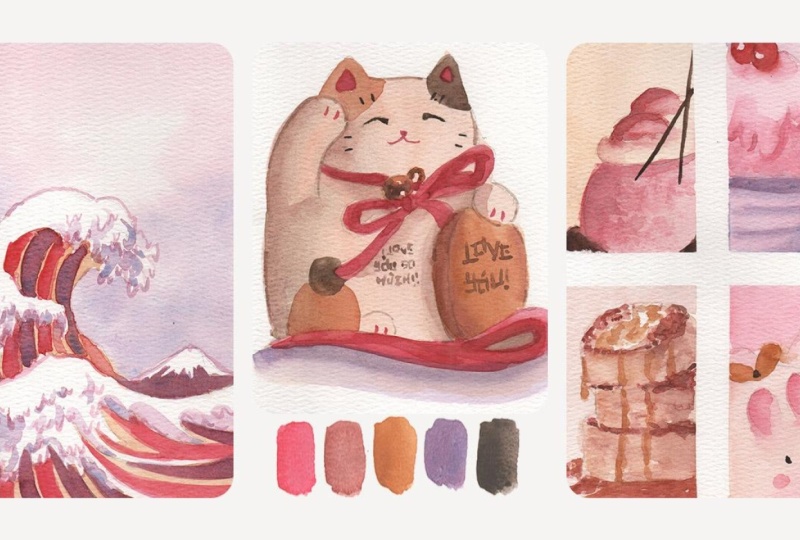
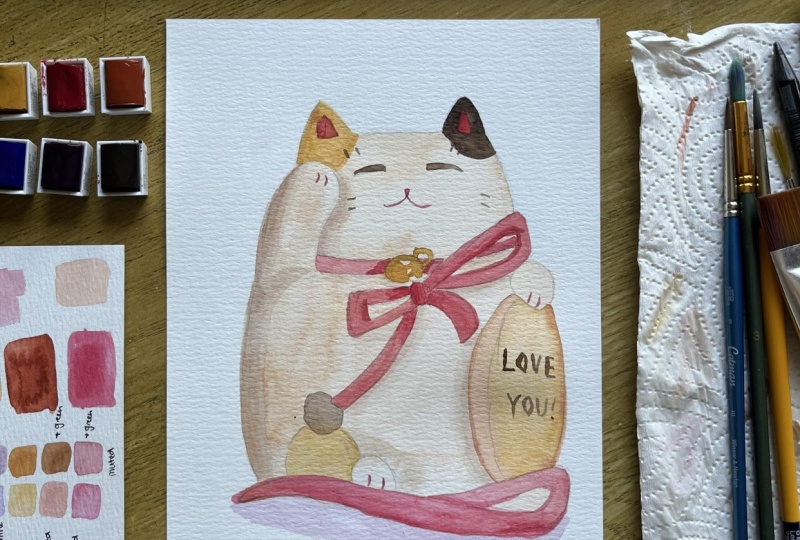
6. Project 1 - Lucky Cat: Let's start with this cute, lucky cat figuring or
what's called ManekiNco. I folded a seven by ten
watercolor paper in half and drew a simple sketch
of this cat at the front. I have a mini study here where I tried painting it with
a light brown base, and I kind of like the
muted look on this one. So let's try and replicate
it with some slight changes. Let's start off with
a water mixture of yellow ochre
and Venetian red. This is a lighter base
compared to the mini study, and I like that it's close
to a flesh or skin tone. Since this is a
very light mixture, let us cover the whole
illustration with this color. Once dry, it will
look even lighter. At this stage, you don't need to worry too much about the
tiny details like the bell, the marking, or its face. Just aim for an even coverage
using a single shade. Then go ahead and mix
a bit of sepia or any brown pigment to the yellow and red mixture
to darken it a bit. Drop that color on some parts to add
volume to this shape. Go for the left side of its body and arm and do the same
thing on its face. Use this color for the
contact shadow that its color and the
ribbon are creating, as well as the gold coin
that it is holding. Don't forget the
ribbon at the bottom. Retouch if needed, and don't worry about copying exactly
as I'm doing, okay? Relax and enjoy the process. While waiting for the
other parts to dry, load your brush with purple. You can use a ready mix or a
combination of your pink and blue and add a shadow
below the Cat figurine. Then at this point, pause
and analyze your painting. Has some parts started drying? If yes, then we can
continue working on it. If not, then please be patient and allow the
first layer to dry. In my case, this
layer has dried fast. So I am loading my brush with a pink and a bit of yellow
just enough to turn it into a reddish tone and color in the parts
where red is needed. I'm going for its
ears and the ribbon. Remember to go carefully around the bell and let's try
our best to leave it out. Paper dries fast, so I will
go for another layer of the same color just to make some parts even
brighter and bolder. A good contrast for
the pale base color. The ribbon really pops out
when we add those shadows too. And don't forget to
color in the ribbon at the bottom and do
the same technique. Paint directly and add some
shadows when it's dry. Now it's time to color
in that gold coin. This coin was actually
from the Edo period, and what's originally written
on it has something to do about wishing for
wealth and prosperity. But since we are using this
cat as an inspiration for a Valentine card or generally a card for
someone we care about, we will be replacing
those characters. So don't worry about rewriting those complicated Kanji
characters, okay? Add back Venetian
red on our palette and use that to define
the volume of the coin. I originally used Sepia
in my mini study, but I think it looks too dull, so replacing it with brad
gives it an extra vibrancy. Since we're using
the yellow pigment, let's go ahead and paint the other parts where
the same color is used, like this additional marking
that I added on the cat. Paint a not so perfect circle
for the marking and then proceed with his left ear
and lastly, the bell. If you can negatively paint around the highlights on the
bell and while it's wet, drop in some red at the
center for additional volume. Next, let's retouch the
ribbon and add some shadows. We can mix the pink
and red pigments together to make it
look even darker. Now, let's introduce Sepia or Brown to our palette
and use that for the darker parts of the cat like his right ear or the ear
to our right hand side. You'll notice that I'm also
speeding up some parts of the demo since I trust that
you observe what we're doing. We're just directly
painting and coloring in parts where a
specific shade goes. Next, retouch the shadows
using red this time. Go over the same areas
like the left arm, the left side of the body, the left side of the face, and the conduct shadows that
the ribbon and coin create. What's different here is I am
softening the edges a bit. After painting the shadows, I will rinse my brush, tap the excess water on my rag, and lightly go over the edges of the shadow shapes so they
won't end up with hard edges. Now it's time for the details. Using red, I will paint
some of its claws. Use the same color for
its nose and mouth. In real time, you'll
notice that I go slower on these details. So take as much
time as you need. For the eyes, let's
switch to sepia again and use that same color for its whiskers and the
additional marking. The lost touch is
the most fun part. Write whatever you want on the gold coin and
on the cat's body. I am writing some words of endearment but
changing the font, so it still looks like
a Japanese character. You can also add some
jubise if you prefer. This is your card, so own it and design
it as you like. And finally, add some message at the bottom bit since you
have so much space in there. If you know calligraphy, then show off your skills. But for me, I went
for a simple font, my own handwriting and
wrote a simple message. So cute. See you in the next video for
another card design.
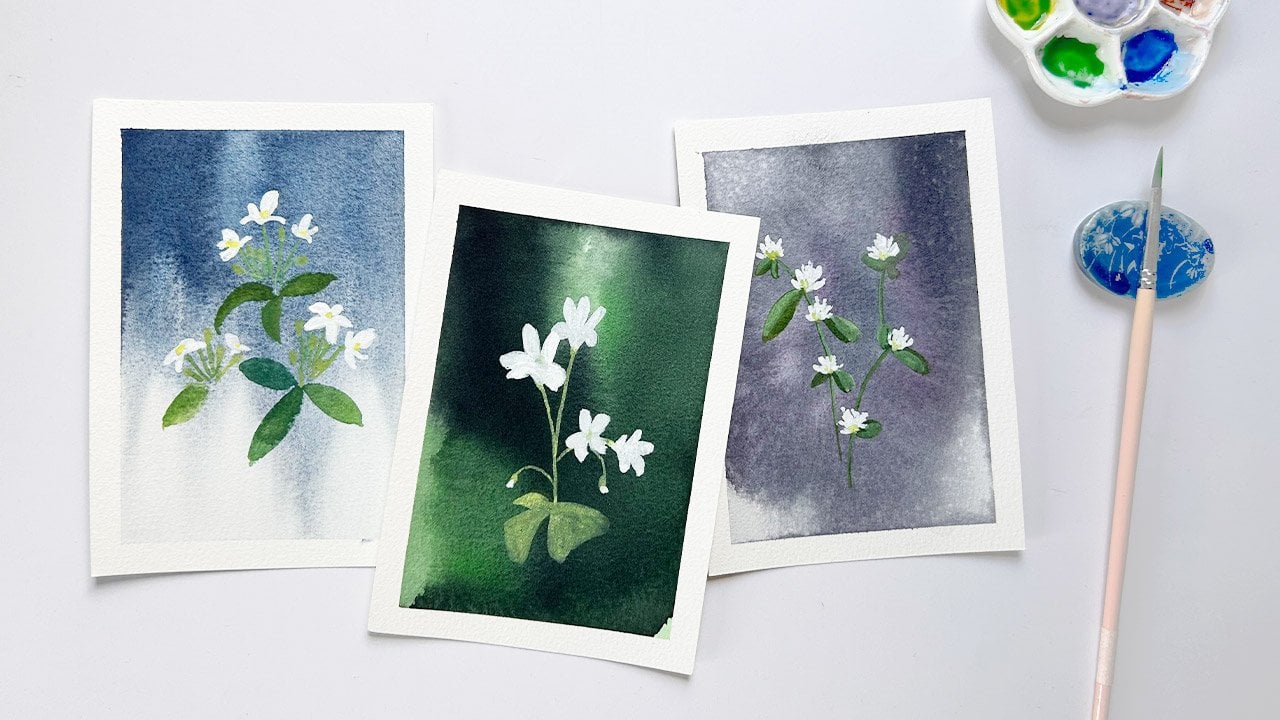
7. Project 2 - Kanagawa Wave: Another iconic Japanese artwork, the great wave of
Kanagawa by Hawksi. Let's simplify this
woodblock print and change the colors a bit to
match our muted palette. We'll start off by preparing a pale pink and purple mixture. Grab a bigger brush and wet the sky area with clean water. Then switch to a smaller one
once you reach the waves. Making sure that the
paper is evenly wet, start painting from the
top with pale pink. Leave out a white
shape for the clouds, and then switch to purple
as we reach the waves. No need to rinse your brush. Again, this blending will only work with a wet
on wet technique. So make sure that your
colors are prepared. The paper is wet enough to
allow the pigments to blend smoothly and work relatively fast before the
paper starts to dry. For this to work, it also
means that we have to really simplify the wave and ignore
those tiny water splashes. For additional
texture, you can also splatter water over
the background area. This won't be too obvious, but it adds a bit of complexity and makes this
piece more interesting. L eave the skite dry and let's work on the waves
at the bottom part. We'll start off with a pale yellow wash
and paint the waves. Leave out some white for the sea foam for
additional contrast. As you can see,
the water splashes in this part are
simplified, too. If not, then we'll need to spend so much time negatively
painting around them, which might take away the
joy of doing this loosely, and the result will be
a stiffly painted card. So don't worry too much
about the details. You can also refer to my outline drawing in the class
guide for reference. Continue doing this until you cover the darker
parts of the waves. Once you reach the top part, make sure that the background
has dried already, or the yellow will bleed through the purple color and
create unwanted blues. Switch to a pointed
tip brush if needed, as you navigate through the
narrow areas of the wave. The bottom part here
has fairly dried. So let's load our brush
with pink this time and paint a stripe pattern
that we see on the wave. Don't bother too much
where to place this color. As long as you can achieve an alternating yellow and
pink pattern, that would do. But I suggest that you
follow the direction of the wave to make it look more like the original
wood block print. Do the same for the upper wave. I'm really excited
about this project. I can't wait to send this card
to my family and friends, and I hope you feel the same
about handmade artwork. They are just so special. So now let's work on the shadows of the sea foam and use a pale purple color. More water in the mixture. You can also refer back to the original Kanagawa
wave reference to help you decide where
to place the shadows. But again, don't worry too much in creating
an exact replica. What matters most here is
that the card is handmade, which is personally, I find it rare to receive one
in this modern era. Go over the mountain in
the background, too. That's the famous
Mount Fuji for you. Add shadows using
the purple mixture. Once the pink layer has dried, we can add a glaze
of purple and do it alternately to create
more visual interest. What's left here is going over the stripe pattern once more
if you find them too pale, like what I'm doing here. And once it's done, you can mark this as completed. Or if you want more challenge, add some outlines using a brush. I am making the waves more
pronounced by defining them using the tip of my brush loaded with darker red violet mixture. If you prefer mixed media, you can also use markers, watercolor or colored pencil, or even a regular pen. Anything to make the
waves stand out more. And just like what we
did with the first card, we can add a message
and even include our loved one's name to
make it extra special. Now, let's paint some sweet
treats in the next video.
8. Project 3 - Sweet Treats: Time to paint something sweet. This time, we'll create four
mini paintings in one card. Of course, you're free to paint only one dessert or take the
challenge and paint along. I find that using
a masking tape is a must for this layout. Let's start off by painting the background color of
each food illustration. Yellow for the first one. And since the topping has
a bit of yellow on it, I'll cover that part with
a background color, too. Now for this cold dessert, I'll use purple and
cover the bowl as well. Next, mixing more water
with my venetian red and covering the
background and shadow area of the mini pancakes. For the last one, which looks
like a rabbit shaped mochi, use a pale wash of pink and go over the
shadowed areas, too. You can look for other
cute Japanese desserts, and I assure you there
are tons to choose from. Pick ones that appeal to you the most and use our muted palette. Going back to our
first illustration, I mixed my Venetian red and crimson or pink plus
red for the base color. Paint the whole shape directly, and for additional texture, use this cumbling
technique where you repeatedly dab the tip of
your brush on the paper. I'm also doing it wet on wet. For the cold dessert, which looks like ice shavings, cover the top bit with
a light pink color. Add more water to the mixture
and leave this to dry. Going back to the pancakes, use a light yellow color
for the base while leaving out this shape at the
top for the butter. Add some shadows
while still wet. Mix the remaining
Venetian red and sepia and drop it on
the shapes while wet. Let the colors blend. Now for the bunny, I will mix yellow and pink and add more water
for the base color. We can also reinforce
the shadow by painting it wet on
wet with pink color. Now, you'll observe
that since we're working on multiple mini
illustrations at the same time, it only makes sense to work on them alternately rather than waiting for one layer to dry and working on the same
illustration at a time. So going back to
the first dessert, color in the slices of
fruit at the top with red. Add shadows to build the volume. You can also use the
tip of your fingers and tap to spread the
colors and add texture. It's a bit messy, but it's fun. Add back sepia and use
that for the base. If you find this too doll, you can also mix a bit
of pink with your brown. Drop darker red colors on the fruit and retouch
the texture if needed. For the cold dessert, load your brush
with darker pink. This means more
pigment than water, and negatively paint
around the toppings. Add some texture
on the ball with a purple mixture and soften
the edges if needed. Retouch the bowl with another glaze of purple
if it turns out pale. Build up the volume by repeatedly adding
another layer of paint. Mix pink and yellow to achieve red and color in the
fruit at the top. Eave this to dry and let's add the darker parts
on our pancakes. Using a stronger
Venetian red mixture or other muted orange pigment, define the darker parts in
the pancakes like the top, the divisions, the
syrup that overflowed. And use a lighter version of that color for the
base of the pancake. Tap your finger for
additional texture and keep adjusting
as you see fit. With the yellow pigment,
paint the butter at the top and use that to add some of the
overflowing syrup. Retouch with another glaze of the orange pigment and
from time to time, add sepia to for contrast. Loading back yellow to my
brush to redefine the zero. The process is almost the same. Just add more and more layers if the painting
still looks pale. Now that the first
illustration has dried, the colors look lighter. So if the same happens to you, you can always add
another layer of paint. Let us do the same for
the second sweet treat. And I'll keep referencing and checking my mini
study for reference. Redefine the shadows with
a light pink mixture, then drop a darker
version of that for the contact shadow
of the toppings. Retouch as needed. Now it's time for
the bonnies Color in the ears with pink and soften the other
side for contrast. Use the same color
for the blush on its cheek and do the same thing on the
other bonny behind it. The next steps would
be final retouching as we observe which part
seems dull or light, which parts need more texture or vibrancy and which parts
need some details. Enjoy this step,
and I hope you're having fun as much as I
enjoyed creating these cards. I'm smiling to
myself as I think of my family and friends who
will receive these cards. Anything handmade is highly
appreciated these days. So be proud of
your work and look forward to the happy faces
that they will create. Have fun adding details, and I'll see you
in the next video, and let's discuss what
you can do from here.
9. What to do From Here: But good job in
completing this class. How do you feel about
your mixing skills? Did you like the muted palette? If you'd like to continue
using this combination, then go ahead and try
other card designs. But don't forget to upload
your project first, okay? And if you have spare
time, a class review will help me improve
my future classes too. If there's one key
takeaway from this class, that is swatching is
never a waste of time. It is your most
valuable preparation. By exploring color
combinations first, you don't just hone
your mixing skills. You build the exact
knowledge needed to choose the right pigments for any
subject with confidence. So if you want to learn
more about color mixing, I have other classes
where you'll have lots of opportunities to mix and discover different
color combinations. Looking forward to seeing you in my other classes, and together, let's make this world
a little bit more colorful with our artwork.
 Bianca Luztre, Watercolor, Productivity, Color Mixing