Transcripts
1. Welcome to this Class: More often than not, when they come across
daily painting challenges, we assumed that we must complete
one painting every day. But that's hard. So I want to propose an
alternative approach. What if we can still cultivate
the habit of painting daily by creating just
one art work a week. Will you take that challenge? Hello, my name is
Bianca new string and I am an aspiring artist from
beta1 does Philippines. Starting in 2018, I made
it a habit to paint every day and dedicated a few minutes each day to
work with watercolors. My practicing daily, I
have honed my skills, expanded my creativity
and develop a sense of discipline and
commitment to my craft. Through this regular
painting routine, I have discovered the
joy of self-expression and satisfaction in seeing
my progress as an artist. During this class, I
will share with you the very same tricks
and techniques that have helped me develop
the habit of painting. Namely, by following
this methods used to can commit to our
regular painting routine, improve your skills and a
niche your grade devotee. I will share my insights
on how to overcome the common obstacles that
can hinder your progress. Such as me see schedules, distractions, or a
lack of inspiration. To apply what we have learned and cultivating the habit
of native painting. We will work on these
two little piece in Sweetwater corners
might painting one layer for your name. As an added bonus, all students to
upload the project will receive a free
water color workbook. This valuable resource
includes a month's worth of Danny painting guy to support you in
achieving your goals. Whether you're a beginner
or unexperienced artist. I believe that this
class can benefit anyone looking to cultivate
a daily painting habit. So let's get started in a knock your full potential
as an artist.
2. Why Paint Daily?: It is crucial to recognize
that the objective of this challenge is to establish a routine and develop
the habit regularly, rather than solely focusing on the quantity of
artwork produced. By committing to
painting once a week, you will reap the benefits such as building
creative momentum, refining your skills, and
fostering self-discipline. Moreover, producing one painting each week may enable you to allocate more time to refining your techniques and
experimenting new styles, rather than feeling pressured to churn out a new piece each day. This approach can result in a more intentional and
well-executed art work that reflects your unique
artistic vision and voice.
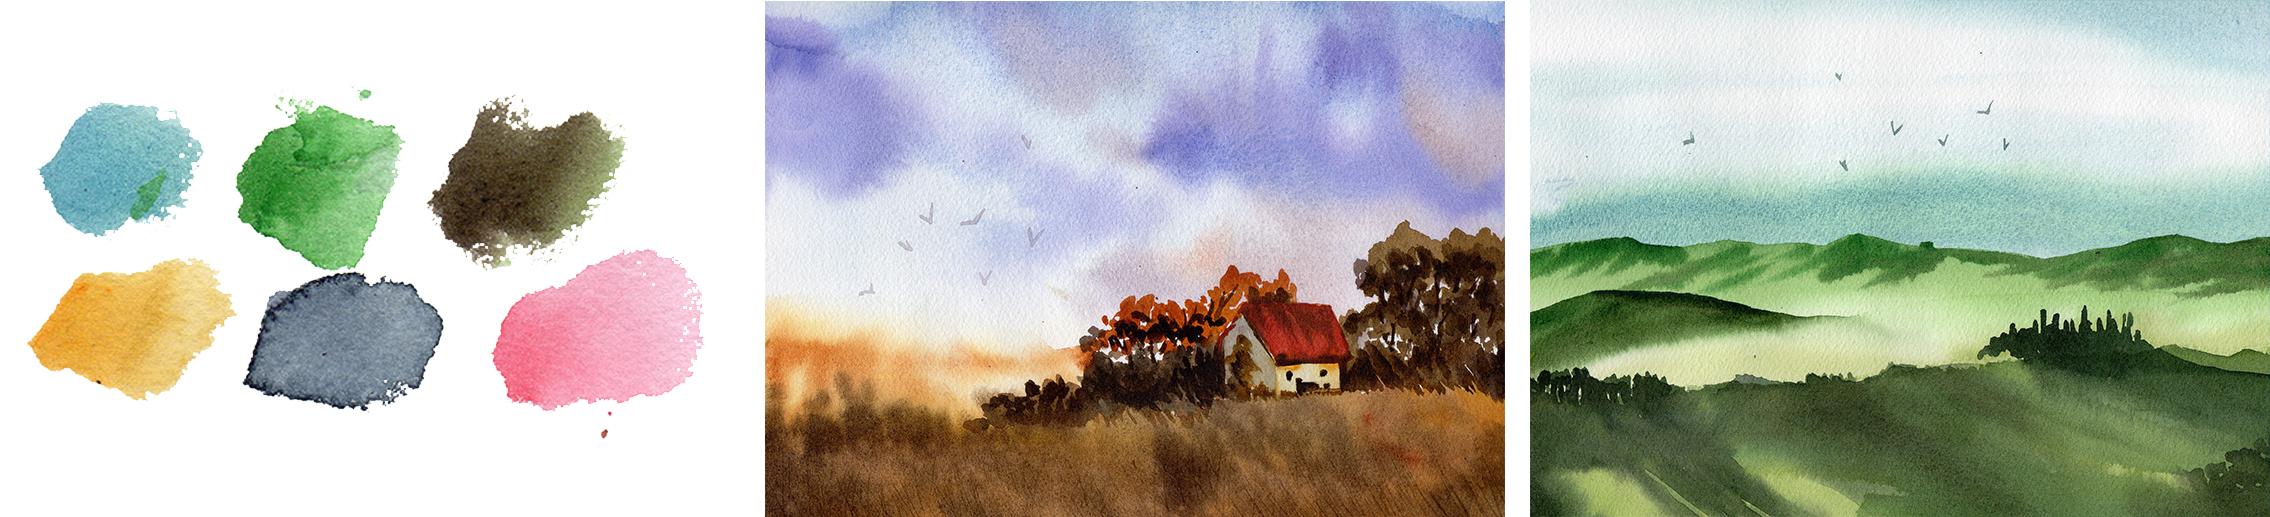
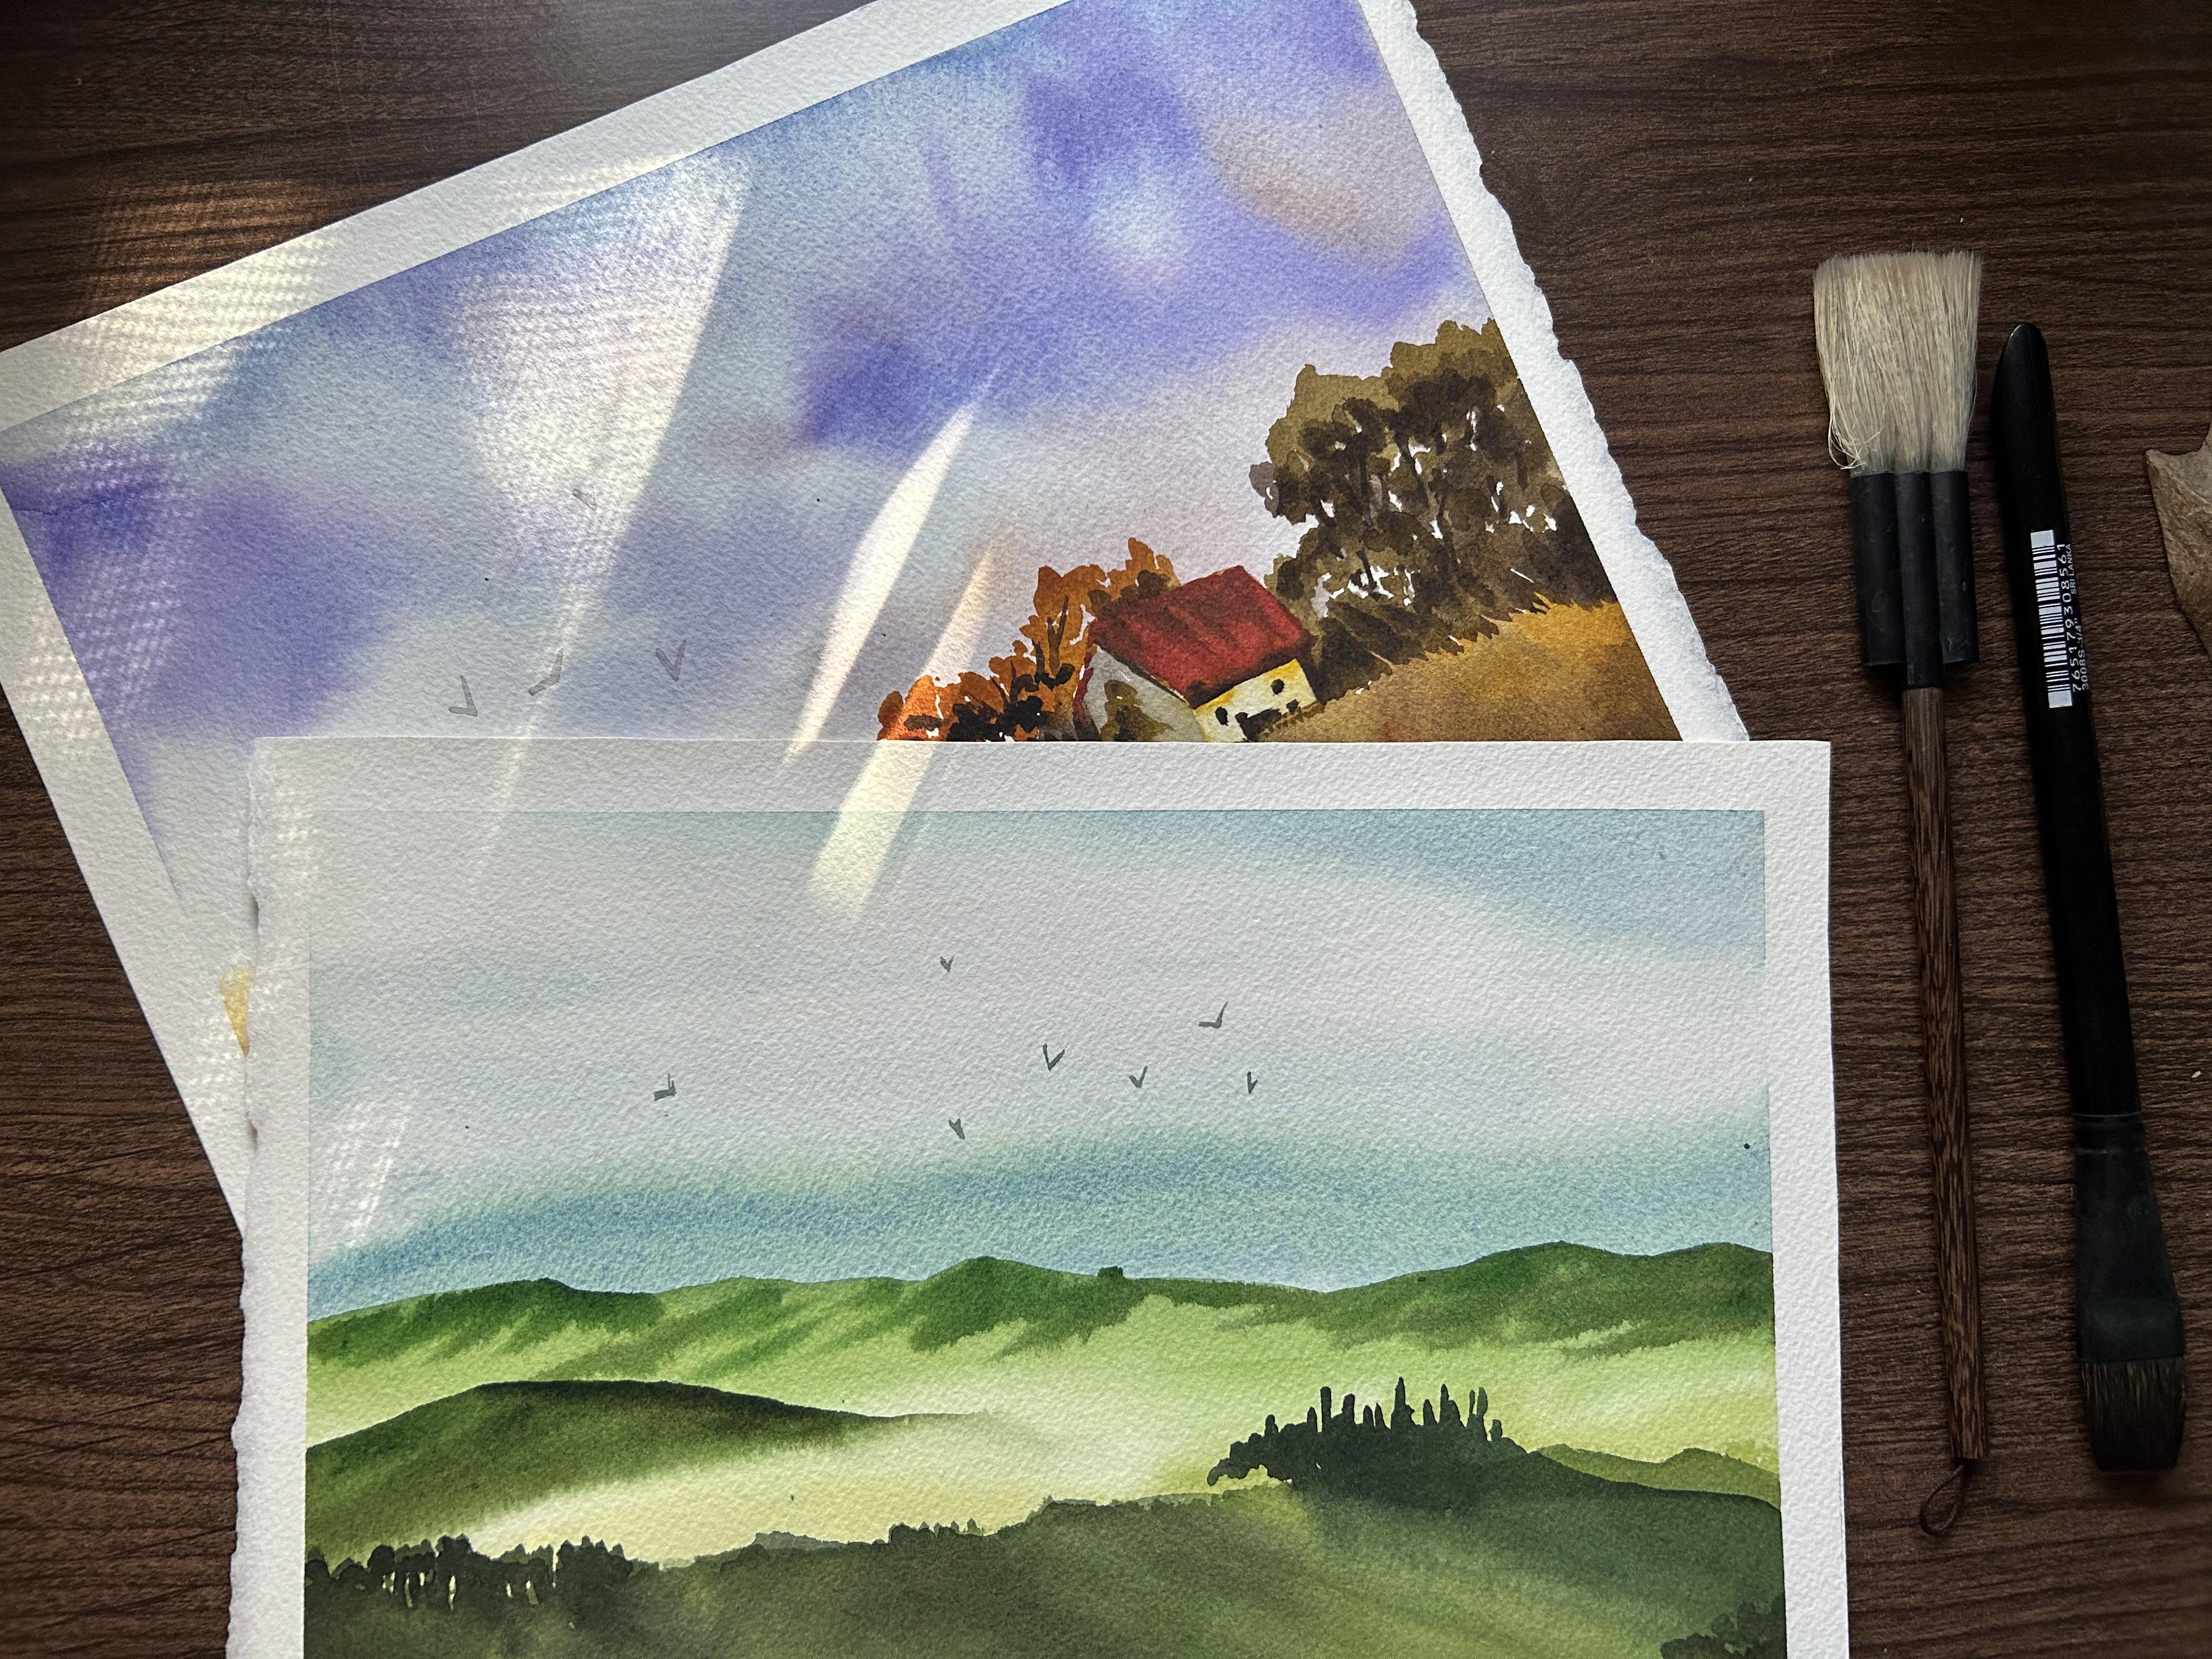
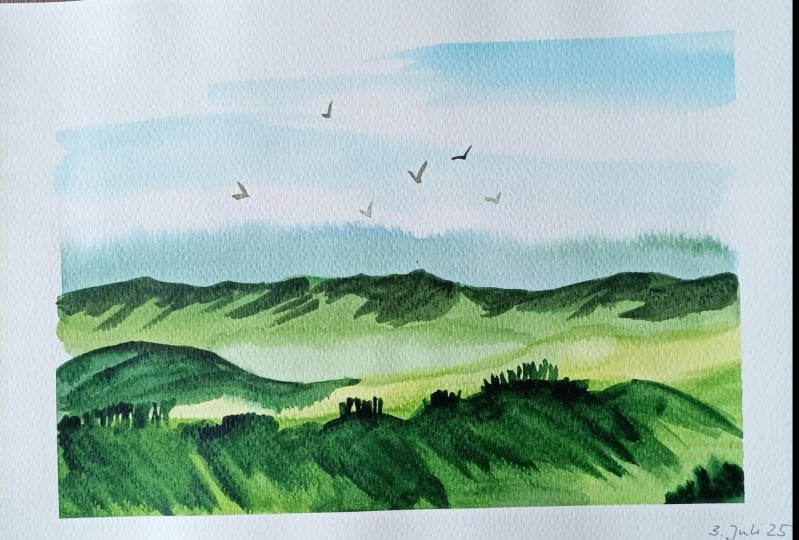
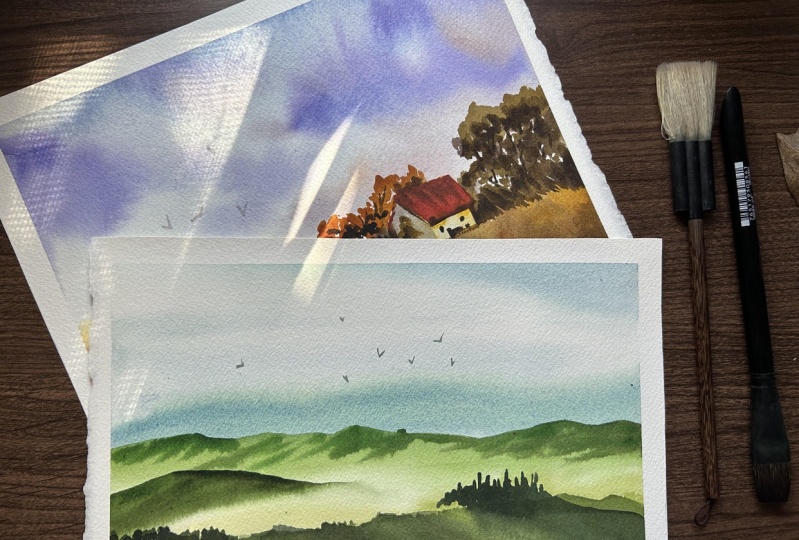
3. Class Project: By the end of this class, you will have two beautiful
watercolor landscape seeds. I recommend working on
them layer by layer instead of trying to
complete them in one day. However, feel free to
work at your own pace. I will be using my usual
watercolor supplies for these landscapes. With you may use any
other medium you prefer. At the end of each demo video, I will share with you a
helpful tip that helped me when I was starting to
build my daily painting habit. To help you achieve your goals. You'll find a class guide
in the resource center. It includes their reference for those scanned copies of their
projects layer by layer, the colors are used and
a summary of the tips. Additionally, I've included
a blank monthly calendar to help you track your progress. As mentioned in the previous
video, anyone helped nodes, a class project will receive a month's worth of prompts to go through with their
painting routine. You may upload the finished
project only our document, your whole weeks process. I will leave a fin
back soon as I can. If you're all set, let's jump into the next video and get started with
project number one.
4. Day 1 - Background: They won. Let's go. I plan to start working on the background
with my largest brush using the wet on
wet technique to ensure that the water
colors blend smoothly. After that, I'll let this
dry and call it a day. It's important not to worry too much about the
initial appearance. Because we know that
watercolor paintings often the best once they've fully
dried and settled. So once I have wet the upper part for this
guy area with clean water, I will load my brush with a turquoise color and
paint the top part. The mix, a bit of cerulean
blue to vary the colors. Again, if you haven't already, please download
the class guide in the Resources Center
for the list of colors are used in each project. Switching to my round
brush and going for a thicker consistency of
the same color mixture, the pain, the farthest
mountains in the background. Then I will let this dry. And colleague today,
it's time for a tip. Number one, plan ahead to avoid mindlessly browsing through social media for
painting inspiration, it's a good idea to plan ahead. What do you want to
paint for the week? So here you can see that I have printed what they plan to
paint for the whole week. I prefer a printed copy of my reference photo
because once I talked to my phone and
I see a notification, I know that I will be tempted to check that out, therefore, distracting me from
what I meant to do that knee tick B1 and
right girl glands.
5. Day 2 - Mountain Range: Welcome today to my first layer has obviously dry pretty well. So now I'll work on the more defined mountains
in the background. I will use a mixture of Hooker's green and yellow here by it. I've also prepared
the darker green for some absence later. I will wet the area just
below where I blend my mountain range so that I can achieve a softer
edge on that bar. In case you're not familiar
with this technique. I have other classes where the focus is about
controlling edges. This is a short and sweet
class where we will paint a hydrangea flower with balancing elements like
soft and hard edges. Right? Now we'll speak of my
flat brush and soften the lower part more to reduce
the streaky appearance. The mountain is
starting to dry a bit. So in adding the darker accents, which is a mixture
of green and CPI, makes sure that your brush is
noted with more paint than water and that it is thick enough not to disturb
the layer beneath. I see you observe my
breathing process. You may notice that I tend
to limit my brushstrokes and tried to paint the darker areas in one consistent direction. When you go back and forth, as we did with the
background yesterday, it's easy to accidentally
pick up paint from the beeper instead of
adding more on top of it. It takes practice to
master this technique, but I encourage you
to give it a try. Remember, that's
our goal for today, is just to pay that mountain and not
necessarily to complete the entire painting by focusing on the process rather
than the final outcome. We can pay closer attention to the techniques and
refine our skills. And if you have also
observed myself up, is pretty much the
same the entire class, which leads me to
tip number two. Make sure to set up your painting
materials where they are visible and
easily accessible. This will reduce
preparation time, which can often hinder us
from starting to paint. And if you have a cat like LMA, I suggest using a
watercolor jar with a lean. Take Beta-2 and right
to where you'll be placing your materials
for easy access.
6. Day 3 - Middle Ground: It's day three already. In my experience, the three or four is the
make or break day. It's when the momentum Samnite
dies down that you have to remind yourself why you are doing this challenge
in the first place. So if you're here
with me on day three, it's a little thing,
celebrate the VAT. Almost the same
approach as CS2 day. I will wet the bottom
area with clean water for a soft edge and go ahead to
paint another mountain range. But this time it looks a
bit different because we're only defining the left side of the mountain and leaving
the right side as it is. I will use hookers
green on the left and a mixture of yellow
green at the right. For the accidents. Again, combine green and CPI to make it
darker and richer. Fun fact, I used to hate
greens in my painting. If you've had workshops
with me before, you'll notice that I tend to
lean towards blues violets and thinks greens
are hard to mix. So if you can use a convenient
mixture like hookers, green, debtor vat of the sap, green, olive green
or green apatite. These are beautiful, rich
colors perfect for landscape. Tip number three. Do healthier your mind
of your painting. Time. Set out a random
time on your alarm, say 07:43 P.M. before
preparing for bedtime, if you are an early
sleep per night, when the alarm sounds, you'll most likely to
get confused purse. But also works as
a good reminder since the timing
seems a bit off. But the apriori like
Jeannie who feels tired after working hours
and going back home. Nicer, just relaxing first. Like take a warm
bath or cold bath. And if you feel better than
maybe you can start painting. But if not, then maybe
paint before you get tired. I once did that
before breakfast. I painted for two to 5 min
and it works best for me. Let me know if this will also work good with
your schedule. Take the three and write
your random alarm time.
7. Day 4 - Foreground: Before congrats, you made
this past the third day. Now it's time to work
on the foreground. I will cover the whole
area with yellow, green, That's Hooker's green and
Indian yellow and violet web. Use a thicker and darker green, blue, and brown mixture to
paint the shadowed areas. While it's helpful to use
my painting as a reference, There's no need to feel
constrained to make your landscape painting look
exactly like mine. Instead, I encourage you to experiment and paint
a shadow shapes and distant trees to add complexity and interests
to your artwork. These elements add depth to your painting and make
it feel more realistic. Remember that painting
is an art form. So it's important to express your own unique style
and creativity. If you want to use other
color combinations, then feel free to do so
and own this painting. E.g. you might want to
try mixing violet with greens to produce a
darker and richer color. Or you can use a totally
different color palette from might even go with a
monochromatic look. If that's what you
feel like painting. I will get the new
painting random shadow shapes until I'm satisfied. Okay. It's time for a tip number four, using a physical
calendar as a checklist. Because they're they're
using a physical calendar as a checklist for
tracking your progress. Not only is it easier to keep track of your
painting schedule, but there's also a sense
of satisfaction in crossing out each day
as you complete it. Take before and right? Yes. If you prefer a physical
college there too.
8. Day 5 - Manmade Structure: Day five, how are you feeling
about their progress? From today to the seventh day? I will focus on adding
details and making some parts of the painting
darker for a more absence. Let's start with the
center of the foreground. Use a big brush and load it with clean water to paint the
right side of the foreground. Then switch to a smaller
brown brush and noted with blue green color and start
working on the details. I'm using light pressure here so that only the tip of the
brush touches the paper. Paint. Random
foliage shapes with tall man-made structure sitting
at the top of that hill. And then with the same color, extend the shape diagonally downwards to portray
some shadows. Tried to do this
calmly and don't pressure yourself to
paint straight lines. Focus on the task at hand. And don't even think about the
finished product just yet. For added motivation,
you can even set a punishment in case you
miss a day of painting. Rich is my tip. Number five. This is one of the most effective
techniques for me so far. Try using a lazy
jar as a motivator. So the rule is simple. For everyday you miss painting, add a set amount of
money to the jar and give it to someone else
to spend after a week. What I usually do is I
tell my husband okay, for the whole month. Whatever is in this jar
is yours to spend. Bye. You're not allowed
to spend it to me because it won't work
as a punishment, right? And I'll tell you every
time I set up a lazy jar, it works like magic. That jar remains empty for the whole duration
of the painting. Child inch. Take day five and right
there is simple punishment.
9. Day 6 - Shadows: Day 61 more day and we've
completed project number one. This time, I'll add
darker shadows at the left side with the same
color mixture from yesterday. Wet the bottom and
right part with clean water to achieve
soft edges. Again. This joint out paint
on my palette has the consistency that's just
perfect for today's task. You'll want more
paint than water. When adding another
layer of water color. I'll follow the
shapes I created on the first layer off
the foreground. To complete today's task. If you feel like a
painting body can inspire you to complete
this challenge, then dip number six
is perfect for you. Consider finding a painting body to take on this
challenge with you. As the saying goes, two heads are better than wine. In fact, in fact, to test this, me and my friends
lawn weekly art project, and they're really simple. You just have to post every
week what you're working on. And it's been going around
for six months now. And I am proud that all of the participants have
already developed the habit of painting
every week and producing a beautiful art
burke that they are proud of. So it's time to call a friend and paint together
to your heart's content. Tick basics, and name
of painting buddy.
10. Day 7 - Final Details: Last day for project number one. Though to think this is an easier approach in developing
a daily painting habit, rather than opting to finish
a whole bing, bing each day. Right? So we'll complete this up by darkening the middle bar it
with the same color as usual, and then adding birds
for more complexity. And then later you can
enjoy an extra cup of coffee or hot cocoa for
going creating this week. Same steps as yesterday. I will wet the area
surrounding the part I'm working on with
clean water and use a blue green and darker green color combination during forest the
shadows in our painting. Tip number seven, is for
those who find it hard to decide what to paint
every day or every week. Finally, choose a
painting subject to focus on for the entire month. This will save you time
by reducing the need to decide what to paint every week. So in this case, you can
see that I decided to bend and focus solely
on landscapes. And then maybe after
three to six months, I will then focus
on painting hands. So the decision process
has already been carried off during
the first month when you are building
this painting habit. Take base Evan, and write the topic that you have in mind.
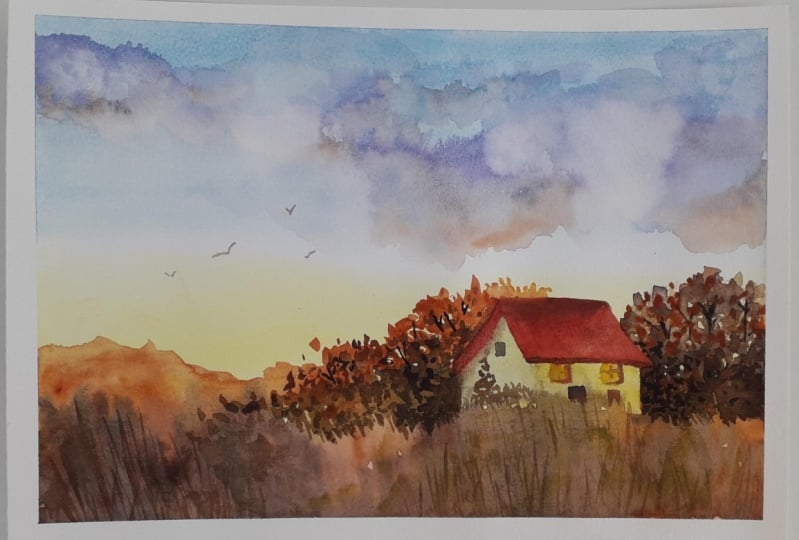
11. Day 8 - Background: Great job in finishing the
first project of this class. How do you feel about
your progress so far? It's they ate and time to work on the first layer
of our project. Number two, this artwork will be a lot more colorful
than the first one, and we'll be using
warmer colors, the yellows and reds. I will begin by wetting
the sky area with clean water and grape
ingredient of blue. Turning to yellow. I will leave a space between the two colors to avoid
accidentally mixing green. Then color in the foreground with yellow and burnt sienna. I am using a flat brush this time to lay down my
background colors. And in case you're wondering, I haven't stretched my paper, I just taped it on
the whiteboard for I know it will flatten
again once dry. But I'm working on
a bigger paper. I make sure to stretch my
paper before painting, especially when I'm using
wet on wet technique. While the paper is still wet, I will paint violet
clouds with soft edges. Have a play around
with the shapes that you can create
with your own brush. Don't get to conscious and painting the same cloud
shapes you see me doing. But please make sure not to overdo it and cover
the whole area. Later. I will also mix in some burnt sienna in the clouds, which are closer to the horizon. For variation to give an
impression of a colorful sunset. This week, our tips will
be more focused on what to do in case you miss a
day of painting or drawing. It is very normal to accidentally forget that you're building your daily routine, especially in the
earlier days when the habit hasn't been
strongly established yet. So to relieve you of any
guilt that you might feel, these techniques
helped me a lot. Which leads me to
tip number eight. Restart. Don't worry if you miss
a day of painting. Simply start again
as soon as you can. You can consider
that as your new day while saying strategy being, I have missed days of painting, but that doesn't discourage me since the number of those days I missed versus the base that
I showed up and painted. Same so small. They ate and write the
days that you missed. If there are any.
12. Day 9 - Bushes: Welcome Today Nine. Today's task will be
outlining the roof of the house and bushes and
trees on the left side, as well as painting
another layer off the grasses in
the foreground. With burnt sienna. I'll draw the outline of
the roof that will serve as my guide on which areas to avoid when painting the foliage. If you prefer using a
pencil instead of a brush, then please feel free to do so. With the same color. I will establish some tree
shapes on the left side and use the different parts of my
brush to paint the foliage. I am using the scumbling
technique and varying the angle on how I paint to
produce interesting shapes. But mind you, it's so easy to get carried away
when you're doing this. So please be mindful to leave some sky holes in your foliage. Then with clean water, I will wet the left side for some softer shapes and load
my brush with Indian yellow feigned sort of random
abstract shapes to give an impression of
bushes farther from us. I will then load my
brush with sepia or any dark brown color
that is available to you to reinforce those shapes. And then generously extend that color to cover
the foreground. From time-to-time, you can see me loading my brush
with Indian yellow, yellow ocher and burnt sienna to give that
mixture a variation. It makes this part look more complex and not too monotonous. While still wet. Make sure to introduce
some grass shapes with a darker and thicker
brown paint consistency. In my experience, I find it hard to maintain the
momentum you feel when you want to work on a new project or experiment
that technique you just learned or revisit and
retouch an old artwork. So as soon as I felt the urge to pick up a brush and
my schedule permits it, I begin that project
immediately. And I thought wait for
the perfect day to come. Which leads me tip number nine, which is starting asap. It's important to
start painting as soon as possible
after I've missed. They don't wait for the perfect time or
inspiration to strike. Simply pick up your
brush or pen and began, like when I decided to sketch one cat
illustration every day, it was on a December. I did not wait for in
January the 1st to start. I just began soon as I can
take the nine and right. Whether you started this
challenge us up or not.
13. Day 10 - Tree Foliage: They ten already. Our focus for today
is painting trees on the right side with a slightly
darker color combination, yellow ocher and sepia. I will use the same
technique I did on the foliage at the right,
which is scumbling. And being careful not to
cover the whole area, but leaving some areas
untouched for this guy whole. It's not visible in the camera, but I am varying the
pressure I put on my brush. Sometimes it's just the tip of the brush touching the paper. And other times, heavier
pressure is applied, which produces bigger markets. As they reach the bottom. I'll go darker and
use negative painting to create an impression
of grasses on that area. I'll continue doing
this until I'm satisfied with how
that side looks. Realistically. There are days when
you're just swamped with responsibilities with
little to no time to paint. But if you have committed a few minutes to paint each day, those minutes will add up and you'll see improvements
soon enough. Now, what do you do
when you missed a day? But the day after, you have no more
free time to work on your craft and
practice painting. It can be because it's the weak and the holiday or
you took a day off. That leads me to tip number ten, making up for the day Smith. If you miss a day of painting, tried to make up for it by w here painting time the next day. This can help lessen any guilty. You might fail and provide more opportunities for practice. Take the ten and right, whether you made up
for any days, missed.
14. Day 11 - House: Welcome today 11. I will be working on the house today and complete the foliage. On the left side. I'll start my painting to yellow lights and add a
gray shadow on my house. This is a combination of burnt sienna and
serial urine blue. You can also try ultramarine
blue and burnt umber. If you have those colors. While it's still wet, I will use a paper
towel to lift off some paint to lighten the
front side of the house. That technique is called
lifting and can be used. Incorrect thing, some mistakes. Have you tried this yet? Okay. Now, I'll work on the bushes at the left side which
covers the tree trunks. It's the same yellow ocher
and CPR combination. I'm just leaving a
tiny gap between the burnt sienna foliage at the top and the newly
painted bushes. And like what I did
on the right side, I'm creating an impression of grasses by negatively
painting those shapes. Sorry, my hand guiding
the covers, the process. But they'll get it soon as you see the shapes I've painted. The next step, be careful in
touching the house, though. Since that is still wet. I am connecting
them already for I know from experience
that the wetness of my paper is just enough that this yellowish brown color won't bleed too
much in my house. You can wait for the
House to completely dry before painting the bushes do. In case it bleeds. I will show you a
way on correcting the shape later with
the lifting method. Tip number 11, knowing why
you missed is important. If you missed a day of painting, take a moment to reflect
on why it happened. If it's due to a
busy schedule that consider adjusting your routine to make time for painting. If you were out and about. Try creating a travel kit
that you can take with you. And if you simply
forgot, That's normal, consider setting
a daily reminder, our alarm to help you
remember to paint. They 11, right? A reason why you think you missed or you might
miss a day of painting.
15. Day 12 - Red Roof: They tell you how it's so fast. Our task for today is
painting the roof, some visible tree trunks, drawing in windows and a door, and adding shadows and the
bushes and the foliage. I'll use red for my roof and avoid painting over
the yellow light. Take your time and
filling in that shape. And did you notice
how the artwork looks livelier when their
ad was added? It's such a bold
and powerful color. Now in sepia, I will
reinforce the shape of the house and paint some
shadows in the bushes. Then mix in some yellow to paint a clump of bushes
covering the house. And of course, using
scumbling technique. For the next step, you can switch to
a smaller brush or a stick with your big brush, but use only the tip. Since it's time
to paint details. I'll start with the shadow
casted by the room. Then define some roof
rafters with diagonal lines. No need to paint them all. Just a few would do. And our brain will
automatically complete that. Then draw in small
windows and a big door. What's left are the tree trunks speaking through the sky
host and more shadows. I remember when I was just starting this daily
painting journey. I always got distracted
with chores. The moment I lift up my brush, I will suddenly
remember that I haven't watched the ambitious
yet or mop the floor. I was in a situation
that time that required me to do those chores
Bailey and religiously. So to address this concern, I adjusted my schedule and
painted in the morning instead of late evening,
specifically before breakfast? Well, it was only a few minutes, so I managed to
squeeze in that time. And it works. Which leads me to tip number
12, eliminate distractions. Eliminating distractions
during painting time can be as simple as turning off your Wi-Fi or enabling
focus mode on your phone. By doing so, you could create a more focused and productive
painting experience. They tell and write your
usual distractions.
16. Day 13 - Foreground: I can't believe it's
the third thing. They already do more layers
and our project two is done. For the next few minutes. I will be working on the foreground and
deepening some areas. In this painting. I will be using the
same techniques such as wet on wet, direct painting, scumbling, and some new ones like splattering and scratching. Of course, same callers as well. Our goal here is to darken the area surrounding the house. So that includes
the bushes, trees, and parts of the foreground to directly eye of the
viewer to our house, which is supposedly our focal
point in this painting. It is one of the basic
composition principles that I almost always
apply in my works. Specifically in
landscape paintings. This off and just in the foreground also
contribute to this. Since the house is surrounded
by hard edges to right now, I am scratching the
still wet foreground degrade undefined grass shapes. I am using the other end of
my Chinese brush to do this. You can also substitute used
up pens or anything sharp. Then splatter with
clean water to add more texture
in our foreground. In times when I feel demotivated and are
just lazy in general, I exerted myself by
setting a reward system. E.g. I. Will bend to go outside
on the weekends. Bite. I can only go out
only if I finish a piece or do not fail to
paint mainly for the week, which is actually
my tip, number 13. Instead of setting a punishment for missing a day of painting, consider something
a reward instead. If you managed to paint. Punishments don't always work. But a little trick can be just the motivation you need to give up in your
painting habit. It can be as simple
as another cup of coffee or something sweet. Take neither dean and write a mini reward you think
that can motivate.
17. Day 14 - Final Details: Last day will help. You deserve some reward. But it doesn't end here
for those who are serious with developing this daily
painting or a theme. Once you upload your project, you already qualify
for a freebie, which is a mini e-book with foreign landscape paintings
presented layer by layer. This can easily translate
to a month long daily prompt to help you
achieve your goals. Write this day is meant
for final details. So some birds in
the background and using the lifting
method with a clean, wet flat brush, a synthetic wine and paper towel to fix
the shape of the house. Here's your last tip. Finally, it's important
to offset that life happens and
priorities can change. If establishing a
daily painting routine feels punishing
instead of satisfying, than try to adjust the time or frequency
allotted for painting. E.g. you could aim to
paint one leaf a day, a small bird every other day, or create one simple
illustration every weekend. The key is to stay
consistent and build the habit at the
pace that works for you. Take day 14 and write
your current priority.
18. What to do From Here: Congratulations, give them. How do you feel about
your progress so far? Now that you know how to get
started with Dana painting, you can apply these tricks and techniques to any habit
if you wanted to, for whether it'd be knitting, learning a new language, or reading a book. If you are struggling to come
up with bing, bing ideas, simply upload your project to the project gallery or
tag me in your socials. I'll send you a free
water color workbook, which includes a
month's worth. Prompts. Further cultivate the
habit of being lazy. And just like our class project, you can paint in this colorful
scenes layer by layer. I will leave a feedback on
your projects soon as I can. I would love to hear from him. What's your favorite tip and
what works best for you? How do you think I can
improve this class? Please leave us honest
review and this time, I will be the line
learning from you. If you have questions
or just want to say hi, drop a comment in
the discussions tab, and let's interact
with each other. Follow me on Skillshare and
explore my other classes. And together make this world a little bit more colorful
with our art for x.
 Bianca Luztre, Watercolor, Productivity, Color Mixing