Transcripts
1. Introduction: Hi, I'm Brandon and welcome to the Inkscape hands-on
series of lessons. In this series, we're using entirely hands-on project-based
approach to learn how to create stunning digital art with Inkscape apparel for free and open-source
vector graphics editor. And this first lesson
of this series, or create a cute character
named Superpave. The process, we'll learn
all about how to create manipulate shapes with the shape tools and the select tool. How to use the fill
and stroke dialogue for full control over colors. How to use the Align
and Distribute dialogue to align parts of our
drawings in various ways. And how to group and sort
our drawings and the canvas. It's going to be
a big lesson and a very important one
for establishing the foundation will need
as we continue to learn more and more advanced topics
throughout the series. Also because this is
the first lesson. Before we get started, we'll do a quick overview of escapes interface and learn how to navigate
around the canvas. If you're already somewhat
familiar with Inkscape, please feel free to skip the overview video and head
straight to the lesson. Alright, if we're
ready to begin, go ahead and load IQ safe
and start a new document. I'll see you in the next video.
2. Quick Interface Overview: In this video, we'll quickly go over Inkscape interface and talk about how we
can do things like zoom and pan around the canvas. The canvas is this large area in the center of the window. And it's where we do
all of our drawing. The center of the Canvas, get this rectangular
area called the page. Although we're working
with vector graphics, which we can re-size it anytime
without loss in quality. It's still sometimes useful to constrain our drawings
to particular area. That's what the page is four, and we'll be using it
for this purpose when we create a poster at
the end of the course, if you want to change the
dimensions of the page, we can do so with the
document properties dialog. We can open by going up to the File menu and choosing
Document Properties. The Display tab
under front page. We can choose the format
of the page here, and it will change the
page straight away. The default format is A4. They can also give the page a custom width and height here. And we can change the pages
orientation. Over here. We can change the
color of the page and the color of its border. At the top here, we can change the display units used by the rulers at the top
and led to the canvas. The default is millimeters, but we can put it on something else like pixels if we want. We can go in and close
up this dialogue now to lead to the
canvas as the toolbox, which contains all the
tools we use for drawing, will be discussing most of
these throughout the course. In version 1.2, we can
re-size the toolbox. First bar above the roller
is the controls bar that's contains
functions pertaining to the tool we're currently using. We're using the leg
tool at the moment, which lets us select and transform objects. So
the control is bar. Now let's us do things
like select all objects, flip objects, and
reposition objects. These functions change as you
squish the different tools. The next bar up is
the command bar. Let's contains a lot of basic
commands like creating, opening and saving documents, undo and redo, copy, cut and paste, and some
different Zoom options. If you click one of
these six buttons here, it would duck a dialogue
over here on the right. This is the fill and
stroke dialogue, which gives us a
lot of control over things like the
colors of objects. Because see other dialogues
we click this arrow here, will be discussing many of
them throughout the course. We can close it out by
clicking the X here. At the top. We of course have the menus. The File menu lets us
do things like create new documents and open
existing documents, as well as save our document, import files into our document, and export our document to file formats that can be used
outside of Inkscape. The Edit menu deals with
things like copying and pasting and selecting objects. Under view, we have a
lot of Zoom options and orientation options. For the remaining menus will be discussing them a lot
throughout the course. If we click this arrow
all the way on the right, it gives you the snap controls, which let us snap parts of our drawings together
in many different ways. And we can actually
see many more options if you click Advanced Mode here. We'll be talking much more
about these a bit later. Before version 1 to the snap controls
were actually in a bar here on the
right of the canvas. At the bottom we have
the color palette, which gives us some
options for quickly changing the colors of objects. You can click these arrows at
the right for more colors. Under the color pelvis,
the status bar, which gives us information like what color is the
selected objects are using other information
about the selected objects, our mouse cursor position, and some options for zooming
and rotating the canvas. Another way we can zoom
is by holding the Control key and scrolling the
mouth swore up and down. And it's actually zooms in
and out around our cursor. To pan around the canvas. They can hold Control and
press the arrow keys. We can hold Shift and
scroll the mouse wheel. Or we can press down the mouse
wheel and move the mouse. Or we can hold down the
spacebar and move the mouse. Okay, that should
do it for a quick overview of the interface. Now we're ready
to start drawing, which we'll do in the next
video. See you there.
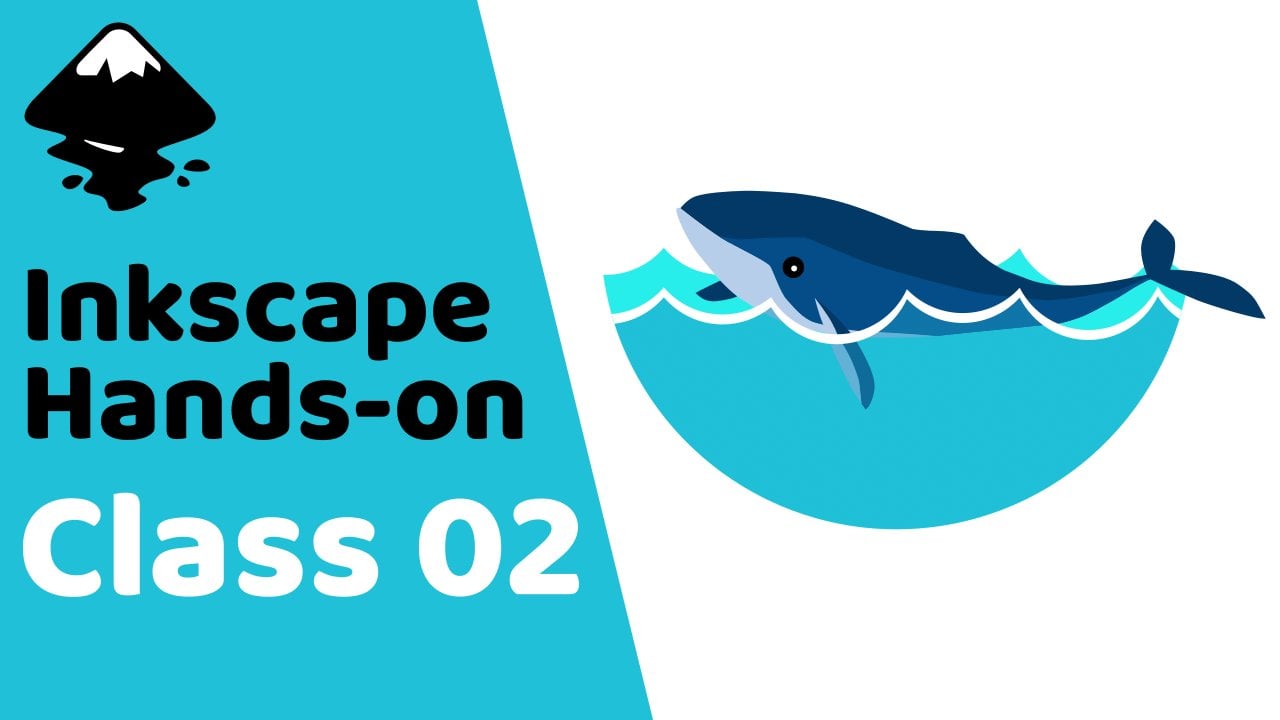
3. Super Pig: Let's start creating
Super Pig by activating the
circles and ellipses tool here in the toolbox. With this tool, when we click
and drag in the canvas, we can create ellipses. After we release the mouse, we get these square handles at the left and top. With these, we can
re-size the ellipse. If we switch to the select tool, we can easily move
the ellipse around. We also get these handles around the ellipse's
bounding box. With these, we can scale it. If we hold Ctrl, it will constrain the
width to height ratio. If we hold Shift, it will scale the opposite side as well. And if we hold Shift and Ctrl, it will scale all sides proportionally. If we click a selected
object with the select tool, it will switch to the
rotation and skew handles. With the handles on the corners, we can rotate the object. If we hold Ctrl, it will snap the angle, and holding Shift will rotate it around
the opposite corner. The handles on the sides let us skew the object. Holding Alt snaps the angle, and Shift skews around
the opposite side. The point around which
the object rotates or skews is called the
object's rotation center. This is denoted by this cross-hair at the center
of the object. We can actually move
the rotation center to another point if we want, then rotate or skew
around that point. All right, let's press
Ctrl Z a few times to undo until the ellipse isn't
rotated or skewed anymore. And we can click it again to get back to the scale handles. The color that's
filling the ellipse is called the fill color. And we can change it
easily by clicking one of the color swatches
in the color palette. This is going to be
for Super Pig's body, so let's use one of
these pink colors. We can also add a
stroke to an object, which is like a
border around it. To do this, we hold Shift
and click a color swatch. Here in the status bar, we can see the fill and stroke colors of the selected object. This number next to the
colors is the stroke width. We can right-click
the number for a few different
stroke width options. We actually don't want a
stroke on this ellipse, so to turn it off,
we can hold Shift and click this red X to the
left of the color palette. If we click the X
without holding Shift, it will turn off the fill color. But
we don't want to do that, So let's give it a
fill color again. Let's switch back to the circles and ellipses tool and start creating another
ellipse for the head. If we hold down
the Ctrl key, it will constrain the
width to height ratio. We're able to create a
perfect circle this way. And if we hold
down Shift as well, we can center it around
the cursor starting position. Let's release
to create a circle. Then switch to the select
tool and move it into place. As you can see, when we create
a shape, it will by default get the same color information as the previous
shape we created. Let's make it a lighter color so that it doesn't blend
in with the body. We could continue using
the color palette, but for much more
control over colors, we can use the fill
and stroke dialog. To open it, we can either go to Object -> Fill and Stroke, or we can click this button
in the commands bar, or we can simply click
somewhere within the color information
area in the status bar. And now it's docked
here on the right. The first tab we have in
here is the fill tab, which lets us change the fill appearance of selected objects. At the top we have
different fill types. The default is flat color, and we have some other types
like gradients and patterns, which we'll discuss
in upcoming lessons. Next, we have some
different color modes we can choose from, like RGB, which stands
for red, green and blue. And CMYK, which stands for cyan, magenta, yellow, and black. The default mode is HSV, which stands for hue,
saturation and value. With hue, we can change
the actual color. Saturation affects how
much white is in the color. And value affects how
dark or bright the color is. We also have the
Alpha channel here, which lets us change the
opacity of the fill color. In the next tab, stroke paint, we have all the same
options as the fill tab, but for the stroke color, and in the stroke style tab, we can adjust various
stroke settings. We'll take a look at
these a bit later. For this circle, let's make it a lighter pink than the body. We first want to set the color back to the color of the body. To do this, we can
switch back to the fill tab and click this
eyedropper button down here, which changes our cursor
to an eyedropper icon. Now if we click a
color on the canvas, it will set the selected object's fill color to that color. Now we can go in here and
adjust the color a bit. Next, let's create
Super Pig's nose. For this, let's switch to the squares
and rectangles tool here. With this tool we can click and drag to create rectangles. Like with the circles and
ellipses tool, we can hold Ctrl to
constrain the ratio. This will allow us
to create squares. And if we hold Shift, it will center it at the cursor
starting position. Let's create a
rectangle for the nose. Like with circles and ellipses, we get these square handles
we can use to resize it. We also get these
circular handles at the top right corner. These let us round the corners. To make the corners sharp again, we can either bring
the handles back to the top right corner, or we can click this button at the end of the
controls bar. We actually do want to round the corners of this
rectangle though. so let's drag this handle
down as far as it will go. Now let's make it
a lighter pink. Let's switch to the select tool and move it onto the head. We could just eyeball the
positioning of the nose, but if we want more accurate
control over alignment, we can use the align and
distribute dialog. To open it, we can
either go to Object -> Align and Distribute, or we click this button
in the commands bar. The first tab we have in
here is the align tab, and in the align
section of the tab, we have these buttons
that allow us to align selected objects in
many different ways, such as aligning
their left edges, centering them vertically, and centering them horizontally. The objects will be aligned
relative to the anchor, which is whatever we choose
in this relative to box. The anchor can be the
last selected object, the first selected object, the biggest or smallest
selected object, the page, the entire drawing, or
the entire selection area. With the default of
last selected, chosen, if we select the
head and nose by dragging a selection
box over them, then hold Shift
and click the body to add it to the selection, last selected now refers to the body, since we
selected it last. So now if we click, for example, this button, which says align right edges of objects to left edge of anchor, the anchor stays in place
and the other objects move so that their right edges are aligned with the
anchor's left edge. Similarly, we can align the right edges and we can
center them horizontally. Okay, now let's
remove the body from the selection by holding
Shift and clicking it again. And let's move the
head and nose back to where we want
them on the body. When we have two
or more objects selected with a selection box, last selected will refer
to the topmost object. So now if we click this button
to center them vertically, the nose stays in place
and the head moves. If we want just the
nose to move instead, we can undo that
with Ctrl Z, choose first selected
as the anchor, which will refer to
the bottom-most object, then click the button. We actually want to move
the nose down a bit so that it's not quite centered
horizontally on the head. To do this, we can
click the canvas to de-select everything, then select the nose, and as we move it, we can
hold the Ctrl key to force it to move either only
horizontally or only vertically. So we can move it down
here some while keeping it centered
vertically on the head. Next, let's use the
squares and rectangles tool to add some nostrils
to the nose. Let's first create
a small rectangle over here, so we can see it. Let's make it a darker
color than the body. To set it to the
color of the body first, we could click the eyedropper
button in the fill and stroke dialog again. However, we won't always have the fill and stroke
dialog open, and in any case, what this
button actually does is it temporarily switches
us to the color picker tool, which is located
here in the toolbox. So we can just
activate the tool here, then click the body
to pick the color. Now we can make it a bit darker. Let's move it into place
with the select tool. Now we want to make a copy of
this and put it over here. One way to make a copy
of an object is to press Ctrl C to copy
it into the clipboard, then press Ctrl
V to paste it. This will make a copy
centered at our cursor. Let's delete the
copy by pressing the Delete key and select
the original again. Another way to make copies is by duplicating. To
duplicate an object, we can either right-click
it and choose duplicate, or we can click this
button in the commands bar, or we can use the
keyboard shortcut Ctrl D. This places the copy
directly on top of the object. So now we can hold
Ctrl and move it over here while keeping them
horizontally aligned. Next, we want to use the
Align and Distribute dialog to align the nostrils
on the nose. Let's first hold Shift and click the other nostril, then the nose, and in the
align and distribute dialog, let's go back to last
selected as the anchor, which will refer to the nose. Now we can click
this button to align the nostrils horizontally
with the nose. We also want to align
them vertically with the nose while keeping the same amount of
space in-between. If we click the center
vertically button right now, it will put both nostrils
at the center of the nose. But if we undo that, we can first
toggle on this move/ align selection
as group button. With this on, the selected objects that
aren't the anchor will be treated as a single object, so they will move together. Now clicking this center
vertically button will give us the correct result. The nostrils for
me were already pretty close to centered, so we can see this better if
I move them over here first. Next, let's use the circles and ellipses tool to
create some eyes. Let's hold Ctrl and create
a small circle over here. Let's give it a black fill. Then we can switch
to the select tool, duplicate the eye with Ctrl D, hold Ctrl and
move it over here, then Shift-click the other eye, then the head, and with the group button still
toggled on here, we can align the
eyes vertically with the head. Let's
work on the ears next. For this, we can use the stars and
polygons tool here. By default, this tool is on star mode with
corners set to five. So if we click and drag, we can create a five cornered star. If we hold Ctrl,
we can snap the angle of rotation. After we create the star, we get these two handles here. The outer handle lets us adjust the tip radius of the
star as well as rotate it. Holding Ctrl will
stop it from rotating. The inner handle lets us change the base radius
and skew the star. And holding Ctrl will
stop it from skewing. We can change the number of corners of the star if we want. Spoke ratio refers to the ratio between the base radius
and the tip radius. If we right-click in here, it gives us options
that correspond to stars with a particular
number of corners. So for this six cornered
star or hexagram, I can choose the hexagram option here for the correct spoke ratio. With rounded, we can
round the corners. We can also do this by holding Shift and dragging
one of the handles. Randomized will
randomize the positions of the corners and the angles. To do this with the handles, we can hold Alt as we drag them. This button at the
end here will reset all the settings
to the defaults. Let's switch to
polygon mode now, which changes our object
into a five cornered polygon. For Super Pig's ear, we want to use a triangle. So let's change
corners to three. We can use the handle here to shrink it down and rotate it. Let's hold Shift and
round the corners a bit. There we can switch to the select tool and
move it into place. Let's use the color
picker tool to make it the same
color as the head. Let's also add an inner
part to the ear. To do this, we can duplicate
the ear with Ctrl D, make it the dark pink
of the nostrils, then switch to the select
tool and shrink it down some holding
Ctrl and Shift. I'm going to adjust the
positioning just a bit. Next, we want to put
both of these shapes onto the other side
of the head as well, but we want to flip
them horizontally. To do this, we can
first select them both and duplicate
them with Ctrl D, then click this
button up here to flip them horizontally or
use the H key shortcut. Then hold Ctrl and
move them over here. We can hold Shift and select the other ear parts, then the head, and with the group
button still turned on in the align and
distribute dialog, let's align them vertically. Okay, let's finish up the
head by creating a mouth. For this, we can first switch
to the circles and ellipses tool and create a
small ellipse down here. We actually want to
turn off the fill of this and give it a stroke
of this dark pink color. To do this, let's first
click the red X down here to turn
off the fill color. Then switch to the
color picker tool. To set the selected object's stroke color to the picked color, we can hold Shift before
clicking the color. If we go back to the
circles and ellipses tool, we have these circular handles
at the right of the ellipse. If we drag one of these around the outside of the ellipse, we can create segments. If we drag it around the inside, we can create arcs. Holding Ctrl will
snap the angle. Let's hold Ctrl and
drag this one down in here until it's horizontally aligned with the other circular handle. And when we release the mouse, the stroke at the top part
of the arc disappears. This gives us a smiley shape. Now we can switch
to the select tool, resize it if we want,
and move it into place. Then let's go to the stroke
style tab in the fill and stroke dialog and adjust
the width of the stroke. Another thing we
can do in here is change the appearance
of the caps, which refers to the
ends of the stroke of an open shape, like this one. By default it's set to butt cap, which squares them off. We also have square cap, which is like an extended
version of butt cap. And we have round cap, which I think looks
better for this. Okay, now we can select the mouth and
Shift-click the head, and in the align and
distribute dialog, we can go ahead and turn
off the group button and align the
objects vertically. Okay, we're finished
with the head now, but let's say we want to
move all the pieces to another position or
resize them all together. At the moment, we have to
drag a selection box around them all in
order to select them, which is pretty inconvenient. A better way to work with
multiple objects that should be transformed together
is to group them. To do this, with all the objects we want to group selected, we can either right-click the
selection and choose Group, or we can click this
button in the commands bar, or we can use the
shortcut Ctrl G. Like with using the Group button in the align and
distribute dialog, grouping objects causes them to be treated as a single object. So now we can select them as a single object and transform
them as a single object. If we want to edit a particular
object within a group, we can either right-click
the group and choose Enter group or
double-click the group. Now we can select the
individual objects. We can also add another
object to the group now if we wanted to.
To get out of a group, we can either right-click
and choose Exit group, or we can select an object
that is outside the group, or we can double-click an
empty area in the canvas. Now we can select the
group as a whole again. To remove an object
from a group, we can double-click
the group to enter it, then right-click the object and choose pop selection
out of group. Now if we get out of the group, we can see this object is
no longer part of the group. Let's go ahead and
delete it. We can also create nested groups, which are groups within groups. For example, we can enter
the head group, and let's select all of the face objects and group
them with Ctrl G. Now we have a face group, which
we can enter into and edit the individual objects. When we're
inside a group within a group, each time we double-click
the canvas, it will exit the current group and move
up through the group hierarchy. So if we double-click
the canvas once, we're now outside
of the face group and inside the head group, and if we double-click again, we're outside both groups. Finally, to ungroup
a group of objects, you can either right-click
the group and choose Ungroup, or we can click this
button in the commands bar, or we can press Shift Ctrl G. And this will actually just
ungroup the topmost group. We have to do it again to
ungroup the face group. But we actually want to keep
our face and head groups, so let's undo a couple of times. Alright, let's start
working on the rest of the body now by creating some legs. For this, let's switch to the squares and rectangles tool and create a rectangle in here. Let's round the corners more by
dragging this handle down. Let's make this leg the
light pink of the nose. Let's turn off the stroke
by going to the stroke paint tab in the fill and stroke dialog
and clicking the X here. Now let's switch to the select tool
and click the leg to get the rotation handles,
then rotate it some. Next, let's duplicate the
leg with Ctrl D, flip it horizontally by
pressing the H key, and move it to the
back of the body. I'm going to rotate
this one a little more. We also want to put some
legs on the other side of the body. Let's first
duplicate the front leg, make it the darkest pink,
and move it over here some. Now we want to put this leg beneath all
these other objects. To do this, we have to
change the z-order or stacking order
of the objects. And in the controls bar
for the select tool, we have these four buttons
for just this purpose. The first one, which uses the
Home key as the shortcut, raises selected objects
all the way to the top. The second one, with
the shortcut pgup, moves the selection up
one step at a time. The third one, with the
shortcut pgdn, moves it down one
step at a time. And the last button, which uses
the End key as the shortcut, move the selection all
the way to the bottom. This is what we want, so let's go ahead and click it. Now let's duplicate
the back leg, make it the dark pink,
and move it into place. Now we can either
click the lower to bottom button again or click the lower one step button twice to put it below the body. Okay, let's next give
Super Pig a cape, so that we'll know he's a super pig
and not just some normal pig. For this, let's switch to the
stars and polygons tool, and with polygon mode
selected, let's set corners to five, rounded to zero, then click and drag
to create a pentagon. Let's make it so
this point under the cursor is facing
towards the right. For the fill color, I'll
go with a light blue. Now let's use the select
tool to move it into place and adjust the
shape the way we want it. We can also flip it vertically, either by clicking this
button in the controls bar, or by pressing the V key. And le'ts click the lower one step button to put it beneath
the head group. Let's also add some
stars to the cape. First, let's de-select the cape, then let's switch to the stars
and polygons tool, click the reset button, and
create a five cornered star. We can hold Ctrl and
drag the inner handle to adjust the base
radius if we want. Let's make the fill
color a yellow. Now we can move
it onto the cape, duplicate it, and
move it over here. Let's shrink it down a bit while
holding Shift and Ctrl. Now I'll duplicate this one
and bring it over here. Okay, finally, let's give
Super Pig a squiggly tail. But first, I'm going to
shrink the body a bit. For the tail, we can use
the spiral tool here, which lets us create spirals. In the controls bar,
can change the number of turns or revolutions
the spiral has. We can also do this by
dragging the outer handle. Another thing we can
change is the divergence. If it's greater than one, the center will be denser. And if it's less than one, the edge will be denser. We can also change
this by holding the Alt key as we drag
the inner handle. The last thing we can
change is the inner radius, which we can also do by dragging the inner handle
without holding Alt. Let's flip the spiral
horizontally with the H key and vertically
with the V key. And let's adjust it until
we have a curly shape. I'm holding Alt here as I drag the inner handle to
change the divergence. Alright, That should
be good. As we can see in the status bar, spirals by default have
a stroke and no fill. We can give it a fill if we want. But we don't actually
want a fill for the tail, so let's
turn it back off. Instead, let's switch to the color picker tool, hold Shift and click
the darkest pink color to set the spiral's
stroke to that color. Now let's switch to the stroke
style tab of the Fill and Stroke dialog and
increase the stroke width. Let's also make
the caps rounded. Then let's move it into place, adjust it some if we want, and put it below everything.
Alright, to finish up, let's select all of
the body shapes, including the cape, and
group them together. And let's move it below
the head group. Then let's also select
the head group and group the body and
head groups together. And that should do it for Super Pig and this lesson. See
you in the next one.
4. Export Drawings: In this video, we'll
learn how we can export our drawings and start using
them outside of Inkscape. Let's start by creating some objects. To export our drawings, we use the export dialog, which we can open either
by clicking this button in the commands bar or by
going to File -> Export. The first tab we have
in here is single image. With this, any parts
of our drawing we export will be placed
in a single image file. And our options are to export every object in our document, all the parts of our drawings
that are inside the page, all the objects
we have selected, or we can define a custom
export area here. At the bottom here, we get a preview of what the exported
image will look like. We get this for each
of the export modes. As we can see in the page mode, the size of the exported
image will be proportional to the
size of the page, and any objects that
aren't fully inside the page will have parts cut off. We also have this export
selected only option here. When this is off, it
will export all parts of the drawing that are
within the export area, regardless of whether or
not they are selected. If we check this, unselected
objects won't be exported. Another thing with this is that if we switch to
selection mode here, when this option is unchecked, it will export this part of
the unselected object that is inside the
selection box. If we check this, however, it won't export that part. In the image size section, which is available
for every mode, we can see and set the exact pixel size of the
exported image. This is helpful in case
we make our objects too big or too small
on the canvas and we want to make
the exported image a different size without having to re-size the
objects themselves. So if we want smaller images, for example, we can decrease the size of the
width or height here. And notice that this also changed the other value by
the same proportion. An easier way to do
this is by changing the DPI value here.
The default is 96. And if we want the image
to be half the size as the area we're exporting, we can simply change the DPI
to half of 96, which is 48. And because we're working
with vector graphics, we don't have to worry
about quality loss when changing the sizes. In the batch export tab, we can export multiple
images at once. With selection
mode, we can export each of the selected objects
to separate images. With layers, we can export all
objects inside each layer. And with pages, we can export all objects inside each
page of our document. Creating multiple pages is a new feature of
Inkscape version 1.2, and we can do so with
the page tool here. At the bottom of the
export dialog, we choose what format
we want to export to. PNG is the default, but we have a few other
options as well. We can also set a location and file name for the image here, then we can export. Okay, that's how we can export our documents. I'll go ahead and
close out this dialog now, and I'll you see in the next video.
 Brandon Grant, Game Developer and Graphic Designer