Transcripts
1. Intro: Hi, my name is Elizabeth
Weglein and I am an Ink illustrator of
mermaids and marine life. This is my sixth class in my
Ink with Me series where I'm sharing the stippling
techniques that I use in my inked illustrations. Throughout the
series. I'm sharing these different techniques
and how I apply them to my favorite flash
sheet style illustration using marine life. Today, I am continuing
this series by diving into our next
group of subjects, which is Tropical Fish. This series of builds on itself and you have the
option to stick around through the entire
series to build your own full flash
sheet of marine life. I've marked this course
as intermediate, but if you're a
beginner and you want to stick around and
challenge yourself, you are more than welcome to. However, I do recommend
going back to the beginning of this
series so that you can start learning those
Techniques and get an intro as we build up those techniques to where we are in this course, we are now building into more
complicated illustrations as we do R2 tropical fish
and a Seahorse today. But so far in this series and
we have covered jellyfish, Orca, sharks and dolphins,
stingrays, and seashells. In this course, I'm sharing where I find my
reference images, my favorite materials to use. And we'll go through various different
stippling techniques and styles that you can use
for your illustrations. Don't forget to follow
me here on Skillshare so you know when my next
course is released, and let's dive in
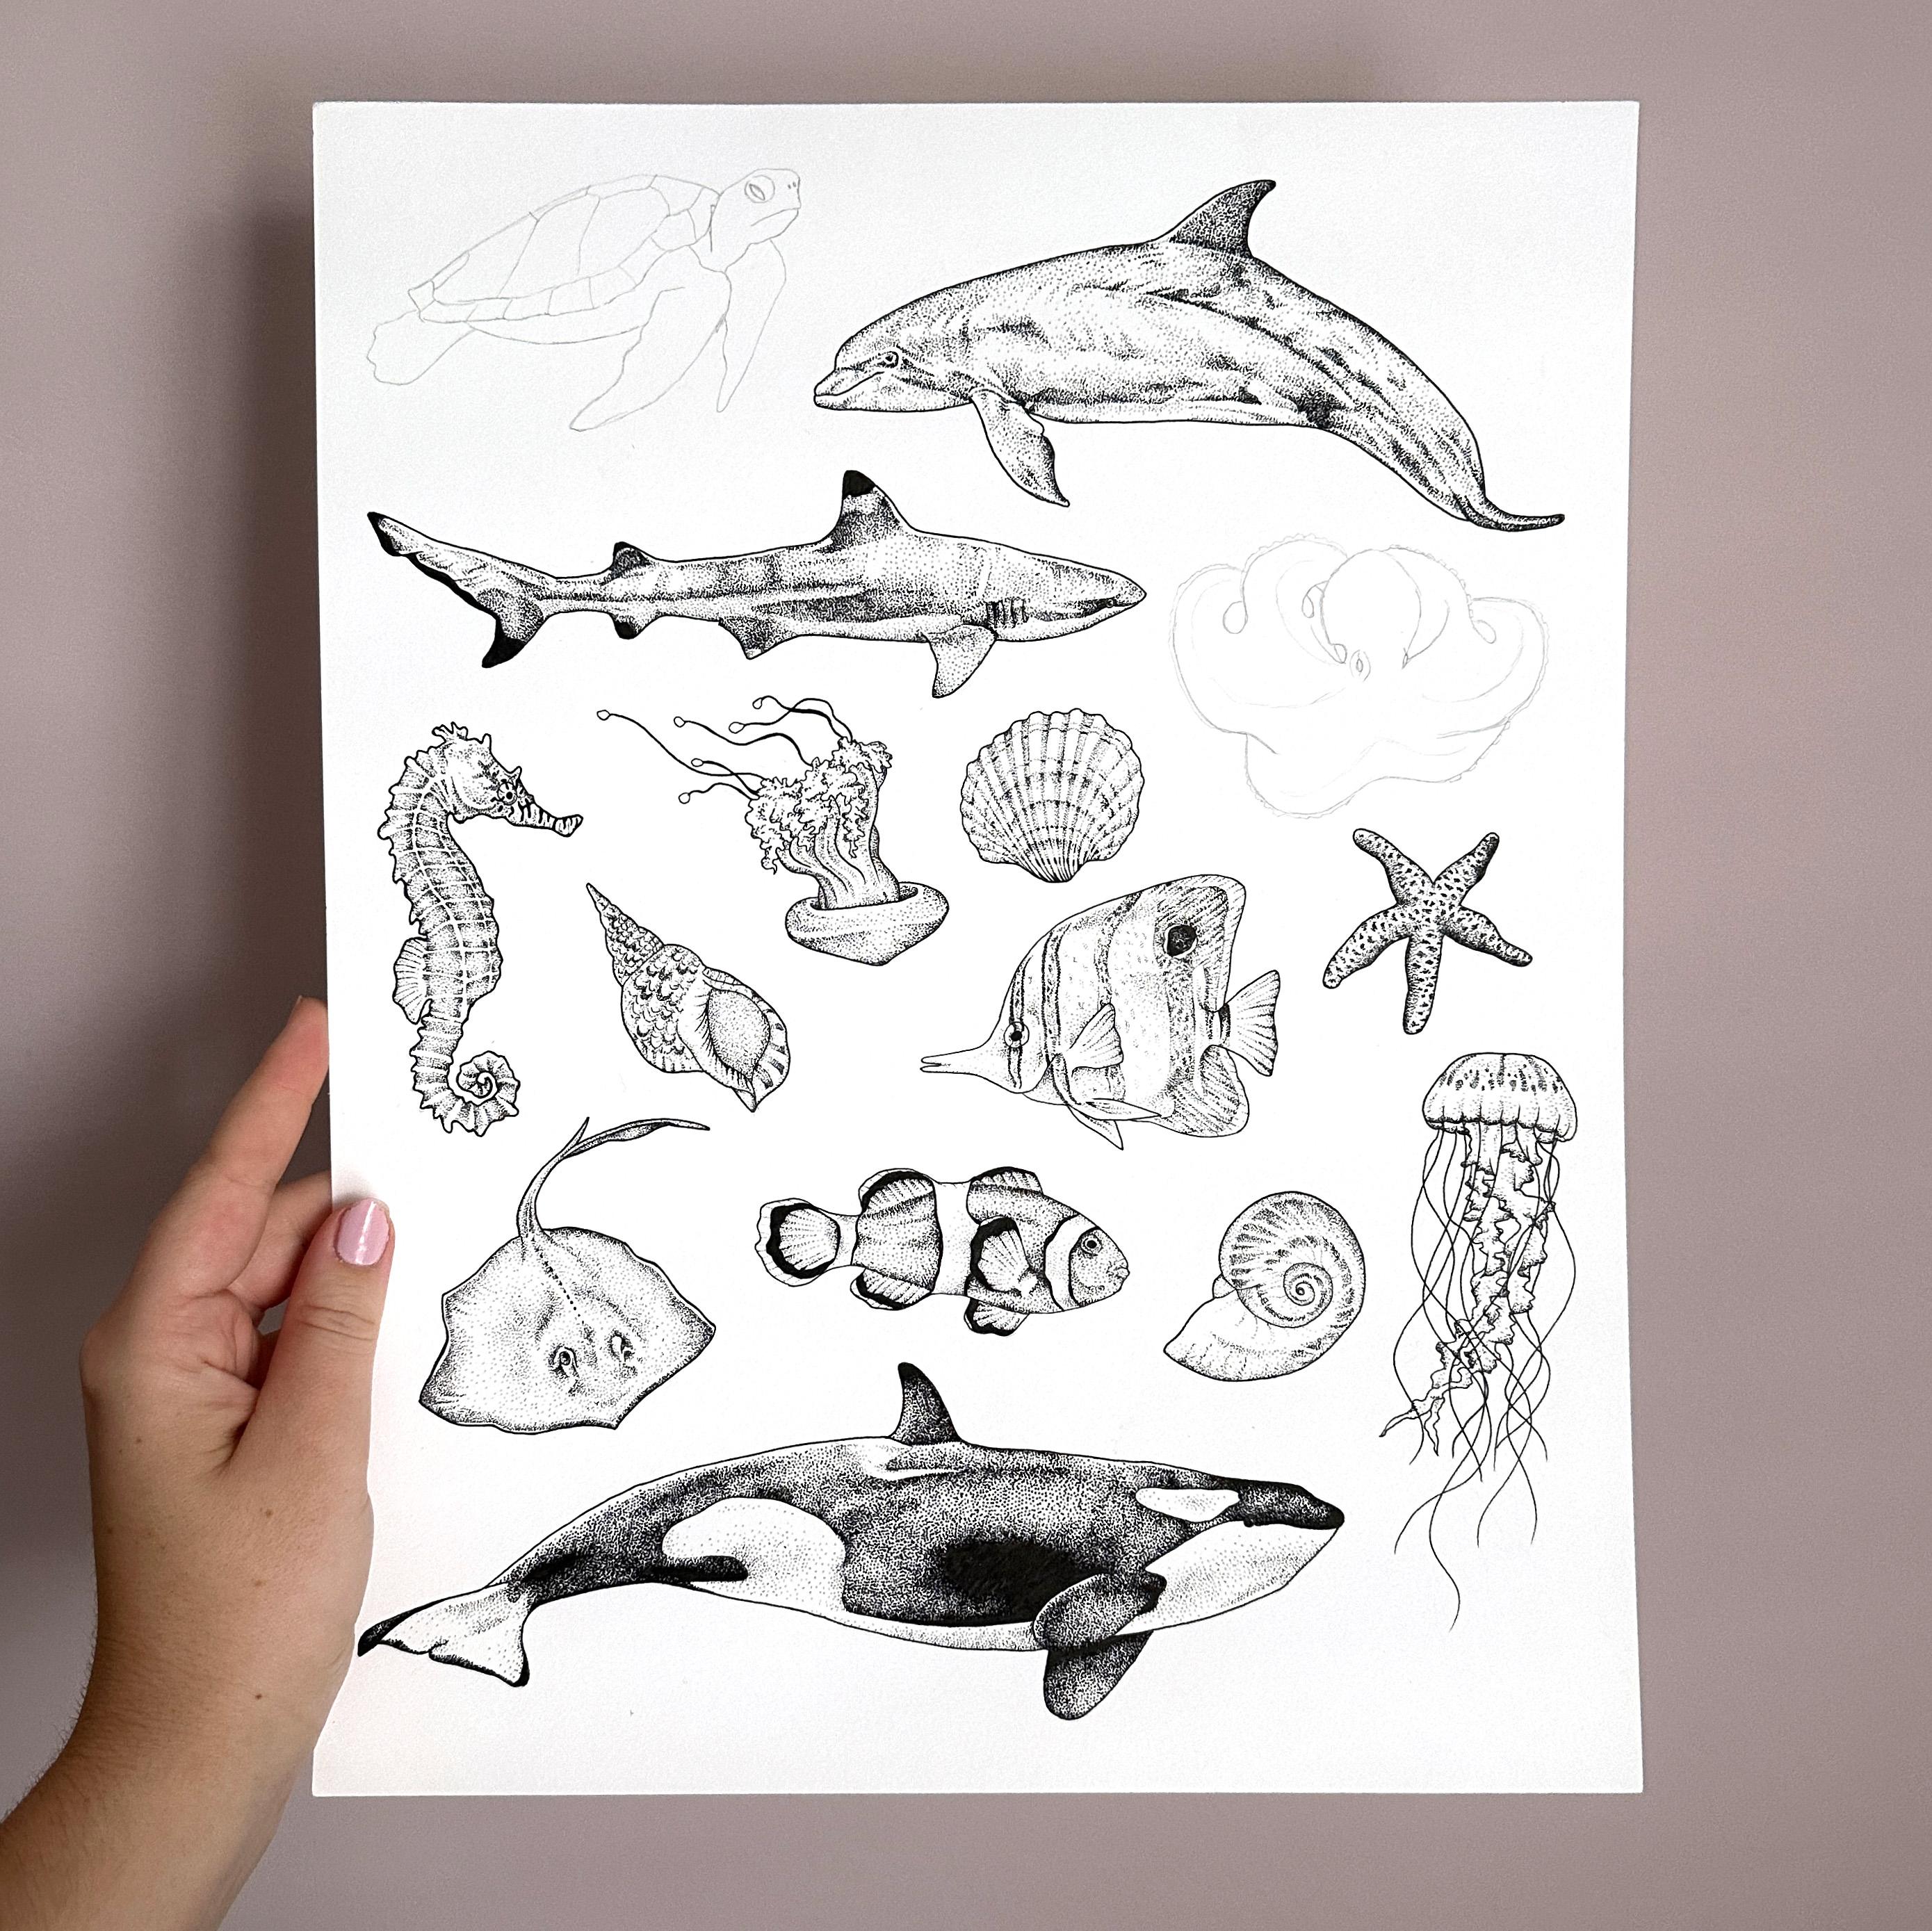
2. Class Project: Your class project
today is to upload the illustrations that you've
inked in today's class. I've shared the reference images that I am using for
my flash sheet. If you go to Projects and Resources on the
right-hand side, you will find the links to
each reference image as well as the sketch for
the full flash sheet. If you want to continue
following along with that project or
want to start it. And now my reference images are all sourced
from unsplash.com, which has an incredible
royalty-free photo resource, can search for anything you
might want to reference, and you can find tons
of amazing images that you can use royalty-free
in your artwork. So you don't have to pay for a license to include
that in your work. You are more than
welcome to find your own reference images
to use for today's class. If you want to look
up tropical fish and see what else you can find, and then simply apply the techniques that
we're talking about in today's class to
your own illustrations. Or you can use the images
that I've provided today. If you want to create your
own a full flash sheet of all of the same marine life that we're doing throughout
this series. Here is the full list of all the marine life that I've
included in my flash sheet. So you can create
your own full project if you wanna go that route. So now that you
know what will be illustrating in today's class, Let's start talking
about materials
3. Materials: Alright, Before we get
into illustrating today, let's talk about the materials that you need for today's class. First four papers. These are my two
favorite papers to use for ink illustrations. I like either Bristol
paper or marker paper. Both have really nice
smooth surfaces for inking. Bristol paper is a little
bit thicker and it's really nice to use for
final illustrations. And it's what I'm using for
my flash sheet illustration. Marker paper is really
nice because also again, that really nice smooth surface. And it's great if
you want to color in your artwork afterwards
using markers, which is something
I often like to do. I use the Strathmore brand
because it's easy to find. So you should be able
to find either one of these at your local
Art supplies store. Next, of course, you will
need a pencil and an eraser. I like to use really light
pencils like a three H or 2H, so that it's really easy to erase once I've done my inking. And then I love these little clicker erasers
because you can get a much more refined erasing
then a big chunky one. I love also to grab a clean brush that has never
been used for anything that I use to swipe eraser shavings
off my paper so I don't get the oil from my hands
or any dirt on my piece. And then probably the
most important thing that you will need
for today's class, of course, is some fine
liner pens for your inking. This is a set of the
Pigma Micron pens, which are my favorite. And they come in a ton
of different sizes, and they also come
in different colors. Although this set is all black. There are tons of
brands out there that sell fine liner pens, so you have lots of options
when you're shopping. I do recommend these, but like I said, there's
lots of great options. The sizes that you want or need is totally up to you
and your styles. Some people like to work in just one size and some people like to use a lot of different
sizes in their work. Reits lot of different sizes. So I have this full set here which gives me tons of options. But you really only need one pen for today's
class if you want. So that is totally up to you. Now that we've talked
about materials, let's get into stippling
techniques next.
4. Stippling Techniques: Okay, let's get into our
stippling techniques. You'll need a plain
piece of paper, pencil and eraser,
your fine liner pens. And then right here I have gone ahead and done a
little pen test. So I would recommend doing this if you have a
new set of pens or if you're just not
sure what sizes you're most comfortable
working with yet. I have this little
quick reference guide of some little squiggles, dots. And then I wrote the
sizes of my Micron pens. Like I said, I have that
as a quick reference guide as I'm doing some practice. Since I've marked this
course is intermediate, I won't be starting at the beginning of
stippling techniques. By now. You understand that
with stippling, less dots, lighter areas, more dots, darker areas. And you understand that you can approach your process of
stippling however you want. So you can work from dark
to light or light to dark. That is totally up to you. So we're going to get more into specific techniques to
create different textures. So the first thing that we
want to practice is just creating some Line gradients. So what I mean is your DAS
will either get further apart as you go down the line or they'll get closer together. So for the first one, we're just going to
use one pen size. I just grabbed the 03. So creating these gradient
lines be super important in either the
outlining fees or to create whatever texture you
might be doing in your piece. Just did a simple line,
lighter to darker. We could go the other way
and do dark to light. So starting really,
really close together and then spreading those dots out more as we go down the line. And again ends up to
you and your process. You could be doing
your line with one size like I just did. Or you can vary the size of your dots with your
pen size as you go. So let's try that. Let's start with
the oh, one size. And since we're starting small will work from light to dark. Space out. Little tiny dots. Start to get a little
bit closer together. And you could do this with as many different sizes you want. You could go down and add
one size every few dots. I'm jumping up to the 03 size. And again, this
has a longer line. It could be shorter. This is just to kinda shake off the cobwebs and get
back into stippling. And then let's go with one more dot size
or go up to the 08. And that will be
our final few dots. You can see there's
a big difference between using a
one size like this to create your lines and then using a whole bunch
of different sizes. So it's really up to you and your process and how
you like to work. But think about that as we get into actually illustrating
our different fish today. Alright, we've zoomed in
quite a bit here so we can kinda go over that again
a little bit closer. I'm going to start by doing
a line in the one size here. Stark, dark, and spread that out to a lighter gradient. So we can do that again. I'll go the opposite way. Space out. And then we'll get progressively closer together as we go. This is such a great tool
and creating textures and the first basis for what we'll be working on in the
next few lessons. Okay, now let's get more
into creating textures. So again, you have
a lot of options with how you want to do
your style of stippling. So as I've mentioned,
some artists use one size pen for
their whole illustration. And some artists like me, like to use a bunch of different sizes in
your illustration. I find it easier to create textures by using
different sizes. But let's go through
some examples. So first let's just draw out some little boxes will use to
create some textures inside In this first one, imagining and creating
kind of a scaly texture. And then of course, any area you're going
to need to shade. So what I like to do
is create the texture first in whatever size
or sizes that I want, and then go back and
shade the illustration. But you can totally flip it
the opposite way if you want, and shade the area first
and then go back and add those textures so I can show you the difference in process
of what that might be. For our first box here, Let's say we're creating just a, a dotted scaly texture. So there's these dark
areas that are spaced out. Again, whatever pen sizes you
use is totally up to you. We created some texture there. So then the next step is, let's pretend that
we're going from dark in this corner to
light in this corner. So then the next step would
be to go in and shade. And again, you can use whatever
pen size that you want. I'm going to use my very
worn O2 and go in that way. So again, we're going
to start in the corner. That's where we start
with our dark dots close together because that
is our dark area. But again, you could choose
to work from the light area to the darker area if
that's what you like to do. I'm just slowly
dispersing those dots. You can see I kinda
sweet back-and-forth. That's how I kinda
try and keep it even. Otherwise, you're
kind of like making it lighter this way and then
this way and then this way, which I just don't
usually like to do. But it definitely depends on the texture that
you're creating. Alright, so that is a
very simplified version. And zoom in, you can see we created these kind
of darker patches with our larger pen tip then
shaded in the background. So let's also try doing it with just one pen size so you can see the difference
of what it creates. Okay, so in our next box are basically doing the same
thing all over again, but we're going to just
choose one pen size. So I'll grab the 04. And again, process wise, you could decide that
you want to shade first and then add the texture. But I always just think that
adding the texture first and then going back in with
that shading is easier. But if you wanna do something
else totally up to you. So first thing I'm
going to create. So we have bunch of
little darker areas. Okay? So you have your background
texture and then again, you're gonna go back in
and shade the background. I'm going to follow
the same kind of idea. Darker in this corner, lighter in the other. I find the challenge of using the same pen size is that then sometimes
you lose the texture. So sometimes you have to go
back and do some alterations to really make sure that your texture is giving
the effect that you want. Alright, and then gotten, these are some really rough
though illustrations, but this gives you a good idea of how different have a look at is to be using different pen
sizes than using the same. And you could use a bunch of different ones if you wanted
to instead of just two. Okay, and I'm kinda keeping this technique video short
because a lot of this is just makes so much more sense when you're actually
using it in practice. But the last little bit that
I want to go into is using different sizes to represent different colors or
different areas. So we can just kinda
do some shading side-by-side with
different pen sizes, which I think is the best
way to show that difference. So I am going to Just sketch out this box here. And then keeping it simple, just draw two lines. So we'll use this as
three different areas. Then you can choose
again however you want. I guess I'll go from dark at the bottom
to light at the top. And just shade all three
of them differently. So you can get
that effect of how it pretty clearly creates a
divide in different areas. Hard for me to find
the best angle to show what I'm actually doing. Alright, So that was the size and one of
my largest pen sizes. And then this is the o5. And depending on the texture
that you're creating, you might want to create more of an exact a line along the edge. But again, that can
be dependent on the subject matter that
you're doing or your style. You guys know by
now probably that I am a huge outline person. So I really like to outline different areas before I start
filling them in with dots, but you don't have to use any outlines
if you don't want to. It creates a really different
look with no outlines. And there's a lot
of really amazing artists that work that way. A subtler difference
between these two, because they are both on the
larger end of the pen sizes. But then I'm gonna go down
to the O2 on this side. Alright, so that creates a pretty clear difference
between these three areas. And again, this is just a
box that we've divided up, so it doesn't really
mean anything, but if you're applying
it to a subject matter, it'll give you pretty
clear different areas. So those are the basic
foundations that will be using in our
illustrations today. So first we are going to go into illustrating
our Clownfish
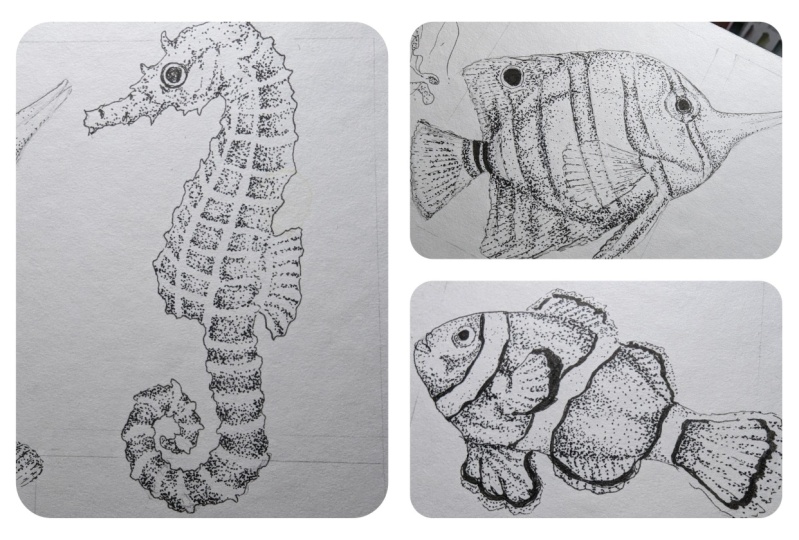
5. Inking: Clownfish: Okay, So the first fish
that we are going to be illustrating in today's class is going to be our
Clownfish here. This one is the simplest
one because mostly Clownfish are just
orange, white, and black. So it's a little bit simpler. So we will start there. So we have the reference image in the Projects
and Resources tab, so you can grab that. Or again, you can
always find your own. So first thing that
I wanna do with my Clownfish is do my outline. So again, this is totally
optional up to your style. If you don't like to outline, that is okay, but I do. So that is what I am
going to start with. I am going to outline
just the outside. All right, so there is
my bold outline and then it is up to you what other details you want to
go in and outline. So I'm going to outline this other fin and
then the eye as well. And then we will get
into some shading. So I am outlining this thin. And then I'm going to use a
smaller size for the eye. All right, then first thing I'm going to color in the
eye because it is black. Then my next step after
doing the outline is actually to do all
of the black areas on the Clownfish is such a dark area than I am
going to end up just color it in and creating those
outlines before I go in and shade the
orange and white areas. So you could decide to do some stippling and
the dark areas. But I just to me, it's not really necessary and I am just going to
color them in black. You can use whatever
size you like for that. Will speed this up here. You don't have to watch me color all of us in, in real time. Okay. So I colored in all of the black areas and
let that dry for a second to make sure that
I don't smudge it when I get to working on the next part. So it is up to you if
you want to work on the orange areas or
the white areas first, but I am going to
go with the orange. And then this is
where those kind of gradient lines really
come into play with creating the effects
on the different thins. We will start there and again, totally up to you what
size pen you want. So I'm going to start
with the 03 and then shift down to
a smaller size. So I'm going to start
with this fin here. I'm going to work from the
outer edge towards the middle, just creating the
lines of those fins. And as you're doing this, remember you can
add as much or as little detail as you want
that is totally up to you. It's kinda going back
over and creating that gradient and then
adding a little bit of an outline to the
fin. We got kinda Darker stripe where it
attaches to the fish's body. So there we have the basics. And now I'm going to go in with a smaller size to shade
in the fin a bit. I'm going to have it
darker at the top here. I'm using the smaller 005 size, having it dark at the black tip of the fin and then getting
a little bit later. Then softening around this
area where we shaded before. And we'll kinda leave that
there for now and then work on some other areas and then we'll come
back and shade in. So next let's go up
to the top fan here. So this has some
pretty clear lines. Again, I'm back with
the zero A3 size, but you can use
whatever size you want. Eating a little borders here. Actually, I'm going to
shade a little bit with the same size before I add in a smaller size Dot. All right, so there
is that top fin. And now let's go down
here to the bottom. Doing the same thing
that we've been doing. Reading or little
gradient lines. And going back in and shading. Right? And, and we
bought, just keep moving on down the line. So two more spots to go. Right? And I'll bring this in closer as we do the
last area for the tail Alright, and we will
finish up this tail area since it's kind of
self-contained in there. So I will add dots for the darker
areas down here, and then blend that in a bit. So again, stylistically
you have the choice. I mean, we created little
gradient dotted lines for all of these fins, but you could just do pen strokes if you wanted to and then just shade around them. So you have lots
of options on what you wanna do with
your personal style. Alright, the next part is to
go in and shade the body. So this is pretty
much back to basics, and we're just creating
those Dot gradients. So the fish is darker right along the fins here at
the top and the bottom, and generally lighter in the middle with a
darker stripe here. Since I like to start
in the darker areas, that is what I'm going to do. I'm going to work
from the top down. So let's start by creating
border along the top. So that gives us a
reference point. And then I will just start
dispersing my dots from there. And then bring this
up just a little bit. And then again, since I'd like
to do those darker areas, now I'm going to go down here to the bottom and repeat
the same process. All right. And then like I mentioned, there's kind of a darker
area in the middle, so I will add that as well. I think I'm going
to disperse that out just a little bit more. Again, you could decide to
shade this whole area with this one pen size or you can
go in with a smaller size. I for this, I'll keep it
the same size just to show you guys what that looks like. So just keeping the dots
dispersed so that we don't lose the detail of the darker
areas that we've added. Then I see another slightly
darker stripe up here, some kind of adding that
in a little bit more I'm just adding a
few more dots to darken up this lower area. Alright, so that is
that part finished. So I'm gonna do the same
thing sticking with this zero A3 size and kind of work on the next
section of the body here, pretty much following
the same thing. It is darker at the top
here and around the fin. So I'm going to
start at the top, creating my little dot border. That is what I like to do. And then working dark to light. Great. A little bit
darker in this corner. Again, I like to go and
do all the darker areas first before I will fill in where it's a
little bit lighter and darker behind
the fin as well. And also don't be afraid to make your own artistic choices when you're looking
at a reference image, you by no means have to follow exactly what that reference
photo looks like. Add your own details
or simplify, however works for you. I think it's taken me so
many years to realize that things that
are complicated, I can just make the
choice to simplify them makes life a lot easier. Now I am filling in the lighter areas, right? And then just add a little bit more detail
here with little stripe. Little more shading down here. Also so important with stippling to take a second and step back a little bit
from your work when you're looking at it so closely, I can just start to look crazy. So sometimes you need
that step back to really see how it's looking. Alright, and then the last
part here is the face. So again, starting with the darker areas
around the eye here, you can add as much or as little detail as you
want around the mouth. And then I had just a
little bit of detail here. And then to the eye as well. Again, you could choose to use a different size for
this if you want. Right there we have all
of the orange areas. So now we just need to do
some really light shading to the white areas and then add just a touch of detail to the last bit of the fins here. So I'm going to
switch back down to the 005 size so that I can
keep the dots really tiny. I'm just going to go
in and start shading. Again. As I mentioned in the
Techniques video, I think that using
a different size, especially this
dramatically, really emphasizes that these areas
are different colors. So that is why I
like doing that. But you could shade with the exact same size that we were using before if you want. And just using less dots to show that the
area is a lot later. Have a lot of shadow here where it's kind
of under the chin. As our first section. Again, I like doing
the darker areas first because the lighter
areas are so quick, It's just such a good feeling to all of a sudden
makes so much progress. Whereas the darker areas take a lot longer because you
have to do a lot more dots. But you could do it in the
totally reverse order. That is up to you. Alright, so that's kinda
the bigger white areas. And now let's add some
little detail here. So I'm doing the same thing in extending the lines
for the fins, but I am just making my lines with really,
really tiny dots. Just for that last
touch of detail. All right, so our Clownfish
is pretty much finished. I'm going to let all of this dry for a second and
then I'm going to go through with my
eraser to clean up the pencil areas and see if there's anything
I need to adjust. And then I might add a little bit of a
boulder outline as well. All right, so got rid of all of the pencil marks and
actually decided, I think I liked the
outline how it is. So we are all finished
with our Clownfish and next we are moving on to
our next fish for today.
6. Inking: Butterflyfish: Time for our next
fish in the Class, which is going to be
our Butterflyfish here. So similar to our Clownfish. And then it has the
different colors, stripes, and some other details. But it does have a
little bit more texture that we're going to work
with versus the Clownfish, which is pretty smooth. So I'll be working on
some of that on this guy. So again, just like
what the Clownfish, I'm going to start
by doing my outline. I am going to do the zero
A5 size for my outline. Actually, just kidding. I'm to zero for starting with that. Again, how much and what you outline is totally up
to you and your style. Fins down here. And then just like what the
Clownfish are gonna do, the eye color that. Alright, so that is the
basics for our outline. And then, oh, wait,
just kidding. Totally forgot this fin. There we go. Okay. Now there are the
basics for our outline. And then I have all of
its scraped stripes sketched out so we are ready
to start working on that. The first thing I'm
gonna do though, is it's kinda black spot up here again because
that's a darker area. Easy to pretty much
knock out right away. I'm just going to dive
in and outline that. For me this is too
big of a spot to just color in all black because it'll just
kinda look like a whole. So I am going to color
it a bit on the edges. Then I'm going to
do dots really, really close together
in the center. Just because I think
that's going to look better for our final piece. There is our darkest
area out of the way. The first thing that
I want to work on is these two stripes near its head have a darker outline around them versus
the rest of them, which are pretty much
just yellow stripes. So I'm gonna be adding
that first with a little bit of thicker Dot. So many go with the 03. And just add that around the width of just a couple of dots around this whole stripe. And it does extend
onto the eye as well. A little bit of a
curve to account for. The eye is 3D. And I kinda trails off. Right? So that is
the first stripe. Bring this down a
little bit lower again. We will get working on
the second stripe here. Pretty much the same principle. Then I'm just repeating it
on the other side here. Alright, and that gives us a
pretty good darker border. And then I'm also going to
make the decision to do that. Little Joel Line or gills as
an outline here, added that. And then let's fill
in in the middle of these stripes,
the yellow parts. I forgot to do this. Okay, so since I'm
using the 03 right now, I'm going to move
down to the zero to just kidding, 01. I do want to think about
adding some more texture to these stripes instead
of just shading them. So I'm going to start with a darker areas and just create some dark
clusters that give a little bit more, more texture. Alright, so I've
added a little bit of texture to those stripes. But again, if you
want to simplify, you could totally just
shade them a little bit. Or you could use
the same pen size. You can use different pen sizes. It is all a personal
decision for you. So since this size is what I used to create these stripes, I'm now gonna go
ahead and do that to work on the rest of the
yellow stripes here. So first I'm going to
start with this one. I am still kinda starting with an outline just because I always like to just give myself that boundary so I know
what I'm working within. But that's again, just a
process decision for you. You could just fully
outline it like I've outlined the fins and things
if you wanna do that. Totally, totally up to you. Alright, so that's one
more strike finished. Going to move on
to the next one, which is sort of 2N1
at the same time. And then as it gets up
around the spot up here, it gets kind of stripy where it's kinda body moves
into becoming a thin. So definitely think about that when you are working
on the texture. I am just creating this outline since it's such a large area. For I get started. Alright, so I've kinda
outline the top half here. And actually I'm
going to use a bit of a larger size to get some of the detail of
the fins in here. And then also I'm
going to create, there is a little bit of a
purple area around this spot. So I am outlining that
to keep it out of a way that's had some
of that thin detail. Before we go in and shade Okay, that's enough. Initial detail. Let's go back in with
our smaller size. Then. I don't think I've talked
about this in this class yet. But also how quickly
or slowly you do your dots is
completely up to you. And for me sometimes
it depends on how much energy I have or
what I'm working on. But you can do them really quick and kind of randomly placed. Or you could be really, really slow and meticulous
with how you do them. It's really up to you what you feel comfortable
with, what you enjoy. I would definitely
say, I think in these classes I do
the dots a little bit quicker than I would normally
foremost subject matter. But not too to dramatically. Unless I'm doing a really, really small meticulous
illustration, I tend to be a little
bit random with my dots. But it all adds up to determining your
style and everything. So once again, everyone's
process will look different. Finishing the outlines down
here towards the bottom. Just continuing to
work on the texture. Which again is optional. How much or how little you want to include
different textures. Adding some darker shading
here I know usually say I add the texture
first and then shade. Doing a little bit of the
opposite for a moment. Again, the texture
I'm trying to create is the scaly texture
of the fish. And then since we are
down at the bottom again, it is moving into the thin area. So I picked up my 03, add some of that detail
before I go back in my smaller pen. Right? And switching back
to the smaller size I'm so excited that
we're going to be almost finished our flashy
after today's class, we just have the octopus
and the sea turtle left to do after today. Right? There is our next
stripe as well. And then there is a little
bit of yellow on its tail. So let's fill that
in real quick. Easy, and then it has a
darker stripe as well. So I'm gonna go in
the bigger size. Fill in that. Alright, that is all of the darker areas. So then the next step
is to go in and add texture to all of the
areas that are white. For me, I'm going to alternate
between this O1 size and e005 to create the texture and shade the details for
the rest of the fish. So first, I'm going to
start with the 01 and add all of our little
lines to its tail fin. I will say I'm
definitely simplifying this reference photo
to some degree. And you are welcome to simplify
it way more than I have. But this fish has this purple
hue to it from the shadows, I guess if the tank
that it's in and I'm just ignoring that I won't be shading it quite
so dark or anything. I'm going to keep all
of the white areas pretty nice and light. Because I just kinda
feel like that vibe goes better with the rest of
the flash sheet as well. Started with that, I'm going to add a
little bit of shading here around the tail, but mostly going to come
back in with a smaller size. Let's add some texture to
finish out these fins. We're just keeping a very
clear delineation between the areas that are
yellow and then the areas on the edge
here that are white. That's why I'm keeping
the shading super, super simple, right? And then it's kind of
darker up in this triangle. And then under the gill here, down at the bottom
and around the eye. So I'm gonna go in and shade
those areas with this size. But then I'm going
to go in and add more detail with the
even smaller size. Again, just like I said
in the last video, don't be afraid to
take a step back from your work and just
see how it's looking. Again, it just gets so easy
to be wrapped up staring so close to your drawing that you're not seeing
the bigger picture. Books a lot better when
you take a step back. Or maybe it doesn't
look good when you take a step back and need to
make some adjustments. So just do that as
often as possible. And then also once we
finish shading on the body, we will finish the last few fins rate and grabbed the 005 so
I can continue shading. And I'm going to
create a little bit of scaly texture with this size. But I don't think I'm gonna
get to too crazy with it. And again, always,
if you are expanding a shaded area with
a smaller pen size, makes sure to integrate some of those smaller dots into
the original dots. For a more seamless blend. Darken up just the
edge of the tail here. Alright, so that is pretty much all the shading for
the white areas. And then we are just
gonna go in and add the last bit of
details to the fence. Pretty much the same thing
that we did with the tail. I'm going to do
with this fin here. And then having the
same thing down here. And then we'll go
back in and add just a touch more detail. I've decided I'm not
going to bother making this one see-through on the fin just because
I think it's just too much work and little too complicated to
where we're at today. We are pretty much finished. Just like a dude
with the Clownfish. I wanted to let the ink
dry for a second and then I will erase off
all of the pencil marks. Alright, now we have erased
all of those pencil marks. And you can kind of
take a step back and decide if you want to change anything or add anything. And then we are finished. Or Butterflyfish
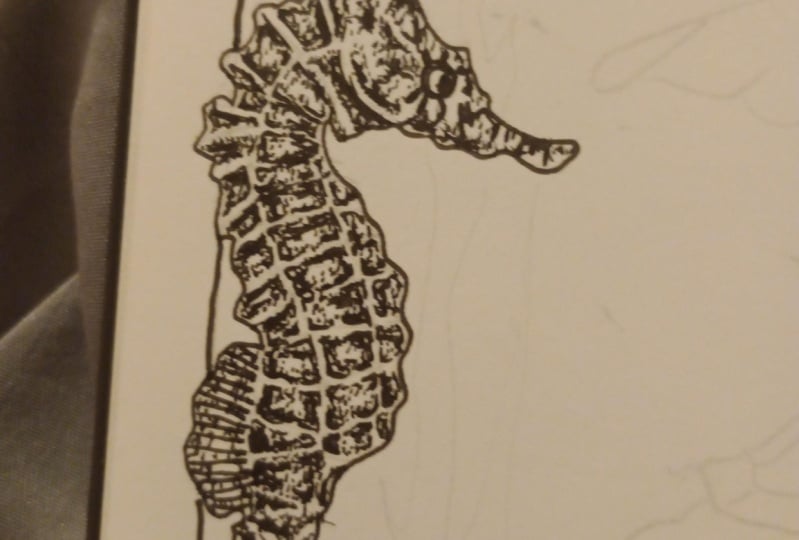
7. Inking: Seahorse: All right, it is now time for our third and final
illustration for today's class, which is our Seahorse here. So grab your reference photo
and just like our last two, Let's start with an outline. All right. So this Seahorse is a complicated one and has
lots of details to it, which is why I left it
for the third lesson today after we'd gotten
warmed up, the other two. But I promise I will show you
some ways to simplify it. Quite as intimidating
as it looks. I will say that this one though, is one where you definitely want to have a pretty
detailed sketch. Some pieces or some animals. You can have a
pretty loose sketch and fill in the details later. But because this one
has so much detail, it's good to have all
of that figure it out from the beginning. All right, There is our outline. And again, just like
the other fish, I'm gonna do the eye. Alright, so there is our outline and we can start to
think about shading. The way that I would divide up this illustration would
be one area is the fin we have here that's very
similar to the other fish that we've done with just
creating those lines. And then we have the area around its mouth and everything with the stripy
pattern that it has. And then third area would
just be the whole body, the texture that it has
and filling all of that in with shading up to you
where you want to start. But I am going to
start up at its head, filling in some of
those darker stripes. I think that's just the
easiest place to start. And then we'll move
on to the thin and filling in the
rest of the body. So because the stripes
on its face are so dark, I'm going to be approaching it kinda like I approached
the Clownfish by just adding those
stripes just in black. If you want to
stipple them instead, that is totally a choice
that you can make. But I am just going to follow the reference image by adding
some different stripes. In a little bit here. A little plant out of the way does have some white
stripes that are mixed in with these
darker stripes here, but we will add that later when we are doing
some more shading. Alright, there are
are darker stripes, so that is one thing
checked off the list. And then the next
part that is pretty easy since it's what we've been doing on our other
illustrations, would be to fill
in the thin here. So that is what I'm
going to do next. Alright, so added
those lines and I will go back and add a
little bit of shading later, but I'm just gonna kinda
leave that there for now. Alright, for the next
part, I'm gonna be working on the tail. I mentioned the importance
of a good sketch, and I'm actually
going to go in and sketch a little bit more. Now. I am sketching. Has these bars over body that are raised and that's how you doing a lot
of the texture. I'm just really lightly
marking that across like that. Then. Now it is time to decide what size pen you want to use for the majority
of your shading. I think I think
I'm gonna go with my very well loved O2 size. So I'm going to start in the smallest area of
the tail and work my way out as I get comfortable with working on this piece, the parts that we outlined here, or where it's lighter. And then in-between It's a
little bit darker and it's especially lighter on
the outer edge here. So we are going to keep that in mind and just start shading. I think pieces like this, like the Seahorse in
particular can be really intimidating
to get started. But I think then you
just like really have to just force yourself
to just dive in. And if you don't like it, That's our starting
in a small area. So we kinda time to
figure that out. I got an F. This reference
image is too much for you or you can simplify
as much as you want. Or you're welcome to find other reference
images for seahorses. Or you can do another
fish if you want to. Whatever you wanna do to kinda practice in advancing
your stippling Techniques. And I am going to come
back through and add some more shading with
a smaller pen size. So keep that in mind. Not that it's a requirement
for you or anything, but you have that option. And again, just like
the other pieces, making sure you keep stepping back to see what it looks like. I think the, one of the
things about stippling is, even though it can be
intimidating to get started. If you feel like it's not
looking right, you know, it's just a couple of dots
out of place and you can lay down as many more dots as
you need to fix it up. It's not like A marker drawing where you used too much of
the wrong color. And now there isn't really
a way to layer over that. Obviously you can't
take dots away, but I don't think that
limits you too harshly on correcting little
mistakes as you go. Because just thinking about
the amount of dots that go into just one piece can
be kind of mind-blowing. There's a way I could
count the dots in a piece. I really am curious sometimes. I mean, I've done some really large stippled
illustration before. So to know the number of dots that I inked on those
would be insane. I've also reached the point in this style where
I'm starting to, if I work for 20 h to ink
dots my hand and my arm, really start to feel it. So I am trying to
take more breaks and make sure I'm staying relaxed and not
being super tense. But it could definitely
be harsh on you if you are two-tenths Hard
doing it for too long. So we have simplified from our reference
image a little bit, but we have created the tail. So the next step is
going to be working. The rest of the body here have some of the
lines drawn out, but it has a grid pattern
on the rest of its body. So I'm gonna go in
and sketch that now. As I mentioned in
the supply video, I suggest using a really, really light pencil for
something like this. I am using a little bit
of a darker one that I normally would so that you guys can see what I'm sketching. But normally I use like a crazy, crazy light pencil and
really light strokes. Just makes it easier to erase
when you're at that stage. And cleaning up the eraser marks or the pencil marks
make my life easier when I go and scan
this and pull it into Photoshop and start
editing it for Art Licensing. Having to contend with
pencil marks that are left behind just adds a little
bit more to my workload. I try and keep it really nice and light so I
don't have to do that. Alright, so we have gridded out the rest of the
body of our seahorse. So we're gonna be treating the lines of the grid
as the lighter areas and darkening around the edges
and inside of the boxes. So again, there's just a really nice
way to break down what looks like a really complicated
and textured creature. We are going to start
from the bottom here, or we've already done the
tail and move our way up. So this is really where those
Dot lines come in handy. Because each time I do a box, I'm going to do
an outline first. And I'm going to darken
up the corners first. Then fill in the middle. Again up to you. If you want to use
different sizes for that, you are welcome to see if I can pull
this in just a little bit closer and onto
the next block. And again, make sure you're
not going all the way to the edge of your pencil lines. Otherwise you won't
have any room left for the lighter areas. Just keep eating these
little boxes, like I said, darkening the corners,
creating the little boundary. And then shading in the middle I just kinda every box
that you do step back, see how it looks. And then again, just stepping
back already noticed that I left a big space here
that I don't like. Not even about the
reference photo or anything when I'm
just gonna kinda add this little stripe here. Kinda break that
up a little bit. Perfect. And then this is going
to be a great one where when we erase
the pencil lines, it's really gonna give the
effect that we've been working towards with the lighter
areas in-between these grids. I actually really like
doing things like this because it's kinda
very methodical. Once you've, we've
kinda figured out how we're creating this texture. So it is just a matter
of going through and repeating it until we
filled in the full area. Alright, and I'm
going to majorly in each release
feed up villa next part so that we can
move on to the head. Alright, so we have pretty much finished the texture
of the body. So now we just have
a little bit more to finish up at its head up here. That is mostly a
little bit simpler. But let's first go in and shade
in-between these stripes. As I mentioned, there are some
white stripes in-between. So we are going to keep
it pretty light just to in a few dots here and there. Shooting where it's
darker along the bottom. And it's definitely a bit
darker up here by the eye. And then around this shape that I've drawn in here as well, I'm just going to do a
quick Dot outline of that, so I keep that as a reference. Shading down here. It's kinda darker, like I said, under the
shape that I outlined. Right. And then they aren't like black stripes like
we created on the face, but there are some
darker areas here that kinda follow the same patterns
and do that with dots. Do some more shading. Which again, you
can choose to do in a different size
pen if you want. Feel like it's kinda unlike me, but I've been more into keeping
it the same size today. Again, stepping back and I
think that looks pretty good. So again, I'm going
to take a second, let the ink dry, will erase out all those pencil lines
and see what we think. All right, I have cleaned
up those pencil lines and I think I just want to
add a little bit of shading to the fin
here with the 005. Just means a touch, more depth, just darkening it up
along the back edge. Alright, and then I do want a little bit more of
an outline on this. One. Thing is just
looking a little bit thinner than the other ones. I'm to go in and add that. I will also say sometimes
when you erase, it does lift up a
little bit of the ink, so it just makes it
a touch lighter. So I do often like
to go back and do a darker outline
after I've erased. But that's also why typically in my drawings when
I'm not teaching, I will erase as I go. And that way I'm not erasing some of the
Ink after the fact, especially for pieces where
I want to sell the original. Alright, so added that
little bit bolder outline, and I think it looks great. So we have finished our tropical fish and made a ton of progress
on our flash sheet. A little bit of the
eraser shavings off and it is looking good.
8. Final Thoughts: Thank you so much for following along with today's series, and I hope you have FUN inking the tropical fish
in today's class. Don't forget to snap a picture of what you inked and upload it to the project
gallery so that we can all take a look at
what you've created. Also, don't forget to follow
me here on Skillshare so that you know
when the next course and the series will be released, which should hopefully
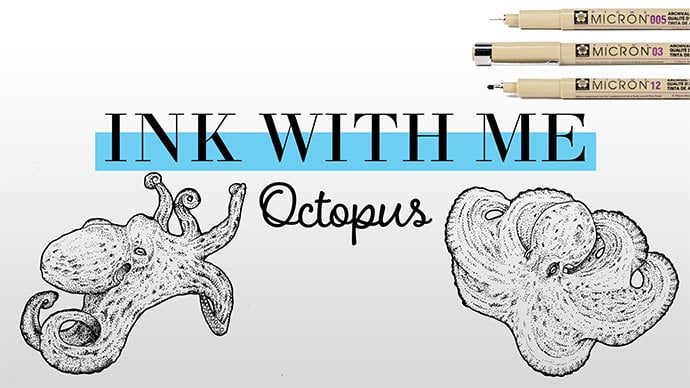
be very soon. The next class for this
series will be the octopus. And then we just have
the sea turtle after that until we have our
completed flash sheet. Also, it is super important
to leave our view here on Skillshare classes
are now subject to removal if they do
not have reviews. So please leave. Review
really means a lot and I'm really happy to
hear that you guys have really seem to be
enjoying this series sum. So grateful for that. And hopefully I will have the
next class out very soon.
 Elizabeth Weglein, Artist and designer