Transcripts
1. Intro: Hi, my name is Elizabeth
Weglein and I'm an illustrator of mostly
mermaids and marine life. In my Ink with Me series, I'm sharing the Inked
techniques that I use in my artwork and sharing how we can apply it to my favorite subject
matter, marine life. I love illustrating using stippling techniques in
this flash sheet style. So I built this full Ink with Me series to share what I love. Today is the seventh
course and the series, and we will be
inking an octopus. This Ink with Me series
builds on itself. So you have the option to
follow along and create a full flash sheet of marine
life to build your skills. This stippling, I've marked this course as an
intermediate level, but if you're a beginner,
you are more than welcome to stay hover. I would suggest going back to the beginning of this
series to start with more basic concepts
with stippling to build up to where we
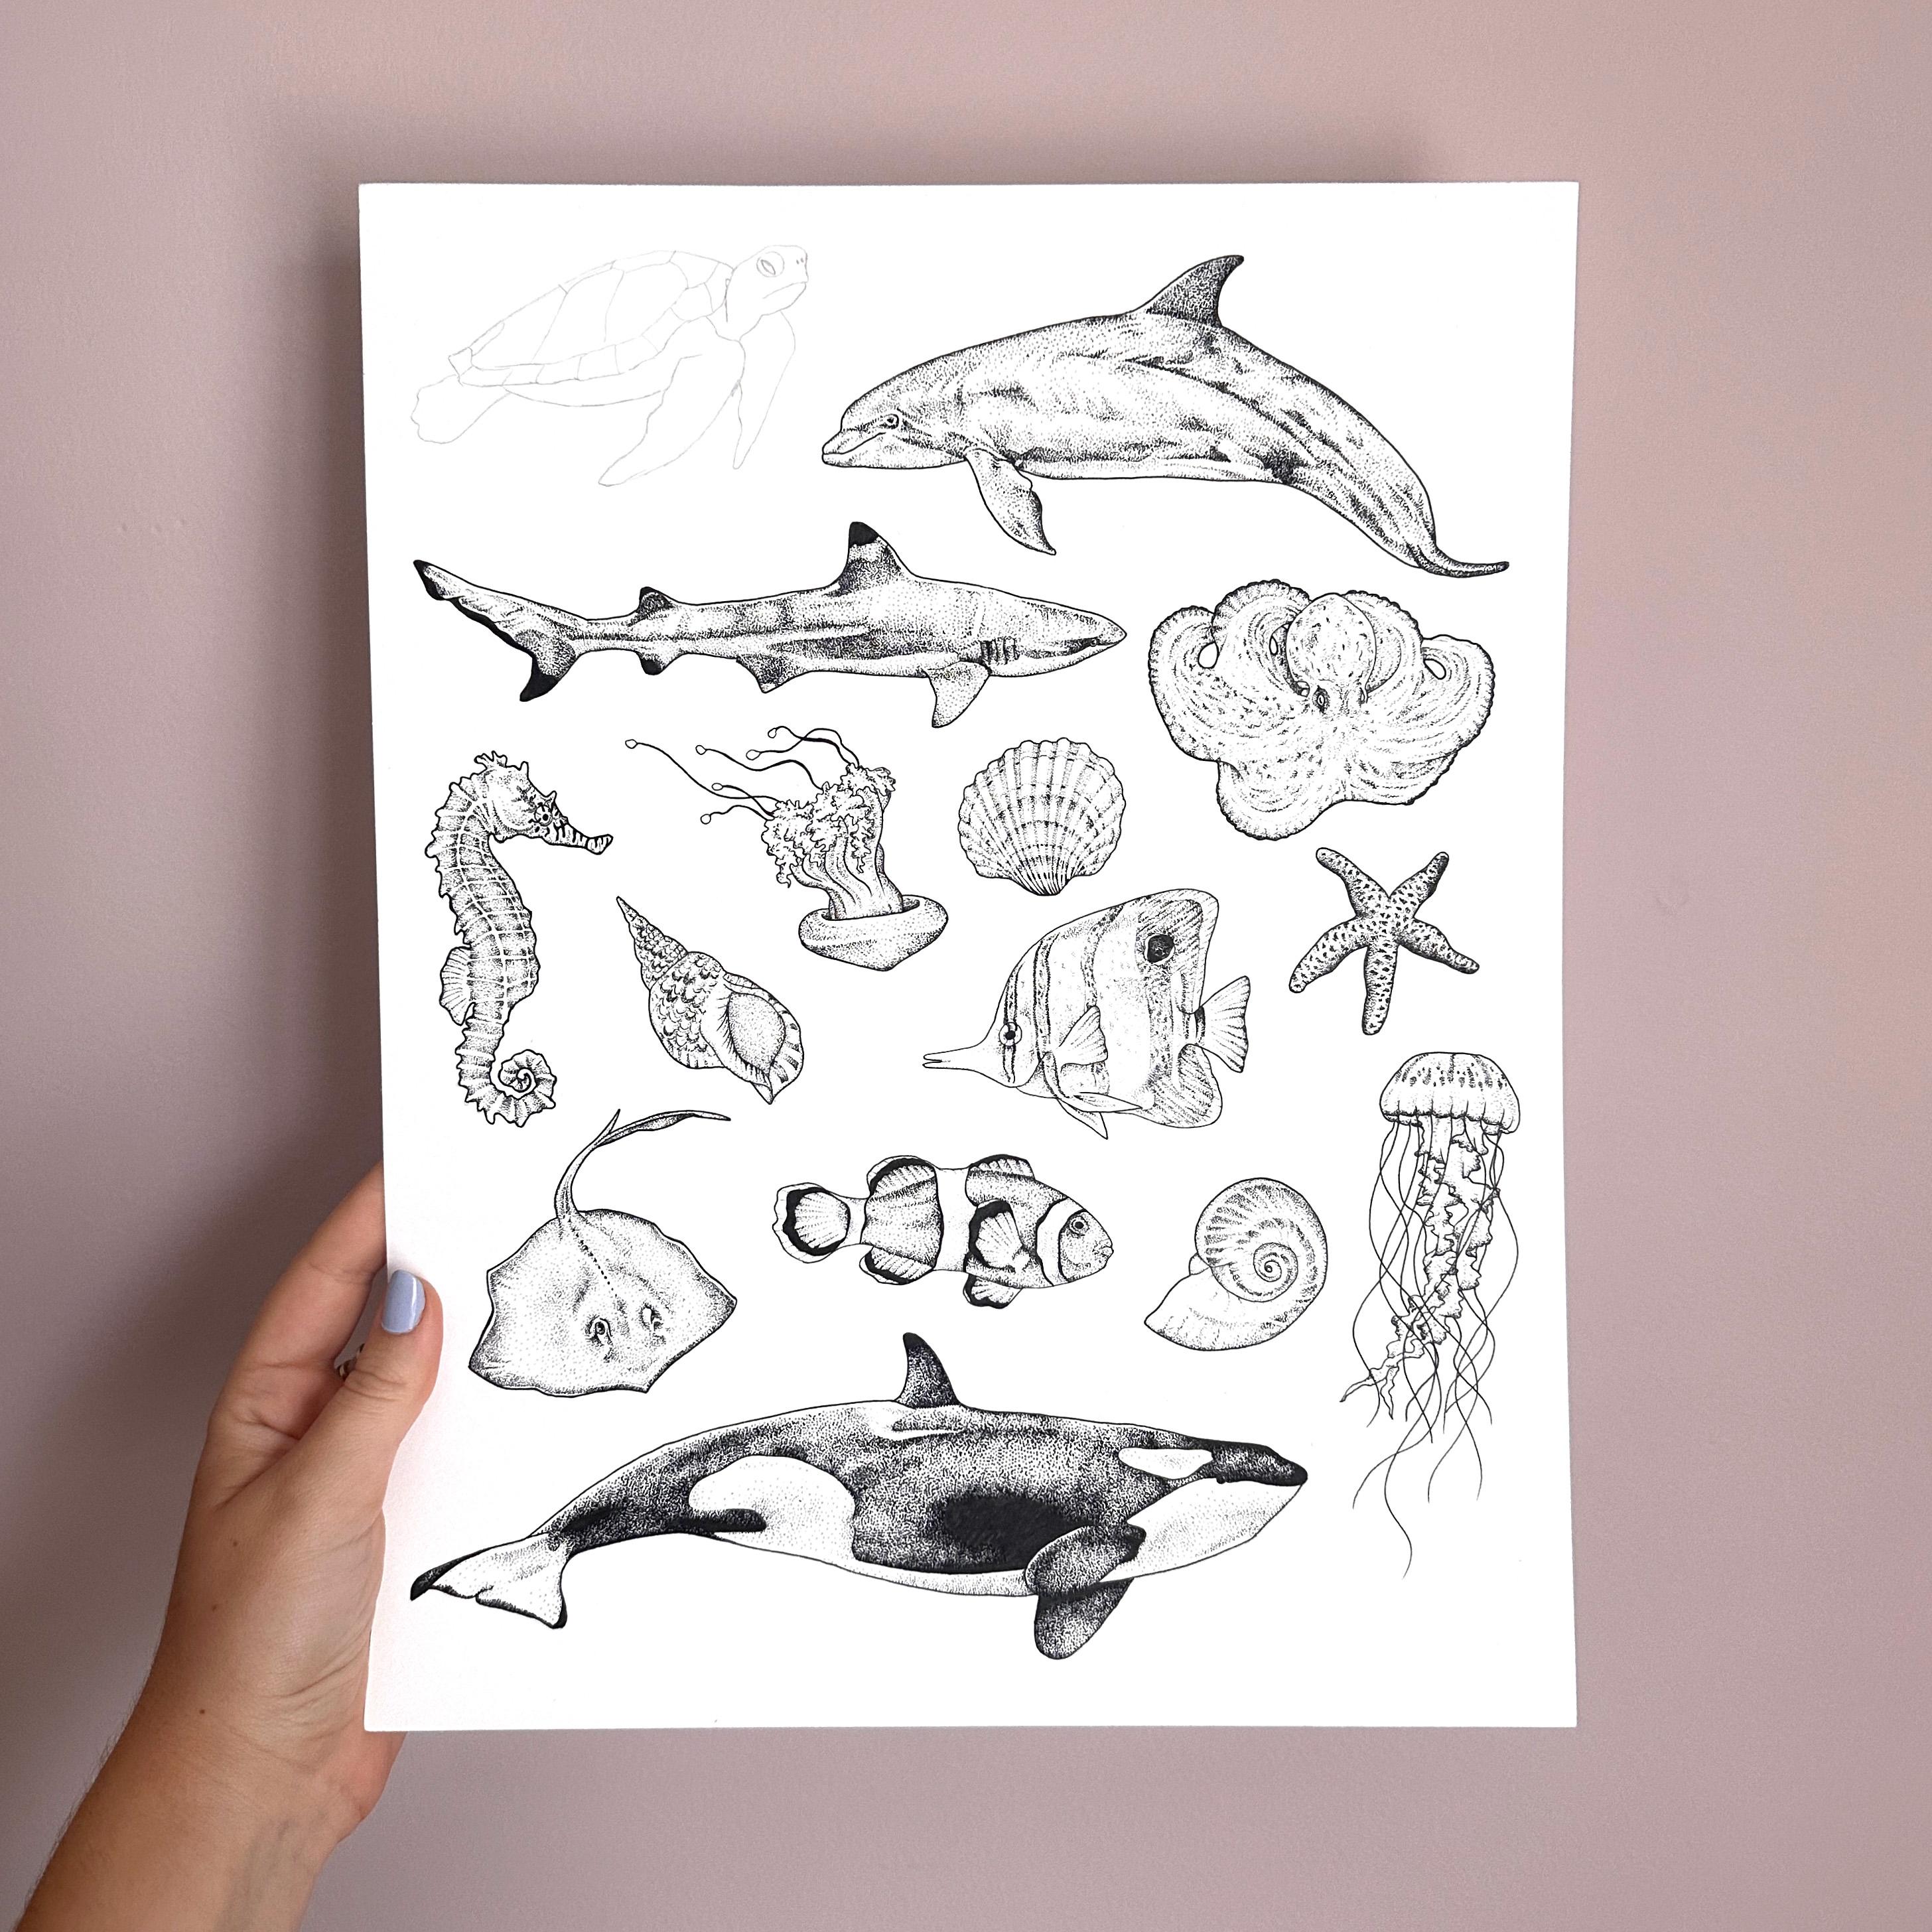
are with today's class. So far in the series,
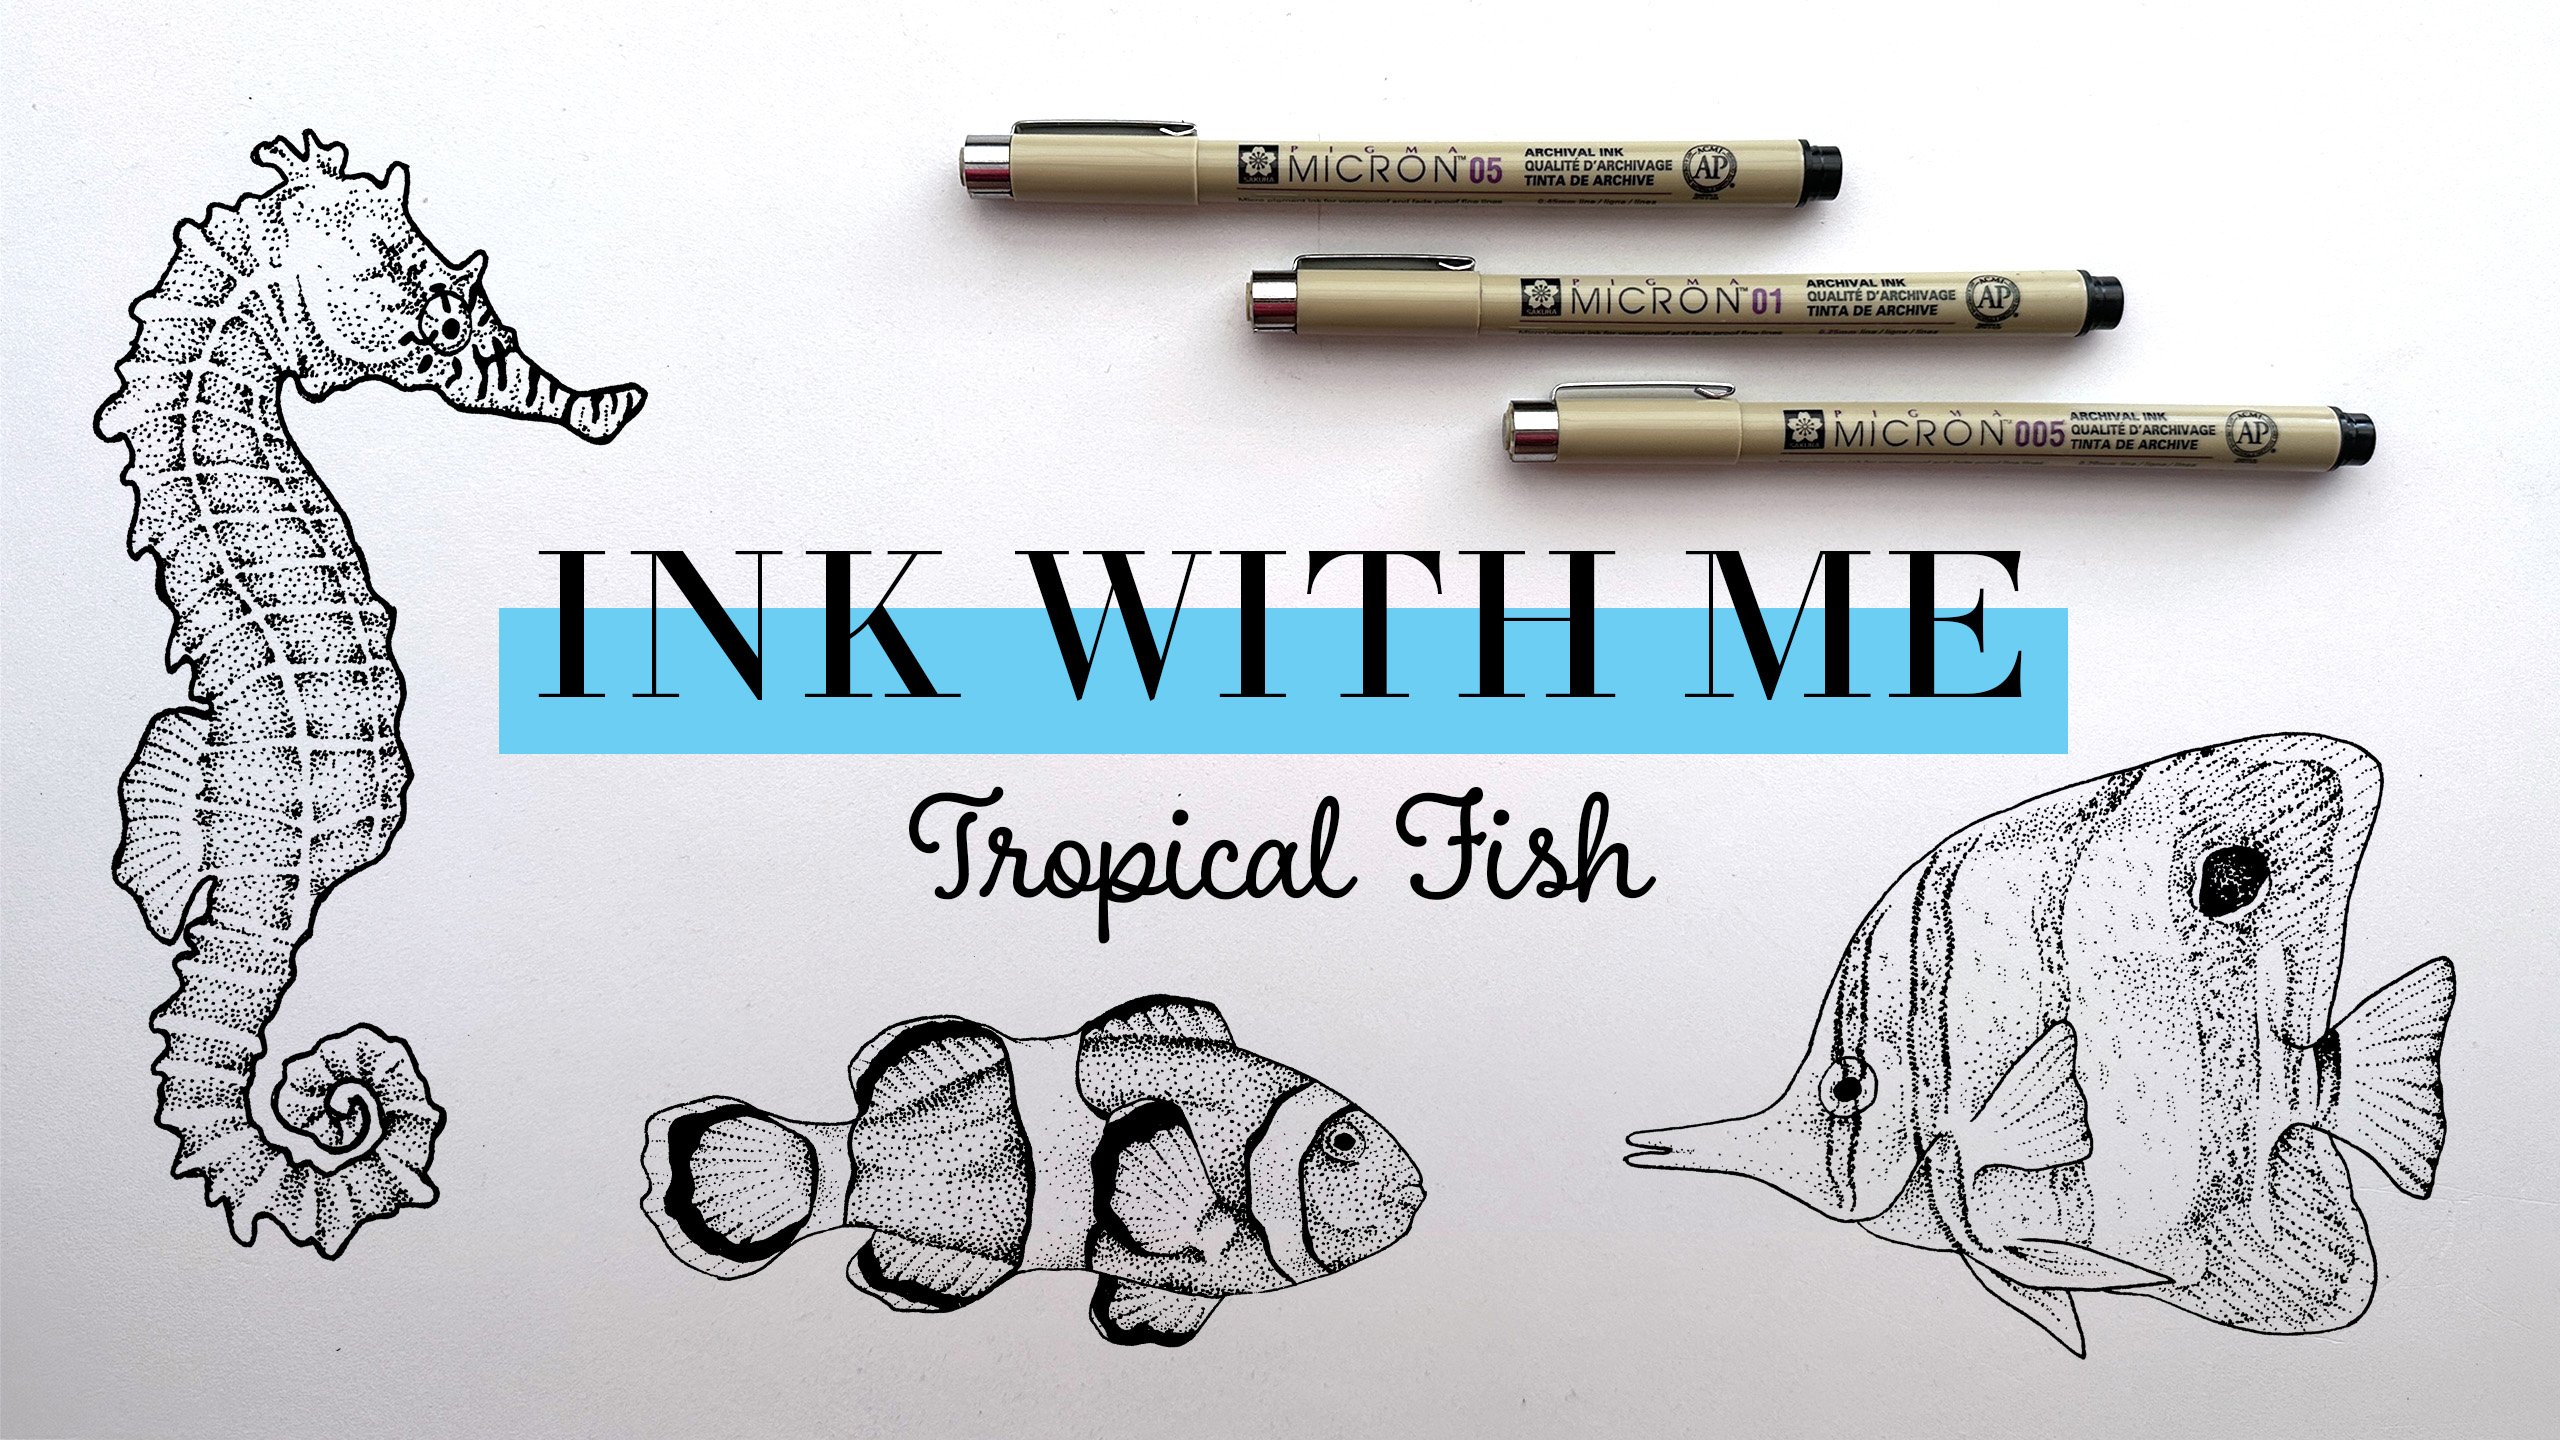
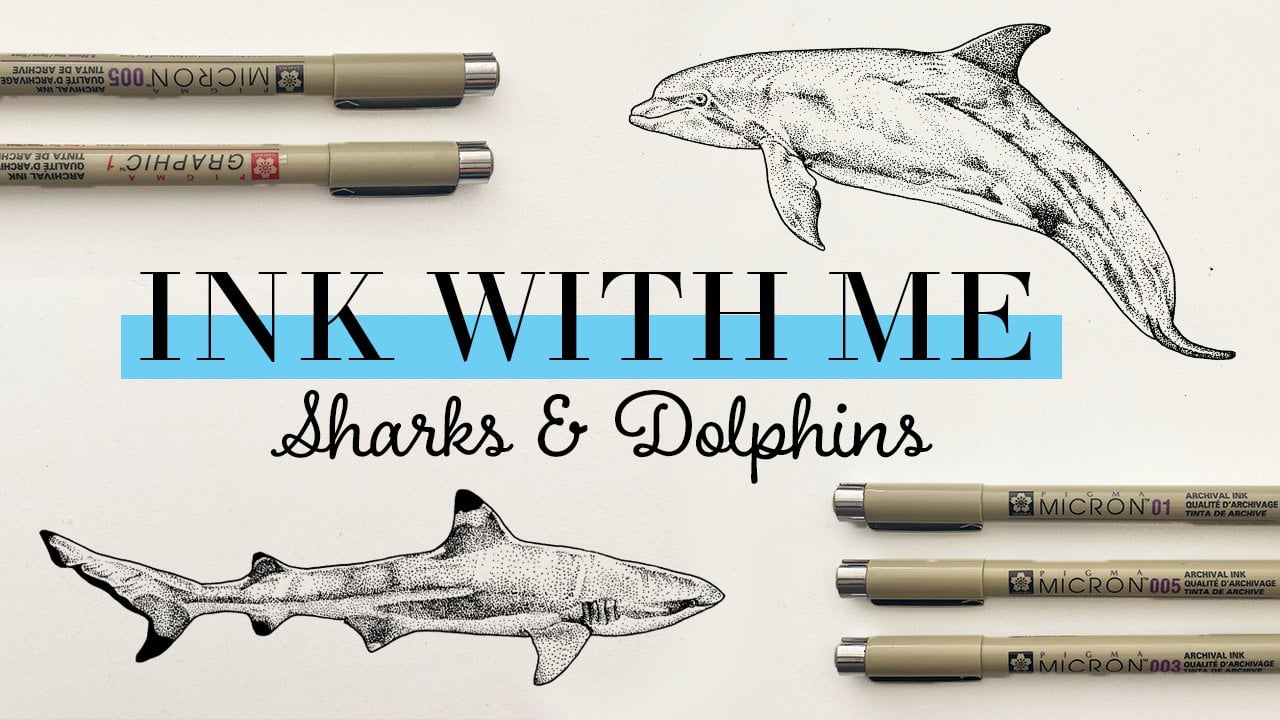
we've covered jellyfish, Orca, sharks and dolphins, seashells, and tropical fish. In this course I'm sharing Rican find great
reference images, the best materials
to use, no sharing, various stippling techniques
that we can apply to our subject matter
octopus today. Don't forget to hit
the Follow button here on Skillshare
so that you know, when I come out
with my next course and let's get started.
2. Class Project: Your class project
for today is to staff a picture of the octopus that
you inked in today's class. If you are following along and doing the full flash sheet, don't forget to
snap a picture and include that in your
class Project as well.
3. Materials: Alright, let's talk
materials for today's class. Things are pretty basic. You need pencil eraser
pens and paper. So you'll want to grab a pencil. I prefer a, this is
a three H pencil. I prefer something with a
really hard lead so that I can sketch really lightly
and erase easily. I will use a little bit
of a darker pencil today, so you guys can see
it on the video. But I suggest a
really light pencil. Also, of course you
need an eraser. I like these little clips, erasers because it's
a little bit of a smaller point than
a big block eraser, but use whatever you like. I also have a paintbrush so that I haven't never
used with paint or anything that I keep to
move eraser shavings off my paper to keep the oil from my hands and any other
dirt off the page. Might want to grab
one of those as well. For pens, you will need
any Fine Liner Pen. Any brand works for you. It's, there's tons of
options out there. I love the Micron pens. I have a whole set
here of a bunch of different sizes that
are very well loved, but they come in
different colors if you want to do something
other than black. And like I said, tons
of brands out there. You should be able
to find something at your local craft store. And then for paper, I have two papers
that are my favorite, either marker paper
or Bristol paper. I use the Strathmore brand. Again, it's really
easy to find it any of your local Art stores. The marker paper is great. It's such a nice, smooth surface and I use
this a lot if I am inking in fine liner and then sometimes I go back and color with marker. I love using that paper. Bristol paper, also very
smooth surface, very nice. And this is what I use for my final pieces usually because it's a
little bit thicker. That's what my flash
sheet is done on. Either one is a great option, both great for inking. So those would be
my suggestions. I'll go ahead and grab
your materials and next we will start practicing
some stippling Techniques
4. Stippling Techniques: Okay, so let's start talking
about stippling techniques. If you've been following
along for the full series, you'll know that I start with a little pen test at the beginning of each
of these lessons. I do this just so that I have
a reference point of all of the different sizes of
fine liners that I have. If you are coming to this class today with only one pen size, that is totally fine. That is completely up to you and your style and how
you like to work. I like to use multiple
different styles. So that is why I have
grabbed a bunch of different microns today so that I am ready for whichever
one I want to work with. I'm just running through
with some lines, some dots, and just noting
the size next to it. I am also getting
really close to needing to replace a lot of these sizes. The one thing with
stippling is matter, how light you try to
be with your dots. Eventually the pen
tips just give out. So you do have to replace
your pens ever so often. And I have been
doing a lot of dots lately or all of my fine liners. And then I also have a
little bolder to appear to for outlining or coloring
in if I want to use that. Okay, so now we have our
pen test ready to go. So we have that for reference. And now let's get into practicing some
different techniques. So since I've marked
this as intermediate, we're not going to
start at the beer beginning by this point, you guys get shading. Your more dots is darker areas, less dots, lighter areas. You know the basics and you can make some
decisions about, you can outline areas or
you can just do dots. It's very just a style
decision for you. But I am going to draw some boxes right here
because what we are going to practice today
is creating Textures. Let's start with
these two boxes here. I've done the octopus as one of the more advanced options in this course series because
they have a lot of texture to them and unique
textures on their skin. So that's what we're
going to be working to recreate today. You can achieve that
in two different ways. Like I said, that the pen tests
you could be working with just one pen size today or
you can work with multiple. So we're going to
practice it both ways. So if you take a look at the reference images that
I've provided today, they have a speckled like surface and we're going to practice creating
that texture. So first we're going to
stick with one pen size. So I'm going to
introduce my very, very well-loved zero to size that is almost
completely worn off. Really need to replace this one. So what I like to do is
work from dark to light. So what I'm going to
go in first and do is add in some darker
speckled areas. And then we'll go in
and shade around them. We're now really following any
particular photo for this. We are just getting a feel for it and practicing some dots. I of course immediately regretted how large I
drew these squares. And I can tell you that I'm
not going to fill it up. Put just making a bunch
of spots on here. Let's stick with that. Bring
in a little bit closer. And now we are going
to shade around this. Let's treat it as this is
gonna be the darker side, and this is going to be
a little bit lighter. And you can shade it
really evenly or you can leave some highlights in it and it is totally up to you. But I'm going to Create this darker
side over here. We want to make sure that you
can still see that texture. Again, I could choose
to outline this part, but since I didn't even
fill up all square, I'm not gonna, not going
to outline right now. I'll leave some
highlights, round spots. Do the best I can so that you guys can see what I'm doing. Alright, so that kinda gives
you an idea of creating a spotty texture here
and shading around it. And again, this is all
done in one pen size. So now let's see how we can
do it in multiple pen sizes. So again, this is gonna
be a personal decision. You could use a ton of different pen sizes or
you could just stick to, to really up to you from mine. I'm going to use two
different pen sizes. I'm going to use the 03 and the 005 just to kinda
give it a big contrast. So I'm going to use the 03 to again create these darker areas. Has another pen that
definitely needs replacing. C. Hard to get the camera to focus. Sometimes it gets
distracted by my hand. Once again, I drew this
absolutely gigantic square, which I will not be filling up. All right, so that
gives an idea there. And then I will be kinda
following the same idea with this one where this will be the lighter side and then
this will be the darker area. I will start with
the darker area. I feel like even with just that, you get an idea of
the difference, that it makes it
somewhat subtle, but you could make it a lot more dramatic
if you wanted to, based on the sizes
that you choose. You could choose to go
one way or the other, whether you want to
always use one pen size and your illustrations or if
you want to switch it up, even from design to design, or within the same piece
are really just depends on the look that you
would like to create. Still going around and leaving some white areas for
a little bit of highlight. That kinda gives you an idea for the different ways that we can create
these textures. I think I'll leave the
stippling techniques at that. And it will be way more FUN when we're actually
illustrating our octopus. In the next lesson, we will get into practicing
on our first one.
5. Inking: Octopus #1: Okay, so we're going to get into inking our first octopus here. So again, I have my reference
photo from Unsplash. You can find it under
the Projects and Resources tab so that
you can pull it up. Or again, you're welcome
to find your own and still apply these techniques to
your own illustration. I have mine sketched
out right here. And the first thing
that I'm going to do is outline my sketch. Again, this is totally
and artistic choice. You can outline it if you
want or you don't have to, and you can just do
dots as the outline. It is completely up to you. But I am going to do an outline. I am going to use my trusty
zero to size and get to work. So just keeping this
outline pretty simple. Octopus does, has some
good texture to it. So I'm not using super smooth lines right here. To Kohl's parts over here with a tentacles I chronic. I love this reference image. It will be PFK-1 to include a hand as part of the
illustration too, but we would be
here all day then. We are keeping it simple. It's just the octopus lost, but a typical kind of
peeking over here. And so we are all set
with our outline. So then the next thing that
I want to do after I've waited a few seconds
for the ink to dry is I want to erase all of my pencil marks so that I am
not doing that at the end. And I kept my sketch
pretty simple. But if you want to sketch more elements that you don't
want to erase right away. Of course, that is totally fine. Like I'm gonna leave
this part right here. That was like a
reference for the head. That's most of my
pencil marks gone. My plan of attack for
this illustration is going to be to work
on the head first. And then I'm going to start down here where the
tentacles are in shadow and kinda work around in this counterclockwise way. So first, I'm going to
start with the head and work on the
texture right here. There's some kind
of speckled areas and texture and then the
shadow down at the bottom. So like I said, we
will start there. So choose whatever size you
want to start off with. And let's get into it. And just like we did in our
practice areas up here, I am going to start with the darker speckles
that are going on. So I am going to use
the zero for size. Let's get started. Again. I always put this
reminder out there. You can follow a
reference image as closely or as a loosely
as you want to, it is totally up to you. I know that for sure ISV one of the people
that got sucked into trying to recreate every single detail
from our reference. And it's just not necessary. Person who is seeing
your final piece did not see your
reference image. So don't get caught up in exactly matching
all of these details. All right, I think
I'm pretty good with that texture to start with. What I'm gonna do now is moved down a couple of sizes
and start to shade. I think I'm going to use two different sizes as I'm
shading the rest of this, probably the 02 and the 005. So I'm going to start once
again with the darkest area, which is gonna be down here. Keeping in mind that
pretty much above each of these little
darker patches, there's a highlight above that. So I want to make sure
that I don't fill that in so that I can create as
much depth as possible. I have been illustrating it
so many octopus recently and I've just had a renewed
fascination with them. I just think they are
so cool and there's so many different types
that are all different. I always love in
nature documentaries and I just feel like every single one there's
some really cool octopus. It's always such a
highlight for me. Awesome number what I was a kid. I am from the Baltimore
area and we have the amazing National Aquarium
at the inner harbor, and that was always such
a fine place to go. And one of the
visits, the octopus, which I think they have like a giant Pacific Octopus maybe, but I don't really
remember what type it is. But it had laid eggs, but it I'd lay
them on the glass. And it was just
really cool to see. And I'll always remember that. Right. So we're just
working in more texture. There's also something dramatic lighting on this
reference image, I think from the
surface of the water. And I'm kind of ignoring
that a little bit. I think that's just
one of those things. If I get too wrapped up in it, I will be here for hours. Alright, I think
I'm going to move down a size smaller now, again, keep in mind with stippling to, you can always make an
illustration as light and airy or dark and
heavy as you want to. That's another big
stylistic choice. I feel like I've
tended to go a little more light and airy
with my illustrations, partly because sometimes
they just do not have the patience to
sit here and just do dots for hours just to
make an area really dark. But I follow some
artists that do a really good job with that
and it's so cool to see. So definitely try it out. If you're going to try it, I would definitely suggest
sketching some things small so that you are not trying to
fill an entire page that way. Right? And then I'm
going to go back to zero to for a second
and fill in right here. I should've learned
more of the words for the anatomy of an octopus
before I started this. Maybe next time? Filling that in with
a simple gradient. So the I is kinda downturn, but I know that octopus have this rectangular pupil to there. I adding that in, right, and I will continue on shading her some dark
areas around the eye. So I'm going to start with that. I'm using the zero
to size still. I'm just going to do some
Dot outlining right here. Right? And then
shifting down once again to the smallest size. Alright, so that's kinda
the head finished. And before I fill in the
rest of the body here, I am going to go through
and do the tentacles one-by-one and then we'll finish with the larger body
area in the center. Okay. So I'm going to start with the darkest areas and
I'm just going to sketch out right here
where that shadow falls. And then pretty much all of
this underneath is in shadow. And let's get started. So you can still see some
texture even in the shadow. So I am going to go through
and create that first. Now starting shooting around it. Alright, that was pretty simple. And now again, it's
pretty dark under here, so I'm just going to do lots and lots of
dots to darken this up. I'm leaving some area at the top here because it is a
little bit lighter. So I'm just going to do that part next. Right. And now we will move on to
the rest of the tentacle. Again. It's really dark under here and then kinda right there. So I am going to start there
and then work this way. And doing some little Dot
outlines here whether you can see little suction cups. Why am I blanking
on that right now? Once again, over here Alright, keeping
it pretty simple, but there is our first tentacle, onto the next tentacle. And I'm going to again start
with the darker areas first, which is going to be along the top here and
then the bottom. And then I'll kinda cut off, I guess like right there of
where we're doing dots for now and then we'll go in
and do that with the body. I'm going in with my 02. We will darken this up. There's a couple of
spots along the way. I'm just gonna keep
filling this in. And then we'll go in and add a little bit of
the texture that's happening towards the
middle of the tentacle. Then as I don't think I've
mentioned in this class yet, the, it is totally up to you how fast or slow you
apply your dots. Some people like to be really slow and meticulous
with their placements. And you could also be like me and do it quick and randomly. I would say I tend
to do it a little bit slower than I'm
doing it right now. If I'm working on a
true like final piece. But it is just
totally up to you. Just darkening up here where it kind of heads into shadow. Okay. Then I'm going to go
back to my larger size, the 04, and add in some of
the texture that's happening. Once again, I am loosely it following
the reference photo. You want to follow it exactly. That is totally fine. Keep it a little bit more loose. Alright, so added some texture. And then go back with the zero to for a bit to do
some more shading. We'll finish off with the 005. Really feel like for
one of these classes and easy to just stick with the one bigger size and do the whole illustration and
just see what that feels like. Because I'm always mentioning
that as an option. I'm just using one size, but I just never do it. I just think it will
be interesting to try that out and see
what it feels like. All right. With our smaller size Alright, let's kinda the
basics for that one. Now, let's move on to
our next one over here. Okay, So for this one, I am first going to take
my really small 005 and outline the little
suckers on here. Which again, you don't have to outline if you don't want to, you could just do
dots around them. Or you could just pretend
that they don't exist and just shade it in
whatever works for you. Alright, so I've added that in. And now I'm going to work on the texture and
the darker areas, but it's kind of,
let's say right there. Grab the zero for first. All right, so there is some
good texture to start with. We can start shading. And again, you can
see I'm cutting this off like right about there. And we will go and do that
as part of the central body. After the tentacles. A tough part here of course, is trying to shade in between
to give it some depth, right? And then go in with
our final small size. Alright, and I'm gonna call
that one finished as well. And Lindsay going, we
can always go back and evaluate how
everything is looking once we are finished
with everything. But right now we will keep chugging along right
to the next one. Alright, so same
thing as before, using the zero for size to
start creating Textures. Using a mix between dots are spots and lines
to create that look. Right? Right. Pretty much another one finished for now. We'll just repeat the
same process over again. These two are pretty small. I'm just gonna kinda do
them at the same time. Switching sizes once
again and finishing out your shadow area. And then this tend to go, you
can see some of the suckers right here in the
reference photo, but they're so tiny. I'm just not going
to bother hombre on. All right. Then before I
switch to that smallest size, I'm just going to do this little bit of
tentacle, this peeking out. I'll go back with my smaller finish these up. Alright, so now
all we have to do is just fill in the
rest of the body here. So for the millionth time, I'm going to start
with the texture, grab that zero for, and start creating
the dark areas. Trying to figure all
the way I can do this where you guys can see. All right, So it out
some texture there. Now we will start to shade. So I signed a step
back and see how close we are to being
finished with this one. It's another thing with
stippling is you have to make sure your
face isn't glued to the page and you never
take a step back because stippling this
I you take a step back. You're like, oh wow. But
when you get wrapped up too closely in every single.it gets harder to see
the bigger picture. Right on to the final bit. All right, one step back, I think I'm going to
call that finished. You can always go back and make certain areas
darker if you want to, you can make certain
areas lighter. You could go out a thicker
outline, which I might do. It is up to you, but I'm going to call our
first octopus finished
6. Inking: Octopus #2: Alright, it is time for
our second octopus. So this is gonna be
the one that I am adding to my final flash sheet. So if you are following
along with the full project, this is the one that
matches my sketch. As a reminder, the reference
image again is under the Projects and Resources tab so that you
can pull that up. For this one, just
like the last one, I'm going to start
with a quick outline. So going in with my
trusty zero to size, laying down that outline. So again, you can
be as detailed with all the different things
you're outlining or not. Totally up to your preference. And then just like a lot of the other courses
in this series, I am going to probably
go back at the end and add a boulder
outline to this. I am starting with a one
here with the zero to Pen. Alright, so there
is our outline. And then again,
I'm going to give this a few seconds to dry and then I'm going go in and erase
most of my pencil marks. Right? Racing. And like I said, I'm
gonna erase most of the pencil marks, but there are definitely something I'm going
to leave in for this one for a moment. All right. I'm going to tackle this octopus similar
to the other one. I'm going to start with the
eyes and the head here. And then we will
just work around counterclockwise and knock out all of the different tentacles. So the first part here, I'm going to grab a smaller size and I'm going to
tackle the eyes. This I overhear is kind of hidden angle, right? One and then Orion and then I'm going to shade around the eyes because that's the darkest part
of this octopus. This down a bit. Alright, so just
slowly darkening up that area. Filling that. And then similar over here as well. All righty. And then we are going to
start with the head up here. This octopus is definitely
still has a lot of texture, but it's generally lighter color than the other one that we did. So I'm not going to use a
boulder pen size and the 02. I am just going to use
this to start adding in some of texture
dots and lines. This is I'll be using
mostly for the texture. And then I will go down and use a smaller size for the shading And again, this is one of
those moments where you can either really try and match the reference
photo if you want, or you can go a little
bit looser with it and just kinda create
your own texture. All right, let's
kind of the basics. And you will start
shading with our 05. I'm trying my
absolute best to make sure you guys can
see what I'm doing. Again, if you ever feel a, you start to lose the
texture when you're shading, you can go back in with
your other pen size or even a larger one if you need to darken up any of the areas. But also don't forget
to pause for a second, take a step back and see what
it looks like from a far. All right. And like I said, since this
one is pretty light-colored, I think I'm going to
leave that there. Now that I've finished
most of the head, we're gonna go in and start
tackling the tentacles. Must start with this
little section back here that has pretty much all
in shadow from the head. I'm going to pick
up my zero to size and first start where
the shadow is darkest. Which in creating the
little dot outline for darken that up. And then I'm just gonna
go back in a little bit, just a little bit of
texture in there, a little bit of variation. And then we can switch
to our smaller size. I'm just going to
use the smaller side a little bit right there. A little bit right here. Okay. And that's the first
tentacle done, but it's barely one, so I don't know if that
counts, but alright, and then I left some of
these pencil lines in here because this shows where this tentacle is a lot
lighter right in here. So it's darkest where it has the little suckers
on the side here. And then there's a little bit of darker texture in here as well. So let's start with this top
edge and then we'll fill in here and here and leave
that highlight pretty light. All right, so darkened
up that edge. And then let's create some
of those other textures. This is stripy, right? Start creating a texture down
towards inner part here. Right? So that is a lot
of the darker area, just adding a touch
more texture. Highlight. And now let's move down to
our smaller size, fill in. And then she'd pretty much
this entire part over here. Keeping this pretty
much a highlight, just adding little, little bits of texture
here and there. Ryan, and then step back. And that is our first
larger tentacle finished with the way that
this octopus is posed. Instead of doing each tentacle, kinda cutting it off and
then doing the body later. I'm just going to
continue it all the way in to where it meets
the head for each area. So this next area is
a pretty large one. And again, I've sketched
in the highlighted areas. That's it. Kinda
have it like that. So again, we'll start where it's darker right along this edge. And then a lot of this
area right here is kinda a little bit
darker textured area to match this part
on this tentacle. Let's get started. Right. And then similar to the last one, will go in and create some
of the stripy texture. Still kinda going on as
it gets closer here, but it's a little
bit more subtle. So yeah, keeping a
little lighter here, creating an edge for
that highlight with some more texture. Right? And then allows go in
with this little area As tedious as I can
be sometimes I just love, just loves stippling. Know. Like it's the easiest thing
for me to just get into that flow state and just relax. Even though it seems
or rare that I get to sit down and fully
do that sometimes. Rainy day like today, it just feels so perfect. Alright, so we've established
some basic textures. Just add a little
bit on here. Right? Let's shade it in. Shade part. Again. It feels like such a big areas to cover
with a very tiny pen. Which again is why
I tend to keep these illustrations a
little bit more light and airy versus dark because
I have to do less dots. This is my first-year as a stippling artists
that sometimes my hand and my arm just
cannot take it anymore. So unfortunately, I
cannot just sit here and do this for our street
with no breaks like I used to. Alright, let's add a
little bit more texture over here to fill that in. Alright, another
area of finished, pretty much just repeating this same process
for the next one. We sketch in, let's solve
the highlight areas. Right? Now let's get started. It's funny thinking back to some other classes
in this course, I don't know if I
would rather be working in larger
areas of texture, kinda like this octopus. Or if I would rather shade
something that's like a little bit smoother like
the dolphin or the orca. Honestly, I don't know. Sometimes when you're just creating a gradient it
gets really boring. But then it also can be really satisfying when you create
such a nice smooth area. I guess the secret is just
alternate, go back-and-forth. Always switch it up. Kinda continue up to
this halfway point. And then we will leave
that for the next two. Cool. Right? Switching
pen sizes again. Once again, shading in without smaller 005 size or whatever
size you have chosen. Going through and adding some
texture in the highlight. I'm going to go through and
add some texture over here. And then once I finished
shading that area in, also going to go
through and erase the pencil lines from the
areas that we've aimed so far. Just to connect, clean
it up a little bit. See how it's all looking. Alright, I'm going to pause, let that dry for a second and then I'll erase out
some of the pencil. Alright. Perfect. Always like seeing it at the pencil marks
gone and cleaned up. I feel like it just gives
it a new life to it. So next we're going to work on this little bit
of technical here and just match it up
to I would say about there and then will include
all this in one swoop. So there's not too much
going on down here. Just have a little
bit of texture to add in a little bit
of a darker area. Just right at the bottom. There's definitely some
pretty bold stripes. Right, So leave the
texture at that time to shade it in part doesn't really have a pronounced highlight
or deep shadow. I think that should pretty much be sufficient for the moment. So again, we're moving
on to another technical. This one once again does
have like a highlight here. Pull up a little bit more like that. So we will fill in this one
we might stop about here, and then we'll just leave this last part for
the final bit. For what feels like
the millionth time. Once again, adding dark edge. Go straight in with texture. And then adding a little bit
on this side, highlight. I had a little bit more stripe to this area. Right? So kind of another
tentacle complete and we are on to the last one. Just like the previous ones. In the same process, I'm just going to work on
finalizing the head here. Right. And then shade
the lawsuit a bit. All righty. I think I will give once again, give that a second to
dry so that I can erase the pencil marks and then we will decide if it
is all finished. I think I'm liking
how that looks. I am going to call
that one all finished. So it is so exciting. We are almost finished. The flash sheet has
come a long way. We just have our sea
turtle to finish
7. Final Thoughts: Alright, thank you so much for following along
with today's class. I hope you enjoy inking these two octopus and
don't forget to snap a photo and upload it to the Class Project Gallery so we can check out what
you've created. If you want to post a picture on Instagram, what you created, don't forget to tag
me at EJW underscore, underscore Art that
I can see that you've created and share
it on my social media. Now that we've
completed the octopus, we only have one animal left
to add to our flash sheet, which is the sea turtle. I can't believe I
am almost wrapping up this series and I'm so excited to see if anyone has followed along with
the full project. Don't forget to leave feedback in a review
for this course. Reviews are super
important here on Skillshare to
ensure that classes remain on the platform as
classes that don't have reviews are subject to removal
after a period of time. So definitely leave feedback. It's always helpful
here what you guys think and I really
appreciate it. Also, don't forget to
follow me so that you know when the final
class and this series, the sea turtle is released. So we can finish out this
series together. Hope diseases
 Elizabeth Weglein, Artist and designer