Transcripts
1. Intro: Are you struggling with
your drawing skills? Have you ever said things
like I can't draw. I'm not an artist. Practicing is boring. Don't feel confident. I don't have talent. I have heard many amateurs and even seasoned artists
saying things like that. And I was one of them. But let me tell
you, none of it is. Drawing is a skill
anyone can master. You just need to know how. Hi. My name is utah Schneider. I'm an artist and educator
based in Germany. This class will
help you advance in your drawing skills while
enjoying the process. We will talk about
brain functions and how we can use
them to our advantage. My ten day drawing
challenge will help you establish a new
practicing habit. The drawing proms are digestible
and repeatable and will train both your drawing muscles and your brain in the
best possible way. You can follow along using the workbook I have
created for this class. Use it together with my
brush set in procreate or in the traditional way printed
out with pen or pencil. Once the ten days are over, you will see a huge improvement
in your drawing skills. You will have learned how
you can motivate yourself, and you will have
a toolbox full of extremely beneficial
drawing exercises. This way, you will become a better artist every
day while feeling great. So are you ready to improve
your drawing for good? Then let's get started. I will see you in class.
2. Class Project: Class projects help you
reinforce what you've learned by applying it
in a practical way. It's one thing to understand
concepts in theory, but putting them into practice
makes the knowledge stick. One of the goals of
this class is to establish a practicing habit
in your daily routine. That's why I created this
ten day drawing challenge. Your class project is
going to look like this. First, you download
the workbook, and if you're planning
to work in procreate, my hand crafted procreate
brush set as well. You can find them in
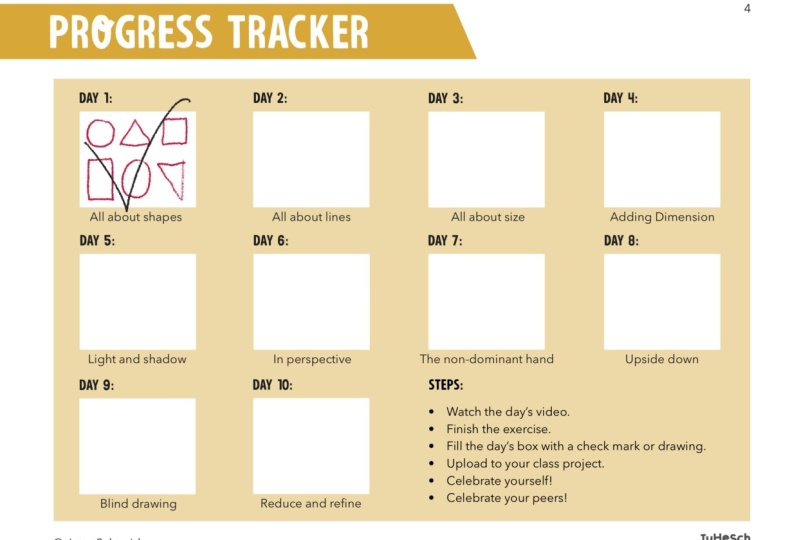
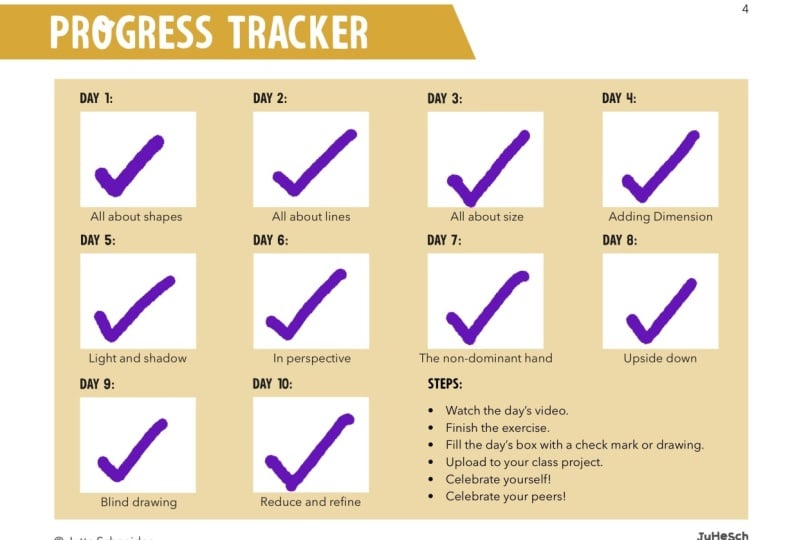
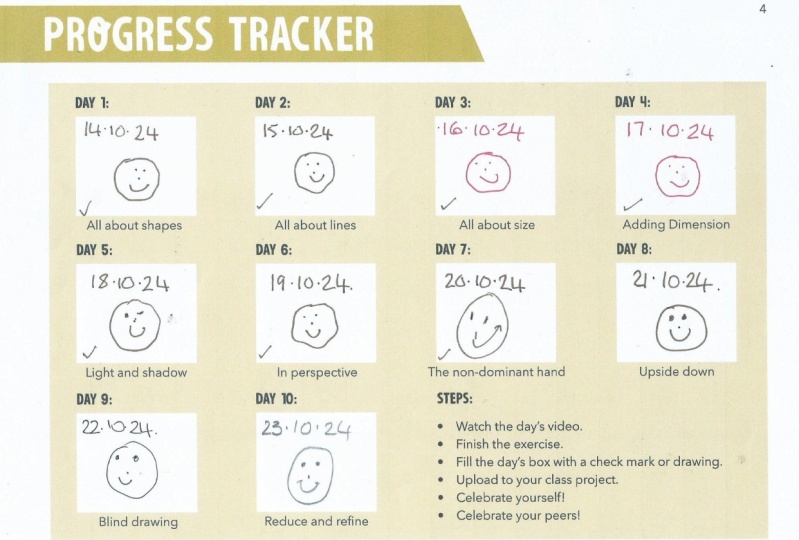
the resources tab. In my workbook, you will
find a progress tracker to help you visualize your
progress and stay accountable. Start with watching Day ones Exercise video and follow
along in your workbook. Tick off the box on
your progress tracker, then take photos or
export from Procreate. Now, you can create a new project in the
project and resources tab. Upload your photos
or JPEx there, and feel free to share
any thoughts with us. Then it's time to celebrate
your first achievement. Please look at your
Peers class projects as well and cheer them on. We all appreciate some praise. Tomorrow, you will
come back and complete the second day's exercise and upload your project as well
as your progress tracker. Continue the following days
with the same process. Watch the video,
complete the exercise, take some photos,
and your project. This will keep you accountable, and it will help you
establish your new habit, as well as staying motivated. I can't wait to see your projects and the
progress in your skills. Let's move on for now to the
next lesson where we talk about the materials
you'll need for this class. I will
see you there.
3. Material: You really don't need much to follow along with my ten
day drawing challenge. If you are a digital artist and like to use procreate,
that's fine. In my brush set, you will
find everything you need. If you prefer to draw on paper, simply print out the workbook and use it with a pencil or pen. You can even follow along when you don't have
access to a printer. In that case, you just need
a sketchbook or plain paper. If you wonder what pens I recommend having,
it's those five. A technical pencil represented in my appropriate brush
set by the sketcher tag. A HB pencil, in my brush set, it's called sketcher HB, a six B pencil, called sketcher six B in my
brush set, a fine liner. The equivalent in procreate
would be my nice liner fine. Add a calligraphy pen, which is represented by the nice liner jacket
in my brush set. But again, you can
follow along with this class by using a
simple HB pencil only. That's no problem at all. In my workbook, you
will find a page dedicated to each day of the
ten day drawing challenge. When you watch the
given day's lesson, you will hear how I
approach the exercise, my pen recommendation, and you will see how I
tackle the practice. Sometimes I will give you additional exercises at
the end of a lesson. In that case, you might need
an additional sheet of, more pages in your sketch, or when you work in Procreate, you can simply add new
layers and draw there. In general, you can spend as much time as you
want for each practice, but make sure you schedule a minimum of 10 minutes
daily for your practice. Let's move on in class now
and have a bit of an insight into our brains architecture.
I will see you there.
4. How Our Brain Works: Un. Are you ready to rewire your brain and
change your thinking? Then let's start by having a
look at how our brain works. Here's a simplified
image of our brain. There is the left hemisphere
and here's the right. The left hemisphere is the
logical and analyzing side. Whereas the right one is more associated with
creativity and intuition. When we look at the
left sides tasks, we can tell that these
are all skills that are highly nurtured in school
and modern society. That makes our left
hemisphere quite dominant. We can also say that making
art, like drawing, painting, or any other
creative process are probably part of the right
hemisphere's duties. Our goal should be to keep
both halves of our brain in balance and use the appropriate
side for a given task. We have already learned that the left part is quite dominant, as it is well trained by the school system
and societal values. But how do you train the
right side of the brain? Well, simply by taking away some of the dominance of
its left counterpart. The reason we often
claim we can't draw is because we use the wrong side of our
brain for this task. In childhood, we memorize simplified images of
everything around us. Storing informations
as simplified symbols makes it easier for our brain. It works faster. Let's prove it. Pause this video and take a
piece of paper and a pen. Now draw a simple flower
just from memory. Then come back to this lesson. If your flower looks
somehow like this, then it's because your
left brain side took over. I just drew a
symbol of a flower, and yes, it looks childish
and not really realistic. It is what my brain
stored back then. And it's pretty quick in referring back to it when
I think of a flower. This happens with basically
anything we want to draw. We draw from memory
instead of what we see. It's not. Let me repeat that. It's not because we
can't do any better. But because the left brain pushs forward and takes away the duties of the right
brain hemisphere. Nothing's wrong with
our drawing ability. In the upcoming exercises, I will show you ways to push back this cheeky
left brain side, and that's already enough to help our creative
side to do its job. We will learn to observe
and focus on what we actually see to stop our brain from referring
back to symbols. And here, step one of rewiring
our brain is complete. In our next lesson, we
will move on to Step two, where we will talk about
motivation and what it takes to actually enjoy or even get
addicted to a necessary chore. Stay tuned, I will
see you there.
5. The Secret to Motivation: In this lesson, we will
talk about motivation. How can we cultivate it? What does setting achievable
goals have to do with it? And how can a ten day
drawing challenge help you? It's clear to improve
your drawing skills, you have to practice regularly. To be honest, sitting down to practice day does
so intimidating. Wouldn't it be great if
we could find a way to happily draw every day
and improve with ease. Let me show you how you
can get there by using your own body and
setting smart goals. Let's start with picturing a moment where you
have finished a task. Let it be housework, writing a paper, a workbook, or whatever else comes to mind. You're finally done,
and you feel good. The achievement
lifts your spirit due to a certain hormone
called dopamine, also known as the
happiness hormone. Dopamine is a neurotransmitter, a messenger in our brain. It's released where we experience something
enjoyable or rewarding, such as eating good food
or receiving praise. Brain scientists found
out where we engage in activities that result
in a positive outcome, Dopamine is released,
creating a feeling of pleasure and reinforcing
the behavior that led to the reward. This reinforcement
strengthens our motivation to repeat the behavior
in the future. Dopamine is also involved
in anticipation. When we anticipate a reward, such as the satisfaction of completing a task or
achieving a goal, dopamine levels
increase, driving us to pursue that reward through
goal directed behavior. This leads us to the necessity
of setting smart goals to fully use the benefit of
DPA mean for our motivation. What does it mean for us when we want to create
a drawing habit? My ten day drawing challenge will help you immensely
to get going. The key is here to have an immediate dopamine release after you finish a practice. Our goal should be
something like this. Today, I will finish a 10
minutes drawing exercise. Simple and short. You practice for 10 minutes, you
reach your goal. Dopamine is released,
you feel good. Be proud and celebrate. Enjoy this dose of dopamine. Tomorrow, it will
be even easier. You know how great you will feel after this
practice session. It's even easier to get started. After a few days, the next factor will
push you even further. You will see how your
strokes have improved. This then releases even
more dopamine in return. After the ten day drawing
challenge is over, you will feel so
hooked to drawing that you can easily go on
with your daily practice. Luckily, you will have a toolbox full of beneficial exercises
you can choose from. I will give you even
more practice ideas at the end of this class. You can use them to warm up
or to release creativity. Just go on with your
daily practice, and you'll become
a better artist every day while feeling great. Let's get started with
the challenge and our first day's exercise in our next lesson. I
will see you there.
6. Day 1 All About Shapes: Hi, and welcome to
your first exercise. For this, you will need the day one exercise page and any pen
or pencil of your choice. When you work in procreate, make sure you have the
page assist enabled. You can do that under
the wrench tool, Canvas, page assist. This way, you can flip
through the pages easily. Go to the page that
says Day one exercise, then open the layers panel
and add a layer on top. Turn this layer into
a clipping mask. I will use my nice liner fine, which basically works
like any fine liner. But a pencil will work fine too. Let's now fill the top box here with loads of basic shapes. There can be
squares, rectangles, triangles, circles or ovals. Each item we see can be
reduced to basic shapes. That's why it is important to feel confident in drawing them. Don't worry if your strokes
aren't perfect right away. Just read you the same line until you're happy
with the result. We just want to train our muscles and get used to
drawing with confidence. You can rotate your paper
or canvas. If you want. Make sure you fill even the
tiniest space with a shape. Focus on the line you're
drawing at that moment. Feel the confidence
growing with every shape. Notice, what is easier
to draw for you, horizontal or vertical lines. This is a great exercise to get familiar with
drawing shapes. If you find that boring, why don't you add fun
faces to your shapes? Let's try in the exercise below. First, you draw a shape, and then you draw faces showing emotions
you can think of. Happy, sad, tired,
scared, and so on. This helps you not only
with your basic shapes, but also with creating
a repertoire of eyes, mouth, and so on for
your future drawings. Doctor And once this box is filled two, you have finished
your first practice. Make sure you repeat this
practice every now and then. Maybe next time, when you want to draw
during a phone call, give yourself a pat
on the back now. You reached your goal. That is amazing. And this is the time to tick the first box in your
progress tracker. Export it together
with your exercise. Then you can create
your class project. I'm looking forward
to see your shapes. And with that, we're one
day down nine more to go. Come back tomorrow for your next exercise. I
will see you there.
7. Day 2 All About Lines: Hi, and welcome to
the second exercise, where it's all about lines. I am so proud of you that
you showed up again. I hope so are you. Can you imagine how awesome you will feel at the
end of this practice? Just take a moment
to anticipate that, and then we'll jump
right into it. For this one, I will use my nice liner jacket
and maybe a pencil. If you follow along on paper, you might need an eraser too. Here I am on the second
day's page of the workbook. Don't forget to add a
layer and turn it into a clipping mask when
you work in procreate. As already mentioned,
today is all about lines. Let's start with vertical lines in this top left box here. Draw lines from top to bottom, but practice your
confident strokes. If the line looks wonky,
that's no problem. Our hands and muscles need
to get used to this motion. That's not too
difficult, isn't it? You can also see how my lines improved as I reached
the end of this box. Then let's move on
to the next box where we want to draw
horizontal lines. I find these a bit
harder to draw. It's due to the
direction of the motion. When I move my hand up and down, my hand stays on the same axis. But when I move my hand
from side to side, it makes a slight curve. That's what we need
to compensate for when drawing straight
horizontal lines. Since I am a lefty, I found this position
that works for me. You might need to play around with a position that
works well for you. There's no need to draw
long lines in one go. You can make shorter but
confident strokes instead. This way, you can correct
your direction throughout. As you can see, drawing horizontal lines is
way more difficult. Of course, you could just rotate the canvas or your paper, but that's not always possible. Make sure you keep practicing your
horizontal lines as well. Let's move on to diagonal lines. Here, you also need
to play around until you find a
drawing position that works best for you. Which direction is
easier for you. Let us know when you upload your exercise to
your class project. For me, it's the lines
that lean to the left, probably because
I am left handed. Now onto wavy lines. I want to split the
box in halves and draw vertical ones on one side and horizontal
ones in the other. Interestingly here, I find horizontal waves easier to
draw than vertical ones. And in our last box, you can combine the different
lines into a pattern. I will split the box into
triangles with a pencil, and then I'll get going. You do whatever
comes to your mind. And with that, our
second exercise is done. You did very well, so be proud of your
accomplishment. Don't forget to tick the box on your tracker and update
your class project. Two days do, eight more to go. Come back tomorrow for
your next exercise. I will see you there. Oh.
8. Day 3 All About Size: Hi, and welcome to
our third exercise. How did you feel after
your practice yesterday? I hope you celebrated
your achievement. If not, let me do that today. You can be very
proud of yourself for pushing through and
showing up today again. Today, we want to repeat
drawing basic shapes. But this time, we want
to focus on their size. I am here on the
exercise page for day three when
working in Procreate, don't forget to add a new layer and turn it
into a clipping mask. I want to use my
sketcher HB today. In this top box, we will draw rows with the
same basic shape, and we will try to keep
them all equal in size. Be gentle with yourself. This is a practice. Nothing
needs to be perfect. In case you wonder why I always start on the right
side with my drawings, it's just because
I am left handed. And when I draw on paper
and start on the left, I will smudge my drawings because my hand wipes over them. So eventually, I just
got used to starting on the right side of the
paper to avoid smearing. This exercise might
feel a bit tedious. So in the next box, you will make it
more fun for you. Draw the shapes in a pattern, for example, or use
different colors. Or try out the new pens you got from your latest
stationary shopping hall. Get creative, but don't overthink it and
give yourself grace. And with this, the
third exercise of this drawing
challenge is done. You did it. You showed up
again and you pushed through. Well done. Make sure you tick the box on your tracker and
update your class project. Leave some praise
with your peers, too. Three days do and
seven more to go. Come back tomorrow for another exercise. I
will see you there.
9. Day 4 Adding Dimension: Hi, and welcome to day four of our ten day
drawing challenge. How did you celebrate
yesterday's achievement? Did you treat yourself to something special
like ice cream? You can share that with us when you upload your today's project. Today is going to
be about dimension. We will turn two D shapes into three D. I will use my sketcher, six B for today's exercise. Let's have a look
at the example. We are supposed to use the given shapes and
put them in dimension. Let's start with
this rectangle here. We will recreate this one. And add another one. Then we draw the lines to
match the corners. And here we have a box. Let's add some dark
sides to indicate the light source that is
probably coming from the front. And our box is done. I guess its correct
name is boid. Let's continue the same
way with our trapezoid. And here we are supposed to
create a square base pyramid, which is fairly simple. Just add a point on top and match that with the
corners of the square. Ta. It's done. And lastly, we create a prism. Copy the triangle and draw
another one above it. Then draw lines to
match the corners. Let's draw the shade
as well. Easy PZ. In the next exercise, we want to indicate the
roundness of the objects. We only need to draw
standing or laying ovals to show the
depth of our objects. Just watch how I
do it here as it is easier to show you
instead of explaining. All right. And as an
additional exercise, you can take another piece of paper or add another
layer in procreate, and there you can draw
more three D shapes, round or angular, whatever
comes to your mind. And then we finished
exercise four as well. Y, I bet. You strokes are way more
confident after day four. Tell us about it in
your project date. And then lean back and admire how far
you've come already. Day four done six more to go. Come back tomorrow for another fun exercise.
I will see you there.
10. Day 5 Light And Shadow: Hi, and welcome to day five of our ten
day drawing challenge. Once this exercise is over, we are halfway through. That's a reason to celebrate
and check in with yourself. How do you feel with your drawings after
five days of practice? Today, we will look for ways to depict light and shadow
in our drawings. We are on the day
five exercise page, if you are working in procreate, remember to add another layer and turn it into
a clipping mask. In Exercise one, we will create values of
darkness with hatching. Keeping the lines further away from each other appears light, and the closer we
move them together, the darker it gets. Let's replicate this example. I am using my
sketcher six B here. Don't be as accurate. Remember, you do you, and a drawing looks more natural with messy and even
wonky strokes. It also tells a lot
about your style. The next way to indicate daka
values is called pointsm. As the name reveals, it has to do with dots. A lot of dots. Keep them apart. It appears light. Put them closely
together. It gets dark. And in our last exercise, we will create a value scale. Here, we need to
work with pressure. Using the pencil
without pressure, creates a light gray, and the more pressure
we apply, the dw. I recommend to not with
the tip of your pencil, but keeping it tilted and sight. If you're not happy
with the value, then you draw over
several spaces once more. And here we are, Half time. Pat your back. You deserve it. It takes a lot to
come back every day and finish an
exercise. But you made it. It's time to tick
your tracker box and upload your project. Let's congratulate each
other for making it halfway. Five days done. Five more to go. Come back tomorrow for
another fun exercise. I will see you there. 33
11. Day 6 Perspective: T Hi, and welcome to the second half
of our drawing challenge. How do you feel? I hope you feel more
confident when you pick up your pencil and that you were looking forward to
practicing today. Today is the last part of the drawing fundamental section, and we will cover
drawing in perspective. Let's have a quick intro
to perspective drawing f. Perspective means you draw something from your
point of view literally. The topic of perspective drawing could fill a class on its own, and we will focus on
its simplest form here, the linear one
point perspective. However, once you've
understood this concept, you can easily build on it. There are a few terms that
are worth explaining. The horizon is the line where the sky meets the
land or water below. The height of the horizon will affect the placement of
the vanishing points, as well as the scenes eye level. The vanishing point
is the place where parallel lines appear to come
together in the distance. A theme can have a limitless
number of vanishing points. The ground plane is the horizontal surface
below the horizon. It could be land or water. The orthogonal lines are lines that are directed
to a vanishing point. The parallel lines of
a road, for example. If I draw a cue, all the parallel lines that show depth are going to be turned
into orthogonal lines. Moving the vanishing point along the horizon changes
the viewing direction, and moving the horizon up and
down changes the eye level. Important. Lines that are parallel
to the horizon stay horizontal in a
single point perspective. All right. With that
out of the way, we move over to page ten in our workbook and look
at the exercise there. When working in procreate, don't forget to add a new layer. It is not important
which pen you use. I will draw with
my sketcher tack. We see a checker board here, and we are supposed to bring that into a one
point perspective. There is the
baseline which tells us where the bottom line
of our pattern should be. Up there is our vanishing point, which means all orthogonal lines are directed towards this point. We've also heard that the horizontal lines
stay horizontal. However, the closer we move
towards the vanishing point, the distance between
them decreases. We don't have to draw it super straight and absolutely correct. T to your best and eyeball, what looks correct for you. Of course, we could use a ruler or the perfect shape
tool in procreate. It would help us
create straight lines. I'm not a fan of
that look though. In an artwork, hand drawn lines feel more natural
and organic to me. It's also a great way to
practice drawing your lines. And this first exercise is done. Now I want you to explore
this even further. On a new piece of
paper or a new layer, I would like you to move
the vanishing point. Move it up and down to the
left, and to the right. See what happens with the
lines and notice how you will be more and more foreseeing what the
shape has to look like. This is what I came up with. Hey, and now we reached
another milestone. We've covered drawing the
fundamentals way to go. Make sure you come back to
these exercises now and then, especially when you
don't know what to draw, or suffer something like a creative block and wish
to wake up your creativity. I promise this does wonders. From tomorrow on, we
will focus on training our right brain hemisphere to learn to draw
what we really see. Time to tick the
box four day six of our progress tracker and
update our class project. Six days down for more to go. Come back tomorrow for another fun exercise.
I will see you there.
12. Day 7 The Non Dominant Hand: Hi, and welcome to day seven
of our drawing challenge. Now that you've practiced
the fundamentals of drawing, your muscles have started to build and you gained a
lot more confidence. You can focus on drawing with the right side
of your brain. If you recall the lesson where we've talked
about the brain, you remember that our brain
tries to work efficiently by referring back to memories
instead of verifying reality. Remember the simple flower
our brain wants you to draw just because it's quicker and easier than observing
a real one. But observing is
extremely important, and our brain needs to understand that where
we want to draw, we don't want to be
quick and efficient. Here's to learning how
to observe and empower the right side of the brain by drawing with your
non dominant hand. Yes, you've heard
right. Trust me. This is going to work.
If you are right handed, you will do this exercise with your left hand and vice versa. I want you to find a reference
photo of a simple flower. I like using photos from websites like
Pixabay or unsplash. Download the photo
of your choice. If you work on paper, you just use this device to
show the reference photo. If you work in Procreate, you can use the
reference function by tapping the wrench tool, Canvas, reference, and then choosing the photo
from your camera role. Of course, you can skip
the downloading step completely and just
draw in split view. Open page 11 in your workbook. When working in procreate, remember to add a new layer and turn it into
a clipping mask. Now, you're going to draw what you see with your
non dominant hand. Please understand that the goal here is not to create the
most beautiful artwork, but to engage the
right brain side. By doing something
completely new and unusual, we can trick our brains and make them stop
drawing from memory. We are forced to
focus on the image, as well as our
wrong drawing hand. This will create new
links in our brain, which is what always happens
when we learn something new. So don't judge your drawing. It will most likely look awful. Instead, see the fun
in this exercise. I am basically
giggling all the time. It feels so weird and my
right hand is so clumsy. But I do also feel how engaged my brain is and how intensely
I am observing my motif, just to tell my clumsy right
hand what exactly to draw. And that's my flower attempt, drawn with my non dominant hand. It's definitely not my
greatest work ever, but this exercise was very
important for our brains to get rid of old behavior patterns that don't work
anymore when drawing. Instead, we re linked our neurons and created
new connections. So, well done you. That was a lot of
work for your brain. Make sure you praise yourself for another
great achievement. Tick the box in your
progress tracker, update your class project, and leave some praise with your fellow students
class projects, too. And then it's time
for a celebration. How about a young cookie? Seven days down,
three more to go. Come back tomorrow for another fun exercise.
I will see you there.
13. Day 8 Upside Down: Hi, and welcome to
our eighth exercise. Did you enjoy yesterday's
unusual way of drawing? What cookie did you
treat yourself with? Tell us about it when
you update your project. Today's exercise is a
hilarious one as well. We will draw from reference, but this time, the
reference photo needs to be turned upside down. I want you to repeat
the steps we did yesterday by finding
a reference photo. How about one of a
beverage of your choice? It could be a coffee mark, a cocktail, or whatever
else comes to your mind. Unsplash and pix survey are great sources for
high quality photos. But of course, you can use
your own photo as well. Download them into
your camera roll, a tap at it. Now we need to rotate the photo until it's upside down. Save it. We draw on page 12
in our workbook, and if you work in Procreate, add a new layer and turn
it into a clipping mask. Same as yesterday, use your device to display your
reference when you draw on paper and the reference function when working
in procreate. Use whatever pen you prefer, I will use my Sketch six
B for today's exercise. Now draw what you see. You might wonder.
Why should you even bother drawing
something upside down? Well, it can be surprisingly helpful when practicing
your art skills. When you draw
something upside down, your brain can't easily
recognize the subject. This forces you to focus
on the actual lines, shapes, and proportions,
rather than the object itself. It's a great way to see
things as they really are, not how you think
they should be. We've learned that
our brains tend to use cuts and symbols
for familiar objects. Drawing upside down helps
to break this habit. Furthermore, it engages the right
hemisphere of the brain, and you improve your
attention to detail and overall accuracy
by concentrating on individual components
rather than the whole image. And again, be gentle
with yourself. This exercise is also not
to create a masterpiece, but to train your
right brain side. However, when turning my
finish drawing upside down, I am fairly surprised
at how good it looks and how many details I was
able to depict correctly. Did you notice the same? Tell us about how
it fell to you to draw upside down when
you update your project. And it's time to tick
your box for day eight, and of course, a happy dance for showing up
and practicing today. Eight days down, two more to go. Come back tomorrow for another fun exercise.
I will see you there.
14. Day 9 Blind Drawing: Le. H i, and welcome to your second
to last drawing exercise. I had such a blast with
all the exercises so far. I hope so had you. Today's practice will train your observation and
replication skills again. The right brain hemisphere
will get another boost. We will practice drum roll,
blind drawing meaning. We draw without looking
at our paper or canvas. I know it's hard to believe that this is going
to be helpful. Trust me, it is tremendously. I will explain more in a minute. Now I need you to choose a
reference photo once more. You are familiar with
the process already, and today's subject is these. Find page 13 of your workbook. Again, when drawing
in Procreate, don't forget to add a new layer and turn it into
a clipping mask. Now draw from your reference
and don't look at your hand. When working in procreate, you cannot use the reference
function this time, but you will need another device to display your reference photo. I filmed myself
while drawing blind. First, to prove that I don't
look at my hand, and second, to show the grimaces I make while trying to avoid
looking at my hand. Maybe it makes you laugh. And as promised. Here's why blind drawing is a
fantastic exercise. By focusing only
on the reference, you train your eyes to notice fine details that you
might overlook otherwise. This sharpens your
observational skills which are crucial for
realistic drawing. Blind drawing strengthens
the connection between what you see and
how your hand moves. This hand eye coordination
is essential for accurately translating visual
information onto paper. Since you're not
looking at your paper, the pressure to make a
perfect drawing decreases. This can help you relax and
enjoy the process even more, making you more open to
experimentation and creativity. It will boost your
confidence and because you're not constantly
checking your work, your lines tend to be more
continuous and fluid. This can add a sense of movement and life
to your drawings. It's a fun and
challenging exercise that can bring a fresh
perspective to your art practice. Let's look at my finished work. Of course, it is a mess. But I didn't want to
make a great art here. I can look at my work
without judging. As I know it was super
beneficial for my art skills, and it trained my
brain and muscles. I can't wait to see how you tackled this blind
drawing exercise. So Tick your box in your progress tracker and
update your class project. Maybe you can even show a photo of yourself
while drawing. Were you making
funny faces as well? Anyway. Excellent work today. Don't forget to celebrate
your achievement. Nine days done. One more to go. Come back tomorrow for our last exercise. I
will see you there.
15. Day 10 Reduce and Refine: Hi, and welcome to the last
day of our drawing challenge. Oh, man, I am quite sad
that it's over now. But I know that I have
created a new habit, and I will continue practicing every day to further
improve my drawing. Today, we will draw a hand. We will wrap up everything
we've learned and combine it in a step by
step drawing exercise. I have chosen this
subject on purpose, and I can hear you sighing. I know, most people find
drawing hands super difficult. That's why I want to
show you a way of how to tackle difficult
drawing subjects. First of all, take a photo of your hand,
fingers, stretched. That's going to be
your reference photo. Open page 14 of your workbook, and when working in procreate, add a new layer and turn
it into a clipping mask. I am drawing with my
sketcher tech today, but the pen choice
doesn't really matter. When drawing something
you find difficult, it is good to draw in steps. Start rough and reduce to minimal visual information
and then refine step by step. Make sure you have
your reference ready. Let's first mark the
overall size of our hand. I will draw something like a bounding box in
which my hand will be. Then I mark the ends of my fingers and where
my fore arm starts. This line here
indicates where my palm transitions
into the fingers. You can see me now
drawing basic shapes. My palm consists of a rectangle and something
like a trapezoid. My thumb starts from
something like a triangle. It's built of two rectangles with the knuckles in between. I indicate them as
circles or ovals. My four fingers consists of three rectangles with
the circles in between. These are, of course,
the knuckles. My fingernails can be
indicated with ovals as well, and here is the basic
shape of a hand. In our next step, we start to refine our drawing. We draw flowy lines connecting all the parts and
add more details. And all of a sudden, we have a great
drawing of a hat here. Would you have ever expected
to be able to do that? Now, you see, you are. The trick is to start
simple and reduce to minimal information rather than laying down the perfect
art right away. It's hardly possible to
start with the end result. No, we need to approach
that step by step. Always reduce to basic shapes, and then refine layer by layer, adding more lines and details. When drawing on paper, you can carefully erase the
basic lines in the end or trace your sketch
on a new sheet of paper using a light
box to see through. In procreate, you can add new layers and refine
your drawing gradually. Then you can turn
off the visibility of the layers with the sketches. And now we reached the
end of the last exercise. I can only say bravo, and you're doing great in
building your practicing habit. I want you to lean back and
flip through your workbook. Can you see the improvement
you've made throughout? What was your favorite exercise? Tell us about it when you
update your class project. And of course, tick the last box in your
progress tracker. And then be proud. You've made it. You are
amazing. Celebrate that. In our next video, I will show you some more
exercises you can incorporate into your daily
practice collection. I will see you there.
16. Additional Exercises: As promised, here are some more drawing exercises you should include in
your daily practice. Let's start with 32nd sketches. For this exercise,
you will need a time. I'm going to use my
old phone for that. But a kitchen will do too. Set your to seconds. Now, you need to
collect a variety of images or observe scenes
with interesting subjects. Now you draw each of your reference within
those 30 seconds, and you try to capture
the essence of the object without worrying
about the details. This improves speed
and efficiency, teaching you to capture the essential elements
of a subject quickly. It also helps you to prioritize the most important aspects of your subject and encourages you to experiment
and be playful. Our next exercise is
gesture or poses drawing. This is one of my favorite. I like to use the website
line of action for it. You can use this
portal for free, even without
creating an account. It's also useful for 30
seconds sketching, by the way, as it offers sections
for still life, nature, and shapes now. Anyway, we focus on
figures in this exercise. We can make our settings about the kind of models
we want to see. We choose same length
and set the interval to a short period like
30 to 60 seconds. Then have fun drawing. Here again, try to catch
the essence and flow of the pose rather than details and practice loose
sweeping lines. This exercise will
help you to see and replicate the core movement
and structure of a body. The next exercise is
negative space drawing, a very interesting one as well. Find a reference image again. Start with a simple
object that has a clear and interesting
negative space. Now, you outlined the negative
spaces around your object. Focus on accurately drawing
and shading these spaces, and you will see how
your subject will be defined by its
surrounding voids. This practices your
composition skill as it teaches you to consider
the entire composition, including the balance of
positive and negative spaces. It also reduces our
typical symbol drawing. Very useful, indeed. And here we are at the
fourth additional exercise. The continuous line drawing. Here, we have to draw
an entire image using one continuous line without
ever lifting pen or pencil. We start at a point on
our subject and let our hand move fluidly
across the paper or canvas. We try to capture the
essential contours and shapes. We can go back and let
our lines overlap. We only need to make sure we
maintain a continuous line. This is a very good exercise for our hand eye coordination, and it promotes fluid
confident lines. The last exercise will
help you with proportion. It's the gritting. Here we
need another reference image, and we will draw a grid over it. Then we draw a
corresponding grid onto our paper or Canvas. In procreate, it works better the other way
around by the way. Now we will focus on
one square at a time, carefully drawing the
content within it. This helps us to pay close attention to the
details and proportions. It makes complex subjects more manageable and simplifies
the drawing process. So we feel less intimidated. What do you think of
these five exercises? Let us know in your project which one you will
try out first. You definitely have a huge
variety of exercises now. Choose one of them
every day or maybe do the same one every day for an entire week and see
where it leads you. Just continue to practice and to celebrate
your achievements. Let's move on to our
final lesson now, where we will wrap
up this class. I will see you there.
17. Whats next?: And here we are at the
end of this class. I am really proud
of you that you stuck through and finished your ten day drawing challenge. This was not an easy task, as we all know, how hard it
is to establish a new habit. But you did it. You have practiced
the fundamentals of drawing with basic exercises, and you learned how to use the right hemisphere
of your brain. By now, you found out
how you can condition yourself by using me
for your motivation, which, by the way, works for any other
task as well. You have now a toolbox full of highly effective
drawing exercises. Keep going. Your skills have already improved and you
want to build up on that. Make sure you schedule a minimum of 10 minutes daily
before your practice. I have created this set of
exercises that vary in length. You can pick and
choose depending on your schedule and your mood. Keep in mind, consistency is key when it is
about lasting results. Before we come to an end, I would like to ask
you for a favor. If you've liked my class and the resources that came with it, then I'm asking you to
please leave a review. What only takes you a few clicks does help us
educators a long way, as well as other students
to find this class. I would also love to stay in touch with you to
see your progress. Make sure you follow me here
as well as on social media. If you're curious to
see what I'm up to, you can also subscribe
to my newsletter. I'll leave the link in the
progress and resources tab. And here's to thank
you for taking my class and staying with
me until the very end. It was a pleasure having you in my ten day drawing challenge. And I hope to see you in any of my future classes until
then happy drawing. Bye.
 Jutta Schneider, Artist | Educator